
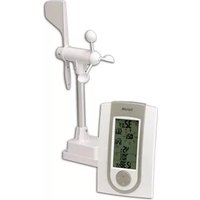
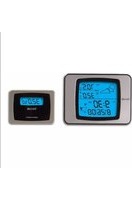
1381-21 - Weather Station Taylor - Free user manual and instructions
Find the device manual for free 1381-21 Taylor in PDF.


| Product Type | Wireless Weather Station |
| Brand | Taylor |
| Model | 1381-21 |
| Display Dimensions (approx.) | 150 mm x 100 mm x 20 mm |
| Weight (approx.) | 200 g (display only) |
| Power Supply | 2 x AAA batteries (display) / AC adapter (optional) |
| Outdoor Sensor | Wireless, up to 100 m range, battery powered (2 x AA) |
| Temperature Measurement Range (Indoor) | 0°C to 50°C (32°F to 122°F) |
| Temperature Measurement Range (Outdoor) | -20°C to 60°C (-4°F to 140°F) |
| Humidity Measurement Range | 1% to 99% relative humidity |
| Barometric Pressure Range | 800 hPa to 1100 hPa |
| Wind Speed Measurement | Anemometer, up to 50 m/s (112 mph) |
| Wind Direction | 16-point compass |
| Rainfall Measurement | Rain gauge, total and rate |
| Weather Forecast | Icons for sunny, partly cloudy, cloudy, rainy, stormy |
| Clock/Calendar | Atomic time sync or manual, date display |
| Data Transmission Frequency | 433 MHz |
| Number of Sensors Supported | Up to 3 outdoor sensors (optional) |
| Cleaning and Maintenance | Wipe with a soft dry cloth; clean sensors periodically |
| Battery Replacement | Replace when low battery icon appears |
| Safety Precautions | Indoor use only; avoid exposure to extreme temperatures or moisture |
| Spare Parts Availability | Outdoor sensors, power adapters available from manufacturer |
| Usage Environment | Indoor display, outdoor sensors weather-resistant |
| Certifications | FCC, CE (typical) |
Frequently Asked Questions - 1381-21 Taylor
User questions about 1381-21 Taylor
0 question about this device. Answer the ones you know or ask your own.
Ask a new question about this device
Download the instructions for your Weather Station in PDF format for free! Find your manual 1381-21 - Taylor and take your electronic device back in hand. On this page are published all the documents necessary for the use of your device. 1381-21 by Taylor.
USER MANUAL 1381-21 Taylor
Today's Weather 24 Hour Forecaster
Instruction Manual
Get actual current temperatures and predict the weather conditions for the next 24 hours as well as your local television weatherperson! Taylor uses the temperature and changes in relative humidity levels to forecast the upcoming day. Plan the day with confidence with Taylor® Today's Weather.
Please read this instruction manual carefully before use and keep these instructions handy.
1 To Power and Set Up the Weather Forecaster


Battery Power
2 AAA alkaline for base unit (not included).
2 AAA lithium for remote sensor (recommended, not included).
Remove the battery compartment cover on the back of the base unit. Install 2 AAA batteries according to the polarity markings in the compartment. Replace the cover.
*Important: Install the base unit batteries first, before installing the remote sensor batteries, for proper signal connection.
2 Set Current Weather Conditions
- After battery installation, the current weather icon flashes.

- Press "Up" or "Down" to select the weather icon you believe most closely reflects the current conditions in your area. (Partly Cloudy is the default setting).
Weather Icons
| Sunny | Partly Cloudy | Cloudy | Rain | Snow |
 |  |  |  |  |
- Press "Time/Date" to select the displayed weather icon. The icon stops flashing.

- The selected weather icon appears on all screens.
(The temperature and forecast readings update after remote sensor is added.)

3 Install Batteries into Remote Sensor
*Important: Install the remote sensor batteries after installing the base unit batteries for proper signal connection.
Remote sensor – use 2 AAA lithium batteries (not included).
Remove the screws from the battery compartment on the back of the remote (take care not to misplace the screws). Install the batteries according to the polarity markings in the compartment. Replace the cover and the screws.
Battery Advice: Alkaline batteries will read outdoor temperatures from 14°F to 122°F (-10°C to 50°C).
Lithium batteries will read outdoor temperatures from -4^ F to 158^ F ( -20^ C to 70^ C).
Although alkaline batteries may be used, lithium batteries are recommended for the wider temperature range.
4 Set Up Remote Sensor
-
After installing the batteries into the base unit and the remote sensor, place the units close together for best setup connection.
-
Press the "SYNC" button on the back of the base unit to send a transmission signal to the remote sensor. Allow a few minutes for a connection as the 🔊 icon flashes and the temperature digits show dashes. When connected, temperatures update and the 🔊 icon disappears.

icon flashes while transmitting, disappears after connection to remote.
- After a signal is received, position the remote sensor at an outdoor location within 100 feet of the base unit in a dry, shaded area. Direct sunlight will heat the casing and inflate temperatures readings.
Important: Though the remote is weather resistant, it should be placed away from direct sunlight, rain, snow and should never be submerged in water.
- Allow at least 6 hours for the remote to analyze weather conditions and report forecast readings. During that time, all screens will show identical conditions, with temperature updating across all 4 screens approximately every 1 minute.

Only the current temperature will update during first 6 hours Temperature forecasts and weather icons stay identical while analyzing 1st forecast.
- When the units begin to forecast weather conditions, all temperature and weather screens will update with new forecasts.

Temperature and Weather forecasts update
-
The remote sensor will automatically transmit weather conditions to the base unit.
-
Current temperature readings will update every 1 minute.
• Temperature forecasts and weather condition forecast readings will update every 6 hours during the first 24 hours of operation.
• After the first 24 hours, updates occur every 1 hour.
Please note: if the remote senses identical weather conditions over a 24 hour period, the screens will all show identical readings.
5 To Set Clock and Date
- Press and hold "TIME/DATE" for 2 seconds, then release.
- Press "UP" or "DOWN" to change the hours. Press "TIME/DATE".
- Press "UP" or "DOWN" to change the minutes. Press "TIME/DATE".
- Press "UP" or "DOWN" to switch between a 12 or 24 hour clock. Press "TIME/DATE".
- Press "UP" or "DOWN" to change the year. Press "TIME/DATE".
- Press "UP" or "DOWN" to change the month. Press "TIME/DATE".
- Press "UP" or "DOWN" to change the date. Press "TIME/DATE".
- Weather Forecaster and Clock/Date setup are complete.
- Press "TIME/DATE" to toggle between the time and year displays.

6 Additional Features
°C/°F Selection
Press the "C/F" button on the back of the base unit to switch between Fahrenheit and Celsius temperatures.

Low Battery Warning
Base unit – replace both batteries when the “☐” icon appears on the right side of the screen.

Remote sensor – replace both batteries when the “☐” icon appears on the left side of the screen.
7To Read the Weather Forecaster

(1) Current outdoor temperature
(2) Transmission signal icon
(3) Remote sensor low battery indicator
(4) Current weather condition icon
(5) Clock/Date
(6) Base unit low battery indicator
(7) 3 forecast displays over 24 hours:
| Morning (7AM-11AM) | |
| Afternoon (11AM-3PM) | |
| Evening (3PM-9PM) |
Forecast screens will rotate as time periods change, with the next period appearing at the left.
8 Tips
Setup:
Place the base unit as close as possible to the remote sensor during setup.
This will ensure the best reception of signals as you set up your wireless forecaster.
Location:
Position the base unit and remote sensor within the effective transmission range of 100 feet (30 meters).
Place the base unit indoors in a well-ventilated location away from direct sunlight.
Place the remote sensor in a dry, shaded area. Direct sunlight will heat the casing and inflate temperatures readings.
Important: Though the remote unit is weather resistant, it should be placed away from direct sunlight, rain, snow and should never be submerged in water.
Note: The effective range is greatly affected by the building materials and where the base and remote units are positioned. Try various set ups for the best results. Check to make sure the transmission path is clear of obstacles and interference. Shorten the distance between base and remote units when necessary.
Placement:
Table stand – use to sit the units on a flat surface, such as a desk or countertop.
Keyhole – use to hang on a wall.

Batteries:
Lithium batteries are recommended for the remote sensor, since alkaline batteries may freeze or otherwise become damaged in extreme temperatures. The sensor will function with alkaline batteries, but are best suited for milder climates.
(See Specifications.)
9 Problem Solving
- If the LCD readout is faint, replace the batteries.
- If outdoor temperature does not display on the base unit:
a) Press the "SYNC" button to trigger a signal from the base to the remote;
b) Relocate remote sensor if it is obstructed from weather conditions or in contact with an object that might affect temperature readings (hot metal object, snow, etc.)
c) Remove and reinstall all batteries, using new fully charged batteries;
d) Repeat set-up procedures;
e) Place the remote sensor closer to the base unit;
e) Position the base and remote within range and without interfering obstructions between units.
- If new batteries are faulty on the initial installation, install fresh batteries. If you did not notice the Low Battery icon warning and the product performed correctly after initial set up, the batteries have lost their charge. Replace the batteries (see To Power and Set Up the Weather Forecaster).
10 General Information
Display Information
If the base unit does not receive a transmission from a remote channel for 1 hour, the display will show dashes. Press the “SYNC” button to send a signal manually. Check that the base and remote are within a 100 foot range. Check that there are no major obstacles between the units that may block signals, such as buildings, trees, etc. Try to have no more than 2 or 3 walls between the units. Try various locations and shorten the distance between units if necessary.
Over- or under- temperature range displays: If the temperature is outside the unit's temperature range of -4^ to 158^ / -20^ to 70^ (with use of lithium batteries), the LCD will show “HH” (higher than the temperaturerange) or “LL” (lower than the temperature range). When temperatures are within the range, the readings will return. If necessary, relocate the remote sensor away from locations with extreme temperatures (such as snow or a hot surface).
Transmission Information
The remote sensor sends temperature and weather condition information to the base unit.
After installing batteries into both units, allow 6 hours to analyze weather conditions and report forecasts.
Weather readings will update as follows:
- Current temperature updates approximately every 1 minute.
- Temperature and weather forecasts update every 6 hours during the first 24 hours of operation after battery installation.
• After 24 hours, updates occur every 1 hour.
If there are no changes on the display after 6 hours, press the "SYNC" button to send a new signal to repeat the transmission cycle.
After an extreme temperature change (ex. relocating the sensor from a warm indoor location to snowy outdoors), allow a few minutes for the temperature reading to stabilize.
Transmission Collision
Signals from other household devices, such as doorbells, home security systems and entry controls, may interfere. This is normal and does not affect the general performance of this product. The transmission will resume once the interference recedes.
Note: This equipment has been tested and found to comply with the limits for a Class B digital device, pursuant to Part 15 of the FCC Rules. These limits are designed to provide reasonable protection against harmful interference in a residential installation. This equipment generates, uses, and can radiate radio frequency energy and, if not installed and used in accordance with the instructions, may cause harmful interference to radio communications. However, there is no guarantee that interference will not occur in a particular installation. If this equipment does cause harmful interference to radio or
television reception, which can be determined by turning the equipment off and on, the user is encouraged to try to correct the interference by one or more of the following measures:
--Reorient or relocate the receiving antenna.
--Increase the separation between the equipment and receiver.
Modifications not authorized by the manufacturer may void user's authority to operate this device.
11 General Information
- Always read the instruction manual before operating this product.
- The base unit is intended for indoor use only. It is not sealed against moisture and could be damaged if used outdoors.
- Do not immerse the base unit in water. If you spill liquid on it, dry immediately with a soft, lint-free cloth.
- The remote sensor is weather resistant but not waterproof and should never be submerged in water. It should be placed away from direct sunlight, rain, and snow.
- Do not clean the units with abrasive or corrosive materials. This may scratch plastic parts and corrode electronic circuits.
- Do not subject units to excessive force, shock, dust, temperature or humidity. This may result in malfunction, shorter electronic life span, damaged battery or distorted parts.
- Do not tamper with the units' internal components. Doing so will invalidate the warranty on this product and may cause damage. The units contain no user-serviceable parts.
- Do not mix old and new batteries. Do not mix Alkaline, Lithium, carbon zinc (standard) or Nickel-Cadmium (rechargeable) batteries. Do not dispose of batteries in fire. Batteries may explode or leak. Remove the batteries if the units will not be used for a long period of time.
- Due to continuous product improvements, the illustrations shown in this manual may differ from the actual displays.
- If you choose to place the remote sensor indoors (in a basement, attic, child's room, etc.), the sensor will not be tracking outdoor conditions and the base unit will not be able to receive an accurate weather forecast.
12 Specifications
Range of temperature measurement:
Base unit (indoor only): 14°F to 122°F (-10°C to 50°C)
Remote sensor:
With Lithium batteries: -4°F to 158°F (-20°C to 70°C)
With Alkaline batteries: 14°F to 122°F (-10°C to 50°C)
Resolution: 1° for temperature
Power: Base unit – 2 AAA alkaline batteries
Remote sensor - 2 AAA lithium batteries
(recommended for wider temperature range)
5 weather forecast icons: Sunny, Partly Cloudy, Cloudy, Rain, Snow
3 forecast time displays over 24 hours:
Morning (7AM-11AM)
Afternoon (11AM-3PM)
Evening (3PM-9PM)
12/24 clock with date and year
Transmission: Max. 100 ft (30m) open area, RF433.92MHz
One Year Limited Warranty
This product is warranted against defects in materials or workmanship for one (1) year from date of original purchase for original purchaser. It does not cover damages or wear resulting from accident, misuse, abuse, commercial use, or unauthorized adjustment and/or repair. Should this product require service (or replacement at our option) while under warranty, do not return to retailer. Please pack the item carefully and return it prepaid, along with store receipt showing date of purchase and a note explaining reason for return to:
Taylor Precision Products 2220 Entrada Del Sol, Suite A Las Cruces, New Mexico 88001 www.taylorusa.com 1-866-843-3905
There are no express warranties except as listed above. This warranty gives you specific legal rights, and you may have other rights which vary from state to state. For additional product information, or warranty information in Canada or elsewhere outside the USA, please contact us through www.taylorusa.com.
Made to our exact specifications in China.
- Today's Weather 24 Hour Forecaster
- Instruction Manual
- Battery Power
- Set Current Weather Conditions
- Install Batteries into Remote Sensor
- Set Up Remote Sensor
- To Set Clock and Date
- Additional Features
- °C/°F Selection
- Low Battery Warning
- 7To Read the Weather Forecaster
- Tips
- Setup:
- Location:
- Placement:
- Batteries:
- Problem Solving
- General Information
- Display Information
- Transmission Information
- Transmission Collision
- General Information
- Specifications
- One Year Limited Warranty
- Made to our exact specifications in China.
Brand : Taylor
Model : 1381-21
Category : Weather Station