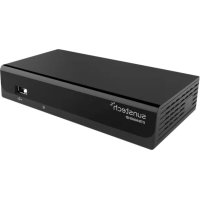
Sunstech DTBP460 - Digital decoder

DTBP460 - Digital decoder Sunstech - Free user manual and instructions

Find the device manual for free DTBP460 Sunstech in PDF.

📄 42 pages English EN Download 💬 AI Question 10 questions ⚙️ Specs
Notice Sunstech DTBP460 - page 28
View the manual : English EN Español ES
Pick your language and provide your email: we'll send you a specifically translated version.
Product Type Digital Decoder
Brand Sunstech
Model DTBP460
Dimensions (approx.) 150 x 100 x 30 mm
Weight (approx.) 200 g
Power Supply DC 5V, 1A
Input Antenna (RF)
Output HDMI, AV (RCA)
Video Resolution 1080p Full HD
DVB Standard DVB-T2/T (MPEG-4/H.265)
USB Playback Yes (MP3, MP4, JPEG)
Remote Control Yes, included
Power Consumption < 10 W
Operating Temperature 0°C to 40°C
Cleaning Wipe with a soft, dry cloth. Do not use abrasive cleaners.
Safety Precautions Keep away from water, heat sources, and direct sunlight. Unplug during storms.
Repairability / Spare Parts Contact Sunstech support. Only use authorized parts.
General Compact design for easy setup. Supports multiple languages (English, French, Spanish, etc.)

Frequently Asked Questions - DTBP460 Sunstech

How do I scan for digital channels on the DTBP460?
Go to the Menu > Installation > Auto Search. Ensure your antenna is connected. The decoder will scan for available DVB-T/T2 channels automatically.
What should I do if I get 'No Signal' on the screen?
Check the antenna cable connection. Make sure the input source is set to TV and not AV or HDMI. Rescan channels if needed. Test the antenna with another device.
Can I use a USB drive to play media?
Yes, insert a USB drive into the port. Use the Source button to select USB. Supported formats: MP3 (audio), MP4 (video), JPEG (photo). Maximum capacity: 32 GB (FAT32).
How do I connect the decoder to my TV?
Use an HDMI cable for best quality. Alternatively, use RCA cables (red/white/yellow) for older TVs. Ensure both devices are off when connecting.
Why is the remote control not working?
Replace the batteries (2x AAA). Check for obstacles between remote and the decoder. Point directly at the IR receiver. Try resetting the remote by removing batteries and pressing any button for 10 seconds.
How can I update the firmware?
Sunstech provides firmware updates on their website. Download the file to a USB drive, insert it, go to Menu > System > Software Update and select USB.
What is the maximum video resolution?
The DTBP460 supports up to 1080p (Full HD) resolution via HDMI.
How do I reset the device to factory settings?
Go to Menu > System > Factory Default. Enter the password (default is 0000 or 1234). This will erase all saved channels and settings.
Can I record TV programs with this decoder?
No, the DTBP460 does not have a built-in recording function. It is a standard digital receiver for live TV only.
The decoder gets warm during use. Is that normal?
Yes, it is normal for electronic devices to warm up. Ensure proper ventilation, do not cover the device, and keep it away from heat sources.

User questions about DTBP460 Sunstech

0 question about this device. Answer the ones you know or ask your own.

Ask a new question about this device

The email remains private: it is only used to notify you if someone responds to your question.

No questions yet. Be the first to ask one.

Download the instructions for your Digital decoder in PDF format for free! Find your manual DTBP460 - Sunstech and take your electronic device back in hand. On this page are published all the documents necessary for the use of your device. DTBP460 by Sunstech.

USER MANUAL DTBP460 Sunstech

natural_image Black Sunstech device with attached 'SCAPT' label, no visible text or symbols on body

MANUAL DE USUARIO

sunstech ^12

Manual de usuario

DTBP460

ESPAÑOL

CE

Sunstech DTBP460 - Manual de usuario - 1

RF IN RF OUT RF IN RF LOOP IR DC-IN 5V TOMA USB IR DC IN

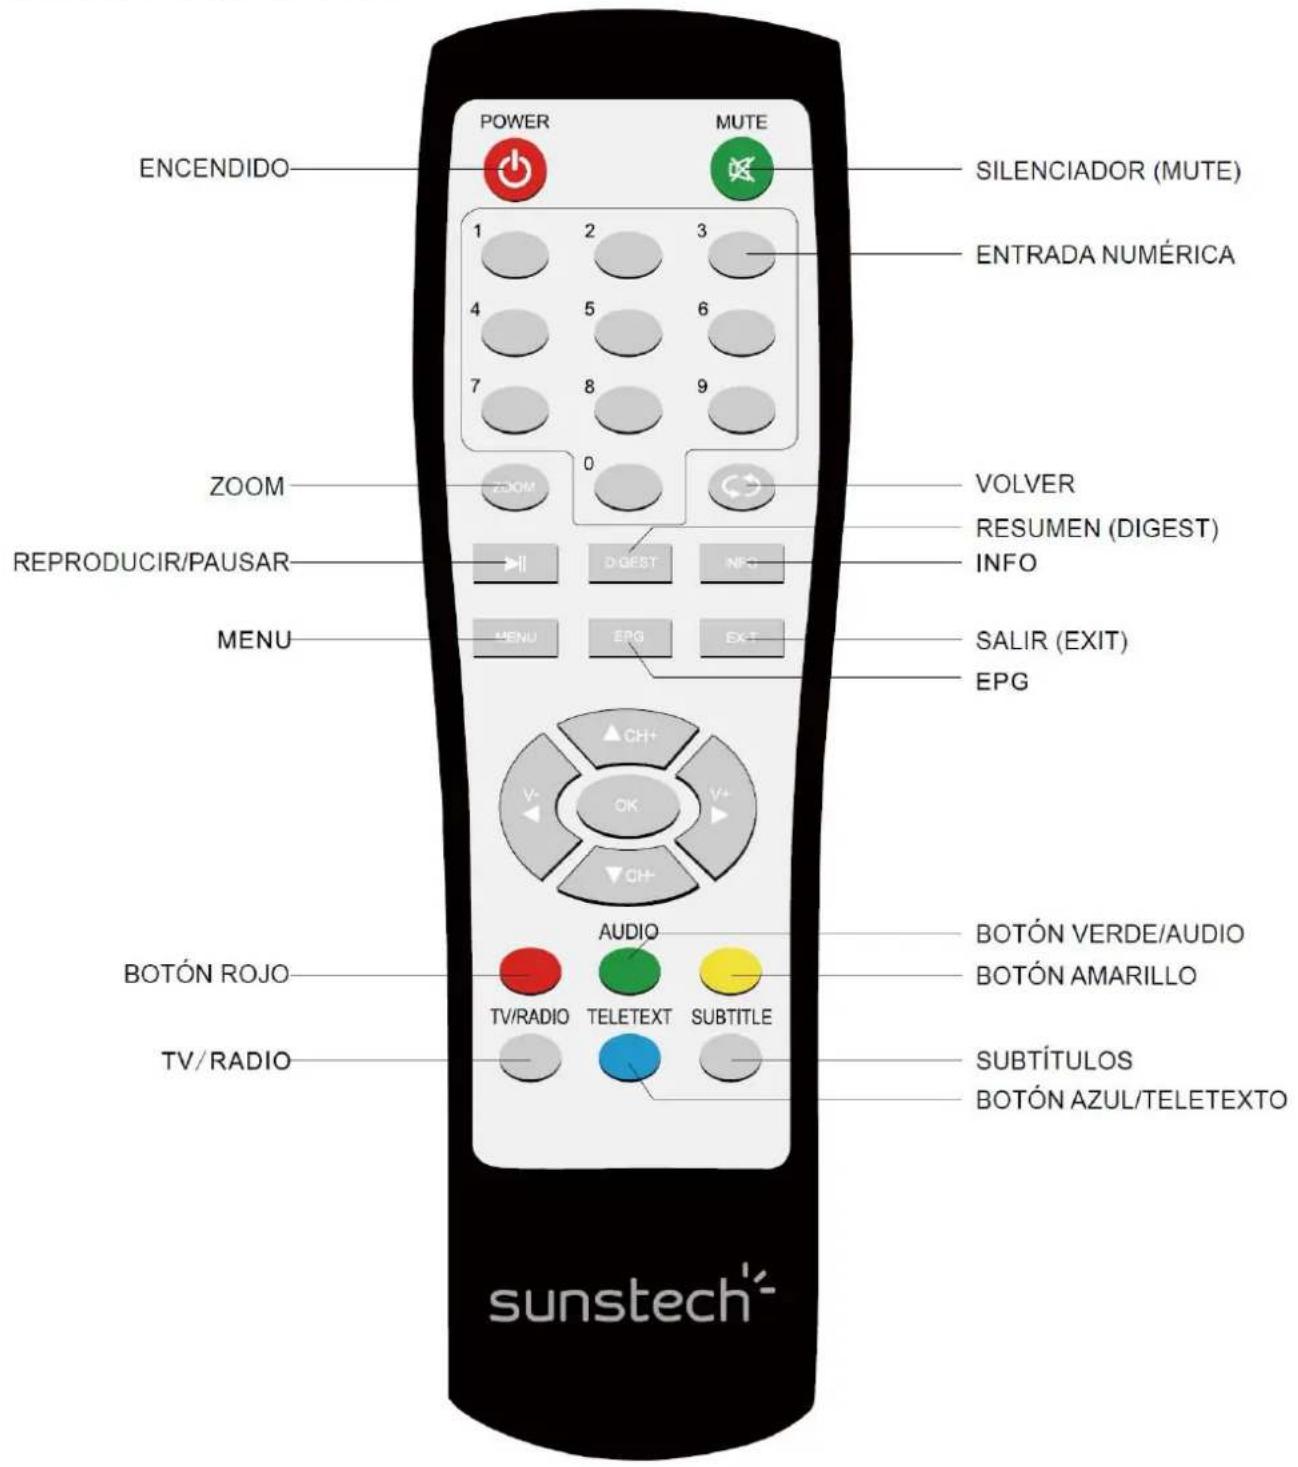
Mando a distancia
ENCENDIDO POWER MUTE SILENCIADOR (MUTE) ENTRADA NUMÉRICA ZOOM VOLVER RESUMEN (DIGEST) INFO REPRODUCIR/PAUSAR DIGEST MENU SALIR (EXIT) EPG MENU EPG EX+ CH+ OK V+ CH+ AUDIO BOTÓN VERDE/AUDIO BOTÓN AMARILLO TV/RADIO TELETEXT SUBTITLE BOTÓN ROJO TV/RADIO SUBTÍTULOS BOTÓN AZUL/TELETEXTO sunstech

Figura 15. Gráfico

System site About your device Formset 1.1.11 previous Software 3.2.0486/s Platform B: .15 About your Internet Connection You are currently connected to the Network IP Address: 00000

Figura 20. Muestra de teletexto

3.8 Subtítulos

Figura 22. Subtítulos

Important Safety Instructions

1) Read these instructions.
2) Keep these instructions.
3) Heed all warnings.
4) Follow all instructions.
5) Do not use this apparatus near water.
6) Clean only with dry cloth.
7) Do not install near any heat sources such as radiators, heat registers, stoves, or other apparatus (including amplifiers) that produce heat.
8) Operate this product only from the type of power source indicated on the label. If you are not sure of the type of power connected to your home, consult your local power company. Disconnect the unit from the mains before any maintenance or installation procedure.

9) Protect the mains cord from damage and stress.

10) Only use attachments/accessories specified by the manufacturer.

11) Unplug this apparatus during lightning storms or when unused for long periods of time.

12) Refer all servicing to qualified service personnel. Servicing is required when the apparatus has been damaged in any way, including damage to the mains cord or plug, if the unit has been exposed to liquid or moisture, has been dropped or is not operating correctly.

13) Do not impede the air flow into the unit by blocking the ventilation slots.

14) Attention should be drawn to the environmental aspects of battery disposal.

15) Use the apparatus in moderate climate.

WARNING: To reduce the risk of fire or electric shock, do not expose this apparatus to rain or moisture.

WARNING: The batteries shall not be exposed to excessive heat such as direct sun light, fire, etc.

Table of Contents

Installation 4

Remote Control 5

Connections 7

User Interface 8

Quick Installation 8

Menu Operations 9

Normal Play 13

Troubleshooting 17

Specifications 18

Warranty Conditions 19

Installation
SCART TO TV

RF IN RF OUT RF IN RF LOOP

USB JACK IR DC IN

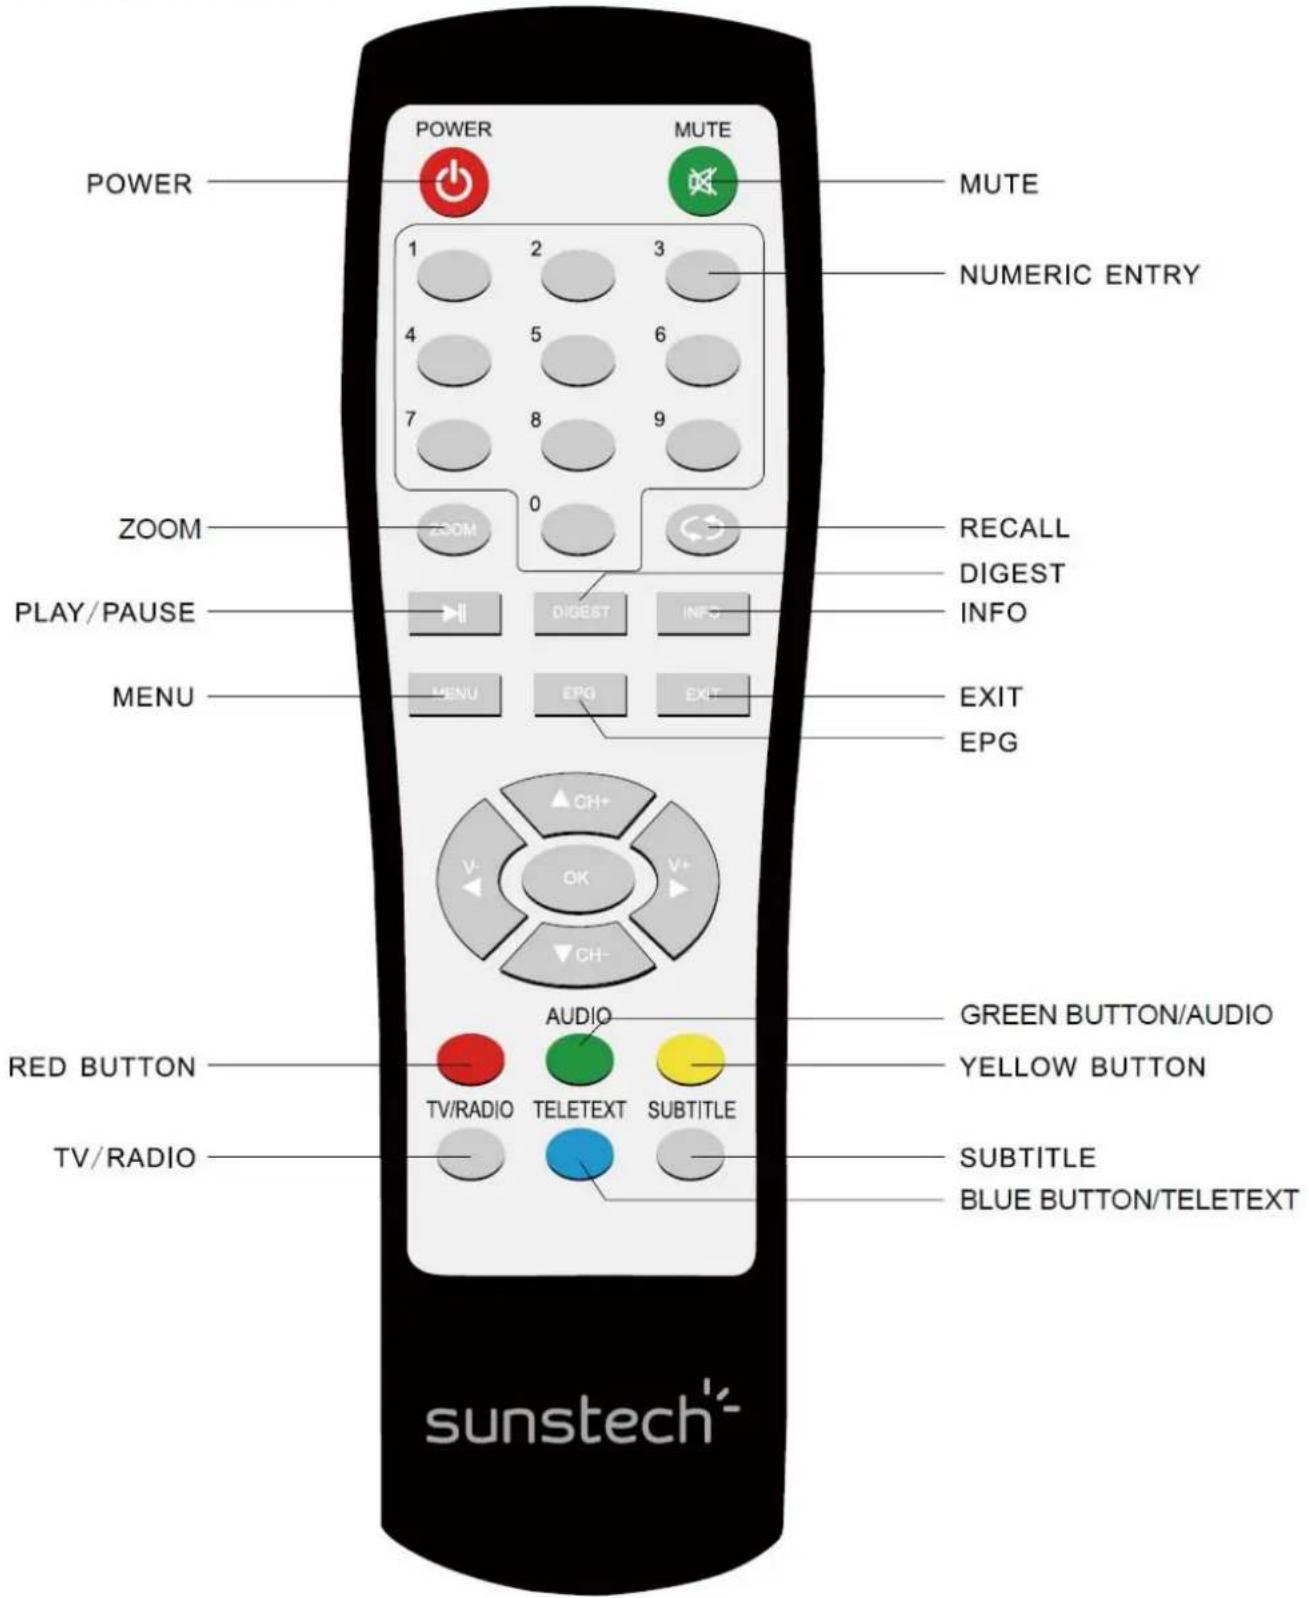
Remote Control
POWER MUTE MUTE NUMERIC ENTRY 1 2 3 4 5 6 7 8 9 0 ZOOM RECALL DIGEST INFO PLAY/PAUSE DGIST MENU EXIT EPG MENU EPG EXIT EPG V- OK V+ CH- CH- RED BUTTON AUDIO TV/RADIO TELETEXT SUBTITLE TV/RADIO GREEN BUTTON/AUDIO YELLOW BUTTON SUBTITLE BLUE BUTTON/TELETEXT sunstech

Installing the Batteries

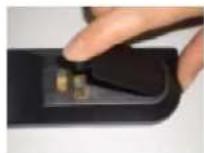
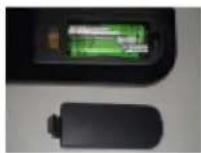
Remove the battery cover from the remote control and put 2XAAA size batteries inside the compartment.

The diagram inside the battery compartment shows the correct way to install the batteries.

1.Open the cover
Sunstech DTBP460 - Installing the Batteries - 1

  1. Install batteries
    Sunstech DTBP460 - Installing the Batteries - 2

  2. Close the cover
    Sunstech DTBP460 - Installing the Batteries - 3

Using the Remote Control

To use the remote control, point it towards the front of the digital set top box.

The remote control has a range of up to 7 metres from the set top box at an angle of up to 60 degrees.

DC-IN 5V IR 30° 30° POWER MUTE THURSD TELEPHONE MUNES sunstech

The remote control will not operate if its path is blocked.

Sunlight or very bright light will decrease the sensitivity of the remote control.

Connections

Caution: Make sure to check the voltage specification of the wall outlet is the same rating with the receiver. To prevent the risk of electric shock, do not open the cover or the back of the receiver

Connecting to TV
Diagram showing installation components of a TV and audio equipment, including a switch, device, and RF input/output ports.

Note: When connecting the receiver to other equipment, e.g., TV, VCR and amplifier, make sure to refer to relevant user manual for instruction. Also, make sure you disconnect all the equipments from the mains supply before the connection.

User Interface

1. Quick Installation

1.1 Setting Country and Language

User can select preferred country and language at Setup- Installation page.

(1) Press

button to enter Main Menu.
(2) Press button to select SETUP option. See Figure1.
(3) Press button to select Installation option.
(4) Press button to enter Installation page. See Figure2,3.
(5) Press button to select Country option.
(6) Press button to set Country Setting.
(7) Press button to select OSD Language option.
(8) Press button to select a language.

If there is no channel database in the STB, it will start at step (5) directly when booting.

Options TV Media Password Advanced Token Delta Transfer Set Default SETUP

Figure 1. Main Menu- SETUP Figure

Scheme Setting Country Setting GSD Language Apple Language Subtable Language LON English English ON

  1. SETUP-Installation

1.2 How to receive the programs?

Scan the possible frequency and bandwidth to receive the programs. Press

button to start Auto Scan or Manual Scan.

1.2.1 Auto Scan

Auto Scan will erase the database first, and scans default frequency and bandwidth by Country Setting. Follow the steps (1) \~ (8) at section 1.1..

(9) Press button to be confirmed to clear the database.
(10) Press button to confirm clear action and start Auto Scan.
It costs time to do Auto Scan, user can press button to exit at anytime. See Figure 3,
4. Later if you want to scan again, you can follow above Quick Installation procedure

Database will be cleared? Continue? Database will be cleared? Continue?

Figure 3. Clear database message Figure

AUTO SANSI NETWORKS SELECT CHANNEL Total Lock 5 Progress DH 98 100% Frequency TV Use T Digital T HD Digital T Guide ITS GCP19 Unknown Unknown Total Get & TV, & Radio Channels Data Saving Please Wait

  1. Auto Scan finished

1.2.2 Manual Scan

Manual Scan adds the scanning results into database, it doesn't erase the database. But the User has to know the Frequency and Bandwidth for scanning. If user scans the same Frequency and Bandwidth more then once, the previous programs will be overwritten. Follow the steps (1) \~ (8) at section 1.1.

(9) Press button to enter Manual Scan Page.

(10) Press button to select Frequency option.

(11) Press <0\~9> button to input the Frequency value.
(12) Press button to select Bandwidth option.
(13) Press button to set Bandwidth value.
(14) Press button to start scan or exit. See Figure 5, 6.

CHANNEL 32.4 Channel No CH - 21 Copy Rate Toulin's Bandwidth 8 Mxy Strength 00 % Quality 94 % Play Move Save Help

Figure 5. Manual Scan Page Figure

MEDIA. 32AM - Screening 00:00:15:47 Out Channel Channel No. OR 21 Frequency TV Up Total Get 0 TV, 0 Radio Channels Data Saving Please Wait

  1. Manual Scan Result

2.Menu Operations

Once the channel scan is finished and all the channels are stored into the database, you can start to watch the digital terrestrial TV channel or listen to the radio broadcast, some typical operations are given in this chapter.

2.1 Main Menu

Main Menu for operating a lot of functions.

(1) Press

button to enter Main Menu. See Figure 1.
(2) Press button to display the version information of STB.

2.2 SETUP

Set the system settings of STB. See Figure 1.

2.2.1 Installation

Set the receiving and playing program settings of STB. See Figure 2.

2.2.1.1 Antenna Setting

Set the antenna power on or off to supply +5V power to antenna or not.

Note: The default is OFF, set this option to "ON" only if this STB is connected to an active antenna which amplifies the received RF signal, otherwise please set it to "OFF".

2.2.1.2 Country Setting

Set the country for Auto Scan, Manual Scan and Time Zone.

Note: Change the Country Setting will automatically change the default Time Zone and set the default Frequency and Bandwidth for Auto Scan.

2.2.1.3 OSD Language

Set the On Screen Display Language.

2.2.1.4 Audio Language

Set the audio language for watching program.

2.2.1.5 Subtitle Language

Set the language for displaying subtitle.

2.2.1.6 LCN

Set the Logical Channel Number to on or off.

Note: LCN is a number that uniquely identifies a logical channel, which is popular in some european countries such as England, France.

2.2.1.7 GMT usage

Using GMT, select ON, set Time Zone. select OFF, set Date and Time.

2.2.1.8 Time Zone

Set the Time Zone for adjusting the system time.

Note: Some Countries are covered with more than one Time Zone.

2.2.1.9 Set Date

Set the system date.

2.2.1.10 Set Time

Set the system time.

2.2.1.11 Auto Standby 3 hours

2.2.2TV Setup

Setup the display mode for TV. See Figure 7.

TV Field 4.2 Lb TV Mode AUTO GSD Transparency 8 Banner Display Time 3 S Video Output CVBS+5+Video Video Enhancement OFF Movie Sat2014 Sat

Figure 7. TV Setup Page

2.2.2.1 TV Format

Set display format for watching program, such as 4:3LB, 4:3PS, 16:9LB, 16:9FIT.

2.2.2.2 TV Mode

Set PAL, NTSC or AUTO for display. AUTO will switch PAL or NTSC by program content. This setting should be matched with user's TV.

2.2.2.3 OSD Transparency

Set the On Screen Display transparency. 1 is the most diaphanous.

2.2.2.4 Video Output

Set the output method to TV.

2.2.2.5 Video Enhancement

Set the Video Enhancement. See Figure 8.

(1) Press button to select Video Enhancement option. 7
(2) Press button to set Video Enhancement.
(3) Press button to select Flesh Tone or Black/White Expansion.
(4) Press button to set Flesh Tone and Black/White Expansion.

Track Time Black/White Exploration OFF OFF

Figure 8. Video Enhancement

2.2.2.6 Auto Scan Channels in Standby

2.2.3 Password

Set password for menu lock or channel lock or censorship lock. And the user can change password here, the default PIN Code is 0000. See Figure 9.

Group Metals Link Channel Lock Censorship Lock Change Password OFF OFF No Block NO More Switch Add

Figure 9. Password Page

2.2.3.1 Setup Menu Lock Lock

the menus by password.

2.2.3.2 Channel Lock

Lock the channel (program) which has been set to lock status when turning on the Channel Lock. Please see section 2.3.1.2. for details.

2.2.3.3 Censorship Lock

Lock the program by password and censorship threshold. The censorship info is in program content. Under the censorship rating, user has to enter the right password for watching program.

2.2.3.4 Change Password

To change the PIN code.select this option, press button to trigger changing password and <0\~9> button to enter old password, new password and confirm new password. If succeed, the PIN Code Changed message will be displayed, otherwise the PIN Code Error message will be displayed.

2.2.4 Advance Timer

User can set timer for watching the program by date and time manually or from the TV/Radio Guide(see section 2.3.2). When setting date and start time is arrived, STB will automatically switch to the wanted program. Press any key except button, STB asks user to abort it or not when watching booked program. User can delete the event while it isn't at running.

2.2.5 Set Default

Reset STB to factory default. All settings did by user will be restored to factory default values and database will be erased together.

2.3 TV/RADIO

There are two types of program. One is TV and the other is Radio. The operation of the List and Guide of TV and Radio are almost the same. Here using TV to be example.

2.3.1 List

User can operate some functions in List. See Figure 10.

0800 7 Digital 0801 7 Digital 1 0802 7 Digital 1 0803 7 Digital 1 0804 7 HD Digital 0805 7 Guide 0806 ITS DRIP 0807 DRIP 0808 Unknown QH21 / 473953 KHz 1 & Features Group Test Status: Drive Fail Save Exit

Figure10. TV List

2.3.1.1 Lock

Lock will ask password before watching this program when SETUP->Password->Channel Lock is turned on. Please see section 2.2.3.2. for details.Press button to set or clear lock status when Lock option selected.

2.3.1.2 Edit

User can edit the program name, maximum length is 16 characters.

(1) Press button to select Edit option and button to select the program.
(2) Press button to display program info and press it again to edit program name.
(3) Press button to select the character.
(4) Press button to finish the editing and return to previous program info page.
(5) Press button to save the editing and return to List or press button to return to List without saving.

2.3.1.3 Skip

Skip will skip the program when changing program by CH+/-.Pressbutton to set or clear Skip status when Skip option selected..

2.3.1.4 Delete

Delete will delete the program perpetually from database . User must rescan to recover it. Press< OK/ GREEN>button to set delete one or delete all when Delete option selected.

User can search the program name by partial keyword or character(s)

(1) Press button to select Search option.
(2) Press button to entry search page.
(3) Press button to input keyword or character(s).
(4) Press button to Search and return List. It will focus on the match result.
(5) Press button to next or previous match result.

2.3.2 Guide

Guide is also naming EPG (Electronic Program Guide). Display program info and events. TV and Radio Guide are the same. See Figure 11 \~ 12.

(1) Press button to select program.
(2) Press button to change event or date.
(3) Press button to exit all the menus or show the detail information of selected event.
(4) Pressbutton to exit to previous menu.
(5) Pressbutton to enter Book page and button to save after edited.

If it conflict with itself or other event, a conflict message will be displayed. The successful booking will be added to Main Menu->SETUP->Advance Timer(see section 2.2.4)

TV Program Date This 2008 03/10 Video F. S. S. M. T. W 21:40 THE AMAZING RACE 22:36 STAPGATE SO-1

Figure 11. Guide - Event Figure

ED THE ROOM 190006.JANBE No Program Name Date 2006 8/8/10 Default As tents continue to make their way through Budapest, Infighting among representatives proves to be more challenging than the tents they 1 / 2 ▶

  1. Guide - Event Detail

2.4 MULTIMEDIA

Multimedia must be used USB port. Enter My Album and My Music, it displays “Device is removed!” Without device.

2.4.1 My Album

My Album can display JPG photo and operate it. Remove device when playing photo, it displays "Device is removed!" message.

2.4.1.1 Thumbnail

If there is no photo in device root folder, it will start at Thumbnail mode. Or it will start at Folder mode. It displays JPG EXIF info (Width, Height and Date) of selected photo.

2.4.1.2 Folder

If there is no photo in device root folder, it will start at Folder mode. Or it will start at Thumbnail mode. User can browser folders and files. It also displays JPG EXIF info of selected photo.

2.4.1.3 Zoom

View and zoom the photo at 100% from Thumbnail or Folder mode. User can zoom the photo with 25%, 50%, 100%, 150%, 200%. If zooming greater then 100%, pressbutton can move the photo.

2.4.1.4 Rotate

View and rotate/flip the photo from Thumbnail mode. After rotating of flipping the photo and return Thumbnail mode, the result will display on Thumbnail mode.

2.4.1.5 Slide Show

Slide all photos in current folder from Thumbnail mode.

2.4.2 My Music

My Music can play MP3. Remove device when playing, it will display "Device is removed!" Message.

(1) Press button to browse folders and files (Mp3).
(2) Press button to play MP3 file.
(3) Press button to play or pause MP3 file.
(4) Press button to stop MP3 file.
(5) Press button to repeat selected MP3 file only.
(6) Press button to random play MP3 file in current folder.
(7) Press button to adjust volume while playing the MP3 file.
(8) Press button to mute.
While playing the MP3, it displays progress, current playing time, and total time.

2.5 GAME

There are three options: Gomoku, Calendar, Calculator.

Gomoku

(1) Press button to set play mode and difficult.
(2) Press button to start play Gomoku.
(3) Press button to select the position.
(4) Press button to place the piece.
Calendar displays the year, month, and date.
Calculator can used for mathematical calculations.

3.Normal Play

Normal Play means STB under watching TV or listening to the Radio. See Figure 13, 14.

So these are I what you'd call fashion pics?

Figure 13. Normal Play-TV

3. 10K: 15,1000 - 52.00 - Infinita Definitre - Infinita & Live Time The Cap Please be to continue on your own website for the following website: Live To http://www.infinita.com/10.10.10

Figure 14. Normal Play-Radio

3.1 Information

Pressbutton once to display info banner. Banner displays the program No., favorite setting, current time, program name, current and next event, lock, scramble, subtitle and teletext info. More detail info displays about tuner info. See Figure 15, 16.

Press button to display banner to show program info.

Press button when banner exist to display program more detail info.

A##s Order # The Box is All to Be 1.8K GND 30:00 - 11:00 - Homes Under The Number Property section at the Bridgery and Liny Road (and Building to be in Liny and a house in the city with a #). Daily Information: 12457

Figure 15. Banner

Setup site About per dntcrs: Formes 1.1.11 format Software 1.0.000s Platform 8: 115 About per Internal Connection You are correctly connected to the Network P Address: 0000

Figure 16. Program Info

3.2 Switch Program

User can switch program by CH+/- or input program number directly. If the input program number doesn't exist, STB will ignore the input.

3.3 Volume

Press button to adjust the volume. Press button to mute.

If adjust the volume with mute, mute will be canceled.

3.4 Program List

Press button to display Program List with No., name, and lock/scramble/skip status. See Figure17.

Press to switch the program.

Press to return normal play mode.

No Program Name Status 003 ITV1 004 Channel 5 004 ITV2 004 DR 004 IV3 004 ITV news 004 Dystopian UK 005 JIS 005 Digital 006 Digital 007 Digital 008 Digital Edit Page Print Exit

Figure 17. Program List

3.5 Audio

Switch the sound channel and switch sound mode to LR(stereo) or LL(left) or RR(right). If setting audio language at SETUP->Installation->Audio Language, the audio channel default language will be chosen by setting. See Figure 18.

Press

Press button to select Channel/Audio PID or Sound Mode option. Press button to set the value.

Audio channel Channel try Audio Pro pulse Sound Mode LR

Figure 18. Audio Setting Page

3.6 Pause

Pause video and audio. But it will be canceled by any input.

3.7 Teletext

Display teletext on screen, the style of teletext may be different by content provider. See Figure 19, 20.

Press button to display the teletext setting page.

Press button to select the teletext language, if the program has teletext.

Press button to exit the teletext setting page.

Press <0\~9/Up/Down/Left/Right> button to change teletext page, if teletext exists.

SELECT Text Language OK

Figure 19.Teletext Setting Page

TELETEXT TTX Subtitle OFF

Figure 20. Teletext Sample

3.8 Subtitle

Display the subtitle on screen, the style of subtitle may be different by content provider. See Figure 21, 22.

Press button to display subtitle setting page.

Press button to select subtitle language, if the program has subtitle.

Press button to exit subtitle setting page.

SUBSTRIP Substrate Language mpg OFF

Figure 21. Subtitle Setting Page

She was enjoying herself too much. Looks like she's not the only one.

Figure 22. Subtitle

3.9Teletext Subtitle

Display subtitle by teletext, the style of the teletext subtitle may be different by content provider.

See Figure 23, 24.

Press button to display teletext or subtitle setting page.

Press button to select "TTX Subtitle".

Press button to select teletext subtitle language.

Press button to exit the setting page.

TITLETEST Sentinel Language img OFY

Figure 23. TTX Subtitle in Teletext

TITLE FTK GREEN OFF

Figure 24. TTX Subtitle in Subtitle

3.10 Sleep

In the mode of TV, press 0 button enter sleep interface, press button to setting sleep time, and the setting class are sleep 30, sleep45, sleep60, sleep90, sleep 120.

3.11 Guide

Press button at normal play state, see section 2.3.2 for details.

3.12List

Press button at normal play state, see section 2.3.1 for details.

3.13 Message

There are some messages to inform user the current status of the STB.

3.14.1 No Signal

STB can't get signal, for example, cable is disconnected.

3.14.2 No Service

Program doesn't have any content to play.

3.14.3 Service Scrambled

Program is scrambled for payment, you need contact with the content provider to know how to descramble it.

3.14.4 HDTV not support

If the program content is HDTV format, this STB doesn't support it.

3.14.5 Channel Locked

Program is locked by setting lock (see section 2.3.1.2) and turning on channel lock in password setting (see section 2.2.3.2). User must input correct password to watch program. See Figure 25.

Enter Password Password Advance Timer SW Update Set Default SETUP

Figure 25. Lock by password

Troubleshooting

If you experience problems with this receiver or its installation, in the first instance please read carefully the relevant sections of this User Manual and this Troubleshooting section.

Problem Possible cause What to do
Standby light not lit 5VDC lead unplugged Check the lead
No signal foundAerial is disconnected Aerial is damaged/misalignedCheck aerial lead check aerial
Out of digital signal area Check with dealer
No picture or soundThe Scart interface not connect hardReinsert the Scart STB to the TV set
Tuned to digital teletex channel Retune to another channel
Mosaic blocks in picture or picture freezesAerial may not be compatible Check aerial
Scrambled channel messageChannel is scrambledSelect an alternative channel
Forgotten channel lock codeRe-install channels to cancel channel lock
No response to remote controlReceiver offPlug in and turn on receiver
Handset not aimed correctlyAim handset at front panel
Infrared Receiver Module obstructedCheck for obstructions
Remote control batteries are inserted incorrectlyCheck batteries direction
Handset batteries exhaustedReplace remote control batteries
After moving the receiver to another room, find can't receive the digital receptionThe aerial feed may come through a distribution system which may reduce the digital signal now received by the receiverTry a direct feed from the antenna

Specifications

Item Specification
Tuner Frequency Range VHF:174MHz to 230MHz UHF:470MHz to 862MHz
Input Impedance 75 Ohms unbalanced
Signal Input Level-78~-25 dbm
Bandwidth 7/8 Mhz
DemodulationDemodulator COFDM
OFDM Modulation 2K,8K FFT,SFN and MFN
Packet Carries 2K/8K
Guard Interval 1/4,1/8,1/16,1/32
Connectors RF IN IEC 169-2 format connector
Power Input100-240V~50/60Hz
Consumption10W max
DisplayDecoder ModulePAL,NTSC
Resolution720 X 576(PAL);720 X 480(NTSC).
Aspect Ratio4:3(Letterbox, Pan & Scan),16:9
Decoding VideoMPEG2 Transport MP@ML
Audio
OthersComplianceETSI EN 300 744 DVB-T Compliance
Sound ModeRight, Left, Stereo

*Specifications are subject to change without further notice.

Sunstech DTBP460 - Troubleshooting - 1

This symbol on the product or in the instructions means that your electrical and electronic equipment should be disposed at the end of life separately from your household waste. There are separate collection systems for recycling in the EU. For more information, please contact the local authority or your retailer where you purchased the product.

Warranty Conditions

  • The warranty of this product is for 2 years since the purchase date.
  • The warranty will exclude breakdowns caused by bad use of the product, wrong installation or installation in not desirable places for a proper maintenance of the product, rips, updates of the products that are not the supplied by the brand, pieces wore away for its use or for not domestic or inappropriate use. Also are excluded breakdowns caused for manipulations of the products by people or companies alien to our company.
  • For any request regarding the warranty terms, the purchase receipt must be attached.

Sunstech DTBP460 - Warranty Conditions - 1

natural_image Abstract blue wave pattern with smooth curves and oval shapes (no text or symbols)

Sunstech DTBP460 - Warranty Conditions - 2

natural_image Abstract blue pattern with diagonal striped and oval shapes, no text or symbols present
Manual assistant
Powered by Anthropic
Waiting for your message
Product information

Brand : Sunstech

Model : DTBP460

Category : Digital decoder