
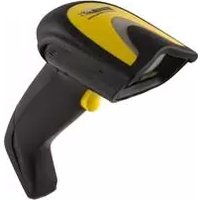
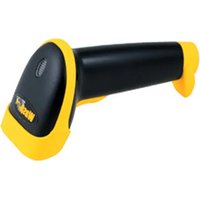
WDI9600 - Barcode Reader Wasp - Free user manual and instructions
Find the device manual for free WDI9600 Wasp in PDF.


| Product Type | Barcode Reader |
| Model | Wasp WDI9600 |
| Dimensions (H x L x W) | 16.6 cm x 10.9 cm x 6.8 cm |
| Weight (without cable) | Approx. 163 g (5.75 oz) |
| Power Supply | 5VDC ±5% (GD4200) or 4.5-14.0 VDC (GD4290) |
| Operating Current | <350mA @ 5V (typical) |
| Standby Current | <60mA @ 5V |
| Max Scan Rate | 400 reads/sec |
| Decode Capability | 1D linear barcodes including GS1 DataBar, Postal Codes (China Post) |
| Operating Temperature | 0°C to +50°C |
| Storage Temperature | -40°C to +70°C |
| Humidity | 95% non-condensing |
| Drop Resistance | 1.8 m (6 ft) per IEC 68-2-32 |
| ESD Protection | 16 kV |
| Protection Class | IP52 |
| Interface Options | USB HID, USB Keyboard, USB COM, RS-232, Keyboard Wedge, IBM46XX |
| Motion Detection | Motionix™ technology for auto-wake |
| Aiming System | Red linear beam with green spot good-read indicator |
| Scan Window Cleaning | Use recommended solutions (e.g., Sani-Cloth, isopropyl alcohol) with soft cloth; avoid abrasives |
| Warranty | 5 years from shipment |
| Country of Origin | Manufactured by Wasp Barcode Technologies, Plano, Texas USA |
| Spare Parts | Cables replaceable; contact reseller for other parts |
Frequently Asked Questions - WDI9600 Wasp
User questions about WDI9600 Wasp
0 question about this device. Answer the ones you know or ask your own.
Ask a new question about this device
Download the instructions for your Barcode Reader in PDF format for free! Find your manual WDI9600 - Wasp and take your electronic device back in hand. On this page are published all the documents necessary for the use of your device. WDI9600 by Wasp.
USER MANUAL WDI9600 Wasp
natural_image
Black WASO barcode scanner with yellow handle and gold buttons (no visible text or symbols)Quick Reference Guide
©2021 Wasp Barcode Technologies
All rights reserved. Without limiting the rights under copyright, no part of this documentation may be reproduced, stored in or introduced into a retrieval system, or transmitted in any form or by any means, or for any purpose, without the express written permission of Wasp Barcode and/or its affiliates.
Owners of Wasp products are hereby granted a non-exclusive, revocable license to reproduce and transmit this documentation for the purchaser's own internal business purposes. Purchaser shall not remove or alter any proprietary notices, including copyright notices, contained in this documentation and shall ensure that all notices appear on any reproductions of the documentation.
Electronic versions of this document may be downloaded from the Wasp website (www.waspbarcode.com). If you visit our website and would like to make comments or suggestions about this or other Wasp publications, please let us know via the "Contact" page.
Disclaimer
Wasp has taken reasonable measures to provide information in this manual that is complete and accurate, however, Wasp shall not be liable for technical or editorial errors or omissions contained herein, nor for incidental or consequential damages resulting from the use of this material. Wasp reserves the right to change any specification at any time without prior notice.
Trademarks
Wasp Barcode Technologies and the Wasp logo are registered trademarks of Wasp in many countries, including the U.S.A. and the E.U.
Patents
Contact Wasp Barcode Technologies for patent list.
TABLE OF CONTENTS
Description 1
Top Productivity for POS and Document Handling...... 1
Decoding.... 1
Hands Free Stand/Holder 2
Setting Up the Reader 3
Connecting to the Host Interface.... 3
Disconnecting the Cable 4
Using the Wasp WDI9600.... 4
Aiming System.... 4
Relative Size and Location of Aiming Pattern .... 5
Linear Bar 5
Relative Size and Location of Green Spot 5
Parts of the Reader 6
Selecting the Interface Type 6
Interface Selection 6
Configuring the Interface....7
USB Interface 8
Keyboard Wedge Interface 10
Country Mode 12
Programming...... 16
Using Programming Bar Codes 16
Configure Other Settings 16
Resetting Product Defaults 16
Numlock 17
Caps Lock State 18
Reading Parameters.... 19
Good Read Green Spot Duration.... 19
Operating Modes 21
Scan Mode 21
Technical Specifications 24
LED and Beeper Indications 27
Troubleshooting 28
Warranty 29
Ergonomic Recommendations 30
Technical Support 30
Support Through the Website 30
Reseller Technical Support.... 30
Cleaning Procedure 31
Common Cleaning Solutions.... 31
Cleaning enclosure and window surfaces 32
DESCRIPTION
With rich feature sets and extensive model options, the WDI9600 from Wasp represents the premium level of data collection equipment for general purpose applications.
The Wasp WDI9600 readers' ability to capture bar codes from near to far, to read both high-density and low resolution codes, to decode hard-to-read, poor or damaged codes and to easily read bar codes from mobile devices make these readers the perfect choice for today's and tomorrow's applications in retail and office environments, pharmacies, light industrial, warehouses and manufacturing plants.
Top Productivity for POS and Document Handling
Perfect for manual reading, the Wasp WDI9600 linear imager uses Motionix™ motion detection technology that detects the operator's natural actions to automatically switch the scanner into "ready to read" scan mode. The distinctive "soft line viewfinder" helps the operator to easily identify the code to be read, making easier and faster to point, shoot and decode the correct label, reducing accidental readings in an environment with multiple bar codes.
Decoding
The Wasp WDI9600 reliably decodes all standard 1D (linear), including GS1 DataBar™ linear codes, Postal Codes (China Post). The data stream - acquired from decoding a symbol - is rapidly sent to the host. The reader is immediately available to read another symbol.
Hands Free Stand/Holder
An accessory is available which holds the reader at a convenient angle, allowing hands free scanning of items. It can also be used as a holder. The reader automatically recognizes the insertion and changes its Scan Mode to allow the user to operate in hands-free mode.

natural_image
Black desktop barcode scanner with flexible neck and base (no text or symbols visible)SETTING UP THE READER
Follow the steps below to connect and get your reader up and communicating with its host.
- Connect the Cable to the reader and the Host as shown below.
- Configure the Interface (see page 7).
- Program the Reader starting on page 16 (optional, as needed).
Connecting to the Host Interface

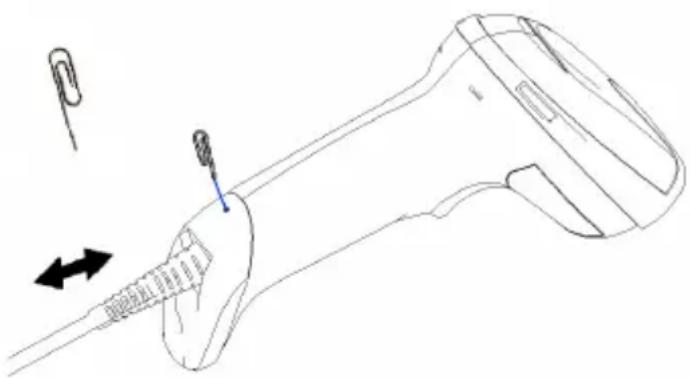
DISCONNECTING THE CABLE
To remove the interface cable from the reader, first locate the hole on the back of the handle. Next, take a paper clip and modify it as shown in the figure below. Insert the end of the paper clip into the hole and press it to push on the clip that holds the connector. As you apply pressure, pull out the cable. When reinserting the cable, make sure the connector clip is on the same side as the reader release hole. Insert the cable, it should click when it is fully inserted.

NOTE: We recommend the use of a perfectly straight new staple to make the operation easier (see the pictures below).
natural_image
Line drawing of a medical device with needle insertion and directional arrows indicating movement (no text or symbols)USING THE Wasp WDI9600
The Wasp WDI9600 normally functions by capturing and decoding codes. The reader is equipped with an internal Motionix™ motion-sensing function which activates the aiming system on device motion. The intelligent aiming system indicates the field of view which should be positioned over the bar code:
Aiming System

natural_image
A single red horizontal line on a gray background (no text or symbols)Relative Size and Location of Aiming Pattern

Linear Bar
A red beam illuminates the label. The field of view indicated by the aiming system will be smaller when the reader is closer to the bar code and larger when it is farther from the code. Symbologies with smaller bars or elements (mil size) should be read closer to the unit. Symbologies with larger bars or elements (mil size) should be read farther from the unit. If the aiming system is centered and the entire bar code is within the aiming field, you will get a good read. Successful reading is signaled by an audible tone plus a good-read green spot LED indicator.
Refer to the Wasp WDI9600 Product Reference Guide (PRG) for more information about this feature and other programmable settings.
Relative Size and Location of Green Spot

PARTS OF THE READER

- LED 2. Cable Release Hole
- Scan Window 4. Trigger
SELECTING THE INTERFACE TYPE
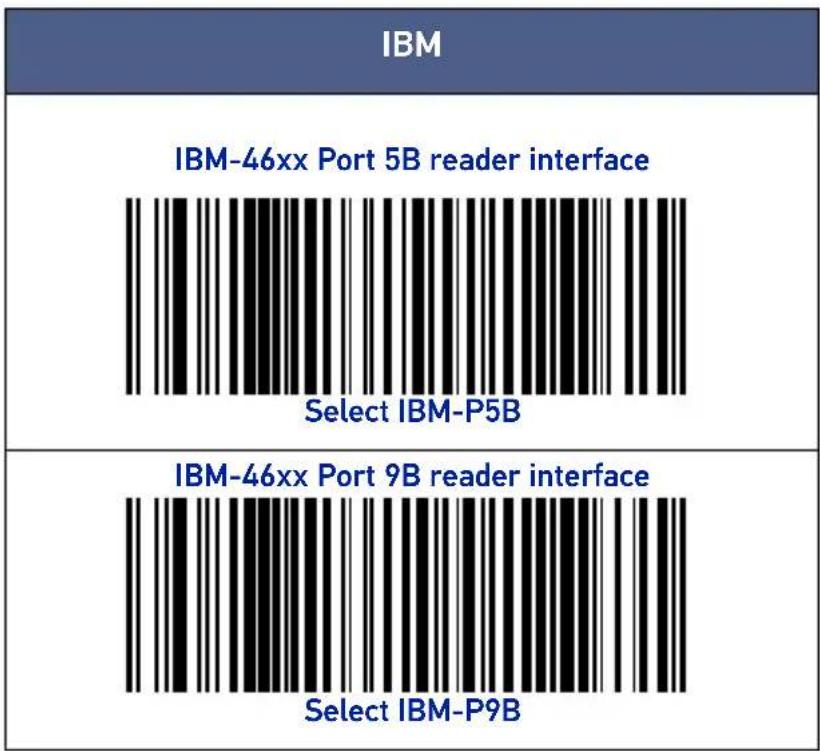
Upon completing the physical connection between the reader and its host, proceed directly to Interface Selection below for information and programming for the interface type supported by the reader and scan the appropriate bar code to select your system's correct interface type, according to your application.
For interfaces other than those listed in this manual, see the Wasp WDI9600 Product Reference Guide (PRG), available online at www.waspbarcode.com.
Interface Selection
The reader will support all the following host interfaces:
- RS-232 STD
- RS-232 WN
• IBM46XX port 9b (a specific cable's required) - USB HID POS
• USB Toshiba TEC
• USB (Keyboard, COM, OEM)
• USB Composite (Keyboard + COM) - USB for Magellan Scanners
- Keyboard Wedge
Information and programming options for each interface type are provided in this section. For defaults and additional information associated with each interface, proceed to the corresponding chapter in the Wasp WDI9600 PRG.
CONFIGURING THE INTERFACE
Scan the appropriate programming bar code to select the interface type for your system.

NOTE: Unlike some other programming features and options, interface selections require that you scan only one programming bar code label. DO NOT scan an ENTER/EXIT bar code prior to scanning an interface selection bar code.
Some interfaces require the scanner to start in the disabled state when powered up. If additional scanner configuration is desired while in this state, pull the trigger and hold for 5 seconds. The scanner will change to a state that allows programming with bar codes.
RS-232


USB Interface
The reader attaches directly to a USB host, or a powered USB hub, and is powered by it. No additional power supply is required. When using a USB interface, the reader auto-detects the USB cable and defaults to the USB keyboard interface.

USB (CONTINUED)

Select USB Alternate Keyboard (with alternate key encoding)

Select USB-OEM

Select USB-KBD-APPLE (for Apple computers)
Keyboard Wedge Interface
To use a Keyboard Wedge interface, scan the bar code for the desired keyboard type.
KEYBOARD

KEYBOARD (CONTINUED)

Select KBD-XT
(PC/XT w/Standard Key Encoding)

Select KBD-IBM-3153
(for IBM Terminal 3153)

Select KBD-IBM-M
(for IBM Terminals 31xx, 32xx, 34xx, 37xx make only keyboard)

Select KBD-IBM-MB
(for IBM Terminals 31xx, 32xx, 34xx, 37xx make break keyboard)

Select KBD-DIG-VT
(for DIGITAL Terminals VT2xx, VT3xx, VT4xx)
Country Mode
This feature specifies the country/language supported by the keyboard. Only the following interfaces support ALL Country Modes.
• USB Keyboard (without alternate key encoding)
- AT, PS/2 25-286, 30-286, 50, 50Z, 60, 70, 80, 90 & 95 w/Std Key Encoding
- Keyboard Wedge for IBM AT PS2 with standard key encoding but without external keyboard
- AT, PS/2 25-286, 30-286, 50, 50Z, 60, 70, 80, 90 & 95 without Alternate Key
- Keyboard Wedge for IBM AT PS2 without alternate key encoding but without external keyboard
All other interfaces support ONLY the following Country Modes: U.S., Belgium, Britain, France, Germany, Italy, Spain, Sweden.
COUNTRY MODE

ENTER/EXIT PROGRAMMING MODE

Country Mode = U.S.

Country Mode = Belgium

Country Mode = Britain
COUNTRY MODE (CONTINUED)

Country Mode = Croatia*

Country Mode = Czech Republic*

Country Mode = Denmark*

Country Mode = France

Country Mode = French Canadian

Country Mode = Germany
*Supports only the interfaces listed in the Country Mode feature description
COUNTRY MODE (CONTINUED)

Country Mode = Hungary*

Country Mode = Italy

Country Mode = Japanese 106-key*

Country Mode = Lithuanian

Country Mode = Norway*

Country Mode = Poland*
*Supports only the interfaces listed in the Country Mode feature description
COUNTRY MODE (CONTINUED)





*Supports only the interfaces listed in the Country Mode feature description
PROGRAMMING
The reader is factory-configured with a set of standard default features. After scanning the interface bar code from the Interfaces section, select other options and customize your reader through use of the programming bar codes available in the Wasp WDI9600 PRG. Check the corresponding features section for your interface, and also the Data Editing and Symbologies chapters of the PRG.
Using Programming Bar Codes
This manual contains bar codes which allow you to reconfigure your reader. Some programming bar code labels, like the "Reset Default Settings" on page 16, require only the scan of that single label to enact the change.
Other bar codes require the reader to be placed in Programming Mode prior to scanning them. Scan an ENTER/EXIT bar code once to enter Programming Mode; scan the desired parameter settings; scan the ENTER/EXIT bar code again to accept your changes, which exits Programming Mode and returns the reader to normal operation.
Configure Other Settings
Additional programming bar codes are available in the PRG to allow for customizing programming features. If your installation requires different programming than the standard factory default settings, refer to the PRG.
Resetting Product Defaults
If you aren't sure what programming options are in your reader, or you've changed some options and want your custom factory settings restored, scan the bar code below to reset the reader to its initial configuration. Reference the PRG for other options, and a listing of standard factory settings.

NOTE: Factory defaults are based on the interface type. Be sure your reader is configured for the correct interface before scanning this label. See "Selecting the Interface Type" on page 6 for more information.

Reset Default Settings
NUMLOCK
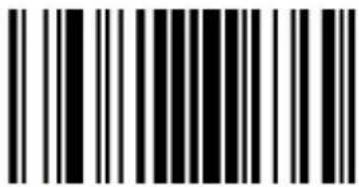
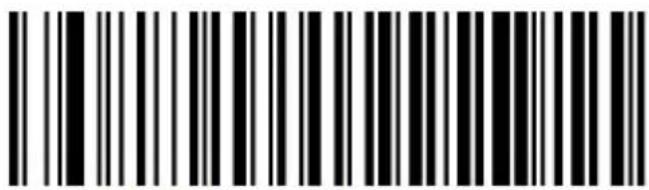
This option specifies the setting of the Numbers Lock (Numlock) key while in keyboard wedge interface. This only applies to alternate key encoding interfaces. It does not apply to USB keyboard.
NUMLOCK
ENTER/EXIT PROGRAMMING MODE
◆ Numlock = Numlock key unchanged

Numlock = Numlock key toggled
◆ = default value
CAPS LOCK STATE
This option specifies the format in which the reader sends character data. This applies to keyboard wedge interfaces. This does not apply when an alternate key encoding keyboard is selected.
CAPS LOCK STATE

ENTER/EXIT PROGRAMMING MODE

◆ Caps Lock OFF

Caps Lock ON

AUTO Caps Lock Enable
◆ = default value
READING PARAMETERS
Move the reader toward the target and center the aiming pattern and illumination system to capture and decode the image. See "Using the Wasp WDI9600" on page 4 for more information.
The aiming system will briefly switch off after the acquisition time, and if no code is decoded will switch on again before the next acquisition. The illuminator will remain on until the symbol is decoded.
As you read code symbols, adjust the distance at which you are holding the reader.
Successful reading can be signaled by a good read green spot. Use the bar codes that follow to specify the duration of the good read pointer beam after a good read.
ENTER/EXIT PROGRAMMING MODE

Disabled

Short (300 ms)
GREEN SPOT DURATION (CONTINUED)

Medium (500 ms)

Long (800 ms)
◆ = default value
OPERATING MODES
Scan Mode
The reader can be set to operate in one of several scanning modes. See the PRG for more information and settings for any of the options:
Trigger Single (Default) This mode is associated with typical handheld reader operation. When the trigger is pulled, illumination is turned on and the scanner attempts to read a label.
Scanning is activated until one of the following occurs:
- the programmable “maximum scan on time” 1 has elapsed
- a label has been read
- the trigger is released
Trigger Pulse Multiple - Scanning begins when the trigger is pulled and continues after the trigger is released, until the trigger is pulled again or until the programmable "maximum scan on time" 1 has elapsed. Reading a label does not disable scanning. Double Read Timeout 1 prevents undesired multiple reads while in this mode.
Trigger Hold Multiple - When the trigger is pulled, scanning starts and the product scans until the trigger is released or “maximum scan on time” 1 has elapsed. Reading a label does not disable scanning. Double Read Timeout 1 prevents undesired multiple reads while in this mode.
Always On - The illuminator is always ON and the reader is always ready for code reading. Double Read Timeout 1 prevents undesired multiple reads.
Flashing - The reader illuminator flashes on and off regardless of the trigger status. Code reading takes place only during the Flash On 2 time. Double Read Timed prevents undesired multiple reads.
Object Detection - The scanner looks for changes within its field-of-view. The Aiming Pattern is always on to show the optimum reading area. If a predefined amount of movement is detected, the red illumination switches on. Scanning continues until a label is read or "maximum scan on time" is reached.
- See the Product Reference Guide (PRG) for these and other programmable features.
- Controlled by Flash On Time and Flash Off Time. Use the PRG to program these options.
SCAN MODE

ENTER/EXIT PROGRAMMING MODE

♦ Trigger Single

Trigger Pulse Multiple

Trigger Hold Multiple
◆ = default value
SCAN MODE (CONTINUED)

Flashing

Always ON
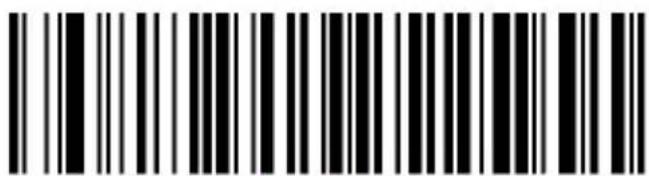
Stand Mode
TECHNICAL SPECIFICATIONS
The following table contains Physical and Performance Characteristics, User Environment and Regulatory information.
| PHYSICAL CHARACTERISTICS | |
| Color | BlackWhite |
| Dimensions | Height 16.6 cm (6.5")Length 10.9 cm (4.3")Width 6.8 cm (2.7") |
| Weight (without cable) | GD4200 approx. 163 g (5.75 oz.) |
| ELECTRICAL CHARACTERISTICS | |
| Power Supply | GD4220: 5VDC ± 5%GD4290: 4.5 - 14.0 VDC |
| Consumption | Operating (Typical): <350mA @ 5V <150mA @12VStandby/Idle (Typical): <60mA @5V <30mA @12V |
| Max. Scan Rate 400 reads/sec | |
| Reading Indicators Top and rear illumination, Good Read Spot, Beep | |
| ENVIRONMENTAL CHARACTERISTICS | |
| Operating Temperature | 0 °C to + 50 °C (+32°F to +122°F) |
| Storage Temperature | -40 °C to + 70 °C (-40°F to +158°F) |
| Humidity 95% non condensing | |
| Drop Resistance | IEC 68-2-32 Tested1.8 m (6 ft) |
| ESD Protection 16 KV | |
| Protection Class IP52 | |
| Cable Length | Refer to www.waspbarcode.com |
| OPTICAL CHARACTERISTICS | |
| Optical Format CCD solid state sensor (2500 pixels) | |
| Illumination System | LED SourceDual LED Array 612-630nm |
| Ambient Light Up to | 130,000 lux |
| OPTICAL CHARACTERISTICS (CONTINUED) | |
| Tilt Tolerancea | +/- 45° |
| Pitch Tolerancea | +/- 65° |
| Skew Tolerancea | +/- 65° |
| Field of Viewa | HORIZONTAL 36° +/- 1° |
| PCS | minimum 15% |
| DECODE CAPABILITY | |
| 1D Bar CodesUPC/EAN/JAN (A, E, 13, 8); UPC/EAN/JAN (including P2 /P5); UPC/EAN/JAN (including; ISBN / Bookland & ISSN); UPC/EAN Coupons; Code 39 (including full ASCII); Code 39 Trioptic; Code39 CIP (French Pharmaceutical); LOGMARS (Code 39 w/ standard check digit enabled); Danish PPT; Code 32 (Italian Pharmacode 39); Code 128; Code 128 ISBT; Interleaved 2 of 5; Standard 2 of 5; Interleaved 2 of 5 CIP (HR); Industrial 2 of 5; Discrete 2 of 5; Datalogic 2 of 5 (China Post Code/Chinese 2 of 5); IATA 2of5 Air cargo code; Code 11; Codabar; Codabar (NW7); ABC Codabar; Code 93; MSI; PZN; Plessey; Anker Plessey; Follet 2 of 5; GS1 DataBar Limited; GS1 DataBar Expanded; GS1 DataBar Truncated; DATABAR Expanded Coupon. | |
a. Based on ISO 15423 specifications
| READING PARAMETERS | |
| DOFa | Code 39 5mils: 50 to 370mm / 1.97 to 14.6 inchb |
| Code 39 7.5mils: 50 to 540mm / 1.97 to 21.3 inchb | |
| Code 39 10mils: 50 to 735mm / 1.97 to 28.9inchb | |
| Code 39 20mils: 25 to 1470mm / 0.98 to 57.87 inchb | |
| EAN13 13 mils: 35 to 900mm / 1.38 to 35.43 inchb | |
| Resolution (Maximum) | 0.0077mm /3mils |
a. The depth of field is defined by an arc and not a plane. Shorter bar codes of a given resolution can be read at a further distance than longer bar codes (as explained in the image below).
b. All labels grade A, typical environmental light, 20°C, label inclination 10°.

natural_image
Diagram of a conical light system with a central vertical bar and curved lines, no text or symbols present.LED AND BEEPER INDICATIONS
The reader's beeper sounds and its illumination flashes or changes color to indicate various functions or errors on thereader. A “Green Spot” also lights to indicate a good read. The tables below list these indications. Reference the PRG for a more detailed list.
| INDICATION LED BEEPER | ||
| Power-up | Upper LED flashes/ blinks on power-up, however, this may be too rapid to view. With a USB interface, the LED blinks until enumeration with the host is completed. | Reader beeps four times at highest frequency and volume upon power-up. |
| Good Read | Upper green LED comes on for programmed time (default). LED behavior for this indication is configurable using Aladdin utility. | One beep at current frequency, volume, mono/bi-tonal setting upon a successful label scan. It is also possible to upload custom jingles with Aladdin. |
| ROM Failure | 200ms on / 200ms off | Reader sounds one error beep at highest volume for 200 mS. |
| Limited Scanning Label Read | N/A | Reader 'chirps' six times at the highest frequency and current volume. |
| Reader Disabled | The LED blinks continuously 100mS on / 900 mS off | N/A |
TROUBLESHOOTING
| PROBLEM POSSIBLE CAUSE | POSSIBLE SOLUTION | |
| Nothing happens when the scan button is pulled. | No power to the reader. | Check system power.Ensure power supply is connected. |
| Interface or power cables are loose. | Ensure all cable connections are secure. | |
| LED comes on, but bar code does not decode. | Reader not programmed for correct bar code type. | Ensure reader is programmed to read the type of bar code scanned. Refer to the PRG for more information. |
| Bar code label is unreadable. | Check the label to ensure it is not defaced. Try scanning another bar code type. | |
| Distance between reader and bar code is incorrect. | Move reader closer to or further from the bar code. | |
| Bar code is decoded but not transmitted to the host. | Reader not programmed for the correct host type. | Scan the appropriate host type bar code.Refer to the PRG for more information. |
WARRANTY
Wasp warrants that the Products shall be free from defects in materials and workmanship under normal and proper use during the Warranty Period. Products are sold on the basis of specifications applicable at the time of manufacture and Wasp has no obligation to modify or update Products once sold. The Warranty Period shall be five years from the date of shipment by Wasp, unless otherwise agreed in an applicable writing by Wasp.
Wasp will not be liable under the warranty if the Product has been exposed or subjected to any: (1) maintenance, repair, installation, handling, packaging, transportation, storage, operation or use that is improper or otherwise not in compliance with Datalogic's instruction; (2) Product alteration, modification or repair by anyone other than Wasp or those specifically authorized by Wasp; (3) accident, contamination, foreign object damage, abuse, neglect or negligence after shipment to Buyer; (4) damage caused by failure of a Wasp-supplied product not under warranty or by any hardware or software not supplied by Wasp; (5) any device on which the warranty void seal has been altered, tampered with, or is missing; (6) any defect or damage caused by natural or man-made disaster such as but not limited to fire, water damage, floods, other natural disasters, vandalism or abusive events that would cause internal and external component damage or destruction of the whole unit, consumable items; (7) use of counterfeit or replacement parts that are neither manufactured nor approved by Wasp for use in Wasp-manufactured Products; (8) any damage or malfunctioning caused by non-restoring action as for example firmware or software upgrades, software or hardware reconfigurations etc.; (9) loss of data; (10) any consumable or equivalent (e.g. cables, power supply, batteries, etc.); or (11) any device on which the serial number is missing or not recognizable.
THE WASP WARRANTIES ARE EXCLUSIVE AND IN LIEU OF ALL OTHER WARRANTIES, WHETHER WRITTEN, EXPRESS, IMPLIED, STATUTORY OR OTHERWISE, INCLUDING, BUT NOT LIMITED TO, THE IMPLIED WARRANTIES OF MERCHANTABILITY AND FITNESS FOR PARTICULAR PURPOSE. WASP SHALL NOT BE LIABLE FOR ANY DAMAGES SUSTAINED BY BUYER ARISING FROM DELAYS IN THE REPLACEMENT OR REPAIR OF PRODUCTS UNDER THE ABOVE. THE REMEDY SET FORTH IN THE WARRANTY STATEMENT IS THE BUYER'S SOLE AND EXCLUSIVE REMEDY FOR WARRANTY CLAIMS. NO EXTENSION OF THIS WARRANTY WILL BE BINDING UPON DAT-ALOGIC UNLESS SET FORTH IN WRITING AND SIGNED BY DATALOGIC'S AUTHORIZED REPRESENTATIVE. DATALOGIC'S LIABILITY FOR DAMAGES ON ACCOUNT OF A CLAIMED DEFECT IN ANY PRODUCT DELIVERED BY WASP SHALL IN NO EVENT EXCEED THE PURCHASE PRICE OF THE PRODUCT ON WHICH THE CLAIM IS BASED. WASP SHALL NOT BE LIABLE FOR DAMAGES RELATING TO ANY INSTRUMENT, EQUIPMENT, OR APPARATUS WITH WHICH THE PRODUCT SOLD UNDER THIS AGREEMENT IS USED. Further details on warranty coverage, rights and conditions are addressed under and regulated by the Terms and Conditions of Sales of Wasp available at www.waspbarcode.com.
ERGONOMIC RECOMMENDATIONS

CAUTION: In order to avoid or minimize the potential risk of ergonomic injury follow the recommendations below. Consult with your local Health & Safety Manager to ensure that you are adhering to your company's safety programs to prevent employee injury.
- Reduce or eliminate repetitive motion
- Maintain a natural position
- Reduce or eliminate excessive force
- Keep objects that are used frequently within easy reach
- Perform tasks at correct heights
- Reduce or eliminate vibration
- Reduce or eliminate direct pressure
- Provide adjustable workstations
- Provide adequate clearance
- Provide a suitable working environment
- Improve work procedures.
TECHNICAL SUPPORT
Support Through the Website
Wasp provides several services as well as technical support through its website.
Log on to (www.waspbarcode.com).
For quick access, from the home page click on the search icon 🔒, and type in the name of the product you're looking for. This allows you access to download Data Sheets, Manuals, Software & Utilities, and Drawings.
Hover over the Support & Service menu for access to Services and Technical Support.
Reseller Technical Support
An excellent source for technical assistance and information is an authorized Wasp reseller. A reseller is acquainted with specific types of businesses, application software, and computer systems and can provide individualized assistance.
CLEANING PROCEDURE
Exterior surfaces and scan windows exposed to spills, smudges or debris accumulation require periodic cleaning to ensure best performance during scanning operations.
Follow the procedures described in this instruction sheet to keep your Wasp device in good operating condition.

WARNING: Be sure to turn off power and unplug the device from electrical outlet before cleaning.

CAUTION: DO NOT use abrasive pads or cleaning agents.
Common Cleaning Solutions
The cleaners and disinfectants listed below are recommended for use on Wasp Disinfectant-Ready Enclosures:
| PRODUCT CHEMICAL CONTENT | |
| Sani-Cloth® HB,Sani-Cloth® Plus,Super Sani-Cloth® | Quaternary Ammonium Chloride solution |
| Hepacide Quat II Virucidal disinfectant cleaner | |
| Alcohol Wipes 70% Isopropyl Alcohol | |
| CaviWipesTMwww.waspbarcode.com | Hylenene GlycolMonobutyl Ether 1-5% |
| Virex® 256 | n-Alkyl Dimethyl Benzyl AmmoniumChloride; Didecyl Dimethyl AmmoniumChloride |
| Formula 409® Glass and Surface Cleaner | n-Alkyl Dimethyl Benzyl AmmoniumChloride; n-Propoxypropanol |
| Windex® Blue Isopropyl Alcohol | |
| Clorox® Bleach;Clorox Healthcare BleachGermicidal Cleaner | Sodium Hypochlorite;Sodium Hydroxide |
| Hydrogen Peroxide 3% | |
| ProSprayTM Wipes(Disinfectant towelettes) | 0.647% o-phenylphenol;0.070% o-benzyl-p-chlorophenol |
| 100% Gentle dish soap and water | |

NOTE: Standard product enclosures are resistant to harsh chemical cleaning.

CAUTION: DO NOT spray or pour cleaner directly onto the unit. DO NOT use solutions in their concentrated form. DO NOT use aerosols, solvents or abrasives. DO NOT use paper towels or rough cloths to clean windows.
Cleaning enclosure and window surfaces
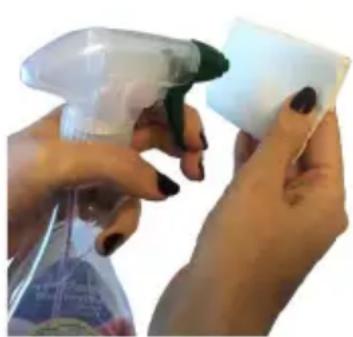
- Moisten a soft cloth with a recommended cleaning solution. Be sure to apply the solution to your cloth first. Wring excessive liquid from the cloth.
- Use the cloth to wipe down the surface of the unit. Use cotton swabs, lightly moistened, to reach in corners and crevices.
- Use another clean dry cloth to remove any residue of the cleaning agent and ensure the unit is dry.
natural_image
Close-up of hands using a spray gun to clean or store items (no visible text or symbols)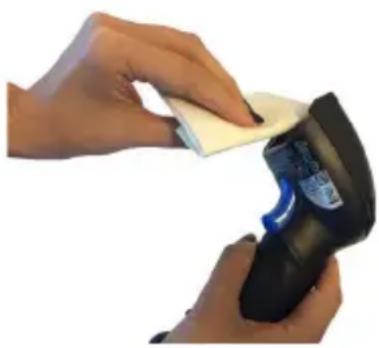
natural_image
Close-up of hands using a handheld scanner to clean or store items (no visible text or symbols)©2021 Wasp Barcode Technologies and /or its affiliates. • All rights reserved • Without limiting the rights under copyright, no part of this documentation may be reproduced, stored in or introduced into a retrieval system, or transmitted in any form or by any means, or for any purpose, without the express written permission of Wasp Barcode Technologies and/or its affiliates • Wasp Barcode Technologies and the Wasp logo are registered trademarks of Wasp in many countries, including the U.S. and the E.U.
Wasp
BARCODE TECHNOLOGIES
www.waspbarcode.com
Wasp Barcode Technologies
1400 10th Street Plano, Texas | USA 75074
Telephone:(214)547-4100
©2021 Wasp Barcode Technologies

- ©2021 Wasp Barcode Technologies
- Disclaimer
- Trademarks
- Patents
- TABLE OF CONTENTS
- Description 1
- Setting Up the Reader 3
- Disconnecting the Cable 4
- Using the Wasp WDI9600.... 4
- Parts of the Reader 6
- Selecting the Interface Type 6
- Configuring the Interface....7
- Programming...... 16
- Numlock 17
- Caps Lock State 18
- Reading Parameters.... 19
- Good Read Green Spot Duration.... 19
- Operating Modes 21
- Technical Specifications 24
- LED and Beeper Indications 27
- Troubleshooting 28
- Warranty 29
- Ergonomic Recommendations 30
- Technical Support 30
- Cleaning Procedure 31
- DESCRIPTION
- Top Productivity for POS and Document Handling
- Decoding
- Hands Free Stand/Holder
- SETTING UP THE READER
- DISCONNECTING THE CABLE
- USING THE Wasp WDI9600
- Aiming System
- Relative Size and Location of Aiming Pattern
- Linear Bar
- Relative Size and Location of Green Spot
- PARTS OF THE READER
- SELECTING THE INTERFACE TYPE
- Interface Selection
- CONFIGURING THE INTERFACE
- USB Interface
- Keyboard Wedge Interface
- Country Mode
- PROGRAMMING
- Using Programming Bar Codes
- Configure Other Settings
- Resetting Product Defaults
- NUMLOCK
- CAPS LOCK STATE
- READING PARAMETERS
- OPERATING MODES
- Scan Mode
- TECHNICAL SPECIFICATIONS
- LED AND BEEPER INDICATIONS
- WARRANTY
- ERGONOMIC RECOMMENDATIONS
- TECHNICAL SUPPORT
- Support Through the Website
- Reseller Technical Support
- CLEANING PROCEDURE
- Common Cleaning Solutions
- Cleaning enclosure and window surfaces
- Wasp
- BARCODE TECHNOLOGIES
Brand : Wasp
Model : WDI9600
Category : Barcode Reader