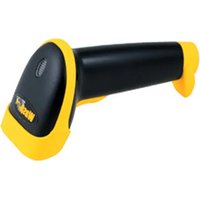
WLR8900 - Barcode Reader Wasp - Free user manual and instructions
Find the device manual for free WLR8900 Wasp in PDF.


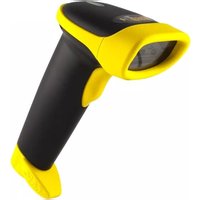
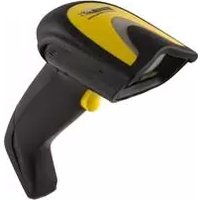
| Product Type | CCD Barcode Scanner |
| Model | WLR8900 |
| Dimensions (L x W x H) | 106 x 62 x 160 mm |
| Weight (without cable) | Approximately 160 g |
| Operating Voltage | +5 VDC ±10% |
| Standby Current | < 100 mA |
| Working Current | < 220 mA |
| Depth of Field | 30 mm to 330 mm (for 40 mil) |
| Best Resolution | 0.127 mm (5 mil) |
| Scan Rate | 45 scans/second |
| Decoding Rate | 100 scans/second |
| Scanning Width | 120 mm |
| Cable Length | 210 cm (interchangeable) |
| Interface | PS/2 or USB keyboard wedge |
| Symbologies Supported | UPC-A/E, EAN-8/13, Code 39/93/128, Interleaved 2 of 5, Codabar, MSI, RSS, and more |
| Operating Temperature | 0°C to 50°C |
| Storage Temperature | -20°C to 60°C |
| Relative Humidity | 0% to 95% non-condensing |
| Drop Resistance | 1.5 m onto concrete |
| Compliance | FCC Class A, CE approval in progress |
| Cleaning Instructions | Clean the scanning window with a soft, dry cloth. Do not use abrasive cleaners. |
| Repair & Spare Parts | Interchangeable cables and warranty repair available. Contact Wasp Technologies for service. |
Frequently Asked Questions - WLR8900 Wasp
User questions about WLR8900 Wasp
0 question about this device. Answer the ones you know or ask your own.
Ask a new question about this device
Download the instructions for your Barcode Reader in PDF format for free! Find your manual WLR8900 - Wasp and take your electronic device back in hand. On this page are published all the documents necessary for the use of your device. WLR8900 by Wasp.
USER MANUAL WLR8900 Wasp
WLR 8900/8905 Programming Guide

Please Read
Note:
The Wasp WLR 8900/8905 Scanner is ready to scan the most popular bar codes out of the box. This manual should only be used to make changes in the configuration of the scanner for specific applications.
This scanner does not require software or drivers to operate. The scanner enters data as keyboard data. Please review this manual before scanning any of the programming bar codes in this manual.

Tech Tip
If you are unsure of the scanner configuration or have scanned the incorrect codes, please scan the default bar code on page 6. This will reset the scanner to its factory settings.
© Copyright Wasp Technologies 2006
All rights reserved. Ver AMC-a-1.01
No part of this publication may be reproduced or transmitted in any form or by any means without the written permission of Wasp Technologies. The information contained in this document is subject to change without notice.
Wasp is a trademark of Wasp Technologies. All other trademarks or registered trademarks are the property of their respective owners.
Table of Contents
Chapter 1. Introduction ...... 1
Chapter 2. Bar Code Symbologies....2
Chapter 3. Installation....3
Chapter 4. Quick Start ....4
Chapter 5. WLR 8900/8905 Setup & Configuration .....5-28
-
Factory Default & Keyboard Connection ....6
-
Autosense Stand Mode ....6
-
Beep and Delay 7-8
-
Upper/Lower Case....9
-
Keyboard Language ....10
-
Preamble/Postamble Configuration .....11
-
Terminator/Code ID 12
-
Enable/Disable Bar Code Symbologies .....13-14
-
Bar Code Symbology Settings .....15-27
Code 39 ......15
Interleaved 2 of 5 and Code 93 ......16
Code 128 and UCC/EAN 128....17
MSI/Plessey 18
Codabar 19
UPC-A....20
UPC-A Supplemental / UPC-A to EAN-13 .....21
UPC-E....22
UPC-E Supplemental 23
EAN-8 24
EAN-8 Supplemental 25
EAN-13 26
EAN-13 Supplemental 27
Appendix A Bar Code Test Symbols 28-30
Appendix B ASCII Table 31-34
Appendix C Codes for PC 35
Appendix D Technical Specifications 36
Product Support ....37
Warranty 37
Frequently Asked Questions....38
Introduction
Bar coding is the most common Automated Data Collection (ADC) technology providing timely, error-free information that can be used to increase productivity, accuracy, and efficiency in the workplace. Virtually every type of industry is using bar codes to replace keyboard data entry. Studies have shown that a proficient data entry operator will make one error for every 300 characters that are manually entered. The error rate using bar codes is almost negligible and can be error-free using bar code symbologies with the check digit enabled.
The Wasp Charged Coupled Device (CCD) technology is a technique whereby a bar code is photographed, digitized, and electronically sampled by built-in photodetectors. The detectors process the measurement of every bar and space using the number of adjacent photodetectors which contrast a black mark and a white space. Wasp WLR 8900 series scanners extremely rugged since they have no moving parts. Wasp WLR 8900 series scanners are support PS/2 or USB keyboard interfaces and easily wedges between the computer and keyboard. Bar code data is passed directly into the keyboard buffer as if it had been typed in by hand by a data entry operator.
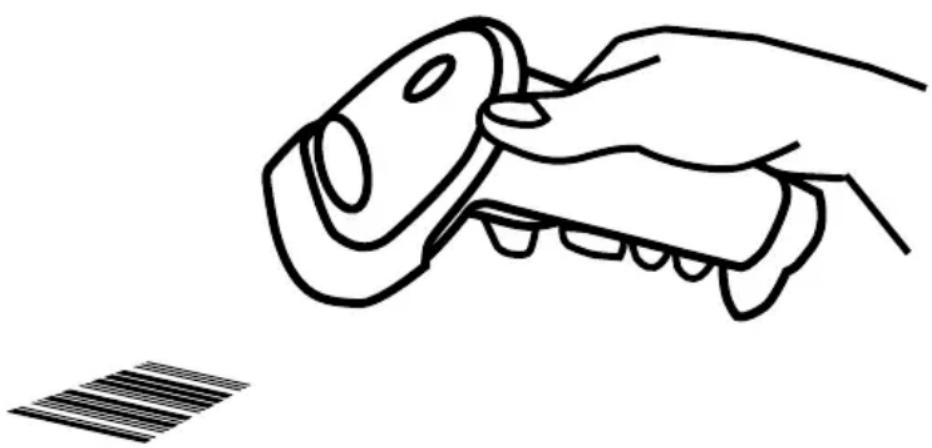
Of all the hand held bar code scanning devices on the market, the CCD reader is the easiest to use and most cost effective for the typical business user. The Wasp WLR 8900 series scanners are extended distance scanners with a depth of reading of up to one foot depending on the mil size of the bar code. To activate the scanner, the user simply points the scanning aperture towards the bar code, pulls the trigger, and aims the red LED beam across the bar code.
natural_image
Simple line drawing of a hand holding a small object, with a barcode symbol below (no text or symbols present)Bar Code Symbolologies
Bar codes are symbols consisting of a series of bars and spaces which can be applied to packages, cartons, bottles, and other commercial products. The bars and spaces in each symbol are grouped in such a way to represent a specific ASCII character or function. The interpretation of these groups is based on a particular set of rules called symbologies. Various symbologies have been developed for particular applications. Some examples are shipping and receiving, manufacturing, retail, healthcare, transportation, document processing and tracking, and libraries.
The resolution of a bar code is dependent on the narrowest element of a bar code (X dimension), and can vary from high density (nominally less than 0.009 in./0.23 mm), medium density (between 0.009 in./0.23 mm and 0.020 in./0.50 mm), and low density (greater than 0.020 in./0.50 mm). Medium and low densities are the most common since these are the easiest to read (scan) with nearly all scanning devices. Wasp WLR 8900/8905 Scanners can read bar codes with X-dimensions as low as 5 mils (0.005 in/0.13mm).
Wasp WLR 8900/8905 Scanners can read the most popular bar code symbologies including Code 39, Code 93, Code 128, Interleaved 2 of 5, UPC-A, UPC-E, EAN/JAN-8, EAN/JAN-13, Codabar, and MSI/Plessey.
Please see test chart on pages 28-30.
Installation
- Turn off your computer.
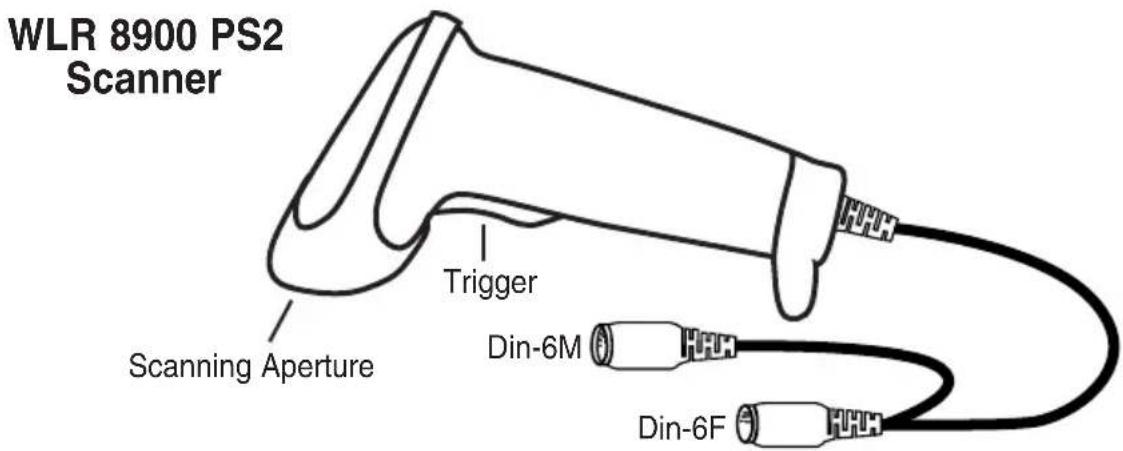
- Unplug your PC keyboard cable and plug the male end (Din 6) of the WLR 8900 Scanner directly into your PC keyboard port. Plug your keyboard cable into the other end (female Din 6) of the the scanner.
- Turn your computer on.

- Plug the USB of the WLR 8905 Scanner directly into your PC's USB port.
Quick Start
Your Wasp WLR 8900/8905 Scanners are ready for use. The default settings of the scanners have been pre-programmed for the most common bar code configurations. Use the "WLR 8900/8905 Setup & Configuration" sections only to customize the scanners settings. Please review the "Enable Bar Code Symbologies" configuration beginning on page 14 to see the list of bar codes symbologies which are enabled by default.
Tip:
- Use the pre-printed "Bar Code Test Symbols" in Appendix A on pages 28-30 as a test chart to practice scanning.

flowchart
graph TD
    A["PS2 Connection"] --> B["WLR 8900 PS2 Scanner"]
    C["USB Connection"] --> D["WLR 8905 USB Scanner"]
    D --> E["PC"]
    E --> F["USB Connector"]
    G["BACK OF PC"] --> H["KEYBOARD Y-CABLE"]
    H --> I["Keyboard Mouse"]
    I --> J["DO NOT PLUG IN MOUSE PORT!"]
Setup & Configuration
In order to configure Wasp WLR 8900/8905 Scanners, you must familiarize yourself with the setup procedures on the following pages. The default settings of the Wasp WLR 8900/8905 Scanners are identified on each page and clearly marked using an asterisk (*). The default settings have been preprogrammed for the most common bar code configurations. Use the Setup & Configuration only to customize the Wasp WLR 8900/8905 Scanners settings. If you need to configure the scanner, the default settings will be overwritten. All the programmed settings are stored permanently in non-volatile memory; therefore, your configuration will be maintained even if the keyboard power to Wasp WLR 8900/8905 Scanners is removed by turning off your PC.
In order to configure Wasp WLR 8900/8905 Scanners, two basic steps need to be followed:
(1) Locate the group that contains the options to be changed.
(2) Scan the bar code representing the option to be changed. The scanner will sound two beeps.
To change Minimum/Maximum Length:
(1) Scan the Minimum or Maximum Length bar code.
(2) Scan a 2 digit value from the ASCII table on pages 31-34
(3) Scan the Minimum or Maximum Length bar code again.
Example: To have a minimum length bar code of 1, you must scan a 0 then 1, then scan the minimum bar code again. To have a maximum length bar code of 10, you must scan a 1 then 0, then scan the maximum bar code again.
Factory Default
Use the Factory Default bar code to reset the scanner to the Default settings.
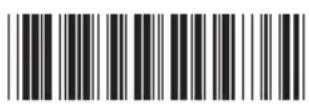
Factory Default
Autosense Stand Mode
Scan this Autosense Stand Mode bar code to enable the hands-free autosense feature of the WLR 8900/8905 Scanners. If you desire to turn this mode "off," please scan the default bar code above.

Autosense Flash Mode Enable
Keyboard Connection
The Keyboard Connection is used to program the Wasp WLR 8900/8905 Scanners for the type of computer it is attached.

PC - AT (PS/2) *

PC - XT

Notebook
*Default
The 'Beep and Delay' configuration supports the general control options for the Wasp WLR 8900/8905 Scanners. These options include the volume, intercharacter delay, and interblock delay.
Interblock delay is the minimum time interval between two adjacent scans. If the processing speed of your host device is slower than your scanning speed, a longer interblock delay may ensure the data integrity.
Intercharacter delay is the time period that the scanner will wait before transmitting the next character. If data sent by the scanner has incorrect or missing characters, a longer intercharacter delay may solve the problem. The intercharacter delay should be changed only if the transfer rate cannot be maintained between the scanner and the keyboard buffer of the computer.
Note: The default for the intercharacter delay is set to '140us' and is the most common configuration; however, your PC may be different. When you scan a bar code, if some stray or scrambled characters appear, increase the intercharacter delay to slow down the transfer rate.
Beep Settings
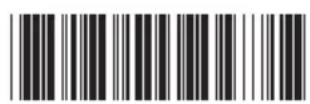
Beep Off

Beep Hi

Beep Medium *

Beep Low to High

Beep High to Low

Beep Low
*Default
Interblock Delay Intercharacter Delay

0ms *

140μs *

10ms
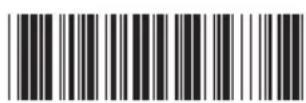
500μs

50ms
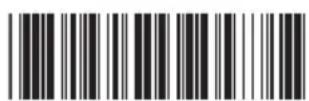
1ms

100ms

4ms

200ms

16ms

500ms
*Default
- Caps Lock Auto (For PC XT/AT only):
In Auto Trace mode, the scanner will keep track of the Caps Lock status automatically. For some PCs, the scanning performance may be compromised because of the auto tracing. If the scanning performance is poor (or cannot scan) or the scanner cannot output the upper/lower case characters correctly, try to select one of the next two choices instead of auto tracing.
- Caps Lock Off:
When the keyboard is in the unshifted state (Caps Lock is not pressed), select "Lower Case."
- Caps Lock On:
When the keyboard is in the shifted state (Caps Lock is on), select "Upper Case."

Caps Lock On

Caps Lock Off *

Caps Lock Auto
*Default
Chapter 5
Keyboard Language
The ‘Keyboard Language’ setting controls the key codes for your keyboard’s language.

U.S. *

German
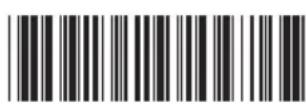
French

Spanish

Italian
*Default
Preamble/Postamble Configuration
The ‘Preamble/Postamble’ configuration is used to add a prefix or suffix set of characters to the bar code value. Up to 8 characters may be added for each option separately. Preamble and postamble characters can function concurrently, but need to be configured separately.
To add preamble or postamble characters, follow the steps below:
1) Scan the 'Clear Pre/Postamble' bar code on this page.
2) Scan the 'Preamble' or 'Postamble' bar code.
3) Use Appendix B on pages 31-34 to locate the characters you want to add as preamble or postamble characters. Make sure that you scan the bar code associated with each letter before preceding to the next character. For example, to add the letter "A," scan the bar code corresponding to the letter "A" on page 33. The letter "A" will always appear in your data as prefix or suffix to the bar code value.
4) Scan the corresponding 'Pre/Postamble' bar code on this page to exit this setting.

Clear Pre/Postamble

Preamble

Postamble
Terminator
The ‘Terminator’ option is used to specify the end-of-text message and is primarily used to denote the end of the bar code value.

CR *

Tab

None

Space

LF

ESC

CR + LF
Code ID
The ‘Code ID’ option sends a specific value when a particular bar code symbology is scanned. For example, if ‘Code ID’ is enabled and Code 39 is scanned, an “M” will appear in the data stream in front of the bar code value.
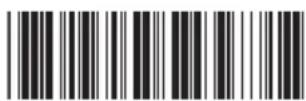
Code ID On
O - MSI/Plessey T - EAN 128
S - EAN 8 K - Code 128
E - UPC E N - Codabar
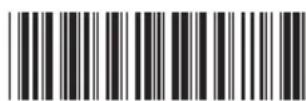
Code ID Off *
A - UPC A D - Full ASCII Code 39
F - EAN 13 M - Std. Code 39
L - Code 93 I - Interleaved 2 of 5
*Default
Enable Disable

Enable All

Disable All

MSI Plessey

MSI Plessey *

Interleaved 2 of 5 *

Interleaved 2 of 5

Code 128 *

Code 128

Codabar *

Codabar
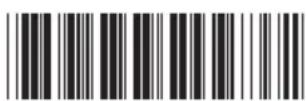
Code 39 *

Code 39
*Default
Chapter 5
Enable/Disable Bar Code Symbologies
Enable Disable



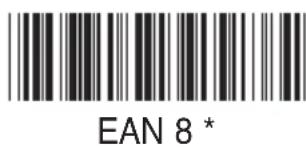


*Default
Code 39 is variable length and is the most frequently used symbology in industrial bar code systems today. It is extensively used within the Department of Defense (DOD). The principal feature is to encode messages using the full alphanumeric character set. Standard Code 39 contains only 43 characters (0-9, A-Z, \$, /, %, +, -, ., SPACE) and can be extended to a 128 character symbology (full ASCII) by combining one of the special characters (S, /, %, +) with a letter (A-Z) to form the characters that are not present in the standard Code 39 symbology.
See page 5 for information on setting the minimum and maximum lengths.

Enable Code 39 *

Disable Code 39
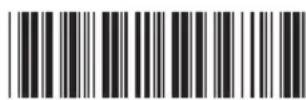
Enable Code 39 Full ASCII *

Disable Code 39
Full ASCII

Check Digit Do Not Calculate *

Check Digit Calculate And Send

Check Digit Calculate But Do Not Send *

Maximum Length (48 *)

Minimum Length (1 *)
*Default
Chapter 5
Interleaved 2 of 5 and Code 93 Settings
Interleaved 2 of 5 is a variable length, even numbered, numeric bar code. It is typically used in industrial and master carton labeling and also in the automobile industry. The symbology uses bars to represent the first digit of a pair and the interleaved (white) spaces to represent the second digit of a character pair. See page 5 for information on setting the minimum and maximum lengths.

Enable Interleaved 2 of 5 *
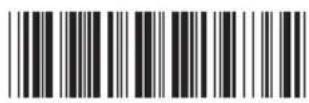
Disable Interleaved
2 of 5
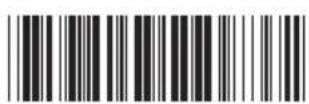
Check Digit Do Not Calculate *

Check Digit Calculate And Send

Check Digit Calculate
But Do Not Send

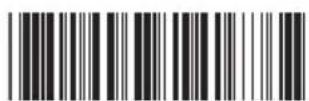
Minimum Length (6 *) Maximum Length (48 *)
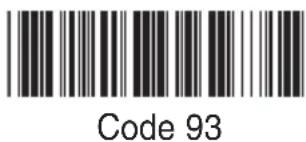
Code 93 encodes the full 128 ASCII character set using 9 modules arranged into 3 bars with adjacent spaces. Two of the characters are check characters. Code 93 is similar to Code 39 but encodes more characters per inch.

Enable Code 93 Disable Code 93 *



Minimum Length (6 *)
Maximum Length (48 *)
*Default
Code 128 is the most flexible of all the common linear symbologies. It supports alpha and numeric characters easily, has the highest number of characters per inch, and is variable length.
See page 5 for information on setting the minimum and maximum lengths.

Enable Code 128 *

Minimum Length (5 *)

Disable Code 128
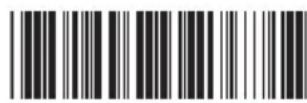
Maximum Length (48 *)

UCC/EAN 128
Enable *

UCC/EAN 128
Disable

UCC/EAN 128
Code ID Enable

UCC/EAN 128
Code ID Disable *

Function 1
Character Send

Function 1
Character Do Not Send *

Define UCC/EAN 128
Group Separator
To Define UCC/EAN 128 Group Separator:
- Scan Define UCC/EAN 128 Group Separator
- Scan ASCII code from pages 31-34
- Scan Define UCC/EAN 128 Group Separator
Note: Default Group Separator is GS
*Default
Chapter 5
MSI Plessey Settings
MSI Plessey is a variable length numeric symbology and is primarily used in marking retail shelves. Each character consists of four bars with intervening spaces for each encoded digit, one or two symbol check digits, and a reverse start code.
See page 5 for information on setting the minimum and maximum lengths.

Enable

Disable *

Check Digit Verify And Send *

Check Digit Verify And Do Not Send

Check Digit Double
MOD 10
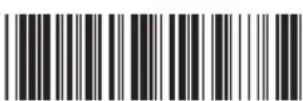
Check Digit Double 11 Plus MOD 10

Check Digit Single
MOD 10

Minimum Length (6 *)

Maximum Length (48 *)
*Default
Codabar is a variable length symbology capable of encoding six special alphanumeric characters, capital letters A through D, T, N, *, E, and all numeric digits. Codabar is one of the oldest bar code symbologies and is still used in some library applications. It should not be considered for new applications except under unusual circumstances.
See page 5 for information on setting the minimum and maximum lengths.

Codabar Enable *
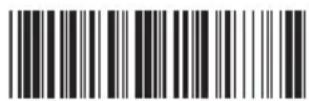
Codabar Disable

Send Start/Stop *

Do Not Send
Start/Stop

Check Digit Do Not Verify *
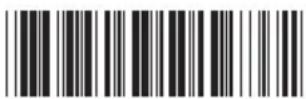
Check Digit
Verify And Send

Check Digit Verify And Do Not Send

Minimum Length (6 *)

Maximum Length (48 *)
*Default
Chapter 5
UPC-A Settings
UPC-A (Universal Product Code-A) is fixed length and is the most common UPC bar code for retail product labeling. It is seen in most grocery stores across the United States. The symbology encodes a 12-digit number. The first six digits are assigned from the Uniform Code Council (UCC). The next five digits are assigned by the manufacturer, and the final digit is a modulo 10 check digit. The nominal height for the UPC-A bar code is one inch. The reduced size is 80% of the nominal size.

UPC-A Enable *

UPC-A Disable

Send Leading Digit *

Do Not Send Leading Digit

Send Check Digit *

Do Not Send
Check Digit
*Default
This option enables the two and five digit supplements for the UPC and EAN/JAN bar code symbologies.

5 Digit Supplement Enable

5 Digit Supplement
Disable *

2 Digit Supplement Enable

2 Digit Supplement
Disable *

Transmit if Present

Must Be Present *
This option expands the UPC-A bar code to EAN-13.

UPC-A to EAN-13
Enable

UPC-A to EAN-13
Disable *
*Default
Chapter 5
UPC-E Settings
UPC-E (Universal Product Code-E) is fixed length and is a compressed six digit code used for marking small packages, including magazines and paperback books. UPC-E symbols are UPC-A symbols that have been zero suppressed (i.e. consecutive zeros are not included in the symbol). The printed value of the UPC-E code is a twelve digit code. The nominal height for the UPC-E bar code is one inch. The reduced size is 80% of the nominal size.

UPC-E Enable *

UPC-E Disable
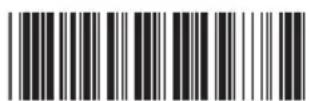
Send Leading Digit *

Do Not Send
Leading Digit

Send Check Digit *

Do Not Send Check Digit
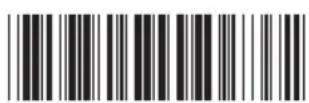
Zero Digit Expansion On

Zero Digit Expansion
Off *
*Default
This option enables the two and five digit supplements for the UPC and EAN/JAN bar code symbologies.

5 Digit Supplement
Enable

5 Digit Supplement
Disable *
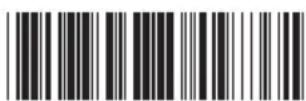
2 Digit Supplement
Enable

2 Digit Supplement
Disable *

Transmit if Present

Must Be Present *
*Default
Chapter 5
EAN-8 Settings
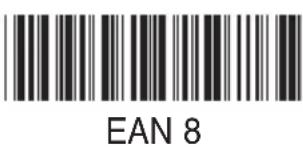
The EAN/JAN-8 is fixed length and is similar to the UPC-E code, but includes two more digits for the country code. The nominal height for the EAN/JAN-8 bar code is one inch. The reduced size is 80% of the nominal size.

EAN-8 Enable *

EAN-8 Disable

Send Leading Digit *

Do Not Send
Leading Digit

Send Check Digit *

Do Not Send
Check Digit
*Default
This option enables the two and five digit supplements for the UPC and EAN/JAN bar code symbologies.
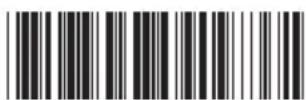
5 Digit Supplement
Enable

5 Digit Supplement
Disable *

2 Digit Supplement
Enable

2 Digit Supplement
Disable *

Transmit if Present

Must Be Present *
*Default
Chapter 5
EAN-13 Settings
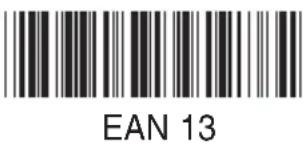
The EAN/JAN-13 (European Article Number/Japanese Article Number) is fixed length and is similar to the UPC-A symbology, but encodes a 13th digit. The nominal height for the EAN/JAN-8 bar code is one inch. The reduced size is 80% of the nominal size.

EAN-13 Enable *

EAN-13 Disable

Send Leading Digit *

Do Not Send
Leading Digit

Send Check Digit *

Do Not Send
Check Digit

ISBN Enable

ISBN Disable *
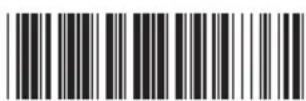
ISSN Enable

ISSN Disable *
*Default
This option enables the two and five digit supplements for the UPC and EAN/JAN bar code symbologies.

5 Digit Supplement
Enable

5 Digit Supplement
Disable *

2 Digit Supplement
Enable

2 Digit Supplement
Disable *

Transmit if Present

Must Be Present *
Appendix A
Bar Code Test Symbols
Note: Make sure that the appropriate bar code symbology is configured properly and enabled before trying to scan. Use the 'Bar Code Symbologies' configuration beginning on page 18 to enable specific symbologies.
| Code 39* |  |
| Code 93 |  |
| Interleaved 2 of 5 * |  |
| Codabar * |  |
| Code 128* |  |
| MSI/Plessey |  |
UPC-A*
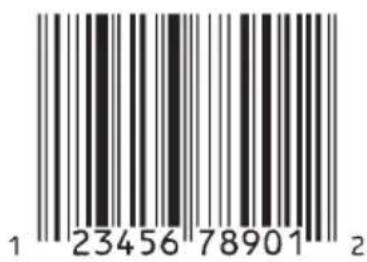
UPC-A w/5 digit supplement

UPC-A w/2 digit supplement

UPC-E*

UPC-E w/5 digit supplement

UPC-E w/2 digit supplement

*Default
Appendix A
Bar Code Test Symbols
EAN/JAN-13*
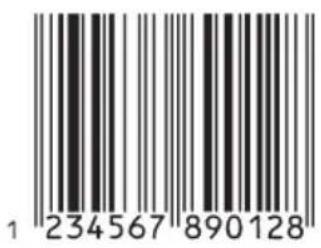
EAN/JAN-13 w/5 digit supplement

EAN/JAN-13 w/2 digit supplement
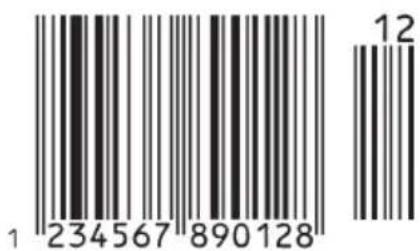
EAN/JAN-8*

EAN/JAN-8 w/5 digit supplement

EAN/JAN-8 w/2 digit supplement

*Default
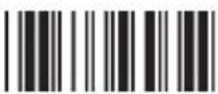
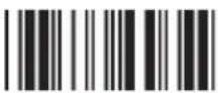
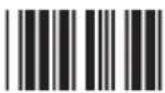
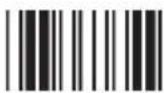
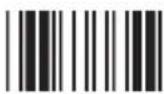
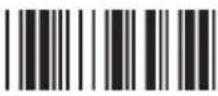
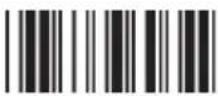
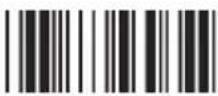
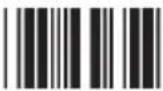
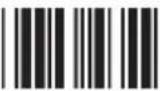
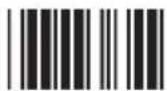
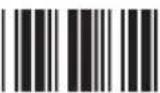
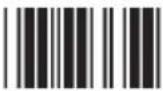
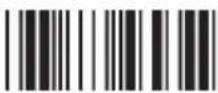
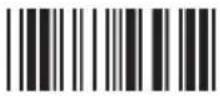
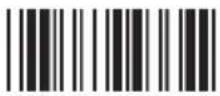
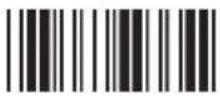
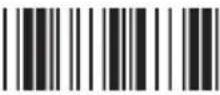
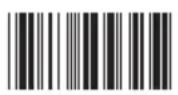
Use this ASCII Table to add preamble and postamble characters to your bar code value. Please refer to the appropriate configuration section for the number of characters that can be configured.
ASCII Character

ASCII Character
 |  |  |
| RS | ) | 4 |
 |  |  |
| US | * | 5 |
 |  |  |
| SP | + | 6 |
 |  |  |
| ! | , | 7 |
 |  |  |
| " | - | 8 |
 |  |  |
| # | . | 9 |
 |  |  |
| $ | / | : |
 |  |  |
| % | 0 | ; |
 |  |  |
| & | 1 | < |
 |  |  |
| ' | 2 | = |
 |  |  |
| ( | 3 | > |
ASCII Character
 |  |  |
| ? | J | U |
 |  |  |
| @ | K | V |
 |  |  |
| A | L | W |
 |  |  |
| B | M | X |
 |  |  |
| C | N | Y |
 |  |  |
| D | O | Z |
 |  |  |
| E | P | [ |
 |  |  |
| F | Q | \ |
 |  |  |
| G | R | ] |
 |  |  |
| H | S | ^ |
 |  | |
| I | T | _ |
ASCII Character
 k k | 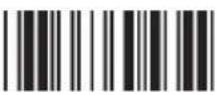 v v | |
 l l |  w w | |
 m m | 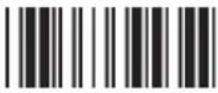 x x | |
 n n |  y y | |
 o o |  z z | |
 p p |  { { | |
 q q |  l l | |
 r r |  } } | |
 s s |  ~ ~ | |
 t t |  DEL DEL | |
 u u |
DEL
F1
F10
Cursor Right

F2

F11

Cursor Up

F3

F12

Cursor Left

F4

Tab

Cursor Down

F5

Back Tab
Page Up
F6

Esc

Page Down

F7

End

Ins

F8

Home

Enter

F9

Back Space

Del
| MODEL WLR890X | |||
| PERFORMANCE | |||
| Sensor 2660 pixels CCD linear imager sensor | |||
| Depth of Field 30mm to 330 mm (40 mil) ± 20mm | |||
| Best Resolution 0.127mm (5mil). | |||
| Scan Rate 45 scan / sec | |||
| Decoding Rate 100 scan / sec (10m / sec) | |||
| Scanning Width 120mm (1 mm barcode) | |||
| Sunlight 5000 Lux / Max (Flourescent Light) | |||
| MECHANICAL | |||
| Dimensions 106 (L) x 62 (W) x 160 (H) mm | |||
| Weight Approximately 160g (without cable) | |||
| Cable 210 cm in length (Interchangeable cable) | |||
| ELECTRICAL | |||
| Operating Voltage + 5 VDC ± 10% | |||
| POWER CONSUMPTION | STANDBY <100mA | WORKING <220mA | SURGE <1000mA |
| ENVIRONMENTAL | |||
| Operating Temperature | 0°C to 50°C | ||
| Storage Temperature | -20°C to 60°C | ||
| Relative Humidity | 0% to 95% non-condensing | ||
| Mechanical Shock | 1.5m drop onto concrete | ||
| Conformance | FCC class A and CE approval in progress | ||
| SYMBOLOGIES | UPC-E, UPC-A, EAN-8, EAN13, UCC/EAN128JAN, ISBN, ISSN, Code 39, Code 93, Code 128Interleave 2 of 5, Industrial 2 of 5, Matrix 2 of 5IATA 2 of 5, China Post Code (Toshiba Code),MSI, Codabar, ABC Codabar, CX Codabar,Code 11, UK Plessey, Telepen, Code 128,RSS | ||

bar
| Position (mil) | Range (in inches) | |---|---| | 40 | 1.2" | | 16 | 1.6" | | 13 | 2.2" | | 10 | 2.6" | | 6 | 3.3" | | 5 | 3.5" | | 40 | 7.9" | | 40 | 7.1" | | 40 | 6.7" | | 40 | 5.7" | | 40 | 5.5" | | 40 | 13.8" | | 3.9" | 2.0" | | 3.9" | 3.9" | | 3.9" | 5.9" | | 3.9" | 7.9" | | 3.9" | 9.8" | | 3.9" | 11.8" | | 3.9" | 13.8" | SCANNING RANGE
Product Support
If you experience any problems with Wasp WLR 8900/8905 Scanners that you are unable to resolve, call for technical assistance at (214) 547-4100, Monday through Friday, 8:00 AM - 5:00 PM Central Standard Time. Our web site is
www.waspbarcode.com
You may also contact us in writing at:
Wasp Technologies
1400 10th Street
Plano, TX 75074
(214) 547-4100
(214) 547-4101 Fax
Warranty Information
Wasp Technologies products are warranted against defects in workmanship and materials for a period of one year from the date of shipment, provided that the product remains unmodified and is operated under normal and proper conditions.
This warranty is limited to repair or replacement at Wasp Technologies option, with reasonable promptness after being notified. These provisions do not prolong the original warranty term for any product which has been repaired or replaced by Wasp Technologies.
This warranty applies to the original owner and does not extend to any product which has been subject to misuse, neglect, accidental damage, unauthorized repair, or tampering.
No other express warranty is given. The replacement or repair of a product is your exclusive remedy. Any other implied warranty of merchantability or fitness is limited to the duration of this written warranty. Some states, provinces, and countries do not allow limits on how long an implied warranty lasts, so the above limitation may not apply to you.
In no event shall Wasp Technologies be liable for consequential damages. Some states, provinces, and countries do not allow the exclusion or limitation of incidental or consequential damages, so the above limitations may not apply to you.
Frequently Asked Questions
Q: How do I configure the scanner for a notebook (or laptop) computer?
A: Scan the "Notebook" bar code on page 6.
Q: How do I change the terminator to a Tab?
A: Scan the "Tab" bar code on page 12.
Q: How do I remove the terminator?
A: Scan the "None" bar code on page 12.
Q: How do I enable the Full ASCII character set for the Code 39 bar code symbology?
A: Scan the following "Enable Code 39 Full ASCII" bar code on page 15.


- WLR 8900/8905 Programming Guide
- Please Read
- Note:
- Tech Tip
- Table of Contents
- Introduction
- Bar Code Symbolologies
- Installation
- Quick Start
- Tip:
- Setup & Configuration
- To change Minimum/Maximum Length:
- Factory Default
- Autosense Stand Mode
- Keyboard Connection
- Beep Settings
- Chapter 5
- Keyboard Language
- Preamble/Postamble Configuration
- Terminator
- Code ID
- Enable/Disable Bar Code Symbologies
- Interleaved 2 of 5 and Code 93 Settings
- To Define UCC/EAN 128 Group Separator:
- MSI Plessey Settings
- UPC-A Settings
- UPC-E Settings
- EAN-8 Settings
- EAN-13 Settings
- Appendix A
- Bar Code Test Symbols
- Product Support
- Warranty Information
- Frequently Asked Questions
Brand : Wasp
Model : WLR8900
Category : Barcode Reader