
HRWF40C - Household Fan Heller - Free user manual and instructions
Find the device manual for free HRWF40C Heller in PDF.


| Product Type | 40cm Wall Fan with Remote Control |
| Model | HRWF40C |
| Voltage | 220-240V~ 50Hz |
| Power Consumption | 50W |
| Blade Diameter | 40 cm |
| Number of Speed Settings | 3 (Low, Medium, High) |
| Airflow Modes | Normal, Nature, Sleep |
| Oscillation | Yes, controlled via SWING button on remote or panel |
| Timer | Inbuilt 8-hour timer (1, 2, 4, 8 hours) |
| Control Method | Remote control and control panel |
| Mounting Type | Wall mounted with hook and screws (included) |
| Minimum Mounting Height | 2.1 m from floor |
| Safety Features | Earth connection required; avoid overload by not sharing circuit with high current appliances |
| Cleaning | Removable front grill and blade for easy cleaning with damp cloth or vacuum |
| Included Accessories | Remote control, wall plugs (4), screws (12), mounting hook |
| Material | Metal blades, plastic housing (estimated) |
| Intended Use | Indoor domestic use only |
| Warranty | Contact GAF Control (Sales) Pty Ltd; 1300 659 489 |
Frequently Asked Questions - HRWF40C Heller
User questions about HRWF40C Heller
0 question about this device. Answer the ones you know or ask your own.
Ask a new question about this device
Download the instructions for your Household Fan in PDF format for free! Find your manual HRWF40C - Heller and take your electronic device back in hand. On this page are published all the documents necessary for the use of your device. HRWF40C by Heller.
USER MANUAL HRWF40C Heller
natural_image
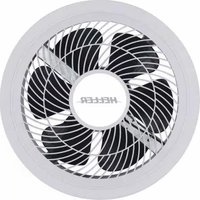
Exterior view of a HELLER electric fan with visible blades and mounting base (no text or symbols on fan body)READ AND SAVE THESE INSTRUCTIONS
- Press the MODE button to select one of three airflow modes; Natural, Sleep and Normal. The MODE LED indicator light will be RED when turn on the fan. Pressing the MODE button again and again will change the colour of the LED to GREEN and extinguish.
- The RED LED indicates the NORMAL airflow mode.
- The GREEN LED indicates the NATURE airflow mode.
- The LED extinguish indicates the SLEEP airflow mode.
- Press ON/SPEED button to turn off the fan.
Care & Cleaning
To make cleaning easier, you can dismantle some parts of your fan.
- Your appliance must be switched OFF via the main power supply and unplugged before proceeding with any dismantling or cleaning.
- Use a small screwdriver or other suitable tool to remove the safety screw (16). Remove fixing clips around the grill.
- Remove the front grill (1)
- Loosen the screw(3)
- Remove the fan blade (2) by pulling blades from the base carefully.
- Unscrew the rear grill collar nut (4) COUNTER CLOCKWISE that holds the rear grill.
- Remove the rear grill (5).
- Clean the housing with a damp cloth, a vacuum cleaner or a dusting brush.
- We recommend lightly running a vacuum cleaner brush nozzle over the fan grill to remove any dust or dirt that may have accumulated.
- Never use flammable or abrasive cleaning agents such as benzene or spirits to clean the appliance.
- Never immerse the appliance in water!
- Follow assembly instructions after cleaning is complete.
Specifications
| Model | Description | Voltage | Frequency | Wattage |
| HRWF40C | 40cm Wall Fan with Remote Control | 220-240V~ | 50Hz | 50W |
Australian Customer Service
GAF Control (Sales) Pty Ltd
P.O Box 19
Altona North Victoria 3025
Phone: 1300 659 489
Hours: 9am-5pm (EST) Mon-Fri
www.gafcontrol.com.au
*This product may vary slightly to the product illustrated due to ongoing product development.
Assembly Instructions
Grills, fan blades and the main body of the fan are packed separately to protect your fan from damages during transportation.
- Be sure your fan is unplugged from the mains supply before proceeding.
- Loosen the screws (4) from the motor housing front cover (7).
- Secure the rear grill to the motor body with the screw(4).
- Push the fan blade (2) onto the motor shaft (6)
- Secure the blade with the screw (3) on the blade shaft sleeve.
- Open securing clips around the front grill (1) and loosen the clip screw(15) at the bottom of the frontgrill. Position the top clip on the uppermost part of the rear grill. Push the top clip down and press rim of the front grill onto the rear grill. Close all clips around and tighten the safety screw.
- Select an appropriate location and fix the mounting hook (11) on a strong wall (or locate a stud behind plaster boards) with four wall plugs (10) and screws (12) (supplier).
- Note: Consider a location within 0.8m radius of a power outlet.
- Mount the wall fan on the mounting hook (11) and plug in the unit.
- Make sure that the excessive length of the power cord will not touch or obstruct the fan blade rotation or fan oscillation.
Before First Use
Before use, remove all packaging and inspect the appliance for any damage. If there appears to be any damage, please take the unit back to place of purchase for a replacement.
Operating Instructions
Before inserting the plug into a power outlet, make sure that the correct voltage being used corresponds to what is indicated on the rating label, and that the socket has an earth facility.
- Connect to power outlet and turn the power supply on.
- You may control your wall fan with either the remote control or with the buttons on the control panel.
- To remove the remote control, pull it out from the holder.
- To turn the fan 'On', press the ON/SPEED button on the remote control or the ON/SPEED button on the control panel. By pressing this button repeatedly the fan will switch between 1 (LOW), 2 (MED), and 3 (HI) speed settings. The LED indicator on the control panel will indicate the speed selected.
- To make the fan oscillate, Press the SWING on the remote control or the SWING button on the control panel
- To stop the fan from oscillating, Press again the SWING on the remote control or the SWING button on the control panel
- Your wall fan comes with an inbuilt 8 hour timer. Press the TIMER button on the remote control or the control panel to turn the TIMER ON. By pressing the TIMER button repeatedly, the time will increase: 1, 2, 4, 8 hours. Press the TIMER button again to turn the timer function OFF. The LED indicator on the control panel will indicate the time selected.
Please read and follow the instructions in this user manual even if you feel you are familiar with the product, and find a place to keep it handy for future reference.
For your convenience record the complete model number (located on the product identification plate) and the date you received the product, together with your purchase receipt and attach to the warranty and service information. Retain in the event that warranty service is required.
NOTE: The rating of this product (as marked on the product identification plate) is based on specific loading tests. Normal use or the use of other recommended attachments may draw significantly less power.
Important Safeguards
When using any electrically powered product, basic safety precautions should always be followed, including the following:
PLEASE READ ALL INSTRUCTIONS CAREFULLY BEFORE USING THIS PRODUCT
WARNING!:- to reduce the risk of fire, electrical shock or injury to persons or property:
- Always operate the product from a power source of the same voltage, frequency and rating as indicated on the product identification plate.
- Remove the unit from its packaging and check to make sure it is in good condition before using.
- Do not let children play with parts of the packaging (such as plastic bags).
- Close supervision is necessary when the product is used by or near children or infirm persons. Do not allow children to use it as a toy.
- Do not operate any product with a damaged cord or plug, or after the product malfunctions, or is dropped or appears damaged in any way. Return the complete product to the place of purchase for inspection, repair or replacement.
- Before unplugging the power cord, be sure to turn the power off. When touching the unit, be sure your hands are dry to prevent electrical shock.
- Ensure the fan is mounted on a stable, even wall, which is strong enough to hold it.
• The wall fan must be installed so the blades are at least 2.1m from the floor. - Never install the unit where it is exposed to direct sunlight, excessive moisture/rain, dust and lack of ventilation near any heat sources.
- Avoid making contact with moving parts. Never insert fingers, pencils or any other objects through the guards whenever the power plug is connected, especially while the unit is working.
- Always place the fan on a stable, level surface when operating to prevent the fan from overturning. Do not run the power cord under carpet. Do not cover the power cord with throw rugs or runners. Route the power cord away from walking paths so that nobody can trip over it. The cable should be kept away from heat, sharp edges and oil.
- To reduce the risk of electric shock, do not immerse or expose the product or flexible cord to rain, moisture or any liquid other than those necessary for correct operation of the product.
- This product should not be used in the immediate vicinity of water, such as bathtub, washbowls, bathroom swimming pool etc. Where the likelihood of immersion or splashing could occur.
- Switch off and unplug from outlet when not in use, before assembling or disassembling parts and before cleaning. Remove by grasping the plug - do not pull on the cord.
- Be sure that no other high current appliances are plugged into the same circuit as your fan, as an overload can occur.
• Metal blades may have sharp edges. Take special care when assembling this product. - Do not remove fixed covers.
- Avoid the use of an extension cord as the extension cord may overheat and cause a risk of fire.
-
Do not use the appliance for other than its intended use.
-
Ensure that the fan is switched off from the supply mains before removing the guard.
• Do not use outdoors. FOR INDOOR USE ONLY. - Do not leave the appliance unattended when switched on.
- Do not cover the grill, or operate in close proximity to curtains etc.
- The use of attachments or accessories not recommended or sold by the product distributor may cause personal or property hazards or injuries.
• This product is intended for normal domestic/household use only. - Use this fan as described in this manual. Any other uses, not recommended by the manufacturer, may cause fire, electric shock, or injury to persons and may void the warranty.
- This appliance is not intended for use by persons (including children) with reduced physical, sensory or mental capabilities, or lack of experience and knowledge, unless they have been given supervision or instruction concerning the use of the appliance by a person responsible for their safety.
- The installation of a residual current device (safety switch) is recommended to provide additional safety protection when using electrical appliances. It is advisable that a safety switch with a rated residual operating current not exceeding 30mA be installed in the electrical circuit supplying the appliance. See your electrician for professional advice.
Parts Location



Brand : Heller
Model : HRWF40C
Category : Household Fan