
HEX250L - Household Fan Heller - Free user manual and instructions
Find the device manual for free HEX250L Heller in PDF.

| Brand | Heller |
| Model | HEX250L |
| Product Type | Ceiling Mounted Extractor Exhaust Fan |
| Fan Size | 250 mm |
| Cutout Diameter | 290 mm |
| Installation Height | At least 2.3 m above ground |
| Clearance from Hotplate | At least 90 cm |
| Clearance Above Blades | At least 30 cm |
| Distance from Side Walls | At least 20 cm |
| Voltage | 230-240 V (typical) |
| Power | 25 W (estimated) |
| Housing Material | Plastic |
| Grille Material | Plastic |
| Installation Type | Ceiling mount with bar clamps or screws |
| Ducting | Not suitable for use with exhaust ducting |
| Indoor Use Only | Yes |
| Grille Cleaning | Remove and wash in warm soapy water, rinse, dry thoroughly |
| Fan Blade Cleaning | Wipe with a cloth moistened with warm soapy water |
| Motor Immersion | Never immerse motor in cleaning solution or liquid |
| Supply Cord | Non-replaceable; if damaged, appliance should be rejected |
| User Serviceable Parts | None except grille and blade cleaning |
| Warranty | Void if not installed per instructions or if blades/grille are dirty |
| Electrical Work | Must be carried out by a licensed electrician |
Frequently Asked Questions - HEX250L Heller
User questions about HEX250L Heller
0 question about this device. Answer the ones you know or ask your own.
Ask a new question about this device
Download the instructions for your Household Fan in PDF format for free! Find your manual HEX250L - Heller and take your electronic device back in hand. On this page are published all the documents necessary for the use of your device. HEX250L by Heller.
USER MANUAL HEX250L Heller
INSTALLATION,USE AND CARE INSTRUCTIONS
HELLER
250mm EXTRACTOR EXHAUST FAN Model No: HEX250L

natural_image
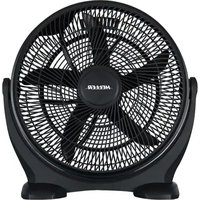
Close-up of a white circular fan with black and white blades, no text or symbols visible.
BEFORE OPERATING THIS PRODUCT READ UNDERSTAND AND FOLLOW THESE INSTRUCTIONS.
Save these instructions for future reference
This is a cut-out template card with size 290mm for the 250mm extractor exhaust fan
This is a cut-out template card with size 290mm for the 250mm extractor exhaust fan
READ AND SAVE THESE INSTRUCTIONS
IMPORTANT SAFEGUARDS
When using any electrically powered product, basic safety precautions should always be followed, including the following:
At GAF, we are very safety conscious when designing and manufacturing consumer products; however there is an onus on the consumer to also exercise care and common sense when using any electrical appliance. Listed below are precautions which are essential for the safe use of an electrical appliance:
PLEASE READ ALL INSTRUCTIONS CAREFULLY BEFORE USING THE PRODUCT.
WARNING - to reduce the risk of fire, electrical shock or injury to persons or property:
• Always operate the product from a power source of the same voltage, frequency and rating as indicated on the product identification plate. This appliance is not intended for use by persons (including children) with reduced physical consumption capabilities, so lack of use
- This appliance is not intended for use by persons (including children) with reduced physical, sensory or mental capabilities, or lack of experience and knowledge. However they have been shown accompanied as instructions concerning use of the appliance by a person responsible for their safety.
knowledge, unless they have been given supervision or instruction concerning use of the appliance by a person responsible for their safety. Do not scratch any product with a damaged cord or plug, as after the product malfunctions, or is dropped or appeared damaged in any way
- Do not operate any product with a damaged cord or plug, or after the product malfunctions, or is dropped or appears damaged in any way.
- This unit is designed for index use only.
- This unit is designed for indoor use only.
- Do not allow any foreign object to enter the grille openings as this may damage the unit and/or the user.
- Do not allow any ceiling insulation to cover any portion of the rear of the appliance.
- Do not attempt to modify the appliance.
- This unit is not suitable for use with exhaust ducting.
INSTALLATION
CAUTION: ANY ELECTRICAL WIRING MUST BE CARRIED OUT BY A LICENSED ELECTRICIAN. DO NOT INSTALL IN AN AREA WHERE WATER MAY BE SPLASHED ON THE APPLIANCE.
- Check for hidden timbers and wiring above the installation area.
- Using the template as described over, mark the mounting hole on the ceiling. In order for the warranty to be honoured the fan must be installed:
a. At least 2.3M above the ground.
b. At least 90cm from any hotplate and have at least 30cm clearance above the fan blades.
c. At least 20cm distance from side walls (see fig 1).
d. Ensure the power cord does not interfere with the fan blades.
e. Ensure any ceiling insulation or frame does not obstruct the airflow.
f. Clean the grille and blades regularly. - Cut the hole using a jigsaw, keyhole saw or hacksaw along the marked line.
- Remove the grille (simply pulls free of the frame) and connect the plug to the power outlet. Insert the fan assembly into the opening. For ceilings 13mm or less use step a). For thicker ceilings use step b).
a) Before inserting the fan into the opening, push the three bar clamps all the way out to hold the fan in the ceiling. Push the fan into the ceiling opening and secure the exhaust fan by tightening the screws securely (See Fig 2).
b) Remove the three bar clamps. Use wood screws (not supplied) to secure the fan to the ceiling. Locate screws in the 3 holes in the outer lip of the fan frame. - Place the grille over the fan assembly and push up until it snaps into place.
- Precautions must be taken to avoid the back-flow of gases into the room from an open flue of gas or other open-fire appliances.


CARE INSTRUCTIONS
Dirty fan blades and clogged grille drastically decrease the fan's performance, working life and void the warranty. Regular cleaning will ensure many years' of trouble free operation. Switch the appliance off before removing the grille.
GRILLE
Remove and wash in warm soapy water then rinse. A soft brush and sugar soap is recommended to remove stubborn grease. Dry thoroughly before refitting.
FAN BLADE
Wipe blade with a cloth moistened with the above solution.
CAUTION: NEVER IMMERSE THE MOTOR IN CLEANING SOLUTION OR ANY OTHER LIQUID.
SERVICE
Apart from grille and blade cleaning there are no user serviceable components in the appliance. If repair is required, contact the dealer from whom you purchased your appliance, together with your proof of purchase, for a replacement.
TEMPLATE
Check that no hidden timbers or wiring are in the area immediately above the hole. This template will help you to outline a 290mm diameter hole for the 250mm fan.
Important Note
The supply cord cannot be replaced. If the cord is damaged the appliance should be rejected.
GAF Control (Sales) Pty Ltd
441 Kororoit Creek Road
Altona Victoria 3018
PH: 1300 659 489
READ AND SAVE THESE INSTRUCTIONS


- INSTALLATION,USE AND CARE INSTRUCTIONS
- HELLER
- 250mm EXTRACTOR EXHAUST FAN Model No: HEX250L
- This is a cut-out template card with size 290mm for the 250mm extractor exhaust fan
- READ AND SAVE THESE INSTRUCTIONS
- IMPORTANT SAFEGUARDS
- INSTALLATION
- CARE INSTRUCTIONS
- GRILLE
- FAN BLADE
- SERVICE
- TEMPLATE
- Important Note
Brand : Heller
Model : HEX250L
Category : Household Fan