
GeoVision 7795 - Gps PRESTIGIO - Free user manual and instructions
Find the device manual for free GeoVision 7795 PRESTIGIO in PDF.


| Product Type | GPS Navigator |
| Brand | Prestigio |
| Model | GeoVision 7795 |
| Dimensions | 12.5 x 8.2 x 1.8 cm |
| Weight | 180 g |
| Power Source | Rechargeable lithium-ion battery |
| Battery Life | Up to 4 hours continuous use |
| Display | 5.0 inch TFT LCD touchscreen |
| Resolution | 480 x 272 pixels |
| Maps | Preloaded with lifetime updates |
| GPS Chip | SiRFstar IV |
| Internal Memory | 4 GB |
| Expandable Memory | microSD card (up to 32 GB) |
| Connectivity | USB 2.0 |
| Languages | Multilingual |
| Operating Temperature | 0°C to 60°C |
| Package Contents | GPS unit, car charger, USB cable, suction mount, user manual |
| Maintenance | Clean with soft dry cloth; avoid harsh chemicals |
| Safety | Not waterproof; avoid moisture and extreme temperatures |
| Reparability | Authorized service center; do not disassemble |
Frequently Asked Questions - GeoVision 7795 PRESTIGIO
User questions about GeoVision 7795 PRESTIGIO
0 question about this device. Answer the ones you know or ask your own.
Ask a new question about this device
Download the instructions for your Gps in PDF format for free! Find your manual GeoVision 7795 - PRESTIGIO and take your electronic device back in hand. On this page are published all the documents necessary for the use of your device. GeoVision 7795 by PRESTIGIO.
USER MANUAL GeoVision 7795 PRESTIGIO
You may find detailed warranty information at: www.prestigio.com/support/warranty-terms.
© Copyright 2015 Prestigio. All rights reserved.
Prestigio

Unboxing

Inside your package
Your device at a glance
Menu
Troubleshooting
Back
Next
Inside your package

natural_image
Line drawings of various electronic devices including a smartphone, cable, microscope, and notebook (no text or symbols)- Prestigio GPS
- Mounting cradle
-
Car charger
-
USB cable
- Quick start guide
- Warranty card
Your device at a glance

- Front camera
- Microphone
- Earpiece
- Volume button
- Power button
-
Reset button
-
Memory card and SIM card slot
- Earphone jack
- Micro USB port
- Speaker
Congratulations on your purchase and welcome to Prestigio. To get the most from your product and enjoy all that Prestigio has to offer, please visit: http://www.prestigio.com/catalogue/Navigators
For more details about your product, please visit: www.prestigio.com/support
Follow the steps below to prepare your device for using. Remember to turn off your device before inserting the cards.


- The use of incompatible SIM cards, manually cut SIM cards, or SIM card adapters may damage the cards or the device, and it may corrupt the data stored on the cards.
- Scratching or bending of the SIM cards may result in the loss of contacts and information, so be careful when handling, inserting, or removing the cards.
- Keep all SIM cards out of the reach of children.
Mount your device
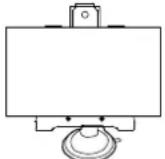
- Install the bracket to mounting cradle.
- Remove the protection plastic film from the suction cup, and position it on the clean windshield or dashboard.
- Hold firmly against the surface and lock the suction cup lever. The mount will suction and stick firmly onto the surface.
- Lock device on the bracket in diagonal (the bracket has stretchable arms).
- Rotate the knob to adjust device to desired viewing angle.

Make sure that the device has a clear view of sky to attain best GPS reception.
Dismount your device
- Take out the device from the mounting cradle.
- Unlock the suction cup lever in anticlockwise to easily remove the suction cup from windshield or dashboard.
Charge the battery
- Using the car charger: after vehicle engine is started, charge the device through vehicle 12V cigarette lighter, to protect the device from sudden surges in current.
- Using micro USB cable: connect the device to AC adapter or the USB port of a computer.

natural_image
Simple line drawing of a device connected to a monitor, with a red arrow pointing to the device (no text or symbols)
- Please fully charge the battery (for at least 8 hours) before initial use. The battery status indicator glows in red color when charging, and turns bright amber color when charging is complete.
- Charging time is approximately 2 hours after initial use.
- It is not necessary to start charging the device before the battery is fully discharged.
Power on your device
Press and hold the power button to turn on your device.

To turn it off, press and hold the power button, and then tap power icon on the pop-up screen.
Home screen
Home screen is the starting point to access all features. The Home screen can have multiple panels. To view other panels, swipe left or right.
Tap to return to the Home screen.
Home screen consists of the following:

Buttons
The menu, home and back keys help you navigate your device.
- Tap to open the list of recent apps.
- Tap to return to the Home screen.
- Tap to return to the previous screen.
Personalise your wallpaper
Pick your favourite picture as your Home wallpaper.
- Tap and hold the blank area on the Home screen.
- Select Wallpaper.
- Select an image and set it as wallpaper. -Or choose a photo in Gallery to set it as wallpaper.
Add an app icon to Home screen
- On the Home screen, tap to open the list menu.
- Tap and hold an application icon.
- Drag it into a panel preview.
Remove an item on Home screen
- Tap and hold an item to remove.
- The Remove option appears at the top of the Home screen.
- Drag the item to the Remove option.
- When the Remove option turns red, release the item.
List menu
All your apps can be found on the list menu. On the Home screen, tap to open the list menu.
Notifications panel
When you get a new notification, you can open the notifications panel to see what event notification or new information you have received.
- To open the notifications panel, slide down from the top left of the screen.
-To dismiss the notification, tap
Quick settings
Quick settings allows you to easily turn on and off airplane mode, Wi-Fi, and other functions. It also provides a shortcut to set the brightness, lock screen auto orientation, and access the system settings.
-Slide down from the top right of the screen to open quick settings.


open notifications panel open quick settings
Prestigio


Home screen
List menu
Notifications panel
Quick settings
Status icons
Menu
Troubleshooting
Back
Next
Status icons
The icons in the status bar at the top of the screen give information about your device:
IconsWhat it means
| Silent mode activated. | |
| Vibration mode activated. | |
| Airplane mode activated. | |
| Battery power level. | |
| Call in progress. | |
| Missed call. | |
| New SMS or MMS. | |
| GPRS network connected. | |
| EDGE network connected. | |
| HSPA network connected. | |
| 3G | 3G network connected. |
| Wi-Fi connected. | |
| Roaming (outside of normal service area). | |
| Bluetooth is activated. | |
| Connected to PC. | |
| Wired earphone + microphone connected. | |
| Wired earphone connected | |
| Warning. | |
| Alarm is set. |
Maps & navigation

Program interface
Routing
Some additional features
Menu
Troubleshooting
Back
Next
Program interface

No Name Function
| 1 Sound Tapping on the button opens the sound menu. |
| 2 Compass Tapping on the button opens the context menu, which controls options of map orientation ("North up" – the map will always be oriented northwards, "Track up" – the map will always be oriented in the direction of movement along the route), type of map view (Plain view "2D", Panoramic view "3D") and skins ("Night skin", "Day skin", "Auto"). |
3 Road lanes The sign displays road lanes with possible maneuvers.
| 4 Information panel | The sign shows the upcoming maneuver (for example, turning) and distance to the maneuver. Tapping on the sign opens the menu containing route options, for instance an option which allows stopping route guidance. |
| 5 Route Visualization of a current route. | |
| 6 Information panel | The panel shows current speed, the remaining time to the destination point, distance to the destination point, and estimated arrival time. |
| 7 GPS-cursor Indication of a current position on the map, when the GPS receiver is switched on. | |
| 8 Menu Tapping on the button opens the main program menu. | |
| 9 Information panel | The panel shows the name of the street you are currently driving along. The information is available only if GPS/GLONASS connection is established and the map contains such information. If there is no street name, the direction will be displayed. |
Prestigio


Program interface
Routing
Some additional features
Menu
Troubleshooting
Back
Next
| 10 Scale button | Zoom out button. |
| 11 Scale button | Zoom in button. |
| 12 "Navitel. Events"* | Button for controlling the "Navitel.Events" service. |
| 13 Route progress bar | The progress bar displays the remaining route, waypoints (if any) and traffic density on the route marked by color. |
| 14 Battery The icon indicates the level of battery charge. Tapping on the icon shows free device memory. | |
| 15 GPS GPS-connection indicator. Grey indicator – GPS/GLONASS-receiver is off; red – receiver is turned on, but there is no connection with satellites; yellow – bad connection; green – connection is established. The number in the icon indicates the number of satellites. | |
| 16 "Navitel. Friends"* | The icon of the “Navitel.Friends” service, tapping on which opens its menu. The service is intended for adding friends, viewing their location and exchanging messages with them. |
Prestigio


Program interface
Routing
Some additional features
Menu
Troubleshooting
Back
Next

| No | Name Function |
| 17 | "Cursor" button Tapping on the button shows the menu for operations with the point marked on the map (making it a destination point by pressing "Go!" button or proceeding to the properties screen. |
| 18 | "Save WP" button Saves the point marked on the map as a waypoint. |
| 19 | 2D/3D Switching between the plain 2D and the panoramic 3D map formats. |
| 20 | Point on the map Short tap on the map marks the point for further operations with it: saving as a waypoint, adding to the route or viewing the object's data, and others. |
| 21 Updates * | Provides access to the program and map update menu screen. |
| 22 Track recording | Button for track recording: red dot-recording is on, grey dot - recording is stopped. |
| 23 Navitel. Traffic* | The icon displays general traffic intensity on ten-point scale. Tapping on the button shows the menu for controlling the "Navitel.Traffic" service. |
| 24 Navitel. SMS* | The icon allows reading/sending messages and using coordinates in them. It also shows the number of unread messages. |
Prestigio


Program interface
Routing
Some additional features
Menu
Troubleshooting
Back
Next

No Name Function
25 "Go!" Tapping on the button gives a command to the program to calculate a route from the current position or the set initial point to the selected point.
26 "Set start" Tapping on the button determines the selected point as a starting point of the route (GPS-receiver must be switched off).
27 "Set finish" The button is active only when there is an existing route. Pressing the button continues the route up to the selected point making it the destination point of the route.
28 "Route
through"
The button is active only when there is an existing route. Pressing the button marks the selected point as a point to be included in the route. The last added point becomes the first one in the route after the starting point.
29 Map Back to map.
* – functionality is available only for devices, having access to the Internet.
Routing
Route to a point selected on the map You can have a route planned to a point, which can be found and marked on the map and then set as the destination, while current position of the device, determined by the GPS system becomes the starting point. To plan a route press on the map to mark the point, select "Cursor" [1] and then "Go!"
[2]. The route will be displayed on the map [3].

Fig.1

Fig.2

Fig.3
Route to an address
To have a route calculated to a point of a known address, press "Menu" in the bottom left corner of the screen [1] → "Find" [2] → "By address", then press "Select country" [3] and start entering the name of a country [4]. Press the icon in the upper right part of the screen to hide the keyboard. Select the country [5]. "Select city", "Select street" and "Select building" become active only if the previous fields were filled out [6]. When all information is entered the object will be shown in the screen [7]. Press "Go!". The program will automatically plan a route from a current location to the indicated address [8]. Now you can follow the route [9].
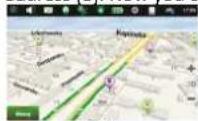
Fig.1
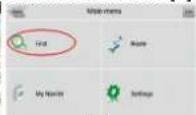
Fig.2

Fig.3

Fig.4

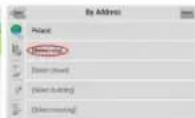
Fig.5
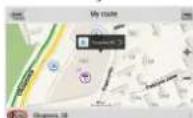

Fig.7

Fig.8
Manual setting of all route points
To plan a route, where the starting and the destination points are determined manually, first mark a point on the map where you plan to start and press "Cursor" [1] to proceed to the "My route" screen. Tap on the information panel at the bottom of the screen [2]. Press "Set start" in the "Properties" screen [3]. The GPS-receiver must be switched off. The point will be marked on the map as a starting point. Select a destination point on
the map: tap on the map to mark the point, press "Cursor" [4] and then press "Go!" in the "My route" screen [5]. The program will automatically plan a route [6].


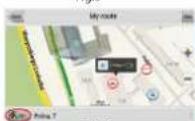
Fig.5
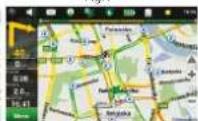
Fig.6
Some additional features
For those devices which support Internet connection, various NAVITEL® online services, including "Navitel.Traffic" and "Navitel.Friends" are available.
Navitel.Traffic
The service provides and displays real-time information about density of traffic on the map. If a part of a road is marked green on the map this means that road traffic here is normal, if it is marked yellow – traffic is rather dense, orange – traffic is heavy, red – there is a traffic jam [1]. To set the service select "Menu" → "Settings" → "Online services".

Navitel. Friends
The "Navitel.Friends" interactive service allows viewing positions of friends on the map in real-time mode, to plan a route, using their coordinates, to share coordinates of other points and exchange messages. To turn the service on select "Menu" → "Settings" → "Online services" and set the switch in the "Turn on Navitel.Friends" field to "On" position.

Fig.1
Connect to the Internet
Your device connects to the Internet whenever necessary, using a Wi-Fi connection (if available) or your mobile operator's data connection.
Wi-Fi
Connect the device to a Wi-Fi network to use the Internet or share media files with other devices.
Connect to a wireless network
- Go to Settings, and tap Wi-Fi to turn it on.
- The Wi-Fi section will show the list of networks detected.
- Tap the desired Wi-Fi network you want to connect to.
-If you selected a secured network, you will be asked to enter the network key or password.
Data connection
Turn on or off data connection
- Go to Setting, tap More... > Mobile networks > Data enabled.
- Tap to turn on or off data connection.
Web browse
You can use the device to browse websites. Before browsing a website, please confirm that you have turn on data connection or Wi-Fi.
Browse a web page
- On the Home screen or list menu, tap
- Enter your search keywords or a web address to start browsing.

Dual Core, 1.3 GHz

512 MB RAM+ 4 GB Flash

AndroidTM 4.4, KitKat®

Micro SDHC/SDXC ≤ 32GB

7" TN, 16:9, 1024*600

0.3 MP

WCDMA: 900/2100 MHz; GSM: 850/900/1800/1900 MHz

Wi-Fi (802.11 b/g/n), 3G, Bluetooth 4.0

GPS, A-GPS

2500 mAh

188*109*12.5 mm (H*W*D)

279 g (approx.)
Take steps described in the tables below to solve simple problems before contacting customer service.

Immediately turn off the device and disconnect the power adapter if the device is not working properly. Never try to repair the unit without authorized professionals for it may damage the unit.
Users can't turn on the unit.
-Connect the adaptor correctly.
-Use the adaptor to supply power or charge the battery.
There is no sound.
-Turn up the volume or turn on the sound output.
There is no picture.
-Adjust the brightness of the LCD.
The unit can't receive satellite signals or can't orient.
- Make sure to use the unit out of room; if in the
vehicle, you can use the external GPS antenna to solve this problem.
The unit can receive signals now but can't then; signals received are not stable.
-Use the adaptor to supply power or charge the battery.
-Remove the veil.
-Avoid great swing of the unit.
Safety instructions
- To reduce the risk of electric shock, do not remove the cover (or back). Only PRESTIGIO certified technicians are qualified to repair your device.
- The manufacturer should not hold responsibility for the damage caused by any substitutions and modifications of the product without authorization from the manufacturer or authorized unit.
- To prevent fire or shock hazard, do not expose your device to rain or moisture.
- Do not put, store or leave your device near heat sources, in direct strong sunlight, or in a high temperature location.
- Maintain well-ventilated conditions around the unit to avoid overheating.
• Operating temperature: -20^ to 60^ .
- Unboxing
- Mount your device
- Dismount your device
- Charge the battery
- Power on your device
- Home screen
- Buttons
- Personalise your wallpaper
- Add an app icon to Home screen
- Remove an item on Home screen
- List menu
- Notifications panel
- Quick settings
- Status icons
- Maps & navigation
- Program interface
- Routing
- Route to an address
- Manual setting of all route points
- Some additional features
- Navitel.Traffic
- Navitel. Friends
- Connect to the Internet
- Wi-Fi
- Connect to a wireless network
- Data connection
- Turn on or off data connection
- Web browse
- Browse a web page
- Safety instructions
Brand : PRESTIGIO
Model : GeoVision 7795
Category : Gps