H-322 - Security Camera BLOW - Free user manual and instructions
Find the device manual for free H-322 BLOW in PDF.


| Brand | BLOW |
| Model | H-322 |
| Product Type | Security Camera |
| Connectivity | Wi-Fi 2.4GHz (no 5G support) |
| App Compatibility | V380 Pro |
| Max SD Card Capacity | 128 GB |
| Reset Button | Yes (press 5s for factory reset) |
| Power Supply | DC 5V (adapter included) |
| Installation | Indoor/Outdoor (check manual) |
| Camera Types Supported | WiFi Smart Camera, 4G Smart Camera, PTZ, Bullet, PT Baby, Panoramic |
| Connection Method | WiFi hotspot mode or direct WiFi |
| Mounting | Various (depending on model variant) |
Frequently Asked Questions - H-322 BLOW
User questions about H-322 BLOW
0 question about this device. Answer the ones you know or ask your own.
Ask a new question about this device
Download the instructions for your Security Camera in PDF format for free! Find your manual H-322 - BLOW and take your electronic device back in hand. On this page are published all the documents necessary for the use of your device. H-322 by BLOW.
USER MANUAL H-322 BLOW
Kamery WiFi
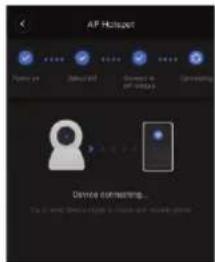

flowchart
graph TD
    A["Power on"] --> B["Select with"]
    B --> C["Connecting"]
    D["Robot Icon"] --> E["Connection Button"]
Device connecting... Try to keep Device close to router and mobile phones
Search for "V380 Pro" in the
download and install the V380 Pro APP.

Scan the QR code to download
the V380 Pro app
Device initialization
App Store or scan the QR code at the bottom left to
First time to use camera, please be patient to setting.
Please add your device to app after you hear the voice to confirm that the device has been started.
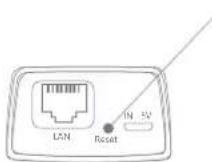
Reset button y, and the specifics are subject to the
Press "Reset" button for 5 second to Restore factory settings.
(The position of the Reset button is for reference on device you have)
Choose the type of your camera
Please select the corresponding connection method according to your camera type.
- For the devices which using WiFi or network cables, please select "WiFi Smart Camera"
*5G WiFi is temporarily not supported
- For 4G camera, please select "4G Smart Camera" and add your device by scanning the QR code.
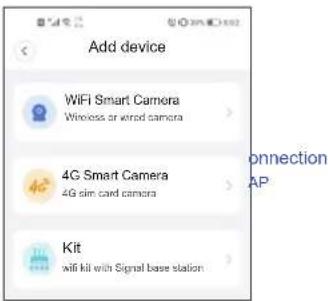
WiFi Smart Camera
^a Before adding a wireless camera, please turn on the mobile WiFi first.
AP
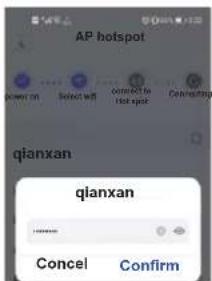
Step2. Select your WiFi, and input password, then select "Confirm"
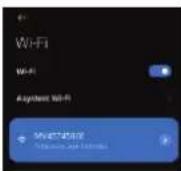
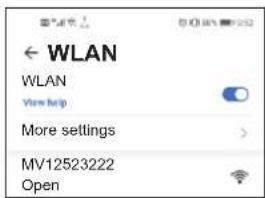
Step3. Select the , and select the device hotspot(MV+ID). " Connect AP spot"
then device will automatically connect to WiFi after returning to the App.
* Please select if WLAN network.has no Internet access."CONNECT"
* Please press "Reset" button 2s to change WiFi mode to Hotspot model if you
don't find the hotspot "MV+ID"
Step4. Select or input "device name"
Step5. Click "Play interface" to set your password.
Return to view your device.
4G Smart Camera
Step1. Open the bottom cover of the camera body, install the SIM card and TF card, and then close the bottom cover to finish the installation (embedded SIM card camera does not need to be installed).
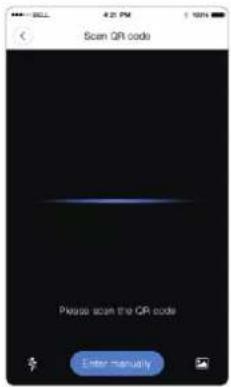
Step2. Power on the camera, waiting for 1 minute; when camera prompts "connection completed", please use APP to scan the QR code on the camera to add device.
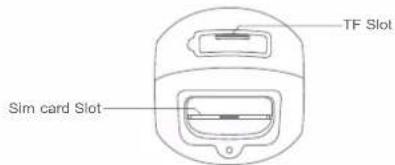
-schematic diagram for reference only, the species are subject to the device you have)
Step3. when camera prompts "Successful connection", please use APP to scan the QR code on the camera to add device.
lep4. After added the camera, you can check the remaining data and recharge data on main screen or check it in "Profile".
SD Micro Memory card Installation
Note: The camera can maximum support a 128G TF memory card.
PTZ camera: The TF memory card is at the bottom of the camera.
Open the plastic cover of the micro SD slot. Then, you will find the card slot.
Insert the memory card carefully(the metal surface of the memory card is close to the motherboard).
Bullet camera: The TF memory card is at the bottom of the camera.
Open the plastic cover of the micro SD slot. Then, you will find the card slot.
Insert the memory card carefully(the metal surface of the memory card is close to the motherboard).
, and select "Finish" or "Skip".
PT Baby camera: Put the camera in a heads-up position, and then you will see the card slot.
Insert the memory card according to the card direction diagram.
Panoramic camera: The memory card slot is on the side.
Insert the memory card according to the card direction diagram.


Brand : BLOW
Model : H-322
Category : Security Camera