
BBPM3007 - Electric meter Becken - Free user manual and instructions
Find the device manual for free BBPM3007 Becken in PDF.


| Product Type | Electric meter |
| Brand | Becken |
| Model | BBPM3007 |
| Dimensions (approx.) | 100 x 80 x 60 mm |
| Weight | 200 g |
| Power Supply | 230 V AC, 50 Hz |
| Functions | Energy consumption (kWh), real-time power (W), total kWh counter, multi-tariff, LCD display |
| Accuracy Class | Class 1 (EN 50470) |
| Communication | Pulse output (S0) standard |
| Mounting | DIN rail (35 mm) |
| Display Type | LCD, 6+1 digit |
| Protection Rating | IP51 (indoor use) |
| Operating Temperature | -10°C to +55°C |
| Certifications | CE, MID (2014/32/EU) |
| Maintenance | Wipe with a dry cloth; do not use liquids or abrasive cleaners |
| Safety | Complies with IEC 61010-1; overvoltage category III |
| Spare Parts | None (no user-replaceable parts) |
| Repairability | Not user-serviceable; contact qualified electrician for repair |
| General Information | Single-phase active energy meter for residential and light commercial use |
Frequently Asked Questions - BBPM3007 Becken
User questions about BBPM3007 Becken
0 question about this device. Answer the ones you know or ask your own.
Ask a new question about this device
Download the instructions for your Electric meter in PDF format for free! Find your manual BBPM3007 - Becken and take your electronic device back in hand. On this page are published all the documents necessary for the use of your device. BBPM3007 by Becken.
USER MANUAL BBPM3007 Becken
Wrist Blood Pressure Monitor
Thank you for purchasing this product.
The quality of this appliance has been certified by several laboratory tests. This instructions manual is provided to simplify the use of the appliance as well as to guarantee a safe use.
Please read carefully the instructions and safety measures described in this manual.
We sincerely hope you will be satisfied when using your new appliance.
INDEX
1. SAFETY INSTRUCTIONS 4
1.1. Humidity and Water 6
1.2. Cleaning 6
1.3. General Precautions 6
2. OPERATING INSTRUCTIONS 10
2.1. Blood Pressure Classification Chart 10
2.2. Product Description 12
2.3. Set-up 14
2.4. Troubleshooting 25
3. TECHNICAL SPECIFICATIONS 29
4. AFTER-SALE SERVICE 31
5. ENVIRONMENTAL PROTECTION 31
1. SAFETY INSTRUCTIONS
 | WARNING |  |
| RISK OF ELECTRIC SHOCKDO NOT OPEN | ||
| Warning: to avoid the risk of electric shock, do not remove the cover. The interior does not contain any parts that can be repaired by the user. Ask for assistance from qualified personnel. | ||
Important Warnings
Before using your appliance read this instructions manual carefully and keep it in a safe place as you may need to consult it in the future.
Before turning on your appliance, and to ensure a safe and correct operation, do not use if:
• It has fallen to the ground;
- You notice any evidence of damage;
- Any anomaly occurs during its operation.
[you can trust]
To avoid hazards or deterioration of your appliance through incorrect use it is advisable to read these instructions thoroughly.
Your appliance may not be used for other purposes than the ones intended and solely for household use. Any damage resulting from using the appliance outside this scope, any incorrect use, as well as any manual modifications to the product will not be covered and automatically voids the warranty.
Assistance
In case of malfunction, take your appliance to a qualified technician for assistance.
This appliance can be used by children from the age of 8 and by people with reduced physical, sensorial or mental capabilities and/or lack of experience and knowledge if they have been given instructions on using the appliance safely and if they understand the hazards involved. Children may not play with the appliance. Cleaning and maintenance must not be carried out by children without supervision.
These instructions are also available at www.suporteworten.pt
1.1. Humidity and Water
Do not use your appliance in humid places. Do not allow the appliance to become wet under any circumstances as this may be dangerous. To avoid fire hazard or electric shock do not expose your appliance to humidity or water. Furthermore, do not place your appliance under water (e.g. for cleaning).
1.2. Cleaning
Do not clean the unit with alcohol or other corrosive liquids.
Do not wet or clean the cuff with water.
Clean the cuff with soft dry cloth after measurement.
1.3. General Precautions
- Self-diagnosis and treatment using measured results may be dangerous. Follow the instructions of your physician or licensed healthcare provider.
- Those who suffer from arrhythmia, diabetes, blood circulation problems or apoplexy problems, please use as instructed by your physician.
- If cuff inflation doesn't stop, remove the cuff or power off the unit, otherwise it may result in a hazardous situation.
- Do not use in combination with a hyperbaric oxygen therapy device, or in an environment where combustible gas may be generated.
[you can trust]
- Do not install the unit in the following locations:
- Locations subject to vibration such as ambulances and emergency helicopters.
- Locations where there is gas or a flame.
- Locations where there is water or steam.
- Locations where chemicals are stored.
- Locations where the unit may easily fall.
- Common arrhythmias such as atrial premature beats, premature ventriculars and atrial fibrillations will lead to inaccurate results or errors.
- Please take into account environmental variables, otherwise they may lead to inaccurate measurement.
- When using or replacing the batteries, the operator should not touch these parts simultaneously with the patient.
- Do not use Luer lock. If Luer lock connectors are used in the construction of tubing, there is a possibility that they might be inadvertently connected to intravascular fluid systems, allowing air to be pumped into a blood vessel.
Precaution
- Avoid high temperatures, moisture, dust and direct sunlight.
- Do not use at extremely high temperatures in high humidity or at high altitudes. Use only within the required ambient conditions.
- Do not drop the device or expose to heavy shocks.
- Do not use the unit near large equipment which uses a switching relay for power ON/OFF.
- Remove the batteries if the unit will not be used for a long time.
• Clinical testing has not been conducted on newborns and pregnant women. Do not use on new-borns and pregnant women. - The blood pressure monitor has gone through several trials of testing to ensure measurement accuracy. If used according to the operation instructions, it does not require periodic re-adjustments.
- Blood pressure measurements determined with the device are equivalent to those obtained by a trained observer using the cuff/stethoscope auscultatory method, manual, electronic or automated sphygmomanometers.
- Keep out of reach of infants, small children, and compromised people who cannot express their consent.
- This product is suitable for the self-monitoring of blood pressure at home or to be used by licensed healthcare personnel in hospitals.
Important information regarding Electro Magnetic Compatibility (EMC)
With the increased number of electronic devices such as PC's and mobile (cellular) telephones, medical devices experience interference which may result in incorrect operation of the medical device and create a potentially unsafe situation.
[you can trust]
In order to regulate the requirements for EMC (Electro Magnetic
Compatibility) with the aim to prevent any unsafe product situation, the IEC60601-1-2 standard has been implemented. This standard defines the levels of immunity to electromagnetic interferences as well as maximum levels of electromagnetic emissions for medical devices.
This medical device conforms to this IEC60601-1-2:2007 standard for both immunity and emissions.
Nevertheless, special precautions need to be observed:
- Do not use mobile (cellular) telephones and other devices, which generate strong electrical or electromagnetic fields, near the medical device. This may result in incorrect operation of the unit and create a potentially unsafe situation. Recommendation is to keep a minimum distance of 7m. Verify correct operation of the device in case the distance is shorter
Consider the blood pressure level classification and definition as following:
| Category Systolic (mmHg) Diastolic (mmHg) | |
| Desirable <120 and <80 | |
| Normal 120-129 and/or 80-84 | |
| Pre-hypertension 130-139 and/or 85-89 | |
| Hypertension >140 and/or >90 | |
| Stage 1 Hypertension | 140-159 and/or 90-99 |
| Stage 2 Hypertension | 160-179 and/or 100-109 |
| Hypertensive Crisis >180 and/or >110 | |
These categories were defined by the American Heart Association. This chart applies to adults age 20 and older.
[you can trust]
Reference Standard
- IEC 60601-1: 2005 Medical electrical equipment-Part: General requirements for safety and essential performance.
- IEC 60601-1-2:2007 Medical electrical equipment - Part 1-2: General requirements for basic safety and essential performance - Collateral standard: Electromagnetic compatibility - Requirements and tests
- IEC 80601-2-30:2009+A1:2013 Medical electrical equipment -Part 2-30: Particular requirements for the basic safety and essential performance of automated non-invasive sphygmomanometers.
• ANSI/AAMI/ISO 81060-2-2009 Non-invasive sphygmomanometers-Part 2: Clinical validation of automated measurement type
Explanation of Symbols

Symbol for "batch code"

bol of "manufacturer"

bol for "CE Conformity marking"

bol for "Follow operating instructions"
IP22 Symbol for "the IP classification"

ECRIP
I for "electrical and electronic equipment"
Symbol for "AUTHORISED REPRESENTATIVE IN THE EUROPEAN COMMUNITY"
2.2. Product Description
Indications for use: Measurement of Human Blood Pressure and Pulse Rate for adults at home or to be used by licensed healthcare personnel in hospitals.
Body

Fig 1
[you can trust]
Cuff Label (Type BF Applied Part)
Applicable Wrist Circumference: 135 mm to 215 mm

Fig 2
Fig 3
2.3. Using the Product
Battery
Installation and Replacement
1) Remove battery cover.
2) Insert 2 standard AAA alkaline batteries.
3) Place back the battery cover.
[you can trust]
4) Replace the battery if low battery icon is displayed.
- If the low battery symbol is displayed, replace with new batteries, otherwise the unit may not function properly.
- Use 2 same brand 1.5 V AAA alkaline batteries and aware of the polarity of batteries during installation.
- Do not mix the new and old batteries.
- Remove the batteries if the unit is to remain unused for an extended period.
- Reset the time and date after battery replacement.

natural_image
Line drawing of a medical or electronic device with ports and connectors (no text or symbols)Fig 4
- Two new LR03 (AAA) batteries will last for approximately 200 measurements, if measurements are taken once a day at room temperature (23°C).
- The battery life can be confirmed on the bottom right of the display. If the low battery symbol is displayed, remaining power is low, replace with new batteries.
2.3.1. Set-up
1) With monitor power off, hold the [S] button for more than 1 second to enter the "Year" setting, "Year" digits will start blinking; Press the [M] button to modify;
2) Press the [M] memory button to advance one number; Hold down the [M] memory button to change the number rapidly;
3) Enter the two digits of the year number; Press the [S] button to confirm and enter the next setting;
4) Repeat step (2) to (3) to set month, day, hour and minutes; Press the [S] button to confirm and enter the unit setting;
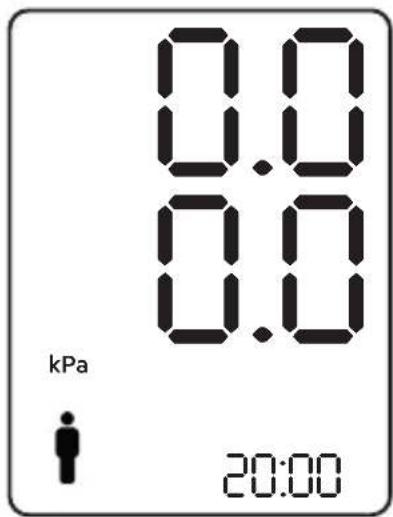
5) Press the [M] memory button to switch the unit (mmHg/kPa) as shown on Fig 5 or Fig 6; Press the [S] button to confirm the unit;
6) Complete setting the unit, press [ON/OFF] button to exit.
[you can trust]
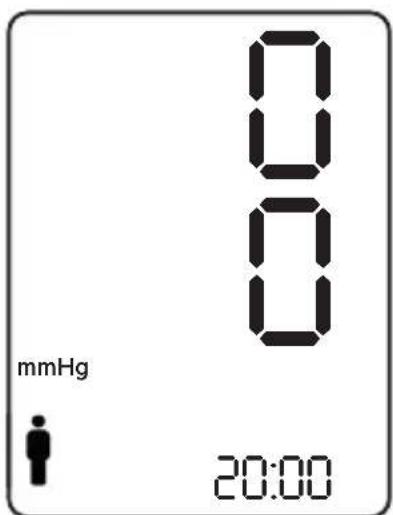
Fig 5 Fig 6
2.3.2. Memory Data Conversion
The blood pressure monitor is capable of holding 2 sets of memory data. Prior to using the blood pressure monitor, select the correct memory data. Memory data conversion:
- With monitor power off, hold the [ON/OFF] button until the selected Memory is displayed.
- Press the [ON/OFF] button to automatically change the memory data conversion either from Memory 1 or Memory 2.
- The setting is completed, the machine is ready to use.
- Don't eat, drink alcohol, smoke, take a shower or exercise for at least 30 minutes before you take your blood pressure and don't use any medicines which could raise blood pressure.
- Try not to take your blood pressure if you are nervous or upset. When nervous, anxious, or agitated your blood pressure may rise.
- Rest for 5 to 10 minutes before taking a reading. Sit in a comfortable, relaxed position. Don't move around or talk while taking your blood pressure. Leave your legs in one position, breathe freely and calmly.
- The blood pressure cuff should fit over about 3/4 of your wrist. It should easily go around the wrist and the Velcro should close tightly.
- If possible, use the same wrist for every reading.
- Measuring blood pressure at the same time on different days should give similar readings (disregarding outside influences like exercise).
- Changes in medication or nutritional supplement can alter your result. Please consult your doctor before taking or stopping medications or supplements.
2.3.4. Applying the wrist cuff
1) Roll up your sleeve. Make sure your sleeve is not rolled up too tightly on your arm. This may constrict the flow of blood in your arm.
[you can trust]
2) Wrap the cuff directly against your skin. Do not apply the cuff over clothing. Place the cuff over your left wrist with your left thumb facing upward.
3) Position the cuff leaving a clearance of approximately 10 to 15mm between the cuff and the bottom of your palm (Fig 7).
4) Hold the bottom part of the cuff and wrap it around the wrist so it fits comfortably and securely around your wrist (Fig 8).
5) Fold the remaining part of the wrist cuff back out of the way.
6) If you cannot apply the cuff on the left wrist, you also can take a measurement using the right wrist position.
natural_image
Illustration of a hand performing a wristwatch maneuver with motion arrow (no text or symbols)Fig 7 Fig 8
2.3.5. Body posture during measurement
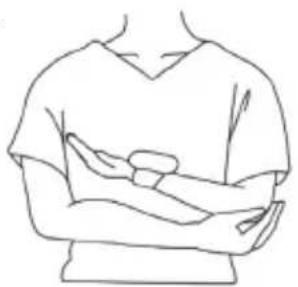
- Hold your wrist at the same level as your heart as show on Fig 9. If your arm is too low, your reading will be too high. If your arm is too high, your reading will be too low.
- Keep your elbow firm to avoid body movement. Sit still and do not talk or move during the measurement.
- Do not use force on your fingers during the measurement. Do not bend your wrist up or down during measurement and do not clench your fist.
natural_image
Line drawing of a person's arm with arms crossed (no text or symbols)Fig 9
[you can trust]
- Do not use the other hand to support the wrist strap, otherwise it may affect the measurement result.
2.3.6. Taking measurement
After installing the batteries and fitting the cuff, the unit is ready for measurement:
1) In order to get the most accurate results, please relax, do not smoke or take deep breaths, and do not speak loudly or move around during the measurement.
2) Press the [ON/OFF] button.
The display will light up for 1 second as shown on Fig 10.
3) Then the display will switch to Fig 11, a beep sound indicates the monitor has begun taking the measurement.
4) When the device detects a pulse, the heart symbol will flash as shown on Fig 12. The cuff inflates, and your pulse and blood pressure measurement is taken.
5) When completing the test, the cuff will automatically deflate and the test result will be displayed on the screen as shown on Fig 13. The pillar on the right side of the display indicates the level of blood pressure, the blood pressure level classification and definition as show in Fig 14.
6) You may turn off the unit or compare with previous results.
7) Automatic shut down in 3 minutes.
8) If a problem occurs during the test, "Err" will be displayed on the screen.
9) At the end of the measurement, "will be displayed on the screen if an irregular pulse is detected.


Fig 10 Fig 11 Fig 12 Fig 13
The blood pressure level classification and definition (Fig 14)
Red


Systolic > 180 mmHg and/or Diastolic >110 mmHg
Systolic between (160-179) mmHg and/or Diastolic between (100-109) mmHg
Systolic between (140-159) mmHg and/or Diastolic between (90-99) mmHg
[you can trust]

bar
| Category | Systolic between (130-139) mmHg and/or Diastolic between (85-89) mmHg | Diastolic between (120-129) mmHg and/or Diastolic between (80-84) mmHg | Systolic < 120 mmHg and Diastolic < 80 mmHg | | :--- | :---: | :---: | :---: | | Yellow | Systolic between (130-139) mmHg and/or Diastolic between (85-89) mmHg | Systolic between (120-129) mmHg and/or Diastolic between (80-84) mmHg | Systolic < 120 mmHg and Diastolic < 80 mmHg | | Green | Systolic between (130-139) mmHg and/or Diastolic between (85-89) mmHg | Systolic between (120-129) mmHg and/or Diastolic between (80-84) mmHg | Systolic < 120 mmHg and Diastolic < 80 mmHg |Fig 14
Notes:
- Do not self-diagnose according to measurement results. Follow the instructions of your physician or licensed healthcare provider.
- Only use the cuff provided by the manufacturer to ensure measurement accuracy.
- The pillar on the right side of the display and the segment colour in the unit will indicate the level of blood pressure, the blood pressure level classification and definition as show in Fig 14.
- If the device should cause any discomfort during measurement or fail to perform as indicated, turn off the power or discontinue use.
- The time of the pressure decrease from 260mmHg (34.67kPa) to 15mmHg (2kPa) does not exceed 10s.
- If the cuff inflated up to 300 mmHg (40 kPa) doesn't stop, please remove the cuff or power off the unit.
2.3.7. Memory
Memory 1 and Memory 2 can hold up to 60 readings each.
1) Reviewing memory data:
a) With monitor power off, press and hold the [M] button to enter the memory mode.
b) The unit will display the 3 most recent sets of data.
c) Hold the [M] button to view the data from the most recent date to the oldest date. Hold the [S] button to reverse the order.
d) If the user needs to display the other set of memory data please refer to section 3.2.2.
Caution: Continuously holding down the [M] button will delete all memory data.
2) Erasing memory data:
a) Enter the memory mode referred to in section 3.2.2
b) Press and hold the memory button until “---” is displayed, all memory data will be deleted.
c) The unit will only delete the present set of memory data; the other set of memory data will not be affected.
[you can trust]
d) The device is not capable of deleting single data entries.
e) Press the [ON/OFF] button to exit the memory mode and shut down.
2.4. Troubleshooting
Error Indication
List of error codes.
| Error Cause | How to correct | |
| Er 30 | Power on, cuff inflation rate is too low or main unit does not connect with the cuff or cuff is too loose. | (1) Cuff or bladder leakage, please contact the manufacturer.(2) Confirm the cuff is wrapped up correctly (ref 4.2), retake the measurement |
| Er 2 | Weak signal or cuff is too loose | Cuff too loose, Confirm the cuff is wrapped up correctly (ref 4.2) and retake the measurement |
| Error Cause How to correct | ||
| Er 3 | Heavy shock during the measurement. | Do not use force on your fingers during the measurement. Do not bend your wrist up or down during the measurement, and do not clench your fist. Then retake the measurement (ref 4.3). |
| Er 5 | Bad Signal, moving or talking during the measurement | Remain still and retake the measurement (ref 4.1) |
| Er 7 | Measurement abnormal Please | retake the measurement |
| Lo | Low battery power, cannot inflate | Change batteries (ref 3.1) |
[you can trust]
Trouble Shooting
When the unit encounters malfunction during use, refer to the table below:
| Abnormal How to correct | |
| After battery installation, power on, no display. | (1) Check battery polarity.(2) If still cannot power on, reinstall the batteries or change new batteries |
| Measured value is abnormally high or low. | (1) Confirm the cuff is wrapped up correctly.(2) If the user's clothing restricts normal flow, please remove the obstructing clothing and retake the measurement.(3) Place the cuff over your left wrist with your left thumb facing upward and hold your wrist at the same level as your heart. Retake the measurement. |
| Cuff inflation rate is too low or cuff does not inflate. | (1) Cuff or bladder leakage, please contact the manufacturer. (2) Confirm the cuff is wrapped up correctly (ref 4.2), retake the measurement. |
| Abnormal How to correct | |
| Cuff deflates too quickly. | (1) Cuff too loose, confirm the cuff is wrapped up correctly. |
| Measured value is different from the hospital or the value is inconsistent. | (1) Blood pressure value varies during the day and is also affected emotional and physical conditions.(2) Record the variance and consult your physician. |
3. TECHNICAL SPECIFICATIONS
| Description | Blood Pressure Monitor | Model BBPM 3007 W | |
| Display LCD | Digital Display | Measuring principle | Oscillometric Method |
| Measurement Range | Pressure: 0mmHg~ (0kPa~37.3kPa)Pulse: 40 pulse/ min ~180 | Accuracy | Pressure: ±3mmHg(±0.4kPa)Pulse: ±5% |
[you can trust]
| Please dispose of Description | batteries according to local regulations. Blood Pressure Monitor | Model BBPM 3007 W | |
| Memory | 2 Memory sets, 60 reading | Automatic Power Off | Unattended 3 minutes |
| Power Source | 2 AAA Alkaline batteries | Batten Life | Approx. 200 measurements |
| Warranty Two years | IP classification | IP22 | |
| Operating Environment | Temperature: +5°C~+40°C; Humidity:<93% Pressure: 70.0kPa~106.0kPa Altitude: < 3 000 m | Storage and transport Environment | Temperature: -25°C~+70°C; Humidity: 10%~-95% Pressure: 50.0kPa~106.0kPa |
| Weight | About 105g (Without batteries) | Size | 62 mm x 82 mm x 29 mm |
| Protection against Electric Shock | Type BF | Contents | • Storage case • Instruction Manual |
BECKEN has designed this appliance in order to guarantee maximum reliability. However, if a problem occurs do not attempt to open the appliance - there is a risk of electrical shock. If you are not able to solve the problem, please contact the Costumer Support Service of any Worten, Modelo or Continente store in order to be assisted. Worten Equipamentos para o Lar provides a 2-year warranty for manufacturing defects from the date of purchase of the appliance.
WARNING: Any attempt to repair the appliance without contacting the manufacturer or seller will void the warranty.
All users must be familiar with these instructions. Knowing what could go wrong can help prevent problems from occurring.
[you can trust]
5. ENVIRONMENTAL PROTECTION
In order to protect the environment we strive to reduce the volume of packaging used, limiting it to three easily sorted materials: cardboard,
paper and plastic. The appliance is manufactured using recyclable materials after disassembled by a specialized company.
Please comply with local regulations concerning the recycling of all materials.

natural_image
Symbol of a trash bin crossed with no visible text or numbers

Hangzhou Hua'an Medical & Health Instruments Co., Ltd Building 2 Industrial Park, Economic Development Zone Wuchang Hangzhou, Zhejiang 310023 P. R. China

Shanghai Internacional Holding Corp. GmbH (Europe) Eiffestrasse, 80, D-20537 Germany
natural_image
Line drawing of a medical or electronic device with ports and connectors (no text or symbols)Imagen 4
natural_image
Illustration of a hand performing a medical or physical procedure on a wrist, with no visible text or symbols.Imagen 7 Imagen 8
natural_image
Line drawing of a person's arm with arms crossed (no text or symbols)Imagen 9
[you can trust]
natural_image
Symbol of a trash bin crossed with no visible text or numbers

Hangzhou Hua'an Medical & Health Instruments Co., Ltd Building 2 Industrial Park, Economic Development Zone Wuchang Hangzhou, Zhejiang 310023 P. R. China

Shanghai Internacional Holding Corp. GmbH (Europe) Eiffestrasse, 80, D-20537 Germany
natural_image
Line drawing of a medical or electronic device with ports and connectors (no text or symbols)Fig. 4
natural_image
Illustration of a hand performing a medical or ergonomic task with a device and arrow indicating rotation (no text or symbols)Fig. 7 Fig. 8
natural_image
Line drawing of a person's arm with arms crossed (no text or symbols)Fig. 9
[you can trust]


Hangzhou Hua'an Medical & Health Instruments Co., Ltd Building 2 Industrial Park, Economic Development Zone Wuchang Hangzhou, Zhejiang 310023 P. R. China

Shanghai Internacional Holding Corp. GmbH (Europe) Eiffestrasse, 80, D-20537 Germany
Imported and distributed by:
Worten Equipamentos p/o Lar S.A.
- Wrist Blood Pressure Monitor
- INDEX
- SAFETY INSTRUCTIONS 4
- OPERATING INSTRUCTIONS 10
- TECHNICAL SPECIFICATIONS 29
- AFTER-SALE SERVICE 31
- ENVIRONMENTAL PROTECTION 31
- SAFETY INSTRUCTIONS
- Important Warnings
- Assistance
- Humidity and Water
- Cleaning
- General Precautions
- Precaution
- Important information regarding Electro Magnetic Compatibility (EMC)
- Reference Standard
- Explanation of Symbols
- Product Description
- Cuff Label (Type BF Applied Part)
- Using the Product
- Battery
- Installation and Replacement
- Set-up
- Memory Data Conversion
- Applying the wrist cuff
- Body posture during measurement
- Taking measurement
- Notes:
- Memory
- Troubleshooting
- Error Indication
- Trouble Shooting
- TECHNICAL SPECIFICATIONS
- ENVIRONMENTAL PROTECTION
Brand : Becken
Model : BBPM3007
Category : Electric meter