
Compact Steam IS1435 - Steam cleaner TEFAL - Free user manual and instructions
Find the device manual for free Compact Steam IS1435 TEFAL in PDF.


| Product Type | Steam Cleaner |
| Brand | Tefal |
| Model | Compact Steam IS1435 |
| Dimensions (L x W x H) | Approx. 25 x 20 x 30 cm |
| Weight | Approx. 1.5 kg (empty) |
| Power Supply | 220-240 V, 50-60 Hz |
| Power Rating | 1500 W |
| Water Tank Capacity | 500 ml |
| Heating Time | Approx. 30 seconds |
| Steam Flow Rate | Up to 30 g/min |
| Steam Pressure | Up to 3.5 bar |
| Functions | Continuous steam, steam burst, adjustable steam |
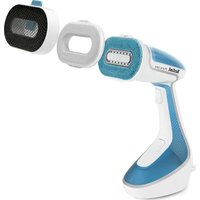
| Accessories Included | Brush, garment steamer attachment, measuring cup |
| Safety Features | Auto shut-off, child lock, pressure relief valve |
| Maintenance & Cleaning | Descaling every 3 months, wipe tank dry after use |
| Spare Parts & Reparability | Spare parts available via Tefal service; water tank and brush replaceable |
| General Information | Compact design, suitable for hard surfaces and garments |
Frequently Asked Questions - Compact Steam IS1435 TEFAL
User questions about Compact Steam IS1435 TEFAL
0 question about this device. Answer the ones you know or ask your own.
Ask a new question about this device
Download the instructions for your Steam cleaner in PDF format for free! Find your manual Compact Steam IS1435 - TEFAL and take your electronic device back in hand. On this page are published all the documents necessary for the use of your device. Compact Steam IS1435 by TEFAL.
USER MANUAL Compact Steam IS1435 TEFAL
natural_image
White Tefal air purifier device with coiled tubing and handle (no visible text or symbols)ZH
TH
AR

natural_image
Line drawing of hands using a tool to press or install a mechanical component (no text or symbols)fig.1 fig.2

natural_image
Line drawing of a hand holding a cable inside an oval-shaped device (no text or symbols)
natural_image
Line drawing of a kitchen appliance with a pot and leafy top (no text or symbols)fig.3

natural_image
Simple line drawing of a medical or laboratory apparatus with a central bulb and vertical rod, no text or symbols present.fig.4

natural_image
Line drawing of a hand interacting with a device resembling a device or scanner (no text or symbols present)fig.5 fig.6
natural_image
Line drawing of a person in uniform holding a tool, with no visible text or symbols广力云
natural_image
Diagram of a showerhead with arrows indicating downward motion (no text or symbols)fig.7

natural_image
Diagram of a medical device with a hand pointing to a plate and arrow indicating direction (no text or symbols)fig.8
natural_image
Line drawing of a hand holding a tool with an arrow indicating movement or force (no text or symbols)fig.9

natural_image
Simple line drawing of a hanging garment with a handle and arrow indicating direction (no text or symbols)fig.10

natural_image
Illustration of a hand hanging from a hanger to a hanging garment with a downward arrow indicating motion (no text or symbols)[Non-Text]

natural_image
Line drawing of a hand pouring liquid from a device into a rectangular container (no text or symbols)fig.12fig.11

natural_image
Line drawing of a hand holding a cable with a rotating device (no text or symbols)fig.13

natural_image
Line drawing of a hand using a tool to adjust a textured object, with no visible text or symbolsfig.14
natural_image
Line drawing of a hand pressing a small mechanical component (no text or symbols)fig.15
SAFETY INSTRUCTIONS
PLEASE READ THESE INSTRUCTIONS CAREFULLY BEFORE FIRST USE AND KEEP THEM IN A SAFE PLACE.

- This product has been designed for domestic use only. Any commercial use, inappropriate use or failure to comply with the instructions, the manufacturer accepts no responsibility and the guarantee will not apply.
- For your safety, this appliance conforms to the applicable standards and regulations (Low Voltage, Electomagnetic Compatibility, Environmental Directives, as applicable...).
- Your product is an electrical appliance: it must be used in normal conditions of use.
- Always plug in your appliance into:
- An electrical installation with voltage between 220V and 240V.
- An earthed socket. If you are using a mains extension lead, ensure that it is correctly rated (16A) with an earth, and is fully extended. Take all necessary precautions to prevent anyone tripping over an extension cord.
- Connecting to the wrong voltage may cause irreparable damage to the appliance and will invalidate your guarantee.
- Never place the appliance or its power cord near, or allow to come into contact with, sources of heat or sharp edges.
- When using the appliance, one should pay attention to the steam emission. To reduce the risk of contact with hot water emitting from steam vents, check the appliance before each use by holding it away from your body and operating the steam button.
- To reduce the risk of electric shock, do not immerse the appliance in water or other liquids.
- The appliance should always be turned «OFF» before plugging or unplugging from socket outlet. Never pull the cord to disconnect it from the socket outlet, instead grasp the plug and pull to disconnect.
- Do not allow the cord to touch hot surfaces. After each use, unplug and let the appliance cool down completely before storing it away. Loop cord loosely around the appliance when storing.
- Do not direct steam at people or animals, or use the steamer on garments while they are being worn.
- Always disconnect appliance from electrical outlet when filling with water, emptying, cleaning or when not in use. Never leave the appliance unattended whilst connected to the power supply, even if for a few moments, especially where children are present.
- Should the power cord or the steam hose become damaged, it must be replaced by a TEFAL approved service centre to avoid the risk of danger or injury. Do not disassemble or attempt to repair the appliance.
- This appliance is not intended for use by persons (including children) with reduced physical, sensory or mental capabilities, or lack of experience and knowledge, unless they have been given supervision or instruction concerning use of the appliance by a person responsible for their safety.
- Keep the appliance and its cord out of the reach of children and do not let the power cord hang where children may reach it.
- Children should be supervised to ensure that they do not play with the appliance.
- Burns could occur from touching hot metal parts, hot water or steam. Use care when you empty a steam appliance, there may be hot water in the tank or inside the appliance.
- Fill water in water tank only and remove the water tank only when it is empty.
- Never drop or insert any object into any opening or hose.
- Always keep the hose and nozzle elevated above the water tank.
- Steam only in an up and down vertical motion. Never use steamer in a horizontal position or tilt into a backward position, this may result in hot water discharge.
- Do not place the steam nozzle directly on any surface or the appliance power cord while it is hot or plugged in. Use the stand provided.
- Use caution when changing attachments, as they may contain hot water from condensation. Ensure the attachments are cooled off to avoid contact with hot water.
- The use of accessory attachments other than those provided by Tefal is not recommended and may result in fire, electric shock or personal injury.
- This unit is for indoor use only.
- Given the diverse standards in effect, if the appliance is used in a country other than that in which it is purchased, have it checked by an Approved Service Centre.
- Remove all packaging materials, stickers and accessories from inside and outside of the appliance.
- Unwind the power cord fully before use and inspect the appliance and power cord for signs of wear or damage prior to connecting to the power supply.
- Any intervention other than normal cleaning and maintenance by the customer must be performed by an Approved Service Centre.
- Do not cut or attempt to extend the steaming hose.
Environmental protection first!
Your appliance contains valuable materials which can be recovered or recycled.
When disposing of it, take it to a local civic waste collection point.
Description
- Steam head
- Eject button
- Hose connector
- Hose
- Carry handle
- Max level
- Steam hose wrapping
- Steam head storage slide
Before use
Please read the instructions for use and Important Safeguards carefully.
- Remove any packaging from the appliance.
- Do not plug in or turn on until assembly is complete.
- Insert the steam hose in the hole on the top of the unit while sliding out the eject knob - fig.1.
- Completely unwind the power cord - fig.2.
Filling with water
- Your garment steamer has been designed to operate using untreated tap water. If your water is very hard (check with your local water authority) it is possible to mix tap water with store-bought distilled or demineralised water in the following proportions:
-50% untreated tap water,
-50% distilled or demineralised water.
Important: Heat concentrates the elements contained in water during evaporation. The types of water listed below may contain organic waste, mineral or chemical elements that can cause spitting, brown staining, or premature wear of the appliance: water from clothes dryers, scented or softened water, water from refrigerators, batteries, air conditioners, rain water, boiled, filtered or bottled water. Also use distilled or demineralised water only as advised above.
- Fill with maximum 1 litre of water, taking care that the water does not spill over - fig.3.
Use
Never overfill your steamer. Never fill it with hot water.
- Plug in your garment steamer. Place your garment steamer on the floor with the steam vents pointing away from the door. Ensure the floor that you put the base on is a flat, stable, heat-resistant surface.
* depending on model
9.a Filling inlet
9.b Emptying outlet
10. On / Off switch
11. Electric cord storage (under base)
12. Upholstery brush*
13. Fabric brush*
14. Crease attachment*
15. Lint pad*
16. Door hook*
- Keep the steam head on the door hook while heating up - fig.4.
- Press on the On / Off switch, the power indicator light will illuminate when the garment steamer is turned on - fig.5.
- Wait for the steam to come out. This will take approximately 2.5 minutes.
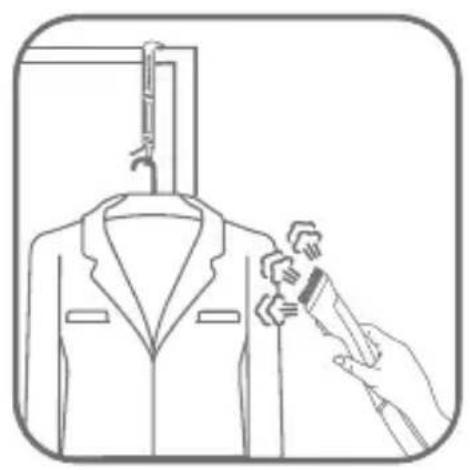
- Put garment onto the door hook*.
- Grasp the steam head with the steam vents pointing away from you. Start steaming by lightly touching the material with the steaming head and moving it in vertical motions - fig.6. Begin at the top of the garment and move in an downward direction.
Tips: Check the fabric's label for recommendations. Test fabric for color fastness on an inconspicuous part of the garment (inner seam). Do not allow the steam head to touch materials made from silk or velvet.
Some garments can be steamed better from the underside. If steaming in a low position near floor, straighten hose out frequently to remove any build up of condensation. If hose becomes clogged, it will make a gurgling noise. Heavier fabrics may require repeated steaming. Exercise caution at all times.
- Steam garments holding the hose in an upright position. This allows any condensation to flow back into the steamer.
Warning: Never steam clothes while they are being worn. The hose and steam head will become hot during use. This is normal. Use caution and avoid prolonged contact with garments being steamed, especially any delicate fabrics.
Place the base of your garment steamer on the floor. Ensure the floor is a flat, stable, heat-resistant surface. Never carry or lift this product over floor height while in use.
- During operation, the steamer hose may make a gurgling noise. This is a normal result of condensation. If it begins to gurgle, extend hose up and out to allow any excess moisture back into the base.
Do not allow steamer to run dry.
Accessories (depending on model)
Before using any of the accessories on upholstery or garments, be sure to consult the manufacturer regarding their recommendations. We also recommend testing on an inconspicuous area.
Reminder: When using accessories steam only in an up and down vertical motion. Never use the steam head in a horizontal position and never steam with the steamhead upside down.
Upholstery brush\*
The upholstery brush is used to aid steam penetration into difficult, heavy fabrics, for faster results.
Be sure unit is unplugged and completely cool before attaching accessories.
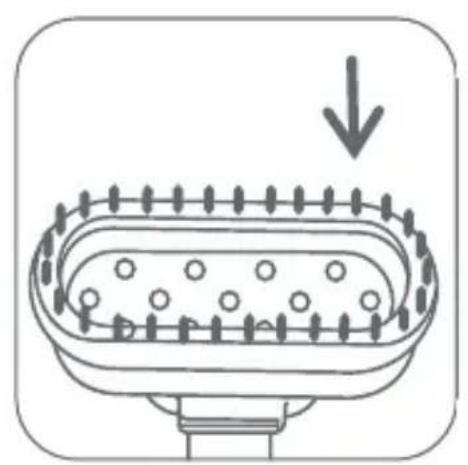
- Attach the upholstery brush to the steam head by lining up the bottom of the brush with the bottom of the steam head. Gently push the top of the brush into place on the steam head until it clicks into place - fig.7.
- Gently brush the area to be steamed with the grain or nap of the fabric.
- Remove the upholstery brush once the unit is unplugged and completely cool. Remove it by pressing on the tab on top of brush while pulling it forward.
Fabric brush\*
The fabric brush opens the weave of the fabrics for better steam penetration.
Be sure unit is unplugged and completely cool before attaching accessories.
- Attach the fabric brush to the steam head by lining up the bottom of the brush with the bottom of the steam head. Gently push the top of the brush into place on the steam head until it clicks into place.
- Gently brush the area to be steamed with the grain or nap of the fabric.
- Remove the fabric brush once unit is unplugged and completely cool. Remove it by pressing on the release tab on top of brush while pulling it forward.
Crease attachment\*
The crease attachment allows you to make trouser creases easily and remove stubborn creases.
Be sure unit is unplugged and completely cool before attaching accessories.
- Fasten the crease attachment to the steam head by inserting it into the slide under the steam brush - fig.8.
• Gently push into place. -
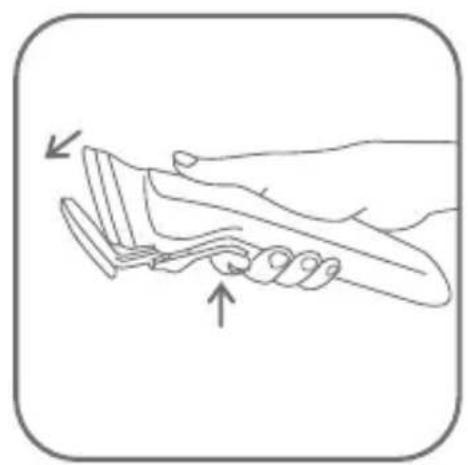
Push on the handle to open out the crease attachment - fig.9.
* depending on model -
Put your fabric in the space between the crease attachment and the steam brush - fig.10.
- Release the handle.
- Move the crease attachment in a downwards motion starting from the top - fig.11.
- Once unit is unplugged and completely cool, remove the crease attachment by sliding it out of the steam brush.
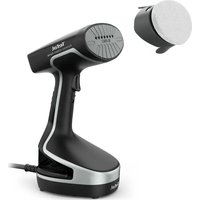
Lint pad\*
The lint pad removes hair, lint and animal fur for a professional finish.
The lint pad is a separate accessory and cannot be attached to the steam head. You can use the lint pad independently from the steamer.
- To use the lint pad, slowly brush the clothing with the grain or nap of the fabric.
- The pad can be cleaned by brushing it in the opposite direction. We recommend cleaning the pad onto an old cloth that can be discarded.
After use
Warning: Never touch the steam head until it cools completely.
- After using the steamer, switch the power off (power indicator light will go out) and unplug the appliance.
Be careful, hot water may remain in the steam hose. Always remove the steam hose before emptying your appliance.
- Remove the steam hose - fig.1.
• Empty the water container - fig.12. - Wrap the hose around the steamer and insert the steam head on its housing - fig.13 and 14.
- Wind the power cord on its storage place under the appliance - fig.2.
Empty all water from the unit before storing it.
For cord winding or transport, never turn your appliance upside down.
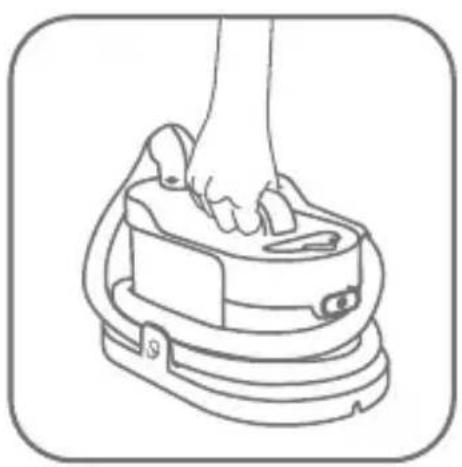
- You can carry your steamer by its handle - fig.15.
Cleaning
Clean the main unit using a damp cloth. To maintain maximum performance, your steamer must be descaled occasionally. The descaling intervals will depend on the water quality and the frequency of use.
The unit should be descaled at least once a year or every 100 hours of use.
For descaling proceed as follows:
- Unplug the unit and fill it with 1/3 white vinegar and 2/3 water.
- Let the appliance run for 3 minutes and do not steam any clothing with this mixture.
-
Switch the appliance off. Unplug it and allow to cool down for at least 30 minutes.
-
Pour the mixture over the sink. Rinse the appliance with fresh water.
If after descaling you believe that there is still a build-up in the appliance, repeat this operation.
Use a new solution of vinegar and water each time you repeat steps 1 and 2.
IS THERE A PROBLEM?
| Problems | Possible causes | Solutions |
| There is no steam. | The garment steamer is not turned on. | Check that your appliance is correctly plugged in and press the illuminated on/off switch (on the front of the base-unit). |
| The water level is too low. | Turn your appliance off and refill it. | |
| The hose is kinked. | Be sure that the hose is fully unravelled. | |
| There is no more water. | Unplug your steamer and refill it. | |
| There is little steam. | Your steamer has a build-up of scale because it has not been rinsed out regularly. | Descale the steamer at least once a year or after every 100 hours of use. If your water is hard, increase the frequency. |
| The water level is too low. | Turn your appliance off and refill it. | |
| There is too much water. | Unplug your steamer and empty the excess water. | |
| Water runs through the holes of the steambrush. | There is condensation in the hose. | Never use steamer in a horizontal position. Hold the hose vertically and wait for water to flow back into the steamer. |
| The steamer takes a long time to heat. | Your steamer has a build-up of scale because it has not been descaled regularly. | Rinse out the steamer at least once a year or every 100 hours of use. If your water is hard, increase the frequency. |
| There is too much water. | Unplug your steamer and empty the excess water. |
If you have any further problems or queries please contact the TEFAL Customer Relations Helpline - see details at the end of this leaflet.
ARAHAN KESELAMATAN
SILA BACA ARAHAN-ARAHAN INI DENGAN TELITI
SEBELUM PENGGUNAAAN PERTAMA KALI DAN SIMPANNYA
DI TEMPAT YANG SELAMAT
Tips: Check the fabric's label for recommendations. Test fabric for color fastness on an inconspicuous part of the garment (inner seam). Do not allow the steam head to touch materials made from silk or velvet. Some garments can be steamed better from the underside. If steaming in a low position near floor, straighten hose out frequently to remove any build up of condensation. If hose becomes clogged, it will make a gurgling noise. Heavier fabrics may require repeated steaming. Exercise caution at all times.


- SAFETY INSTRUCTIONS
- PLEASE READ THESE INSTRUCTIONS CAREFULLY BEFORE FIRST USE AND KEEP THEM IN A SAFE PLACE.
- Environmental protection first!
- Description
- Before use
- Filling with water
- Use
- Accessories (depending on model)
- Upholstery brush\*
- Fabric brush\*
- Crease attachment\*
- Lint pad\*
- After use
- Cleaning
- ARAHAN KESELAMATAN
- SILA BACA ARAHAN-ARAHAN INI DENGAN TELITI
- SEBELUM PENGGUNAAAN PERTAMA KALI DAN SIMPANNYA
- DI TEMPAT YANG SELAMAT
Brand : TEFAL
Model : Compact Steam IS1435
Category : Steam cleaner