
ULE-185U - Loudspeaker Ikegami - Free user manual and instructions
Find the device manual for free ULE-185U Ikegami in PDF.


Pick your language and provide your email: we'll send you a specifically translated version.
| Product Type | Broadcast/Surveillance LCD Monitor |
| Screen Size | 18.5 inches |
| Resolution | 1366 x 768 |
| Brightness | 250 cd/m2 |
| Contrast Ratio | 1000:1 |
| Aspect Ratio | 16:9 |
| Viewing Angle (H/V) | 170°/170° |
| Display Colors | 16.7 million |
| Response Time | 14 ms |
| Video System | NTSC/PAL |
| Panel Life | 30,000 hours |
| Inputs | Video In (BNC) 2, VGA In 1, HDMI In 1, SDI In 1, Audio In (RCA) 2, PC Stereo In 1 |
| Outputs | Video Out (BNC) 2, SDI Out 1 |
| Built-in Speakers | Yes (1W x 2) |
| Remote Control | Yes (included) |
| OSD Languages | English, Spanish, French, German, Italian |
| Dimensions (with stand) | 17.64 x 11.72 x 3.58 inches |
| Cabinet Material | Electro-Galvanized Steel |
| Power Supply | DC 12V (adapter included) |
| Operating Temperature | 0°C to 50°C |
| Storage Temperature | -20°C to 60°C |
| VESA Mount | 100 x 100 mm |
| Included Accessories | Adapter, VGA cable, Trigger cable, Power cable, Battery, Remote controller, User manual |
Frequently Asked Questions - ULE-185U Ikegami
How do I turn on the monitor?
Connect the power adapter to the monitor and a wall outlet. Press the power button on the front panel or the POWER button on the remote control. The LED will turn green when powered on.
The screen is black, what should I do?
Check if the power cord is securely connected. Ensure the monitor is turned on (LED green). Verify the correct input source is selected using the SOURCE button. If the LED is orange, the monitor is in DPMS power saving mode; press any key to wake it.
How do I clean the screen?
First, unplug the monitor from the power outlet. Use a soft, dry cloth to gently wipe the screen. Do not use liquid cleaners or chemical agents, as they may damage the panel.
The buttons on the front panel do not respond.
The keys may be locked. To unlock, press and hold the ▲ and ◀ buttons simultaneously for 10 seconds. If the remote control works, you can also use the KEY LOCK function in the OSD menu to unlock.
The remote control is not working.
Ensure the battery is installed correctly (check polarity). Replace the battery if it is dead. Point the remote directly at the monitor's IR receiver and make sure there are no obstacles.
How do I select the correct input source?
Press the SOURCE/▼ button on the front panel to open the input source menu. Use the ▲ or ▼ keys to highlight the desired input (Video1, Video2, HDMI, VGA) and press ▶ to confirm. Alternatively, use the remote control's direct input buttons (VIDEO1, VIDEO2, HDMI, VGA).
How do I access the OSD menu?
Press the MENU button on the front panel or the remote control. The PICTURE menu will appear. Use ▲/▼ to navigate and ◀/▶ to adjust values. Press MENU again to exit.
The screen looks stretched or the image is not centered (PC input).
Press the AUTO button on the front panel to automatically adjust the position, clock, and phase for VGA input. Alternatively, go to the OSD menu, select PICTURE > Screen and run Auto Adjust.
How do I change the aspect ratio?
Press MENU to enter OSD, then navigate to PICTURE > Aspect Ratio. Use ◀/▶ to select from available options (e.g., 4:3, 16:9, Full). The available ratios depend on the input signal.
Disposal instructions for this product?
This product bears the crossed-out wheeled bin symbol, indicating it should not be disposed of with household waste. It must be taken to an appropriate recycling facility for electrical and electronic equipment. Contact your local waste disposal service or the point of purchase for recycling options.
User questions about ULE-185U Ikegami
0 question about this device. Answer the ones you know or ask your own.
Ask a new question about this device
No questions yet. Be the first to ask one.
Download the instructions for your Loudspeaker in PDF format for free! Find your manual ULE-185U - Ikegami and take your electronic device back in hand. On this page are published all the documents necessary for the use of your device. ULE-185U by Ikegami.
USER MANUAL ULE-185U Ikegami
natural_image
Illustration of a flat-screen monitor with control buttons at the bottom (no text or symbols)BROADCAST/SURVEILLANCE APPLICATIONS
ULE-185U REV.G
| 1 SAFETY INSTRUCTION 3 | |
| 2 FCC RF INTERFERENCE STATEMENT 7 | |
| 3 INSTALLATION 8 | |
| 4 OSD MENU SETTING 12 | |
| 5 FEATURE 18 | |
| 6 TROUBLESHOOTING 19 |
1. SAFETY INSTRUCTION
\- Follow this safety instruction to use the monitor properly and prevent the damage. \* This safety instruction has "Warning" & "Caution" as below  Warning - If the user does not follow this instruction, it may cause the serious damage to the user.  Caution - If the user does not follow this instruction, it may cause the slight damage to the user or cause some damages to the monitor. \- Keep this user's guide book for later use. Warning
Never remove the back cover and touch the inside of the monitor. If you need a service, please contact the service center. natural_image
Cartoon illustration of a smiling computer monitor character with arms and legs, holding a screwdriver (no text or symbols)natural_image
Cartoon illustration of a computer monitor with a sad face and a steaming cup beside it, under a sun (no text or symbols)natural_image
Cartoon illustration of a computer monitor with a sad face and a '100' sign, symbolizing online toxicity or misinformation (no text present)natural_image
Cartoon illustration of a computer monitor with a sad face and a starburst, connected to an electrical outlet (no text or symbols)Warning
Do not install this monitor on the outside and near water. It may cause damage to the product, electric shock and fire. natural_image
Illustration of a steaming cake next to a computer monitor with a sad face and a cross symbol (no text or labels)natural_image
Cartoon illustration of a computer monitor with a sad face and lightning bolts, showing electrical connections (no text or symbols)natural_image
Cartoon illustration of a smiling computer monitor with a waving hand and a question mark, symbolizing confusion or curiosity (no text present)WARNING: How to fix
Do not open this product as it contains high voltage inside. It may create an electric shock. If the user disassembles and remove the back cover, it does not make sure to make up for the damage and do a service and exchange the monitor. Cautions
Install this monitor some distance from the wall and do not install unless proper ventilation is provided.  Place this product on a stable place. If not, it may fall, causing serious damages to the monitor and people. natural_image
Cartoon illustration of a sad computer monitor character with arms and legs, showing dynamic fluctuations (no text or symbols)natural_image
Cartoon illustration of a computer monitor with a sad face and frowning expression (no text or symbols)natural_image
Cartoon illustration of a smiling computer monitor with hands holding the screen (no text or symbols)natural_image
Cartoon illustration of a smiling computer monitor with a smile, connected to an electrical outlet (no text or symbols)natural_image
Illustration of a hand using a power plug to mark electrical socket (no text or symbols)Cautions
Install this monitor about 50cm far from the eyes and an angle of 0\~15 degrees below eyes. Too close installation may cause having weak sight.  Do not press the LCD panel with hands or the sharpened material hardly. natural_image
Cartoon illustration of a computer monitor character with a sad face and frowning expression, holding a blank sign (no text or symbols present)natural_image
Simple line drawing of a computer monitor with a smiling face, next to two square shapes with a cross mark (no text or symbols)WARNING: TO REDUCE THE RISK OF ELECTRIC SHOCK, DO NOT EXPOSE THIS EQUIPMENT TO RAIN OR WATER.
Instructions for Disposal of Electrical and Electronic Equipment in Private Households
 Disposal of used Electrical and Electronic Equipment (Applicable in the European Union and other European countries with garbage separate disposal and collection methods) This symbol on the product, or in the related documents in the package, indicates that this product shall not be treated as normal household waste. Instead, it should be taken to a proper applicable collection point or depot for the recycling of electrical and electronic equipment. By ensuring this product is disposed of correctly, you will help prevent possible negative consequences for the environment and human health, which could otherwise be caused by inappropriate waste handling of this product. The recycling of materials will help to conserve natural resources. For more detailed information about recycling of this product, please contact your local city authority, your household waste disposal service or the place where you purchased the product.2. FCC RF INTERFERENCE STATEMENT
NOTE
This equipment has been tested and found to comply with the limits for a Class A digital device, pursuant to Part 15 of the FCC Rules. These limits are designed to provide reasonable protection against harmful interference in a residential installation. This equipment generates, uses and can radiate radio frequency energy and, if not installed and used in accordance with the instructions, may cause harmful interference to radio communications. However, there is no guarantee that interference will not occur in a particular installation. If this equipment does cause harmful interference to radio or television reception which can be determined by turning the equipment off and on, the user is encouraged to try to correct the interference by one or more of the following measures. - Reorient or relocate the receiving antenna. - Increase the separation between the equipment and receiver. - Connect the equipment into an outlet on a circuit different from that to which the receiver is connected. - Consult the dealer or an experienced radio, TV technician for help. - Only shielded interface cable should be used. Finally, any changes or modifications to the equipment by the user not expressly approved by the grantee or manufacturer could void the users authority to operate such equipment.DOC COMPLIANCE NOTICE
This digital apparatus does not exceed the Class A limits for radio noise emissions from digital apparatus set out in the radio interference regulation of Canadian Department of communications.3. INSTALLATION
3-1 Parts
natural_image
Illustration of a flat-screen monitor with no visible text or symbols on the screen surfacenatural_image
Line drawing of a rectangular electronic device with coiled wires and a terminal block (no text or symbols)natural_image
Line drawing of two connected USB connectors (no text or symbols)natural_image
Simple line drawing of a cord tied with a string (no text or symbols)natural_image
Line drawing of a cable tied with a plug (no text or symbols)3-2 How to Install
1) KEY BUTTON
 SHORT KEY FUNCTION| OSD Key Function | |
| MENU Activate the menu function / Exit from the menu | |
| SOURCE / ▼ Input source menu / Source selection(move down from OSD menu) | |
| AUTO / ▲ Auto-fit screen with PC-RGB input / move up from OSD menu | |
| ◀(VOL) Decrease | the level of volume and move the previous menu |
| (VOL)▶ Increase | the level of volume and select the OSD menu |
| Power On / Off | |
| LED | Red : Power Off stateGreen : Power On and available input signal stateOrange : When DPMS "ON" state, no input signal |
| ▲+◀ | Press “▲ , ◀” Key 10 seconds simultaneously to lock / unlock OSD Key |
| 1 | DC 12V DC adapter input | |
| 2 | AUDIO(VIDEO-1) Stereo audio input for VIDEO-1 | |
| 3 | AUDIO(VIDEO-2) Stereo audio input for VIDEO-2 | |
| 4 | VIDEO-1 IN/OUT VIDEO-1 signal input/output | |
| 5 | VIDEO-2 IN/OUT VIDEO-2 signal input/output | |
| 6 | TRIGGER TRIGGER signal input | |
| 7 | HDMI HDMI signal input | |
| 8 | VGA VGA(PC RGB) signal input | |
| 9 | AUDIO(PC) Stereo audio input for VGA | |
| 10 | For FW Update | |
| 11 | SDI IN/OUT SDI signal input/looping out |
3) REMOTE CONTROLLER
| MODE SELECT MENU | |
| VIDEO1 Select V | IDEO1 mode |
| VIDEO2 Select V | IDEO2 mode |
| HDMI Select HDMI mode | |
| VGA (RGB) Select VGA mode | |
| S.SET Select Input source | |
| OSD CONTROL MENU | |
| POWER Turn ON | / OFF the monitor |
| MUTE Turn ON / | OFF the sound |
| AUTO Auto adjust | position of the screen (in VGA mode) |
| COLOR TEMPERATURE | Select color temperature of the screen |
| SCAN MODE Select the scan mode of the screen | |
| VOL- / VOL+ Increase / Decrease the volume level | |
| MENU / EXIT Activate and exit the OSD menu | |
| KEY LOCK Locking the button (Prevent operation) | |
4. OSD MENU SETTING
MENU STRUCTURE
When user presses the menu key, the first "PICTURE" menu is displayed. Select by "◀" key then two types of menu functions are shown as below. - PICTURE : Menu related to PICTURE Function - OPTION : Other OSD Menu Status Control and Firmware Update If press "▲, ▼" key, then select sub title in functions.PICTURE MENU
 The PICTURE Menu can be selected from the following 7 modes by pressing the ▲ or ▼ key.| Picture Mode | Adjust setting of the picture |
| Color Temperature | Change color according to the color temperature |
| Aspect Ratio | Change the aspect ratio |
| Noise Reduction | Adjust noise attenuation of input signal |
| Screen | Adjust the PC-RGB input signal to fit the screen |
| Trigger | Select Trigger input |
| Pixel shift | Select auto pixel shift |
1) Picture Mode
Picture Mode can select 4 modes as Mild, Dynamic, Standard and User as shown in the figure below. Press the "◀, ▶" key to change the mode.  Three of the four modes except for User mode are shipped with fixed values at the time of shipment from the factory. User mode can be set with “◀, ▶” keys by selecting each item below with “▲, ▼” key only in the User mode.| Contrast | Adjust difference in the color and brightness |
| Brightness | Adjust the dark and light |
| Color | Adjust for desired color intensity |
| Sharpness | Adjust for best clarity of outline detail |
| Tint | Adjust for natural flesh tones |
2) Color Temperature
Color Temperature can select 4 modes as Cool, Medium, Warm and User as shown in the figure below.  Three modes except User mode are factory shipped with factory default values, and each color item (RED, GREEN, BLUE) is selected with the "▲, ▼" keys in the User mode only. User settings are available.3) Aspect Ratio
Aspect Ratio allows user to select the each aspect ratio as shown in the figure below. (However, activated list is according to the input port and the input resolution.) 4) Noise Reduction
Noise Reduction can select 5 modes as Off, Low, Middle, High, Default as shown in the figure below. 5) Screen
Screen enables to set the active area of the display when using PC-RGB input port.  Auto Adjust is an item to be set automatically, and the input signal should be operated in the signal state where the Outline has a lot of white color.6) Trigger
Select Trigger input (Off, VIDEO 1, VIDEO 2)7) Pixel shift
Select auto pixel shift (On, Off)OPTION MENU
 The Option Menu can be selected from the following 8 modes by pressing the ▲ or ▼ key.| OSD Language | Selectable OSD Menu Language |
| Blending | Adjust blending for OSD Menu and Main window |
| OSD Duration | Setting Duration time of OSD Menu |
| Restore Factory Default | |
| Software Update(USB) | |
| Key Lock | Locking the button(prevent operation) |
| DPMS | When input signal is the no signal, DPMS "on" change the power saving mode. |
| Cycle setup | Select auto input source |
1) OSD Language
As shown in the figure below, OSD Language can be selected by "▲, ▼" key. 2) Blending
OSD Menu Blending can select 4 modes as Off, Low, Middle, High by pressing the "▶ SELECT" key.3) OsdDuration
OSD menu Duration can select 4 modes as 5, 10, 15Sec and Off by pressing the "▶ SELECT" key.4) Restore Factory Default
Restore factory default can be selected by pressing the "▶ SELECT" key. Select Yes or No by the "◀, ▶" key. 5) Software Update(USB)
Software update default can be selected by pressing the "Menu" key. Select Yes or No by the "◀, ▶" key.  6) Key Lock
Key lock default can be selected by pressing the "▶ SELECT" key.  7) DPMS
The function can be activated(ON) or deactivated(OFF) with the button ▶.8) Cycle setup
Select auto pixel shift with the button ▶.INPUT SOURCE
Input Source can be selected from the following four input modes by using the ▲ and ▼ keys when the window as shown below is displayed by pressing the "SOURCE / ▼" key in the Main window. (Input Source can be selected by ▲ and ▼ key when window shown as below. To be in this menu, pressing the "ENTER" / ▶ key in the Main window.) AUDIO VOLUME
Audio Volume can be increased or decreased by pressing "VOL- / ◀", "VOL + / ▶" Key.  205. FEATURE
| General Features ULE-185U REV.G | ||
| Display | Screen Size | 18.5 inches |
| Resolution | 1366*768 | |
| Pixel Pitch | 0.300*0.300 mm | |
| Brightness | 250 cd/m2 | |
| Contrast Ratio | 1000:1 | |
| Aspect Ratio | 16:9 | |
| Viewing Angle (H/V) | 170/170 degrees | |
| Display Color | 16.7 million | |
| Response Time | 14 ms | |
| Video System | NTSC/PAL | |
| Panel Life Time (hours) | 30,000 hours | |
| Interface | Video In/Out (BNC Type) | 2/2 |
| VGA In (15Pin D-Sub) 1 | ||
| HDMI In | 1 | |
| SDI In/Out 1/1 | ||
| Audio In(RCA Type) | 2 | |
| PC Stereo In | 1 | |
| Special Features | Built in Speakers | Y (1W*2) |
| Remote Control | Y | |
| Filter Type | 3D Comb filter | |
| Deinterlacing | Y | |
| Trigger Source Switching | Y | |
| Noise reduction | Y | |
| Auto source sequencing | Y | |
| Multilingual Language | Eng, Spa, Fre, Ger, Ita | |
| Dimension | Outline Dimension (with Stand) | 17.64" x 11.72" x 3.58" |
| Cabinet | Cabinet Material | Electro-Galvanized Steel |
| Power | Electrical Ratings | DC 12V |
| Circumstance | Operating Temperature 0~50 Celsius | |
| Storage Temperature | -20~60 Celsius | |
| Mounts | VESA Mount Size | 100x100 mm |
| Ceiling Mount | CMK-01 | |
| Wall Mount | WB-5, 10, 30, 31 | |
| Rack Mount RMK-08 | ||
6. TROUBLESHOOTING
\* When the following troubles are occurred, follow the trouble shooting. Before contacting service center.| Troubleshooting | Troubleshooting Tip |
| The screen doesn’t show up | 1. Make sure if the power supply is connected property2. Turn on the power.3. Select the input signal right for the connected port. |
| The screen is too light or to dark | Control the BRIGHTNESS |
| The screen size is not fit for the PC signal | Press the AUTO key among keys in the front.(It is used only in the PC signal) |
| The screen color shows strange in the PC signal | In the FUNCTION menu of OSD menu, perform the AUTOADJUST. |
| The key pad does not work | Press ▲ and ◀ button on the key pad for 10 seconds. |
Ikegami
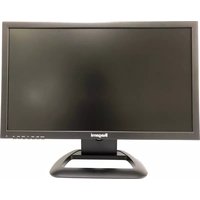


Table of contents
Click a title to access it
- BROADCAST/SURVEILLANCE APPLICATIONS
- ULE-185U REV.G
- SAFETY INSTRUCTION
- Warning
- WARNING: How to fix
- Cautions
- WARNING: TO REDUCE THE RISK OF ELECTRIC SHOCK, DO NOT EXPOSE THIS EQUIPMENT TO RAIN OR WATER.
- Instructions for Disposal of Electrical and Electronic Equipment in Private Households
- FCC RF INTERFERENCE STATEMENT
- NOTE
- DOC COMPLIANCE NOTICE
- INSTALLATION
- 3-1 Parts
- 3-2 How to Install
- 1) KEY BUTTON
- 3) REMOTE CONTROLLER
- OSD MENU SETTING
- MENU STRUCTURE
- PICTURE MENU
- 1) Picture Mode
- 2) Color Temperature
- 3) Aspect Ratio
- 4) Noise Reduction
- 5) Screen
- 6) Trigger
- 7) Pixel shift
- OPTION MENU
- 1) OSD Language
- 2) Blending
- 3) OsdDuration
- 4) Restore Factory Default
- 5) Software Update(USB)
- 6) Key Lock
- 7) DPMS
- 8) Cycle setup
- INPUT SOURCE
- AUDIO VOLUME
- FEATURE
- TROUBLESHOOTING
- Ikegami
Manual assistant
Powered by Anthropic
Waiting for your message
Product information
Brand : Ikegami
Model : ULE-185U
Category : Loudspeaker