
TV-40LE74SM - Television Vivax - Free user manual and instructions
Find the device manual for free TV-40LE74SM Vivax in PDF.


| Product Type | LED TV |
| Screen Size | 40 inches (101.6 cm) |
| Display Resolution | 1920 x 1080 (Full HD) |
| Display Technology | LED |
| Smart TV | Yes (Android) |
| Operating System | Android |
| Tuner | DVB-T/C, DVB-S2 |
| Inputs | 2x HDMI, 1x VGA, 1x SCART, 1x CI, 1x Composite AV, 1x RF, 1x YPbPr, 1x USB, 1x VGA Audio, 1x Coaxial (output), 1x Headphone |
| Audio Output | 2 x 8W (stereo, estimated) |
| Connectivity | Wi-Fi, Ethernet |
| Power Supply | AC 100-240V, 50/60Hz |
| Power Consumption (typical) | 75 W |
| Standby Power | <0.5 W |
| Dimensions (with stand) | Approx 90.6 x 55.5 x 20.0 cm |
| Weight (with stand) | Approx 7.5 kg |
| VESA Mount | 200 x 200 mm |
| Features | Parental Control, Hotel Mode, PVR, Time Shift, EPG, Teletext, HDMI CEC |
| Safety Instructions | Keep 10 cm ventilation, avoid rain/moisture, unplug during storms, no open flames |
| Cleaning | Soft dry cloth, no solvents |
| Repairability | No user-serviceable parts; contact authorized service |
Frequently Asked Questions - TV-40LE74SM Vivax
User questions about TV-40LE74SM Vivax
0 question about this device. Answer the ones you know or ask your own.
Ask a new question about this device
Download the instructions for your Television in PDF format for free! Find your manual TV-40LE74SM - Vivax and take your electronic device back in hand. On this page are published all the documents necessary for the use of your device. TV-40LE74SM by Vivax.
USER MANUAL TV-40LE74SM Vivax
natural_image
Illustration showing a no-smoking sign, a car on a road with smoke, and a computer monitor (no text or symbols)LED TV treba maknuti od izvora topline i direktne sunčeve svjetlosti. Treba mu dobra prozračenost, stoga ostavite razmak od najmanje 10 cm između uređaja i zida, i drugih uređaja.
Sigurnosne mjere


natural_image
Illustration showing a person using a radio with a prohibition symbol, a chair, and a monitor (no text or symbols present)natural_image
Illustration of a cable being connected to a computer monitor (no text or symbols present)
natural_image
Illustration of a person sitting at a desk with a computer monitor (no text or symbols visible)natural_image
Illustration of a computer monitor with a crossed-out X symbol above it (no text or labels)
High-definition multimedia interface.
Prihvatljivi su video signali 480P/576P/720P/1080I/1080P
3. VGA:
Može se povezati sa D-sub 15 igličnim kabelom na vaše računalo
- RF IN(DVB-S2): povezuje se sa signalom satelitskeTV
5. SCART:
Scart ulaz 6.CI:
ulaz za Cl
7.AV
Pritisnite INPUT gumb da bi se prikazao popis za unos,
Pritisnite ▼ / ▲ ili OK gumb za odabir unosa koji želite
Pritisnite OK gumb za potvrdu odabranog unosa
Pritisnite EXIT gumb da izadete iz izbornika.
Priključite RF kabel iz ulaza na TV-u označenog sa "RF-In" u utičnicu za antenu. Odaberite jezik.
Pritisnite ◀ / ▶ gumb da odaberete jezik i zemlju
Pritisnite ▼ / ▲ gumb da odaberete izbornik za odabranu zemlju
Pritisnite ◀ / ▶ gumb da odaberete zemlju


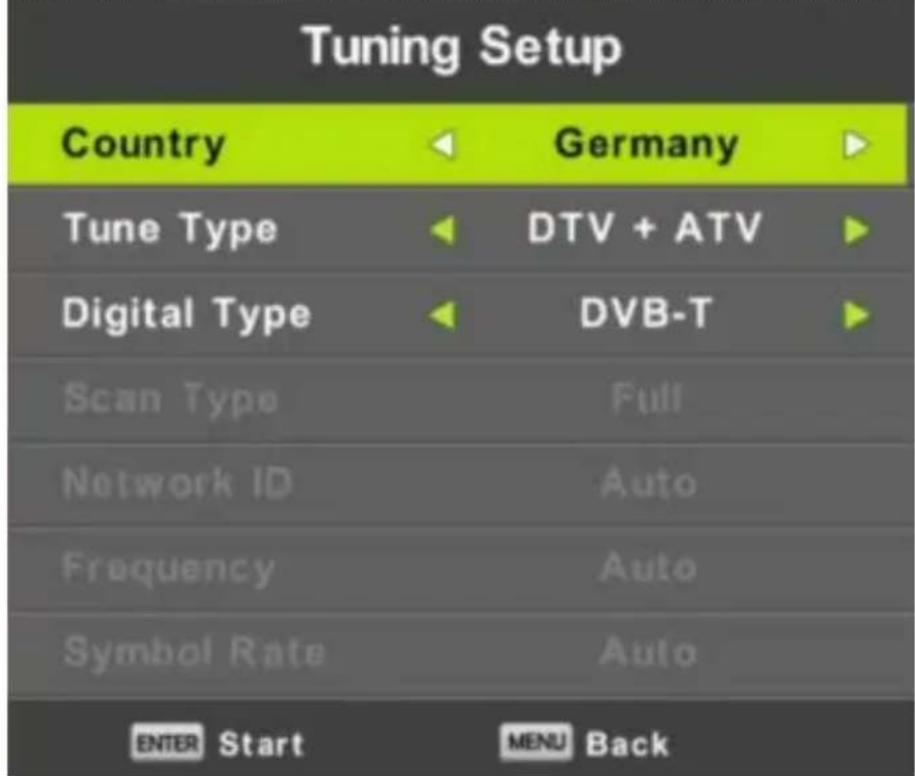
Automatsko podešavanje
Za prvo podešavanje ATV pritisnite MENU i lijevu strelicu kako bi izbjegli ATV podešavanje. Drugo podešavanje DTV, pritisnite MENU i lijevu strelicu da izbjegnete DTV podešavanje.


Upravljanje izbornikom
Izbornik programa
- Pritisnite ▼ / ▲ gumb da odaberete opciju koju želite prilagoditi u CHANNEL izborniku.
- Pritisnite Enter gumb za prilagodbu.
- Kada dovršite podešavanje pritisnite Enter gumb da bi pohranili odabrano i vratili se na prijašnji izbornik.
Automatsko podešavanje
Pritisnite ▼ / ▲ gumb da odaberete automatsko podešavanje, zatim pritisnite Enter/^ gumb za odabir.
Upravljanje izbornikom


ATV ručno podešavanje

Trenutni program. Odaberite broj programa.
Sustav boja. Odaberite sustav boja. (Dostupni sustavi su: AUTO PAL, SECAM)
Sustav zvuka. Odaberite sustav zvuka.

Trobojne tipke su prečaci za programiranje kanala. Prvo pritisnite
▼ / ▲da označite program koji želite odabrati, a potom : pritisnite crveni gumb da izbrišete program sa liste, žuti gumb da premjestite program na listu favorita, plavi gumb da preskočite odabrani program. Pritisnite Fav gumb da dodate program na listu omiljenih,ili da ga uklonite s liste. (Vaš TV će automatski preskočiti program kada koristite CH +/- za listanje programa)
Raspored prikaza
Pritisnite ▼ / ▲ gumb da odaberete raspored prikaza, zatim Enter da uđete u pod-izbornik. On je dostupan pod SOURCE.

Pritisnite žuti gumb da uđete u dolje prikazani interface.
Podatci o signalu
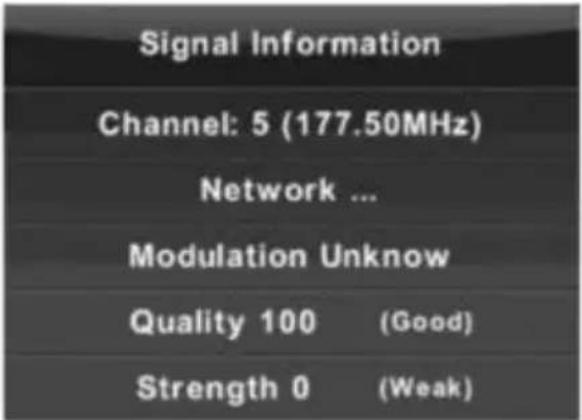
Pritisnite ▼ / ▲ gumb da odaberete Signal Information, zatim Enter da vidite detalje o informacijama signala. To je dostupno samo kada na DTV -u ima signala.
Upravljanje izbornikom
Izbornik slike
Pritisnite MENU gumb da se prikaže glavni izbornik.
Pritisnite ◀ / ▶ gumb da odaberete PICTURE u glavnom izborniku

- Pritisnite ▼ / ▲ gumb da odaberete opciju koju želite prilagoditi u izborniku slikebutton to select the option that
- Pritisnite OK gumb da bi prilagodili.
- Kada završite podešavanje pritisnite MENU gumb da pohranite promjene i vratite se na prijašnji izbornik.
Način prikaza slike
Pritisnite ▼ / ▲ gumb da odaberete PICTURE MODE, zatim pritisnite OK gumb da uđete u podizbornik. Možete mijenjati kontrast, svjetlinu, boju, oštrinu i tonove kada je slika u Personal modu.
Savjet: možete pritisnuti PMODE gumb da bi promijenili Picture Mode direktno.

Kontrast/Svjetlina/Boja/Tonalitet/Oštrina
Pritisnite ▼ / ▲ gumb da odaberete opciju, a onda ◀ / ▶ gumb da prilagodite.
Kontrast prilagođava intenzitet svjetla, ali ne i sjene na slici.
Upravljanje izbornikom
Off odaberite da se isključi otkrivanje smetnji u slici.
- Pritisnite ▼ / ▲ gumb da odaberete opciju koju želite prilagoditi u SOUND izborniku.
- Pritisnite Enter gumb za prilagodbu.
- Kada završite prilagodbu pritisnite Enter enter da pohranite promjene i vratite se na početni izbornik.

Sound Mode
Pritisnite ▼ / ▲ gumb da odaberete Sound
Mode, onda Enter da uđete u poizbornik.
Pritisnite T/^ gumb da odaberete opciju.
Upravljanje izbornikom
Kada vam je zvuk u Personal modu možete podešavati visoke i niske tonove.
- Pritisnite ▼ / ▲ gumb da odaberete opciju koju želite prilagoditi u LOCK SYSTEM izborniku.
- Pritisnite Enter/-^ / ► gumb za prilagođavanje.
- Kada dovršite podešavanje, pritisnite MENU gumb za vraćanje u početni izbornik.
Pritisnite ▼ /A gumb da odaberete Lock System, zatim Enter da bi slijedeće tri opcije bile valjane.
Pritisnite ▼ / A gumb da odaberete Set Password, zatim pritisnite Enter da uđete u podizbornik i unesete novu lozinku.
Zaključavanje programa

Pritisnite ▼ / ▲ gumb za odabir Channel Lock a zatim Enter da uđete u podizbornik s opcijama.
Pomoću zelenog gumba program se zaključava/otključava.
Roditeljski nadzor
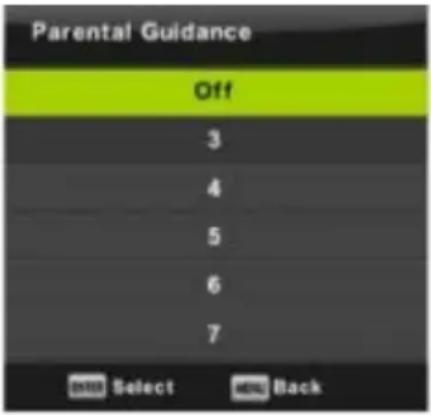
Pritisnite T / ▲ gumb da bi odabrali Parental Guidance, potom Enter gumb da uđete u podizbornik i odaberete dob koja je najbliža starosti vaše djece.
Zaključavanje tipki
Pritisnite ▼ / ▲ gumb da odaberete Key Lock, zatim◀ / ▶ gumb da odaberete Off ili On. Kada je uključen Key Lock's status tipke na uređaju ne mogu se koristiti.
Upravljanje izbornikom
Hotel Mod
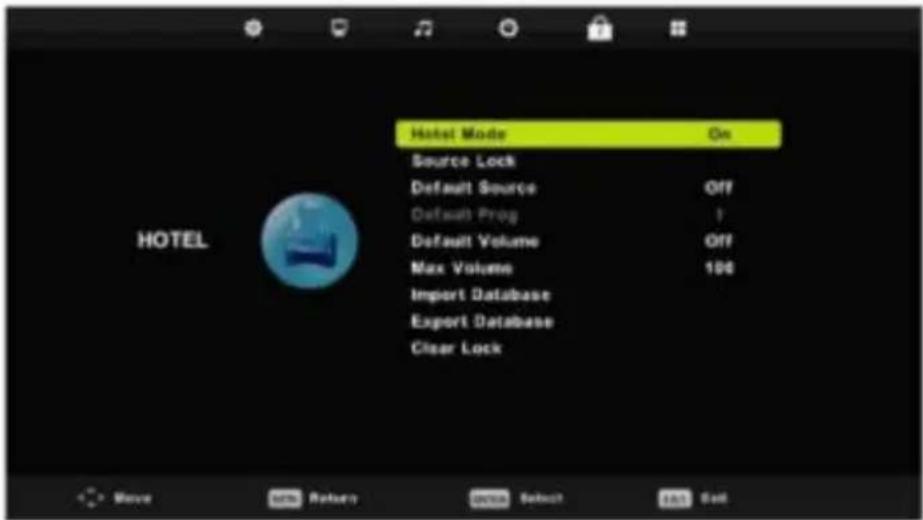
- Pritisnite ▼ / ▲ gumb na daljinskom upravljaču da bi odabrali hotel mod u Lock izborniku.
- Pritisnite Enter gumb na daljinskom upravljaču da uđete u podizbornik.
- Kada završite podešavanje pritisnite MENU gumb da pohranite odabrano i vratite se na početni izbornik.
Hotel Mode
Pritisnite ▼ / ▲ gumb da odaberete Hotel Mode, zatim ◀ / ▶ gumb da odaberete On ili Off.
Upravljanje izbornikom
Press ▼ / ▲ button to select Software Update (USB), plug your USB device in the USB slot, then press Enter button to update the right software.
HDMI CEC
Press ▼ / ▲ button to select HDMI CEC, then press Enter button to enter the sub-menu.

HDMI CEC Pritisnite ◀ / ▶ gumb da uključite/isključite HDMI CEC.
HDMI ARC Pritisnite ◀ / ▶ gumb da uključite/isključite HDMI ARC.
Auto mod pripravnosti Pritisnite ◀ / ▶ gumb da uključite/isključite Auto Standby
Popis naprava Pritisnite Enter gumb da otvorite izbornik za glavnu napravu.
Pritisnite MENU gumb da se prikaže glavni izbornik.
Pritisnite ◀ / ▶ gumb da odaberete SCREEN u glavnom izborniku.

- Pritisnite ▼ / ▲ gumb da odaberete opciju koju želite podešavati u SCREEN izborniku.
- Pritisnite Enter gumb da namjestite opciju.
- Kada dovršite podešavanje pritisnite Enter za pohranjivanje i povratak u prijašnji izbornik.
4. Auto Adjust
Pritisnite Enter da automatski započnete ugađanje H-Offset/V-Offset/Size/Phase.
H-Offset.
Prilagodite horizontalni prikaz slike. Pritisnite ▼ / ▲ gumb da odaberete H-Offset, zatim Enter da uđete u podizbornik.
V-Offset
Pritisnite ◀ / ▶ gumb da odaberete dokument koji želite pregledati u i zborniku za izbor dokumenata, a zatim Media gumb da se prikaže odabrana slika.
Pritisnite ◀ / ▶ gumb da odaberete MUSIC u glavnom izborniku, a zatim Enter da uđete u izbornik.
Pritisnite Exit gumb da se vratite u prijašnji izbornik, pa exit menu da odustanete od započete


Pritisnite ◀ / ▶ gumb da odeberete CD koji želite gledati, a zatim Enter da uđete u izbornik. Pritisnite ◀ / ▶ gumb da se vratite u prijašnji izbornik.

Izbornik filmova
Pritisnite ◀ / ▶ gumb da odaberete MOVIE u glavnom izborniku, zatim Enter da uđete u izbornik.
Pritisnite Exit gumb da se vratite u prijašnji izbornik, pa exit menu da odustanete od započete radnje.

Pritisnite ◀ / ▶ gumb da odaberete CD koji želite gledati, zatim Enter. Pritisnite Media gumb da pokrenete odabrani film.
Pritisnite Display gumb da odaberete izbornik pri dnu ekrana kojeg želite pokrenuti, zatim Enter. Pritisnize Exit gumb da se vratite u prijašnji izbornik, i Exit da izadete iz cijelog izbornika.

Izbornik teksta
Pritisnite ◀ / ▶ gumb da odaberete TEXT u glavnom izborniku, zatim Enter button to enter.
Pritisnite Exit gumb da se vratite u prijašnji izbornik, pa exit menu da odustanete od započete
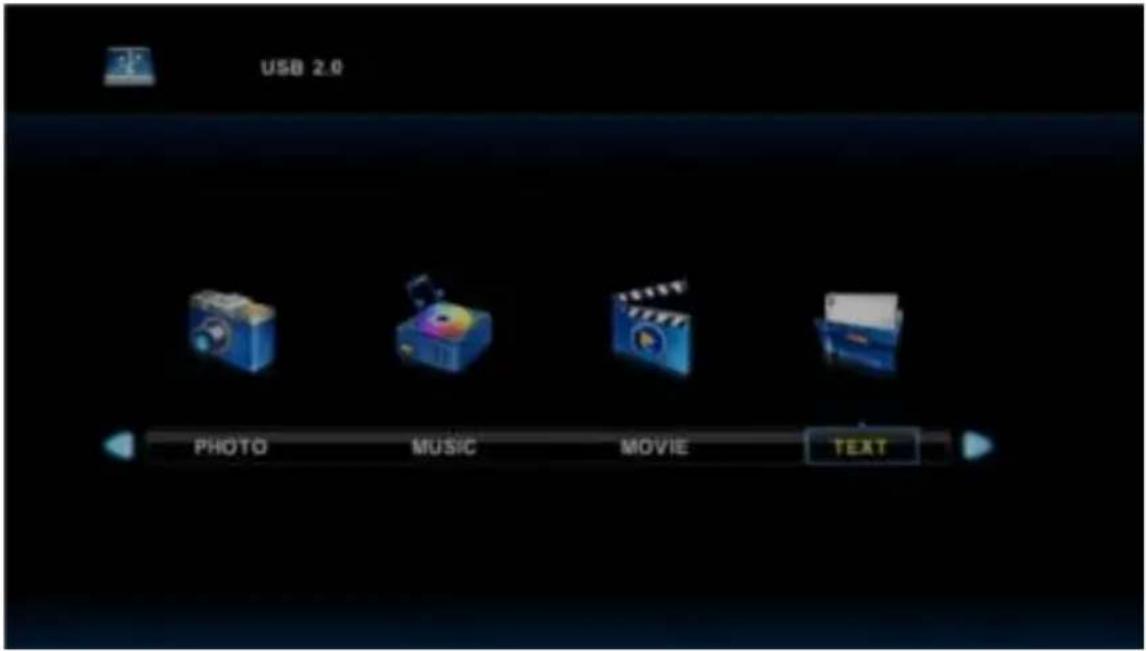
Pritisnite ◀ / ▶ gumb da odaberete CD koji želite gledati, a zatim Enter. Pritisnite ◀ / ▶ gumb da odaberete povratak u prijašnji izbornik.

Sigurnosne mjere
Obavezno pročitajte upute za korištenje uređaja!
Položaj
Podsjetnik
Ako ne želite koristiti automatskog vodiča kroz instalaciju, pritisnite tipku HOME. Ako ugasite vodiča, on se više neće automatski aktivirati.
| Language | English (United Kingdom) |
| English (New Zealand) | |
| English (Singapore) | |
| Choose your Language: | English (United States) |
| 日本語(日本) | |
| русский (Русский) | |
| 中文(周体) | |
| 中文(星體) |
Odabir mreže

Podsjetnik
Podsjetnik
Ako odaberete 'Wi-Fi', odaberite i pristupnu točku.
Ako odaberete 'Ethernet', status spajanja biti će prikazan na ekranu.
Odabir Ethernet mreže(LAN)

Ručno konfiguriranje Etherneta

Postavljanje točne vremenske zone

Podsjetnik
natural_image
Underwater view of a coastal area with visible water droplets and directional arrows (no text or symbols)Podsjetnik
| Postavke | Pojašnjenje: |
| Wi-Fi postavke | Uključite/isključite Wi-FiKada je uključen treba ručno odabrati SSID da bi se povezali, ako je aplikacija šifrirana, morate unijeti lozinku. |
| Ethernet | | Uključite/isključite EthernetAko je uključen, IP se doseže automatski preko DHCP. |
2.2 Postavke
2.2.2 Ekran

| Postavke | Pojašnjenje |
| HDMI auto-detection | Automatski odabire najbolju rezoluciju naprave koristeći HDMI. |
| Display Position | Namješta položaj slike na ekranu. |
| Start screen saver | Namješta vrijeme za uključivanje čuvara ekrana (screensaver) |
2.2 POSTAVKE
2.2.3 Napredne

| PostavkeCEC Control | Pojašnjenje: |
| CEC Control opcije | |
| Location | Postaviti zemljuPostaviti županijuPostaviti grad |
| Digital audio auto-detection | Automatski odabire digitalnu audio output napravu prema HDMI |
| Digital Audio Output | Ručno odabirete digitalnu audio output napravu pomoćuPCM/HDMI |
2.2 POSTAVKE
2.2.4 Ostalo


| Pojašnjenje: |
| Povratak na tvorničke postavke |
| Update sustava pomoću update.zip USB-a ili micro SD kartice |
| Za napredniji izbornik sa više mogućnosti |
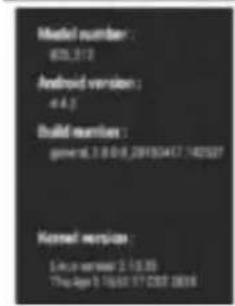
| StatusBroj modelaAndroid verzijaKernel verzijaSerijski broj proizvodnje |
2.3 Aplikacije
Instaliranje preko USB-a
- Otvorite "File manager"
- Odaberite USB flash drive ili neki drugi izvor za pohranu podataka
- Pronađite svoju aplikaciju i selektirajte je
- Pritisnite gumb za instalaciju
- Aplikaciju možete pronaći u "Apps" nakon instalacije
natural_image
Illustration showing a no-smoking sign, a car on a road with smoke, and a computer monitor (no text or symbols)
natural_image
Illustration showing a person using a computer with a prohibition symbol, sitting on a chair next to a desk and monitor (no text or symbols present)natural_image
Illustration of a person sitting at a desk using a computer (no text or symbols visible)Ne stavljajte izvore otvorenog plamena (sveće i sl.) na ili pokraj TV-a. Ako u TV uđe voda ili upadne neki predmet, isključite ga i odmah kontaktirajte servis.

natural_image
Illustration of a cable being inserted into a computer monitor (no text or symbols present)natural_image
Illustration of a computer monitor with a crossed-out X symbol above it (no text or labels)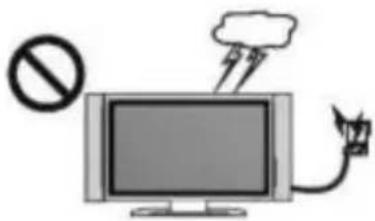
Za vreme grmljavine isključite uređaj iz utičnice i isključite antenu kako ne bi došlo do oštećenja. Za vreme grmljavine nipošto ne dirajte isključeni kabl od antene.
Sadržaj
Upozorenja ....
Sigurnost ....
Sadržaj ....
Kontrolna ploča ......
Dijagram povezivanja
High-definition multimedia interface.
Prihvatljivi su video signali 480P/576P/720P/1080I/1080P
3. VGA:
Pritisnite INPUT taster da bi se prikazao popis za unos,
Pritisnite ▼/▲ ili OK taster za izbor unosa koji želite
Pritisnite OK taster za potvrdu biranog unosa

Automatsko podešavanje
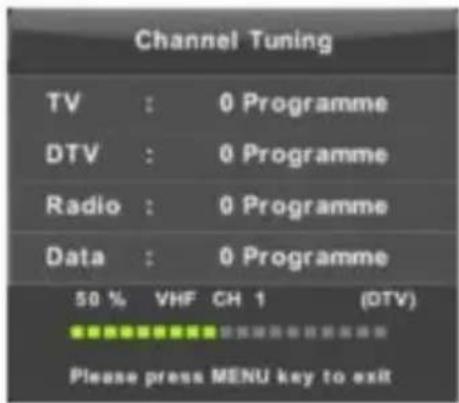

Upravljački meni
Meni programa
Pritisnite MENU taster za prikaz glavnog menija.
Pritisnite ◀/▶ taster da izaberete CHANNEL/KANAL u glavnom meniju

- Pritisnite ▼/▲ taster da izaberete opciju koju želite da podesite u CHANNEL (kanal) meniju.
- Pritisnite Enter taster za prilagođavanje.
- Kada dovršite podešavanje pritisnite Enter taster da bi sačuvali izabrano i vratili se na prethodni meni.
Automatsko podešavanje
Pritisnite ▼/▲ taster da izaberete automatsko podešavanje a zatim pritisnite Enter/^ taster za potvrdu.
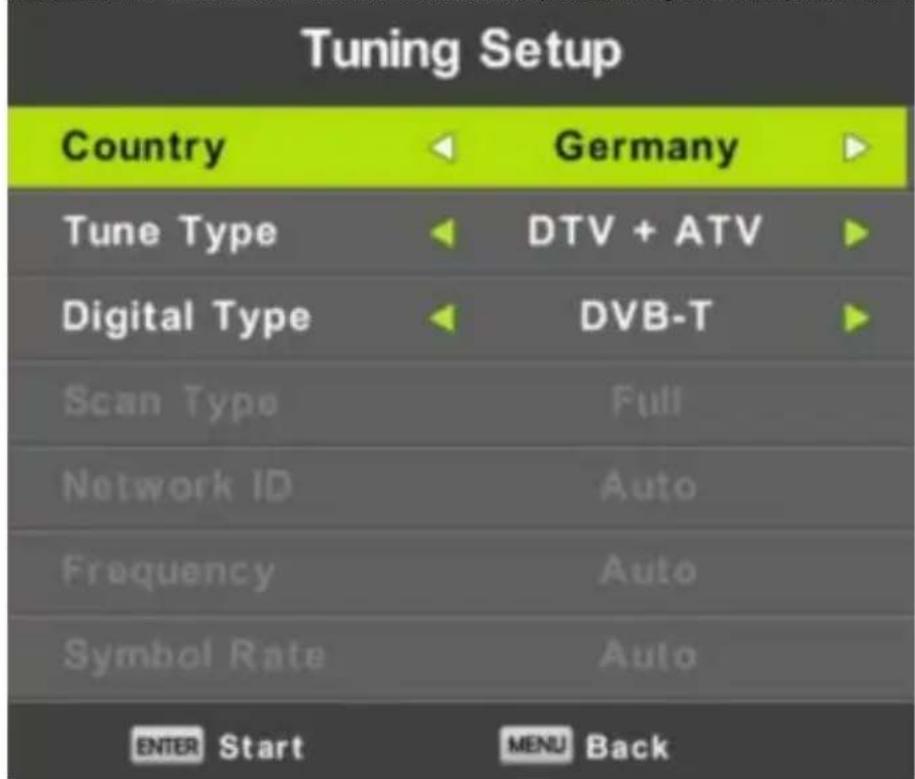
Upravljački meni
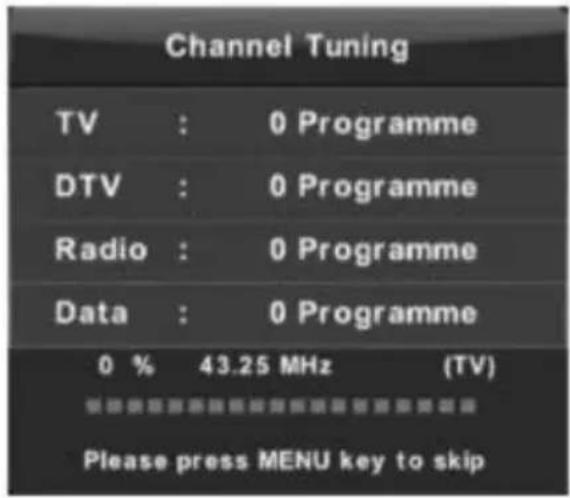


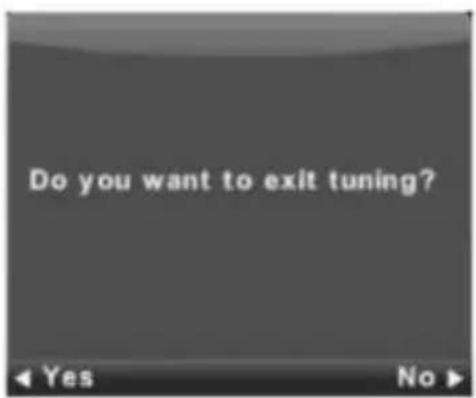
ATV ručno podešavanje

Trenutni program. Izaberite broj programa.
Sistem boja. Izaberite sistem boja (dostupni sistemi su: AUTO, PAL, SECAM)
Sistem zvuka. Izaberite sistem zvuka.

Tasteri u bojama su prečice za programiranje kanala. Prvo pritisnite ▼/▲da označite program koji ste izabrali a onda pritisnite:
-crveni taster da izbrišete program sa liste, -žuti taster da premestite program na listu favorita, -plavi taster da preskočite izabrani program.
Pritisnite Fav taster da dodate program na listu omiljenih ili da ga uklonite sa liste. (Vaš TV će automatski da preskoči program kada koristite CH +/- za listanje programa)
Raspored prikaza
Pritisnite ▼/▲ taster da biste izabrali raspored prikaza, zatim Enter da uđete u pod-meni. On je dostupan pod SOURCE (IZVOR)
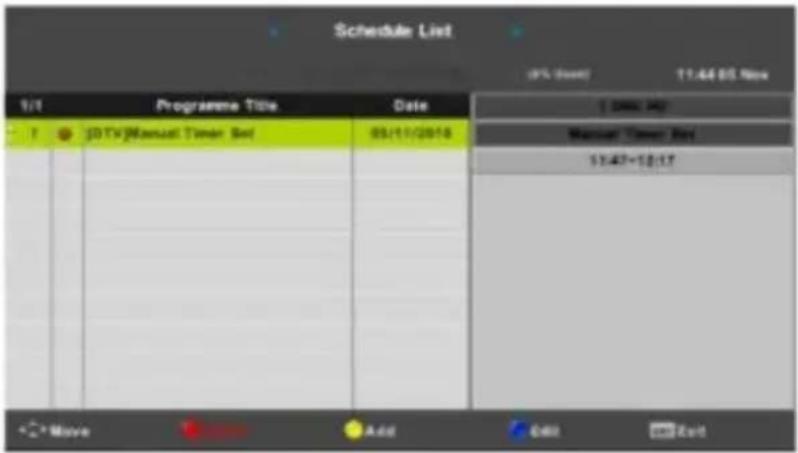
Pritisnite žuti taster da uđete u dole prikazani interface.

Podaci o signalu
Pritisnite ▼/▲ taster da izaberete Signal Information (Informacije o signalu) a zatim Enter da vidite detalje informacija o signalu. To je moguće samo kada na DTV-u ima signala.

Upravljački meni
Meni slike
Pritisnite MENU taster da se prikaže glavni meni.
Pritisnite ◀/▶ taster i birajte PICTURE (SLIKA) u glavnom meniju

- Pritisnite ▼/▲ taster i birajte opciju koju želite da podesite u meniju slike
- Pritisnite OK taster da biste prilagodili.
- Kada završite podešavanje, pritisnite MENU taster da sačuvate promene i vratite se na prethodni meni.
Način prikaza slike
Pritisnite ▼/▲ taster i izaberite PICTURE MODE ("NAČIN" SLIKE), zatim pritisnite OK taster da uđete u podmeni. Možete da menjate kontrast, svetlinu, boju, oštrinu i tonove kada je slika u Personal modu.
Savet: možete da pritisnete PMODE taster da biste promenili Picture Mode direktno.

Kontrast/Svetlina/Boja/Tonalitet/Oštrina
Pritisnite ▼/▲ taster da izaberete opciju, a onda ◀/▶taster da podesite.
Kontrast - prilagođava intenzitet svetla ali ne i sene na slici.
Upravljački meni
Off izaberite da se isključi otkrivanje smetnji u slici.
"Način" zvuka
Pritisnite ▼/▲ taster kako bi izabrali Sound Mode, onda Enter da uđete u podmeni. Pritisnite T/^ taster da birate opciju.
Upravljački meni
Kada vam je ZVUK u Personal modu možete da podešavate visoke i niske tonove.
Pritišćite ▼/▲ i ◀/► taster da izaberete vremensku zonu.
Timer za automatsko gašenje
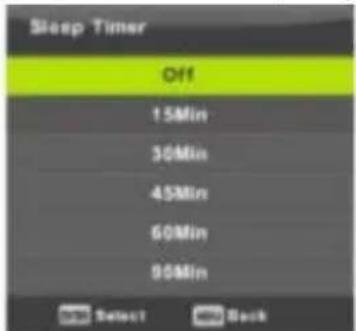
Pritisnite ▼/▲ taster i izaberite Sleep Timer pa onda Enter taster da uđete u podmeni.
- Pritisnite ▼/▲ taster da izaberete opciju koju želite da podesite u LOCK SYSTEM meniju.
- Pritisnite Enter/-^ / ► taster za prilagođavanje.
- Kada dovršite podešavanje, pritisnite MENU taster za vraćanje u početni meni.
Zaključavanje sistema

Pritisnite ▼ / A taster da izaberete Lock System, zatim Enter da bi sledeće tri opcije bile valjane.
Prema početnim podeševanjima lozinka je 0000 a ako zaboravite lozinku koju ste sami uneli, svakako nazovite najbliži servis.
Postavljanje lozinke

Pritisnite ▼ / A taster da izaberete Postavljenje lozinke, zatim pritisnite Enter da uđete u podmeni i unesete novu lozinku.
Zaključavanje programa
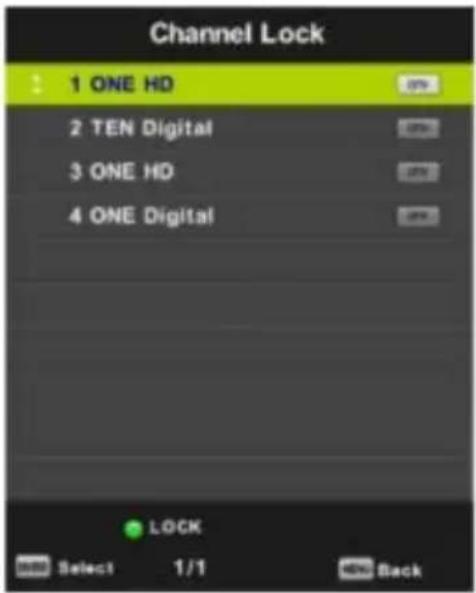
Pritisnite ▼/▲ taster za izbor Channel lock (Zaključavnje programa) a zatim Enter da uđete u podmeni sa opcijama. Pomoću zelenog tastera program se zaključava/otključava.
Roditeljski nadzor
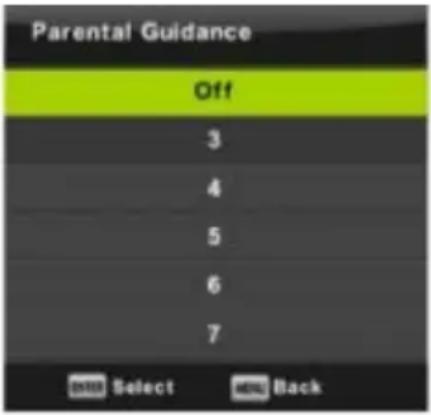
Pritisnite T / ▲ taster da bi ste izabrali Parental Guidance, zatime Enter da uđete u podmeni i izaberete uzrast koji je najbliži starosti vaše dece.
Zaključavanje tastera
Pritisnite ▼/▲ taster da izaberete Key Lock, zatim◀/▶ taster da izaberete Off ili On. Kada je uključen Key Lock's status, tasteri na uređaju ne mogu da se koriste.
Upravljački meni
Hotel Mod

- Pritisnite ▼/▲ taster na daljinskom upravljaču kako bi izabrali hotel mod u Zaključavenje/Lock meniju.
- Pritisnite Enter taster na daljinskom upravljaču da uđete u podmeni.
- Kada završite podešavanje, pritisnite MENU taster da sačuvate izabrano izabrano i vratite se na početni meni.
Hotel Mode
Pritisnite ▼/▲ taster da izaberete Hotel Mode, zatim ◀/► taster da izaberete On ili Off.
Upravljački meni
Jezik obaveštenja
Pritisnite ▼/▲ taster da izaberete Audio Languages, zatim Enter da uđete u podmeni. Pritisnite ◀/▶ taster da izaberete popis ponuđenih jezika. Pritisnite ▼/▲ i ◀/▶ taster da izaberete željeni jezik.

Jezik titlova
Pritisnite ▼/▲ taster da izaberete Subtitle Language, zatim Enter da uđete u podmeni. Pritisnite ◀/► taster da izaberete popis Subtitle Language. Pritisnite ▼/▲ i ◀/► taster da izaberete željeni jezik titlova.

natural_image
Close-up of young green plant seedlings in a field, captured via a camera interface (no text or symbols on the plants themselves)Meni teksta
Pritisnite ◀/▶ taster da izaberete TEXT u glavnom meniju, zatim Enter za ulazak. Pritisnite Exit taster da se vratite u prethodni meni, pa exit menu da odustanete od započete radnje.
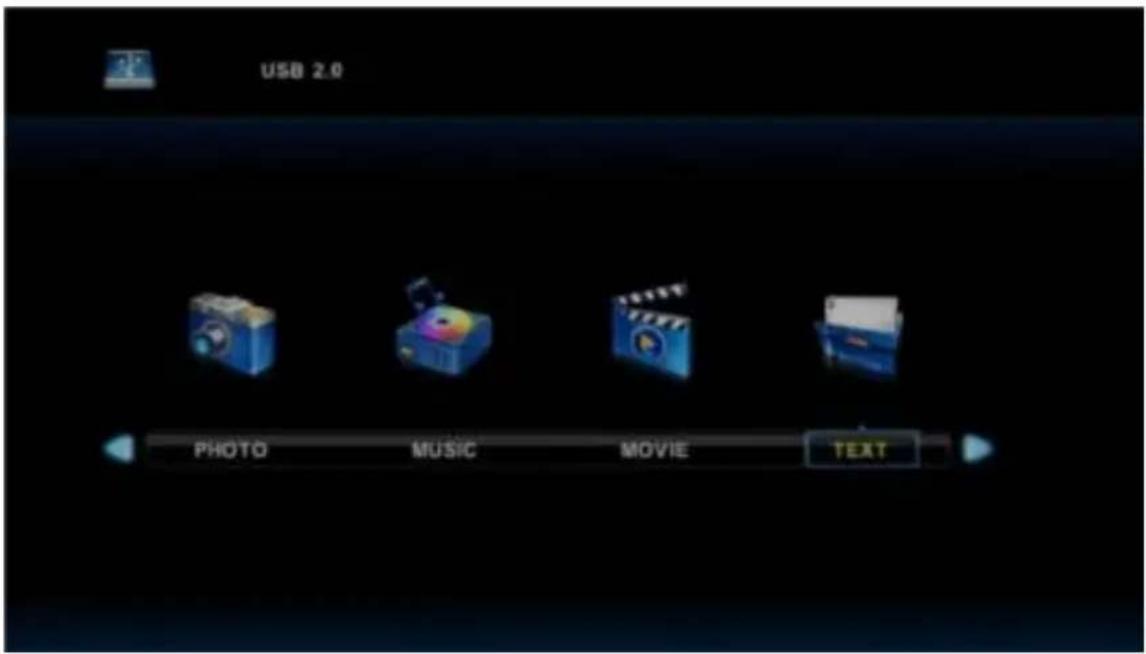
Pritisnite ◀/▶ taster da izaberete CD koji želite da gledate a zatim Enter. Pritisnite ◀/▶ taster da izaberete povratak u prethodni meni.

Sigurnosne mere
Obavezno pročitajte uputstva za upotrebu uređaja!
Položaj
Podsetnik
Ako ne želite da koristite
Podsetnik
Ako ne želite da birate mrežu, pritisnite
Podsetnik
Ako izaberete 'Wi-Fi', izaberite i pristupnu tačku.
Ručno konfigurisanje Etherneta

Postavljanje tačne vremenske zone

Podsetnik
natural_image
Underwater view of a wetland with visible water droplets and directional arrows (no text or symbols)Podsetnik
Korisnik u ovoj fazi konfiguracije može da podesi jezik, mrežu, vremensku zonu, vreme/datum kao i veličinu ekrana.
2.1 Glavni pokretač
Pritisnite strelice.*./▼ da bi izabrali ikonu i pritisnite ENTER da uđete u prozorčić.

Funkcija

OPIS
natural_image
Illustration showing a no-smoking sign, a car on a road with smoke, and a computer monitor (no text or symbols)Masat e sigurisë
natural_image
Illustration of a room setup with a chair, no sign, and monitor (no text or symbols)natural_image
Illustration of a doctor examining a computer monitor (no text or symbols visible)High-definition multimedia interface.
Të pranueshëm janë sinjalet e videos 480P/576P/720P/1080l/1080P
3. VGA:
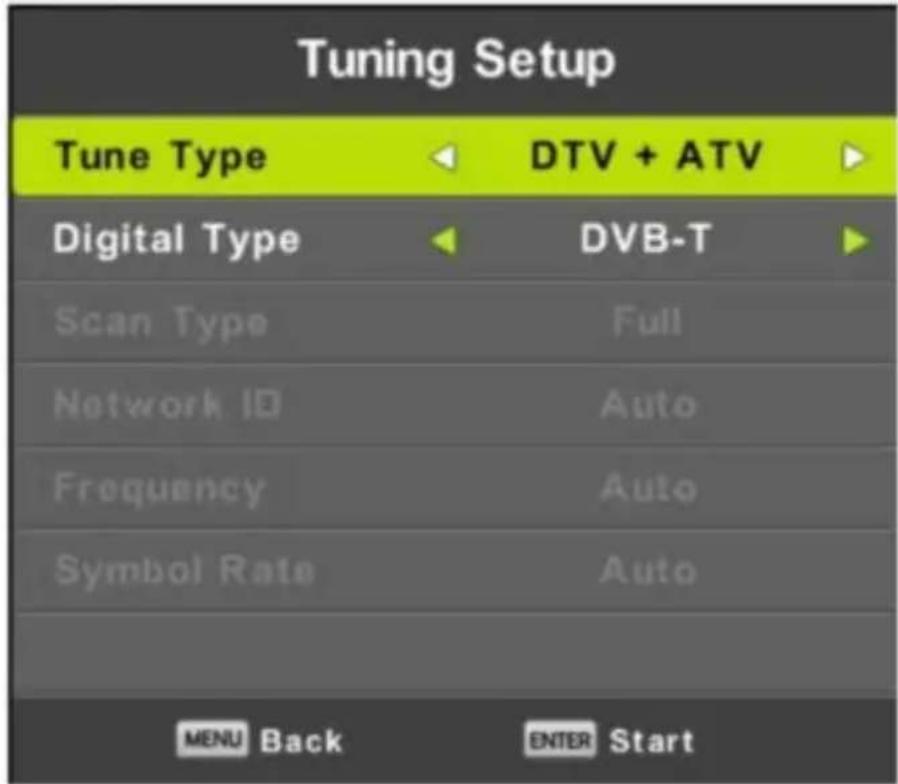
Vendosje automatike
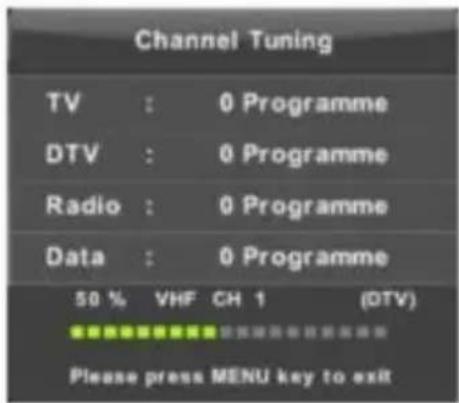
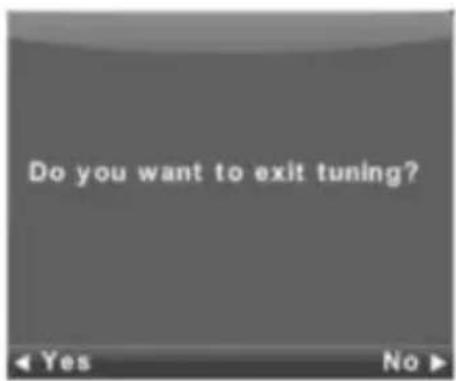
Menaxhimi i Menusë

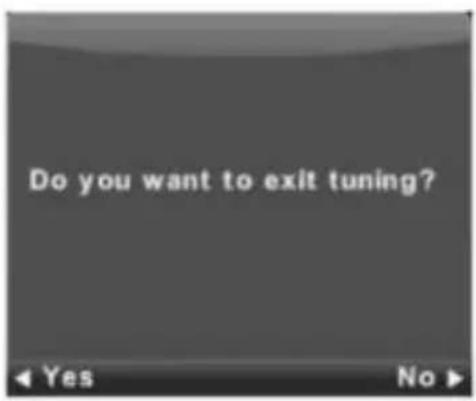
ATV vendosje manuale
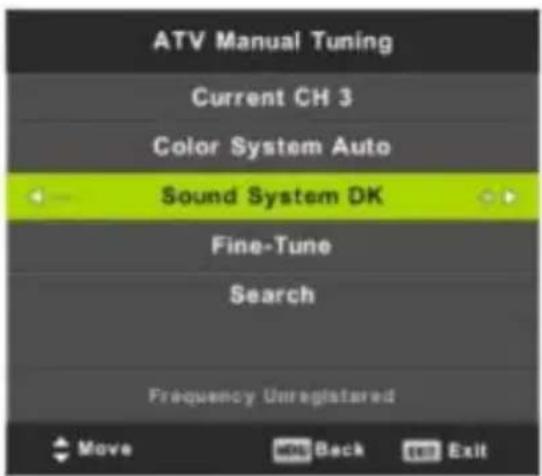
Programi aktual. Zgjidhni numrin e programit.

Menaxhimi i Menusë
Menuja e figurave
Zvogëlimi I zhurmave
Menaxhimi i Menusë
Mënyra e zërit
Menaxhimi i Menusë
Menuja e filmave
Kujtesë
Kujtesë
Kujtesë
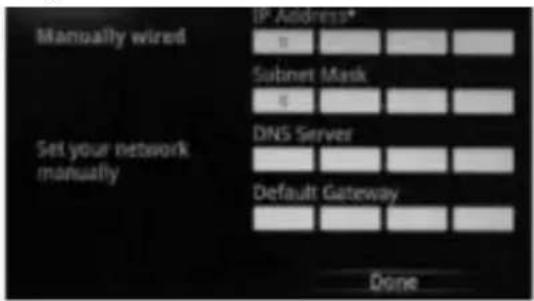
Konfigurim manual i Ethernetit
Kujtesë
natural_image
Underwater view of a coastal area with visible water droplets and directional arrows (no text or symbols)Kujtesë

natural_image
Illustration showing a no-smoking sign, a car on a road with smoke, and a computer monitor (no text or symbols)Сигурносни мерки


natural_image
Illustration showing a person using a computer with a prohibition symbol, a chair, and a monitor (no text or symbols present)natural_image
Illustration of a cable being connected to a computer monitor (no text or symbols present)
natural_image
Illustration of a person using a computer (no text or symbols visible)natural_image
Illustration of a computer monitor with a crossed-out X symbol above it (no text or labels)High-definition multimedia interface.
Прифатливи видео сигнали се 480Р/576Р/720Р/1080Л/1080Р
3. VGA:
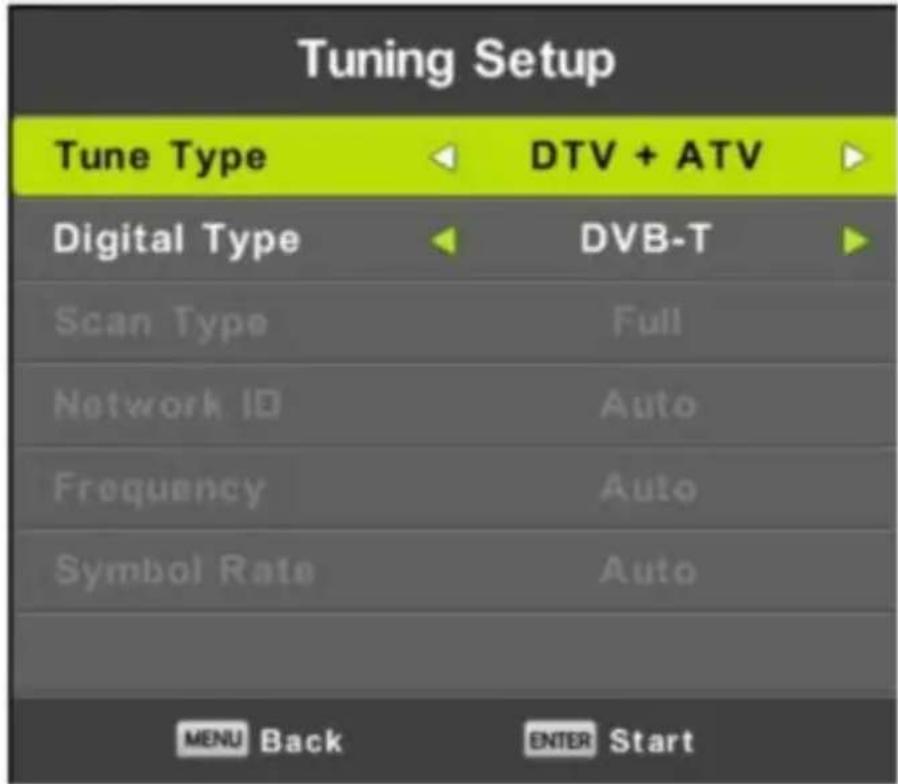

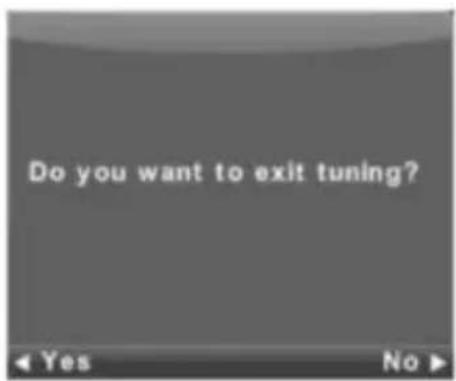
Управување со мени
Мени за програма



Начин на звук
Balance: This item can adjust the speaker's output, it enables you to listen to best at your position. Auto Volume: This item is used for reducing the difference between channel and program's volume automatically.
Мени време
Управување со
MOHITA
Подсетник
Подсетник
Подсетник
Подсетник
natural_image
Underwater view of a coastal area with visible water and scattered debris (no text or symbols)Подсетник
ОПИС
Attaching the Stand to the TV
1. Assemble the stand
Before attaching/detaching the stand, make sure to turn off the TV.
-Before performing work spread cushioning over the base area to lay the LED TV on.
This will prevent it from being damaged.
TV-32LE74SM
Stand installation instruction

- Combine the TV base and stand neck, fix them with 4pcs of screws (The one with gasket on it).
- Place the TV body on a flat table, and put the TV base on it, ensure the screw holes matching.
- Fix the TV body and TV base with another 4 pcs of screws (The one without gasket on it).
- Finished.
TV-40LE74SM
Stand installation Instruction

- Combine the TV base and stand neck, fix them with 4pcs of screws (The one with gasket on it).
- Place the TV body on a flat table, and put the TV base on it, ensure the screw holes matching.
- Fix the stand and TV body with 4 pcs of screws (BM4x14mm, upper 4 holes) and 3 pcs of screws (BB4x12mm, lower 3 holes).
Warning

Warning

No any spare parts for maintenance attached. Do not open the back cover to avoid electric shock.
Please contact our after-sale service personnel if necessary
Warning: Do not open the back cover to avoid electric shock. No additional spare parts are inside the case. Any questions. please contact our service personnel.

A triangle with a lightning arrow imRemind you of probable higt voltage here in case of electric shock.

A triangle with an excalmatory mark in iRemind you that the parts here are very important .if replacement etc.is needed,please refer to relevant technical Specifications.
Warning: Do not put the TV in rainy or foggy places to prevent from fire or electric shock. Do not apply hard objects to attrite or knock on the liquid crystal screen since these may cause scratches or damages.
Warning: Modifying the product without any authorization is forbidden.
NOTE:
excessive sound pressure from earphones and headphones can cause hearing loss. An appliance coupler is used as the disconnect device, the disconnect device shall remain readily operable.
Safety
Please immediately pull out the AC power plug from adapter. If there is an abnormal sound or smell or the LED TV has sound but no picture, and contact after sales support.


natural_image
Illustration showing a no-smoking sign, a car on a road with smoke, and a computer monitor (no text or symbols)The LED TV should be kept from high temperature heating objects or direct sunlight. It requires good ventilation. Allow 10cm between the LED TV and other appliances or built-in cabinet walls.
The LED TV should be kept free from rain, damp and dust to prevent electrical shock and short circuits.
Do not cover the ventilation openings with table clothes, curtains, newspapers etc.

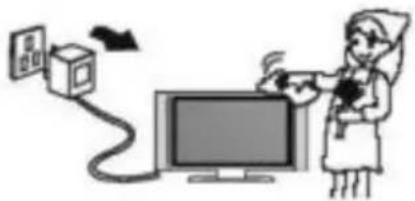
Do not wipe the LED TV with any petrol, chemical or alcohol based solvents as it will lead to product damage of the panel and cabinet.
You may clean the display panel with a soft clean cloth after pulling out the power plug. Do not repeatedly wipe the panel, nor scrape, tap or strike the panel with a hard object.

natural_image
Illustration showing a person using a computer with a prohibition symbol, a chair, and a monitor (no text or symbols present)Do not place the power cord or other cables across a walkway in case it is trampled on. Do not overload the power cord or power socket.

Do not place the LED TV on an unstable surface.

natural_image
Illustration of a person using a computer monitor (no text or symbols visible)
natural_image
Illustration of a cable being connected to a computer monitor (no text or symbols visible)Do not disassemble the back cover as it contains high voltages inside and will cause electric shock. Internal adjustments and checks should only be conducted by qualified professionals.
Do not place naked flame sources, such as lit candles on or near the LE D TV.
Please pull out the power plug and contact after sales support If there are abnormal objects or water in the TV.

natural_image
Illustration of a computer monitor with a crossed-out X symbol above it (no text or symbols present)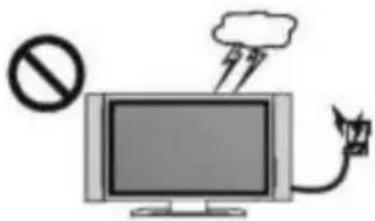
Pull out the power cord and antenna cable during electrical storms so the LED TV is not damaged by electrical surges. Keep all people away from the antenna cable during electrical storms.
Table of Contents
Warning ....
Safety ....
Table of Contents ......
Control Panel ......
Terminal Wiring Diagram
Remote Contro ......
Picture Menu ....
Sound Menu ....
Channel Menu......
Lock System ....
Setup Menu ......
USB Opreation ....
Media Menu......
Congratulations! You have chosen the latest generation high definition liquid crystal television. Endowed with high display quality and light weight, it is power-saving and radiationless with high sensitivity television reception. The new generation liquid crystal television will bring you safe&comfortable brand new visual experience.
Applying color active matrix TFT with brand new technologies, the product can provide high quality display Image .flicker free television .VCD&DVD programs. In addition. It can be used as definition digital television or computer display. We believe the product will surely make you satisfied.
Thank you for purchasing and using our products!
Control panel
The control button for front panel is in the back of TV

POWER
Turn the TV on or enter into standby mode.
INPUT
Signal source selection button.
MENU
Enter/exit the main menu.
VOL-
Volume decreasing short cut key; enter into the next menu and adjust OSD options (decreasing).
VOL +
Volume Increasing short cut key; enter Into the next menu and adjust OSD options(increasing).
CH-
Channel decreasing short cut key; decrease the channel No. and select the last option In the menu.
CH+
Channel increasing short cut key; Increase the channel No. and select the next option In the menu.
Connecting Cables
"This LED TV has digital multimedia" performance and can be connected to multiple external devices. The following diagram presents the connections to other video and audio ^appliances.

- USB:
It is used to updating the software of the DVB-T/C and DTV, and it should only be operated by a qualified TV technician.
User can access multi-media files stored in the USB device.
The supported format includes :
*.dat, *.vob, *.mpg and *.avi video formats. Besides, *.jpg, *.bmp and *.mp3
(DTV1080P hd programs burn, you must use more than streaming system of speed or move hard disk). 2/12. HDMI1/HDMI2:
High-definition multimedia interface.
Note: Acceptable video signal 480P/576P/720P/1080I/1080P
- VGA:
This can be connected with the D-sub 15 pin singnal cable to your PC.
-
RF IN(DVB-S2): Connect to receivesatellite TV signal.
-
SCART:
Scart input 6.CI:
CI input.
7.AV
To connect to the Composite VIDEO (R/L) output sockets on external video devices.
- VGA AUDIO:
PC audio input.
- COAXIAL
Digital TV sound output.
- EARPHONE:
Headphone to headphones.
11.Y/Pb/Pr
Y/Pb/Prinput.
Descriptions of Television Remote Control

TV MODE:
-
POWER Button C <|) ) Press this button to turn the TV on or into standby mode
-
MUTE Button (D\$) Press this button to mute the sound and the sign of mute will appear all the while if you do not press again. 3.AUDIO Button Change audio mode:left, right, mono, stereo. 4.ASPECT
Button Select different size. 5.PMODE Button
Select the different picture mode directly.
6.SMODE Button
Select the different sound mode directly.
Press these buttons to enter digits. These buttons for direct access to use a channel to enter channel number for both ATV and DTV or enter password for Parental lock.
- -/-buttons
Press to change the channel bit
- CP Button
This button is used to return to the previous channel
- DISPLAY Button
Press this button to display the information on current Input.
- MEDIA Button
Enter to USB
channel
- AUTO Button
PC channel images automatic calibration shortcuts
- RED Button Use in TXT,
DTV and TV
- GREEN Button Use
in TXT, DTV and TV
- YELLOW Button Use
in TXT, DTV and TV
- CYAN Button Use in
TXT, DTV and TV
17 .SLEEP Button
Sleep time setting.
18 .SOURCE Button
Source setting.
- ENTER Button
To confirm the choice with the highlighted menu item, to display the channel list In the no-menu.
- A/▶ Button
Decrease/Increase the option value.
- A/T Button
Select the previous/next function option.
22 MENU.Button Adjust out
the system menu.
23 .EXIT Button
Exit function.
- CH A/T Buttons
Increase/decrease the channel.
- VOLA/VButtons
Increase/decrease the volume.

- TEXT Button Display the teletext
on screen. MI Button Play or pause.
27 .REVEAL Button Display the
characters hid. <44 Button Fast
reverse. 28. SIZE Button
Change the size of current page. M»-
Button Fast Forward.
29 .INDEX Button
Ask for the list of main TV letter broadcast page Number. ■
Button
Press this button to STOP.
30 .S.TITLE Button
Display/OFF the subtitle on screen.
M4 Button
Skip to previous track or chapter.
- S.PAGE Button Display the
current sub-page. W Button
Skip to next track or chapter.
32 .HOLD Button
Hold the current page and prevent against being updated.
On DTV, press the button to enter the Time Shift function.
33 .FAV Button Favourite
program channel button
34 .RADIO Button
In the DTV source, press is to enter "Radio" channel and press it again to enter
DTV channel 3S.EPG Button
To show the Electronic Program Guide during no-menu state only. 36.R.LIST
Button Open the recording documents list
- • Button
Record
- FAV-button
Favourite program channel down button
- FAV+button
Favourite program channel up button
Notes:
The remote control shall be applied in effective reception scope of the television. Make the remote control point towards the infrared receiver of the liquid crystal television and ensure that there are no obstacles. Its normal operation distance will be shortened in direct sunlight or lamplight. Be careful to use the remote control .avoid falling off or being trampled or splashed with liquids.


Press INPUT button to display the input source list,
Press ▼ / ▲ or OK button to select the input source you want to,
Press OK button to enter the input source,
Press EXIT button to quit.
Connect an RF cable from the Tv's input called "RF-In" and to your TV Aerial socket. Select Language
Press ◀ / ▶ button to select the language to be used for menus and message. Select Country
Press ▼ / ▲ button to highlight country menu. Press ◀ / ▶
button to select the country you want to.
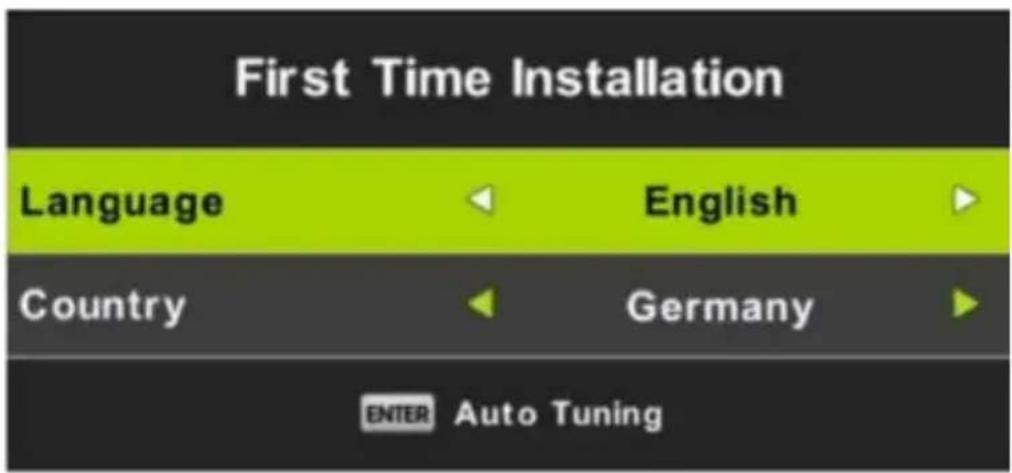

Auto Tuning
First tuning ATV, press Menu and left arrow button to skip ATV tuning, Second tuning DTV, press Menu and left arrow button to skip DTV tuning.


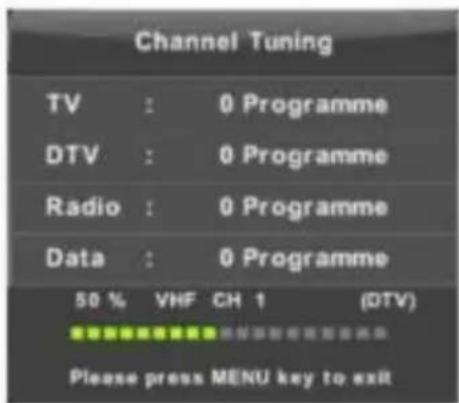

Channel Menu
Press MENU button to display the main menu.
Press ◀ / ▶ button to select CHANNEL in the main menu.
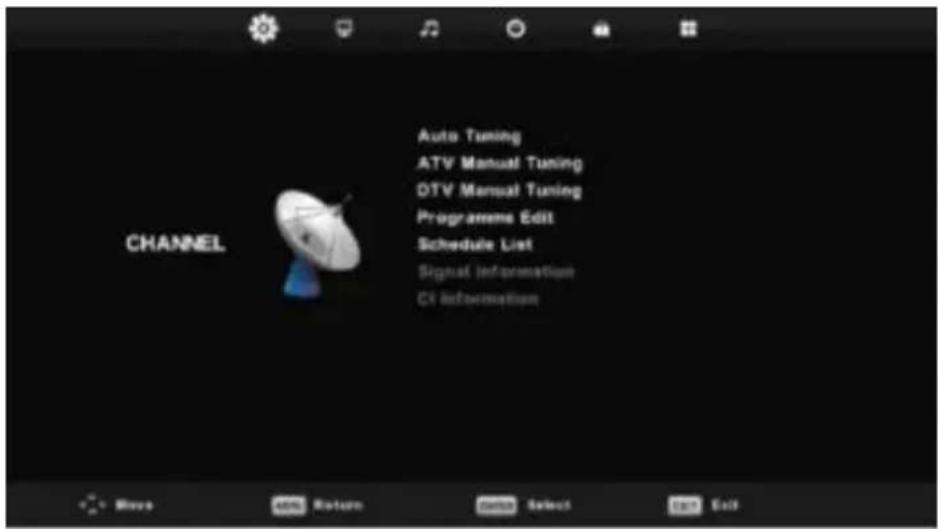
- Press ▼ / ▲ button to select the option that you want to adjust in the CHANNEL menu.
- Press Enter button to adjust.
- After finishing your adjustment, Press Enter button to save and return to the previous menu. Auto Tuning Press ▼ / ▲ button to select Auto Tuning, then press Enter/^ button to enter.

Menu Operation


ATV Manual Tuning
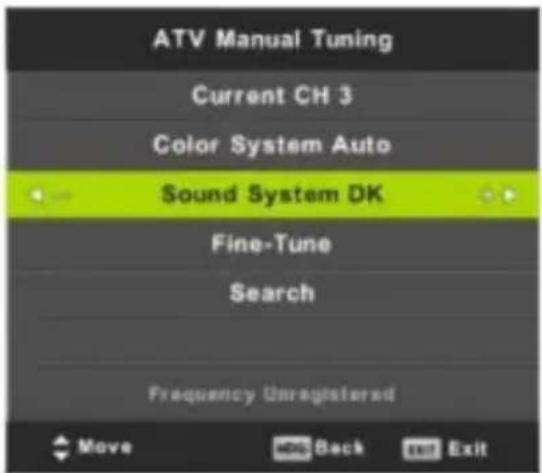
Current CH
Set the channel number.
Color System
Select the color system
(Available System: AUTO, PAL, SECAM)
Sound System
Select the Sound system
Fine-Turn
Adjust the frequency of the channel finely.
Search
Start searching channel.
Menu Operation
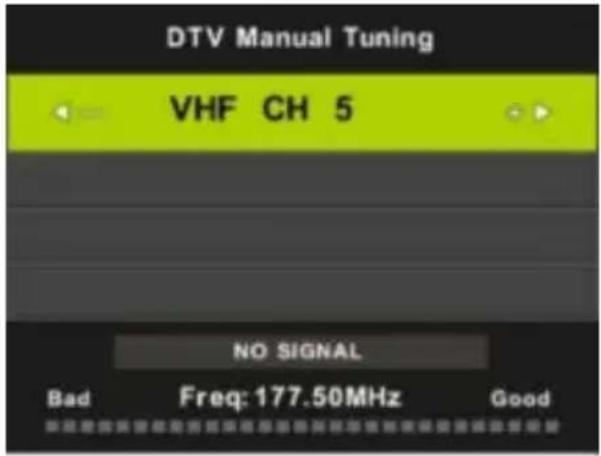
DTV Manual Tuning
Press ▼ / ▲ button to select DTV Manual Tuning, then press Enter button to enter sub-menu. Press ◀ / ▶ button to select channel, then press Enter button to search program.
Program Edit
Press ▼ / ▲ button to select Prog ram Edit, then press Enter button to enter sub-menu.


The three colored key is the shortcut key for programming the channel.
First press ▼ / ▲ to highlight the channel you want to select, then:
Press the Red button to delete the program in the list.
Press the Yellow button to move the channel in favorite list.
Press the Blue button to skip the selected channel.
Press Fav button to add or remote the channel to your favorite list.
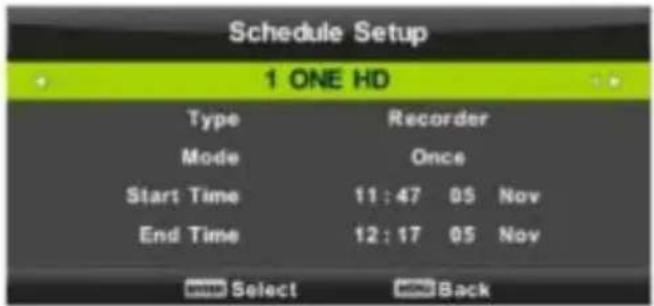
Schedule List
Press ▼ / ▲ button to select Schedule List, then press Enter button to enter sub-menu. It is available in source.

Press the YELLOW button to enter the interface below.

When the time appointment is conflict, it will produce a warning message.

Signal Information
Press ▼ / ▲ button to select Signal Information, press the Enter button to see the detail information about the signal. Only available when there is signal in DTV.

Menu Operation
Picture Menu
Press MENU button to display the main menu.
Press ◀ / ▶ button to select PICTURE in the main menu.

- Press ▼ / ▲ button to select the option that you want to adjust in the PICTURE menu.
- Press OK button to adjust.
- After finishing your adjustment, Press MENU button to save and return back to the previous menu.
Picture Mode
Press ▼ / ▲ button to select Picture Mode, then press OK button to enter sub-menu. You can change the value of contrast, brightness, color, sharpness and tint when the picture is in Personal mode.
TIPS: You can press PMODE button to change the Picture Mode directly.

Contrast/ Brightness/ Color/ Tint / Sharpness
Press ▼ / ▲ button to select option, then press ◀ / ▶ button to adjust. Contrast Adjust
the highlight intensity of the picture, but the shadow of the picture is invariable.
Brightness Adjust the optical fiber output of the entire picture, it will effect the dark region of the picture.
Color Adjust the saturation of the color based on your own like.
Tint Use in compensating color changed with the transmission in the NTSC code.
Sharpness Adjust the peaking in the detail of the picture.
Color Temp
Change the overall color cast of the picture.
Press ▼ / ▲ button to select Color Temperature, then press OK button to enter sub-menu.
Press ◀ / ▶ button to select. (Available Picture mode: Cool, Medium, Warm).
You can change the value of red, green and blue when the color temperature is in User mode.

Cold Increase the blue tone for the white.
Normal Increase the sex-linked colors for the white. Warm
Increase the red color for the white.
Noise Reduction
To filter out and reduces the image noise and improve picture quality.
Press ▼ / ▲ button to select Noise Reduction, then press OK button to enter sub-menu.

Menu Operation
Off Select to turn off video noise detection.
Low Detect and reduce low video noise.
Middle Detect and reduce moderate video noise.
High Detect and reduce enhanced video noise.
Default Set as Default.
Sound Menu
Press MENU button to display the main menu.
Press ◀ / ▶ button to select SOUND in the main menu.
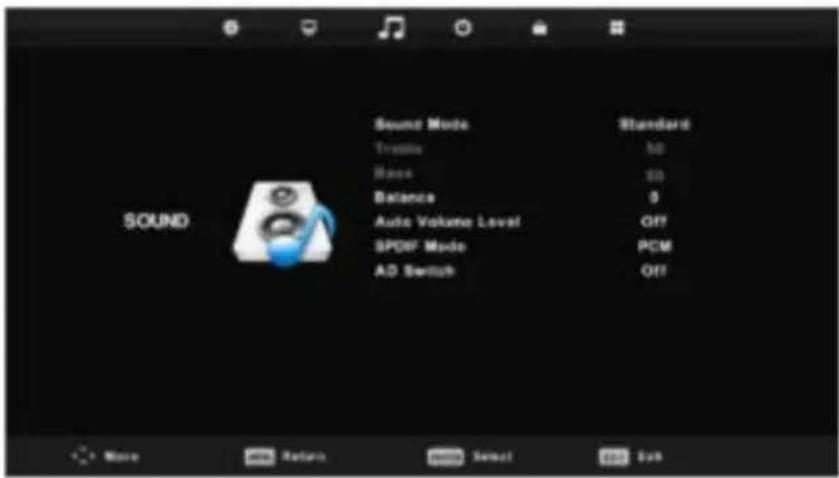
- Press ▼ / ▲ button to select the option that you want to adjust in the SOUND menu.
- Press Enter button to adjust.
- After finishing your adjustment, Press Enter button to save and return to the previous menu.
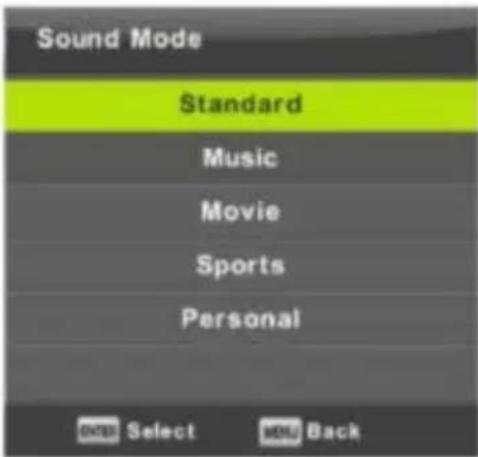
Sound Mode
Press ▼ / ▲ button to select Sound Mode, then press Enter button to enter sub-menu. PressT/^ button to select.
Menu Operation
You can change the value of Treble and Bass when the sound is in Personal mode.
TIPS: You can press SMODE button on the remote control to change the Sound Mode directly.
| Standard | Produces a balanced sound in all environments. |
| Music | Preserves the original sound.Good for musical programs. |
| Movie | Enhances treble and bass for a rich sound experience. |
| Sports | Enhances vocals for sports. |
| Personal | Select to customize picture settings. |
Note: The treble and bass are only available in User mode, you can adjust them as you like. Balance
Press ▼ / ▲ button to select option, Press ◀ / ▶ button to adjust. Auto
Volume level
Press ▼ / ▲ button to select Auto Volume Level, then press ◀ / ▶ button to select On or Off. SPDIF Mode
Press ▼ / ▲ button to select SPDIF Mode, then press ◀ / ▶ button to select Off / PCM / Auto. AD Switch
Press ▼ / ▲ button to select AD Switch, then press ◀ / ▶ button to select On or Off. Amblyopia function for the blind, the tracks will be mixed describe the current screen. It need codestream to support.
NOTE:
Balance: This item can adjust the speaker's output, it enables you to listen to best at your position. Auto Volume: This item is used for reducing the difference between channel and program's volume automatically.
Time Menu
Press MENU button to display the main menu. Press ◀ / ▶ button to select TIME in the main menu.

- Press ▼ / ▲ button to select the option that you want to adjust in the TIME menu.
- Press Enter button I to adjust.
- After finishing your adjustment, Press Enter button to save and return to the previous menu. Time Zone Press ▼ / ▲ button to select Time Zone, then press Enter button to enter sub-menu.
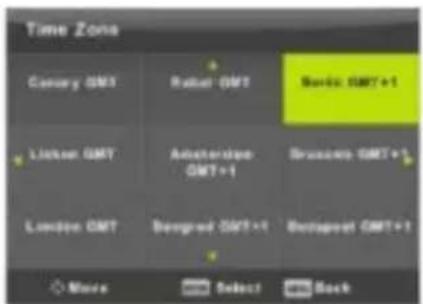
Press ▼ / ▲ / ◀ / ▶ button to select time zone.
Sleep Timer

Press ▼ / ▲ button to select Sleep Timer, then press Enter button to enter sub-menu.
Press ▼ / ▲ button to select. (Available options are:Off, 10min, 20min, 30min, 60min, 90min, 120min, 180min, 240min).
Menu Operation
Auto Standby

Press ▼ / ▲ button to select Auto Standby, then press Enter button to enter sub-menu.
Press ▼ / ▲ button to select.
Tips: The remote control does not make any operation in the hypothesis time, it will close down automatically. If you do any operation, it will reset the time.
OSD Timer
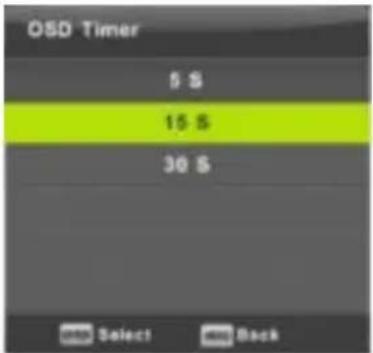
Press ▼ / ▲ button to select OSD Timer, then press Enter button to enter sub-menu.
Press ◀ / ▶ button to select.
Lock Menu
Press MENU button to display the main menu. Press ◀ / ▶ button to select Lock in the main menu.
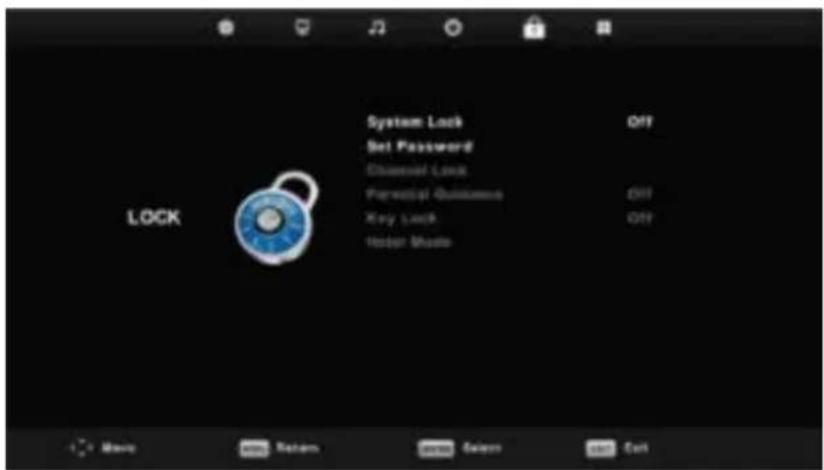
- Press ▼ / ▲ button to select the option that you want to adjust in the LOCK SYSTEM menu.
- Press Enter/-^ / ▶ button to adjust.
- After finishing your adjustment, Press MENU button to return back to the previous menu
Lock System

Press ▼ / A button to select Lock System, then press Enter button to make the following 3 options valid.
Default password is 0000, and if forget what you set, please call the service center.
Set Password
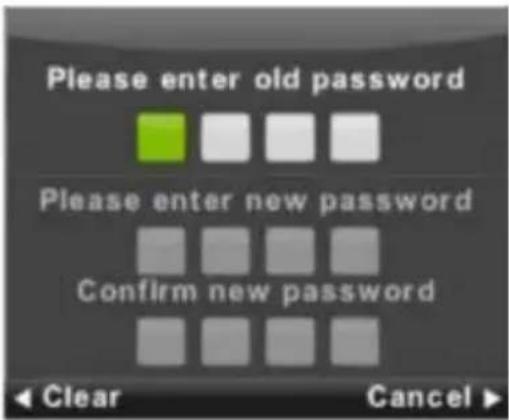
Press ▼ / A button to select Set Password, then press Enter button to enter sub-menu to set new password.
Channel Lock

Press ▼ / ▲ button to select Channel Lock then press Enter button to enter sub-menu to select.
Press Green button to lock or unlock the channel.
Parental Guidance

Press T / ▲ button to select Parental Guidance, then press Enter button to enter sub-menu to select the number of age which is suitable for your children.
Key Lock
Press ▼ / ▲ button to select Key Lock, then press ◀ / ▶ button to select Off or On. When Key Lock's statue is on, you can't use the Key panel button.
Hotel Mode

- Press ▼ / ▲ button on the remote control to select hotel mode in the Lock menu.
- Press Enter button on the remote control to enter the sub-menu.
- After finishing your adjustment, Press MENU button to save and return back to the previous menu. Hotel Mode
Press ▼ / ▲ button to select Hotel Mode, then press ◀ / ▶ button to select on or off. Source
Lock
Press ▼ / ▲ button to select Source Locke, then press Enter button to enter sub-menu to select. Default Source
Press ▼ / ▲ button to select Default Source, then press Enter button to enter sub-menu to select. Default Prog Press ▼ / ▲ button to select Default Prog, then press ◀ / ▶ button to adjust. It is available when the default source is TV.
Max Volume
Press ▼ / ▲ button to select Max Volume, then press ◀ / ▶ button to adjust. Clear Lock Press ▼ / ▲ button to select Clear Lock, then press Enter button to clear the setting you have done before.
Setup Menu
Press MENU button to display the main menu.
Press ◀ / ▶ button to select SETUP in the main menu.

-
Press ▼ / ▲ button to select the option that you want to adjust in the SETUP menu.
-
Press Enter button to adjust.
-
After finishing your adjustment, Press Enter button to save and return to the previous menu.
OSD Language
Select an OSD menu language can be displayed. Default English is
selected as menu language. Press ▼ / ▲ / ◀ / ▶ button to select Menu

TT Language
Press T / ▲ button to select TT Language, then press Enter button to enter sub-menu. Press T /
▲ / ◀ / ▶ button to select TT language.

Menu Operation
Audio Languages
Press ▼ / ▲ button to select Audio Languages, then press Enter button to enter sub-menu. Press ◀ / ▶ button to select the primary of Audio Languages. Press ▼ / ▲ / ◀ / ▶ button to select the Audio Languages.

Subtitle Language
Press ▼ / ▲ button to select Subtitle Language, then press Enter button to enter sub-menu. Press ◀ / ▶ button to select the primary of Subtitle Language. Press ▼ / ▲ / ◀ / ▶ button to select the Subtitle Language.
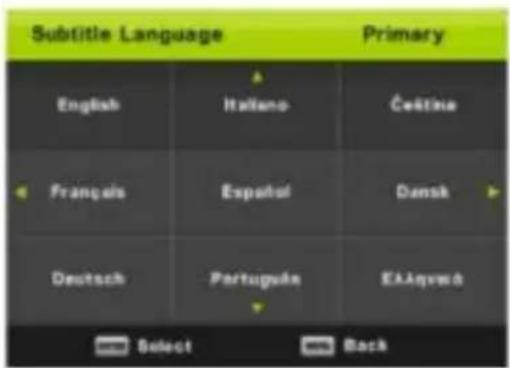
Hearing Impaired
Press ▼ / ▲ button to select Hearing Impaired, then press Enter button to select On or Off.
PVR File System
Press ▼ / ▲ button to select PVR File System, then press Enter button to enter sub-menu. Press ▼ / ▲ button to select Check PVR File System, then press Enter button to enter. Then it will check the USB

Aspect Ratio
Press T / ▲ button to select Aspect Ratio, then press Enter button to enter sub-menu. Press T / ▲ button to select aspect ratio. (Available options are: Auto, 4:3,16:9, Zoomi, Zoom2).

Blue Screen
Press ▼ / ▲ button to select Blue Screen, then press Enter button to select On or Off. First Time
Installation
Press ▼ / ▲ button to select First time installation, then press Enter button to enter. Reset
Press ▼ / ▲ button to select Reset, then press Enter button to enter sub-menu. Software
Update(USB)
Press ▼ / ▲ button to select Software Update (USB), plug your USB device in the USB slot, then press Enter button to update the right software.
HDMI CEC
Press ▼ / ▲ button to select HDMI CEC, then press Enter button to enter the sub-menu.

HDMI CEC Press ◀ / ▶ button to turn the HDMI CEC on or off.
HDMI ARC Press ◀ / ▶ button to turn the HDMI ARC on or off.
Auto Standby Press ◀ / ▶ button to turn the Auto Standby on or off.
Device List Press Enter button to open the main menu of device.
Press MENU button to display the main menu.
Press ◀ / ▶ button to select SCREEN in the main menu.
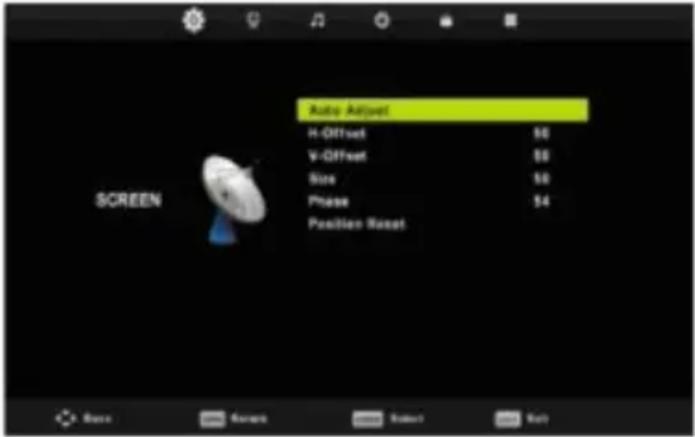
- Press ▼ / ▲ button to select the option that you want to adjust in the SCREEN menu.
- Press Enter button to adjust.
- After finishing your adjustment, Press Enter button to save and return to the previous menu. Auto
Adjust
Press Enter button to start adjusting H-Offset/V-Offset/Size/Phase automatically. H-Offset. Adjust the horizontal position of the picture.
Press ▼ / ▲ button to select H-Offset, then press Enter button to enter sub-menu.
V-Offset
Adjust the vertical position of the picture.
Press ▼ / ▲ button to select V-Offset, then press Enter button to enter sub-menu. Size Adjust the display size.
Press ▼ / ▲ button to select Size, then press Enter button to enter sub-menu. Phase Adjust the horizontal interfering lines.
Press ▼ / ▲ button to select Phase, then press Enter button to enter sub-menu. Position Reset
Press ▼ / ▲ button to select Position Reset, then press Enter button to enter.
Notes:
- Noise Reduction in PICTURE option is invalid.
- AD Switch in SOUND option is invalid.
- TIME menu and description are the same as that for Air mode.
- Block Program and Parental Guidance in LOCK option is invalid.
- Audio Languages, Subtitle Language, Hearing Impaired and PVR File System in SETUP option is invalid. 6.PC mode has no CHANNEL menu.
USB
Note: Before operating Media menu, Plug in USB device, then press INPUT button to set the Input Source to Media.
Press ▼ / ▲ button to select Media in the Source menu, then press Enter button to enter.

Press ◀ / ▶ button to select the option you want to adjust in the main Media menu, then press Enter button to enter.
Photo Menu
Press ◀ / ▶ button to select PHOTO in the main menu, then press Enter button to enter. Press Exit button to return to the previous menu and exit menu to quit.

Press ◀ / ▶ button to select the file you want to watch in the file selecting menu, then press media button to display picture.
When highlighting the option you select, the file information will appear on the right and picture will be previewed in the center.

Music Menu
Press ◀ / ▶ button to select MUSIC in the main menu, then press Enter button to enter. Press Exit button to return to the previous menu and exit menu to quit.
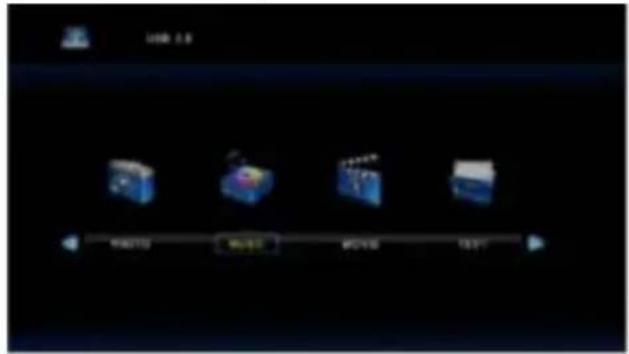

Press ◀ / ▶ button to select drive disk you want to watch, then press Enter button to enter. Press ◀ / ▶ button to select return option to the previous menu.

Movie Menu
Press ◀ / ▶ button to select MOVIE in the main menu, then press Enter button to enter. Press Exit button to return to the previous menu and exit menu to quit.

Press ◀ / ▶ button to select drive disk you want to watch, then press Enter button to enter. Press media button to play the selected movie.
Press display button to select menu in the bottom you want to run, then press Enter button to operate. Press Exit button to back to the previous menu and exit button to quit the entire menu.
![24 [AVC 7485V600 7422K V6r 55-06K 29:13] 00:00:01 / 00:03:28 Pause FB FF Prev Next Stop ChorRed Repeat(ALL)](/content/2026/05/977866/images/4e8d3d8e42937ad2ce92dfd99b8fbaf2c54a402a6e758ba36bf1ffe6429ebd98.jpg)
Text Menu
Press ◀ / ▶ button to select TEXT in the main menu, then press Enter button to enter. Press Exit button to return to the previous menu and exit menu to quit.

Press ◀ / ▶ button to select drive disk you want to watch, then press Enter button to enter. Press ◀ /
▶ button to select return option to back to the previous menu.
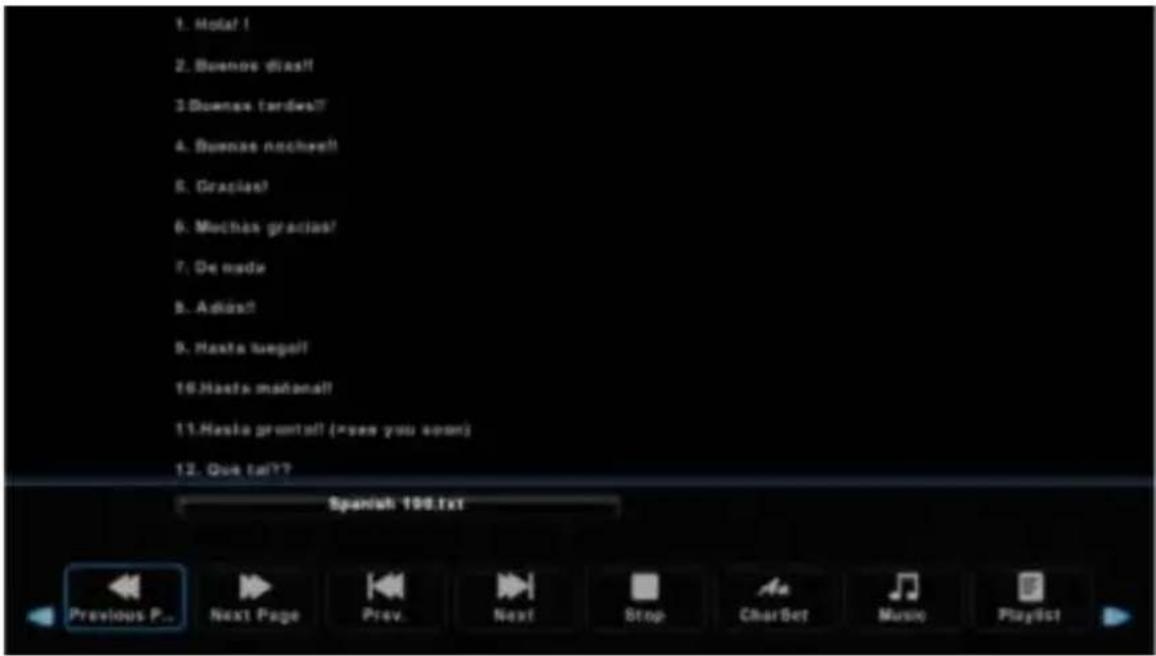
Before operating the unit, please read through this manual.
PLACEMENT
- Do not place the unit on an unstable cart, stand, tripod, bracket, table, or shelf.
- Do not expose the unit to direct sunlight and other sources of heat.
- Do not handle liquids near or on the unit.
- Never spill liquid of any kind into the unit
- Do not put the unit near appliances that create magnetic fields.
- Do not put heavy objects on top of the unit.
TEMPERATURE
- Do not place the unit near or over a radiator or a heater register.
- If your unit is suddenly moved from a cold to a warm place, unplug the power cord for at least two hours so that moisture that may have formed inside the unit can dry completely.
HUMIDITY
- Do not expose machine in rain, damp or place near water.
- Ensure the indoor drying, cool.
VENTILATION
- Keep the ventilation openings clear.
1.1. WELCOME PAGE
When the Android Box is first powered up, Welcome Page will be shown. It will help you to configure the device.

+Reminder
If you want to skip this wizard, press "HOME" key If you have finished this wizard once, it will not auto-open again
1.2. Setup page
Select Language:
| Language | English (United Kingdom) |
| English (New Zealand) | |
| English (Singapore) | |
| Choose your Language: | English (United States) |
| 日本語(日本) | |
| pyockeiR (Poucon) | |
| 中文(简体) | |
| 中文(聖體) |
Select network type:

+Reminder
If you do not want to choose your network, you can skip this step by press "Skip". You will also find the network settings in function "Settings"
1.2. Setup page
Select Wireless network(Wi-Fi)
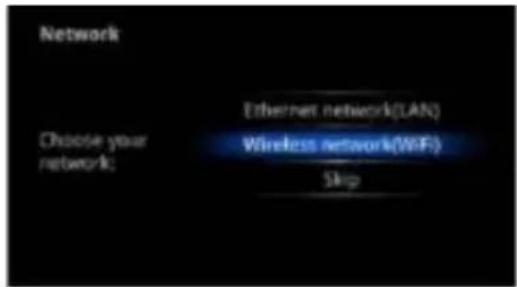
+Reminder
If choosee'Wi-Fi', select a Wi-Fi
Access Point
If choHse'Ethernet', the screen will show
Ethernet connection status
Select Ethernet network(LAN)

Configure Ethernet manually

Set up the correct Time Zone

+Reminder
If netw&k is not connected, setup the date and time manually
1.2. Setup page
Setup time/data manually


Configuration

Adjust screen size, using the arrow buttons on remote control

natural_image
Underwater view of a coastal area with visible water droplets and directional arrows (no text or symbols)+Reminder
User can setup the Language, Network, Time Zone, Data/Time, and adjust screen size in this part
2.1 Main Launcher
Press the arrow buttons .*/▼ to select the icon and press "enter" the sub-screen

FUNCTIO
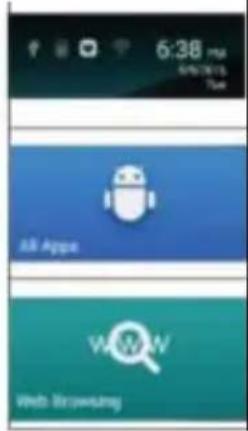
DESCRIPTION
Main Laucher tab contains: Time information(You can set time information at settings) Function status contains: Wi-Fi;Micro SD card;USB connection (White for working,gray for standby)
All App menu can view and select more apps
The Browsertab contains bookmarks and search bar. Hallows you enjoy yourtime on surfing Internet. You can search for information and watch online TV etc.
2.1 Main Launcher

| DESCRIPTION |
| Add you favorite APP to this directory |
| Add the player to this directory |
| The Settings screen contains most of the customizing and configuration options, such as language, aspect ratio and network settings |
2.2 SETTINGS
2.2.1 Network

| Settings | Generation introduction |
| Wi-Fi settings | Turn on/off Wi-FiIf on, to show the Ap lists. Need to manually choose a SSID to connect, If the Ap is encrypted, need to enter the password |
| Ethernet | | Turn on/off EthernetIf on, to obtain IP address automatically by DHCP |
2.2 SETTINGS
2.2.2 Display

| Settings | Generation introduction |
| HOMI auto-detection | Automatically selects the best resolution of the output device according to hdmi |
| Display Position | Setting the screen display range |
| Start screen saver | Set the screen saver time |
2.2 SETTINGS
2.2.3 Advanced

| Settings | Generation introduction |
| CEC Control option | |
| CEC Control | |
| Location | Set countrySet provinceSet city |
| Digital audio auto-detection | Select the digital audio output automaticallyaccording to hdmi output device |
| Digital Audio Output | Manually select digital audio output : PCM/HDMI passthrough |
2.2 SETTINGS
2.2.4 Other

Settings


| Generation introduction |
| Restore factory default |
| Update system via update.zip from USB flash drive or micro SD card |
| Enter advance setting menu. |
| StatusModel numberAndroid VersionKernel VersionBuild number |
2.3 APPLICATIONS
Install from USB Flash Drive
- Open the "File manager"
- Choose your USB flash drive or any other mass storage's folder
- Find you application, and press it
- Press the install button
- You can find the application in tab "Apps" after installation
Download & install from Browser
- Open the Browser.
- Press search key and input your website address
- Download the APK file which you like if there is a link for download (If you have problems with downloading, please make sure there is enough space in your internal storage)
Install from ApkInstaller
- Open the ApkInstaller
- Find the icon of the application, and enter it
- Press the install button
- You can find the application in tab "Apps" after installation
2.3 APPLICATIONS

Remove Applications
- Enter SETTINGS
- Enter "Applications"
- Find the application you want to remove in tab "All"
- Enter the icon and press "Uninstall"
- Press "OK" to confirm uninstall
2.4 Browser
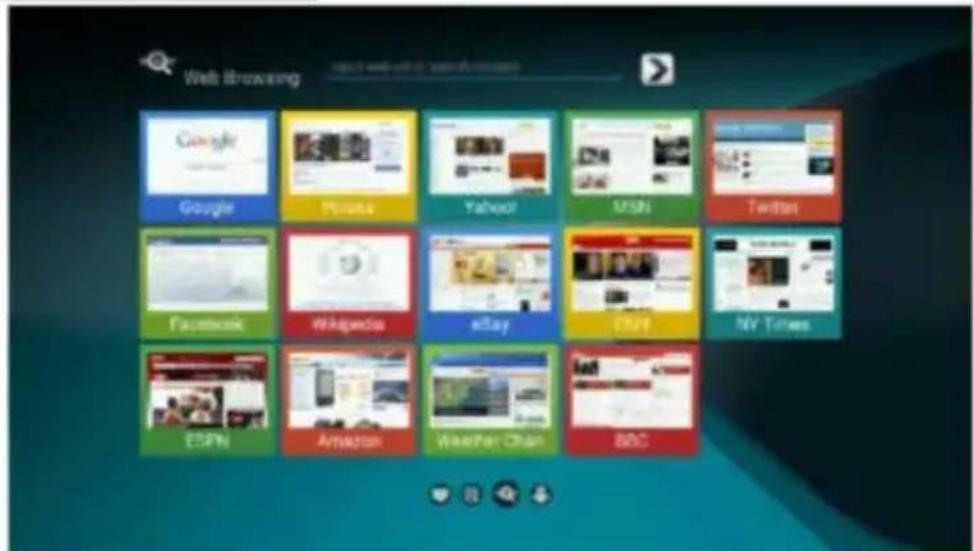
+You will use the buttons as follow
- Menu Key Call out the menu of browser
- Back Key Back to the last page
You will use the mouse buttons as follow
- Left click
Click to confirm entering or choosing
• Right click Click to back - MouseWheel In webview: Flip over, Page up&down
POŠTOVANI!
Zahvaljujemo na kupnji Vivax uređaja i nadamo se da ćete biti zadovoljni odabirom. Ako u jamstvenom roku bude potreban popravak proizvoda, mollimo savjetujte se sa ovlaštenim prodavačem koji Vam je proizvod prodao ili nas kontaktirajte na dolje navedene brojeve i adrese. MOLIMO VAS DA PRIJE UPORABE PROIZVODA PAŽLJIVO PROČITATE UPUTE PRILOŽENE UZ PROIZVODI
JAMSTVENI LIST
VIVAX
HR
MODEL UREĐAJA
SERIJSKI BROJ
DATUM PRODAJE
BROJ RAČUNA PRODAVATELJA
POTPIS I PEČAT PRODAVATELJA
POTPIS I PEČAT PRODAVATELJA
- Ovom garancijom garantira proizvođač proizvoda, preko KIM TEC d.o.o., kao uvoznika i davatelja garancije u Republici Bosni i Hercegovini besplatan popravak istog u skladu s važećim propisima i u skladu s uvjetima opisanim u ovom garantnom listu. Ovom garancijom garantiramo da će predmet ove garancije raditi bez greške uzrokovane eventualnom lošom izradom i lošim materijalom izrade. Svi eventualno nastali kvarovi biti će besplatno otklonjeni u ovlaštenom servisu u garantnom roku.
- UVJETI GARANCIJE Garantni rok počinje teći od dana kupnje proizvoda i traje 12 mjeseci, osim za Vivax Imago televizore (CRT, LCD, PDP) za koje jamstvo traje 24 mjeseca.
- U slučaju kvara na proizvodu koji je predmet ove garancije, obavezujemo se da ćemo isti popraviti u najkraćem mogućem roku, a najkasnije u roku od 45 dana. Ako se proizvod ne može popraviti ili se ne popravi u roku od 45 dana, biti će zamijenjen novim. Ako popravak proizvoda traje duže od 10 dana, garancija će se produžiti za vrijeme trajanja popravka.
- Garancija se priznaje samo uz račun o kupnji, te uz ovaj garantni list koji mora biti ispravno popunjen odnosno mora sadržavati datum prodaje, pečat i potpis prodavatelja.
- Davalac garancije osigurava servis i rezervne dijelove 7 godina od datuma kupnje.
- GARANCIJA NE OBUHVAĆA
POTPIS I PEČAT PRODAVCA
-
Ovom garancijom garantuje proizvođač proizvoda, preko KIM TEC CG d.o.o., kao uvoznika i davaoca garancije u Republici Crnoj Gori besplatan popravak istog u skladu s važećim propisima i u skladu s uslovima opisanim u ovom garantnom listu. Ovom garancijom garantujemo da će predmet ove garancije raditi bez greške uzrokovane eventualnom lošom izradom i lošim materijalom izrade. Svi eventualno nastali kvarovi biti će besplatno otklonjeni u ovlaštenom servisu u garantnom roku.
-
USLOVI GARANCIJE Garantni rok počinje teći od dana kupovine proizvoda i traje 12 mjeseci, osim za Vivax Imago televizore (CRT, LCD, PDP) za koje jamstvo traje 24 mjeseca.
-
U slučaju kvara na proizvodu koji je predmet ove garancije, obavezujemo se da ćemo isti popraviti u najkraćem mogućem roku, a najkasnije u roku od 45 dana. Ako se proizvod ne može popraviti ili se ne popravi u roku od 45 dana, biće zamijenjen novim. Ako popravak proizvoda traje duže od 10 dana, garancija će se produžiti za vrijeme trajanja popravke.
-
Garancija se priznaje samo uz račun o kupovini, te uz ovaj garantni list koji mora biti ispravno popunjen odnosno mora sadržiti datum prodaje, pečat i potpis prodavaoca.
-
Davalac garancije osigurava servis i rezervne dijelove 7 godina od datuma kupnje.
-
GARANCIJA NE OBUHVATA Redovnu provjeru, održavanje uz zamjenu dijelova koji se troše normalnom upotrebom. Prilagođavanje ili promjene za poboljšanje proizvoda za primjenu koje nijesu opisane u tehničkim uputama za korištenje, osim ako je za te promjene predočena saglasnost KIM TEC CG d.o.o.
-
Garancija se ne priznaje u sljedećim slučajevima: Ako kupac ne predoči ispravan garantni list i račun o kupovini. Ako se kupac nije pridržavao uputa o korištenju proizvoda. Ako je proizvod otvaran, prepravljan ili popravljan od neovlaštene osobe. Ako su kvarovi na proizvodu nastali djelovanjem više sile kao što su: udar groma, strujni udari u električnoj mreži elementame nepogode i slično. Ako su kvarovi nastali oštećivanjem zbog nepropisane upotrebe ili nepravilnim transportovanjem. Ako je kvar nastao greškom u sistemu na koji je proizvod priključen.
-
Ovaj garantni list ne miljenja zakonska potrošačka prava važeća u Republici Crnoj Gori u odnosu na ona koja propisuje proizvođač. Naziv davaoca garancije: Kim Tec CG d.o.o. Čemovsko polje bb, 81000 Podgorica, Crna Gora
CENTRALNI SERVIS (CALL CENTAR):
Kim Tec CG d.o.o., Čemovsko Polje bb,
Tel: 020/608-251, E-mail za opšte upite: servis@kimtec-cg.com
SERVIS
DATUM PRIJEMA UREĐAJA U SERVIS
DATUM POPRAVKA
DATUM PRIJEMA UREĐAJA U SERVIS
DATUM POPRAVKA
DATUM PRIJEMA UREĐAJA U SERVIS
DATUM POPRAVKA
POPIS SERVISNIH MJESTA
VIVAX
CG
| Grad | Ovlašteni servis | Br. telefona | Adresa |
| PODGORICA | TV C. ĐEČEVIĆ | 020 620 981 | Bulevar Save Kovačevića 153 |
| NIKŠIĆ | TV SERVIS NENAD | 069 024 945 | Kosovska bb |
| NIKŠIĆ | TV SERVIS GORANOVIĆ | 040 213 868;067 502 663 | Ljubljanska 3 |
| BIJELO POLJE | DIGITAL TV SERVIS -MUZUROVIĆ | 050 431 399 | Škurije Međenovića |
| BIJELO POLJE | VIDEO KOMERC | 050 431 265 | Radomira Medojevića bb |
| BERANE | TV SERVIS KUDUK | 051 234 664 | Donje Luge bb |
| PLJEVLJA | TV SERVIS JOVO | 069 087 325 | Rudarsko naselje bb |
| BAR | RTV servis Lalić | 030 311 810 | Makedonsko naselje bb |
| TIVAT | SERVIS MIKI | 069 046 712 | Gradlošnica bb |
Kosova Electronic Service Center
Kosova Electronic Service Center
-VIVAX Air Conditions; White Goods and Small Home Appliances
TÊ NDERUAR!
- Sigurnosne mjere
- VGA:
- SCART:
- 7.AV
- Automatsko podešavanje
- Upravljanje izbornikom
- Izbornik programa
- ATV ručno podešavanje
- Raspored prikaza
- Podatci o signalu
- Izbornik slike
- Način prikaza slike
- Kontrast/Svjetlina/Boja/Tonalitet/Oštrina
- Sound Mode
- Roditeljski nadzor
- Zaključavanje tipki
- Hotel Mod
- Hotel Mode
- HDMI CEC
- Auto Adjust
- H-Offset.
- V-Offset
- Izbornik filmova
- Izbornik teksta
- Položaj
- Podsjetnik
- Postavke
- Ekran
- Napredne
- Ostalo
- Aplikacije
- Instaliranje preko USB-a
- Sadržaj
- Upravljački meni
- Meni programa
- Podaci o signalu
- Meni slike
- Kontrast/Svetlina/Boja/Tonalitet/Oštrina
- "Način" zvuka
- Timer za automatsko gašenje
- Zaključavanje tastera
- Jezik obaveštenja
- Jezik titlova
- Meni teksta
- Sigurnosne mere
- Podsetnik
- Glavni pokretač
- OPIS
- Masat e sigurisë
- Vendosje automatike
- Menaxhimi i Menusë
- ATV vendosje manuale
- Menuja e figurave
- Zvogëlimi I zhurmave
- Mënyra e zërit
- Menuja e filmave
- Kujtesë
- Сигурносни мерки
- Управување со мени
- Мени за програма
- Начин на звук
- Мени време
- Управување со
- MOHITA
- Подсетник
- ОПИС
- Attaching the Stand to the TV
- Assemble the stand
- TV-32LE74SM
- Stand installation instruction
- TV-40LE74SM
- Warning
- NOTE:
- Safety
- Table of Contents
- Control panel
- POWER
- INPUT
- MENU
- VOL-
- VOL +
- CH-
- CH+
- Connecting Cables
- Descriptions of Television Remote Control
- TV MODE:
- Notes:
- Auto Tuning
- Channel Menu
- Menu Operation
- ATV Manual Tuning
- DTV Manual Tuning
- Program Edit
- Schedule List
- Signal Information
- Picture Menu
- Picture Mode
- Contrast/ Brightness/ Color/ Tint / Sharpness
- Color Temp
- Noise Reduction
- Sound Menu
- Volume level
- Time Menu
- Sleep Timer
- Auto Standby
- OSD Timer
- Lock Menu
- Parental Guidance
- Key Lock
- Lock
- Max Volume
- Setup Menu
- OSD Language
- TT Language
- Audio Languages
- Subtitle Language
- Hearing Impaired
- PVR File System
- Aspect Ratio
- Blue Screen
- Installation
- Update(USB)
- Adjust
- USB
- Photo Menu
- Music Menu
- Movie Menu
- Text Menu
- PLACEMENT
- TEMPERATURE
- HUMIDITY
- VENTILATION
- WELCOME PAGE
- +Reminder
- Setup page
- Main Launcher
- DESCRIPTION
- SETTINGS
- Network
- Display
- Advanced
- Other
- Settings
- APPLICATIONS
- Install from USB Flash Drive
- Download & install from Browser
- Install from ApkInstaller
- Remove Applications
- Browser
- You will use the mouse buttons as follow
- POŠTOVANI!
- JAMSTVENI LIST
- VIVAX
- HR
- POTPIS I PEČAT PRODAVATELJA
- POTPIS I PEČAT PRODAVCA
- SERVIS
- DATUM PRIJEMA UREĐAJA U SERVIS
- DATUM POPRAVKA
- POPIS SERVISNIH MJESTA
- Kosova Electronic Service Center
- TÊ NDERUAR!
Brand : Vivax
Model : TV-40LE74SM
Category : Television