
MS-B1 - CD Player ONKYO - Free user manual and instructions
Find the device manual for free MS-B1 ONKYO in PDF.


| Product Type | CD Player |
| Brand | Onkyo |
| Model | MS-B1 |
| Dimensions (W x H x D) | 215 mm x 99 mm x 305 mm |
| Weight | 2.8 kg |
| Power Supply | AC 120V 60Hz (US model) / AC 220-240V 50/60Hz (international model) |
| Power Consumption | 15 W |
| Disc Compatibility | CD, CD-R, CD-RW |
| Audio Outputs | Analog RCA (L/R), Digital Optical (Toslink) |
| Frequency Response | 20 Hz - 20 kHz |
| Signal-to-Noise Ratio | ≥ 100 dB |
| Total Harmonic Distortion | < 0.005 % |
| Dynamic Range | ≥ 96 dB |
| Supported Formats | CD-DA, MP3 |
| Playback Modes | Repeat (All, Single, Random), Program |
| Display | Fluorescent Display |
| Remote Control | Included (RC-810S) |
| Color | Silver or Black |
| Safety Certifications | CE, RoHS |
| Cleaning | Use a soft, dry cloth. Do not apply liquids directly. |
| Repairability | Professional service only; user-replaceable fuse |
Frequently Asked Questions - MS-B1 ONKYO
User questions about MS-B1 ONKYO
0 question about this device. Answer the ones you know or ask your own.
Ask a new question about this device
Download the instructions for your CD Player in PDF format for free! Find your manual MS-B1 - ONKYO and take your electronic device back in hand. On this page are published all the documents necessary for the use of your device. MS-B1 by ONKYO.
USER MANUAL MS-B1 ONKYO
Hard Disk Music Library
MB-S1
Instruction Manual

Thank you for purchasing the Onkyo Hard Disk Music Library.
Please read this manual thoroughly before making connections and plugging in the unit. Following the instructions in this manual will enable you to obtain optimum performance and listening enjoyment from your new Hard Disk Music Library. Please retain this manual for future reference.
Contents
Before using 2
Facilities and connections 8
Operation 16
Carry Tunes 45
Appendix 54
WARNING:
TO REDUCE THE RISK OF FIRE OR ELECTRIC SHOCK, DO NOT EXPOSE THIS APPLIANCE TO RAIN OR MOISTURE.
CAUTION:
TO REDUCE THE RISK OF ELECTRIC SHOCK, DO NOT REMOVE COVER (OR BACK). NO USER-SERVICEABLE PARTS INSIDE. REFER SERVICING TO QUALIFIED SERVICE PERSONNEL.

WARNING RISK OF ELECTRIC SHOCK DO NOT OPEN


The lightning flash with arrowhead symbol, within an equilateral triangle, is intended to alert the user to the presence of uninsulated "dangerous voltage" within the product's enclosure that may be of sufficient magnitude to constitute a risk of electric shock to persons.

The exclamation point within an equilateral triangle is intended to alert the user to the presence of important operating and maintenance (servicing) instructions in the literature accompanying the appliance.
Important Safeguards
-
Read Instructions – All the safety and operating instructions should be read before the appliance is operated.
-
Retain Instructions - The safety and operating instructions should be retained for future reference.
-
Heed Warnings - All warnings on the appliance and in the operating instructions should be adhered to.
-
Follow Instructions - All operating and use instructions should be followed.
-
Cleaning - Unplug the appliance from the wall outlet before cleaning. The appliance should be cleaned only as recommended by the manufacturer.
-
Attachments - Do not use attachments not recommended by the appliance manufacturer as they may cause hazards.
-
Water and Moisture—Do not use the appliance near water – for example, near a bath tub, wash bowl, kitchen sink, or laundry tub; in a wet basement; or near a swimming pool; and the like.
-
Accessories – Do not place the appliance on an unstable cart, stand, tripod, bracket, or table. The appliance may fall, causing serious injury to a child or adult, and serious damage to the appliance. Use only with a cart, stand, tripod, bracket, or table recommended by the manufacturer, or sold with the appliance. Any mounting of the appliance should follow the manufacturer's instructions, and should use a mounting accessory recommended by the manufacturer. PORTABLE CART WARNING
-
An appliance and cart combination should be moved with care. Quick stops, excessive force, and uneven surfaces may cause the appliance and cart combination to overturn.

-
Ventilation – Slots and openings in the cabinet are provided for ventilation and to ensure reliable operation of the appliance and to protect it from overheating, and these openings must not be blocked or covered. The openings should never be blocked by placing the appliance on a bed, sofa, rug, or other similar surface. The appliance should not be placed in a builtin installation such as a bookcase or rack unless proper ventilation is provided. There should be free space of at least 5 cm (2 in.) and an opening behind the appliance.
-
Power Sources - The appliance should be operated only from the type of power source indicated on the marking label. If you are not sure of the type of power supply to your home, consult your appliance dealer or local power company.
-
Grounding or Polarization - The appliance may be equipped with a polarized alternating current line plug (a plug having one blade wider than the other). This plug will fit into the power outlet only one way. This is a safety feature. If you are unable to insert the plug fully into the outlet, try reversing the plug. If the plug should still fail to fit, contact your electrician to replace your obsolete outlet. Do not defeat the safety purpose of the polarized plug.
-
Power-Cord Protection - Powersupply cords should be routed so that they are not likely to be walked on or pinched by items placed upon or against them, paying particular attention to cords at plugs, convenience receptacles, and the point where they exit from the appliance.
- Lightning - For added protection for the appliance during a lightning storm, or when it is left unattended and unused for long periods of time, unplug it from the wall outlet and disconnect the antenna or cable system. This will prevent damage to the appliance due to lightning and power-line surges.
- Overloading - Do not overload wall outlets, extension cords, or integral convenience receptacles as this can result in a risk of fire or electric shock.
- Object and Liquid Entry - Never push objects of any kind into the appliance through openings as they may touch dangerous voltage points or short-out parts that could result in a fire or electric shock. Never spill liquid of any kind on the appliance.
- Servicing - Do not attempt to service the appliance yourself as opening or removing covers may expose you to dangerous voltage or other hazards. Refer all servicing to qualified service personnel.
- Damage Requiring Service – Unplug the appliance form the wall outlet and refer servicing to qualified service personnel under the following conditions:
A. When the power-supply cord or plug is damaged,
B. If liquid has been spilled, or objects have fallen into the appliance,
C. If the appliance has been exposed to rain or water,
D. If the appliance does not operate normally by following the operating instructions. Adjust only those controls that are covered by the operating instructions as an improper adjustment of other controls may result in damage and will often require extensive work by a qualified technician to restore the appliance to its normal operation,
E. If the appliance has been dropped or damaged in any way, and
F. When the appliance exhibits a distinct change in performance – this indicates a need for service.
19. Replacement Parts – When replacement parts are required, be sure the service technician has used replacement parts specified by the manufacturer or have the same characteristics as the original part. Unauthorized substitutions may result in fire, electric shock, or other hazards.
20. Safety Check – Upon completion of any service or repairs to the appliance, ask the service technician to perform safety checks to determine that the appliance is in proper operation condition.
21. Wall or Ceiling Mounting - The appliance should be mounted to a wall or ceiling only as recommended by the manufacturer.
22. Heat - The appliance should be situated away from heat sources such as radiators, heat registers, stoves, or other appliances (including amplifiers) that produce heat.
23. Liquid Hazards - The appliance shall not be exposed to dripping or splashing and no objects filled with liquids, such as vases shall be placed on the appliance.
1. Recording Copyright
Recording of copyrighted material for other than personal use is illegal without permission of the copyright holder.
2. Power
WARNING
BEFORE PLUGGING IN THE UNIT FOR THE FIRST TIME, READ THE FOLLOWING SECTION CAREFULLY.
The voltage of the available power supply differs according to country or region. Be sure that the power supply voltage of the area where this unit will be used meets the required voltage (e.g., AC 230 V, 50 Hz or AC 120 V, 60 Hz) written on the rear panel.
Turning off the standby button does not shut off the power completely. So the power cord should be removed from the AC outlet when the unit is not used for a prolonged time.
3. Do not touch this unit with wet hands
Do not handle this unit or power cord when your hands are wet or damp. If water or any other liquid enters the case, take this unit to an authorized service center for inspection.
4. Location of this unit
Place this unit in a well-ventilated location.
Take special care to provide plenty of ventilation on all sides of this unit especially when it is placed in an audio rack. If ventilation is blocked, this unit may overheat and malfunction.
Do not expose this unit to direct sunlight or heating units as this unit's internal temperature may rise and shorten the life of the pickup.
Avoid damp and dusty places and places directly affected by vibrations from the speakers. In particular, avoid placing the unit on or above one of the speakers.
Be sure this unit is placed in a horizontal position. Never place it on its side or on a slanted surface as it may malfunction.
Do not place near tuners or TV sets.
If placed next to a TV or tuner, it may cause reception interference resulting in some noise in the TV or tuner output.
5. Care
From time to time you should wipe the front and rear panels and the cabinet with a soft cloth. For heavier dirt, dampen a soft cloth in a weak solution of mild detergent and water, wring it out dry, and wipe off the dirt. Following this, dry immediately with a clean cloth.
Do not use rough material, thinners, alcohol or other chemical solvents or cloths since these could damage the finish or remove the panel lettering.
6. Points to remember
If this unit is brought from a cold environment to a warm one or is in a cold room that is quickly heated, condensation may form on the pickup, preventing proper operation. In this case, remove the disc and leave the power ON for about one hour to remove the condensation.
When transporting this unit, be careful not to bump it.
DANGER:
INVISIBLE LASER RADIATION WHEN OPEN AND INTERLOCK FAILED OR DEFEATED. AVOID DIRECT EXPOSURE TO BEAM.
CAUTION:
THIS PRODUCT UTILIZES A LASER. USE OF CONTROLS OR ADJUSTMENTS OR PERFORMANCE OF PROCEDURES OTHER THAN THOSE SPECIFIED HEREIN MAY RESULT IN HAZARDOUS RADIATION EXPOSURE.
For U.S. model
The laser is covered by a housing which prevents exposure during operation or maintenance. However, this product is classified as a Laser Product by CDRH (Center for Devices and Radiological Health) which is a department of the Food and Drug Administration. According to their regulations 21 CFR section 1002.30, all manufactures who sell Laser Products must maintain records of written communications between the manufacturer, dealers and customers concerning radiation safety. If you have any complaints about instructions or explanations affecting the use of this product, please feel free to write to the address on the back page of this manual. When you write us, please include the model number and serial number of your unit.
In compliance with Federal Regulations, the certification, identification and the period of manufacture are indicated on the rear panel.
FCC INFORMATION FOR USER
CAUTION:
The user changes or modifications not expressly approved by the party responsible for compliance could void the user's authority to operate the equipment.
NOTE:
This equipment has been tested and found to comply with the limits for a Class B digital device, pursuant to Part 15 of the FCC Rules. These limits are designed to provide reasonable protection against harmful interference in a residential installation. This equipment generates, uses and can radiate radio frequency energy and, if not installed and used in accordance with the instructions, may cause harmful interference to radio communications. However, there is no guarantee that interference will not occur in a particular installation. If this equipment does cause harmful interference to radio or television reception, which can be determined by turning the equipment off and on, the user is encouraged to try to correct the interference by one or more of the following measures:
- Reorient or relocate the receiving antenna.
- Increase the separation between the equipment and receiver.
- Connect the equipment into an outlet on a circuit different from that to which the receiver is connected.
- Consult the dealer or an experienced radio/TV technician for help.
Declaration of Conformity
We, ONKYO EUROPE
ELECTRONICS GmbH INDUSTRIESTRASSE 20 82110 GERMERING, GERMANY

declare in own responsibility, that the ONKYO product described in this instruction manual is in compliance with the corresponding technical standards such as EN60065, EN55013, EN55020 and EN61000-3-2, -3-3.
GERMERING, GERMANY

ONKYO EUROPE ELECTRONICS GmbH
Memory Preservation
This unit does not require memory preservation batteries. A built-in memory power back-up system preserves the contents of the memory during power failures and even when the unit is unplugged. The unit must be plugged-in in order to charge the back-up system.
The memory preservation period after the unit has been unplugged varies depending on climate and placement of the unit. On the average, memory contents are protected over a period of a few weeks after the last time the unit was unplugged. This period is shorter when the unit is exposed to a highly humid climate.
For Canadian model
NOTE: THIS CLASS B DIGITAL APPARATUS COMPLIES WITH CANADIAN ICES-003.
For models having a power cord with a polarized plug:
CAUTION: TO PREVENT ELECTRIC SHOCK, MATCH WIDE BLADE OF PLUG TO WIDE SLOT, FULLY INSERT.
This unit contains a semiconductor laser system and is classified as a "CLASS 1 LASER PRODUCT". So, to use this model properly, read this Instruction Manual carefully. In case of any trouble, please contact the store where you purchased the unit. To prevent being exposed to the laser beam, do not try to open the enclosure.

This label on the rear panel states that:
-
This unit is a CLASS 1 LASER PRODUCT and employs a laser inside the cabinet.
-
To prevent the laser from being exposed, do not remove the cover. Refer servicing to qualified personnel.
For British model
Replacement and mounting of an AC plug on the power supply cord of this unit should be performed only by qualified service personnel.
IMPORTANT
The wires in the mains lead are coloured in accordance with the following code:
Blue : Neutral
Brown : Live
As the colours of the wires in the mains lead of this apparatus may not correspond with the coloured markings identifying the terminals in your plug, proceed as follows:
The wire which is coloured blue must be connected to the terminal which is marked with the letter N or coloured black.
The wire which is coloured brown must be connected to the terminal which is marked with the letter L or coloured red.
IMPORTANT
A 5 ampere fuse is fitted in this plug. Should the fuse need to be replaced, please ensure that the replacement fuse has a rating of 5 amperes and that it is approved by ASTA or BSI to BS1362. Check for the ASTA mark or the BSI mark on the body of the fuse.
IF THE FITTED MOULDED PLUG IS UNSUITABLE FOR THE SOCKET OUTLET IN YOUR HOME, THEN THE FUSE SHOULD BE REMOVED AND THE PLUG CUT OFF AND DISPOSED OF SAFELY. THERE IS A DANGER OF SEVERE ELECTRICAL SHOCK IF THE CUT OFF PLUG IS INSERTED INTO ANY 13 ampere SOCKET.
If in any doubt, please consult a qualified electrician.
Before using
Important Safeguards.... 2
Precautions 3
Contents 5
Main Features 6
Supplied accessories 7
Before using this unit 7
Installing the remote controller batteries 7
Using the remote controller.... 7
Facilities and connections
Parts names and functions 8
Connecting the MB-S1 12
Connecting to other components 13
Notes on CD and the internal hard disk drive .... 14
Rules for recording digital input 15
Operation
Understanding the basic operations before using the MB-S1.... 16
Turning on the power 18
Switching the CD player and HDD 18
Opening the CD tray 18
Setting date and time 19
Setting date and time 19
Displaying the date and time (Remote controller only) .... 19
Listening to an audio CD or CD-R 20
Listening to an audio CD or CD-R 20
Stopping playback 20
Selecting the track 20
Reversing and fast forwarding 20
Playing tracks repeatedly (remote controller only) ..... 20
Switching the display information 21
Recording 22
Recording an audio CD or CD-R synchronously ..... 22
Dubbing all tracks on a CD (CD dubbing) 23
Dubbing a track on a CD 23
Recording audio signals from external devices 24
Adjusting the recording level (Analog input only) ..... 25
Listening to tracks recorded on the HDD..... 26
Listening to tracks recorded on the HDD 26
Stopping the playback 26
Selecting a track you want to listen to 26
Reversing and fast forwarding 26
Playing tracks in a group in random order 26
Playing tracks repeatedly 26
Switching the display information 27
Naming tracks recorded on the HDD 28
Entering the name of a track 28
Entering characters 28
Selecting a genre 29
Erasing tracks recorded on the HDD 30
Erasing a track 30
Erasing an entire group 31
Creating a play list 32
Creating a play list.... 32
Listening to tracks using a play list.... 34
Listening to tracks using a play list 34
Stopping the playback 34
Selecting the track you want to listen to 34
Reversing and fast forwarding 34
Playing tracks in a play list in random order 35
Playing tracks in a play list repeatedly 35
Exiting the play list playback mode.... 35
Editing the play lists 36
Naming a play list 36
Moving a track within a play list 37
Deleting a track in a play list 37
Deleting a play list.... 38
Using various playback features.... 39
Playing track in sorted order 39
Marking a track as you favorite (FAVORITE IT function) .... 40
Playing your favorite tracks only 40
About combination of play modes 41
Displaying track information 41
Using timer functions 42
Setting a timer 42
Specifications 44
Carry Tunes
Overview of the supplied Carry Tunes software .... 45
System Requirements 46
Setting the PC 46
Installing the device driver 46
Confirming the installation of the device driver ..... 50
Installing the Carry Tunes 51
Install Procedure 51
Using Carry Tunes 52
Registering MP3 files with Carry Tunes.... 52
Main operations 52
Transferring MP3 music files to the MB-S1 53
Appendix
Troubleshooting guide 54
Main unit and remote controller 54
Playback....54
Recording/Editing 54
Timer 54
Others....55
Carry Tuncs 55
If one of the messages shown below appears 55
■Encoding the music files on an audio CD in MP3 format ^(1-1) and decoding the MP3 music files
- You can record tracks on an audio CD in MP3 format. The tracks are compressed approximately 1/10 in data size when using the standard 128 kbps bit rate ^(*2) .
• Available encoding bit rates are no compression (PCM), 96 kbps, 128 kbps, and 192 kbps. - You can display and edit the ID3 tag (^+3) information including song title, album title, and artist name.
- You can record from the built-in CD player, digital input and analog input. In addition, you can record (transfer) the tracks stored on your PC through USB interface.
- Sorting feature using the file information including ID3 tags is available for various playback modes.
- You can mark any tracks you like as your favorites and play only the favorite tracks.
■Playing audio CDs and CD-Rs
- You can play CD-Rs containing audio data in MP3 format as well as ordinary audio CDs.
- You can copy the MP3 files recorded on a CD-R to the internal hard disk drive (HDD) 10 times faster than when recording tracks from an audio CD (when using the QUICK REC feature).
■Longer hours recording with the internal hard disk drive (HDD)
- FDB (Fluid Dynamic Bearing) motor employed in the HDD section has the lowest vibration characteristics suited for motor-driven audio devices. This enables stability in playback.
- You can record and play MP3 music files many hours using the HDD. Approximately 350 hours of music can be recorded onto the 20GB HDD when using standard 128 kbps bit rate.
- Timer recording feature allows you to record long hour programs even while you are away from the MB-S1.
■Transferring music files from PC to the MB-S1
- The MP3 files stored on PC can be transferred to the MB-S1 through USB interface using the Carry Tunes (attached file transfer software).
*1 MP3
An audio compression format that is part of MPEG1 image compression technology.
*2 bit rate
The maximum amount of data that can be processed by a system per second.
Bit is the minimum unit expressed by 0 or 1 in digital data. kbps is the abbreviation of kilobit per second. The larger the bit rate is used, the greater the encoded file size is.
^*3 ID3 tag
The area for storing character information on MP3 file. You can add up to 128 bytes of character information such as album title and artist name. Each information will be limited to 30 characters long. The information entered in the ID3 tag area can be displayed and edited on the player which supports ID3 tag.

CT, Inc.
Digital controller board & Firmware are developed and provided by QPICT, Inc.
Supplied accessories
Check that the following accessories are supplied with the MB-S1.

natural_image
Line drawing of a remote control with two cylindrical batteries (no text or symbols)Remote controller × 1 Batteries (AA, R6 or UM-3) × 2

natural_image
Two bundles of bundled cables with various connectors (no text or symbols visible)Audio connection cables × 2

RI cable × 1
CD-ROM × 1
(Carry Tunes Installer Disc)

natural_image
Coiled electrical connector with two USB ports and connectors (no text or symbols visible)USB cable × 1
Instruction manual × 1
Warranty card × 1
Before using this unit
Installing the remote controller batteries
- Remove the battery compartment cover by pressing and sliding the cover.
- Insert two AA (R6 or UM-3) batteries into the battery compartment. Carefully follow the polarity diagram (positive (+) and negative (−) symbols) inside the battery compartment.
- After batteries are installed and seated correctly, replace the compartment cover.

natural_image
Three-step diagram showing battery charging process: moving, adding, and discharging (no text or symbols)Notes:
- Do not mix new batteries with old batteries or different kinds of batteries.
- To avoid corrosion, remove the batteries if the remote controller is not to be used for a long time.
- Remove dead batteries immediately to avoid damage from corrosion. If the remote controller does not operate smoothly, replace both the batteries at the same time.
- The life of the batteries supplied is about six months but this will vary depending on usage.
Using the remote controller
Point the remote controller toward the remote control sensor.
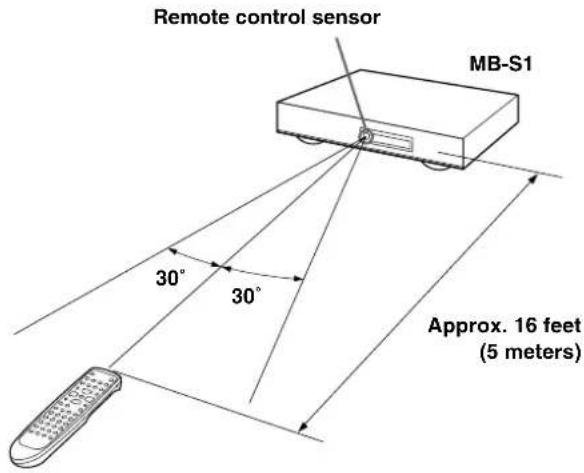
Notes:
- Place the unit away from strong light such as direct sunlight or inverted fluorescent light which can prevent proper operation of the remote controller.
- Using another remote controller of the same type in the same room or using the unit near equipment which uses infrared rays may cause operational interference.
- Do not put objects on the remote controller. Its buttons may be pressed by mistake and drain the batteries.
- Make sure the audio rack doors do not have colored glass. Placing the unit behind such doors may prevent proper remote controller operation.
- If there is any obstacle between the remote controller and the remote control sensor, the remote controller will not operate.
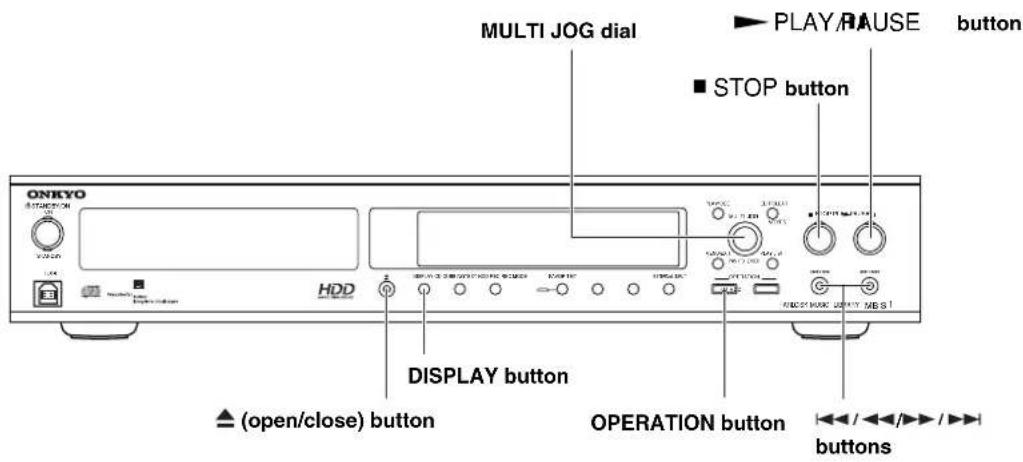
Front panel
The numbers within the brackets are the pages where the part or function is introduced.

① STANDBY/ON button [18]
Turns on the MB-S1 or places it in the standby state.
② MENU/EXIT button [19, 25, 42]
Switches the menu mode. Press this button while selecting any menu item to exit the menu.
③ PLAY MODE/YES button [28, 30-32, 39, 40]
Used together with the MULTI JOG dial to switch play mode.
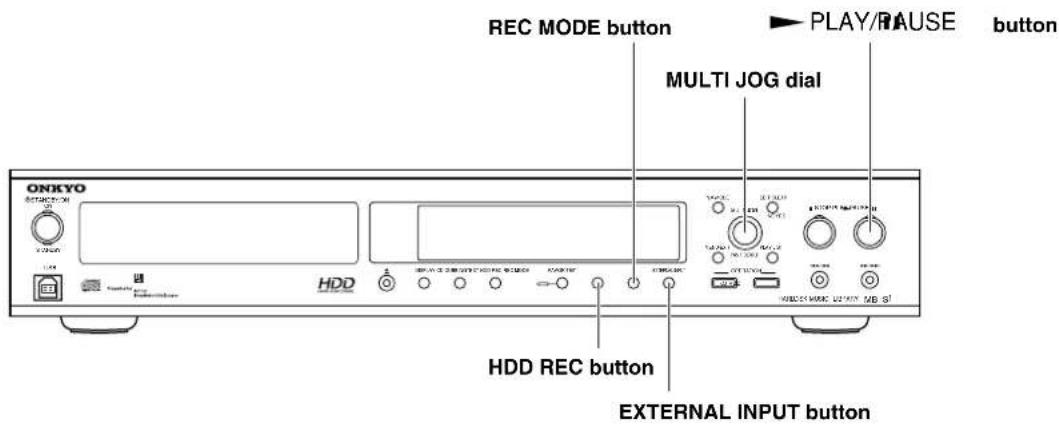
④ MULTI JOG dial [32, 36]
Used for selecting the group number (folder). When setting any mode, this dial is used for selecting the parameters for the mode. Also, press this dial to confirm the entry.
⑤ EDIT/CLEAR/NO button [29-31]
Press this button to enter the state for setting modes or parameters. When you are asked to select Yes or No, this button works as NO selection. While editing ID3 tag information, this button works as CLEAR button for canceling the entry.
⑥ PLAY LIST button [34, 36-38]
Used together with the jog dial to switch the play lists. You can store up to 100 play lists on memory of the MB-S1.
⑦ ■ STOP button [20, 26, 34]
Stops the playback of a CD or the HDD, or stops recording.
⑧ ▶ PLAY/■PAUSE button [20, 26, 34, 36]
Starts playing or recording tracks on a CD or the HDD. Press this button while playing or recording to pause the MB-S1. Press it again to resume playing or recording.
⑨ ▶▶/▶▶ button [20, 26, 29, 34]
Press to locate the beginning of the next track. Hold down to fast forward.
⑩ ◀◀/◀◀ button [20, 26, 29, 34]
Press to locate the beginning of the current or previous track. Hold down to reverse.
⑪ HDD button [18, 26, 34]
Activates the HDD section.
⑫ CD button [18, 20]
Activates the CD player section.
⑬ EXTERNAL INPUT [24]
Selects the external input source. The input sources switches between ANALOG, DIGITAL-1 (optical), and DIGITAL-2 (coaxial).
⑭ REC MODE button [22-24]
Switches the recording mode. The recording modes switches between MP3 128kbps, MP3 192kbps, PCM, and MP3 96kbps.
⑮ HDD REC button [22-24]
Puts the MB-S1 in the recording standby state. Press it again to select the group which the recorded tracks will belong to.
⑯ FAVORITE IT button and indicator [40]
Marks the currently selected or played track as your favorite. Pressing the button again unmarks the track.
⑰ CD DUBBING button [23]
Copies whole CDs onto the MB-S1's HDD with ease. When you copy the CD containing MP3 files, one group (folder) on the CD will be copied on to the HDD.
Enters the mode for entering and editing characters.
⑲ DISPLAY button [28, 29, 41]
Switches the information displayed in the display area (TITLE, ALBUM, ARTIST, GENRE, DATE, GROUP). Displays the letter you entered while editing information.
20 ▲ (open/close) button [18, 20]
Opens and closes the CD tray.
②1 USB port [12, 47]
Connects the MB-S1 to your PC. You can transfer MP3 audio files from a PC to the MB-S1's HDD using the Carry Tunes PC software.
The MB-S1 supports the hot plug capability, allowing you to connect or disconnect without turning the PC off.
Front panel display
The numbers within the brackets are the pages where the part or function is introduced.
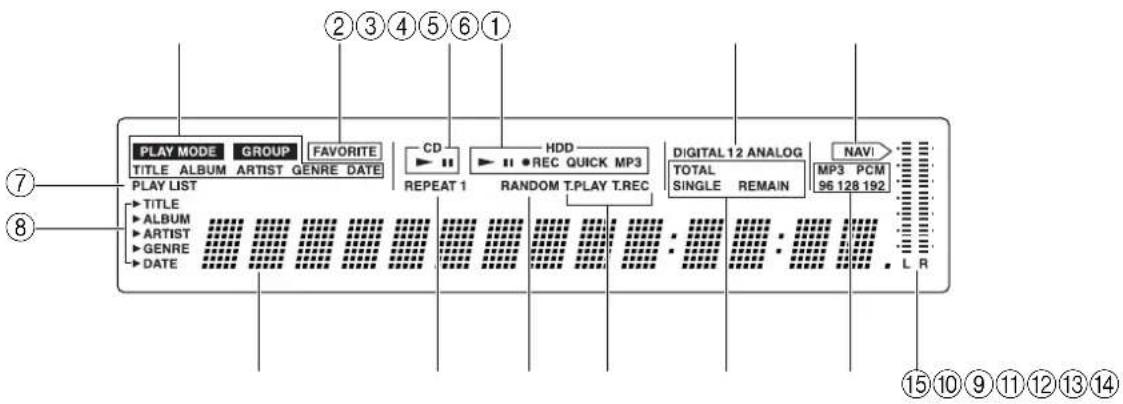
① PLAY MODE indicators
The indicator showing the current play mode lights.
② FAVORITE indicator
Lights while your favorite tracks are played.
③ CD mode indicator
Lights when you are playing a CD.
④ HDD mode indicator
Lights when you are playing tracks recorded on the hard disk drive. "QUICK" lights when the quick recording mode is operating. (See page 25.) "MP3" lights when the tracks are recorded in MP3 format.
⑤ DIGITAL 1/2, ANALOG indicators
Lights when the DIGITAL 1 (optical), DIGITAL 2 (coaxial), or ANALOG (analog) is selected for input source.
⑥ NAVI indicator
Lights when the display shows the current position of the track played.
⑦ PLAY LIST indicator
Lights when the tracks registered with the play list are played.
⑧ ▶TITLE, ▶ALBUM, ARTIST, GENRE, and ▶DATE indicators [41]
Shows the display mode for the multi function display.
⑨ Multi function display
⑩ REPEAT/REPEAT 1 indicator
Lights when the tracks are played repeatedly. "REPEAT 1" lights when the single track is played repeatedly.
11 RANDOM indicator
Lights when the tracks on the hard disk drive are played in random order.
⑫ T.PLAY and T.REC indicators [42]
Lights when the timer recording or playing operation is reserved.
⑬ TOTAL, SINGLE, and REMAIN indicators [21, 27]
Lights when the playing time information is shown in the multi function display.
⑭ MP3, PCM, 96, 128, and 192 indicators
Shows the encode mode for the current track. When you play the MP3 track, "MP3" indicator lights with "96," "128," or "192" indicator according to the track bit rate.
⑮ Level indicator
Shows the audio level for the current track or the position currently playing. When in the group mode, the left level meter shows the position of the current group to the all groups while the right level meter shows the position of the current track to the group.
Remote controller
The numbers within the brackets are the pages where the part or function is introduced.
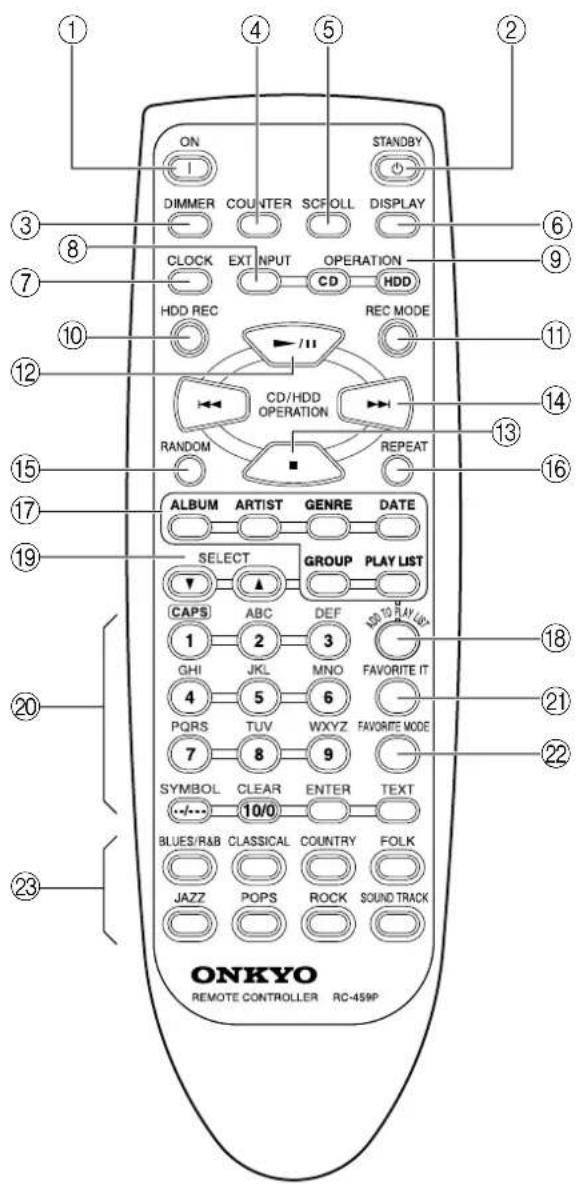
① ON button [18]
Press to turn the MB-S1 on and off.
② STANDBY button [18]
Press to turn the MB-S1 into the standby state.
③ DIMMER button [21, 27]
Press to change the brightness of the display.
④ COUNTER button [21, 27]
Press to change the displayed information for playing time.
⑤ SCROLL button [21, 27, 29]
Press to scroll the display.
⑥ DISPLAY button [29, 36, 41]
Press to change the display mode.
⑦ CLOCK button [19, 21, 27]
Press to display the current day of the week and time.
⑧ EXT INPUT button [25]
Press to select the external input source.
With each press of the button, the input source switches between ANALOG, DIGITAL 1, and DIGITAL 2.
⑨ OPERATION buttons [18, 21]
CD: Turns the operation mode into the CD mode.
HDD: Turns the operation mode into the HDD mode.
⑩ HDD REC button [22, 25, 27]
Press to enter the recording standby state. Then press again to select the target recording group.
⑪ REC MODE button [22, 25]
Press to select the recording mode.
With each press of the button, the recording mode switches in the order of MP3 128kbps, MP3 192kbps, PCM, and MP3 96kbps.
⑫ ▶/■ (play/pause) button [21, 27]
Press to start playing or recording. Press this button while playing or recording to pause, the MB-S1. Press the button again to resume playing or recording.
⑬ ■ (stop) button [21, 27]
Press to stop playing or recording.
⑭ ◀◀/▶button [21, 27, 29]
While playing, press to jump to the beginning of the current track and the next track respectively. While stopped, press to select the track you want to play.
⑮ RANDOM button [26, 27, 35]
When you want to play tracks in random order, press this button to set the random play. The "RANDOM ON" lights in the display area.
⑯ REPEAT button [20, 21, 26, 27, 35]
When you want to play a track or tracks repeatedly, use this button to select the repeat playback mode.
⑰ PLAY MODE buttons [39]
Press to switch the playback mode.
ALBUM: Displays the album information.
ARTISTS: Displays the artist information.
GENRE: Displays the genre information.
DATE: Displays the date information.
GROUP: Displays the group information.
PLAYLIST: Displays the play list information. [35, 36]

ADD TO PLAY LIST button [33]
Press to add the current track to the play list.
![ONKYO MS-B1 - ADD TO PLAY LIST button [33] - 1](/content/2026/05/973579/images/a20868562ea01e823ca1a8881da568e668580c87dc3cdd027a40beb663f3f1ba.jpg)
SELECT button [21, 25, 27, 29]
Select the track or the group number (folder) using the ▼/▲ buttons. While setting any mode, used for selecting the parameters for a mode.
![ONKYO MS-B1 - SELECT button [21, 25, 27, 29] - 1](/content/2026/05/973579/images/0f652ea50038b5d40c9539d20a46d59e3a8b6955b46db5a268b836684c17d0ad.jpg)
Alphabetic letters/Symbols/Numeric (1 to 10) buttons [21, 27, 29, 37]
Numeric: Press to select the track you want to play.
Alphabetic letters/SYMBOL/Numeric: Press to enter the name of the disc, artist, or track.
CLEAR: Press to cancel the letter.
ENTER: Press to enter and confirm the letter while editing the disc, artist, or track names.
TEXT: Press to enable editing the disc, artists, or track names.
![ONKYO MS-B1 - Alphabetic letters/Symbols/Numeric (1 to 10) buttons [21, 27, 29, 37] - 1](/content/2026/05/973579/images/f0b29b5cff75be79e60ee8871c9cfcc540b5d47e7766aee525972680ad7d86d2.jpg)
FAVORITE IT button [41]
Press to mark the current track as your favorite. Press again to unmark the track.
![ONKYO MS-B1 - FAVORITE IT button [41] - 1](/content/2026/05/973579/images/5c86e0a41e6f7debba449c4b36e1fa99d2aeae5b548b1fdc6e571e8827c3d7e4.jpg)
FAVORITE MODE button [41]
Press to turn the favorite mode on and off. In the favorite mode, only the tracks marked as your favorite are played.
![ONKYO MS-B1 - FAVORITE MODE button [41] - 1](/content/2026/05/973579/images/4ab7d8053c897c05bffbab2ce5b1005f5edb5f78e32932bac3287a70489a6d28.jpg)
Genre buttons [39]
Press to select the genre for playing the tracks registered with respective genres.
Rear panel


Analog input/output terminals (ANALOG)
Connect the analog devices such as tuner or cassette tape deck, and the analog output from the digital devices such as CD player and others.

Digital input terminals (DIGITAL INPUT)
Connect the digital output from the digital devices such as CD player, DVD player, MD player and others. Optical (OPTICAL) and coaxial (COAXIAL) terminals are available.

RI connection terminals (REMOTE CONTROL)
Connect the Onkyo products equipped with the RI connection terminals.

Digital output terminal (DIGITAL OUTPUT)
Connects the digital output from the MB-S1 to the digital input terminals on digital recording devices such as an MD recorder, CD recorder, or DAT deck.
Under the SCMS copyright protection system, the output signal is limited to the signals from an audio CD or the audio signals of MP3 data recorded on an CD-R.
Note:
The audio signals from data recorded on the MB-S1 hard disk drive is not output digitally.
* SCMS is a copy guard system for protecting copyrights. See page 15 for details.
Here is an explanation of how to connect the main components to the MB-S1 in the standard manner. There are many ways that any one component can be connected, and it is up to you to decide which method best fits your situation. The directions given here are only one option and should only be thought of as such. It is best to fully understand the nature of each connector and terminal as well as each of your components and their features to ascertain which method of connection is best.
- Be sure to always refer to the instructions that came with the component that you are connecting.
- Do not plug in the power cord until all connections have been made.
- For input jacks, red connectors (marked R) are used for the right channel, and white connectors (marked L) are used for the left channel.
- Do not bind audio/video connection cables with power cords and speaker cables. Doing so may adversely affect the picture and sound quality.
- Digital output terminals on the MB-S1 are only designed to output the digital signals. When you use analog output signals, be sure to use the analog output terminals with audio connection cables.
- Insert all plugs and connectors securely. Improper connections can result in noise, poor performance, or damage to the equipment.

- When using one of the optical input jacks, remove the protective cap and keep it safely. When the jack is not used, replace the protective cap.
- When using an optical input jack, always use an optical fiber cable.
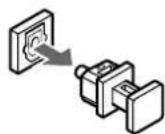
Optical digital input terminal
An optical digital input terminal is equipped with a protection cap. When connecting, remove this cap. When not using, put the cap back on the terminal.


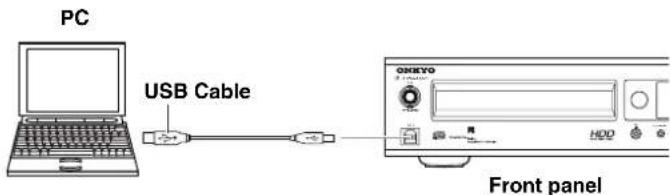
Connecting to other components
Here are detailed explanations of how to connect the main components to the MB-S1. When connecting, refer to the diagram on page 12.
①Connecting to an amplifier
Connect the analog terminals on the MB-S1 to the terminals such as TAPE or MD on the amplifier.
Notice:
When you connect the MB-S1 to the Onkyo TX-L5, use the HD terminal on the rear panel of the TX-L5.
②Connecting an external CD or DVD player
When connecting a CD player, DVD player, CS tuner, or DAT deck equipped with digital output terminals (OPTICAL/COAXIAL), you can record the input source digitally using the MB-S1.
Connect the digital output terminals on a CD player, DVD player or others to the DIGITAL INPUT (OPTICAL/COAXIAL) terminals using audio digital cables. Use the optical digital cable for OPTICAL terminal and the coaxial digital cable for COAXIAL terminal.
When connecting devices, be sure to use the digital cable commercially available.
③Connecting a digital audio recorder such as an MD recorder or CD recorder
When connecting a CD recorder, MD recorder, or DAT deck equipped with digital input terminals (OPTICAL), you can perform digital recording to the external digital recorder.
Connect the DIGITAL OUTPUT terminal (OPTICAL) on the MB-S1 to a digital recorder such as a CD recorder or MD recorder. Use an optical digital audio cable.
When connecting devices, be sure to use an optical digital cable commercially available.
Notes:
- When you copy the audio source digitally, certain restrictions will be applied (page 15).
- Do not bundle the audio cables together with power cords or speaker cables. Doing so may cause deterioration of the audio signal.
- When you place the MB-S1 near a TV, the picture on the TV may become poor and the output sound from the MB-S1 may be distorted. In this case, place the unit away from the TV.
- When you connect the digital audio output on a DVD player to the DIGITAL INPUT terminals on the MB-S1, set the output type to PCM on the DVD player. However, the PCM output setting is not available on some DVD players. In this case, the audio signal will not be output even if the DVD player and the MB-S1 are connected.
④Connecting an analog audio device such as AM/FM tuner or cassette tape deck
When connecting the audio output from an analog audio device such as an AM/FM tuner, cassette tape deck, or video deck to the MB-S1, you can record the audio signal onto the HDD.
Connect the analog output terminals on the analog audio device to the ANALOG INPUT terminal on the MB-S1.
Notes:
- Insert the plugs and connectors securely. Remember that improper connections can result in noise or malfunctions.
- Do not bundle the audio cables together with power cords or speaker cables. Doing so may cause deterioration of the audio signal.
- When you place the MB-S1 near a TV, the picture on the TV may become poor and the output sound from the MB-S1 may be distorted. In this case, place the unit away from the TV.
⑤Connecting the power cord
Plug the power cord into a wall outlet.
After connecting the power cable, the MB-S1 enters the standby state.
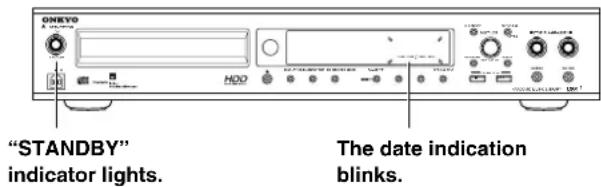
⑥Connecting the Onkyo receiver TX-L5
Use the supplied Rable to connect the terminal to the terminal of the MB-S1. Connecting the Rable only does not make the system operational. You must also connect the audio connection cables as well.
When you make RI connections, you can perform the following operations.
The R terminals are only effective if they are used in conjunction with an Onkyo amplifier with an RI connector. Do not connect to a component other than an Onkyo component with an RI connector. Doing so may damage the MB-S1.
The functions of the left and right RI terminals are the same. Connect to either one.
Notes on CD and the internal hard disk drive
Notes on discs
■Notes on playing discs
Use the discs compatible with IEC standards such as the CD with the logo (right) printed on it. You can also use CD-Rs containing MP3 audio data.

Do not play CD-Rs intended for computer use or non-audio compact discs. Doing so may cause high-pitched noises or other unpredictable results that may damage speakers, amplifiers, and other connected components.
Never use heart-shaped, octagonal, or other special shaped discs as they may damage the internal mechanisms of the MB-S1.


■Handling discs
Be careful not to touch the data side of the disc (the side that does not have printing on it). Always hold discs by the edges or by using the hole in the middle.
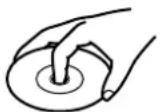
Never place labels or stickers on the data side or label side of the discs. Also, do not write on the discs or allow them to become scratched.
■Cautions when using rented compact discs
Do not use discs that have cellophane tape attached to them or rental compact discs that have rental labels attached. If the tape is sticking out or peeling off, the disc may not be able to be ejected and the MB-S1 may become damaged.
■Cleaning
Dirt and contaminants on discs can obstruct the pickup of the signals and lead to deterioration the sound. When dirty, clean the data side with a soft dry cloth, wiping from the inside of the disc toward the outside.
If the dirt is excessive, soak the cloth in water, wring it out, and then wipe the disc surface clean. Next, using a soft dry cloth, wipe the moisture form the disc surface. Do not use conventional record cleaners or antistatic agents. Also, never use benzene, thinners, or other volatile agents as they may damage the disc surface.

■Cautions for disc storage
Do not store discs in locations exposed to direct sunlight, near heat emitting devices, and other locations of excessive heat, or locations of extremely low temperatures. Also, always store discs properly in their protective cases.

Note on the internal hard disk drive
■Handling the hard disk drive
Do not shake or carry around the MB-S1 while playing the tracks recorded on the hard disc drive. Doing so may damage the internal hard disk drive.
■Notes on the data and track recorded on the MB-S1's HDD
Onkyo shall not be liable for the loss of the data and tracks recorded on the MB-S1's HDD, regardless of the cause of failure or trouble.
If the HDD is replaced with the new one or initialized at MB-S1's repair, all the data and tracks stored on the HDD will be lost. Onkyo shall not be liable for any damages resulting from the loss of the data and tracks on the HDD.
If you want to avoid the loss of the data and tracks, save the original CDs and store the original data and tracks on other media.
Condensation
When moving the MB-S1 from a cold location to a hot location, when quickly heating a cold location with a furnace, or other similar situation, condensation may occur. This may not only cause improper operation of the device, but may also damage the discs and components. If condensation has occurred, leave the MB-S1 until the condensation disappears without turning the power on. Using the MB-S1 with the condensation occurred may cause failure. If you will not use the MB-S1, then eject any disc inside.
Rules for recording digital input
For processing digital audio signals, the MB-S1 employs the copy guard systems which places limitations on recording and playing. These limitations are intended for protecting the copyrights and restricting the actions which violate copyright laws.
SCMS (Guide to the serial copy management system)
This system is designed for permitting only one generation of digital-to-digital copying (the recording of the original digital signals as they are) between digital audio devices.
- When recording from the digital output terminals on the MB-S1
- When the digital audio data from the MB-S1 is recorded as an analog input source on an MD using MD recorder, the digital signal on the MD can be recorded digitally onto another MD.
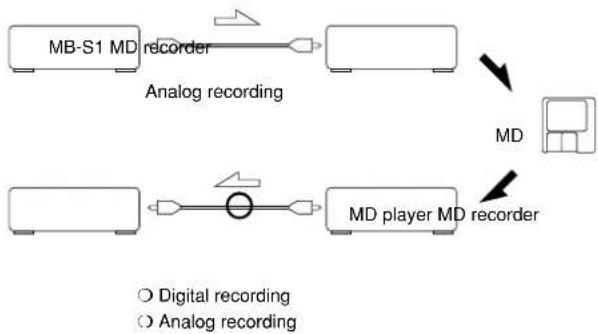
flowchart
graph LR
    A["MB-S1 MD recorder"] --> B["Analog recording"]
    C["MD player MD recorder"] --> D["Analog recording"]
    E["MD"] --> F["Analog recording"]
    style A fill:#f9f,stroke:#333
    style C fill:#f9f,stroke:#333
    style E fill:#ccf,stroke:#333
- When the digital audio data from the CD section of the MB-S1 is recorded as a digital input source on an MD using MD recorder, the digital signal on the MD cannot be recorded digitally onto another MD. If you want to record the digital signal on the MD, perform analog input recording.

flowchart
graph TD
    A["MB-S1 (CD) MD recorder"] --> B["MD playerMD recorder"]
    B --> C["MD"]
    D["Digital recording"] --> A
    E["Analog recording"] --> F["Analog recording"]
    style A fill:#f9f,stroke:#333
    style B fill:#ccf,stroke:#333
    style C fill:#cfc,stroke:#333
    style D fill:#fcc,stroke:#333
    style E fill:#cff,stroke:#333
Note:
Music performances and media including radio programs, CDs, records, music tapes, and original music cassettes, music elements of lyrics and melodies are equally protected by the copyright law. Therefore, to sell, transfer, distribute, and lease those music media above, and use them as BGM in public space such as stores are prohibited.
- When recording from the digital audio signals from the internal CD player section or other external digital audio devices
- The digital audio signal on a CD-R/RW recorded digitally from the CD cannot be copied to the MB-S1's HDD. When you record such digital signals, connect the signals to the analog input terminals.

flowchart
graph TD
    A["CD player CD recorder"] --> B["Digital recording"]
    B --> C["CD-R"]
    C --> D["HD DUBBING"]
    D --> E["MB-S1 (HDD)"]
    E --> F["CD R"]
- When the digital audio signal on the CD was recorded from an MD as an analog input source, you can record the audio signal on the CD digitally using the digital input terminals on the MB-S1.
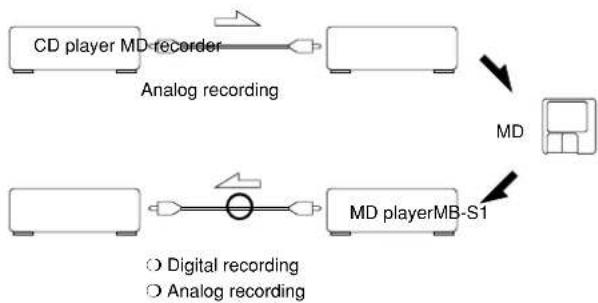
flowchart
graph LR
    A["CD player MD-recorder"] --> B["Analog recording"]
    B --> C["MD playerMB-S1"]
    D["Analog recording"] --> E["Analog recording"]
    E --> F["Analog recording"]
    style A fill:#f9f,stroke:#333
    style D fill:#f9f,stroke:#333
    style B fill:#ccf,stroke:#333
    style C fill:#cfc,stroke:#333
    style E fill:#fcc,stroke:#333
The materials you recorded using the MB-S1 are for private use only. Under the copyright law, you cannot use recorded materials without permission from the copyright holder.
Understanding the basic operations before using the MB-S1
The MB-S1 allows you to play audio CDs or CD-R discs containing MP3 music files just like ordinary CD players. In addition, the MB-S1 can store the music data on its hard disk drive (HDD), allowing you to enjoy the various playback functions such as long-hour playback or play list playback.
■Managing the music information on the MB-S1
The MB-S1 manages the music information in groups and tracks. The number of the group and track is shown on the display when the “GROUP” indicator lights.
When using the MB-S1 for playing CDs, only the number of the group and track is displayed and you can select the tracks according to the group or the track number. When using or playing the tracks recorded on the MB-S1's HDD, the various music information is available, including the name of album and artist, genre, date, and favorite marking, as well as the number of the group and track. Registering additional track information enables you to sort the track, play only the favorite tracks, display the tracks information, and select the track according to the track information.
■Typical uses for the MB-S1
1. Playing an audio CD with the CD player section.
For more information, see “Understanding playing features for the CD player section” on this page and “Listening to an audio CD or CD-R” on pages 20 and 21.
2. Playing a CD-R containing MP3 music files with the CD player section.
For more information, see “Understanding playing features for the CD player section” on this page and “Listening to an audio CD or CD-R” on pages 20 and 21.
3. Recording tracks from the CD player section onto the internal HDD and playing them.
For more information, see “Understanding playing features for the internal HDD section” on this page, and “Recording” and “Listening to tracks recorded on the HDD” on pages 22-27.
4. Recording tracks from an external component such as an MD player to the HDD and playing them.
For more information, see “Understanding playing features for the internal HDD section” on this page, “Connecting the MB-S1” on pages 12 and 13, and “Recording” and “Listening to tracks recorded on the HDD” on pages 22-27.
5. Transferring MP3 files from the PC to the MB-S1 and playing them.
For more information, see “Understanding playing features for the internal HDD section” on this page, “Listening to tracks recorded on the HDD” on pages 26 and 27, and “Overview of the supplied Carry Tunes software” on page 45.
6. Playing tracks on the HDD using a play list.
For more information, see “Understanding playing features for the internal HDD section” on this page, “Understanding the play list” on the next page, “Listening to tracks recorded on the HDD” on pages 26 and 27, and creating and using a play list on pages 32-38.
■Understanding playing features for the CD player section
The CD player section of the MB-S1 allows you to play audio CDs and CD-R discs containing music files encoded in PCM or MP3 format.
You can select and play a track by its group or the track number. Use the MULTI JOG dial to select a group and the ◀◀/◀◀/▶▶/▶▶ buttons to select a track number.
- When playing an audio CD
One CD = One group
The total tracks on the CD = The number of tracks
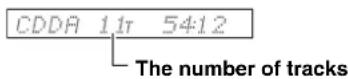
- When playing a CD-R containing MP3 files
The number of folders on the CD-R = The group number The number of files in each folder = The number of tracks
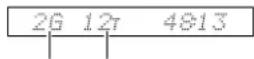
The number of groups
The number of tracks
* Sorting track order and random playback are not available for the CD player section. If you want to use these features, the tracks from the CD or CD-R must be recorded onto the internal HDD.
■Understanding playing features for the internal HDD section
In the HDD section, you can record from the CD player of the MB-S1, MD players, and other external components, as well as play MP3 files transferred from your PC. You can select and play the tracks by the group or the track number. Additionally, you can select and play the tracks by the album title, artist name, genre, date and favorite marking.
Making a play list allows you to play the tracks recorded on the HDD in your favorite order.
* For tracks not containing the album title, artist name, genre, date or favorite marking, you cannot use the sort feature with the ALBUM, ARTIST, GENRE or DATE button and the favorite track playback feature. In this case, the tracks will be sorted and played by group and track number.
* When you create or edit the play list, select the tracks by group and track number. For more information on play list, see "Understanding Play List."
■Understanding the play list
You can create a play list compiled by choosing your favorite tracks on the HDD. You can also name the play list and easily switch the play list when playing.
The track information registered in the play list is just a reference to the actual track information stored on the HDD. Therefore, editing or deleting a play list will not change or delete the track information stored on the HDD. If the track in a play list contains additional information such as album title and others, the additional information will be displayed when selecting or playing tracks.
For more information on creating and using a play list, see pages 32-38.
* You can create up to 100 play lists.

flowchart
graph TD
    A["The MB-S1 will find the tracks on the play list through the HDD in the order defined in the list and play them."] --> B["Playlist 1"]
    B --> C["Group No. 1, Track No. 3"]
    B --> D["Group 2, 3, 2, 5, 4"]
    B --> E["Track 1, Track 2, Track 3"]
    B --> F["HDD"]
    F --> G["Group 1 Group 2"]
    F --> H["Group 3"]
    F --> I["Track 1, Track 2, Track 3"]
    F --> J["MB-S1"]
    style A fill:#f9f,stroke:#333
    style J fill:#ccf,stroke:#333
Turning on the power
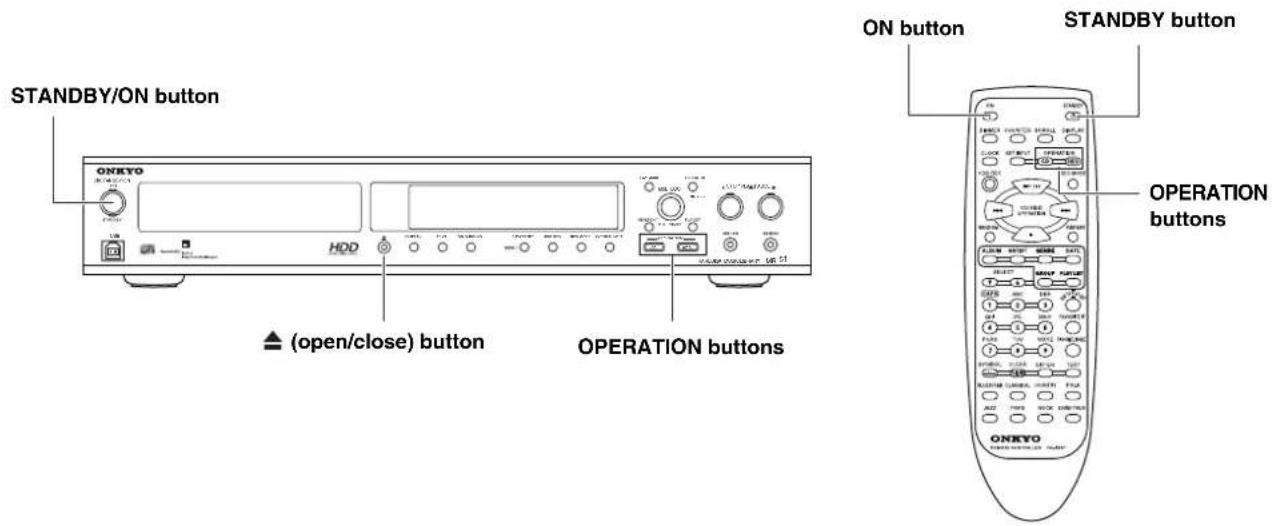
Press the STANDBY/ON button on the MB-S1 to turn on the power. Pressing it again causes the MB-S1 to enter the standby state. When using the remote controller, pressing the ON button turns on the power and pressing the STANDBY button causes the MB-S1 to enter the standby state.
STANDBY/ON STANDBY /ON

Remote controller

Standby state: The state entered when the current time is displayed in the display area. If you have not set the current time, "-- : --" is displayed (see the next page).
Power-on state: The state entered when the STANDBY/ON button on the MB-S1, or the ON button on the remote controller, is pressed while in the standby state. In the power-on state, you can operate the MB-S1. After pressing the button, "HDD MUSIC LIBRARY" indication scrolls in the display area. Then, the total number of groups and the total number of tracks on the HDD is displayed, and the same mode indicators light that were lit the last time the MB-S1 was turned off. When the CD mode is active, "Reading Media" is displayed in the display area and the loading of the CD starts. After the CD loading process has finished, the number of groups and tracks, and the total recorded time for the CD appears in the display.
When the HDD section is activated, the same group indicator lights as when the MB-S1 turned off last time.
Switching the CD player and HDD
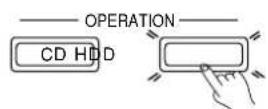
The MB-S1 can play the tracks on an audio CD or a CD-R containing music files as well as the tracks recorded on the hard disk drive (HDD). To switch the playing source, use the OPERATION buttons.
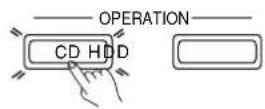
Pressing the CD button activates the CD player, and the MB-S1 enters the CD mode. The CD, ■ STOP, and ▶ PLAY/ PAUSE indicators light orange. In the CD mode, you can play audio CDs and CD-R discs using the buttons on the MB-S1 or remote controller.

Remote controller

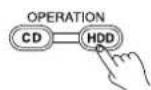
Pressing the HDD button activates the HDD section, and the MB-S1 enters the HDD mode. The HDD, ■ STOP, and
▶ PLAY/1PAUSE indicators light green. In the HDD mode, you can play the music files recorded on the internal HDD.
Remote controller
Opening the CD tray

Press the ▲(open/close) button on the MB-S1 to open the CD tray.
Note:
No button operates for a few seconds immediately after the power is turned on. Remember to operate the MB-S1 after the loaded information is displayed.

Setting date and time
1. Enter the menu mode.
MENU/EXIT

Pressing the MENU/EXIT button displays the menu items in the display area.
2. Select the clock setting menu.
MULTI JOG
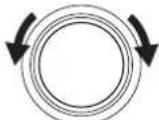
PUSH TO ENTER
Rotate the MULTI JOG dial to select the clock setting menu ("Clock Setting?").
The menu items are displayed in the following order: Clock Setting?, Timer Setting?, AnaRecSetting?.
Clock Setting?
MULTI JOG

PUSH TO ENTER
Press the MULTI JOG dial.
3. Set the date and time.
MULTI JOG

PUSH TO ENTER
2001-01-01 Mon
Rotate the MULTI JOG dial to select the year.
MULTI JOG
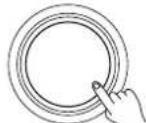
PUSH TO ENTER
2001-01-01 Mon
Press the MULTI JOG dial to enter the year. The highlight moves to the month.
Set the month, day, hour and minute using the same procedure above.
The day of the week will be automatically set.
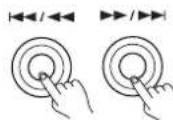
You can highlight any item (year, month, day, hour, and minute) to set them using the
◀◀/◀◀/▶buttons.
4. Confirm the setting.
PLAYMODE

Press the YES button to confirm the setting. The second is displayed and the clock starts.
12 Fri 10:47:38
5. Restore the normal indication.
Press the MENU/EXIT button or ■STOP button.
Displaying the date and time (Remote controller only)
Press the CLOCK button on the remote controller. With each press of the CLOCK button, the displayed information changes as follows.
Remote controller

2001-09-03 Mon
09-03 Mon 15:30
03 Mon 15:30:46
Return to the normal indication.
Listening to an audio CD or CD-R
1. Set a disc.

Press the ▲(open/close) button to open the CD tray. Place the disc on the tray with the label facing upward.
When setting a single-sized CD, place it on the inner well.
Press the ▲ (open/close) button to close the tray.
2 Activate the CD player section.

Press the CD button.
3. Start playing.
PLAY/■PAUSE
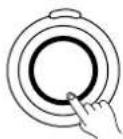
Press the ▶PLAY/ PAUSE button.
CD lights in the display area and playback starts.
When playback finishes, the CD player automatically stops.
Press the ▶ PLAY/ I PAUSE button while playing to pause the playback. The
CD indicator lights. Press it again to resume playback from the position where the playback paused.
Stopping playback
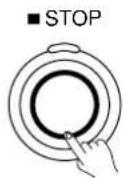
Press the ■ STOP button.
Pressing the ▶ PLAY/■PAUSE button starts playback from the beginning of the track which was played when the ■ STOP button was pressed.
Press the ■ STOP button twice to display the track information and stop playback.
Selecting the track
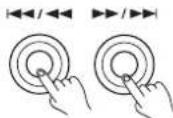
While playing or pausing, pressing the ◀◀/◀◀ button locates the beginning of the current track, and pressing it twice locates the beginning of the previous track. Then each press of the ◀◀/◀◀ button locates the beginning of another previous track.
Each press of the button carries you to the beginning of the next track.
Reversing and fast forwarding

During playback, hold down the ▶ or / ◀◀ ▶▶ /▶▶ button for 0.5 seconds or longer to reverse or fast forward the current track. At first, reverse and fast forward is eight times faster than normal speed playback, and then will be 16, 32, and 64 times faster. When the reverse or fast-forward comes to your desired position, release the ◀◀/◀◀ or ▶▶ /▶▶ button to resume normal playback.
The sound is not output while reversing or fast forwarding. While reversing, when the MB-S1 comes to the beginning of the track, the playback of that track starts in normal speed. While fast forwarding, when the MB-S1 comes to the beginning of the next track, the playback of the next track starts in normal speed.
Playing tracks repeatedly (remote controller only)
Pressing the REPEAT button on the remote controller displays the current setting of the repeat playback. Each press of the REPEAT button switches the repeat playback mode in the following order: Repeat All, Repeat 1, Repeat Off.
Remote controller

Repeat All: Plays all the tracks on a CD repeatedly. When you select this mode, "REPEAT" indicator lights. When playing a CD containing MP3 files, all the tracks in the selected group (folder) are played repeatedly.
Repeat 1: Plays the current track repeatedly. When you select this mode, "REPEAT 1" indicator lights.
Repeat Off: Turns off the repeat playback mode.
Switching the display information
Each press of the COUNTER button on the remote controller switches the information displayed in the display area.
When stopped
Playing time for the first track on the CD

The total track number and the total playing time for the CD

When paused or during playback
The elapsed time for the currently played track

The remaining time for the currently played track

When the disc title is longer than the display area
When you play a CD that contains text data, press the SCROLL button on the remote controller to display the whole title sequentially.
Using the remote controller

Notice:
Available recording modes and speeds depend on the data or format for recording source. For more information, see table on page 25.
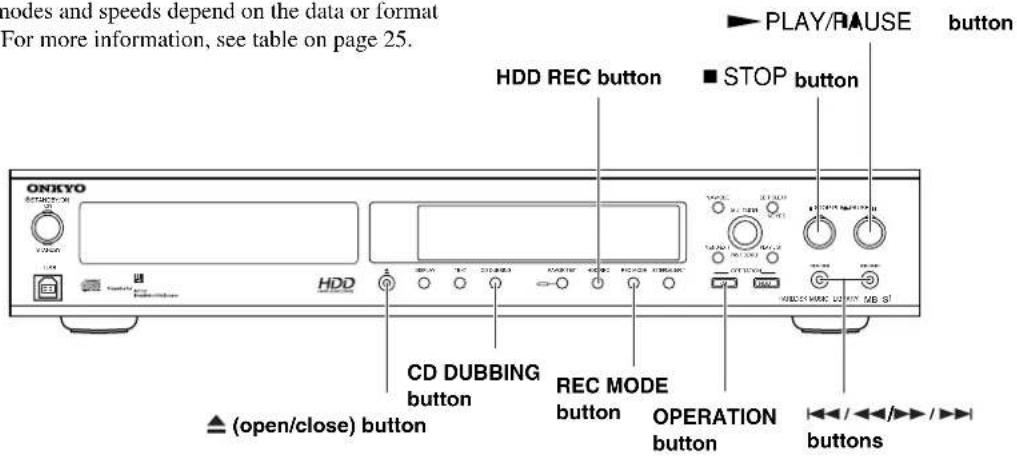
Recording an audio CD or CD-R synchronously
1. Set the CD on the CD tray.
For setting the CD, see page 20.

2. Activate the CD player.

Press the CD button.
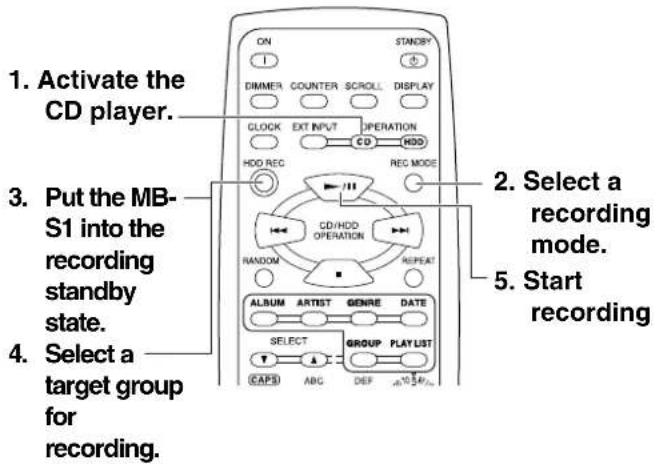
3. Select a recording mode.
REC MODE

105 1249
Press the REC MODE button to select the desired recording mode. The recording mode switches to the next one with each press of the button.
PCM: Records the signal on CD without compression. You will get better sound quality than MP3 formats, but the size of music files is larger, occupying more space on the HDD.
MP3 96kbps: The size of music files will be 3/4 of those recorded in 128kbps, and you can store more files on the HDD.
MP3 128kbps: The size of music files will be 1/10 of those recorded in PCM mode.
MP3 192kbps: The size of music files will be 1.5 times larger than those recorded in 128kbps. You can store fewer files on the HDD, but will get better sound quality than 96kbps and 128kbps.
4. Put the MB-S1 into the recording standby state.
HDD REC

Press the HDD REC button. The MB-S1 enters the CD synchronous recording standby state. The display area will change to HDD ■●REC MP3.
5. Select a target group for recording.
HDD REC

Press the HDD REC button again to select a target group for recording. You can select Current or New for the target group.
Current: The new recording will be added to the end of the existing group containing recorded tracks.
New: The new recording will be recorded as the first track for a new group.
Current 36
6. Start recording.
PLAY/RAUSE

Press the ▶PLAY/ PAUSE button to start recording.
After recording until the end of the CD, the MB-S1 stops automatically.
Using the remote controller
Do the following steps in numeric order.
Dubbing all tracks on a CD (CD dubbing)
1. Set the CD on the CD tray.
For setting the CD, see page 20.
2. Stop the CD or HDD.
■ STOP
Press the ■ STOP button.

3. Select a recording mode.
(See step 3 on the previous page.)
REC MODE

MP3 128kbP=
Press the REC MODE button to select the desired recording mode. The recording mode switches to the next one with each press of the button.
4. Start the CD dubbing.
CD DUBBING

Press the CD DUBBING button to start the CD dubbing. The group to which the recorded tracks will be added is automatically created to the HDD.
CD-Dubbing
Tip:
If you want to stop the CD synchronous recording or the CD dubbing during operation, press the ■STOP button.
Dubbing a track on a CD
1. Set the CD on the CD tray.

For setting the CD, see page 20.
2. Activate the CD player.
Press the CD button.
3. Select a recording mode.
(See step 3 on the previous page.)
REC MODE

MP3 128kbps
Press the REC MODE button to select the desired recording mode. The recording mode switches to the next one with each press of the button.
4. Select a track you want to record.

Press the / button to select a track you want to record.
5. Put the MB-S1 into the recording standby state.
HDD REC

Press the HDD REC button. The MB-S1 enters the CD synchronous recording standby state.
The display area will change to
HDD ■ ■ REC MP3
6. Select a target group for recording.
HDD REC

Press the HDD REC button again to select a target group for recording. You can select Current or New for the target group.
Current: The new recording will be added to the end of the existing group containing recorded tracks.
New: The new recording will be recorded as the first track for a new group.
7. Start dubbing a track on a CD.
CD DUBBING

Pressing the CD DUBBING button locates the beginning of the selected track and starts recording automatically.
- 2023年1月1日
Recording audio signals from external devices
1. Confirm the connections between the MB-S1 and the external device.
For details, see "Connecting the MB-S1" on pages 12 and 13.
2. Select an input source.
EXTERNAL INPUT
Press the EXTERNAL INPUT button repeatedly.

DIGITAL-1
DIGITAL-1: When connected to the DIGITAL INPUT1 (OPTICAL) terminals
DIGITAL-2: When connected to the DIGITAL INPUT2 (COAXIAL) terminals
ANALOG: When connected to the ANALOG input terminals (When you record the input source recorded at higher recording level, such as analog records, do the steps in “Adjusting the recording level” on page 25.)
3. Select a recording mode.
(See the step 3 on page 22.)
REC MODE

MP3 128kbps
Press the REC MODE button to select the desired recording mode. The recording mode switches to the next one with each press of the button.
For more information, see table on page 25.
4. Put the MB-S1 into the recording standby state.
HDD REC

Press the HDD REC button. The MB-S1 enters the CD synchronous recording standby state.
The display area will change to
II •REC
MP3
5. Adjust the recording level. (Analog input only)
MULTI JOG
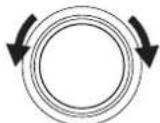
PUSH TO ENTER
Turn the MULTI JOG dial to adjust the recording level with playing the input source.

The optimum recording level is the one at which the red segments of the level meter lights occasionally.
Tip:
A track number automatically increments when the input level is below the threshold. You can set this threshold level as necessary. To set the threshold level, press the ◀◀/◀◀/▶buttons. "TR
Marking" appears in the display. Then, press the ◀◀/◄◀/►►/►► button to select the threshold level from the preset level of 1 to 9.
6. Select a target group for recording.
HDD REC

Press the HDD REC button again to select a target group for recording. You can select Current or New for the target group.
Current: The new recording will be added to the end of the existing group containing recorded tracks.
New: The new recording will be recorded as the first track for a new group.
7. Start recording.
PLAY/II PAUSE
Press the ▶PLAY/ PAUSE button and start playback on the external device simultaneously.
Notice:
- About maximum recording time
The maximum recording time is 6 hours per group.
The recording time will be displayed up to 99 hours 59 minutes 59 seconds. When the recording lasts longer than the maximum time above, the indication will be “-- : -- : --.”
- While waiting an input signal, "Signal Wait" appears.
Using the remote controller
Do the following steps in numeric order.
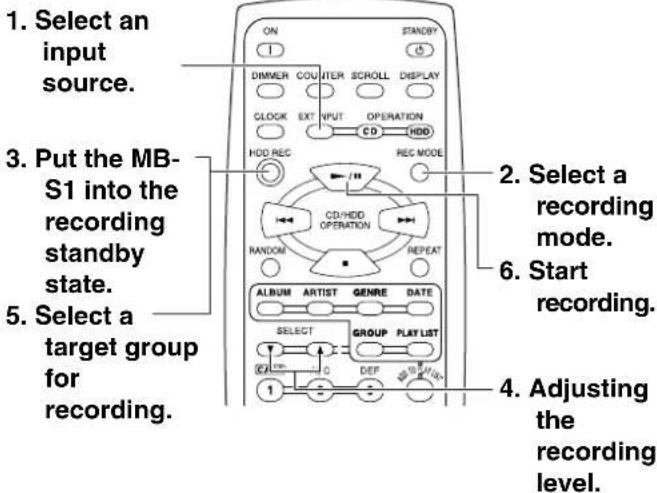
Input source and recording format
The available recording formats and speeds depend on the external device and input source as follows:
When recording from the CD player section of the MB-S1
| Input source\Operation | Recording mode (REC MODE) | QUICK indication | Recording level |
| Audio CD | PCM | Quick Rec *2 (approx. 5X speed) | — |
| MP3 96/128/192kbps | Normal speed | — | |
| MP3 CD *1 (a CD-R containing MP3 encoded tracks) | MP3 (Same as the source track) | Quick Rec *2 (approx. 20X speed) | — |
*1 Duplicated CDs and CD-Rs containing MP3 files are limited to private use only. Duplicated CD-Rs and CD-RWs created with an audio CD-R recorder cannot be recorded on the MB-S1 under SCMS restriction.
^*2 When using Quick Rec feature, the sound is not output.
When recording from external audio devices
| Inputsource\Operation | Recording mode (REC MODE) | QUICK indication | Recording level |
| DIGITAL-1 DIGITAL-2 | PCM MP3 96/128/192kbps | Normal speed | — |
| ANALOG | Available (Analog only) |
Adjusting the recording level (Analog input only)
1. Enter the menu mode.
MENU:EXIT

Press the MENU/EXIT button. A menu item appears in the display area.
2. Select the menu for adjusting recording level.

PUSH TO ENTER
AnaRecSetting?

Turn the MULTI JOG dial to select "AnaRecSetting?" and press the MULTI JOG dial to confirm. "Norm" or "Low" blinks slowly.
PUSH TO ENTER
3. Select the adjusting level range.

PUSH TO ENTER
The image contains no legible text or symbols. The OCR result "B" is a hallucination and does not correspond to any content in the source image. Therefore, the correct OCR output is an empty string.

PUSH TO ENTER
Turn the MULTI JOG dial to select the level range of either "Norm" or "Low."
Norm (Normal): Select when you record an analog input source from digital audio devices such as CD, DVD, or MD.
Low: Select when you record an analog input source with higher output level such as analog records. The level for the Low setting is attenuated 12 dB from the Norm level.
After selecting the level range, press the MULTI JOG dial to confirm it.
4. Confirm the level setting.
MULTI JOG
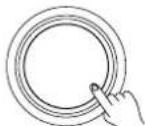
PUSH TO ENTER
Press the MULTI JOG dial to confirm the recording level setting.
Listening to tracks recorded on the HDD

Listening to tracks recorded on the HDD
1. Activate the HDD section.

Press the HDD button.
2. Start playback.
PLAY/RAUSE

Press the ▶PLAY/ PAUSE button to start playing from the group and track you selected last time. ▶HDD lights in the display area. If you want to change the group, turn the MULTI JOG dial to select a group you want to play. After playing the last track in the last group, the MB-S1 automatically stops. During playback, press the ▶ PLAY/ II PAUSE button to cause the MB-S1 to pause. ▶ HDD lights in the display area. Press it again to resume playback from the position where you pressed the ▶ PLAY/ I PAUSE button.
Stopping the playback

Press the ▪ STOP button. When stopped, pressing the ▶ PLAY/ ▪ PAUSE button resumes playback from the beginning of the track at which you pressed the ▪ STOP button. Pressing the ▪ STOP button twice locates the first track of the current group, then the MB-S1 stops.
Selecting a track you want to listen to
During playback or when paused, pressing the ◀◀/◀◀ button once locates the beginning of the current track. Pressing the ◀◀/◀◀ button twice locates the beginning of the previous track and another press of the button locates the beginning of another previous track.
Each time you press the ▶▶/▶▶ button, playback starts at the next track.
Reversing and fast forwarding

During playback, hold down the ▶/◀◀ ▶▶/▶▶ button for 0.5 seconds or longer to reverse or fast forward the current track. At first, reverse and fast forward is eight times faster than normal speed playback, and then will be 16, 32, and 64 times faster. When the reverse or fast-forward comes to your desired position, release the ◀◀/◀◀ or ▶▶/▶▶ button to resume normal playback. The sound is not output while reversing or fast forwarding. While reversing, when the MB-S1 comes to the beginning of the track, the playback of that track starts in normal speed. While fast forwarding, when the MB-S1 comes to the beginning of the next track, the playback of the next track starts in normal speed.
Playing tracks in a group in random order
Remote controller only

Pressing the RANDOM button on the remote controller displays the current setting for random playback. Each press of the RANDOM button switches the setting between "Random On" and "Random Off."
Random On: Plays the tracks in the current group in random order. When you select Random On, the "RANDOM" indicator lights.
Random Off: Disables the random playback function.
Playing tracks repeatedly
Remote controller only

Pressing the REPEAT button on the remote controller displays the current setting of the repeat playback. Each press of the REPEAT button switches the repeat playback mode in the following order: Repeat All, Repeat 1, Repeat Off.
Repeat All: Plays all tracks in the current group repeatedly. When you select this mode, "REPEAT" indicator lights.
Repeat 1: Plays the current track repeatedly. When you select this mode, "REPEAT 1" indicator lights.
Repeat Off: Turns off the repeat playback mode.
Switching the display information
Each press of the COUNTER button on the remote controller switches the information displayed in the display area. While the text information is displayed using the DISPLAY button, the information below will not be displayed.
When stopped
Playing time for the first track in the current group
| 16 | 17 | 4:52 |
The total track number and the total playing time for the current group
| TOTAL | ||
| 16 | 47 | 17:15 |
When paused or during palyback
The elapsed time for the current track
| 16 | 27 | 038 |
The remaining time for the current track
| TOTAL | ||
| 1G | 2T | 2:34 |
When the disc title is longer than the display area
Press the SCROLL button on the remote controller to display the whole title sequentially.
Using the remote controller


Entering the name of a track
For the tracks recorded on the HDD, you can enter the track information such as track title, album title and genre. Stop playback before you enter the track information.
Entered information can be used when creating and editing a play list.
1. Activate the HDD section.

Press the HDD button.
2. Select the track to which you want to enter the information.
For selecting a track, see page 26.
3. Enter the editing mode.

Press the TEXT button. The editing mode appears telling you which text will be edited.
Title In ?
4. Select the editing mode you want.
PUSH TO ENTER
PUSH TO ENTER
Title In ?
Turn the MULTI JOG dial to select the editing mode. The editing mode changes in the following order: Album In?, Artist In?, Genre In?, Date In?, Title In?.
Press the MULTI JOG dial to confirm the editing mode you select.
5. Enter the characters.
When the editing mode is Title In?, Album In? and Artist In?, see "Entering characters" below. When the editing mode is Genre In?, see "Selecting a genre" on the next page.
6. Confirm the entry and exit the editing mode.
PLAY MODE

or
TEXT

Press the YES button or the TEXT button to confirm the entry.
"Complete!" appears in the display area.
Complete!
Entering characters
When the editing mode is Title In?, Album In? and Artist In?, you can enter the character information using the following procedures.
1. Selecting a character you want to enter.
DISPLAY

AJ
Press the DISPLAY button repeatedly to change the type of character to be entered.
| Display Type of character to be entered | |
| A] Upper-case letter (A-Z) | |
| a] Lower-case letter (a-z) | |
| 1] | Numbers (0-9)/Symbols |
| ↑] | Same letter or symbol as you entered before |
| space | A-Z, a-z, 0-9, Symbols, All displays |
Tip:
If you want to insert space, enter the ▶ sign.
2. Selecting a letter you want to enter.

Turning the MULTI JOG dial displays each letter for the current character type.
Pressing the MULTI JOG dial confirms the letter and you can enter the next digit.

3. Moving to a digit.
Pressing the button focuses the previous letter. Pressing the ▶▶/▶▶ button focuses the next letter.
4. Deleting a letter.
EDIT/CLEAR

Press the EDIT/CLEAR button to delete the current letter.
Selecting a genre

When the editing mode is Genre In?, you can select a genre name by turning the MULTI JOG dial. The 24 genres shown below are available for your selection.
PUSH TO ENTER
MULTI JOG
PUSH TO ENTER
Press the MULTI JOG dial to confirm the selection.
(Undefined), Alternative, Blues/R&B, Books & Spoken, Children's Music, Classical, Country, Dance, Data, Easy Listening, Electronic, Folk, Hip Hop/Rap, Holiday, House, Industrial, Jazz, New Age, Pop, Religious, Rock, Soundtrack, Trance, World, Other
Using the remote controller
Do the following steps in numeric order.
2. Select a track for which you want to edit information.
Press the SELECT ▲ buttons to select a group, and press the ◀◀/▶buttons to select a track.
4. Select the mode.
* When you select "Genre In?", instead of steps 6 and 7, press the SELECT ▲/▼buttons to select a genre and press the ENTER button to confirm it.
7. Enter a letter.
①: Select a number-entering mode using the DISPLAY button to enter "1." In any other mode, pressing the "1" button enters nothing.
ABC WXYZ
② - ⑨: When you select a number-entering mode using the DISPLAY button, you can enter any number. When you select a lower-case mode or an upper-case mode, you can enter the letters given above the button.
SYMBOL : Press this button to enter a symbol regardless of the mode selected with the DISPLAY button.
CLEAR
100: You can enter "0" with this button after selecting a number entering mode using the DISPLAY button. In any other modes, this button works as a delete button.
ENTER: Press this button to confirm the letter.
Scroll the whole track name.
6. Select a type of character.
1. Activate the HDD section.
5. Confirm the editing mode.
3. Enter the character-editing mode.
8. Exit the character-editing mode.
* When the specific mode is not selected using the DISPLAY button, each press of a letter or number button switches the letters to be entered as below.
Example: in case of ② button: A, B, C, a, b, c, 2

Erasing a track
1. Activate the HDD section.

Press the HDD button.
2. Select the track you want to erase.
MULTI JOG

PUSH TO ENTER


Turn the MULTI JOG dial to select the group and then press the ◀◀/◀◀/▶buttons to select the track you want to erase.
3. Enter the edit/clear mode.
EDIT/CLEAR

Press the EDIT/CLEAR button.
4. Select the one-track erase mode.
MULTI JOG

PUSH TO ENTER
Turn the MULTI JOG dial to select "1T Erase?."
It Erase?
5. Press the MULTI JOG dial.
MULTI JOG

PUSH TO ENTER
The erase confirmation message appears.
It Erase?
6. Confirm the erase operation.
PLAY MODE

Press the YES button. After "Erasing..." is displayed, "Complete!" appears in the display area.
Complete!
Notice:
To cancel the erase operation before confirming, press the MENU/EXIT or ■ STOP button.
Erasing an entire group
1. Activate the HDD section.

Press the HDD button.
2. Select the group you want to erase.
MULTI JOG
PUSH TO ENTER
Turn the MULTI JOG dial to select the group you want to erase.
3. Enter the edit/clear mode.
EDIT/CLEAR

Press the EDIT/CLEAR button.
4. Select the group erase mode.
MULTI JOG

PUSH TO ENTER
Turn the MULTI JOG dial to select "1G Erase?" and press the MULTI JOG dial to confirm the selection. The MB-S1 enters the group erase mode.
Is Pass?
5. Press the MULTI JOG dial.
MULTI JOG

PUSH TO ENTER
The erase confirmation message appears.
is Erase??
6. Confirm the erase operation.
PLAY MODE

Press the YES button. After "Erasing..." is displayed, "Complete!" appears in the display area.
Complete!
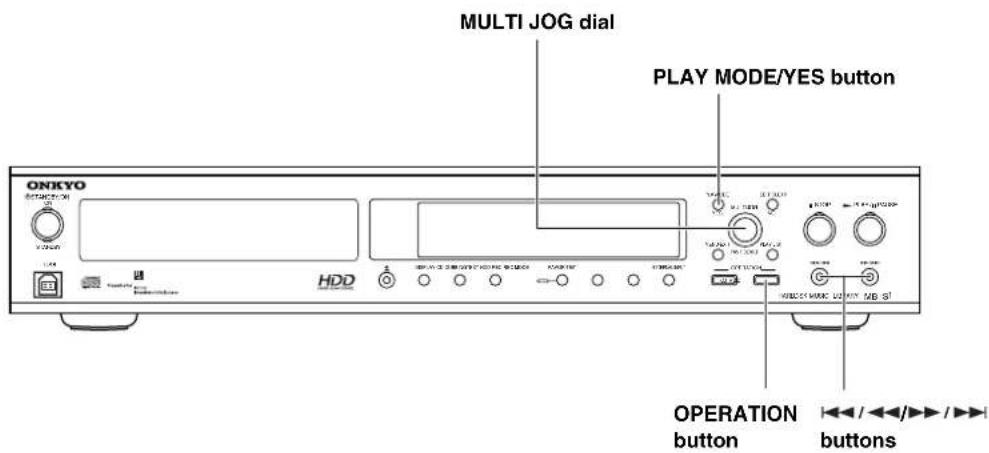
Creating a play list
You can create a play list which includes your favorite tracks. You can choose tracks for a play list from the audio CD tracks or music files recorded on the HDD.
You can create up to 100 play lists and add up to 100 tracks to each play list.
1. Activate the HDD section.

Press the HDD button.
2. Select the track you want to add to a play list.
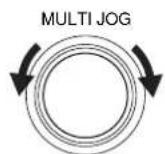
PUSH TO ENTER

Turn the MULTI JOG dial to select the group and use the ◀◀/◀◀/▶buttons to select the track you want to add to a play list.
3. Activate the play list creation mode.

PUSH TO ENTER
Press the MULTI JOG dial. "Add PlayList" appears in the display for a second, and then changes to the indication for play list number selection.

flowchart
graph TD
    A["Add Playlist"] --> B[":1F: New 0:00"]
When you create a play list first time, "1p" blinks. After second time, the play list number you selected last time blinks.
4. Select a play list.

PUSH TO ENTER
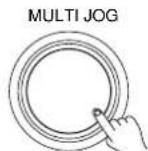
PUSH TO ENTER
When the blinking play list is the one to which you want to add a track, press the MULTI JOG dial to confirm. When you want to select another play list, turn the MULTI JOG dial to select the play list. After selecting a play list, press the MULTI JOG dial to confirm it.
When the "New" indication appears next to the play list number, the play list contains no track. And when the "3P5T" indication appears next to the play list number, the track you are going to add will be added as a fifth track of the third play list.
5. Select the position where you want to add a track.
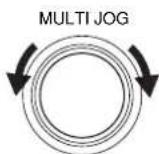
PUSH TO ENTER

If you want to add a track to the track number blinking, press the MULTI JOG dial. If you want to add a track to another track number, turn the MULTI JOG dial to select the track number.
6. Confirm your selection.
PLAY MODE

Press the YES button or the MULTI JOG dial to confirm your selection. "Complete!" appears in the display area.
Complete!
Notice:
To cancel the erase operation before confirming, press the MENU/EXIT or ■STOP button.
■Understanding the indication on play lists
When creating a play list
When you create a play list for the first time, "1P New" appears.
“1P” means the first play list and “New” means that the play list contains no tracks.
For subsequent play lists, the indication will be “2P New” and so on.
“2P” means the second play list and “New” means that the play list contains no tracks.
* If you delete a play list, the play list number is reserved until a new play list is created. The renumbering for play list numbers is not performed. When you create a subsequent play list, the reserved play list number appears as a new play list number. For example, if you have play lists No.1 through No.10 and delete the play list No.3, when you create a play list next time, "3P New" appears.
When adding tracks to a play list
When you add a track to an existing play list, for example, the first play list containing 5 tracks, the indication will be "1P 6T."
“1P” means the first play list and “6T” means the position to which you are going to add a track. If you want to change the order of playing tracks, change the track number.
* If you delete a track in a play list, the track number for the next track of the deleted track is receded, and then the rest of the tracks in the play list are renumbered accordingly. For example, when you register 10 tracks (No.1 through No.10) in the first play list and you delete the track No.3, the track No.4 is receded to No.3 and the rest of the tracks in the play list is renumbered accordingly, resulting in 9 tracks in the play list.
Using the remote controller
Do the following steps in numeric order.

Listening to tracks using a play list
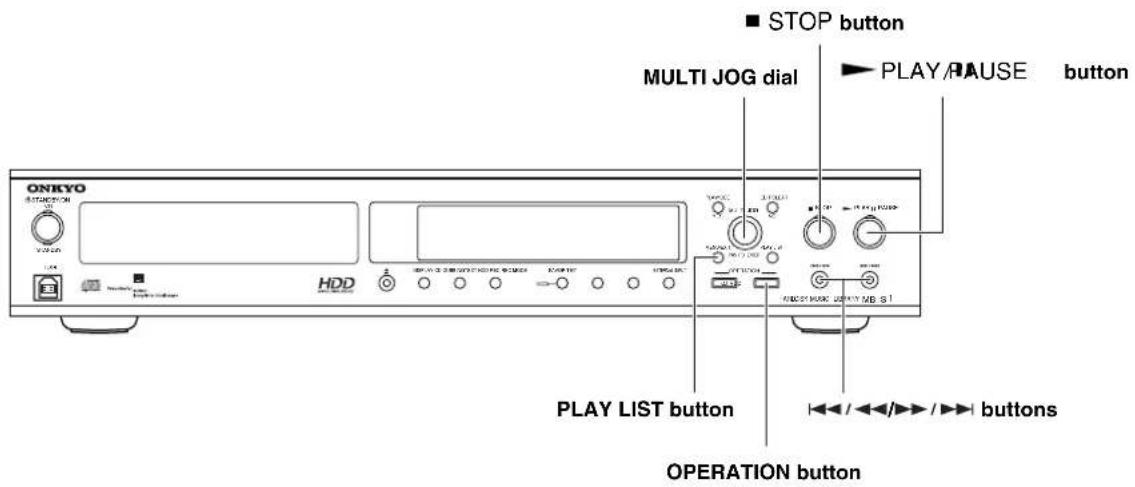
Listening to tracks using a play list
1. Activate the HDD section.

Press the HDD button.
2. Activate the play list mode.
PLAY LIST

Press the PLAY LIST button.
3. Select the play list.

Turn the MULTI JOG dial to select the play list you want to use.
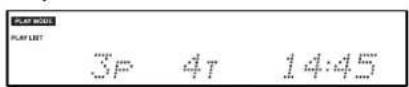
4. Start playing.
PLAY/■ PAUSE
Press the ▶ PLAY/1PAUSE button. The playback starts from the first track in the play list.

Stopping the playback

Press the ■STOP button. After the playback is stopped, press the ▶ PLAY/■PAUSE button to start playing from the beginning of the track where you pressed the ■STOP button. Pressing the ■ STOP button twice locates the first track of the current group and stops the playback.
Selecting the track you want to listen to

During playing or paused, pressing the ◀◀/◀◀ button locates the beginning of the current track. Pressing the ◀◀/◀◀ button twice locates the beginning of the previous track and another press of the button locates the beginning of another previous track.
Pressing the button locates the beginning of the next track.
Reversing and fast forwarding
During playback, hold down the ◄/◄◄►►/►► button for 0.5 seconds or longer to reverse or fast forward the current track. At first, reverse and fast forward is eight times faster than normal speed playback, and then will be 16, 32, and 64 times faster. When the reverse or fast-forward comes to your desired position, release the ◄◄◄/◄◄ or ►button to resume normal playback.
The sound is not output while reversing or fast forwarding. While reversing, when the MB-S1 comes to the beginning of the track, the playback of that track starts in normal speed. While fast forwarding, when the MB-S1 comes to the beginning of the next track, the playback of the next track starts in normal speed.
Playing tracks in a play list in random order
Remote controller only

Pressing the RANDOM button on the remote controller displays the current setting for random playback. Each press of the RANDOM button switches the setting between "Random On" and "Random Off."
Random On: Plays the tracks in the current play list in random order. When you select Random On, the "RANDOM" indicator lights.
Random Off: Disables the random playback function.
Exiting the play list playback mode
PLAY MODE

MULTI JOG
Press the PLAY MODE button. After the "Group?" indication appears, press the MULTI JOG dial. After the "Sorting" indication appears, the MB-S1 enters the mode playing tracks in the order according to the group name. Also refer to the description on pages 39 to 41.

PUSH TO ENTER
Playing tracks in a play list repeatedly
Remote controller only

Pressing the REPEAT button on the remote controller displays the current setting of the repeat playback. Each press of the REPEAT button switches the repeat playback mode in the following order: Repeat All, Repeat 1, Repeat Off.
Repeat All: Plays all tracks in the current play list. When you select this mode, "REPEAT" indicator lights.
Repeat 1: Plays the current track repeatedly. When you select this mode, "REPEAT 1" indicator lights.
Repeat Off: Turns off the repeat playback mode.
Using the remote controller
Do the following steps in numeric order.


Naming a play list
1. Activate the play list mode.
PLAY LIST
Press the PLAY LIST button.

2. Select the play list.
MULTI JOG

PUSH TO ENTER
Turn the MULTI JOG dial to select the number of the play list you want to name.

3. Activate the character-editing menu.
TEXT

MULTI JOG

PUSH TO ENTER
Press the TEXT button. "P.List Name" appears in the display area. Press the MULTI JOG dial to activate the play list naming mode.

4. Enter the play list name.
For entering character, see "Entering characters" on pages 28 and 29. If you want to cancel naming, press the MENU/EXIT button.
5. Confirm the entry.
PLAY MODE

Complete!
Press the YES button to confirm the name.
"Complete!" is displayed in the display area.
Using the remote controller
Do the following steps in numeric order.
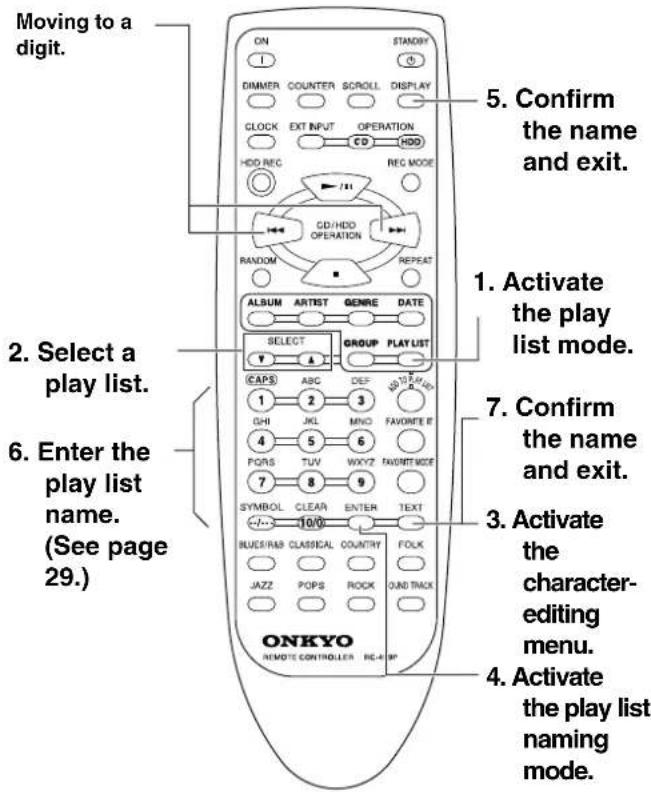
Moving a track within a play list
1. Activate the play list mode.
PLAY LIST
Press the PLAY LIST button.

2. Select the play list.
MULTI JOG
PUSH TO ENTER
Turn the MULTI JOG dial to select the play list number that contains the track that you want to move.

3. Select the track you want to move.

Press the ◀◀/◀◀/▶▶/▶▶ button to select the track you want to move.
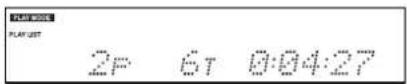
4. Select the track-moving mode.
EDIT/CLEAR

MULTI JOG

PUSH TO ENTER
Press the EDIT/CLEAR button and turn the jog dial to select "TrNo.Change? (Track Number Change?)."
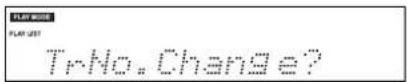
5. Activate the track-moving mode.
PLAY MODE

Press the YES button to activate the track-moving mode.
6. Select the position to which you want to move the track.
MULTI JOG

PUSH TO ENTER
Turn the MULTI JOG dial to select the track position to which you want to move the track.

7. Confirm the position.
PLAY MODE

Press the YES button to confirm the new track position. "Complete!" appears in the display area.
Complete!
Deleting a track in a play list
1. Activate the play list mode.
PLAY LIST
Press the PLAY LIST button.

2. Select the play list.
MULTI JOG

PUSH TO ENTER
Turn the MULTI JOG dial to select the play list number that contains the track that you want to delete.

3. Select the track you want to delete.
◀◀/◀◀ ▶▶/▶▶
Press the ◀◀/◀◀/▶▶/▶▶ button to select the track you want to delete.


4. Select the one-track deleting mode.
EDIT/CLEAR

MULTI JOG
Press the EDIT/CLEAR button and turn the MULTI JOG dial to select "1T Clear?."
IT Clear?
PUSH TO ENTER
5. Confirm the delete operation.
PLAY MODE

Press the YES button to confirm the delete operation. "Complete!" appears in the display area.
Complete!
Notice:
Editing or deleting a play list will not change or delete the track information stored on the HDD.

Deleting a play list
1. Activate the play list mode.
PLAY LIST
Press the PLAY LIST button.

2. Select the play list you want to delete.
MULTI JOG
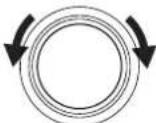
PUSH TO ENTER
Turn the MULTI JOG dial to select the play list number you want to delete.

3. Activate the play-list deleting mode.
EDIT/CLEAR

MULTI JOG
Press the EDIT/CLEAR button and turn the MULTI JOG dial to select "1P Clear?."
IF Clear?

PUSH TO ENTER
4. Confirm the delete operation.
PLAY MODE

Press the YES button to confirm the delete operation. "Complete!" appears in the display area.
Complete!

Playing track in sorted order
You can use the information registered in tracks on the HDD to sort the playback order.
For example, you can sort and play tracks in the following ways:
- In the order which groups and tracks were recorded onto the HDD (without sorting)
• In alphabetical order of the track titles
• In alphabetical order of the album titles
• In alphabetical order of the artist name
• In alphabetical order of the genre
• In order from newer tracks according to the date information
1. Activate the play mode.
PLAYMODE
Press the PLAY MODE button.

2. Select a play mode.
MULTI JOG

PUSH TO ENTER
Turn the MULTI JOG dial to select a play mode. While turning, the play mode changes in the following order: Group?, Title?, Album?, Artist?, Genre?, and Date?.
“Artist?”
3. Confirm the selection.
MULTI JOG

PUSH TO ENTER
Press the MULTI JOG dial to confirm the play mode selection. "Sorting" appears and then the first track of the sorted order is displayed.
Sorting
4. Start playback.

PLAY/■PAUSE
Press the ▶PLAY/ start playback.
PAUSE button to

Using the remote controller
Do the following steps in numeric order.

-
Starts playback.
-
Press a play mode button you want to execute.
Select a genre.
Tip:
You can directly select one of the eight genres by using the remote controller: BLUES/R&B, CLASSICAL, COUNTRY, FOLK, JAZZ, POPS, ROCK, and SOUND TRACK.

Marking a track as you favorite (FAVORITE IT function)
When you have your favorite tracks, you can mark them as favorites together with the track information.
When you enable the favorite mode, you can play the tracks marked as your favorites only.
You can use the favorite mode playback combining with the sorted track playback function on the last page.
1. Mark a track as your favorite.
FAVORITE IT
While your favorite track appears in the display area, press the FAVORITE IT button to mark the track as your favorite. "Favorite On" appears for 2 seconds and the FAVORITE indicator lights in green.
You can mark a track as your favorite while the track is being played.
Press the FAVORITE IT button again to unmark the track.
Playing your favorite tracks only
1. Activate the play mode.
PLAYMODE

twice
Press the PLAY MODE button twice.
Favorite Off?
The current setting appears.
2. Activate the favorite mode.
MULTI JOG

PUSH TO ENTER
Turn the MULTI JOG dial to select "Favorite On?."
Favorite On ?
3. Confirm the selection.
MULTI JOG

PUSH TO ENTER
Press the MULTI JOG dial. "Sorting" appears in the display area and tracks marked as your favorite are selected.
Sorting
4. Start playback.
PLAY/PAUSE
Press the ▶PLAY/ PAUSE button to start playback.
■Disabling the favorite mode
In step 2 above, select "Favorite Off" and press the MULTI JOG dial.
About combination of play modes
■When you combine the sorted tracks mode and the favorite mode
Plays only favorite tracks from sorted tracks in sorted order.
■When you use the random and repeat playback feature
Plays tracks in random order and repeatedly.
Displaying track information
DISPLAY

To switch the track information displayed such as the track title or artist name for the current track, press the DISPLAY button. With each press of the button, a indicator in the left part of the display lights one by one and the track information you entered using the steps described on pages 28 and 29 appears.

Notice:
The MB-S1 does not support 2-byte character code. When you play CDs or music files on the HDD which contain some 2-byte character, the track information will not be displayed properly.
Using the remote controller

- Mark a track as your favorite.
- Activate the favorite mode.
Using the remote controller
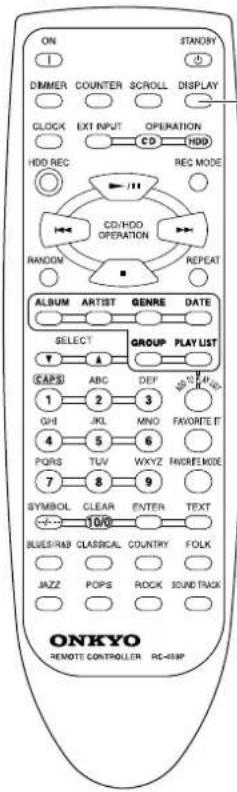
Displays track information.
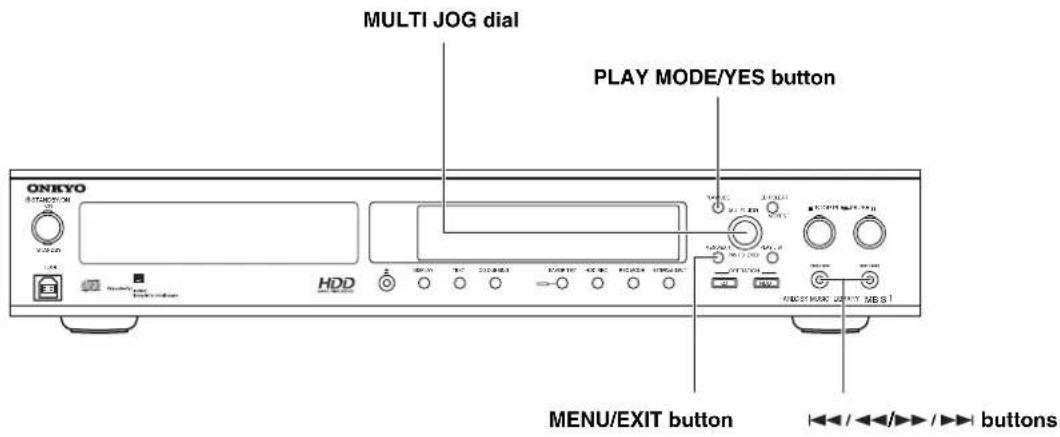
Setting a timer
You can set four kinds of timer functions including timer playback and timer recording.
For each timer setting, you can set the function like playing tracks on the HDD, or playing and recording the source from external devices with the date and the day of the week for activating timer. You can also set a play list when playing and a target recording group when recording.
1. Enter the menu mode.
MENU/EXIT

Press the MENU button. The menu appears in the display area.
2. Select the timer setting menu.
MULTI JOG
PUSH TO ENTER
Timer Setting?
Turn the MULTI JOG dial to select "Timer Setting?" and press it to confirm the selection.
If "Clock Adjust" appears, set the clock. For setting the clock, see page 19.
3. Select a timer setting number.
MULTI JOG

PUSH TO ENTER
T1: HDD PLAYOFF
You can set up to four timer settings (T1-T4).
MULTI JOG

PUSH TO ENTER
Turn the MULTI JOG dial to select a timer setting number and press it to confirm the selection.
4. Set the timer function.
MULTI JOG

PUSH TO ENTER
T1 HDD Playoff
Turn the MULTI JOG dial to select the timer function for the timer setting.
MULTI JOG

PUSH TO ENTER
After selecting the timer function, press the MULTI JOG dial to confirm the timer function.
Timer Function
HDD Play: Plays tracks on the HDD.
D-1 Rec: Records the audio signal from DIGITAL INPUT 1 input terminals.
D-2 Rec: Records the audio signal from DIGITAL INPUT 2 input terminals.
Ana Rec: Records the audio signal from ANALOG input terminals.
5. Set the timer on or off.
MULTI JOG
PUSH TO ENTER
TI HDD PLAY On
MULTI JOG
Turn the MULTI JOG dial to select "On" or "Off" and press it to confirm the selection.

When you set the timer to "Off," the time setting mode finishes.
PUSH TO ENTER
6. Set the start time and end time for the timer setting.


- Turn the MULTI JOG dial to select hour for the start time. Press the MULTI JOG dial to confirm the hour and the highlight moves to the minute.
• After setting the start time for the timer setting, the time one hour later than the start time appears as the end time. - Use the ◀◀/◀◀/▶buttons to move the highlight forward or back.
• The maximum recording time from the start time to the end time is 5 hours 59 minutes 59 seconds.
7. Confirm the start time and the end time.

Press the YES button to confirm the time. Then the display changes to the indication of setting the day of the week. At first, the current day of the week blinks.
8. Set the day of the week.

Use the button to select the day of the week for activating the timer setting and press the MULTI JOG dial.
9. Confirm the day of the week.

Press the YES button to confirm the day of the week.
In step 4 above:
When you select "HDD PLAY," go to step 10, "Select a play list."
When you select "D-1 REC," "D-2 REC," or "ANA REC," go to the step 11, "Select a target group for recording."
When the setting is completed, "T. PLAY" or "T. REC" lights.

10. Select a play list.
(Only when you select "HDD Play" for timer function in step 4.)
MULTI JOG

PUSH TO ENTER
MULTI JOG

PUSH TO ENTER
$$ P _ {n} L i s t = \text { } j _ {n} ^ {\prime} p $$
Turn the MULTI JOG dial to select a play list and press it to confirm the selection. If you have not created any play list, "Current" appears and the last group which was played before the timer activated will be played when the start time comes.
After pressing the MULTI JOG dial, the timer setting finishes and is enabled.
11. Select a target group for recording.
(Only when you select "D-1 REC," "D-2 REC," or "ANA REC.")
MULTI JOG

PUSH TO ENTER
MULTI JOG
Turn the MULTI JOG dial to select a target group for recording and press it to confirm the selection. You can choose from "Current," "New," or "Fix."
Current: Set the target group to the group the last time the recording or playback was performed.
New: Create a new target group.
Fix: Select a target group from the existing groups. Turn the MULTI JOG dial to select a target group for recording and press it to confirm the selection.

PUSH TO ENTER
Notes:
- A track number automatically increments when the input level of the recording source is below the threshold. If you record a track which contains longer silence section, a track number may increment when the recording comes to the silence section. (See the tips of step 4 on page 24.)
- If an operation is performed such as playing, recording and others when the start time for the timer setting comes, the timer function may not operate normally.
- The timer function will activate whether the MB-S1 is turned on or in the standby state.
- When you record the source from an external audio device, turn on the power of the device.
- You can set up to 4 timer settings. However, when a timer setting already executed has not yet completed and the start time for another timer setting comes, the latter timer setting will be ignored.
CD-ROM Drive Unit: ATA Packet Interface (specified in SFF-8020) (E-IDE)
Industry Standard 5.25" Half Height Form Factor
Hard Disk Drive Unit: AT Attachment 5 (ATA-5)
Industry Standard 3.5" Half Height Form Factor
20GB
D/A Converter: Single bit (Crystal CS4341, 24 bit/96 kHz)
A/D Converter: Single bit (Crystal CS53L32A, 24 bit/96 kHz)
Connections: 1 Analog Output (stereo)
1 Analog Input (stereo)
2 Digital Input (optical)/(coaxial)
1 Digital Output (optical) (with Audio CD Playback only)
1 USB (Type B)
Frequency Response: 5 Hz - 20 kHz
Playback Harmonic distortion: 0.007 % (at 1 kHz, 0 dB)
Playback Dynamic range: 90 dB
Playback Signal to noise ratio: 90 dB
Recording Harmonic distortion: LPCM: 0.007 % (at 1 kHz, 0 dB), MP3: 0.018 % (at 1 kHz, 0 dB)
Recording Dynamic range: 90 dB
Recording Signal to Noise ratio: 90 dB
Channel Separation: 90 dB (playback)
Wow and Flutter: Below threshold of measurability
Output Level: 2.0 volts r.m.s.
Power Supply Rating &
Power Consumption
USA & Canadian models: AC120 V, 60 Hz, 27 W
Others models: AC120-240 V, 50/60 Hz, 24 W
Dimension (W.H.D,) 435 x 81 x 359 (17-1/8" x 3-3/16" x 14-1/8")
Weight 5.0 kg, 11.0 lbs
Specifications and features are subject to change without notice.
Overview of the supplied Carry Tunes software
The supplied Carry Tunes software is designed for transferring MP3 music files. Though until now MP3 music files have only been able to be played on PCs, Carry Tunes allows you to enjoy the music files easily and in high quality on the MB-S1.
■Plays MP3 music files
You can play MP3 music files with easy operation.
■MP3 track information edit feature
You can add and edit the track information such as track title and album title.
■MP3 music file transfer feature
Using Carry Tunes, you can transfer MP3 music files from your PC to the HDD on the MB-S1 through the USB interface, allowing playback in high quality on the MB-S1. You can easily select the MP3 music files to transfer using check boxes or the CHECK ALL button.
* The music files you can play or transfer to the MB-S1 using Carry Tunes are MP3 format files only.
■Other features
Track list sort feature (You can sort the tracks easily by clicking the information item title.)
Track data calculation feature (The total playing time and the total size for selected files can be displayed.)
File transfer progression display feature (You can easily find the file transfer status in the progress bar display. The progress display in files or in sizes is available.)
Tip:
The supplied CD-ROM contains necessary software and sample music files used in this manual.
What is a device driver?
A device driver is software installed in your PC to make the peripheral devices available to the PC. Also simply called a "driver."
What is a device?
A device means every PC peripheral.
- This instruction manual is written assuming that the reader is familiar with how to use a computer mouse and keyboard and other basic operations of a personal computer.
- Onkyo will accept no responsibility for any losses caused by the use of this product.
- Onkyo will accept no responsibility for any damages or financial losses caused by the malfunction, misuse, or faulty operation of this product.
• The contents of this instruction manual may be changed without notice and without Onkyo incurring and obligations. - You may not lend or copy or reproduce this instruction manual, whole or in part, without the express consent of Onkyo.
- Carry Tunes is a registered trademark of Onkyo Corporation.
- Microsoft, Windows, Windows 98SE, Windows Me and Windows 2000 are registered trademarks of Microsoft corporation.
- Intel and Pentium are registered trademarks of Intel corporation.
To transfer music files from a PC to the MB-S1, the following configuration is required.
• CPU: Intel Pentium II 233MHz or higher (recommended Intel Pentium III 450MHz or higher)
- HDD space: 60MB or more
• RAM: 64MB or more (recommended 128MB or more)
- CD-ROM drive (or equivalent)
- Windows 98SE/Me/2000
- Display resolution 800 x 600 or higher, and high color enabled.
- The sound device drivers installation. For more information on the sound device drivers, see Help for Windows you are using.
Be aware that even if the PC satisfies the requirements above, the MB-S1 may not operate properly depending on the specifications of the PC or the environment in which the MB-S1 is used.
Setting the PC
When connecting the MB-S1 to your PC for the first time, you will need to install the device driver.
Installing the device driver
1. Turn on the PC.
Make sure the operating system successfully completes its startup process.
2. Turn on the MB-S1.
3. Connect the MB-S1 to the PC using a USB cable.

For the procedures after step 3, go to step 4 on the next page for Windows 98SE/Me, and go to step 4 on page 48 for Windows 2000.
Windows 98SE/Me
- The "Add New Hardware Wizard" window appears on the PC display. Click "Next."

- Click "Next."
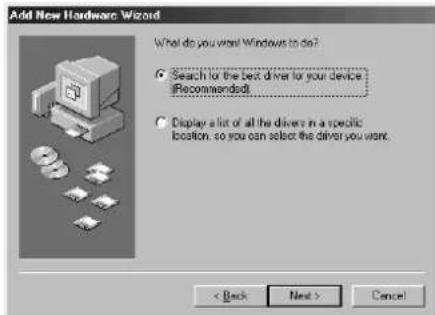
- Insert the supplied CD-ROM ("Carry Tunes Installation CD") into the CD-ROM drive of the PC.
If the "Carry Tunes Installation CD" window appears, click "End" to close the window.
- Select the "CD-ROM drive" check box to specify a search location for the drivers, and click "Next."

When you reinstall the drivers, select the "Specify a location" check box and click "Browse" to select the folder containing the device drivers. In the example above, "D:" represents the drive letter for the CD-ROM drive.
- Click "Next."

- Click "Finish."

- Click "Next" to start searching the next driver.

- Click "Next."

12. Select the "CD-ROM drive" check box, and click "Next."

When you reinstall the drivers, select the "Specify a location" check box and click "Browse" to select the folder containing the device drivers. In the example above, "D:" represents the drive letter for the CD-ROM drive.
13. Click "Next."

14. Click "Finish."

This completes the device driver installation.
Windows 2000
Continued from step 3 on page 46.
4. Start searching the hardware.
The "Found New Hardware Wizard" window appears on the PC display. Click "Next."

5. Click "Next."
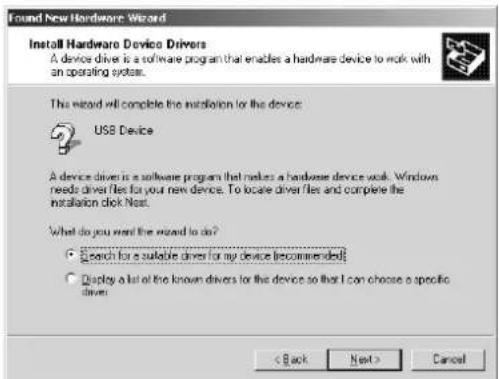
6. Select the "CD-ROM drive" check box to specify a search location for the driver, and click "Next."
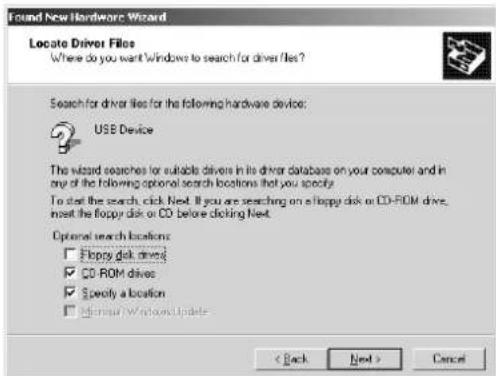
When you reinstall the device drivers, select the "Specify a location" check box.
7. Insert the supplied CD-ROM ("Carry Tunes Installation CD") into the CD-ROM drive of the PC, and click "OK."
If the "Carry Tunes Installation CD" window appears, click "End" to close the window.
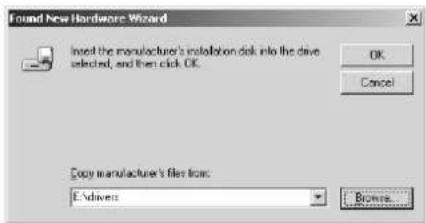
If you select the "Specify a location" check box in step 6 above, click "Browse" to select the folder containing the device drivers. In the example above, "E:" represents the drive letter for the CD-ROM drive.
8. Click "Next."

9. Click "Finish."
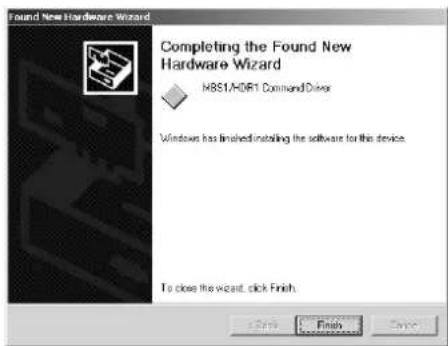
10. Start searching the next device driver.
After the window below appears, click "Next."

11. Click "Next."
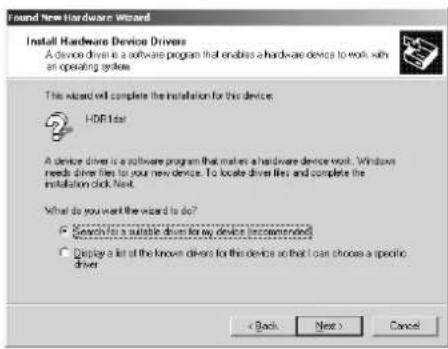
12. Select the "CD-ROM drive" check box, and click "Next."

When you reinstall the driver, select the "Specify a location" check box.
13. Click "OK."

If you select the "Specify a location" check box in the step 12 above, click "Browse" to select the folder containing the device drivers. In the example above, "E:" represents the drive letter for the CD-ROM drive.
14. Click "Next."

15. Click "Finish."
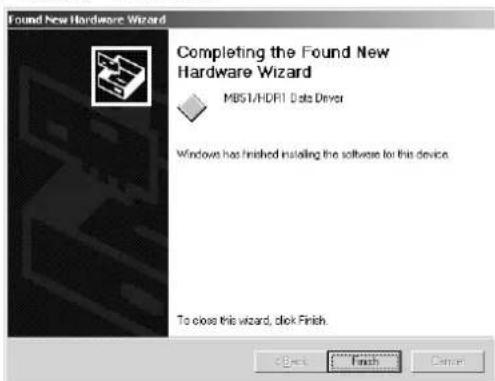
This completes the device driver installation.
Confirming the installation of the device driver
- Click "Start," point to "Settings," and choose "Control Panel."
- Double-click the "System" icon.
- Click "Hardware." (Windows 2000 only)
- Click the "Device Manager" tab.
When using Windows 98SE/Me

Confirm these device drivers are installed.
5. Confirm the installed device drivers are displayed in the dialog box.
Find "MBS1/HDR1 Command Driver," "MBS1/HDR1 Data Driver," and "Generic USB Hub."
Notes:
- Make sure that the sound device drivers are working properly. For more information, refer to the documentation that comes with your PC.
- When "Unknown device" appears under "Universal Serial Bus Controller", unplug the USB cable and plug it in again for the MB-S1 to be recognized.
- For Windows Me, a green “?” mark may appear next to “USB Compatible Device” in the Device Manager tab, but this will not effect the operation and function of the MB-S1.
- It may take about 15 seconds to recognize the USB Audio device when you connect the USB cable or the PC starts up. During this recognition process, do not start any application and do not perform any operations on the PC. Do not unplug the USB cable while any applications runs on the PC.
Install Procedure
1. Insert the supplied CD-ROM into the CD-ROM drive of the PC.
The setup menu automatically appears. If the setup menu does not appear automatically, double-click the "CtStart" file.
2. Click "Install" on the "Carry Tunes Installation CD" window.
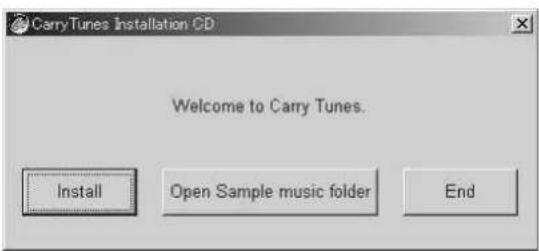
3. The "Welcome" window appears. Click "Next."

4. The "Software License Agreement" window appears. After you read it, click "Yes."
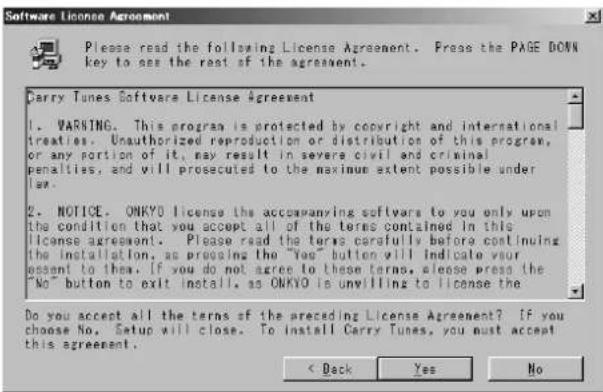
5. The "Choose Destination Location" window appears. Click "Next."

6. The "Select Program Folder" window appears. Click "Next."

7. The "Setup Complete" window appears. Click "Finish."

This completes the installation procedures for Carry Tunes.
Registering MP3 files with Carry Tunes
1. Start Carry Tunes.
Click "Start," point to "Programs," point to "Carry Tunes," and click "Carry Tunes."
When the Carry Tunes icon is created on the desktop, double-click the icon.
2. Drag the MP3 files you want to register and drop them onto Carry Tunes.
The supplied CD-ROM contains sample MP3 files.
To use the sample MP3 files, insert the CD-ROM into the CD-ROM drive on the PC.
Click "Open Sample music folder" in the Carry Tunes Installation CD dialog box to open the folder containing the sample MP3 files. Do not drag and drop the files other than MP3 files because they cannot be registered with the Carry Tunes software.
To check if the file is an MP3 file, right-click the file to open the property and make sure that the file extension is MP3.
* If the Carry Tunes Installation CD dialog box does not appear automatically, open the CD-ROM, and double-click the "CtStart" file.
3. The MP3 files you dropped are displayed in the Carry Tunes screen.


Open a music file.
Main operations

Transferring MP3 music files to the MB-S1
1. Make sure the MB-S1 is connected to the PC properly.
When the connection is properly made, the display in the MB-S1 appears as shown below.
| USB | 2G | 5T | ? |
2. Select the MP3 files you want to transfer.
Click in the CHECK column on the track list to select or de-select a track.
To select all tracks on the track list, click the "CHECK ALL" button. Click the "CLEAR" button to de-select all tracks.
3. Select the target group for transferring MP3 files.
Click the "EXPORT TO." "CURRENT" and "NEW" are displayed alternately.
When you select "CURRENT," selected MP3 files are transferred to the group currently selected on the MB-S1.
When you select "NEW," a target group is newly created on the MB-S1 and selected MP3 files are transferred to the newly created group.
Also confirm the display area on the MB-S1 for target group.
4. Click the "EXPORT" button to start transferring.
The progress bar indicates the progression of file transfer.
On the MB-S1, the target group and track position in the group to which a current file is being transferred to.
| USB | 2g | 5t >> |
5. Transfer completes.
The transferred tracks disappear from the list, and the indication on the MB-S1 showing file transfer completion appears.
| USB | 2s | 5T OK |
6. Close the Carry Tunes software.
Click the checkmark located at the right bottom of the screen.
When you listen to the transferred MP3 files using the MB-S1, remove the USB cable from the MB-S1.
Notes on Carry Tunes:
- Some of MP3 files such as RIFF WAV format file are not supported.
- When the tag information contained in MP3 file is broken or invalid, Carry Tunes may not operate properly.

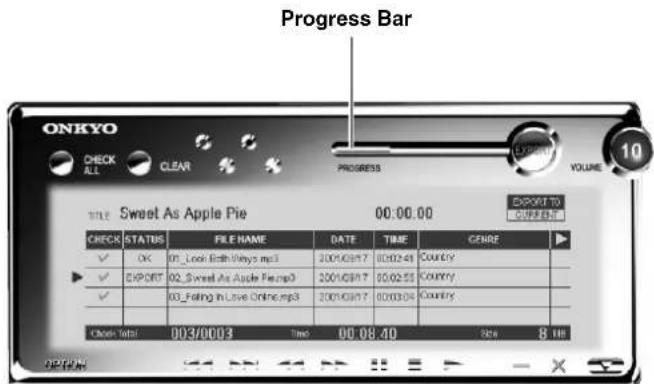

- Close the Carry Tunes software
If a problem occurs while you are using the remote controller, first try to operate the controls on the front panel of the MB-S1 to make sure that it is not due to a malfunction (or worn out batteries) in the remote controller.
Main unit and remote controller
The power does not turn on.
- The power cord is not properly plugged in.
→Plug the power cord properly into a main's power supply. (See page 13.) - The component where the power cord is plugged into is not turned on.
→Turn on the component into which the power cord is plugged.
The buttons on both the MB-S1 main unit and the remote controller do not function.
- The microcomputer inside the MB-S1 malfunctions.
→Press the STANDBY/ON button to turn the MB-S1 on again. If this does not eliminate the problem, unplug the power cord and plug it in again.
Playback
Playback does not start.
- Condensation is present inside the MB-S1.
→When condensation occurs or may occur, leave the MB-S1 in room temperature for one to two hours before using. (See page 14.)
The playback skips.
• The MB-S1 is being subjected to vibrations.
→Place the MB-S1 in a more stable location.
The playback skips (CD).
- The disc is scratched.
→Replace the disc. - The disc is dirty. →Clean the disc. (See page 14.)
The disc is inserted, but the playback does not start.
• The disc is inserted upside down.
→Insert the disc with the label side up. (See page 20.)
- The disc is dirty.
→Clean the disc. (See page 14.)
- The disc is damaged.
→Replace the disc.
- A blank disc is inserted.
→Replace the disc with an audio CD or one that contains MP3 files. (See page 14.)
Locating a track on the disc takes too long (CD).
- The disc is dirty.
→Clean the disc. (See page 14.) - The disc is damaged. →Replace the disc.
When playing a track recorded from an analog input source, the output is small (HDD).
- The recording level (REC LEVEL) setting is not appropriate.
→Adjust the recording level.
Set the recording level setting to "Norm." (See pages 24, 25.) - The recording level is set to "Low." →Set the recording level setting to "Norm."
During playing MP3 files on the HDD, the bit rate is not displayed (HDD).
- The bit rate for the track played is other than 96kbps, 128kbps, or 192kbps.
→The MB-S1 does not display bit rates other than 96kbps, 128kbps, and 192kbps. (See page 9.) - The bit rates for MP3 files recorded with variable bit rates may not be displayed correctly.
→Use the constant bit rate when encoding music files in MP3 format.
Recording/Editing
Cannot record or nothing was recorded.
- The connection between the MB-S1 and the other device is not proper.
→Confirm the connections. (See pages 12, 13.) - The recording source is digital, but an optical or coaxial cable is not connected to the MB-S1.
→Make sure that the cable is connected properly. (See pages 12, 13.) - The recording source is protected with the copy guard system. →You cannot record the input source protected with the copy guard system. (See page 15.)
- While recording, the power cord was unplugged or the power failed.
→Perform the recording again. - The selection of the input source is not proper.
→Select the input source properly. (See page 24.)
Recorded sound is distorted.
- Recording is being affected by the television.
→Either turn off the television or move the MB-S1 away from the television. - The recording level is set to “Norm” when recording from records.
→Set the recording level to "Low". (See page 25.)
The text information cannot be entered.
- You tried to enter the text information for a CD.
→You cannot enter the text information for tracks on a CD.
Timer
The timer function activated, but the sound was not output.
- The time set in the timer settings overlapped.
→When you use more than one timer setting, be sure not to overlap the time set in timer settings.
• The volume was set at the lowest level.
→Set the volume at the appropriate level in advance.
Others
The MB-S1 does not operate.
- The connections are incomplete. →Make sure that all the cables are connected properly, including RI connection cable and audio connection cables.
The remote controller does not work.
- The remote controller batteries are dead. →Replace all the remote controller batteries with new batteries.
- The remote controller is being used outside of its operational range. →Use the remote controller within its operational range.
- There is an object between the MB-S1 and the remote controller obstructing the signals. →Remove or avoid the obstructing object.
Carry Tunes
The music files are not transferred.
- You are transferring music files that are not MP3 format. →The Carry Tunes software can transfer only MP3 format music files.
The MB-S1 is not recognized.
- The USB cable connection is incomplete. →Make sure that the USB cable is connected properly. - The device driver installation is incomplete. →Confirm the device driver installation and install necessary device drivers.
If one of the messages shown below appears
“(Undefined)” There is no text data or undefined name in the current track.
"Clock Adjust" The clock of this unit has not been set.
"Copy Protect" An attempt was made to record copyright-protected material.
"Group Full" An attempt was made to record more than 999 groups.
"HDD Check ..." System error occurred. Wait for a while.
“HDD Check 999” System error occurred. Do not operate the MB-S1 until the count down is over.
"HDD Media Full" The HDD is full.
"HDD Only" This function is only available with HDD mode.
"HDD Track Full" The number of tracks has reached the limit for input to the HDD.
"New#######Full" An attempt was made to enter a new group that exceeds the maximum group capacity.
"No Disc" There is no disc in the MB-S1.
“No Favorite” There are no tracks that have a "favorite it" marking.
"No Genre" There are no tracks that have a genre.
"No Group" There is no group data in the HDD.
"No Playlist" There are no play lists.
“No Track” There are no tracks in the group; or an appropriate track was not found.
"Not Audio-CD" The CD data format is not PCM or MP3.
"Not Available in this Source" Will not work with the current input source.
"Not Available MP3CD" The Rec Mode cannot be selected with CDs containing MP3 data.
"P.List Full" An attempt was made to enter more than 100 tracks in the playlist.
“System Err...Please Power Off & On” System error occurred. Press the STANDBY/ON button.
"Track Full" An attempt was made to record more than 255 tracks.
ONKYO CORPORATION
Sales & Product Planning Div.: 2-1, Nisshin-cho, Neyagawa-shi, OSAKA 572-8540, JAPAN
Tel: 072-831-8111 Fax: 072-833-5222 http://www.onkyo-intl.com
18 Park Way, Upper Saddle River, N.J. 07458, U.S.A.
Tel: 201-785-2600 Fax: 201-785-2650 http://www.onkyousa.com
ONKYO EUROPE ELECTRONICS GmbH
Liegnitzerstrasse 6, 82194 Groebenzell, GERMANY
Tel: +49-8142-4401-0 Fax: +49-8142-4401-555 http://www.onkyo.net
ONKYO CHINA LIMITED
Units 2102-2107, Metroplaza Tower I, 223 Hing Fong Road, Kwai Chung,
N.T., HONG KONG Tel: 852-2429-3118 Fax: 852-2428-9039 http://www.onkyochina.com


- Hard Disk Music Library
- MB-S1
- Instruction Manual
- Contents
- WARNING:
- CAUTION:
- WARNING RISK OF ELECTRIC SHOCK DO NOT OPEN
- Important Safeguards
- Recording Copyright
- Power
- WARNING
- Do not touch this unit with wet hands
- Location of this unit
- Care
- Points to remember
- DANGER:
- For U.S. model
- FCC INFORMATION FOR USER
- NOTE:
- Declaration of Conformity
- Memory Preservation
- For Canadian model
- For British model
- IMPORTANT
- Before using
- Facilities and connections
- Operation
- Carry Tunes
- Appendix
- ■Encoding the music files on an audio CD in MP3 format (1-1) and decoding the MP3 music files
- ■Playing audio CDs and CD-Rs
- ■Longer hours recording with the internal hard disk drive (HDD)
- ■Transferring music files from PC to the MB-S1
- Supplied accessories
- Before using this unit
- Installing the remote controller batteries
- Notes:
- Using the remote controller
- Front panel
- Front panel display
- Remote controller
- ADD TO PLAY LIST button [33]
- SELECT button [21, 25, 27, 29]
- Alphabetic letters/Symbols/Numeric (1 to 10) buttons [21, 27, 29, 37]
- FAVORITE IT button [41]
- FAVORITE MODE button [41]
- Genre buttons [39]
- Rear panel
- Analog input/output terminals (ANALOG)
- Digital input terminals (DIGITAL INPUT)
- RI connection terminals (REMOTE CONTROL)
- Digital output terminal (DIGITAL OUTPUT)
- Connecting to other components
- ①Connecting to an amplifier
- Notice:
- ②Connecting an external CD or DVD player
- ③Connecting a digital audio recorder such as an MD recorder or CD recorder
- ④Connecting an analog audio device such as AM/FM tuner or cassette tape deck
- ⑤Connecting the power cord
- ⑥Connecting the Onkyo receiver TX-L5
- Notes on CD and the internal hard disk drive
- Notes on discs
- ■Notes on playing discs
- ■Handling discs
- ■Cautions when using rented compact discs
- ■Cleaning
- ■Cautions for disc storage
- Note on the internal hard disk drive
- ■Handling the hard disk drive
- ■Notes on the data and track recorded on the MB-S1's HDD
- Condensation
- Rules for recording digital input
- SCMS (Guide to the serial copy management system)
- Understanding the basic operations before using the MB-S1
- ■Managing the music information on the MB-S1
- ■Typical uses for the MB-S1
- Playing an audio CD with the CD player section.
- Playing a CD-R containing MP3 music files with the CD player section.
- Recording tracks from the CD player section onto the internal HDD and playing them.
- Recording tracks from an external component such as an MD player to the HDD and playing them.
- Transferring MP3 files from the PC to the MB-S1 and playing them.
- Playing tracks on the HDD using a play list.
- ■Understanding playing features for the CD player section
- - When playing an audio CD
- - When playing a CD-R containing MP3 files
- ■Understanding playing features for the internal HDD section
- ■Understanding the play list
- Turning on the power
- Switching the CD player and HDD
- Opening the CD tray
- Setting date and time
- Enter the menu mode.
- Select the clock setting menu.
- Set the date and time.
- Confirm the setting.
- Restore the normal indication.
- Displaying the date and time (Remote controller only)
- Listening to an audio CD or CD-R
- Set a disc.
- Activate the CD player section.
- Start playing.
- Stopping playback
- Selecting the track
- Reversing and fast forwarding
- Playing tracks repeatedly (remote controller only)
- Switching the display information
- When stopped
- When paused or during playback
- Recording an audio CD or CD-R synchronously
- Set the CD on the CD tray.
- Activate the CD player.
- Select a recording mode.
- Put the MB-S1 into the recording standby state.
- Select a target group for recording.
- Start recording.
- Stop the CD or HDD.
- Start the CD dubbing.
- Select a track you want to record.
- Put the MB-S1 into the recording standby state.
- Select a target group for recording.
- Start dubbing a track on a CD.
- Recording audio signals from external devices
- Confirm the connections between the MB-S1 and the external device.
- Select an input source.
- Adjust the recording level. (Analog input only)
- Tip:
- Start recording.
- Input source and recording format
- Adjusting the recording level (Analog input only)
- Select the menu for adjusting recording level.
- Select the adjusting level range.
- Confirm the level setting.
- Listening to tracks recorded on the HDD
- Activate the HDD section.
- Start playback.
- Stopping the playback
- Selecting a track you want to listen to
- Playing tracks in a group in random order
- Playing tracks repeatedly
- When paused or during palyback
- Entering the name of a track
- Select the track to which you want to enter the information.
- Enter the editing mode.
- Select the editing mode you want.
- Enter the characters.
- Confirm the entry and exit the editing mode.
- Entering characters
- Selecting a character you want to enter.
- Selecting a letter you want to enter.
- Moving to a digit.
- Deleting a letter.
- Selecting a genre
- Select a track for which you want to edit information.
- Select the mode.
- Enter a letter.
- Erasing a track
- Select the track you want to erase.
- Enter the edit/clear mode.
- Select the one-track erase mode.
- Press the MULTI JOG dial.
- Confirm the erase operation.
- Erasing an entire group
- Select the group you want to erase.
- Select the group erase mode.
- Creating a play list
- Select the track you want to add to a play list.
- Activate the play list creation mode.
- Select a play list.
- Select the position where you want to add a track.
- Confirm your selection.
- ■Understanding the indication on play lists
- When creating a play list
- When adding tracks to a play list
- Listening to tracks using a play list
- Activate the play list mode.
- Select the play list.
- Start playing.
- Selecting the track you want to listen to
- Playing tracks in a play list in random order
- Exiting the play list playback mode
- Playing tracks in a play list repeatedly
- Naming a play list
- Activate the play list mode.
- Select the play list.
- Activate the character-editing menu.
- Enter the play list name.
- Confirm the entry.
- Moving a track within a play list
- Select the track you want to move.
- Select the track-moving mode.
- Activate the track-moving mode.
- Select the position to which you want to move the track.
- Confirm the position.
- Deleting a track in a play list
- Select the track you want to delete.
- Select the one-track deleting mode.
- Confirm the delete operation.
- Deleting a play list
- Select the play list you want to delete.
- Activate the play-list deleting mode.
- Confirm the delete operation.
- Playing track in sorted order
- Activate the play mode.
- Select a play mode.
- Confirm the selection.
- Start playback.
- Marking a track as you favorite (FAVORITE IT function)
- Mark a track as your favorite.
- Playing your favorite tracks only
- Activate the favorite mode.
- ■Disabling the favorite mode
- ■When you combine the sorted tracks mode and the favorite mode
- ■When you use the random and repeat playback feature
- Displaying track information
- Setting a timer
- Select the timer setting menu.
- Select a timer setting number.
- Set the timer function.
- Timer Function
- Set the timer on or off.
- Set the start time and end time for the timer setting.
- Confirm the start time and the end time.
- Set the day of the week.
- Confirm the day of the week.
- In step 4 above:
- Select a play list.
- Select a target group for recording.
- Overview of the supplied Carry Tunes software
- ■Plays MP3 music files
- ■MP3 track information edit feature
- ■MP3 music file transfer feature
- ■Other features
- What is a device driver?
- What is a device?
- Setting the PC
- Turn on the PC.
- Turn on the MB-S1.
- Connect the MB-S1 to the PC using a USB cable.
- Windows 98SE/Me
- Select the "CD-ROM drive" check box, and click "Next."
- Click "Next."
- Click "Finish."
- Windows 2000
- Start searching the hardware.
- Click "Next."
- Select the "CD-ROM drive" check box to specify a search location for the driver, and click "Next."
- Insert the supplied CD-ROM ("Carry Tunes Installation CD") into the CD-ROM drive of the PC, and click "OK."
- Click "Next."
- Click "Finish."
- Start searching the next device driver.
- Click "Next."
- Click "OK."
- Click "Next."
- Click "Finish."
- Confirming the installation of the device driver
- Confirm the installed device drivers are displayed in the dialog box.
- Install Procedure
- Insert the supplied CD-ROM into the CD-ROM drive of the PC.
- Click "Install" on the "Carry Tunes Installation CD" window.
- The "Welcome" window appears. Click "Next."
- The "Software License Agreement" window appears. After you read it, click "Yes."
- The "Choose Destination Location" window appears. Click "Next."
- The "Select Program Folder" window appears. Click "Next."
- The "Setup Complete" window appears. Click "Finish."
- Registering MP3 files with Carry Tunes
- Start Carry Tunes.
- Drag the MP3 files you want to register and drop them onto Carry Tunes.
- The MP3 files you dropped are displayed in the Carry Tunes screen.
- Main operations
- Transferring MP3 music files to the MB-S1
- Make sure the MB-S1 is connected to the PC properly.
- Select the MP3 files you want to transfer.
- Select the target group for transferring MP3 files.
- Click the "EXPORT" button to start transferring.
- Transfer completes.
- Close the Carry Tunes software.
- Notes on Carry Tunes:
- Main unit and remote controller
- The power does not turn on.
- The buttons on both the MB-S1 main unit and the remote controller do not function.
- Playback
- Playback does not start.
- The playback skips.
- The playback skips (CD).
- The disc is inserted, but the playback does not start.
- Locating a track on the disc takes too long (CD).
- When playing a track recorded from an analog input source, the output is small (HDD).
- During playing MP3 files on the HDD, the bit rate is not displayed (HDD).
- Recording/Editing
- Cannot record or nothing was recorded.
- Recorded sound is distorted.
- The text information cannot be entered.
- Timer
- The timer function activated, but the sound was not output.
- Others
- The MB-S1 does not operate.
- The remote controller does not work.
- The music files are not transferred.
- The MB-S1 is not recognized.
- If one of the messages shown below appears
- ONKYO CORPORATION
- ONKYO EUROPE ELECTRONICS GmbH
- ONKYO CHINA LIMITED
Brand : ONKYO
Model : MS-B1
Category : CD Player