
FR-N3X - CD Player ONKYO - Free user manual and instructions
Find the device manual for free FR-N3X ONKYO in PDF.


| Product Type | CD Player |
| Brand | Onkyo |
| Model | FR-N3X |
| Dimensions (W x H x D) | 435 x 115 x 330 mm |
| Weight | 4.5 kg |
| Power Supply | AC 120V, 60Hz |
| Power Consumption | 15 W |
| Disc Compatibility | CD, CD-R, CD-RW |
| Playback Modes | Repeat, Random, Program |
| Audio Outputs | Analog stereo RCA, Headphone jack |
| Remote Control | Included |
| Display | Fluorescent, track/time display |
| Tracking | Optical pickup, auto tracking |
| Error Correction | Built-in CIRC |
| Sampling Rate | 44.1 kHz |
| Bit Depth | 16-bit |
| Frequency Response | 20 Hz - 20 kHz ±0.5 dB |
| Signal-to-Noise Ratio | 100 dB |
| Harmonic Distortion | 0.003% (1 kHz) |
| Channel Separation | 90 dB |
| Cleaning | Clean lens with dry cloth; avoid solvents |
| Safety | Do not place in humid environment; unplug during storms |
Frequently Asked Questions - FR-N3X ONKYO
User questions about FR-N3X ONKYO
0 question about this device. Answer the ones you know or ask your own.
Ask a new question about this device
Download the instructions for your CD Player in PDF format for free! Find your manual FR-N3X - ONKYO and take your electronic device back in hand. On this page are published all the documents necessary for the use of your device. FR-N3X by ONKYO.
USER MANUAL FR-N3X ONKYO
Thank you for purchasing the Onkyo CD/MD TUNER AMPLIFIER.
Please read this manual thoroughly before making connections and turning on the power.
Following the instructions in this manual will enable you to obtain optimum performance and listening pleasure from your new CD/MD TUNER AMPLIFIER.
Please retain this manual for future reference.
Advanced Operation
Additional Operation
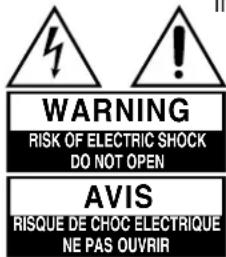
WARNING:
TO REDUCE THE RISK OF FIRE OR ELECTRIC SHOCK, DO NOT EXPOSE THIS APPLIANCE TO RAIN OR MOISTURE.

The lightning flash with arrowhead symbol, within an equilateral triangle, is intended to alert the user to the presence of uninsulated “dangerous voltage” within the product’s enclosure that may be of sufficient magnitude to constitute a risk of electric shock to persons.
CAUTION:
TO REDUCE THE RISK OF ELECTRIC SHOCK, DO NOT REMOVE COVER (OR BACK). NO USER-SERVICEABLE PARTS INSIDE. REFER SERVICING TO QUALIFIED SERVICE PERSONNEL.

The exclamation point within an equilateral triangle is intended to alert the user to the presence of important operating and maintenance (servicing) instructions in the literature accompanying the appliance.
Important Safeguards
- Read Instructions – Read all safety and operating instructions before operating the appliance.
- Retain Instructions - Retain the safety and operating instructions for future reference.
- Heed Warnings – Heed all warnings on the appliance and in the operating instructions.
- Follow Instructions – Follow all operating and usage instructions.
- Cleaning – Unplug the appliance from the wall outlet before cleaning. The appliance should be cleaned only as recommended by the manufacturer.
- Attachments – Attachments not recommended by the manufacturer may create hazards. Use only recommended attachments.
- Water and Moisture – Do not use the appliance near water – for example, near a bath tub, wash bowl, kitchen sink, or laundry tub; in a wet basement; or near a swimming pool, and the like.
- Accessories – Do not place the appliance on an unstable cart, stand, tripod, bracket, or table. The appliance may fall, causing serious injury to a child or adult, and serious damage to the appliance. Use only with a cart, stand, tripod, bracket, or table recommended by the manufacturer, or sold with the appliance. Any mounting of the appliance should follow the manufacturer's instructions, and should use a mounting accessory recommended by the manufacturer. PORTABLE CART WARNING
- Move appliance and cart combinations with care. Quick stops, excessive force, and uneven surfaces may cause the appliance and cart combination to overturn.
PORTABLE CART WARNING - Ventilation – Slots and openings in the cabinet are provided for ventilation and to ensure reliable operation of the appliance and to protect it from overheating. Do not block or cover these openings by placing the appliance on a bed, sofa, rug, or other similar surface. Do not place the appliance in a built-in installation such as a bookcase or rack unless proper ventilation is provided. There should be free space of at least 20 cm (8 in.) and an opening behind the appliance.
-
Power Sources – The appliance should be operated only from the type of power source indicated on the marking label. If you are not sure of the type of power supply to your home, consult your appliance dealer or local power company.
-
Grounding or Polarization - The appliance may be equipped with a polarized alternating current line plug (a plug having one blade wider than the other). This plug will fit into the power outlet only one way. This is a safety feature. If you are unable to insert the plug fully into the outlet, try reversing the plug. If the plug should still fails to fit, contact your electrician to replace your obsolete outlet. Do not defeat the safety purpose of the polarized plug.
- Power-Cord Protection - Power-supply cords should be routed so that they are not likely to be walked on or pinched by items placed upon or against them. Pay particular attention to cords at plugs, convenience receptacles, and the point at which they exit from the appliance.
- Outdoor Antenna Grounding – If an outside antenna or cable system is connected to the appliance, be sure the antenna or cable system is grounded so as to provide some protection against voltage surges and built-up static charges. Article 810 of the National Electrical Code, ANSI/NFPA 70, provides information with regard to proper grounding of the mast and supporting structure, grounding of the lead-in wire to an antenna-discharge unit, size of grounding conductors, location of antenna-discharge unit, connection to grounding electrodes, and requirements for the grounding electrode. See Figure 1.
- Lightning – For added protection for the appliance during a lightning storm, or when it is left unattended and unused for long periods of time, unplug it from the wall outlet and disconnect the antenna or cable system. This will prevent damage to the appliance due to lightning and power-line surges.
- Power Lines - An outside antenna system should not be located in the vicinity of overhead power lines or other electric light or power circuits, or where it can fall into such power lines or circuits. When installing an outside antenna system, extreme care should be taken to avoid touching such power lines or circuits as contact with them can be fatal.
- Overloading - Do not overload wall outlets, extension cords, or integral convenience receptacles as this can result in a risk of fire or electric shock.
- Object and Liquid Entry – Never push objects of any kind into the appliance through openings as they may touch dangerous voltage points or short-out parts, resulting in a fire or electric shock. Never spill liquid of any kind on the appliance.
-
Servicing – Do not attempt to service the appliance yourself as opening or removing covers may expose you to dangerous voltage or other hazards. Refer all servicing to qualified service personnel.
-
Damage Requiring Service – Unplug the appliance form the wall outlet and refer servicing to qualified service personnel under the following conditions:
A. When the power-supply cord or plug is damaged
B. If liquid has been spilled, or objects have fallen into the appliance
C. If the appliance has been exposed to rain or water
D. If the appliance does not operate normally as per the operating instructions. Adjust only those controls that are covered by the operating instructions as an improper adjustment of other controls may result in damage and will often require extensive work by a qualified technician to restore the appliance to its normal operation.
E. If the appliance has been dropped or damaged in any way, and
F. When the appliance exhibits a distinct change in performance – this indicates a need for service.
-
Replacement Parts - When replacement parts are required, be sure the service technician has used replacement parts specified by the manufacturer or that have the same characteristics as the original part. Unauthorized substitutions may result in fire, electric shock, or other hazards.
-
Safety Check – Upon completion of any service or repairs to the appliance, ask the service technician to perform safety checks to determine that the appliance is in proper operating condition.
-
Wall or Ceiling Mounting – The appliance should be mounted to a wall or ceiling only as recommended by the manufacturer.
- Heat - The appliance should be situated away from heat sources such as radiators, heat registers, stoves, or other appliances (including amplifiers) that produce heat.
- Liquid Hazards – The appliance shall not be exposed to dripping or splashing and no objects filled with liquids, such as vases shall be placed on the appliance.
FIGURE 1:
EXAMPLE OF ANTENNA GROUNDING AS PER NATIONAL ELECTRICAL CODE, ANSI/NFPA 70

Precautions
1. Recording Copyright
Recording of copyrighted material for other than personal use is illegal without permission of the copyright holder.
2. AC Fuse
The fuse is located inside the chassis and is not user-service-able. If power does not come on, contact your Onkyo authorized service station.
3. Power
WARNING
BEFORE PLUGGING IN THE UNIT FOR THE FIRST TIME, READ THE FOLLOWING SECTION CAREFULLY.
The voltage of the available power supply differs according to country or region. Be sure that the power supply voltage of the area where this unit will be used meets the required voltage (e.g., AC 230 V, 50 Hz or AC 120 V, 60 Hz) written on the rear panel.
Setting the STANDBY button to standby mode does not shut off the power completely.
4. Do not touch this unit with wet hands.
Do not handle this unit or power cord when your hands are wet or damp. If water or any other liquid enters the case, take this unit to an authorized service center for inspection.
5. Location of this unit
Place this unit in a well-ventilated location.
Take special care to provide plenty of ventilation on all sides of this unit especially when it is placed in an audio rack. If ventilation is blocked, this unit may overheat and malfunction.
Do not expose this unit to direct sunlight or heating units as this unit's internal temperature may rise and shorten the life of the pickup.
Avoid damp and dusty places and places directly affected by vibrations from the speakers. In particular, avoid placing the unit on or above one of the speakers.
Be sure this unit is placed in a horizontal position. Never place it on its side or on a slanted surface as it may malfunction.
Do not place this unit near tuners or TV sets.
If placed next to a TV or tuner, it may cause reception interference resulting in some noise in the TV or tuner output.
6. Care
From time to time you should wipe the front and rear panels and the cabinet with a soft cloth. For heavier dirt, unplug the power cord from the AC outlet, dampen a soft cloth in a weak solution of mild detergent and water, wring it out dry, and wipe off the dirt. Following this, dry the unit immediately with a clean cloth.
Do not use rough material, thinners, alcohol or other chemical solvents or cloths since these could damage the finish or remove the panel lettering.
7. Points to remember
If this unit is brought from a cold environment to a warm one or is in a cold room that is quickly heated, condensation may form on the pickup, preventing proper operation. In this case, remove the disc and leave the power ON for about one hour to remove the condensation.
When transporting this unit, be careful not to bump it.
US and foreign patents licensed from Dolby Laboratories Licensing Corporation.
This unit contains a semiconductor laser system and is classified as a "CLASS 1 LASER PRODUCT." To use this model properly, read this Instruction Manual carefully. In case of any trouble, please contact the store where you purchased the unit. To prevent being exposed to the laser beam, do not try to open the enclosure.
DANGER:
INVISIBLE LASER RADIATION WHEN OPEN AND INTERLOCK FAILED OR DEFEATED. AVOID DIRECT EXPOSURE TO BEAM.
CAUTION:
THIS PRODUCT UTILIZES A LASER. USE OF CONTROLS OR ADJUSTMENTS OR PERFORMANCE OF PROCEDURES OTHER THAN THOSE SPECIFIED HEREIN MAY RESULT IN HAZARDOUS RADIATION EXPOSURE.

This label on the left hand panel states that:
- This unit is a CLASS 1 LASER PRODUCT and employs a laser inside the cabinet.
- To prevent the laser from being exposed, do not remove the cover. Refer servicing to qualified personnel.

Main features
- DLA Link (Digital Rec Level Adjustment) function automatically adjusts the recording level of CD-to-MD dubbing.
- Adjustable digital recording volume level.
• Supports MDLP long hour recording mode (2X/4X).
• Double-speed CD-to-MD dubbing function - Sampling rate converter equipped
• Title function facilitates naming an MD.
• Optical digital OUT connectors equipped. - WRAT (Wide Range Amplifier Technology) could lead to a broad-band, next-generation media.
- Various external IN connectors (CD-R and LINE).
- A tuner enables you to program up to 30 preset stations into memory.
Memory Preservation
This unit does not require memory preservation batteries. A built-in memory power back-up system preserves the contents of the memory during power failures and even when the unit is unplugged. The unit must be connected to a power source to charge the back-up system. The memory preservation period after the unit has been unplugged varies depending on climate and placement of the unit. On the average, memory contents are protected over a period of a few weeks after the last time the unit has been unplugged. This period is shorter when the unit is exposed to a humid climate.
Supplied accessories
Check that the following accessories are supplied with this unit.
The number of accessories is indicated in brackets.
- Remote controller - RC-497S [1]
- Batteries (size AA/R6/UM3) [2]

natural_image
Line drawing of a remote control with keypad and buttons (no text or symbols)
- Indoor AM antenna (aerial) [1]
- Indoor FM antenna (aerial) [1]

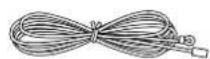
• 75/300 ohm antenna adapter [1]
• Instruction Manual (this manual) [1]

Table of contents
Before Using
Important Safeguards/Precautions/Main features/Supplied accessories 2–4
Connecting
Antenna (aerial) and speakers ....6
Audio/video equipment....9
Connecting the power cord....11
Preparations
Precautions for handling Compact Discs (CDs) 12
Precautions for handling MiniDiscs (MDs)....12
Preparing the remote controller....13
Part names and functions....14
Understanding preparatory and common operations ....16
Setting the day of the week and the time 17
Programming FM stations automatically — Auto Preset....18
Programming AM/FM stations one by one — Preset Write....19
Basic Operation
Playing a CD....20
Playing an MD 22
Listening to an FM/AM station....24
Adjusting the tone....26
Dubbing CD to MD (CD dubbing) 27
Dubbing CD to MD at double speed....28
Recording CD to MD (Various CD Dubbing) 29
Recording CD to MD (Synchro recording)....31
Recording an FM/AM broadcast program to an MD....32
Recording from another Onkyo System (Synchro Recording) ....33
Recording data from a connected external device to an MD....34
Settings for Recording 35
Advanced Operation
Various ways to play CDs and MDs 40
Using the MD Group Function 43
Editing Groups (Move, Combine and Erase)....45
MD Group Functions (Playing MD Groups)....48
Changing the FM/AM preset channels 50
Naming an MD and its tracks, and preset channels ....52
Moving, dividing, combining, and erasing MD tracks ....55
Using the timer functions....60
Customizing the source names 65
Miscellaneous
Messages 66
Rules for digital recording....67
System limitations....68
Troubleshooting....69
Specifications 71
Antenna (aerial) and speakers
Do not connect the AC power cord (main lead) when you connect the antenna or speakers. You will connect the AC power cord on page 11.

◆ Connecting the supplied indoor FM antenna (aerial)
While listening to the radio on page 24, move the antenna (aerial) in various directions until you receive the clearest signal. Then secure the antenna (aerial) with push pins in the position that creates the least distortion.

To connect the outdoor FM antenna (aerial)
If signals received via the indoor FM antenna (aerial) are not clear enough, connect an outdoor FM antenna (aerial).
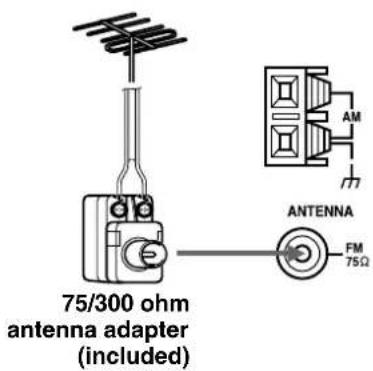
- To avoid the risk of lightning and electrical shock, be sure to electrically ground the unit. Follow item 14 in the "Important Safeguards" on page 3 when you install the outdoor antenna.
WARNING
Do not install the antenna (aerial) near power lines to minimize the risk of electrical shock.
Note
Keep the antenna (aerial) away from noise sources, such as neon signs and busy roads.
◆ Connecting the FM antenna cable to the 75/300 ohm antenna adapter
Connecting the 300 ohm ribbon wire
Loosen the screws and wrap the wire around the screws. Then tighten the screws with a screwdriver.
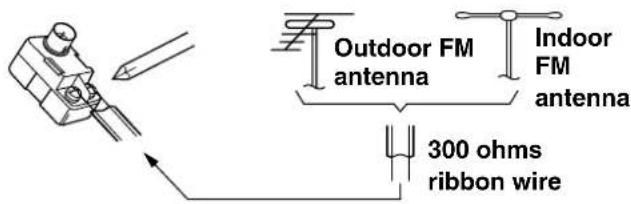
Connecting the coaxial cable
- With your fingernail or a small screwdriver, press the stoppers outward and remove the cover.

natural_image
Mechanical assembly diagram showing a bolt and housing with directional arrows (no text or symbols)- Remove transformer wire A from slot B and insert it into slot C.

- Prepare the coaxial cable as shown in the diagram.
Connect the 75/300 ohm antenna adapter to the coaxial cable.
① Insert the end of the cable.
② Use pliers to clamp it in place.

- Re-install the cover.
Directional linkage
Do not use the same antenna for both FM and TV (or VCR) reception since these signals may interfere with each other. If you must use a common FM/TV (or VCR) antenna, use a directional linkage type splitter.

◆Connecting the AM antenna
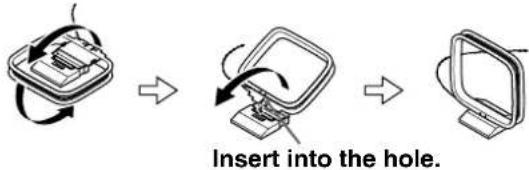
Assembling the AM loop antenna
Assemble the loop antenna as shown in the following illustration.
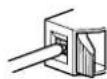
Connecting the AM antenna cable
-
Press down the lever.
-
Insert the wire into the hole.
-
Release the lever to lock the wire in place.


Connecting the AM loop antenna
The AM loop antenna is for indoor use only. Set it in the direction and position in which you receive the clearest sound. Locate it as far as possible away from this unit, televisions, speaker cables, and power cords.

Connecting an AM outdoor antenna
When reception is not satisfactory with the supplied AM loop antenna alone, an outdoor antenna is recommended.
The outdoor antenna will be more effective if it is stretched horizontally above or outside a window.
- Do not remove the AM loop antenna.
- To avoid the risk of lightning and electrical shock, grounding is necessary. Follow item 14 of the "Important Safeguards" on page 3 when you install the outdoor antenna.

(Continued on the next page)
Antenna (aerial) and speakers (continued)
flowchart
graph TD
    A["Push down the lever"] --> B["Insert the tip of the speaker cable"]
    B --> C["Release the lever to replace it."]
    C --> D["Left speaker"]
    D --> E["Right speaker"]
    E --> F["Speaker R L"]
    F --> G["Speaker L"]
    G --> H["Speaker R"]
    I["Peel the insulation to expose about 10mm of the core wire."] --> J["10mm"]
    K["Twist the core wire."] --> L["2"]
Notes
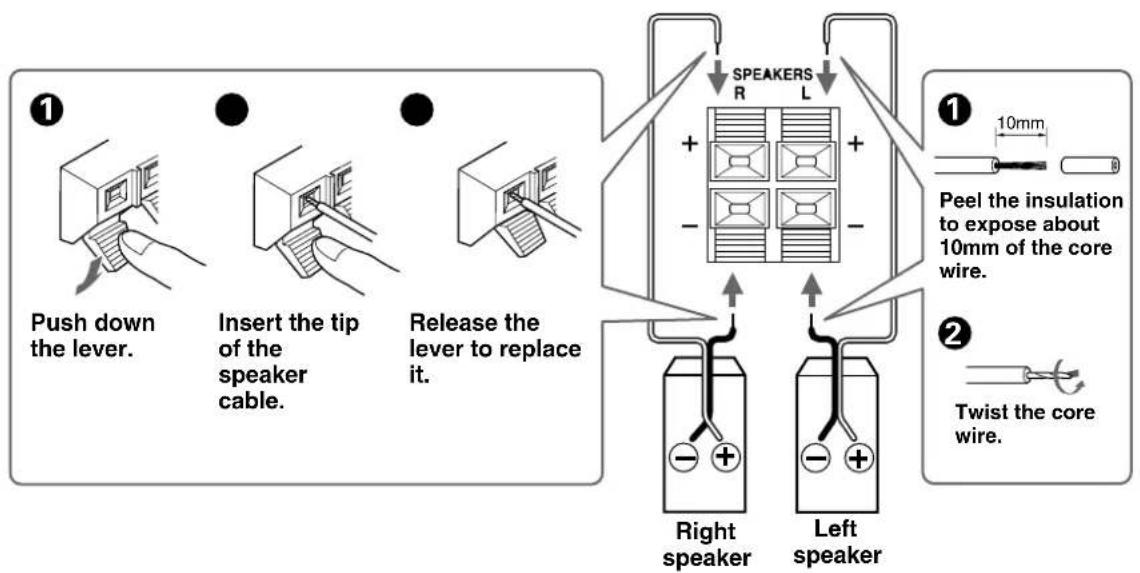
- Connecting the left and right speakers reversely or with incorrect polarities can cause unnatural or distorted sound.
- The load impedance of each speaker must be between 4 and 16 ohms. Connecting speakers with less than 4 ohms impedance could damage the amplifier.
- To prevent damage to circuits, never short-circuit the positive (+) and negative (−) speaker wires.

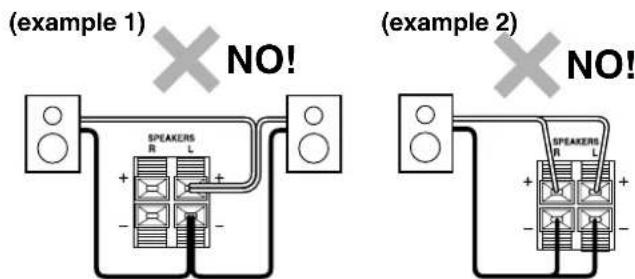
- Do not connect the speaker cord to the L and R connectors at the same time (example 1). Do not connect more than two speaker connectors to the same speaker (example 2).
◆ Connecting a subwoofer
The FR-N3X has a SUBWOOFER PRE OUT jack. Connect an active subwoofer (a subwoofer that contains an amplifier), or connect an amplifier to the FR-N3X, then connect a non-active subwoofer to the amplifier.
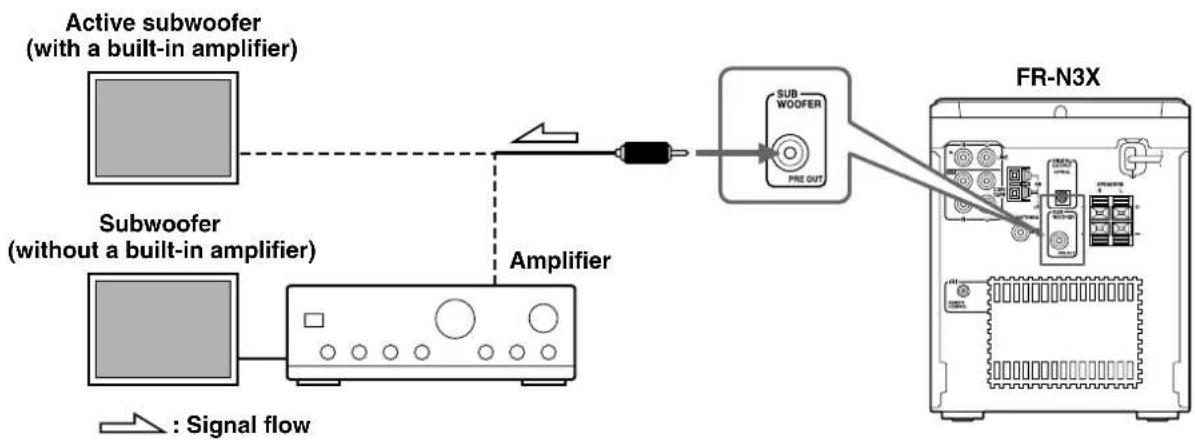
flowchart
graph LR
    A["Active subwoofer (with a built-in amplifier)"] --> B["Amplifier"]
    C["Subwoofer (without a built-in amplifier)"] --> B
    B --> D["FR-N3X"]
    D --> E["Subwoofer (with a built-in amplifier)"]
    style A fill:#f9f,stroke:#333
    style C fill:#f9f,stroke:#333
    style D fill:#ccf,stroke:#333
    style E fill:#cfc,stroke:#333
Audio/video equipment
Connect the white plugs of the audio cables to the L jacks and connect the red plugs of the audio cables to the R jacks.
Tip
The source names appearing in the display can be customized for the connected component (see page 65).

Notes
Do not place objects on the unit as they may interfere with proper ventilation.
- Follow the rules for digital recording (see page 67).
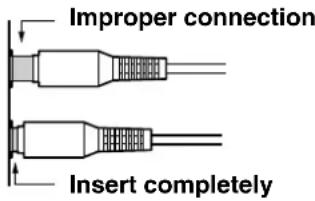
- Audio plugs must be connected securely. Incomplete connection will not reproduce sound.
- Do not bundle the audio connection cables with the speaker cords. This may impair the sound quality.
- If the TV screen and the unit interfere with each other, put more distance between the speakers and the TV set.
◆ Connecting an Onkyo stereo cassette tape deck
The following diagram illustrates how to connect an optional Onkyo stereo cassette tape deck. Connect the FR-N3X CDR/TAPE OUT (REC) jacks to the tape deck's INPUT (REC) jacks, and the FR-N3X CDR/TAPE INPUT (PLAY) jacks to the tape deck's OUTPUT (PLAY) jacks.
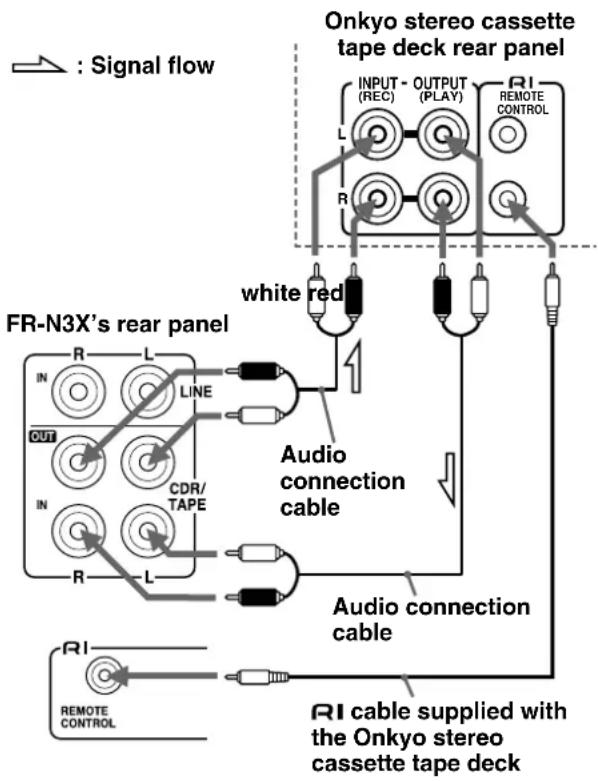
flowchart
graph TD
    A["Signal flow"] --> B["FR-N3X's rear panel"]
    B --> C["LINE"]
    C --> D["OUT"]
    D --> E["CDR/TAPE"]
    E --> F["R"]
    F --> G["L"]
    G --> H["white red"]
    H --> I["ONkyo stereo cassette tape deck rear panel"]
    I --> J["INPUT - OUTPUT (REC) / (PLAY) / RI REMOTE CONTROL"]
    I --> K["Audio connection cable"]
    K --> L["Audio connection cable"]
    L --> M["RI cable supplied with the Onkyo stereo cassette tape deck"]
    M --> N["REMOTE CONTROL"]
What does connecting an Onkyo stereo cassette tape deck using an Rable enable you to do?
- To operate the system, you need to change the source name in the display to TAPE (see page 65). (The default source name in the display is CD-R.)
- You can operate an Onkyo stereo cassette tape deck using the supplied remote controller. (You also need to connect the audio pin cable.)
- When you start playing a tape, the unit input selector will automatically switch to the stereo cassette tape deck (TAPE).
- Synchro recording operations (see page 33).
(Continued on the next page)
◆Connecting a Onkyo DVD player
The following diagram illustrates how to connect an optional Onkyo DVD player. Connect the FR-N3X LINE IN jacks to the DVD player's analog audio output jacks.
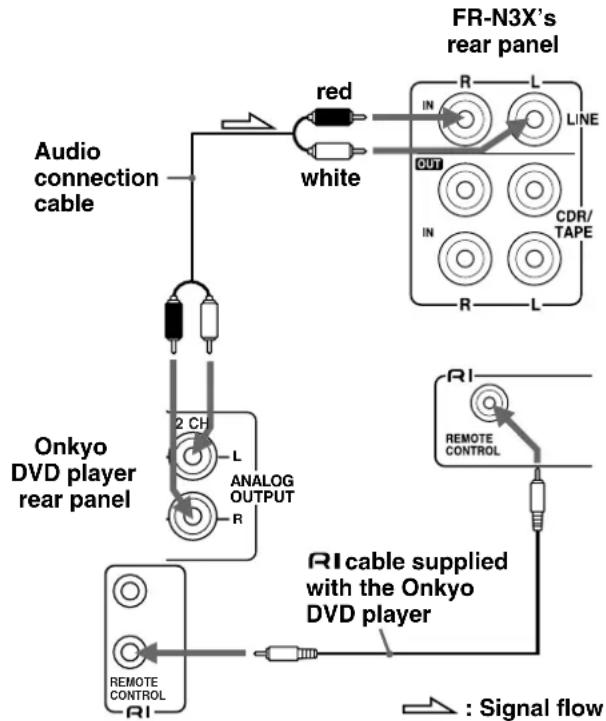
flowchart
graph TD
    A["Audio connection cable"] --> B["Onkyo DVD player rear panel"]
    B --> C["Analog OUTPUT R"]
    C --> D["RF-N3X's rear panel"]
    D --> E["LINE OUT"]
    D --> F["CDR/TAPE IN"]
    D --> G["R L"]
    D --> H["R L"]
    D --> I["IN LINE"]
    B --> J["2 CH L"]
    B --> K["REMOTE CONTROL RI"]
    D --> L["REMO-CONTROL RI"]
    style A fill:#f9f,stroke:#333
    style B fill:#ccf,stroke:#333
    style C fill:#cfc,stroke:#333
    style D fill:#fcc,stroke:#333
    style E fill:#ffc,stroke:#333
    style F fill:#fcc,stroke:#333
    style G fill:#ffc,stroke:#333
    style H fill:#fcc,stroke:#333
    style I fill:#ffc,stroke:#333
What does connecting an Onkyo DVD player using an Enable enable you to do?
- To operate the system, you need to change the source name in the display to DVD (see page 65). (The default source name in the display is LINE.)
- You can operate an Onkyo DVD player using the supplied remote controller.
- When you start playing a DVD player, the unit input selector will automatically switch to the DVD player (DVD).
About the LINE jacks
In addition to the previous examples, a laser disc player, satellite broadcast tuner, or VCR may also be connected. Connect the analog audio output jacks to the unit's LINE using the audio connection cable.
◆ Connecting an Onkyo compact disc recorder
The following diagram illustrates how to connect an optional Onkyo compact disc recorder. Connect the FR-N3X CDR/TAPE OUT (REC) jacks to the disc recorder's INPUT (REC) jacks. Connect the FR-N3X CDR/TAPE IN (PLAY) jacks to the disc recorder's OUTPUT (PLAY) jacks.
About the OPTICAL DIGITAL OUT connector
You can connect a CD or DAT recorder that has an optical digital audio input to the FR-N3X for digital recording. Use a standard optical fiber audio cable for connection. Digital recording is allowed only for the first generation. (See "Guide to the serial copy management system" on page 67.).

flowchart
graph TD
    A["RF-N3X's rear panel"] --> B["Analog INPUT (REC)"]
    A --> C["Output (PLAY)"]
    A --> D["Remote CONTROL"]
    B --> E["red white"]
    C --> F["white"]
    D --> G["white"]
    H["Jacks on the compact disc recorder's rear panel"] --> I["Digital Optical Control"]
    I --> J["INPUT1"]
    I --> K["INPUT2"]
    I --> L["OUTPUT"]
    M["Optical fiber audio cable"] --> N["Line OUT"]
    M --> O["TAPE CDR/"]
    P["An RI cable that comes with the compact disc recorder"] --> Q["Remote Control"]
The jack connection enables you to use the following functions:
- To operate the system, the source name in the display should be CD-R. (Since the default source name in the display is CD-R, you do not need to change the setting. See page 65 for further information.)
- You can control a connected Onkyo compact disc recorder from the FR-N3X's remote controller.
- When the connected Onkyo compact disc recorder plays back, the Input Selector on the FR-N3X is automatically switched to CD-R.
Connecting the power cord
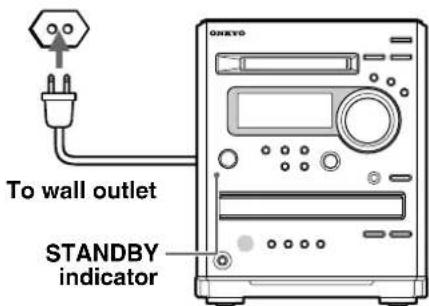
When the power cord is connected to the AC outlet, the FR-N3X enters stand-by mode. The STANDBY indicator lights up.

Precautions for handling Compact Discs (CDs)
Important notes on handling CDs
① Carefully lift the disc from the disc case, making sure to hold the disc by its edges or the hole in the middle.

natural_image
Line drawing of a hand pressing down on a circular object (no text or symbols)②You can use a soft, dry cloth to wipe dust and fingerprints off the surface of CDs.

Do not use volatile agents on discs, such as thinner or benzene. Also, do not use conventional record cleaner or antistatic agents.
- Do not place a CD in direct sunlight or in locations subject to high humidity or low temperature.
- Do not store a CD in the unit's disc tray for a long period of time.
playable discs
This unit can play the following discs.
| Disc mark | Contents | Disc size | |
| Audio CDs |  | Audio | 12 cm |
| 8 cm (CD single) |
You cannot play back discs other than those listed above.
Do not use discs that are not audio discs (e.g., CD-ROMs for use with personal computers), as these could damage the speakers and amplifier.

Avoid using heart-shaped or octagonal discs. Playing irregularly-shaped discs may damage the internal mechanism of the unit.
Do not use discs that have residue from adhesive tape, rental discs that have peeling labels, or discs that have custom labels or stickers. Otherwise, you may not be able to eject the discs or the unit may become inoperative.
Precautions for handling MiniDiscs (MDs)
The MD is housed in a cartridge, so you can handle it without worrying about dust and fingerprints. Even so, a dirty or warped cartridge may malfunction. Always remember the following precautions so you can enjoy high-quality sound for a long time.
Do not touch the disc in the cartridge directly with your fingers.
Do not open the shutter by hand. Doing so may damage the disc.
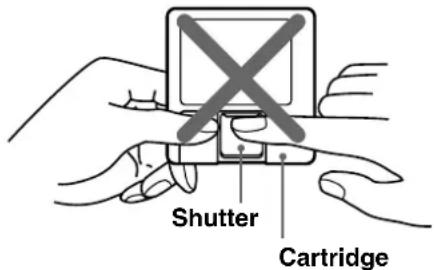
Storage location
Avoid storing MDs in a place subject to direct sunlight, high temperature, or high humidity.
When the unit is not to be used for an extended period
Remove the MD from the unit to prevent dust from entering the MD cartridge. When the MD is in the unit, the shutter of the MD cartridge remains open.
Regular care
Wipe off dust and dirt that has accumulated on the cartridge surface with a dry cloth.
Removing a partially inserted MD
If the "self-lock function" is activated and the MD cannot be removed, push the MD further into the MD disc slot and then press MD ▲(eject) to remove the MD.
Protecting recordings from accidental erasure
You can protect your MDs from accidental recording by sliding the record-protect tab on the MDs to open the record-protect window. To make the MDs recordable again, return the record-protect tab.

Preparing the remote controller
◆Inserting the batteries
1

natural_image
Line drawing of a mobile phone casing with an arrow indicating rotation (no text or symbols)Detach the battery cover.
2

natural_image
Line drawing of a remote control device with two batteries and an internal battery (no text or symbols)Insert the two R6 (size AA) batteries.
Be sure to match the + and - ends of the batteries with the diagram inside the battery compartment.
3

natural_image
Line drawing of a handheld device with a scroll wheel (no text or symbols)Attach the battery cover.
Notes
- Do not mix new batteries with old batteries or different kinds of batteries.
- To avoid corrosion, remove the batteries if the remote controller is not to be used for a long period of time.
- Remove dead batteries immediately to avoid damage from corrosion. If the remote controller does not operate smoothly, replace both batteries at the same time.
- The life of the batteries supplied is about six months but will vary depending on usage.
◆Using the remote controller
Point the remote controller toward the remote control sensor.

Notes
- Place the unit away from strong light such as direct sunlight or inverted fluorescent light, which can prevent proper operation of the remote controller.
- Using another remote controller of the same type in the same room or using the unit near equipment that uses infrared rays may cause operational interference.
- Do not put any object, such as a book, on the remote controller. The buttons of the remote controller may accidentally be pressed and drain the batteries.
- Make sure the audio rack doors do not have colored glass. Placing the unit behind such doors may prevent proper remote controller operation.
- If there is an obstacle between the remote controller and the remote control sensor, the remote controller will not operate.

Front panel
MULTI JOG dial
Enables you to skip tracks forward or backward. When the system is stopped, it enables you to select a track to play. It is also used to select a type of editing and characters to input. Press this dial to confirm the settings.
MD disc slot
Insert an MD in this slot.
GROUP button
Use this button to select a group.
DISPLAY button
Each time you press this button, the information on the display changes. This button also enables you to select the input character type.
TIMER button
Press this button to enable the Timer function.
STANDBY/ON button
Press this button to turn on the power to the unit or place the unit in Standby mode.
STANDBY indicator
Lights up in standby mode.
EDIT/CLEAR/NO button
Enables you to adjust settings for recording and playback, and select editing operations. It also cancels the displayed setting.
MODE/YES button
Press this button to confirm the displayed settings for recording, playback, and other editing operations.
Remote control sensor
Receives signals from the remote controller.
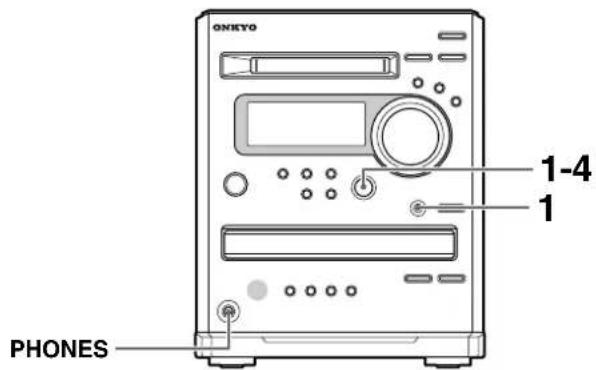
PHONES jack
Connect a headphone mini plug here. When the headphones are connected, no sound is output from the speakers.
CD DUBBING button
Starts the CD dubbing operation.
CD/MD button
Each time you press this button, the input source switches between CD and MD.
MD ■ button
Stops playback or recording.
MD ▲ button
Ejects a loaded MD.
MD ▶/II
button
Starts playback or recording. When you press this button during playback, the unit is placed in Pause mode. Press the button again to resume playback.
OTHER INPUTS button
Each time you press this button, the input source switches between CD-R and LINE.
AM/FM button
Each time you press this button, the input source switches between AM and FM.
VOLUME control
Adjusts the volume level.
CD ▲
button
Ejects a loaded CD.
TONE/S.BASS button
Adjusts the tonal quality and the low bass range.
CD disc tray
Place a CD on the tray to load.
CD ▶/II
button
Starts playback. When you press this button during playback, the unit enters Pause mode. Press the button again to resume playback.
CD ■ button
Stops playback.
◀/▶buttons
Fast-forward or backward the track being played. These buttons also move the cursor when you input characters, and tune a broadcast station.
MD REC button
Places the MD player into Record Standby mode.
◆ Remote controller
CD/MD button
Each time you press this button, the input source switches between CD and MD.
STANDBY/ON button
Switches between power standby and on.
Alpha-numeric/symbol buttons
Used to name a disc or track. They also select a track or sort the tracks for Memory playback.
GROUP button
Used to select a group.
/buttons
Selects the previous or next track. Each time you press one of these buttons, the track number skips forward or backward. These buttons also selects preset stations.
◀/▶button
Fast-forward or backward the track being played. These buttons also move the cursor when you input characters or tune a broadcast station.
CD operation buttons
II : Pauses playback.
■ : Stops playback.
▶ : Starts playback.
MD operation buttons
II : Pauses playback or recording.
■ : Stops playback or recording.
▶ : Starts playback or resumes recording.
Operation buttons for an Onkyo CD recorder
■ : Pauses playback or recording.
■ : Stops playback or recording.
▶ : Starts playback or resumes recording.
Operation buttons for an Onkyo DVD player
II : Pauses playback.
■ : Stops playback.
▶ : Starts playback.
Operation buttons for an Onkyo stereo cassette tape deck
: Plays the B side.
■ : Stops playback, recording, fast-forward, or rewind.
▶ : Plays the A side.
FM/AM button
Each time you press this button, the input source switches between AM and FM.
OTHER INPUTS button
Each time you press this button, the input source switches among LINE and CD-R.
NAME button
Used to input characters.
DISPLAY button
Each time you press this button, the information on the display changes. It also selects the character input type.
SCROLL button
Scrolls the displayed characters. It also selects the character input type when you input a name.
ENTER button
Press this button to confirm the displayed settings for recording, playback, and other editing operations.
CLEAR button
Cancels the memory or settings, and erases a character.
MODE button
Switches FM reception mode. It also switches between CD and MD play mode.
SLEEP button
Activates the sleep timer that turns off the power at a specified time.
CLOCK CALL button
Press this button to display the current time.
SURROUND button
Does not function with this model.
S.BASS button
Adjusts the tonal quality and the low end bass range.
MUTING button
Lowers the volume level temporarily.
VOLUME ▲/▼
Adjust the volume level.
buttons

Understanding preparatory and common operations
This section explains the following preparatory and common operations: turning the unit on and off, selecting a source, adjusting the volume, etc.


Turning the unit on and off
Press STANDBY/ON on the unit or on the remote controller.
If you press the same button again, the unit will turn off and enter standby mode.
The FR-N3X has the following two power modes.
Standby mode: The display remains turned off (see page 11).
Power On mode: The FR-N3X enters Power On mode when you press the STANDBY/ON button on the unit or remote controller while the unit is in Standby mode. The FR-N3X operates normally in this mode.
Tip!
When you start playing (or turn on the power to) an Onkyo CD recorder or cassette tape deck that is connected to the FR-N3X via an cable and audio pin cables, the power to the FR-N3X is automatically turned on. Also, if you turn on or off the power to the FR-N3X, the power to such a device is automatically turned on or off (standby).

Adjusting the volume
Operating with the unit
Turn VOLUME clockwise to increase the volume and counterclockwise to decrease the volume.
Using the remote controller
Press VOLUME ▲/▼ the remote controller.

Selecting a source
You can select CD, MD, FM, AM, or connected external audio/video equipment (LINE and CD-R) as the audio source.
Operating with the unit and remote controller
Buttons Usage
| CD/MD Press this button to toggle between CD and MD. | |
| FM/AM Press this button to toggle between FM and AM. | |
| OTHER INPUTS | Press this button to select LINE or CD-R. |
Setting the day of the week and the time
You can select either the 12-hour or 24-hour display. (This section explains how to set the time based on the 12-hour display.)

1 | Press TIMER repeatedly until “Clock” appears in the display.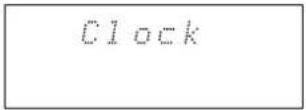 |
| 2MULTI JOG[IMAGE] | Press MULTI JOG. - SUN- 12:00amYou can now set the day of the week. If you prefer the 12-hour display, press DISPLAY. |
| 3MULTI JOG[IMAGE] | Turn MULTI JOG to select the current day of the week. - THU- 12:00am |
| 4MULTI JOG[IMAGE] | Press MULTI JOG to confirm the setting. - THU -12:00amYou can now set the time. |
| 5MULTI JOG[IMAGE] | Turn MULTI JOG to set the current time. (This example shows the 24-hour display.) - THU -7:03pm |
6 | Press MULTI JOG in sync with the time signal. |
 | |
| The clock starts operating and a dot indicating seconds starts to flash. |
To cancel the clock setting Press EDIT/CLEAR/NO.
◆ Checking the time and the day of the week
To check the time and the day of the week, press CLOCK CALL on the remote controller. To switch between the 12-hour and 24-hour displays, press DISPLAY while the current time is indicated on the display.

To display the current time while the unit is in Standby mode, first turn on the power to the unit, then press and hold down the STANDBY/ON button for more than two seconds.
To cancel the current time indication, press and hold down the STANDBY/ON button for more than two seconds while the power is on.
If the unit displays the current time during Standby mode, standby power consumption will increase.

Programming FM stations automatically — Auto Preset
Auto presets store the frequencies of radio stations into memory so you can select your favorite channels without tuning manually. Radio station signals can be automatically located and stored. This function does not apply to AM stations (see the next page).

Before auto presetting
If any radio stations are preset before you start the auto preset procedure, they will be replaced with new presets.
| 1STANDBY/ON | Press STANDBY/ON to turn on the unit. |
| 2FM/AM | Press FM/AM to display “FM.”FMTo improve the FM reception, adjust the antenna position. |
| 3EDIT/CLEARNO↓MULTI JOG|←→→|PUSH TO ENTER | Press EDIT/CLEAR/NO and turn MULTI JOG to display “AutoPre-set?”AutoPreset? |
| 4MULTI JOG|←→→|PUSH TO | Press MULTI JOG.The confirmation message “AutoPre-set??” appears in the display.AutoPreset??To stop auto presetting, press EDIT/CLEAR/NO. |
| 5 | Press MULTI JOG. |
| Auto presetting starts. It scans for the best signal quality radio stations starting from the lowest frequency and moving to the highest, then presets the selected radio stations to the channels sequentially, starting with 1. | |
| You can preset up to 20 stations. The preset stations will be automatically sorted in frequency order. |
Note
Auto presetting may store noise instead of a station with a clear signal to some preset channels, depending on your location. In such cases, erase the preset manually (see page 50).
If auto presetting is unsuccessful
Check the antenna (aerial) connection and position (see page 6).
If you have a power failure or disconnect the AC power cord (mains lead)
Memory will normally be preserved for three days after the power supply has stopped. If the data in memory has been erased, repeat auto presetting.
◆Customizing the preset channels
The following additional functions are available:
- Naming a preset channel (see page 52)
- Erasing a preset channel (see page 50)
- Copying the radio station in the selected channel to another (see page 51).
Programming AM/FM stations one by one — Preset Write
You can store the frequencies of AM stations one by one manually into the preset memory channels. (You can store FM stations manually or by using the auto preset function.)
- You can preset up to 30 channels including both FM and AM stations. For example, if you have already stored FM stations to eight channels, you can use 22 channels to store preset AM stations.
- Programmed FM and AM stations are indicated separately. Therefore, one of the preset FM stations and one of the preset AM stations could use the same channel number.
- The Preset Write function enables you to store radio station frequencies to any channel number. For example, you could program three AM stations to channels 2, 5, and 9.

| 1FM/AM | Press AM/FM to display “AM.”AMPress again to select “FM” to store an FM station. |
| 2TUNING | Press TUNING ◀/► to tune in the radio station you wish to preset.AM 810kHzIf you hold down either of the buttons, the frequency keeps changing. |
| 3EDIT/CLEARNO↓MULTI JOG|←→|PUSH TO ENTER | Press EDIT/CLEAR/NO and turn MULTI JOG until “Preset Write?” appears in the display.PresetWrite? |
4 | Press MULTI JOG.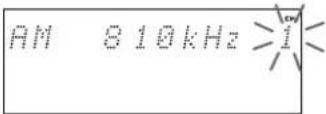 The channel number to be preset flashes.To cancel presetting, press EDIT/CLEAR/NO instead. The channel number to be preset flashes.To cancel presetting, press EDIT/CLEAR/NO instead. |
5 | If you wish to change the channel number, turn MULTI JOG. |
6 | Press MUTLI JOG to confirm.You may press MODE/YESinstead of MULTI JOG to get the same result.If “Complete” appears[IMAGE]The radio station is registered to the preset channel.If “Overwrite?” appears[IMAGE] |
MODE EDIT/CLEAR EDIT/CLEAR | The channel you’ve selected is registered already.To register the new radio station by deleting the existing radio stationPress MODE/YES.To cancel presettingPress EDIT/CLEAR/NO.If “Memory Full” appears[IMAGE]The FM/AM stations have already been programmed into all 30 channels. Delete unnecessary stations (page 50) and try again. |
| 7 | Repeat steps 2 to 6 to preset the next channel. |
Playing a CD

1

Insert a CD (Compact Disc).
①Press CD ▲o extend the disc tray.
② Place the CD in the tray with the label side facing up. If you play a CD single, place it in the center circle of the tray.
③Press CD ▲o retract the tray.
2

Press CD ▶to start playback.
The playback (▶) indicator lights up in the display.

Tip
If the unit is in standby mode, it turns on automatically when you press CD ▲
To stop playback
Playback automatically stops after the last track is played. Alternatively, press CD ■o stop playback any time.
To take out the CD
Press CD ▲o extend the disc tray.
To pause
Press CD ▶/■ lights up in the display. To resume playback, press CD ▶/■.

Selecting the track to play
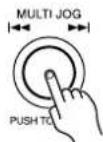
• To locate the beginning of the playing track, turn MULTI JOG counterclockwise slightly.
If you turn it further, you can select the previous tracks in reverse order.
To select the next track in order, turn MULTI JOG clockwise.
If you select the track while the CD is stopped, press MULTI JOG to start playback.

PUSH TO ENTER

Note
It may take a while to start playing back CDs that contain many tracks.
- The CD track can also be selected and played back by pressing MULTI JOG while the CD is playing or stopped. Each press skips one track ahead.

Locating a particular point in a track
Press and hold ➤ fast forward, and ◀ fast reverse during playback or pause until you locate the desired point.

Press DISPLAY on the unit repeatedly to change the display as follows:
While the CD is stopped
Total number of tracks
Total playing time

*1 If the CD contains CD text, the name appears in the display. If no CD text is included, the unit displays "No Name," then displays the disc information.
If the disc name is long:
You can scroll long names across the display by pressing SCROLL on the remote controller (see below).
During playback or pause
The elapsed time of the playing track

"TRACK"
Lights up while the elapsed time of the playing track is displayed.
The remaining time of the playing track
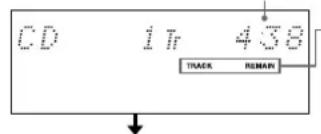
"TRACK REMAIN"
Lights up while the time remaining on the playing track is displayed.
Playback track name (Only when the CD TEXT is included)

"TRACK NAME"
Lights up when the track name is displayed.
The remaining time on the disc

"REMAIN"
Lights up while the time remaining on the disc is displayed.

Using the remote controller
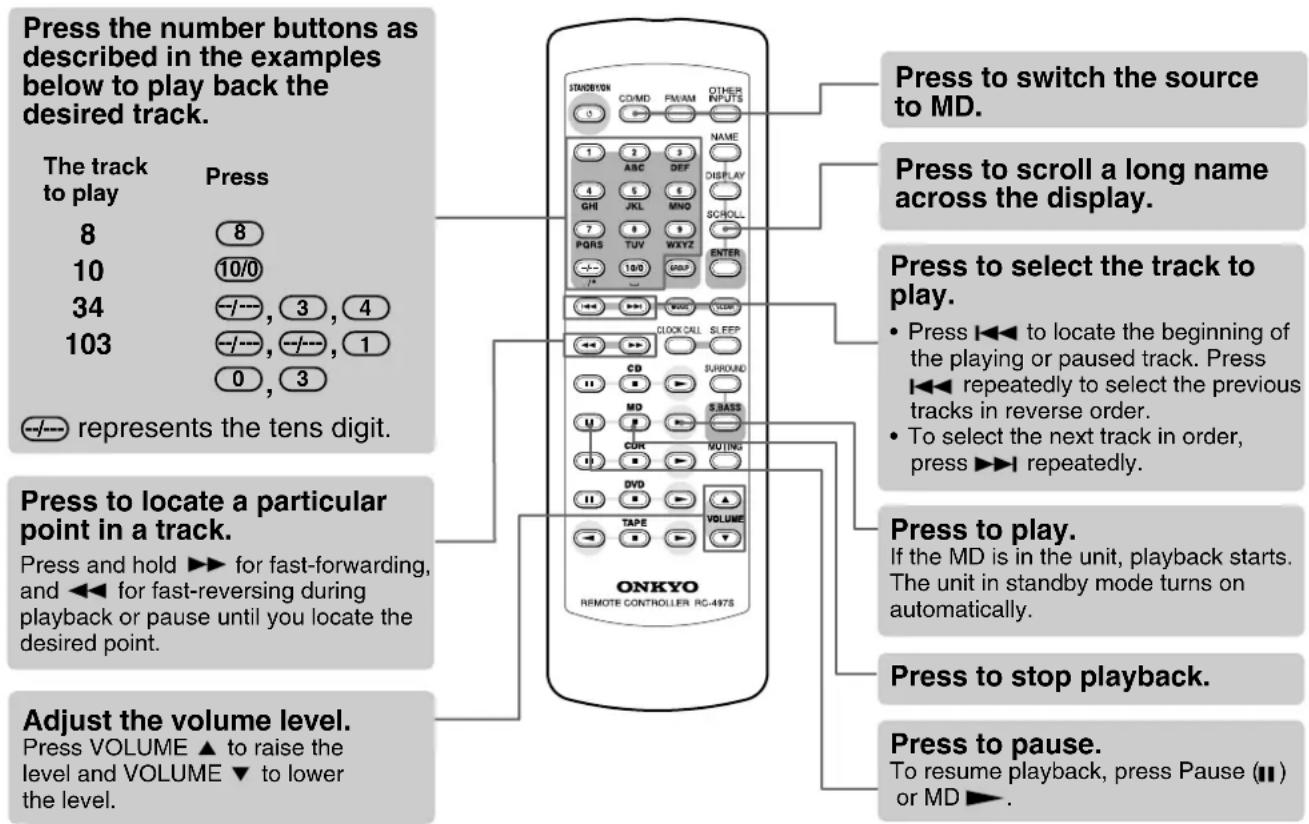
Press the number buttons as described in the examples below to play back the desired track.
| The track to play | Press |
| 8 | 8 |
| 10 | 10/0 |
| 34 | --/-- , 3 , 4 |

represents the tens digit.
Press to locate a particular point in a track.
| Press and hold ▶▶ for fast-forwarding, and ◀◀ for fast-reversing during playback or pause until you locate the desired point. |
Adjust the volume level.
| Press VOLUME ▲ to raise the level and VOLUME ▼ to lower the level. |
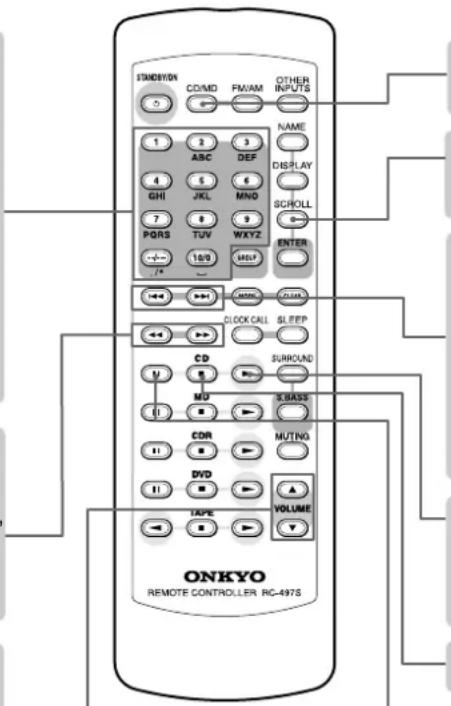
Press to switch the source to CD.
Press to scroll a long name across the display.
Press to select the track to play.
- Press I◀◀ to locate the beginning of the playing or paused track. Press I◀◀ repeatedly to select the previous tracks in reverse order.
- To select the next track in order, press repeatedly.
Press to play.
Playback starts if the CD is in the unit. The unit in standby mode turns on automatically.
Press to stop playback.
Press to pause.
To resume playback, press Pause (1) or CD▶.
Playing an MD
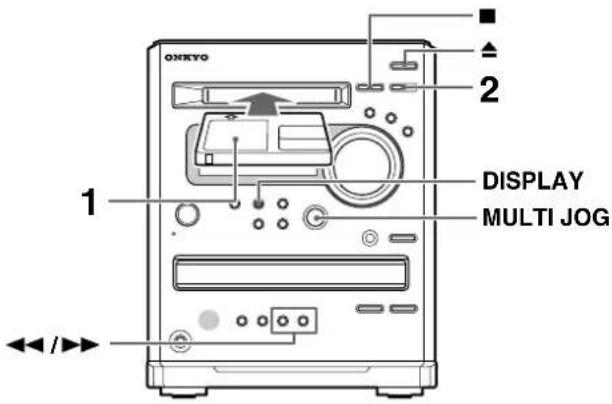
| 1 | Insert an MD (Mini Disc).The MD must be pre-recorded.The arrow on the MD must face up and point to the unit.Push gently to load the MD into the unit. | TipIf the unit is in standby mode, it turns on automatically when you insert the MD. |
| 2 | Press MD ▶to start playback.The playback (▶indicator lights in the display. | To stop playbackPress MD ■Playback automatically stops when the last track has been played.To take out the MDPress MD ▲to eject.To pausePress MD ▶/ || lights in the display. To resume playback, press MD ▶agIn. |
 |  |
◆Selecting the track to play
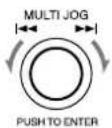
• To locate the beginning of the playing track, turn MULTI JOG counterclockwise slightly. If you turn it further, you can select the previous tracks in reverse order.
To select the next track, turn MULTI JOG clockwise.
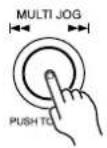
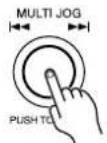
If you select a track while the MD is stopped, press MULTI JOG to start playback.
- The MD track can also be selected and played back by pressing MULTI JOG while the MD is playing or stopped. Each press skips one track ahead.
◆ Locating a particular point in a track
Press and hold ▶ fast forward, and ◀ fast reverse during playback or pause until you locate the desired point.
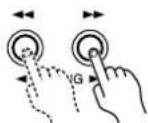
Note
If you operate this function while the unit is paused, no sound will be reproduced. Check the elapsed time in the display to locate the point.
Press DISPLAY on the unit repeatedly to change the display as follows:
While the MD is stopped

During playback or pause

*1 If you insert an MD produced only for playback, this information will not appear.
*2 If the disc or tracks are not named, only the total number of tracks or the track number appears in the display. See "Naming an MD and its tracks, and preset channels" on page 52.
*3 If the MD is not recorded, "MD BlankDisc" appears in the display.
If the disc or song title is long:
You can scroll long names across the display by pressing SCROLL on the remote controller (see below).

Using the remote controller
Listening to an FM/AM station
First, program the stations into preset channels (see pages 18 and 19).

1 | Turn on the power to the FR-N3X. | |
2 | Select FM or AM.Pressing FM/AM toggles between FM and AM. The channel selected most recently will be recalled. | |
3 | Turn MULTI JOG or press the dial repeatedly to select the desired preset channel.Turn the dial counterclockwise to select a lower channel number, or turn it clockwise to select a higher channel number.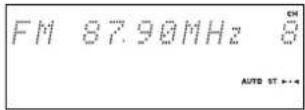 | Adjusting the volume levelTurn the volume control to adjust the level. |
Pressing DISPLAY on the main unit repeatedly toggles between two types of information display.
FM/AM frequency

* If a given preset channel is not named, the unit displays "No Name," then indicates the frequency. See "Naming an MD, and its tracks, and preset channels" on page 52.
◆Using the remote controller
Press the number buttons as described in the examples below to select the desired preset channel
| Preset channel | Press |
| 8 | 8 |
| 10 | 10/0 |
| 22 | -/-, 2, 2 |
Adjust the volume level. (Pressing VOLUME ▲ increases the volume level, and pressing VOLUME ▼ decreases the level.)

◆Manually tuning a broadcast station
You can also tune in radio stations manually.
①Turn on the power to the FR-N3X.
②Select FM or AM.
③Press TUNING or repeatedly while observing the display to tune in the desired frequency. Each press of the button changes the frequency by 50kHz for FM and 9kHz for AM. Pressing and holding down the button for more than one second will change the frequency continuously. While FM is selected, pressing and holding or down a while, then releasing it, will automatically raise (or lower) the frequency.

If FM reception is not good
When an FM stereo broadcast is being received, "ST" lights up on the display. However, if the signal is weak or too much noise interferes, it will not light up. In this case, press MODE to switch to monaural reception. ("AUTO" turns off.) This could reduce noise and intermittent cut-outs.

To return to AUTO tuning, press MODE again.
Adjusting the tone

◆Adjusting the tonal quality
1

Press the TONE/S.BASS button to select "Bass±0" (bass adjustment), then turn MULTI JOG to adjust the bass.

2
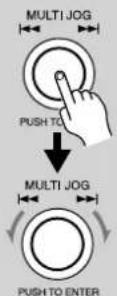
Press MULTI JOG to select "Treble±0" (treble adjustment), then turn MULTI JOG to adjust the treble.

3

Press MULTI JOG to select "S.BASS," then turn MULTI JOG to select "On" or "Off."

4

Press MULTI JOG.
The display returns to normal indication.
You can also use the S.BASS button on the remote controller to turn S.BASS on or off.
◆Muting the sound
Press MUTING on the remote controller. The MUT-ING indicator lights in the display.
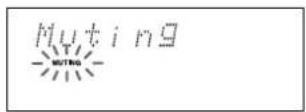
To restore the sound, press MUTING again.
Tip
During muting:
- If you press VOLUME on/the remote controller, the sound will be restored.
- If you turn the unit off and then on again, the sound will be restored.
◆Listening through the headphones
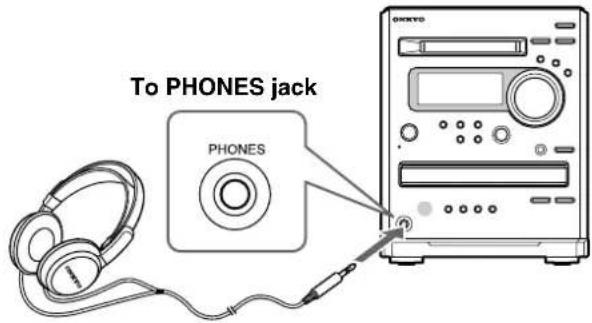
Decrease the volume, then connect the stereo headphones mini plug to the PHONES jack.
You can adjust the volume and mute the sound as described above.
The speakers will reproduce no sound while the headphones are connected.
Dubbing CD to MD (CD dubbing)
• This operation is one-touch recording that enables the DLA LINK.
- The tracks are automatically numbered.
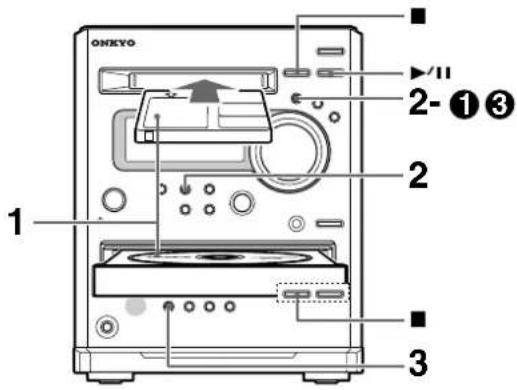
1
Insert a CD and MD.
See Step 1 of "Playing a CD" on page 20. See Step 1 of "Playing an MD" on page 22. Use a recordable MD.
2


Check the necessary recording time.
① Press CD/MD repeatedly to select "CD."
②Check the CD's total playback time.
If the display does not indicate the total playback time, press DISPLAY repeatedly.

Total playback time
③ Press CD/MD to select "MD."
④Check the available recording time on the MD.
If the display does not indicate the available recording time, press DISPLAY repeatedly.

If some data has already been recorded in the MD, the additional songs will be recorded and numbered sequentially following the existing data in the MD.
Canceling the dubbing operation
When playback of a CD is complete, or an MD is recorded up to the end, recording automatically stops. To cancel the operation during recording, press MD ■or CD ■.
Note
DLA LINK may take up to 90 seconds.
3

Press CD DUBBING to start dubbing.

"X2 Dubbing?" appears for three seconds.
"CD-MD Dubbing" scrolls on the display.
The FR-N3X searches for the peak level in the CD and sets the optimum recording level. (DLA LINK)
Then, it starts recording.
When CD playback is completed or the recording reaches the end of the MD, the recording stops.
Checking the recording result
After recording is complete or you press ■ to stop recording, press MD ▶ the FR-N3X or on the remote controller. Playback starts from the top of the recording.
Tip!
- Recorded songs are automatically numbered during CD-to-MD dubbing.
- CD-R or LINE input source is audible during CD dubbing. (The level meter in the display indicates the level of the recording source. The FR-N3X DIGITAL OUT connector outputs the CD audio.)
Notes on CD dubbing
- You cannot change the input source.
The ▶(play/pause) and (eject) are disabled.

Dubbing CD to MD at double speed
- You can copy a CD to an MD at double speed.
• The tracks are automatically numbered.

| 1 | Insert a CD and an MD.See Step 1 of “Playing a CD” on page 20.See Step 1 of “Playing an MD” on page 22.Use a recordable MD. | Tip!The quality of data recorded via double-speed CD dubbing may be adversely affected by a dirty disc. If skipping or noise occurs, dub at normal speed.You cannot dub CDs at double speed when the CD is in REPEAT play, MEMORY, or RANDOM play mode. |
| 2 | Check the necessary recording time.Refer to Step 2 on page 27. | |
3 | Press CD DUBBING twice to start double-speed CD dubbing.Press the button twice within a three-second interval.CD-MD × 2 Dubbing scrolls on the display.The FR-N3X searches for the peak level in the CD and sets the optimum recording level. (DLA LINK)Then, it starts recording.When playback of the CD is completed or the end of the MD is reached, the recording stops.Checking the recording resultAfter recording is complete or you press ■to stop recording, press MD ▶the FR-N3X or on the remote controller.Playback starts from the top of the recording. | Tip!DLA LINK may take up to 90 seconds.Recorded songs are automatically numbered during double-speed CD-to-MD dubbing.Switching the display during double-speed CD dubbingRefer to “Switching the display information during dubbing” on page 35.Notes on double-speed CD dubbingThe (play pause) and ▲(eject) are disabled. |
◆Limitations of double-speed CD dubbing
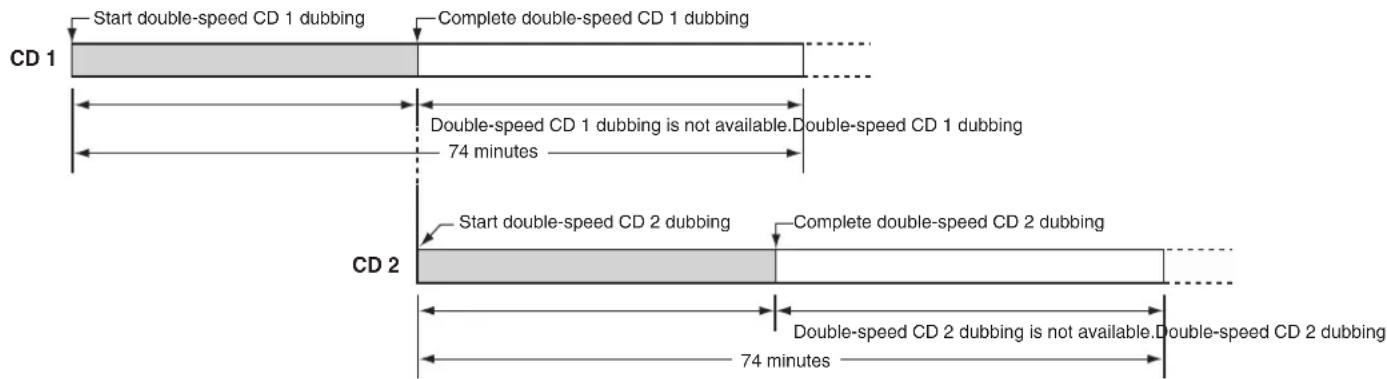
Due to limitations established for copyright protection, you cannot repeat double-speed CD dubbing using the same CD until the first 74 minutes of double-speed CD dubbing is completed. If you try to continue the operation, the FR-N3X displays the "Time Protect" message and the waiting time required until the same CD can be used for double-speed CD dubbing (e.g., "Wait 42min"). (However, you can continue double-speed CD dubbing with a different CD.) Also, you cannot perform double-speed CD dubbing continuously using twenty-one or more CDs within 74 minutes.
Recording CD to MD (Various CD Dubbing)
◆ Recording from the top of a song you are listening to (specified track dubbing)
You cannot use double-speed CD dubbing for this operation.
①Insert a CD and an MD and press the CD ▶/Ⅱ to start playback.
Be sure to insert a recordable MD with the record-protect tab closed.
②If you wish to record a song you are currently listening to, press CD DUBBING during play-back.
Playback resumes from the top of the song and dubbing starts. When dubbing of the song is complete, the MD stops. The CD continues playing.
◆ Dubbing a CD in a different play-back mode to an MD
①Insert a CD and an MD, select CD as the input source, then select a different playback mode.
- Be sure to insert a recordable MD with the record-protect tab closed.
- Set up MEMORY playback (see page 40), 1TR playback (see page 41), or REPEAT playback (see page 42). (Set up a playback mode and select a song(s). Do not play back the song(s).)
②Press CD DUBBING.
CD-to-MD dubbing starts.
Notes
- Double-speed CD dubbing is disabled in MEMORY playback and REPEAT playback modes.
- If you have set up 1TR playback mode, you can dub only the first song on the CD even if you select multiple songs to be recorded.
- If you record only one song on the CD in REPEAT playback mode, the recorded song on the MD may not be numbered.
◆ Copying CD text
- If a CD contains CD text, the CD's track names will be copied to the MD's tracks during CD dubbing.
- During CD dubbing to an MD that contains no recording data or title, the CD disc title and the artist's name will be also copied to the MD and used as the MD disc title.
- Many CD texts are protected by copyright. If a particular CD text is protected by copyright, “Text protect” appears on the display one second after you press the CD DUBBING button.
If "Text Copy?" appears:
To start copying the CD and CD text to an MD, press the CD DUBBING button.
To start copying the CD but not copy CD text, do not press the CD DUBBING button.
Note:
Due to the limitations of the MD formats, CD text may be converted into a blank space, depending on the character type.
Recording CD to MD (Various CD Dubbing) (continued)
◆Switching to Fade Out mode (while the input source is MD and the system is stopped)
This mode fades out (gradually lowers the volume level of) the end of a track that cannot be recorded to its conclusion during CD dubbing, specified track dubbing, or double-speed CD dubbing.
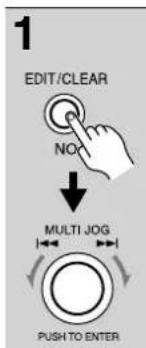
Press EDIT/CLEAR/NO and turn MULTI JOG to display "Fade Dub?."
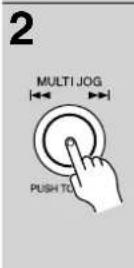
Press MULTI JOG.
The current setting is displayed. In this case, "Off-On?" appears, asking whether you wish to switch to Fade Out mode.


Press MULTI JOG to confirm the setting.
To cancel this setting, press the EDIT/CLEAR/NO button.

◆ MD Group CD dubbing (while the source is MD and the recorder is stopped.)
You can record multiple tracks as a group.
1EDIT/CLEAR | Press EDIT/CLEAR/NO and turn MULTI JOG until “Group Dub?” appears in the display.Group Dub? |
2 | Press MULTI JOG.Off + On?"Off → On?" or "On → Off?" appears. |
3 | Press MULTI JOG.Gr.Dub On |
Recording CD to MD (Synchro recording)
After you select songs, this function enables you to edit and record the songs.

| 1 | Insert a CD and an MD.See Step 1 of “Playing a CD” on page 20.See Step 1 of “Playing an MD” on page 22.Use a recordable MD. | Tip!If “MD Reading” appears on the MD information display, you can-not perform Synchro recording. |
| 2 | Check the necessary recording time.Refer to Step 2 on page 27. | |
3 | Press CD/MD repeatedly to display “CD.” | |
| 4 | Select digital or analog recording.See “Selecting digital or analog recording from CD to MD” on page 37. | |
5 | Press ●REC to set the FR-N3X in recording standby mode.Adjusting the recording level. See the next page. | Turning Level Sync on or offSee “Numbering the songs —Level Sync” on page 39. |
6 | Play the CD. Numbering the desired song(s)Press ●REC during recording of the desired song. If you do not hold down ●REC long enough (about four seconds or less), the song may not be numbered.Dubbing another CDPress CD ▪ to stop playback, and replace the CD with another one. The MD recorder enters recording standby mode.When the end of the MD is reached, the recording automatically stops. Numbering the desired song(s)Press ●REC during recording of the desired song. If you do not hold down ●REC long enough (about four seconds or less), the song may not be numbered.Dubbing another CDPress CD ▪ to stop playback, and replace the CD with another one. The MD recorder enters recording standby mode.When the end of the MD is reached, the recording automatically stops. | Tip!During recording, you can check the elapsed time and remaining time on the MD using DISPLAY.Selecting a song after pausing the CDThe MD also enters recording stand-by mode.Use ▪ to stop playback, and replace the CD with another one. The MD recorder enters recording standby mode.When the end of the MD is reached, the recording automatically stops. |
Recording an FM/AM broadcast program to an MD
To record a very long program, switch the recording mode. (Refer to page 36.)

| 1 | Insert an MD.Refer to Step 1 on page 22.Use a recordable MD. | |
| 2 | Check the available recording time on the MD.Refer to Step 2 on page 27. | |
| 3 | FM/AM | Select “FM” or “AM” for input. |
| 4 |  PUSH TO ENTER PUSH TO ENTER | Turn MULTI JOG to select a preset channel. |
| 5 |  | Press ●REC to set the FR-N3X into recording standby mode. If the FR-N3X does not enter record stand-by modeSee “Can’t dub?” on page 36. If the FR-N3X does not enter record stand-by modeSee “Can’t dub?” on page 36. |
| 6 |  | Press MD ▶(play/pause) to start recording. When the MD is recorded up to its end, recording automatically stops.To stop a recording while in progress, press MD■To pause recordingPress MD ▶714 indicator lights up on the display.Press the button again to resume recording from the stopped point. At this time, the track number increases by one.Numbering the desired song(s)Press ●REC during recording of the desired song. If you do not hold down ●REC long enough (about four seconds or less), the song may not be numbered. When the MD is recorded up to its end, recording automatically stops.To stop a recording while in progress, press MD■To pause recordingPress MD ▶714 indicator lights up on the display.Press the button again to resume recording from the stopped point. At this time, the track number increases by one.Numbering the desired song(s)Press ●REC during recording of the desired song. If you do not hold down ●REC long enough (about four seconds or less), the song may not be numbered. |
Recording from another Onkyo System (Synchro Recording)
This function is useful when you record CDs while selecting tracks.
It is also convenient for analog recording from another Onkyo system.
The following operations are available if you connect an optional Onkyo cassette tape deck to the FR-N3X.
- Synchro Recording from the unit CD to the stereo cassette tape deck
- Synchro Recording from the unit MD to the stereo cassette tape deck
- Synchro Recording from the stereo cassette tape deck to the MD unit.
For more information on Synchro recording from a CD or MD to a cassette tape, refer to the instruction manual for the cassette tape deck.
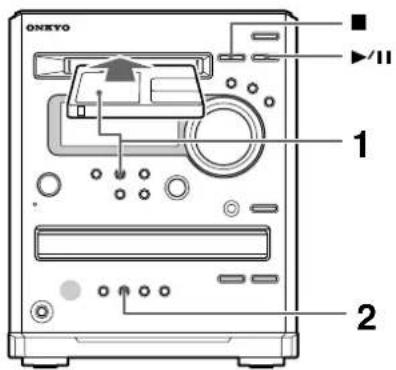
This section explains how to perform Synchro recording from a cassette tape deck to an MD in the FR-N3X.
1

Set up the recording source (in this example, a cassette tape) and insert an MD in the MD recorder.
Check the available recording time on the MD.
If the display does not indicate the available recording time, press DISPLAY repeatedly.

2
Press ●REC to set the recorder in recording standby mode.
3
Play the recording source (in this example, a cassette tape).

The recording starts.

Cancelling Synchro recording
Stop playback of the recording source. The MD recorder enters Record Standby mode.
Checking the recorded data
After recording is complete, press the MD recorder's ▶/■ button or the remote controller's ▶button for MD. Playback starts from the top of the recording.
Pausing and selecting a track When you pause or stop the source, the MD recorder enters Record Standby mode. Select a track, then play the source again. The MD recording resumes. Note that when you press the MD recorder's button, the MD recorder stops, but the source (CD recorder) continues play-back.
Numbering the tracks
Press the ●REC button at the point at which you wish to assign a track number. If you press the button with a short interval (about four seconds or less), you will be unable to assign track numbers.
Recording data from a connected external device to an MD
You can record data from an external device (that you have connected following the explanation on page 9) to an MD.
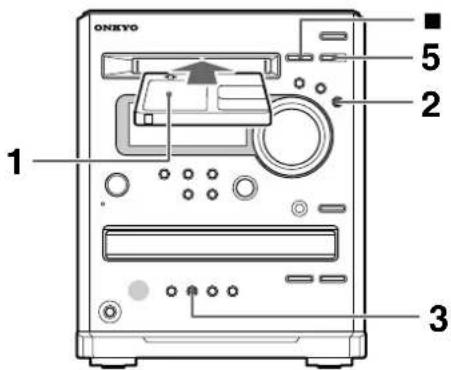
| 1 | Insert an MD.Be sure to insert a recordable MD with the write-protection turned off. |
| 2OTHER INPUTS | Press OTHER INPUTS repeatedly to select the desired external sound source.LINENoteIf you have changed the title of the device, the new title appears (see page 65). |
| 3●REC | Press ●REC to set the recorder in recording standby mode.If the FR-N3X does not enter recording standby mode:See “Can’t dub?” on page 36. |
| 4 | Start playing the external device.Adjusting the recording input level on the FR-N3X will change the monitoring volume level. |
5
MD

When an MD is recorded up to its end, the MD automatically stops.
Numbering the desired song(s)
Press ●REC while recording the desired song. If you do not hold down ● REC long enough (four seconds or less), the song may not be numbered.
To pause recording
Press MD ▶Miss the button again to resume recording.
Stopping the MD
To cancel a recording in progress, press MD ■.
Adjusting the recording level See page 38.
Checking the recording result See page 27.
Turning Level Sync on or off See "Numbering the songs — Level Sync" on page 39.

Signal Synchro Recording
Signal Synchro Recording starts recording onto an MD when a signal is received from a source connected to the input jacks.
① Execute Steps 1 to 3 on the previous page. The MD is set to recording pause.
②Press ● REC.
"Signal Rec" appears in the display, then the MD switches to Signal Synchro Recording pause.
Signal Rec
③Start playing the selected source.
When a sound signal is received from the source, the MD will automatically start recording. (You do not need to press MD ▶to start recording in Step 5 on this page.)
Settings for Recording
◆ About the recording indicators
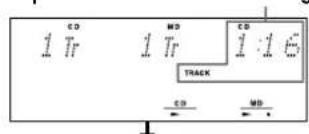
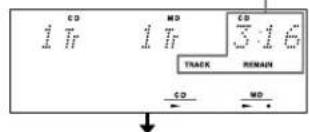
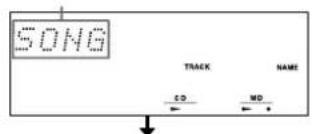
Switching the display information during recording
- Pressing CD/MD repeatedly toggles between the CD and MD information display.
MD information ("MD" lights up.)
Track the song number being played on the CD

Track the song number being recorded on the MD
CD information ("CD" lights up.)
Track the song number being played on the CD

Track the song number being recorded on the MD
• The display changes as follows when you press DISPLAY:
Displayed MD information
Elapsed time of the current song

flowchart
graph TD
    A["1 Tr"] --> B["CD"]
    A --> C["MD"]
    A --> D["MD"]
    A --> E["1:16"]
    E --> F["TRACK"]
    G["1 Tr"] --> H["CD"]
    G --> I["MD"]
    J["1 Tr"] --> K["MD"]
    J --> L["MD"]
    J --> M["56:44"]
    N["1 Tr"] --> O["SPC"]
    N --> P["NUMAN"]
    Q["1 Tr"] --> R["CD"]
    Q --> S["MD"]
    T["BALLAD"] --> U["TRACK"]
    T --> V["NAM"]
    W["Available recording time on the disc"] --> X["1 Tr"]
    Y["Title of the song being recorded (*)"] --> Z["BALLAD"]
CD information
Elapsed time of the current song
Remaining time of the current song
Playback track name (Only when the CD TEXT is included)
Remaining playback time on the CD

* Nothing appears if the song has no name. See "Naming an MD and its tracks, and preset channels" on page 52.

An MD after recording
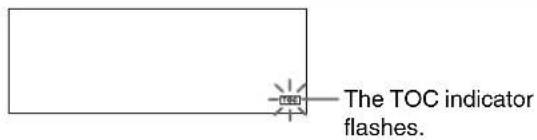
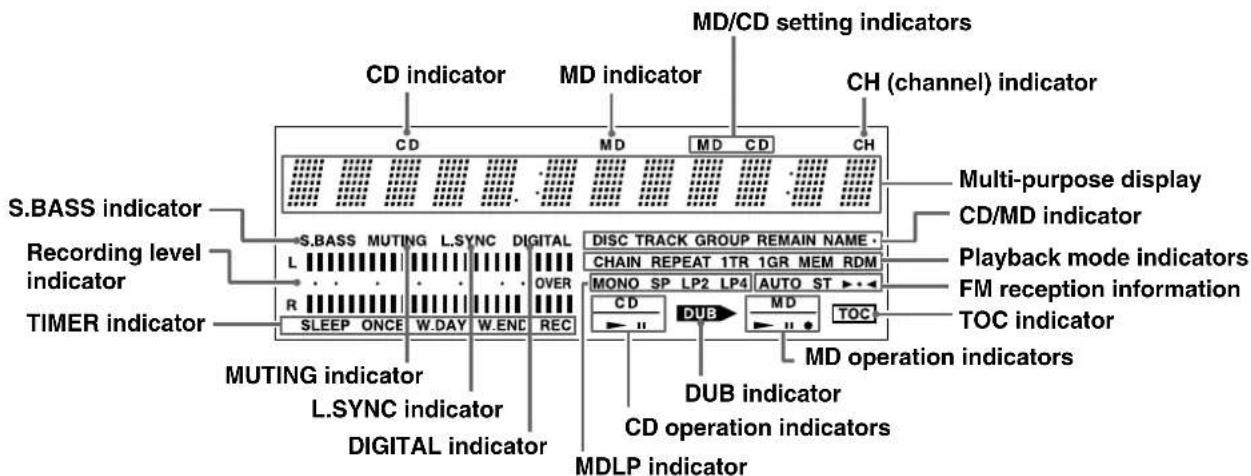
TOC indicator
Information, such as track numbers, is written into the table of contents (TOC) on the MD before you eject the MD, before the recorder enters standby mode, or before recording is stopped.
Do not disconnect or move the power cord under the following situations. Otherwise, the data will not be written correctly. (Also, refer to the "When the power is down" section on the right.)
- When the TOC indicator is lit
The information to be written into the TOC is currently stored in memory on the FR-N3X.
- When the TOC indicator is flashing
The information is being written to the MD.
When the power is down
If the power is down or if you disconnect the power cord accidentally while the TOC indicator is lit or flashing, the data recorded prior to power down will be erased.
When "Retry Error" appears
Eject the MD, insert it again, then try recording again.

Can't dub?
- “Cannot Rec” appears on the display.
The current MD is for playback only. Use a recordable MD.
- "Protected" appears on the display.
The MD is write-protected. See "Precautions for handling the MiniDisc (MD)" on page 12.
- "Disc Full" appears on the display.
The MD has no space available for recording. Use a new MD.
- "CD Dub Fail" appears on the display.
The MD mechanism is still operating. Wait a while, then press CD DUBBING.
The CD is in RANDOM mode. Press MODE to cancel RANDOM mode.

Selecting a recording mode (while the input source is MD and the recorder is stopped)
Select Record mode before you start recording.
Press EDIT/CLEAR/NO.
Turn MULTI JOG to display "Rec Mode?".
Press MULTI JOG.
4 | Turn MULTI JOG to select a recording mode from the selection below in the following order.SP: Normal stereo recording mode. You can record stereo data of a length specified on the disc.LP2: Normal stereo data is compressed to half its length. The available recording time is twice the length of “SP.”LP4: Normal stereo data is compressed to a quarter of its length. The available recording time is four times the length of “SP.”MONO: Monaural recording mode. The available recording time is twice the length of “SP.” | NoteIf you have recorded a disc in LP2 or LP4 mode, you cannot play it on a player that does not support LP2 or LP4 mode. If you play such a disc on another MD player, “LP:” may appears in the display as a title. |
| 5 | Press MULTI JOG when the desired recording mode appears on the display. |
◆Selecting digital or analog recording from CD to MD (while the input source is CD and the recorder is stopped
This operation is available for Synchro recording and Signal Synchro recording.
1 | Press EDIT/CLEAR/NO to display “Rec Signal?.” | Tip!The “DIGITAL” indicator lights up on the CD information display if digital recording has been selected. The indicator does not light up if analog recording has been selected. |
2MODE[36  ] ] | Press MODE/YES.Current recording option |  |
| 3EDIT/CLEAR[IMAGE] | If you do not wish to change the current setting, press EDIT/CLEAR/NO. If you wish to change the setting, press MODE/YES.When you press MODE/YES after the FR-N3X displays “Dig→Ana?,” it starts analog recording.When you press MODE/YES after the FR-N3X displays “Ana→Dig?,” it starts digital recording. The FR-N3X displays “Complete.” You have now completed all settings.When you eject the CD and press the CD-DUB button, the FR-N3X displays “Dig.” | |
 | If you do not wish to change the current setting, press EDIT/CLEAR/NO. If you wish to change the setting, press MODE/YES.When you press MODE/YES after the FR-N3X displays “Dig→Ana?,” it starts analog recording.When you press MODE/YES after the FR-N3X displays “Ana→Dig?,” it starts digital recording. The FR-N3X displays “Complete.” You have now completed all settings.When you eject the CD and press the CD-DUB button, the FR-N3X displays “Dig.” |
◆Adjusting the recording level
You can adjust the recording level for better recording quality.
This operation is available during Synchro recording and Signal recording. You cannot adjust the recording level during CD dubbing with DLA LINK or during double-speed dubbing. Play the recording source, and perform the steps below during in record standby mode. You can adjust the level for analog and digital recording.
1 | Press EDIT/CLEAR/NO and turn MULTI JOG to display “Rec Level?” (recording level). |
2 | Press MULTI JOG. |
3 | Turn MULTI JOG to adjust the recording level.Adjust the level so that the “OVER”indicator will not light up. You can adjust the level between -∞ dB and -18 dB,by 0.5dB within the range of -12.5 dB and +18.0dB, by 2.5dB within the range of -12.5 dB and -30 dB, and by 5.0dB steps within the range of -30 dB and -60 dB You can adjust the level between -∞ dB and -18 dB,by 0.5dB within the range of -12.5 dB and +18.0dB, by 2.5dB within the range of -12.5 dB and -30 dB, and by 5.0dB steps within the range of -30 dB and -60 dB |
4 | Press MULTI JOG.“Complete” appears on the display. You have now completed the setting. |

Numbering the songs — Level Sync
- The Level Sync function of the FR-N3X automatically numbers the song at the beginning of signal input. Turn on this function to automatically number songs during recording. (The songs may not be numbered if the gap (silence) between songs is too short.)
- During CD dubbing, specified track dubbing, and double-speed dubbing, the tracks are automatically numbered, regardless of the Level Sync function status.
- To number the songs, turn off the Level Sync function and follow Step 6 "Numbering the desired song(s)" on page 32.
- When the Level Sync function is on, the MD recorder automatically enters Record Standby mode if silence continues for 60 seconds.
- When the L.SYNC indicator is lit, the Level Sync function is turned on. (When you turn off the function, this indicator disappears.)

flowchart
graph LR
    A["L.SYNC indicator"] --> B["LAYNE"]
To turn the Level Sync function on or off, follow the steps during recording or in recording standby mode. (To cancel this operation, press EDIT/CLEAR/NO.
You can also turn the function on or off before inserting a disc.
1

Press EDIT/CLEAR/NO and turn MULTI JOG to display "Level Sync?."

2
Press MULTI JOG.
"On→Off?" or "Off→On?" appears on the display.

3

Press MULTI JOG.
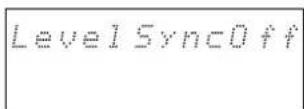
"LevelSyncOff" appears when the function is turned off, and "LevelSyncOn" appears when the function is turned on.
Various ways to play CDs and MDs
Five different playback modes are available in addition to normal playback. Insert a CD or MD before you begin operations (see pages 20 and 22).
◆MEMORY playback
You can select and store track numbers (up to 25) in a desired playback order.
By combining this function with the CD dubbing function, you can easily create an MD of your favorite recordings. (You cannot combine this function with the CD double-speed dubbing function.)
3
EDIT/CLEAR/NO
2
3
1
/
Note
If the total playing time of the programmed tracks exceeds the following time length, the FR-N3X does not display the total time. However, this does not affect MEMORY playback. CD: "--:" appears when the total time meets or exceeds 99 minutes 59 seconds. MD: "--:" appears when the total time meets or exceeds 511 minutes 59 seconds. You can program up to 25 tracks for a CD and MD. If you try to program more tracks, the unit displays "Memory Full."
3
Press on the selected source to start MEMORY play-back.
The playing track number
When the unit finishes playing the track number you stored last, playback stops. The track numbers stored in memory are retained.
1 Press MODE repeatedly until the MEMORY indicator lights in the display.
The MEMORY indicator lights.
2 Turn MULTI JOG to select the first track you want to play back, then press MULTI JOG.
The selected track is stored in memory. To select the next track to be played, repeat this step.
Track number to be stored in memory The total time of programmed tracks
You can also use the number buttons on the remote controller to select a track.
To cancel a track number stored in memory:
Press EDIT/CLEAR/NO. Each press erases the last track number stored in memory.
2
Number buttons
(See pages 21
and 23.)
(These buttons do
not operate during
MEMORY
playback.)
/
/
1
CLEAR
3
Press on the
selected source.
To select a track number in memory:
Turn MULTI JOG or press / on the remote controller repeatedly during MEMORY playback.
To check the track numbers in memory:
Press / while the CD/MD is stopped.
To erase a track number from memory:
- While in MEMORY playback mode, and the CD/MD is stopped, press EDIT/CLEAR/NO or CLEAR on the remote controller. Each press erases the last track number stored in memory.
- If you change the playback mode, all data stored in MEMORY playback will be erased.
- When you eject the disc, all programmed data will be erased.
◆1 TR (one track) playback
You can play back only a single track using this mode. In addition, using the CD dubbing function along with this mode enables you to create a single track CD easily.

While the source is CD or MD, and the unit is in stop mode
| 1MODEYES | Press MODE/YES repeatedly until the 1TR indicator lights in the display. |
| The 1TR indicator lights. | |
| 2▶/II | Press ▶on the selected source.1 TR (one track) playback starts. |
| 3MULTI JOGPUSH TO ENTER | If you wish to select another track, turn MULTI JOG.You can select only one track while using the CD dubbing function. |

◆RANDOM playback
All tracks on the disc will be shuffled, then played back.

While the source is CD or MD, and the unit is in stop mode
| 1MODEYES | Press MODE/YES repeatedly until the RDM indicator lights in the display. |
| The RDM indicator lights. | |
 | |

(Continued on the next page)
◆REPEAT/CHAIN REPEAT playback
- The REPEAT mode plays back a CD or MD repeatedly, and the CHAIN REPEAT mode plays back both the CD and MD in turn.
- You can combine either REPEAT or CHAIN REPEAT mode with MEMORY, 1 TR, or RANDOM mode. In CHAIN REPEAT mode, you can set the other combination mode separately for CD and MD.

| MODEYES | While a CD or MD is playing, press MODE/YES repeatedly until the REPEAT or CHAIN REPEAT indicator lights in the display. The REPEAT or CHAIN REPEAT play-back mode is set. |
| The REPEAT or CHAIN REPEAT indicator lights. |


◆ Cancelling the playback mode

Cancelling 1TR, MEMORY, and RANDOM mode
| 1 | Press ■ on the selected source to stop playback. |
| 2MODE | Press MODE/YES repeatedly until neither the MEM, 1TR, or RDM indicator lights in the display. |
Cancels REPEAT and CHAIN REPEAT mode
| MODEYES | While a CD or MD is playing, press MODE/YES button repeatedly until neither the REPEAT or CHAIN REPEAT indicator lights in the display. |


Using the MD Group Function
If 1TR, 1GR, MEM, or RDM is lit, you cannot use the edit functions. Place the unit in normal playback mode.

Group
The Group function enables you to assign tracks on an MD to groups. This function is convenient when you use MDLP for a disc that contains many tracks.
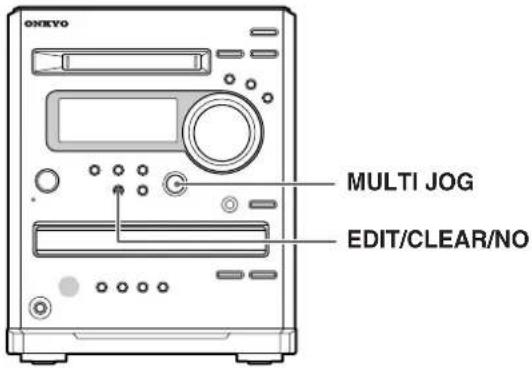
Notes
- You can group only consecutive tracks.
- You cannot assign a single track to multiple groups.
- If you try to play an MD that contains groups on a device that does not support Groups, the disc name will not be displayed correctly.
Do not edit an MD that contains groups on a device that does not support Groups.
Group Set (while the source is MD and the unit is stopped)
You can place tracks that do not belong to any group into a new group.
 | Turn MULTI JOG to select the first track you wish to assign to a new group.  |
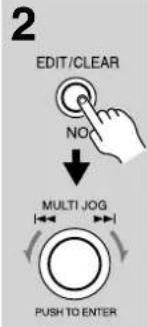 | Press EDIT/CLEAR/NO and turn MULTI JOG until “XX Tr Gr.Set?” appears in the display. 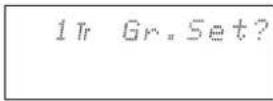 |
 | Press MULTI JOG. |
4

Turn MULTI JOG to select the last track you wish to assign to a new group.

5

Press MULTI JOG.
"Complete" appears, and the new group is created.
Group In (while the source is MD and the unit is stopped)
You can place tracks that do not belong to any group into an existing group.
1
Turn MULTI JOG to select a track you wish to assign to a group.
2

Press EDIT/CLEAR/NO and turn MULTI JOG until "XX Tr Gr.In?" appears in the display.
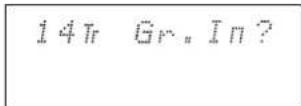
3

Press MULTI JOG.
4

Turn MULTI JOG to select the destination group.

5

Press MULTI JOG.
"Complete" appears, and the track is placed as the last track of the selected group.
(Continued on the next page)

natural_image
Solid gray rectangular shape with rounded corners (no text or symbols)
Using the MD Group Function (continued)
Group Out (while the source is MD and the unit is stopped)
This function enables you to remove a track from the group.
1
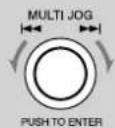
Turn MULTI JOG to select a track you wish to remove from the group.
2
EDIT/CLEAR

Press EDIT/CLEAR/NO and turn MULTI JOG until "XX Tr Gr.Out?" appears in the display.
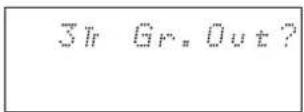
3

Press MULTI JOG.
"Complete" appears, and the selected track is removed from the group.

Track removed from the group

◆
Cancelling all groups (while the source is MD and the unit is stopped)
This function enables you to cancel all the groups on the disc.
1

Press EDIT/CLEAR/NO and turn MULTI JOG until "Gr.Release?" appears in the display.

2
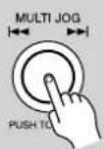
Press MULTI JOG.
"Complete" appears, and all the groups are cancelled.
◆
Cancelling the selected group (while the source is MD and the unit is stopped)
This function enables you to cancel only the selected group.
1

Press GROUP.
2

Turn MULTI JOG to select a group you wish to cancel.

3

Press EDIT/CLEAR/NO and turn MULTI JOG until "G Release?" appears in the display.
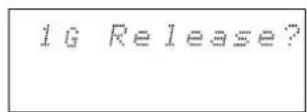
4

Press MULTI JOG.
"Complete" appears, and only the specified group is cancelled.
Editing Groups (Move, Combine and Erase)
You can perform three editing functions: move a group to change the order, combine two groups into one, and erase tracks in a group.
◆Outline of edit function
Erasing a group—G.Erase
All tracks in the specified group will be erased.
Moving a group—G.Move
Enables you to move a group.
Combining groups—G.Combine
Enables you to combine two groups into one.
◆Combining two edit functions
Combining two groups that are located apart:
(G.Move + G.Combine)
G.Combine enables you to combine the selected group with the preceding adjacent group. To combine two groups that are listed apart from each other, first use the G.Move function to move one group next to the other group, then use the G Combine function to combine the groups.
Notes regarding edit functions
- The edit information is written in the TOC of the MD when you eject the MD or when the recorder enters standby mode. When the recorder is writing this information, the TOC indicator lights up or flashes. During this time, do not disconnect the power cord or move or shake the system. (See "When the TOC indicator lights up or flashes" on page 36.)
- You cannot use the edit functions when the MEM, RDM, 1TR, or 1GR indicator is lit. Place the recorder in Normal Playback mode. (See "Cancelling the playback mode" on page 42.)
◆Erasing tracks in the specified group — G.Erase
- You can execute this function only when the input source is MD and an MD is stopped.
• To cancel the operation, press MD ■
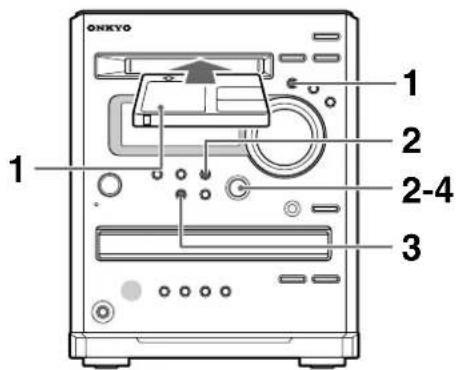

(Continued on the next page)

natural_image
Solid gray rectangular shape with rounded corners (no text or symbols)
Editing Groups (Move, Combine and Erase) (continued)

Moving a group — G.Move
- You can execute this function only when the input source is MD and an MD is stopped or paused.
• To cancel the operation, press MD ■

1
CD/MD

Insert an MD, and select MD as the source.
2
GROUP


PUSH TO ENTER
Press GROUP, then turn MULTI JOG to select a group to move.
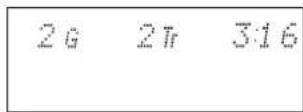
3
EDIT/CLEAR

PUSH TO ENTER
Press EDIT/CLEAR/NO and turn MULTI JOG until "G.Move?" appears in the display.

4

Press MULTI JOG.

The group will be assigned this group number.
The number of the specified group and its destination number appears in the display.
5
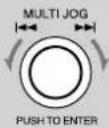
To change the destination group number, turn MULTI JOG.

6

Press MULTI JOG.
The group moves, and "Complete" appears in the display.

The groups are renumbered.
Moving the group

flowchart
graph TD
    A["1"] --> B["2"]
    B --> C["3"]
    C --> D["4"]
    D --> E["5"]
    E --> F["6"]
    F --> G["7"]
    G --> H["8"]
    H --> I["9"]
    I --> J["10"]
Renumbering the groups

◆Combining groups — G.Combine
- You can execute this function only when the input source is MD and an MD is playing or paused.
- The name of the lower-numbered group is assigned to the combined group.
• To cancel the operation, press MD ■

| 1CD/MD | Insert an MD, and select MD as the source. |
| 2GROUP↓MULTI JOG|←→|→|PUSH TO ENTER | Press GROUP, then turn MULTI JOG to select a group you wish to combine.2G 3Tr 316The selected group will be combined with the preceding group. Therefore, you must select the second of the two groups to be combined. |
| 3EDIT/CLEARNO↓MULTI JOG|←→|→|PUSH TO ENTER | Press EDIT/CLEAR/NO and turn MULTI JOG until “G.Combine?” appears in the display.2G Combine? |
| 4MULTI JOG|←→|→|PUSH TO | Press MULTI JOG.1G+2G?Preceding group Selected groupThe numbers of the selected group and the preceding group appear. |
5
Press MULTI JOG.

The groups are combined, and "Complete" appears in the display. The group are renumbered.
Combining the groups

flowchart
graph TD
    A["1"] --> B["2"]
    B --> C["3"]
    C --> D["4"]
    D --> E["5"]
    E --> F["6"]
    F --> G["7"]
    G --> H["8"]
    H --> I["9"]
    I --> J["10"]
    style A fill:#fff,stroke:#000
    style B fill:#fff,stroke:#000
    style C fill:#fff,stroke:#000
    style D fill:#fff,stroke:#000
    style E fill:#fff,stroke:#000
    style F fill:#fff,stroke:#000
    style G fill:#fff,stroke:#000
    style H fill:#fff,stroke:#000
    style I fill:#fff,stroke:#000
MD Group Functions (Playing MD Groups)
Before you use this function, you need to create a group on the disc (see page 43).

MD Group playback
The selected group and all subsequent groups will be played.

1

Press GROUP.
2
Rotate MULTI JOG to select a group you wish to play.

Use the number buttons on the remote controller to select the group number.
3

Press MULTI JOG.
Playback starts.

MD 1Group playback
Only the selected group will be played.

1
Press GROUP.

2

Rotate MULTI JOG to select the desired group.

Use the number buttons on the remote controller to select the group number.
3
Press MODE/YES repeatedly to select "1GR."

4

Press MULTI JOG.
Playback starts. When playback is completed, MD1 Group playback mode is cancelled.
You can specify groups to skip during playback.
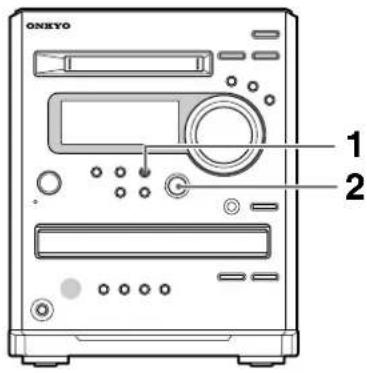
1
Press the GROUP button during playback.
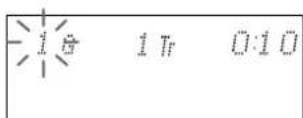
2

Rotate MULTI JOG to select the desired group.
Playback starts from the first track of the selected group.
Changing the FM/AM preset channels
Using the delete and copy functions, you can delete preset stations, copy a preset station to another channel, or change the channel number.
Tips for changing the preset channels
To change the channel number:
Use the copy and delete functions.
For example, if you wish to change channel 3 (which has an FM station programmed) to channel 8 (an empty channel):
① Copy the station in channel 3 to channel 8.
② Delete the station in channel 3.
◆ Erasing a preset channel – Preset Erase

| 1 | Call the preset channel you wish to erase. |
| 2EDIT/CLEAR↓MULTI JOG | Press EDIT/CLEAR/NO and turn MULTI JOG until "PresetErase?" appears in the display. |
| PresetErase? |
| 3 | Press MULTI JOGA confirming message appears in the display. |
| Erase 0k? 4 |
| 4 | Press MULTI JOG. “Complete” appears in the display. The preset channel is erased. |
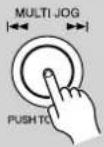 | Complete |
◆ Copying a preset channel – Preset Copy
If you copy a preset channel to another channel, the name of the preset channel (see page 52) is also copied to the other channel.

1
Call the preset channel you wish to copy.

2
EDIT/CLEAR


Press EDIT/CLEAR/NO and turn MULTI JOG until "PresetCopy?" appears in the display.

3
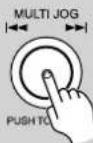
Press MULTI JOG.

4
Turn MULTI JOG to select the pre-set channel number to which you wish to copy.

5

Press MULTI JOG to confirm.
You may press MODE/YES instead of MULTI JOG to achieve the same result.
If "Complete" appears:
Complete
The same radio station is copied to the preset channel.
If "Overwrite?" appears:

The channel you wish to copy to is registered already.
• To register the new radio station by deleting the existing radio station:
Press MODE/YES.
• To cancel copying: Press EDIT/CLEAR/NO.
Naming an MD and its tracks, and preset channels
◆Naming an MD disc or track
- You can enter up to 100 alphabetical characters per name.
- Use a recordable MD with the record-protect tab closed.
①Insert the MD, then select MD as the source.
② To name the disc, proceed to Step ③. To name a track, select the track.
③ Execute "Entering a name" as described in the right column.
◆Naming a group on an MD
①Insert the MD, then select MD as the source.
②Press the GROUP button, then turn MULTI JOG to select a group.
③ Follow the steps described in the "Entering a name" section in the right column.
Notes
- If the MD is record-protected or a playback-only disc, you cannot name the disc. (See page 12.)
- Before naming the disc, check that no particular track is selected. If a track is selected, press MD
- You can name a track during recording or playback. However, if recording or playback of the next track starts, the naming process may not be completed correctly.
- If the MEM, RDM, 1TR, or 1GR indicator is lit, you cannot name the disc.
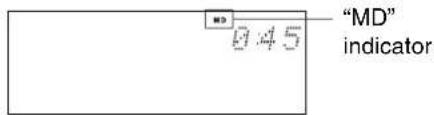
- Information such as names will be recorded to the TOC of the MD when you eject the MD, turn off the unit, or stop recording. Therefore, do not disconnect the AC power cord (mains lead) or vibrate the unit when the TOC indicator is lit or flashing. (See page 36.)
◆Naming a preset channel
After you select the preset channel to name, execute "Entering a name" as described in the right column.
You can enter up to eight characters per name.
◆Entering a name
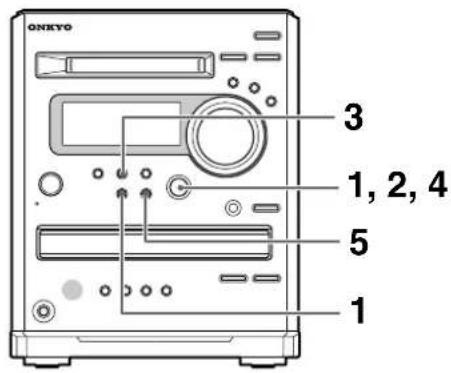
1 Press EDIT/CLEAR/NO and turn MULTI JOG until "Name In?" appears in the display.
Name In?

2 Press MULTI JOG.

3 Press DISPLAY repeatedly until the character type you wish to enter appears in the display.
You can select one of the following character entry modes:
• “ A” for capital letters
• “ a” for small letters
• " 1" for numbers and symbols
• “ ♪” for Easy Name* (see next page).
* This mode cannot be selected when you are naming a preset channel.
The character type appears.

4


Turn MULTI JOG to select the character (or title when in Easy Title mode), then press it to enter.
Repeat this step for the next character. If you wish to change the type of characters, repeat Step 3, then proceed with this step.
If you entered the wrong character See "Correcting and erasing a character."
To add a new character between characters
See "Inserting a character."
5

Press MODE/YES after you enter all the characters.
Complete
To cancel the characters, press and hold EDIT/CLEAR/NO for more than two seconds.
What characters can be entered?
You can enter the following characters:
ABCDEFGHIJKLMNOPQRSTUVWXYZ abcdefghijklmnopqrstuvwxyz 0123456789
gt; lt; ) ( : _ % \ amp; + -* / = ?! ^ . (space) insert)
What's Easy Name?
The following music related words are prepared for easy entry:
| BALLAD | LIVE | African | Anthology | Heavy |
| BLUES | POPS | American | Best of | Hit Songs |
| CLASSIC | REGGAE | Asian | Collection | Omnibus |
| DANCE | ROCK | British | Favorite | Selection |
| FUSION | SOUL | Euro | Happy | Special |
| JAZZ | TECHNO | German | Super | |
| VOCAL | Japanese | * |
* represents a space.

Correcting and erasing a character
If the unit is not in "Name In" mode, execute Steps 1 and 2 in "Entering a name," then follow the steps below.
①Press ↔ repeatedly until the character you wish to correct or erase flashes.
②When correcting
Enter the desired character (or title) following
Steps 3 and 4 in "Entering a name" on the previous page.
When erasing
Press EDIT/CLEAR/NO on the unit or CLEAR on the remote controller.
Note
If you press and hold EDIT/CLEAR/NO on the unit for more than two seconds, the FR-N3X returns to the previous indication without erasing characters.
To continue entering characters, execute Step 3 on the previous page. To complete the operation, execute Step 5 on this page.

Inserting a character
If the unit is not in "Name In" mode, execute steps 1 and 2 in "Entering a name," then follow the steps below.
①Press or repeatedly until the character following the desired point of insertion flashes.

② Turn MULTI JOG until “M” appears, then press MULTI JOG.

③Enter the desired character (or title) as per Steps 3 and 4 in “Entering a name.”

To continue entering characters, follow Step 3 on the previous page. To complete the operation, follow Step 5 on this page.

Erasing the name assigned to a preset channel
①Select AM or FM as the source.
②Turn MULTI JOG to select the preset channel name you wish to erase.
③Press EDIT/CLEAR/NO and turn MULTI JOG until "Name Erase?" appears in the display.
4Press MODE/YES.
"Complete" appears and the name is erased.
(Continued on the next page)
Naming an MD and its tracks, and preset channels (continued)

Inputting characters from the remote controller
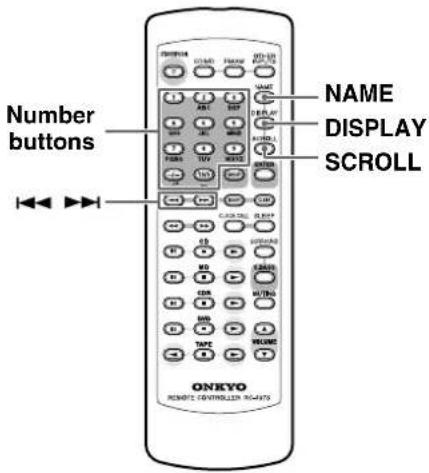
1 | Press NAME. |
2   | Press DISPLAY repeatedly until the character type you wish to enter appears in the display.Each press of the DISPLAY button switches the type of characters. If you press SCROLL button, the type of characters switches in the reverse order.• Inputting alphabets:Each press of the number buttons switches alphabets. For example, repeatedly pressing the 2/ABC button displays A→B→C→A in this order. Display the desired character, then press ENTER.• Inputting an Easy Name:Each press of the number buttons switches between the Easy Names that start with the same characters as the buttons. For example, repeatedly pressing the 2/ABC button displays the Easy Names that start with A, B, or C, such as BALLAD, BLUES, and CLASSIC. Display the desired Easy Name, then press ENTER.• Inputting numbers and symbols:Pressing a number button displays the corresponding number. Each press of the --/--- (•/*) button or the 10/0 ()_button switches between the symbols labeled on the corresponding button. You can input “_→•→/→*→-→, →!→?→’→(→)” using the --/---(•/*) button, and _(space) using the10/0 ( ) button. Display the desired number or symbol, then press ENTER.You can also use the remote controller’s ◀◀ or ▶▶ button, then press ENTER to select and input a character.NoteInputting symbols from the remote controller:You cannot input all symbols from the remote controller’s number buttons. To input symbols, use the remote controller’s ◀◀ or ▶▶ button to select the desired symbols. |
3 | Press the NAME button to complete the naming process. |
Moving, dividing, combining, and erasing MD tracks
◆Five basic functions
- All Erase
This function erases all the tracks and names to initialize the MD. ("Blank Disc" is displayed.)
- Erase
This function erases the selected track.
- Move
This function moves the selected track to the desired position.
- Divide
This function divides the selected track.
- Combine
This function combines the selected track and the immediately preceding track.
◆Combining basic functions
Erasing part of a track – Divide and Erase
Divide the track at the end or beginning of the portion you wish to erase. If necessary, repeat this operation to separate an unwanted portion. Then, erase the separated track.
Combining separately positioned tracks – Move and Combine
If the tracks you want to combine are in different locations, move the track to be merged to a position following the other track, then combine them.
Notes on combining tracks
- You cannot combine a digital recording track and an analog recording track. (If you try, “Impossible” will appear on the display.)
- You cannot combine tracks recorded in different recording modes. You can combine only tracks recorded in the same recording mode. (For example, a track recorded in MONO mode cannot be combined with a track recorded in LP2 mode.)
Notes
- Information about the edited or erased contents is recorded to the TOC of the MD when you eject the MD, turn off the unit, or stop recording. Therefore, do not disconnect the AC power cord (mains lead) or vibrate the unit when the TOC indicator is lit or flashing (see page 36).
- If the MEM, RDM, 1TR, or 1GR indicator is lit in the display, you cannot edit or erase any tracks. In such cases, cancel the MEMORY, RANDOM, 1TR, and 1GR playback mode (see page 42) before starting the operation.
- If you edit an MD that has a group, the group information may be modified.
◆ Erasing all tracks on an MD – All Erase
- You can execute this function only when the input source is MD and an MD is stopped.
- To cancel the operation, press MD

| 1 | Insert the MD, then select MD as the source.Use a recordable MD with the record-protect tab closed. |
| 2 | Press EDIT/CLEAR/NO and turn MULTI JOG until “All Erase?” appears in the display. |
| All Erase? |
| 3 | Press MULTI JOG.The confirmation message “All Erase??” appears in the display. |
| All Erase?? |
| 4 MULTI JOG | Press MULTI JOG to erase all tracks. |
"Complete" appears in the display. All tracks on the MD have been erased.
| Complete |
(Continued on the next page)
Moving, dividing, combining, and erasing MD tracks (continued)

Erasing a selected track – Erase
- You can execute this function only when the input source is MD and an MD is stopped or paused.
• To cancel the operation, press MD ■

1

Insert the MD, then select MD as the source.
Use a recordable MD with the record-protect tab closed.
2

Turn MULTI JOG to select a track to erase.

3

Press EDIT/CLEAR/NO and turn MULTI JOG until "Erase?" appears in the display.

4

Press MULTI JOG to erase the track.
"Complete" appears in the display. The selected track is erased and all the other remaining tracks are renumbered from the top.

Deleting the selected track
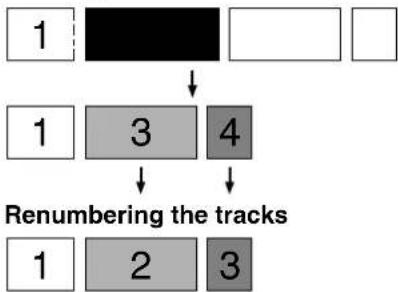
flowchart
graph TD
    A["1"] --> B["3"]
    C[" "] --> B["3"]
    D[" "] --> E["4"]
    F[" "] --> G["2"]
    H[" "] --> I["3"]
    B --> J["Renumbering the tracks"]
    E --> J
    G --> J
    I --> J
◆ Moving the selected track – Move
- You can execute this function only when the input source is MD and an MD is stopped or paused.
• To cancel the operation, press MD ■

| 1CD/MD | Insert the MD, then select MD as the source.Use a recordable MD with the record-protect tab closed. |
| 2MULTI JOG|←→|→|PUSH TO ENTER | Turn MULTI JOG to select a track to move.MD 2Tr 3:16 |
| 3EDIT/CLEAR|↓NO|MULTI JOG|←→|→|PUSH TO ENTER | Press EDIT/CLEAR/NO and turn MULTI JOG until “Move?” appears in the display.2Tr Move? |
| 4MULTI JOG|←→|→|PUSH TO | Press MULTI JOG.The destination track number appears, pointed to by an arrow.2Tr → 1 Tr ?Destination track number |


◆ Moving a track to a different group
If you move a track, the track may end up belonging to a different group. See the example below.
Before moving a track

Moving Tr.15 to Tr.6
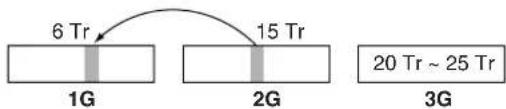
flowchart
graph LR
    A["1G"] -->|6 Tr| B["2G"]
    B -->|15 Tr| C["3G"]
    C -->|20 Tr ~ 25 Tr| D["End"]
A track moved from Tr.15 to Tr6 now belongs to Group 1, instead of Group 2.


Moving, dividing, combining, and erasing MD tracks (continued)

Dividing a selected track – Divide
- You can execute this function only when the input source is MD and an MD is playing or paused.
- If a selected track has a name (see page 52), the first part will retain the name after the track is divided.
• To cancel the operation, press MD ■

1

Insert the MD, then select MD as the source.
Use a recordable MD with the record-protect tab closed.
2
Turn MULTI JOG to select the track to divide.
You may press ▶ fast forward or ← to fast reverse on the remote controller to help locate the desired dividing-point.

3
Press MD ▶/II
Playback starts.
4
Press MD ▶ the desired dividing.
The MD pauses.
5

Press EDIT/CLEAR/NO and turn MULTI JOG until "Divide?" appears in the display.

6

Press MULTI JOG.
"Rehearsal" and "Position OK?" appear alternatively and an approximately four-second section around the dividing point will be played repeatedly.

7

If necessary, turn MULTI JOG to fine tune the dividing point.
You may adjust the dividing point between the values of -45 and +45 (or approx. +/-3 seconds in SP mode) within the selected track.

8

Press MULTI JOG to divide.
"Complete" appears in the display. The selected track is divided and all the tracks are renumbered from the top.

Dividing a selected track

flowchart
graph TD
    A["1"] --> B["2"]
    B --> C["3"]
    C --> D["4"]
    E["1"] --> F["2"]
    F --> G["3"]
    G --> H["4"]
    style A fill:#fff,stroke:#000
    style B fill:#000,stroke:#000
    style C fill:#fff,stroke:#000
    style D fill:#fff,stroke:#000
    style E fill:#fff,stroke:#000
    style F fill:#fff,stroke:#000
    style G fill:#fff,stroke:#000
    style H fill:#fff,stroke:#000
Renumbering the tracks

◆Combining selected tracks – Combine
- You can execute this function only when the input source is MD and an MD is playing, paused, or stopped.
- When the preceding track has a name, this name will be used as the name of the combined track.
• To cancel the operation, press MD ■

| 1CD/MD | Insert the MD, then select MD as the source.Use a recordable MD with the record-protect tab closed. |
| 2MULTI JOG|←→|→H|PUSH TO ENTER | Turn MULTI JOG to select the track to be combined.The selected track will be combined with the preceding track, so select the second of the two tracks.MD 3Tr 3:16 |
| 3EDIT/CLEAR|NO↓|MULTI JOG|←→|→H|PUSH TO ENTER | Press EDIT/CLEAR/NO and turn MULTI JOG until “Combine?” appears in the display.3TrCombine? |
| 4MULTI JOG|←→|→H|PUSH TO | Press MULTI JOG.The selected and preceding tracks are displayed.2Tr+3Tr?The preceding track The selected track |
| 5 | Press MULTI JOG. |
| "Rehearsal" and "Track OK?" appear alternatively and an approximately eight-second section around the combining point is played repeatedly. | |
| Approximately eight seconds rehearsal play | |
| The preceding track The selected track The combining point |
| 1 | 4 | □ |
| 1 | 4 | 5 |
| 1 | □ | □ |
◆If the selected track belongs to a group
If a selected track is combined with a preceding track that belongs to a different group, the selected track will be added to the group that contains the preceding track.

Using the timer functions
The FR-N3X provides five timer functions: Sleep, Once, Weekday, Weekend, and Rec timer.

Five basic functions
Sleep timer
This timer places the FR-N3X into standby mode automatically when the sleep timer counts down to zero. This function is convenient, for example, when you wish to fall asleep to music or a radio program.
Once, Weekday, and Weekend timer (For playback)
- When the programmed start time is reached, the power is automatically turned on and the specified input source starts playback.
- The unit enters standby mode when the specified end time is reached.
- The Once timer operates only one time.
- The Weekday timer operates every Monday to Friday (initial setting).
You can customize the Weekday timer to match your schedule. - The Weekend timer operates every Saturday and Sunday (initial setting).
You can customize the Weekend timer to accommodate your weekend schedule.
Rec timer (For recording)
When the specified start time is reached on the specified day, the unit automatically powers on. The specified recorder starts recording data from the selected input.
The following two settings are available for the REC timer:
Once: Timer recording is made only once at the specified time.
Every: Timer recording is made once every day at the specified time. (You can also change the setting for the day(s) of the week.)
- The unit enters standby mode when the set end time is reached.
- The MD recorder enters record standby mode. If an Onkyo cassette tape deck is connected to the FR-N3X, change the input source indication from CD-R to TAPE. In this case, you can select "TAPE" or "MD&TAPE" as the recording device.
Tips
While Rec timer is operating, the sound is muted. To check the sound during timer recording, press MUT-ING or VOLUME ▲ of the remote controller to turn off the muting function.

Using the Sleep timer
The Sleep timer can be set for 10 to 90 minutes, in intervals of 10 minutes.

Press SLEEP while you are listening to music or a radio program.
"Sleep 90" appears in the display, indicating the unit will turn off in 90 minutes.
Each press of the same button reduces the remaining time by 10 minutes.

Checking the remaining time
Press SLEEP while the Sleep timer is on. If you press SLEEP while the remaining time is displayed, the remaining time is reduced by 10 minutes.
Canceling Sleep timer
Press SLEEP repeatedly until "Sleep off" appears in the display.
Turning off the unit automatically after completing CD Dubbing
If you set the Sleep timer while you are carrying out CD Dubbing to CD, MD, Onkyo stereo cassette tape deck, or CD-R, the unit will turn off after completing CD dubbing regardless of the remaining time you set. This is convenient for starting CD Dubbing before going to bed or going out.
Operating with the unit
You can set the Sleep timer for 10 to 90 minutes, in intervals of 10 minutes. It is also possible to set the timer from 1 to 99 in one-minute increments is also possible using MULTI JOG.

1TIMER | Press TIMER while you are listening to music or a radio program.“Sleep 90” appears in the display window. The unit will turn off in 90 minutes. |
2TIMER | Press TIMER if you wish to reduce the remaining time.Each press reduces the remaining time by ten minutes:90→80→...→10→off.Sleep 60 |
3 | Turn MULTI JOG if you wish to set the remaining time in one-minute increments.Turn MULTI JOG clockwise to increase the remaining time by up to 99 minutes, or counterclockwise to decrease the remaining time down to one minute.Sleep 54 |
4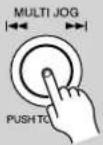 | Press MULTI JOG.The Sleep timer starts operating.The SLEEP indicator lights.Sleep |
Setting the Once, Weekday, Weekend, or Rec timer

1TIMER | Press TIMER repeatedly until the timer menu you wish to set appears in the display.Proceed to Step 2 within eight seconds.  * Select “Clock” to set the clock (see page 17). * Select “Clock” to set the clock (see page 17). |
| 2MULTI JOG[IMAGE]MULTI JOG[IMAGE]PUSH TO ENTER | Press MULTI JOG, then turn it to select the source.When setting Once, Weekday, and Weekend timers:The following playing sources appear in turn:CD AMMDFMLINE*CD-R*When setting Rec timer:The following playing sources to be recorded appear in turn:FMAMLINE*If you changed the name, the new name appears (see page 65).Connect the timer-equipped source.FM |
| 2 | Press MULTI JOG, then turn it to select the source. When setting Once, Weekday, and Weekend timers: The following playing sources appear in turn: |
 | CD AM MD FM ←→↓ LINE* ←→ CD-R* |
 | When setting Rec timer: The following playing sources to be recorded appear in turn: |
| FM AM LINE* →↑* If you changed the name, the new name appears (see page 65). Connect the timer-equipped source. |
(Continued on the next page)
3
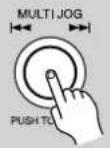
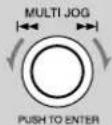
Press MULTI JOG, then turn it to select the start time.
24-hour display

12-hour display

4

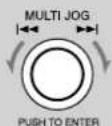
Press MULTI JOG, then turn it to select the end time.
After you press MULTI JOG in this step, the end time is automatically set to one hour after the start time.
24-hour display

12-hour display

5
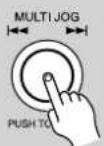

If you selected FM or AM in step 2: Press MULTI JOG, then turn it to select the desired preset channel.
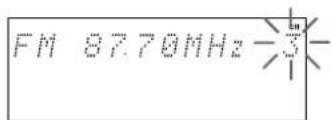
If you selected a source other than FM or AM in step 2:
Proceed to the next step.
6
When setting Once timer:
Proceed to the next step.
When setting Weekday and Weekend timers:
Execute "Setting your own weekdays and weekends" on the next page if necessary.
When setting Rec timer:
Execute "Setting the day and selecting the recorder for Rec timer" on the next page.
7
Press MULTI JOG.
"Timer On" is displayed and the timer you set turns on.


8
Prepare the source specified in the timer.
When setting Once, Weekday, or Weekend timers:
Prepare the source for playback (e.g., insert a CD).
Even if MEMORY mode or RANDOM mode is selected for playback, an MD will play in normal mode when the timer is triggered.
Adjust the volume before proceeding to the next step. When the timer turns on the unit, the volume will be set to the volume level when you switched off the unit.
When setting Rec timer:
Insert an MD (with the record-protect tab closed) into the unit.
Adjust the recording level, or turn the Level Sync function on or off (see page 39) if necessary.
9
Turn off the unit.
The timer does not operate if the power is on. Make sure to turn off the unit after you set the timer.

Setting the timer for weekdays and weekends
①Press MULTI JOG.
Check the ON or OFF setting for each day. If you do not need to change the setting, skip the following steps, then proceed to step 7 on the previous page.

②Turn MULTI JOG to select the day setting that you wish to modify.

③Press MULTI JOG to modify the setting.
Each press toggles the day On or Off.

④To change the setting for the other days, repeat steps ② and ③.
⑤ Turn MULTI JOG until "Set" appears in the display.

⑥ Go back to Step 7 on the previous page.
◆Selecting the day(s) of the week and the recorder for Rec timer
①Press MULTI JOG.
The "Once" or "Every" indicator flashes.
② Turn MULTI JOG to select "Every" or "Once."
Now you can set the day of the week for the timer. If you selected "Once":
The selected recorder will record once on the closest specified day of the week.
Press MULTI JOG. The "NEXT" indicator or a day of the week flashes. If you select "NEXT," the recorder will record only once at the specified time.
To change the day of the week, rotate MULTI JOG to display the desired day.
For example:

Today's day of the week Specified day of the week
Press MULTI JOG to complete the setting.
If you selected "Every":
The selected recorder will record at the specified time on every day of the week you specify. Press MULTI JOG to display the following message. (All days of the week are currently selected for timer recording.)

Refer to step ③, ④ in the left column for information on turning the selected day of the week on or off.
③Press MULTI JOG, then turn it to select the recorder.
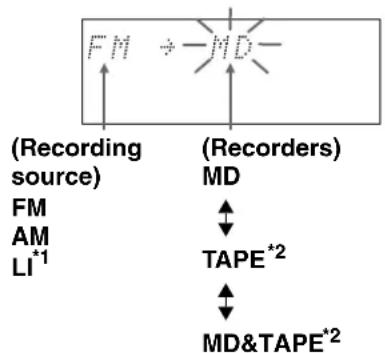
flowchart
graph TD
    A["(Recording source)"] --> B["FM"]
    A --> C["AM"]
    A --> D["LI*1"]
    E["(Recorders)"] --> F["MD"]
    G["TAPE*2"] --> H["MD&TAPE*2"]
    I["↑"] --> J["↑"]
    K["↑"] --> L["↑"]
    M["↑"] --> N["↑"]
    O["↑"] --> P["↑"]
    Q["↑"] --> R["↑"]
    S["↑"] --> T["↑"]
    U["↑"] --> V["↑"]
    W["↑"] --> X["↑"]
    Y["↑"] --> Z["↑"]
*1 If you changed the name, the new name appears (see page 65).
*2 If an Onkyo cassette tape deck is connected to the FR-N3X, change the input source indication from CD-R to TAPE. In this case, you can select "TAPE" or "MD&TAPE" as the recording device.
You can record the same source to the MD and a stereo cassette tape deck simultaneously if you select MD&TAPE.
④Go back to Step 7 on the previous page.
(Continued on the next page)

Using the timer functions (continued)
◆Switching the set timer On/Off
You can switch each set timer to Off or On.

1
Check each timer to see whether it is On or Off.
The indicator of the timer set to On is lit in the display.
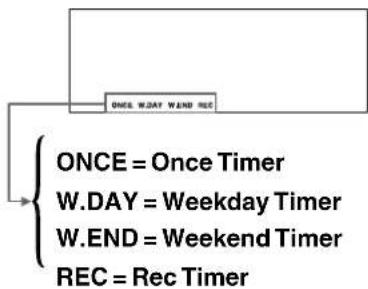
flowchart
graph TD
    A["ONCE = Once Timer"] --> B{W.DAY = Weekday Timer}
    B --> C["W.END = Weekend Timer"]
    C --> D["REC = Rec Timer"]
    D --> E["End"]
2

Press TIMER repeatedly until the desired timer appears in the display.

3

Turn MULTI JOG.
If the timer was On, it turns Off, and vice-versa.
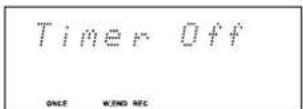
Note
If you set the timer to On, be sure to turn off the power to the unit. Otherwise, the timer will not work.
◆If the start or end time of one timer overlaps another
If the same start time is set in more than one timer:
The priority of the timers is as follows: Once, Weekday, Weekend, and Rec.
If the start time of a timer arrives while another timer is operating:
The timer that started first has priority over the overlapped timer. The latter timer will be canceled, including the end time.
When you set the timer, make sure to keep at least a one minute interval between the end time of the former timer and the start time of the latter timer.
What happens to a Once timer if the power to the unit is on, or if the timer overlaps?
The timers will automatically be switched Off.
Customizing the source names
You can change the source name that appears in the display to suit any component you connected per the instructions on pages 9, 10.

5
Press MULTI JOG to enter the new name.
"Complete" appears in the display.
Complete
You may press MODE/YES instead of MULTI JOG to get the same result.
1 | Press OTHER INPUTS until the source whose name you wish to change appears in the display.The source names appear in the following order: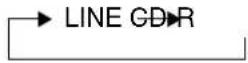 |
| 2EDIT/CLEARNO | Press EDIT/CLEAR/NO repeatedly until “Name Select?” appears in the display.Name Select? |
| 3MULTI JOG|←→|→|PUSH TO | Press MULTI JOG. |
| 4MULTI JOG|←→|→|PUSH TO ENTER | Turn MULTI JOG to select a new name for the source.Depending on the source you’ve selected in step 1, the name changes in the following order:CD-R ←→ TAPE ←→ DAT↑↓PC ←→ HD ←→ MD 2 VCR↓↓LINE VIDEO →↓↓TV ←→ DSR ←→ CS BSGAMI↑↓ |
2EDIT/CLEAR | Press EDIT/CLEAR/NO repeatedly until “Name Select?” appears in the display. |
 |
| 3 | Press MULTI JOG. |
 |
| 4 | Turn MULTI JOG to select a new name for the source. Depending on the source you've selected in step 1, the name changes in the following order: | |
 | CD-R←TAPE←DAT↑↓PC←HD←MD 2 VCR |  |
About the shorten source names
The short source names appear in the display depending on the situation. Check the short names in the table below.
| Ordinary names Shorten names | |
| BS BS | |
| CD-R CR | |
| CS CS | |
| DAT DT | |
| DVD | DV |
| DSR | DR |
| GAME | GM |
| HD | HD |
| LINE | LI |
| MD2 | M2 |
| PC PC | |
| TAPE TA | |
| TV | TV |
| VCR | VC |
| VIDEO DISC | VD |

Messages
The following table explains the messages that appear in the display.
Message Meaning
| MD Blank Disc A recordable MD without disc or track names is inserted. | |
| Cannot Copy | You tried to create a second digital copy from a digitally dubbed MD (see “Rules for digital recording” in the right column). |
| Cannot Edit You tried to edit a playback-only disc. | |
| Cannot Rec You tried to record onto a playback-only disc. | |
| Cannot Set You tried to set a timer while another timer was operating. | |
| CD Dub Fail CD dubbing could not be activated. | |
| Complete The editing operation has been completed. | |
| Cannot Read The disc is abnormal (scratched or missing a TOC). | |
| Disc Full | The disc is full (see “System limitations” on page 68). |
| Full You tried to enter a character over the maximum character capacity while naming a disc, track, or group, etc. | |
| Impossible You tried to edit a disc using a function not available for some reason other than an MD system limitation. | |
| MD Writing The unit is writing the recorded or edited contents to the MD. | |
| Mecha Error | An error occurred in the unit's internal mechanism. |
| Memory Full | You tried to store a 26th track or a 31st channel, exceeding the unit's capacity. |
| Name Full | The naming capacity of the disc or unit has reached its limit. |
| No Change | The name has not been changed. |
| CD/MD No Disc | There is no disc in the unit. |
| Protected The inserted disc is record-protected. | |
| Recording | You tried to switch to another source while recording, or to perform a CD or tuner operation that is disabled during recording. |
| Retry Error | The recording attempt failed due to consecutive disturbances from scratches on the MD or from applied vibration. |
| Signal Wait | The MD recorder has entered Signal Wait mode. |
| Text Protect The CD text is copyrighted. | |
| Time Protect | You tried to repeat double-speed dubbing using the same CD. |
| TOC Error | The unit failed to read or record onto a disc. |
Rules for digital recording
Guide to the serial copy management system
Since your MD unit uses the Serial Copy Management System (SCMS), MDs recorded through the digital input terminal cannot be used to make subsequent copies to other MDs through the digital output terminal. The following diagram shows a system for making copies through the digital or analog terminals.
Rule 1
You can record digital source (CD, premastered MD, and DAT equipment with a sampling frequency of 44.1 kHz) to a recordable MD through the digital input terminal.
However, you cannot make subsequent copies from the recordable MD to other recordable MDs through the digital output terminal. Subsequent copies can be made only through the analog output terminal.

flowchart
graph TD
    A["CD player DAT deck"] --> B["MD recorder"]
    B --> C["Digital output terminal"]
    B --> D["Optical cable or coaxial digital connecting cable"]
    B --> E["Digital input terminal"]
    B --> F["Recording"]
    F --> G["MD recorder"]
    G --> H["First-generation MD recorded via digital-to-digital connection"]
    H --> I["MD recorder"]
    I --> J["Playing"]
    J --> K["Line (analog) output terminal"]
    J --> L["Audio connecting cable"]
    J --> M["Line (analog) input terminal"]
    J --> N["Recording"]
    N --> O["MD recorder"]
    O --> P["Line (analog) output terminal"]
    O --> Q["Audio connecting cable"]
    O --> R["Line (analog) input terminal"]
    style A fill:#f9f,stroke:#333
    style B fill:#ccf,stroke:#333
    style C fill:#cfc,stroke:#333
    style D fill:#fcc,stroke:#333
    style E fill:#cff,stroke:#333
    style F fill:#ffc,stroke:#333
    style G fill:#cfc,stroke:#333
    style H fill:#fcc,stroke:#333
    style I fill:#ffc,stroke:#333
    style J fill:#cfc,stroke:#333
    style K fill:#fcc,stroke:#333
    style L fill:#cfc,stroke:#333
    style M fill:#fcc,stroke:#333
    style N fill:#ffc,stroke:#333
    style O fill:#cfc,stroke:#333
    style P fill:#fcc,stroke:#333
    style Q fill:#cfc,stroke:#333
    style R fill:#fcc,stroke:#333
Rule 2
You can record a digital satellite broadcast signal onto a recordable MD via the digital input terminals on the MD recorder, which is capable of handling a sampling frequency of 32 kHz or 48 kHz. You can then record the contents of this recorded MD (first-generation) onto another recordable MD via digital input terminals on the MD recorder to create a second-generation digital copy.
Note, however, that with some BS tuners, second-generation digital copying may not be possible.
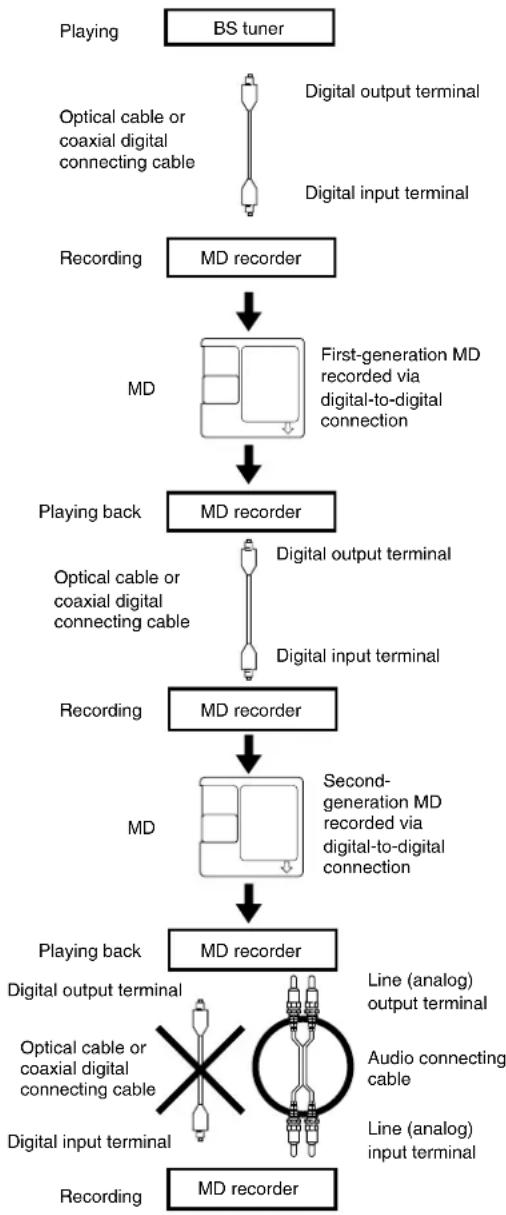
flowchart
graph TD
    A["Playing"] --> B["BS tuner"]
    B --> C["Optical cable or coaxial digital connecting cable"]
    C --> D["Digital output terminal"]
    C --> E["Digital input terminal"]
    D --> F["Recording"]
    E --> F
    F --> G["MD recorder"]
    G --> H["First-generation MD recorded via digital-to-digital connection"]
    H --> I["MD"]
    I --> J["Playing back"]
    J --> K["Optical cable or coaxial digital connecting cable"]
    K --> L["Digital output terminal"]
    K --> M["Digital input terminal"]
    L --> N["MD recorder"]
    M --> N
    N --> O["Recording"]
    O --> P["MD recorder"]
    P --> Q["Second-generation MD recorded via digital-to-digital connection"]
    Q --> R["MD"]
    R --> S["Playing back"]
    S --> T["Digital output terminal"]
    S --> U["Optical cable or coaxial digital connecting cable"]
    U --> V["Digital input terminal"]
    S --> W["Line (analog) output terminal"]
    S --> X["Audio connecting cable"]
    S --> Y["Line (analog) input terminal"]
    T --> Z["MD recorder"]
    U --> Z
    V --> Z
    W --> Z
    X --> Z
    Y --> Z
Rules for digital recording (continued)
Rule 3
A recordable MD with material recorded from analog sources (analog records or FM programs, etc.) through the line input terminal can be copied to another recordable MD through the digital output terminal.
However, you cannot make subsequent copies from the recordable MD to other recordable MDs through the digital output terminal. Subsequent copies can be made only through the analog output terminal.
When MD recorders are connected using analog terminals, the number of dubbings is unlimited.
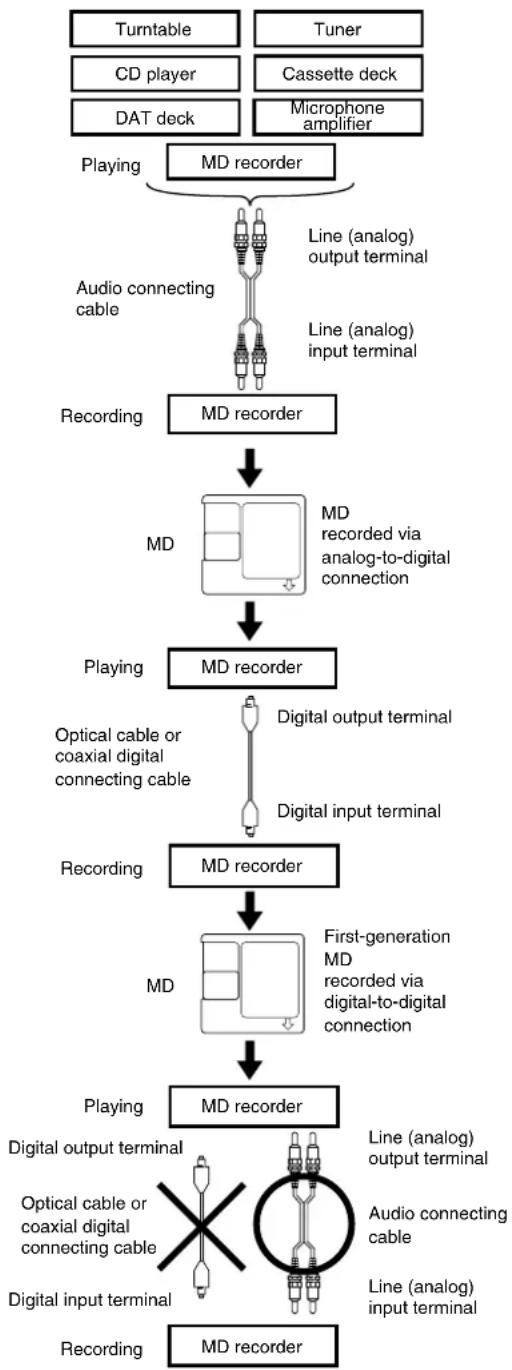
flowchart
graph TD
    A["Turntable"] --> B["CD player"]
    C["Tuner"] --> D["Cassette deck"]
    E["DAT deck"] --> F["Microphone amplifier"]
    B --> G["MD recorder"]
    D --> G
    F --> G
    G --> H["Audio connecting cable"]
    H --> I["Line (analog) output terminal"]
    H --> J["Line (analog) input terminal"]
    I --> K["Recording"]
    J --> K
    K --> L["MD recorder"]
    L --> M["MD recorded via analog-to-digital connection"]
    M --> N["Playing"]
    N --> O["Optical cable or coaxial digital connecting cable"]
    N --> P["Digital output terminal"]
    N --> Q["Digital input terminal"]
    O --> R["MD recorder"]
    P --> R
    Q --> R
    R --> S["First-generation MD recorded via digital-to-digital connection"]
    S --> T["MD"]
    T --> U["Playing"]
    U --> V["MD recorder"]
    V --> W["Line (analog) output terminal"]
    V --> X["Audio connecting cable"]
    V --> Y["Line (analog) input terminal"]
    V --> Z["Digital output terminal"]
    V --> AA["Optical cable or coaxial digital connecting cable"]
    V --> AB["Digital input terminal"]
System limitations
The MD recording system in the unit is significantly different from those used in cassette and DAT decks and is characterized by the limitations described below. Note, however, that these limitations are due to the inherent nature of the MD recording system itself and not to mechanical causes.
- “Disc Full” lights up before the disc has reached the maximum recording time (60, 74, or 80 minutes).
When 255 tracks have been recorded on the disc, "Disc Full" lights up regardless of the total recorded time. You cannot record more than 256 tracks on the disc. To record new tracks, erase unnecessary tracks or use another MD.
- "Disc Full" lights up before the maximum number of tracks is reached.
If you use a disc that contains many edits, the “Disc Full” indicator may light up regardless of the recording time or the number of tracks.
- The remaining recordable time on the MD does not increase even after erasing numerous short tracks.
- Some tracks cannot be combined with others. Track combination may become impossible when tracks are edited.
- The remaining recordable time on the MD may decrease by more than the total recorded time, depending on the status of the MD or how you record.
• Tracks created through editing may exhibit sound dropout during searching operations.
- Track numbers are not recorded correctly. Incorrect assignment or recording of track numbers may result (1) when CD tracks are divided into several smaller tracks during digital recording, or (2) when certain CDs are recorded with the Level Sync On for automatic track marking.
- “MD Reading” appears for a long time. If an inserted recordable disc is brand new, “MD Reading” remains on the display longer than if the disc had been used.
- You can enter up to 1,792 characters on an MD. However, if you use the Group function, the maximum number will be lower.
- Group function data is written in the memory area for names.
If you input an excessive number of characters, the available data capacity will be reduced, possibly disabling Group functions. In this case, try to reduce the number of characters used for names.
Troubleshooting
Use this troubleshooting guide as an aid to remedy problems.
Problems may be caused by any component connected to this unit. Please check the table below, cross-referencing with the instruction manuals for the other components.
| Symptom Cause Remedy Pages | ||||
| AmplifierCD/MDCDMD | The unit does not turn on. | The AC power cord (mains lead) is not fully inserted into the wall outlet (the mains). | Insert the AC power cord (mains lead) plug to the wall outlet (the mains) securely. | 11 |
| No sound is reproduced from either the left or right speaker. | ·The wire of the speaker cord is touching the other jacks, connectors, or metal parts.·The volume level is turned down to the minimum.·The sound is muted with the muting function.·The headphones are connected to the PHONES jack.·The audio cables are not inserted firmly. | ·Check the speaker connections.·Adjust the volume level.·Press MUTING on the remote control to restore the sound.·Turn down the volume level first, then disconnect the headphones.·Check the connections and insert the audio connection cable plugs firmly. | 81626269, 10 | |
| Noise is audible. Strong magnetism from a television or a similar device may be interfering with operations. | Turn off any television or similar devices or move them away from the unit. | — | ||
| The disc skips. ·Vibrations are being transmitted to the unit.·The disc is severely scratched.·The disc is extremely dirty. – CD | ·Place the unit in a vibration-free location.·Replace the disc with a new one.·Clean the disc. | —1212 | ||
| Track numbers cannot be stored when setting MEMORY playback. | ·No disc is inserted in the unit.·A track number not on the disc is being input. | ·Insert a disc into the unit.·Input only the track numbers on the disc. | 20, 2240 | |
| The disc is loaded in the disc tray, but playback will not begin. | ·The disc is inserted with the wrong side facing upward. – CD·The disc is extremely dirty. – CD·The disc is dirty or damaged. (“Disc Error” appears in the display.) – MD·The disc inserted is not recorded. – MD·Moisture has formed inside the unit. | ·Insert the disc with the label side facing upward.·Clean the disc.·Replace the disc with a new one.·The disc may be reused after erasing all the data.·Replace the disc with a recorded one.·Take the disc out and leave the unit for several hours until the moisture evaporates. | 12, 201212, 6655223 | |
| Search time (when moving to a specific track) is extremely long. | ·The disc is dirty.·The disc is scratched. | ·Clean the disc.·Replace the disc with a new one. | 1212 | |
| Disc cannot be loaded. | ·The wrong side of the disc is being inserted. | ·Insert the disc in the direction of the arrow printed on the disc. | 22 | |
| The unit does not record. | ·The disc is record-protected. (“Protected” appears in the display.)·The unit is not connected properly to the sound source.·The analog recording level is too low.·A playback-only disc is inserted. (“Cannot Rec” appears in the display.)·There is not enough time left on the disc.·“Retry Error” appears in the display. | ·Close the record-protect tab on the disc.·Check the connections and insert the audio connection cable plugs firmly.·Adjust the recording level properly.·Replace the disc with a recordable one.·Replace the disc with another recordable disc with enough recording time, or delete unnecessary tracks from the disc.·Eject the MD, then insert it again and retry recording. | 129, 1038—55, 56— | |
| The disc name or track name cannot be entered. | ·The disc is record-protected. (“Protected” appears.)·A playback-only disc is inserted. (“Cannot Rec” appears.) | ·Close the record-protect tab on the disc.·Replace the disc with a recordable one. | 12— | |
| If the unit does not operate properly even after attempting the prescribed remedies, unplug and then plug in the power cord again. | ||||
| TunerTimerRemote control | Too much noise is audible or the sound is interrupted occasionally. ("ST" indicator does not light steadily.) | ·FM stereo signals may generate hiss at high levels.·The position or direction of the antenna (aerial) is incorrect.·Station is too weak. | ·Switch the frequency receiving mode to MONO.·Adjust the position, height, and direction of the antenna (aerial).·Connect an outdoor FM antenna (aerial). Try to use an antenna (aerial) having more elements. [For installation of the outdoor antenna (aerial), consult the nearest dealer as the process requires a special technique and experience.] | 2566 |
| Sound is distorted or sound volume decreases. | ·The radio signal is distorted.·Cars are operating or airplanes are flying near the house. | —— | — | |
| Sound is excessively distorted. | There is a tall building or a mountain nearby. [The waves transmitted from transmission center (direct waves) and the waves dif-fracted by buildings or mountains (diffraction waves) interfere with each other causing multi bass distortion.] | —— | — | |
| Noise interferes with the AM reception. | An electric or electronic device with the power turned on is in close proximity to the FR-N3X. | ·Locate the AM indoor antenna far from the electric or electronic device.·Turn off the power to the interfering elec-tric or electronic device. | — | |
| Repetitive or cyclical noise is recorded along with an AM broadcasting program. | The AM indoor antenna is located close to the FR-N3X. | ·Locate the AM indoor antenna further from the FR-N3X. | — | |
| The timer did not operate. | ·The unit was already on when the start time arrived.·The timer overlapped another timer. | ·The timer does not operate if the unit has been turned on. To set the timer, turn off the unit.·Set the timer to a different time. | 6262 | |
| No sound was reproduced when the timer was activated. | ·While the Rec timer is operating, the sound is muted.·When the playback timer (Once, Weekday, or Weekend timer) is operating, the volume will become the same as the volume when you last switched the unit off. | ·If you wish to check the recording sound, press MUTING on the remote control to turn off the muting function.·Adjust the volume. Adjust the volume properly before you turn off the unit to set the timer. | 6262 | |
| The remote control does not operate. | ·The batteries in the remote control are dead.·Your position is too far from the unit's remote control sensor or outside the sen-sor's detection angle.·There is an obstruction between the remote control and the unit. | ·Replace the batteries with new ones.·Check the effective range of the remote control.·Try to operate the remote control from a different angle, or remove the obstruc-tion. | 131313 | |
| The remote control operates the unit but does not operate the Onkyo stereo cassette tape deck and CD recorder. | ·The Rable is not connected. | ·Connect the system correctly, cross-ref-erencing the Onkyo stereo cassette tape deck and CD recorder instruction man-ual.·Connect the unit and stereo cassette tape deck and CD recorder correctly using the Rable and the audio pin cable. | 99, 10 | |
This unit contains a sensitive microcomputer, which under certain circumstances might fail to operate due to excessive noise interference. In such cases, disconnect the AC power from the electrical outlet, wait five seconds and reconnect the AC power.
Specifications
General
Power supply AC 220-230 V, 50/60 Hz
AC 120 V, 60 Hz
Power consumption 46 W (220-230 V, 50/60 Hz)
55 W (120 V, 60 Hz)
(Standby) 1.5 W
Clock precision monthly error: +/-30 seconds
(at 25 degrees Celsius)
Dimensions (W × H × D) 155 × 190 × 361 mm
Weight 4.7 kg
Amplifier
Power output 2 × 18 W at 4 Ω EIAJ
2 × 15 W at 6 Ω EIAJ
Rated Power
2 × 13 W min, RMS at 4 Ω
1 kHz no more than
0.4 % THD
Dynamic power 2 × 14 W at 4 Ω
Total harmonic distortion 0.4 % at rated power
IM distortion 0.4 % at rated power
Damping factor 25 at 8 Ω
Sensitivity and impedance
LINE, CDR/TAPE: 300 mV, 50 kΩ
CDR/TAPE: 300 mV, 50 kΩ
Frequency response 10 to 100,000 Hz: +3.5, -3dB
Tone Control
S.BASS +10 dB at 50 Hz
Bass 120 Hz
7 positions (-7, -5, -2.5, 0, +2.5, +5, +7 dB)
Treble 10 kHz
7 positions (-7, -5, -2.5, 0, +2.5, +5, +7 dB)
Muting 50 dB
CD player
Signal readout system
Optical non-contact
Frequency response
10 Hz to 20 kHz ( ± 2 dB)
Wow and flutter
Below threshold of
measurability
MD recorder
Signal readout system
Optical non-contact
Frequency response
10 Hz to 20 kHz (± 2 dB)
Wow and flutter
Below threshold of measurability
Tuner
| Tuning range | FM: 87.50 to 108.00 MHz(50 kHz steps)AM: 522 to 1611 kHz(9 kHz steps) |
| Usable sensitivity | FM Mono:11.2 dBf,1.0 μV (75 Ω IHF)Stereo:17.2 dBf,2.0 μV (75 Ω IHF)AM: 30 μV |
| 50 dB quieting sensitivity | FM Mono:17.2 dBf,2.0μV (75 Ω)Stereo:37.2 dBf,20.0 μV (75 Ω) |
| Capture ratio | 2.0 dB |
| Image rejection ratio | FM: 85 dBAM: 40 dB |
| IF rejection ratio | FM: 90 dBAM: 40 dB |
| Signal to noise ratio | FM Mono : 72 dB IHFStereo : 67 dB IHFAM: 40 dB |
| Selectivity | FM: 50 dB(±300 kHz at 40 kHz devi.) |
| Harmonic distortion FM: | Mono: 1.0 %Stereo: 0.3 %AM: 0.7 % |
| Frequency response | FM: 30 to 15,000 Hz (±1.5dB) |
| Stereo separation | FM: 45 dB at 1,000 HzFM: 30 dB at 100 to 10,000 Hz |
Specifications and features are subject to change without notice.
ONKYO CORPORATION
Sales & Product Planning Div.: 2-1, Nisshin-cho, Neyagawa-shi, OSAKA 572-8540, JAPAN
Tel: 072-831-8111 Fax: 072-833-5222 http://www.onkyo-intl.com
18 Park Way, Upper Saddle River, N.J. 07458, U.S.A.
Tel: 201-785-2600 Fax: 201-785-2650 http://www.onkyousa.com
ONKYO EUROPE ELECTRONICS GmbH
Liegnitzerstrasse 6, 82194 Groebenzell, GERMANY
Tel: +49-8142-4401-0 Fax: +49-8142-4401-555 http://www.onkyo.net
ONKYO CHINA LIMITED
Units 2102-2107, Metroplaza Tower I, 223 Hing Fong Road, Kwai Chung,
N.T., HONG KONG Tel: 852-2429-3118 Fax: 852-2428-9039 http://www.onkyochina.com


- WARNING:
- CAUTION:
- Important Safeguards
- Precautions
- Recording Copyright
- AC Fuse
- Power
- WARNING
- Do not touch this unit with wet hands.
- Location of this unit
- Care
- Points to remember
- DANGER:
- Main features
- Memory Preservation
- Supplied accessories
- Table of contents
- Before Using
- Connecting
- Preparations
- Basic Operation
- Advanced Operation
- Miscellaneous
- Antenna (aerial) and speakers
- ◆ Connecting the supplied indoor FM antenna (aerial)
- To connect the outdoor FM antenna (aerial)
- Note
- ◆ Connecting the FM antenna cable to the 75/300 ohm antenna adapter
- Connecting the 300 ohm ribbon wire
- Connecting the coaxial cable
- Directional linkage
- ◆Connecting the AM antenna
- Assembling the AM loop antenna
- Connecting the AM antenna cable
- Connecting the AM loop antenna
- Connecting an AM outdoor antenna
- Antenna (aerial) and speakers (continued)
- Notes
- ◆ Connecting a subwoofer
- Audio/video equipment
- Tip
- ◆ Connecting an Onkyo stereo cassette tape deck
- What does connecting an Onkyo stereo cassette tape deck using an Rable enable you to do?
- ◆Connecting a Onkyo DVD player
- What does connecting an Onkyo DVD player using an Enable enable you to do?
- About the LINE jacks
- ◆ Connecting an Onkyo compact disc recorder
- About the OPTICAL DIGITAL OUT connector
- The jack connection enables you to use the following functions:
- Connecting the power cord
- Precautions for handling Compact Discs (CDs)
- Important notes on handling CDs
- playable discs
- Precautions for handling MiniDiscs (MDs)
- Storage location
- When the unit is not to be used for an extended period
- Regular care
- Removing a partially inserted MD
- Protecting recordings from accidental erasure
- Preparing the remote controller
- ◆Inserting the batteries
- ◆Using the remote controller
- Front panel
- MULTI JOG dial
- MD disc slot
- GROUP button
- DISPLAY button
- TIMER button
- STANDBY/ON button
- STANDBY indicator
- EDIT/CLEAR/NO button
- MODE/YES button
- Remote control sensor
- PHONES jack
- CD DUBBING button
- CD/MD button
- MD ■ button
- MD ▲ button
- MD ▶/II
- button
- OTHER INPUTS button
- AM/FM button
- VOLUME control
- CD ▲
- TONE/S.BASS button
- CD disc tray
- CD ▶/II
- CD ■ button
- ◀/▶buttons
- MD REC button
- ◆ Remote controller
- Alpha-numeric/symbol buttons
- /buttons
- ◀/▶button
- CD operation buttons
- MD operation buttons
- Operation buttons for an Onkyo CD recorder
- Operation buttons for an Onkyo DVD player
- Operation buttons for an Onkyo stereo cassette tape deck
- FM/AM button
- NAME button
- SCROLL button
- ENTER button
- CLEAR button
- MODE button
- SLEEP button
- CLOCK CALL button
- SURROUND button
- S.BASS button
- MUTING button
- VOLUME ▲/▼
- buttons
- Understanding preparatory and common operations
- Turning the unit on and off
- The FR-N3X has the following two power modes.
- Tip!
- Adjusting the volume
- Operating with the unit
- Using the remote controller
- Selecting a source
- Operating with the unit and remote controller
- Setting the day of the week and the time
- ◆ Checking the time and the day of the week
- Programming FM stations automatically — Auto Preset
- Before auto presetting
- If auto presetting is unsuccessful
- If you have a power failure or disconnect the AC power cord (mains lead)
- ◆Customizing the preset channels
- Programming AM/FM stations one by one — Preset Write
- Playing a CD
- 1
- Insert a CD (Compact Disc).
- 2
- Press CD ▶to start playback.
- To stop playback
- To take out the CD
- To pause
- Selecting the track to play
- Locating a particular point in a track
- While the CD is stopped
- During playback or pause
- Press to select the track to play.
- Press to play.
- Press to stop playback.
- Press to pause.
- Playing an MD
- ◆Selecting the track to play
- ◆ Locating a particular point in a track
- Listening to an FM/AM station
- ◆Manually tuning a broadcast station
- If FM reception is not good
- Adjusting the tone
- ◆Adjusting the tonal quality
- 3
- 4
- ◆Muting the sound
- ◆Listening through the headphones
- Dubbing CD to MD (CD dubbing)
- Insert a CD and MD.
- Check the necessary recording time.
- Canceling the dubbing operation
- Press CD DUBBING to start dubbing.
- Then, it starts recording.
- Checking the recording result
- Notes on CD dubbing
- Dubbing CD to MD at double speed
- ◆Limitations of double-speed CD dubbing
- Recording CD to MD (Various CD Dubbing)
- ◆ Recording from the top of a song you are listening to (specified track dubbing)
- ◆ Dubbing a CD in a different play-back mode to an MD
- ◆ Copying CD text
- Note:
- ◆Switching to Fade Out mode (while the input source is MD and the system is stopped)
- Press MULTI JOG.
- Press MULTI JOG to confirm the setting.
- ◆ MD Group CD dubbing (while the source is MD and the recorder is stopped.)
- Recording CD to MD (Synchro recording)
- Recording an FM/AM broadcast program to an MD
- Recording from another Onkyo System (Synchro Recording)
- Recording data from a connected external device to an MD
- 5
- Numbering the desired song(s)
- To pause recording
- Stopping the MD
- Signal Synchro Recording
- Settings for Recording
- ◆ About the recording indicators
- Switching the display information during recording
- An MD after recording
- TOC indicator
- When the power is down
- When "Retry Error" appears
- Can't dub?
- Selecting a recording mode (while the input source is MD and the recorder is stopped)
- ◆Selecting digital or analog recording from CD to MD (while the input source is CD and the recorder is stopped
- ◆Adjusting the recording level
- You can adjust the recording level for better recording quality.
- Numbering the songs — Level Sync
- Press EDIT/CLEAR/NO and turn MULTI JOG to display "Level Sync?."
- Various ways to play CDs and MDs
- ◆MEMORY playback
- Press on the selected source to start MEMORY play-back.
- Press MODE repeatedly until the MEMORY indicator lights in the display.
- Turn MULTI JOG to select the first track you want to play back, then press MULTI JOG.
- To cancel a track number stored in memory:
- To select a track number in memory:
- To check the track numbers in memory:
- To erase a track number from memory:
- ◆1 TR (one track) playback
- While the source is CD or MD, and the unit is in stop mode
- ◆RANDOM playback
- ◆REPEAT/CHAIN REPEAT playback
- ◆ Cancelling the playback mode
- Cancels REPEAT and CHAIN REPEAT mode
- Using the MD Group Function
- Group
- Group Set (while the source is MD and the unit is stopped)
- Group In (while the source is MD and the unit is stopped)
- Using the MD Group Function (continued)
- Group Out (while the source is MD and the unit is stopped)
- Cancelling all groups (while the source is MD and the unit is stopped)
- Cancelling the selected group (while the source is MD and the unit is stopped)
- Press GROUP.
- Editing Groups (Move, Combine and Erase)
- ◆Outline of edit function
- ◆Combining two edit functions
- Notes regarding edit functions
- ◆Erasing tracks in the specified group — G.Erase
- Editing Groups (Move, Combine and Erase) (continued)
- Moving a group — G.Move
- ◆Combining groups — G.Combine
- MD Group Functions (Playing MD Groups)
- MD Group playback
- MD 1Group playback
- Changing the FM/AM preset channels
- Tips for changing the preset channels
- ◆ Erasing a preset channel – Preset Erase
- ◆ Copying a preset channel – Preset Copy
- Press MULTI JOG to confirm.
- Naming an MD and its tracks, and preset channels
- ◆Naming an MD disc or track
- ◆Naming a group on an MD
- ◆Naming a preset channel
- ◆Entering a name
- Turn MULTI JOG to select the character (or title when in Easy Title mode), then press it to enter.
- To add a new character between characters
- Press MODE/YES after you enter all the characters.
- What characters can be entered?
- What's Easy Name?
- Correcting and erasing a character
- Inserting a character
- Erasing the name assigned to a preset channel
- Moving, dividing, combining, and erasing MD tracks
- ◆Five basic functions
- - All Erase
- - Erase
- - Move
- - Divide
- - Combine
- ◆Combining basic functions
- Erasing part of a track – Divide and Erase
- Combining separately positioned tracks – Move and Combine
- Notes on combining tracks
- ◆ Erasing all tracks on an MD – All Erase
- Moving, dividing, combining, and erasing MD tracks (continued)
- Erasing a selected track – Erase
- ◆ Moving the selected track – Move
- ◆ Moving a track to a different group
- Dividing a selected track – Divide
- ◆Combining selected tracks – Combine
- ◆If the selected track belongs to a group
- Using the timer functions
- Five basic functions
- Sleep timer
- Once, Weekday, and Weekend timer (For playback)
- Rec timer (For recording)
- Tips
- Using the Sleep timer
- Press SLEEP while you are listening to music or a radio program.
- Checking the remaining time
- Canceling Sleep timer
- Turning off the unit automatically after completing CD Dubbing
- Setting the Once, Weekday, Weekend, or Rec timer
- Press MULTI JOG, then turn it to select the start time.
- Press MULTI JOG, then turn it to select the end time.
- If you selected a source other than FM or AM in step 2:
- 6
- When setting Once timer:
- When setting Weekday and Weekend timers:
- When setting Rec timer:
- 7
- 8
- Prepare the source specified in the timer.
- When setting Once, Weekday, or Weekend timers:
- 9
- Turn off the unit.
- Setting the timer for weekdays and weekends
- ①Press MULTI JOG.
- ◆Selecting the day(s) of the week and the recorder for Rec timer
- Using the timer functions (continued)
- ◆Switching the set timer On/Off
- Check each timer to see whether it is On or Off.
- Press TIMER repeatedly until the desired timer appears in the display.
- Turn MULTI JOG.
- ◆If the start or end time of one timer overlaps another
- If the same start time is set in more than one timer:
- If the start time of a timer arrives while another timer is operating:
- What happens to a Once timer if the power to the unit is on, or if the timer overlaps?
- Customizing the source names
- Press MULTI JOG to enter the new name.
- About the shorten source names
- Messages
- Rules for digital recording
- Guide to the serial copy management system
- Rule 1
- Rule 2
- Rules for digital recording (continued)
- Rule 3
- System limitations
- Troubleshooting
- Specifications
- General
- Amplifier
- CD player
- MD recorder
- ONKYO CORPORATION
Brand : ONKYO
Model : FR-N3X
Category : CD Player