
T1 - Receiver MANHATTAN - Free user manual and instructions
Find the device manual for free T1 MANHATTAN in PDF.


| Product Type | Digital Receiver |
| Brand | Manhattan |
| Model | T1 |
| Color | Black |
| Dimensions (W x D x H) | 150 x 100 x 30 mm |
| Weight | Approx. 300 g |
| Power Supply | 5V DC, 1A via USB or AC adapter |
| Power Consumption | Max. 5 W |
| Inputs | 1 x Coaxial (F-type), 1 x USB 2.0 |
| Outputs | 1 x HDMI, 1 x Composite AV, 1 x Optical Audio |
| Functions | Digital TV reception (DVB-T/T2), media playback via USB, electronic program guide (EPG), parental lock |
| Signal Type | DVB-T/T2, MPEG-2/H.264 decoding |
| Remote Control | Included (batteries not included) |
| Manual | Free downloadable PDF from manufacturer website |
| Safety Precautions | Indoor use only. Do not expose to moisture or direct sunlight. Unplug during storms. |
| Maintenance | Clean with soft, dry cloth. Do not use solvents. |
| Spare Parts | Contact Manhattan customer support for replacement remote or power adapter. |
| Repairability | Designed for easy access; user-serviceable parts: remote control, power supply. |
| Warranty | 2 years from date of purchase (check local regulations) |
| Country of Origin | China |
Frequently Asked Questions - T1 MANHATTAN
User questions about T1 MANHATTAN
0 question about this device. Answer the ones you know or ask your own.
Ask a new question about this device
Download the instructions for your Receiver in PDF format for free! Find your manual T1 - MANHATTAN and take your electronic device back in hand. On this page are published all the documents necessary for the use of your device. T1 by MANHATTAN.
USER MANUAL T1 MANHATTAN
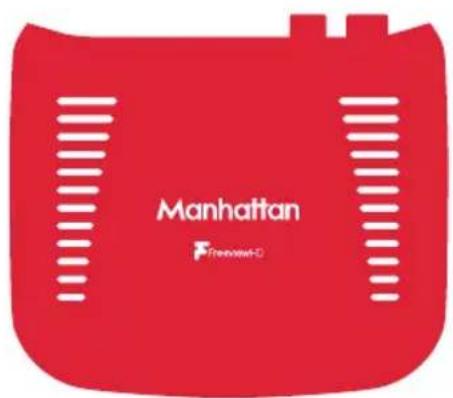
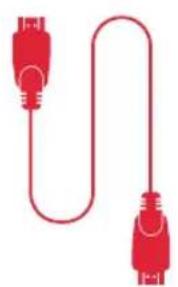
Unpack the following from your Giftbox:

natural_image
Red remote control with white circular buttons (no text or symbols)Remote control

2x AAA batteries
Manhattan T1
natural_image
Red cable with two connectors (no text or symbols)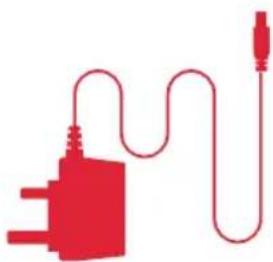
natural_image
Red line drawing of a plug connected to a cable (no text or symbols)HDMI cable Power adapter
You'll need:
• A TV with an HDMI input
• A coaxial aerial cable
Before you plug in, please read the Safety section of the Important Information booklet.
Connect Up
• Take the coaxial cable from your aerial wall socket and connect it to your T1.
- Next, connect the T1 to your TV using the HDMI cable provided.
- To view Freeview's free and premium streaming channels or receive software updates over the internet, connect the T1 to your router using an Ethernet cable.
- Finally, plug the AC power adapter into a wall socket that is turned off, then connect the other end to the T1.

If you want to use your TV's tuner, connect the Loop Out connector to the Aerial input of your TV. See the back cover for details of using Loop Out in Standby.

If your TV doesn't have an HDMI input, the T1 has an analogue AV output that you should be able to connect to your TV using the Manhattan T1 AV Kit (not supplied). See the included leaflet or contact us for more details.

Switch On
- Remove the battery compartment cover from the back of the remote by pushing the catch. Insert the batteries, matching the + and – symbols to what is marked on the inside of the compartment.
- Turn on the wall socket you connected the Manhattan T1 to and it will switch on.
- Turn on your TV set and choose the HDMI input you connected your Manhattan T1 to. Most TV remotes use a button labelled 'AV', 'SOURCE', 'INPUT' or with each press cycling through your inputs.
Follow the on-screen instructions to set up your T1. It takes about 5 minutes, which is the perfect amount of time to read the rest of this Guide!
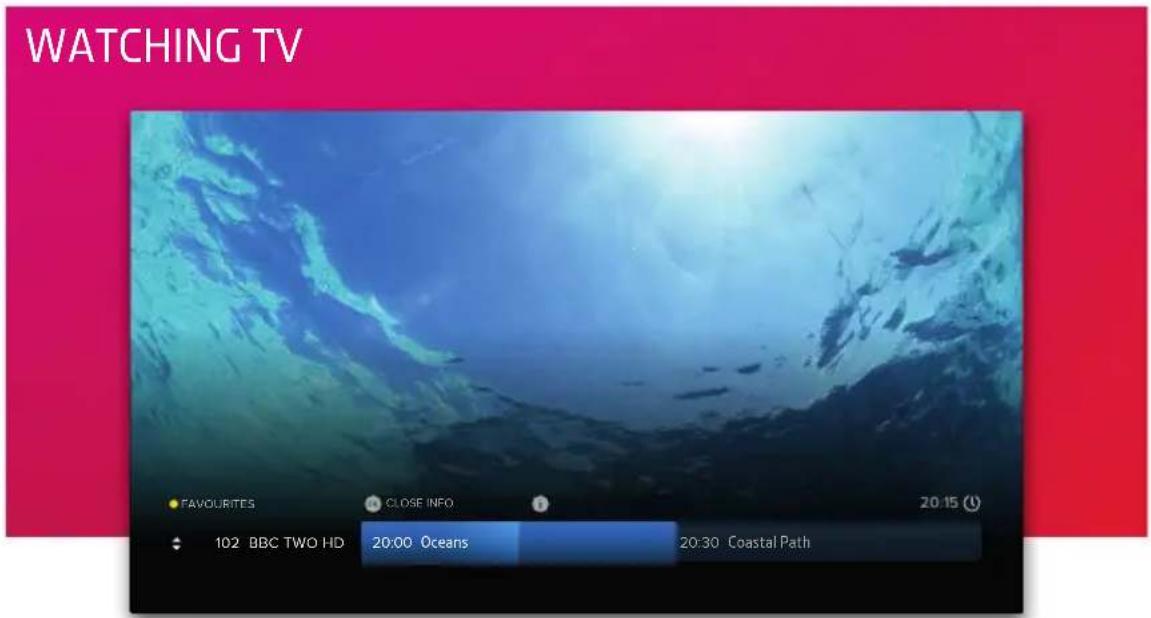
Now & Next Browser
The T1 makes it easy to browse what's on whilst watching full screen TV. Press to display the Now & Next Browser for the current channel then press or to browse other channels.
• To watch programmes on now and change channel, press OK
• To set a reminder for programmes on next, press to highlight it and press (see 7. Reminders)

• To view detailed info about a highlighted programme, press
Quickly Changing Channel
There are 3 ways to directly change channel whilst watching TV:
-
Press or to change to the channel above or below
-
Enter a channel number with the number buttons
-
Press to change to the last channel you were watching
Volume & Accessibility
Turn the volume up or down with or . To mute and unmute the sound altogether, press
Toggle Subtitles and Audio Description on and off with the and buttons.

Basics
Press to display the full TV Guide and browse what's on across the next 7 days. Move around the Guide using the directional pad, then:
- Press to watch programmes on now
- Press to set a reminder for programmes on later (see: 7. Reminders)
- Press to view detailed info about a highlighted programme
Quickly Navigating
As there are lots of channels and programmes to browse, you can get around more quickly by:
- Pressing and to page up and down
- Holding or to skip through time
- Pressing or to skip 24 hours backwards or forwards
When you've browsed ahead, simply press to skip back to what's on now.
Lists
The TV Guide can be filtered to show only HD, Radio or your Favourite Channels:
- Press
- Choose a list using or
- Press to select it
PROGRAMME INFO

New: The X Factor
SAT 19 NOV 20:00 21:25
WATCH
Tonight's theme is movie week, which sees the contestants performing hit songs from some of the biggest blockbuster films. Who will impress the voting public this week? [HD,S]
Genre: Entertainment
Contains some strong language
Also available in HD on ITV HD

The info screen displays the description, genre and other key information for a programme. It is displayed by pressing when watching TV, using the Now & Next Browser or the TV Guide.
The full list of icons that can be displayed are:

Part of a series

In HD

Surround sound audio

Programme is in two or more parts (e.g. a movie split by the evening news).

Subtitles

Audio Description

Guidance

Press to display the Main Menu. Use & to highlight an option and to select it.

Press to go back to a previous menu or press to return to full screen TV.
The Main Menu has the following options:
TV Guide
View what's on across the next 7 days. You can also press on the remote (see section 2, TV Guide).
Schedule
View and cancel reminders that have been set.
Channels
Manage your favourite and protected channel lists or choose channels for deletion (see section 5, Channels).
Settings
View and modify the T1's settings.
Help
View Help with using the T1 and detailed System Info for troubleshooting.

Favourite Channels
Select ‘Edit Favourites’ in the Channels Menu to choose channels for your favourites list. As explained in section 2, TV Guide, your favourites can be used to filter the TV Guide. They can also be quickly browsed using the Now & Next Browser:
- Whilst Watching TV, press to display the Now & Next Browser
- Notice in the top left of the browser it shows: FAVOURITES
- Whilst the Browser is displayed, each press of cycles through your favourite channels
Protected Channels
Protected Channels are hidden and can only be shown by entering your PIN. To choose channels to protect, select ‘Protected Channels’ in the Channels menu and then enter your PIN.
When you want to temporarily show your protected channels, highlight ‘Protected Channels’ in the Channels Menu and then select the ‘Show’ option that appears to the right. After entering your PIN, all Protected Channels will be shown until the T1 next enters standby or you choose the option to hide them again.
Deleting Channels
Channels can be deleted entirely by selecting the 'Delete Channels' option in the Channels Menu. If you want to restore them in the future, select the 'Smart Retune' option in the Tuning section of Settings.
REMINDERS

Using Reminders
When a programme is highlighted in the TV Guide or the Now & Next Browser that is on later, press to add a reminder. To cancel it, just press again
Reminders are displayed 60 seconds before a programme is scheduled to start. The T1 has an option in the Tuning section of Settings called 'Reminder AutoTune' that is turned off by default, meaning:
- A reminder will only be displayed if the T1 is on
- You must choose to watch the programme within 60 seconds to change the channel
- If you don't, the reminder will be cancelled and the channel will not change
When 'Reminder AutoTune' is turned on:
- If the T1 is in standby it will turn on for the reminder and the channel will change automatically
- If the T1 is on the reminder will be displayed as normal but at the end of the 60 seconds the channel will change automatically
The Schedule
All reminders that have been set can be viewed in the Schedule Menu by pressing MENU and selecting 'Schedule'.
YOUR REMOTE

Turns the receiver on & off


Increases or decreases the volume

Mutes & unmutes the receiver's sound

Turns Audio Description On & Off

Turns Subtitles On & Off


Switches to the next or previous channel
Moves one page up or down the TV Guide & Schedule

Opens the Main Menu

Displays programme information


Chooses options in menus
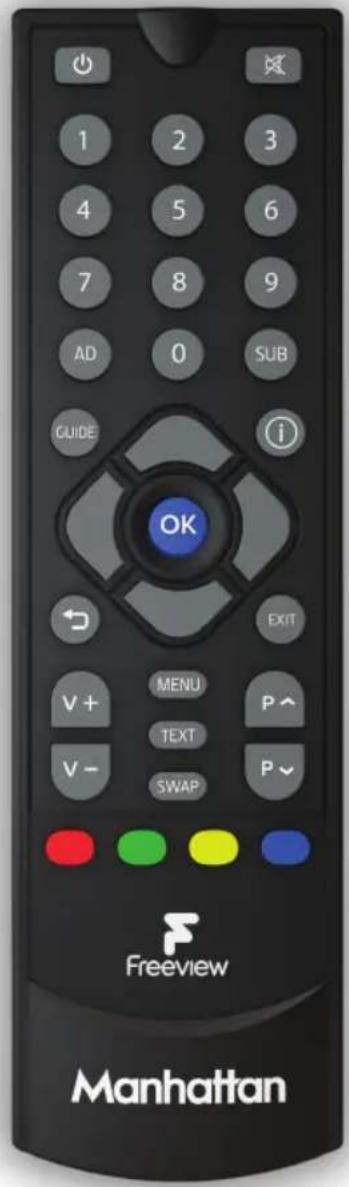

Navigates the menus

Displays Now & Next when watching TV
Selects highlighted options in menus
Performs the action displayed on-screen

Opens the TV Guide

Swaps to the last channel viewed

Returns to the previous menu or if there is no previous menu, returns to full screen TV

Takes you back to full screen TV

Displays teletext service, if available


Enter a channel number
TROUBLESHOOTING
| PROBLEM | POSSIBLE CAUSE | WHAT TO DO |
| There's no picture or sound and even the T1's menus can't be seen | The HDMI/AV cable may be disconnected. | Check the HDMI or AV cable connections between the T1 and your TV. |
| The input the Manhattan T1 is connected to may not be selected on your TV | Select the correct HDMI/AV input (see your TV's manual for guidance). | |
| Your TV may not correctly communicate the resolutions it is capable of and an incompatible resolution may be selected | • Turn the T1 on and wait 30 seconds• Press MENU• Press & Hold '0' for 5 seconds• The T1 will try each of the 3 HD resolutions for 15 seconds in this order: 1080p, 1080i and 720p. Select 'Confirm' when you can see the picture. | |
| The picture and sound keep breaking up or 'No signal' is displayed on screen | Inadequate signal from your aerial. | You can check your signal in the System Info section of Help. If it's weak or not present, get a professional to check your installation: your aerial may provide a better signal if it is realigned or moved somewhere else. We don't recommend using an indoor aerial.As a last resort, try using a signal amplifier or booster to improve reception. |
| Some antennas that are installed with a signal amplifier need a power supply from the receiver because they do not have their own. | If you have connected a signal amplifier, you can have the T1 supply it with a +5V DC supply by selecting the option in the System section of Settings. | |
| Channels not working after moving to a new home | The new home is in a different Freeview transmission area. | Select 'Smart Retune' in the Tuning section of Settings. |
| The TV picture is not HD | You may be watching an SD channel or you are using the AV connection to your TV. | Connect the receiver with an HDMI cable to an HD-Ready TV and select an HD channel. |
| Your remote control does not work | Receiver is not turned on or its front is obstructed.Batteries are weak in the remote control. | Ensure the front of the receiver is not obstructed.Replace batteries in the remote control. |
| Your T1 switches off after 3 hours | The T1 is set to go to standby by default after 3 hours without interaction. | Set Auto Standby to Off in the System section of Settings. |
| You can't remember your PIN | You've forgotten it or someone has changed it. | Your PIN can be reset with the master PIN.Please contact us. |
SOFTWARE UPDATES
From time to time we may release software updates to add features or address bugs. When registering your T1, unless you opt-out we will contact you by email whenever a new version is released.
The T1 will automatically check for an update each night and install one if it's available. This can be disabled by turning ‘Automatic Updates’ to off in the System section of Settings. You can also manually check for an update by selecting ‘Check for Update Now’.
Please note that unless the update is considered critical, it will only be released over the internet and not broadcast over the air, so we recommend keeping your T1 connected to your internet router by Ethernet cable. If you can't connect your T1 to your router using an Ethernet cable, the update can be installed using USB instead. Full information about the update and how to install it via USB will be available on our website.
ENERGY SAVING
Please note the following is required to meet EU requirements:
1. Loop Out is disabled in standby by default
The Loop Out connector is disabled by default when in standby. It can be enabled in the System section of Settings.
2. Auto Standby is enabled by default
The T1 will go into standby automatically if no buttons are pressed for 3 hours. The length of Auto Standby can be changed or disabled altogether in the System section of Settings.
The details in this guide are correct at the time of going to print and are for guidance only. Product features outlined are subject to change at any time without notice. © 2017 Manhattan TV Limited. Manhattan is a registered trademark of Manhattan TV Limited; registered company no. 2247629. The FREEVIEW words and logos are trade marks of DTV Services LTD. © DTV Services Ltd. v2 (13/2/17).
- You'll need:
- Connect Up
- Switch On
- Now & Next Browser
- Quickly Changing Channel
- Volume & Accessibility
- Basics
- Quickly Navigating
- Lists
- PROGRAMME INFO
- TV Guide
- Schedule
- Channels
- Settings
- Help
- Favourite Channels
- Protected Channels
- Deleting Channels
- REMINDERS
- Using Reminders
- The Schedule
- YOUR REMOTE
- TROUBLESHOOTING
- SOFTWARE UPDATES
- ENERGY SAVING
- Loop Out is disabled in standby by default
- Auto Standby is enabled by default
Brand : MANHATTAN
Model : T1
Category : Receiver