
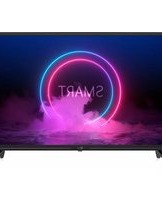
SOUND 43 SMART 4K - Television TELE System - Free user manual and instructions
Find the device manual for free SOUND 43 SMART 4K TELE System in PDF.


| Product Type | LED Smart TV |
| Screen Size | 43 inches (108 cm) |
| Resolution | 3840 x 2160 (4K Ultra HD) |
| Display Technology | 4K HDR (HDR10, HLG) |
| Smart Platform | Smart TV (likely Linux or proprietary) |
| WiFi | Built-in 802.11b/g/n |
| Bluetooth | Supported (for soundbar/keyboard) |
| HDMI Ports | 2 x HDMI 2.0 |
| USB Ports | 1 x USB 2.0 |
| Ethernet | 1 x RJ45 |
| CI+ Slot | 1 |
| Audio Output | 3.5mm jack, optical out |
| Speakers | 2 x 8W (stereo) |
| Power Consumption | Typical: 75W, Standby: <1W |
| Power Supply | AC 100-240V, 50/60Hz |
| Dimensions (W x H x D) - without stand | 970 x 565 x 80 mm |
| Dimensions (with stand) | 970 x 615 x 200 mm |
| Weight (without stand) | 7.5 kg |
| Weight (with stand) | 8.2 kg |
| VESA Mount | 200 x 200 mm |
| Remote Control | Infrared, numeric keys, smart apps |
| Operating Temperature | 0°C to 40°C |
| Repairability Index | 4.5/10 (estimated) |
| Recommended Cleaning | Dry soft cloth; no solvents |
| Safety | Stand stable; keep vents clear |
Frequently Asked Questions - SOUND 43 SMART 4K TELE System
User questions about SOUND 43 SMART 4K TELE System
0 question about this device. Answer the ones you know or ask your own.
Ask a new question about this device
Download the instructions for your Television in PDF format for free! Find your manual SOUND 43 SMART 4K - TELE System and take your electronic device back in hand. On this page are published all the documents necessary for the use of your device. SOUND 43 SMART 4K by TELE System.
USER MANUAL SOUND 43 SMART 4K TELE System
TV SOUND SMART 4K HDR

Manuale d'utilizzo
Gentile Cliente,
Impianto SCR/Unicable
Thank you for purchasing our product. We invite you to carefully read these instructions before using the appliance. This way you can achieve optimal performance and maintain the original characteristics of reliability over time. Keep this manual for future reference. We also suggest you keep the original TV packaging. For any problem, remember to take note of the TV's serial number which is on the back of the device.
The TELE System staff.
WARNING!
The reception and viewing of digital TV channels depends on the level and quality of the antenna signal (terrestrial/satellite) available. The signal varies depending on the area of residence, the correct orientation/operation of the antenna system, the weather conditions and the peculiarities of the signal transmitted by the television broadcaster.
Similarly, the use of audio-video streaming content in Smart/Connected TV mode (through appropriate IP applications) depends on several factors, such as quality and speed of your internet connection and the characteristics of the server/network of the service provider.
NOTE
TELE System Digital Srl communicates that, following any software and/or hardware changes aimed at improving the product, there could be inconsistencies between the content of this manual and the product in your possession.
Index
1 Safety 1
2 Product description.... 2
2.1 Front 2
2.2 Keyboard 2
2.3 Connections.... 2
2.4 Remote control....3
2.4.1 Keys 3
2.4.2 Batteries 3
3 First installation 4
4 Main functions 5
4.1 Digital TV mode 5
4.2 Source selection 5
4.3 Main menu 6
4.4 Smart (Home) mode 6
4.4.1 APPS selection 6
4.4.2 Settings section....6
5 Advanced functions 7
5.1 TV channels search....7
5.1.1 Terrestrial/Wire 7
5.1.2 Satellite....7
5.2 Menu and channel protection....9
5.3 Common menu....9
5.4 Factory reset (reset) 9
5.5 USB Media player 9
6 Technical specifications 11
7 Troubleshooting....12
8 Safety
WARNING: TO REDUCE THE RISK OF SHOCK AND AVOID VOIDING THE WARRANTY, DO NOT REMOVE THE BACK COVER OF THE DEVICE COVER!
Before connecting the power cable to the mains power supply outlet, make sure that the electric voltage indicated on the appliance corresponds to the one used in your area.
Make sure that you install the power cord, and other connection cables sturdily and securely. Voltage overloads and power extension cords can be dangerous, such as worn cables or broken plugs/sockets; these conditions can cause electric shock or fire. Contact a trusted technician to replace damaged parts. Do not insert any metallic object into the device – there is a risk of electric shock. To avoid electric discharges do not touch internal parts of the device; only qualified personnel may open the television. The television has slots for air circulation. To prevent overheating, these openings must not be covered nor blocked. If you position the TV in confined spaces (in bookcases, furniture), make sure that there is adequate ventilation.
Do not use the television in extreme temperatures, intensely humid areas or in dusty environments. Recommended temperature: 5÷35°C. Relative humidity recommended: 30÷80RH.
Do not subject the TV to rain or splashes of water; do not install it near kitchens, swimming pools, etc. Should water accidentally enter the television, immediately unplug the supply cord and contact a technician.
If necessary, clean the LED screen with a soft cloth lightly moistened with water; remember to disconnect the television before cleaning it. Do not use solvents such as benzene, acid or alcohol to clean the television; the surface of the screen and the LED panel could be irreversibly damaged.
Position the device on a solid surface that preferably facilitates access to the power outlet.
Do not place the television near sources of heat or flames such as, for example, radiators, heaters and candles. Do not place any objects filled with liquids such as vases or bottles on or near the TV.

The crossed-out trash bin symbol indicates that it is forbidden to disperse into the environment or to throw it into the general municipal waste. Anyone who does not comply with this rule will be fined in accordance with current legislation.
Proper disposal of the appliance helps avoid potential harm to the environment and human health, as well as facilitate the recycling of the components and materials contained therein, therefore saving energy and resources.
The manufacturer has established a recovery system for Waste from Electrical and Electronic Equipment (WEEE) of the product which is subject to separate collection and treatment systems, using plants conforming to the provisions in force in this matter.
Take the unusable product (and any accessories, including batteries) to a collection center authorized to handle electrical and electronic equipment waste. Alternately, you can return your used or dead equipment to the dealer when purchasing a new equivalent type of device or free of charge if the household appliance is less than 25 cm in external dimensions.
9 Product description
9.1 Front
In the lower front part of the TV, usually on the right (the position may vary depending on the model of TV), there are the following adjacent components:
- LED: LED status indicators: on (GREEN), standby (ROSSO) and remote-control operation (flashing RED).
- IR: Infrared sensor for the remote control.
9.2 Keyboard
The keyboard, normally located on the right side of the TV (the position may vary depending on the TV model), includes the following function keys:
- VOL+ e VOL-: audio volume regulation.
- CH+ e CH-: previous/next channel change.
- MENU: access the main menu.
- SOURCE: input source selection/TV mode.
- POWER: power on/turn off in Standby mode.
9.3 Connections
The following inputs and outputs are available behind the TV:
- USB (x2): USB2.0 ports for connecting USB mass storage devices for multimedia playback (Media player function).
- Headphone: headphone output (3,5mm jack).
- YPbPr: Video Component input (YPbPr). Optional external adapter required.
- Cl/Cl+: housing for Cl/Cl + common interface modules.
- COAXIAL: coaxial digital audio output.
- HDMI1, HDMI2, HDMI3: HDMI digital audio-video inputs (v.1.4) for connecting an external AV source (e.g. a receiver or DVD player) equipped with an HDMI interface.
- RF IN (T2/C): antenna input (IEC type) for receiving digital terrestrial (DVB-T / T2) or cable (DVB-C) signal.
- RF IN (S2): SATELLITE RF Antenna input (type F).
- SCART/RCA: analogue audio-video input for connecting an AV device with a RCA (CVBS + Stereo Audio) interface.
- PC Audio IN and PC VGA: audio inputs (3.5mm jack) and video (VGA) for connecting a Personal Computer.
- LAN: Ethernet (RJ45) port for connection to the Internet, necessary for the Smart TV function.
- Supply: integrated power cable for connecting the television to the 230VAC, 50Hz mains supply.
9.4 Remote control
9.4.1 Keys
- Power: power on/turn off in Standby.
- (Mute): temporarily interrupts the audio.
- 0÷9 numerical keys: direct selection of channels.
- LIST: access the channels list.
- (Recall): return to the latest selected program.
- PICTURE: change video mode.
- SOUND: change audio mode.
- SLEEP: set the shutdown timer.
-
VOL-/VOL+: regulate audio volume.
-
AUDIO: choose audio.
-
ASPECT: choose image format.
-
CH-/CH+: previous/next channel change.
-
EPG: access the TV electronic program guide.
-
⬆ HOME: recall the HOME menu (Smart/connected mode).
-
APP: direct access to the list of available applications.
-
MENU: recall the main MENU of the selected source.
-
Source: source selection.
-
Arrow Keys: navigation within the menu.
-
ENTER: confirm/select sub-menus/access to channels list.
-
EXIT: exit menu.
-
INFO: view information regarding the current AV content.
-
RED GREEN YELLOW BLUE: contextual function keys.
-
Reverse/INDEX: rewind into the media player / teletext index.
-
Play&Pause/CANCEL: start or pause media playback / cancel temporary teletext view.
-
FF/TXT: fast-forward into the media player / teletext index.
-
BackSkip/SUB.PG: previous media file / Teletext subpage.
-
Skip/REVEAL: next media file / viewing hidden teletext information.
-
STOP/MIX: stop multimedia playback / teletext transparency.
-
CAPTURE: stop multimedia playback / teletext transparency.
-
SUBTITLE: activation of subtitles (if available).
-
FREEZE: stop frame.
-
FAV: call up favorite channels list.
-
SIZE/MOUSE: teletext function/mouse cursor activation in Smart mode.
-
HOLD/REFRESH: stop teletext sub-page / update page in Smart mode.

9.4.2 Batteries
You must insert the batteries (not supplied) when the product is purchased; it is instead necessary to replace them once the remote control no longer works properly.
First open the appropriate cover on the back of the remote control. Then to replace the batteries, introduce the 2 AAA batteries into the compartment respecting the correct polarity as indicated; instead, to remove batteries, remove the dead batteries from the compartment and dispose of the batteries separately from household waste and take them to any point of sale or collection.
TELE System
WARNINGS
- To prevent corrosive liquid leakage from damaging the remote control, it is advisable to remove the batteries if you believe you will not use the device for a long time.
- Avoid using different types of batteries such as new and used batteries at the same time.
10 First installation
Before switching on the television, it is advisable to connect the aerial cable (terrestrial and/or satellite) and the ethernet cable (if available). In this way, thanks to the installation wizard, you can start using your Smart TV by performing a few simple steps briefly described below:
Step 1, Step 2, Step 3
After the welcome / start screen, the procedure requires the choice of the menu language, country of use and time zone. Make your choices by moving the screen cursor with the ▼ arrow key on the remote control to the desired value, then press the arrow key ▶ to continue.
Step 4
Section dedicated to the configuration of the TV connection to the Internet network necessary to use the connected Smart / TV functions. If the Ethernet cable has already been connected to the TV's RJ45 port, the connection to the home modem/router will take place automatically; otherwise, connect the Ethernet cable and wait for the TV to connect to the network. Then go to the next step with the arrow key ▶ on the remote control. If it is not possible to connect an Ethernet cable to the TV, configure the Wireless connection using the arrow keys and ENTER on the remote control: select the item Use Wi-Fi network, choose your own Wi-Fi network from the list of detected networks, type the correct network password very carefully (press ENTER to bring up the virtual keyboard), then select the Connect item. Finally press the arrow key ▶ to go to the next step.
Step 5
For some advanced functions, the supplied remote control does not allow full and easy use; in this regard, there is a dedicated Android/iOS application available that will make your mobile device (smartphone or tablet) a means to control your TV. To download the application, simply frame the QR code visible on the screen with the appropriate QR/video camera of your mobile device, then proceed with the installation.
ATTENTION!
• Make sure that your mobile device and Smart TV are connected to the same home data network.
- The application does not totally replace the traditional remote control, it is mainly designed to control the Smart features of the TV (applications, media player, etc. ...)
- Some IP applications require the use of a keyboard and/or a cursor/mouse; in this case, the traditional remote control supplied with the TV is not sufficient to control them.
Step 6
The last step in the configuration wizard asks you to choose the user's favorite mode / source. In particular, by choosing TV, your product will initially start in traditional TV mode to allow the scanning and therefore the viewing of television, terrestrial and / or satellite channels (see section 4.1). By choosing the
Home item instead, the TV will initially start in Smart TV mode to have quick access to applications/browsers typical of a TV connected to the Internet (see section 4.4).
11 Main functions
11.1 Digital TV mode
At the end of the installation wizard (Section 3), if you have selected the TV mode, you need to scan a digital TV channel. To access the Channel menu, set the Antenna Type between Digital Terrestrial (DVB-T / T2), Cable (DVB-C) or Digital Satellite (DVB-S / S2), make sure that the corresponding antenna cable is correctly connected, define the search parameters and proceed with the scan (see section 5.1).
If you opt for automatic scanning of digital TV, the TV will propose that you upload a list of Italian satellite default channels with a typical arrangement of the TivùSat platform channels.
NOTE
- The viewing of the encrypted TivùSat channels requires the use of a dedicated conditional access module (CAM) and card (Smart-card), to be purchased separately.
- Due to frequent satellite channel updates, the default satellite channel list may contain obsolete channels and may not coincide exactly with the TivùSat channel list.
Once the selected frequencies have been scanned, the TV will create the channel list with the defined arrangement (e.g. the LCN one, corresponding to the numbering requested by the terrestrial channel issuers).
If you want to proceed with the scanning of different input/antenna channels, proceed as described above choosing the corresponding type of antenna desired (different from the previous one).
The different available channel lists will then be available only if the TV is in the correct TV section (terrestrial/cable/satellite). In particular, to switch from viewing a terrestrial channel to a satellite channel, press the MENU button, enter the Channel menu and set Digital SAT (satellite) as Antenna Type. Obviously to return to the terrestrial channel list, set Digital terrestrial as Antenna Type.
The TV will create a channel list with the defined ordering (e.g. the LCN one, corresponding to the numbering requested by the terrestrial channel broadcasters) once TV has scanned the frequencies.
If you want to scan channels from a different input/antenna, then proceed as just described above by selecting the corresponding Antenna type (a different one from the previous).
The various available channels list will then be accessible only if the TV is in the correct TV section (terrestrial/cable/ satellite). In particular, to switch from viewing a terrestrial channel to a satellite channel, press the MENU button, enter the Channel menu, and set the Antenna Type to Digital SAT (satellite). If you want to return to the terrestrial channel list, set the Antenna Type back to Digital terrestrial.
11.2 Source selection
If the television is in Smart/TV mode (HOME menu), you can select the TV's operating mode/input source in the Source section (the next to last entry in the Home menu). Otherwise, in all other modes, use the
SOURCE button or follow the path MENU> Input. Then, choose between:
- TV: to activate the digital TV mode (terrestrial/cable/satellite) and therefore allow reception of the respective programs.
- AV (1) : to activate the RCA analog audio-video input.
- YPbPr (1): to activate the YPbPr component video input.
- SCART (2) : to activate the SCART analog audio-video input.
- VGA (2) : to activate PC mode, from VGA video input and AUDIO IN PC.
- HDMI 1/HDMI 2/HDMI 3 (2) : to activate the corresponding HDMI 1/2/3 digital audio-video input.
NOTE
(1) Cable-adapter required not included in the supplied accessories.
(2) Audio-video connection cable not included among the supplied accessories.
11.3 Main menu
From TV source (or from audio-video inputs), press the MENU button to display the main menu and use the ◀/▶ arrow buttons to navigate through the menu titles. Press the ENTER button to confirm your selection, MENU to return to the previous menu or EXIT to exit
The submenus are:
- Home: access to connected Smart / TV mode (see section 4.4).
- Input: input source selection (external audio-video device) or TV mode (see section 4.2).
- Image: adjustment of the image features on the screen.
- Audio: configuration of the audio features.
- Channel (available only in TV mode): for channel management, in particular to access different types of digital TV, terrestrial/cable/satellite channels (section 4.1) and the corresponding channel search (see section 5.1).
- System Lock (only available in TV mode): channel protection settings and menus (see section 5.2).
- Config. timer: settings for the display duration of the on-screen menu (OSD), the TV automatic switch-off in standby mode and the activation of the Sleep timer.
- Common: access to some additional settings. In particular, in TV mode you can also change preferences on languages such as teletext, audio and subtitles. Refer to the section 5.3.
11.4 Smart (Home) mode
The Home menu, also directly accessible from the HOME key on the remote control, mainly allows access to the so-called Smart section (connected component/IP) to manage and use the IP applications and the browser for navigation, as well as access to the various sources of input/mode.
11.4.1 APPS selection
Moving to the APPS section of the Home menu, you can see the list of all IP applications installed under the Application List (accessible directly from the APP button on the remote control), where you can also access the application store to download and install new ones.
The Multimedia submenu on the other hand allows access to the Multimedia player function (Media player), to reproduce multimedia audio/video contents saved on an external USB memory device (see section 5.5) or to manage files saved in the internal TV storage (e.g. installation of APK expert users, a procedure recommended only for expert users).
11.4.2 Settings section
The submenu to configure the connection to the Internet (via LAN cable or via Wi-Fi) is particularly important. This submenu is essential to use the connected Smart/TV functions and can be reached from the path: Home Menu> Settings> Other Settings > Network. It is useful if you want to change the network settings defined during initial installation (see section 3). In the Other Settings menu, you will also find:
Time settings submenu to adjust the time and related parameters, the Common Settings submenu for general changes such as language, keyboard type, permissions/account management and finally the Info submenu to consult technical system information such as the MAC addresses of the Ethernet/LAN and Wi-Fi interfaces.
12 Advanced functions
12.1 TV channels search
To perform a channel scan, press the MENU key and access the Channels menu, from which you will have to define the Country where the TV is installed should it be a different one than the one chosen during the initial installation (section 3), and choose the Antenna Type desired between:
- Digital terrestrial: to search for channels broadcast in terrestrial digital (DVB-T / T2),
- DVB-C: to search for channels broadcast by cable (DVB-C),
- Digital SAT: to search for satellite broadcast channels (DVB-S / S2).
Depending on the Antenna Type selected, the Channels menu items change and then the corresponding channel search procedure as described in the following paragraphs.
WARNINGS
- Make sure that the chosen antenna cable is properly connected to the corresponding antenna input of the TV.
- If you re-scan automatic channels, the list of previously memorized channels will be totally eliminated and replaced by the one generated by the new search.
12.1.1 Terrestrial/Wire
From the Channel menu, select Terrestrial Digital as the Antenna Type. Subsequently, to perform an automatic channel search move to the Automatic scan submenu and confirm the start with the ENTER key on the Start scan item. Instead, to scan on a single frequency, go to the Manual Scan submenu, define the desired search parameters (channel/frequency) and confirm the start of the scan by pressing the ENTER key on the Start scan item.
Following similar steps to those described above, it is possible to search for digital channels transmitted by cable choosing DVB-C as Antenna type in the Channel menu.
NOTE
- At any time, you can press EXIT to finish the search in progress.
- Cable transmission (DVB-C) is not normally used in Italy. Therefore, avoid selecting it when searching for channels with a digital terrestrial antenna system.
12.1.2 Satellite
To activate the reception/viewing mode of the digital satellite channels, activate the corresponding TV mode: press MENU, select the CHANNEL sub-menu and select Digital SAT.
If the satellite channels have not already been memorized, you must first configure the parameters of the satellite antenna system in use (see section 5.1.2.1), then proceed to the channel scan (see section 5.1.2.2).
12.1.2.1 Antenna system configuration
The factory settings provide that the satellite system can receive signals simultaneously from 2 satellites via DiSEqC switch, HotBird 13° East in first position and Astra 19.2° East in second position. If the system does not correspond to the settings indicated, it is necessary to modify the default settings to make them consistent with the satellite dish used.
NOTES AND WARNINGS
- The TV is compatible with single universal, multi-satellite DiSEqC 1.0 and multi-user SCR/Uni-cable systems. Motorized antennas (DiSEqC 1.2 and USALS) are not supported.
- Incorrect antenna configuration may result in some or all channels not being loaded. If you do not know the characteristics of your antenna system and/or you are not able to configure the receiver yourself, it is advisable to contact a trusted professional installer.
- The Signal and Quality Level indicators refer to the transponder of the selected satellite indicated on the screen. Make sure that it is valid/updated and actually active.
- It is not recommended to avoid connecting the TV to the satellite signal through the pass-through antenna connector (LNB Out / Loop Through) of an external satellite receiver as both devices cannot operate simultaneously. When the TV is switched on, the receiver must be in standby (with the tuner not powered) and vice versa.
The following are the general steps to follow when setting typical antenna systems installed in Italy. In the Channel Menu> Scan you can define the type of antenna by changing the parameter LNB type. Its possible values are:
- LNB Only: single satellite and single user,
- DiSEqC: multi-satellite with DiSEqC 1.0 switch (up to 4 satellites),
- SatCR: multi-user on a single-cable SCR / Unicable.
Single system
In the case of a classic single antenna satellite system with single universal converter (Low Noise Block - LNB), set LNB type on LNB Only, choose the satellite to which the antenna is pointed (default HotBird 13° East).
DiSEqC system
For multi-satellite antenna systems with signal distribution via DiSEqC 1.0 protocol (up to 4 satellites), set DiSEqC first as LNB type, then associate the correct position through the parameters called DiSEqC A/B/C/D to each satellite of the plant, respecting the relative physical connection of the antenna to the DiSEqC switch.
SCR/Uni-cable system
For single-converter antenna systems with SCR/Uni-cable technology for satellite signal distribution over multiple points of use (receivers) via a single cable, set SatCR as LNB Type and press ENTER on Position A. Make sure the Satellite parameter carries the name of the desired satellite (otherwise change it), then press ENTER on Satellite Configuration and define:
- SatCR IF Channel: the user number corresponding to the SCR (or band) channel assigned to the television connected to the antenna.
- SatCR IF Freq.: the central frequency of the above SCR channel (band) assigned to the user. Typical values for correct interfacing with other receivers/tuners are:
| Canale SCR | 1 | 2 | 3 | 4 |
| Freq. SCR | 1210 | 1420 | 1680 | 2040 |
WARNINGS
• Each TV / receiver connected to the same system must use a different SCR channel.
- For the connection of several receivers to a SCR system, do not use any loop-through antenna connection of an external satellite receiver, but use a dedicated external signal splitter.
12.1.2.2 Channels search
Go to the Channel> Scan menu. To run a scan on all the available transponders (frequencies) of the set satellite(s), select Auto Scan and press ENTER. Refer also to par. 4.1 to load the default channel list.
Alternatively, to reduce the channel search to a single transponder (frequency) of a satellite, choose the Manual Scan submenu, where you can also add and/or edit the transponder data, then press ENTER on Start scan to operate the search.
12.2 Menu and channel protection
The System Lock menu is password protected; to access it, you need to enter the system password (PIN) default 0 0 0 0. The following functions are available:
Change password: allows you to change the defined previously password.
WARNING
Write down and keep the new code in a safe place. If you forget it, use the universal code 4 7 1 1, with which you can access the Change Password sub-menu again and then set a new password.
Lock system: If enabled, access to the Channels menu is protected by a password and the two additional checks listed below are also enabled.
Parental control (available only in TV mode): to control the vision of some sensitive events, commonly called Parental Control. In particular, if the tuned channel transmits an event with information viewing protection for an audience of the same age and above the chosen age level, the TV will block the channel. The channel unlock request will then be shown on the screen by entering the PIN code.
Keyboard block: once enabled, the physical keyboard of the TV set (section 2.2) will be disabled and the user will be able to interact with the TV only through the remote control.
Hotel Function
The TV has an additional feature called hotel security and customization. It lets you disable certain menus and functions or authorize access though a password. To display the hidden menu Hotel mode and enable/disable and customize it, sequentially press MENU 7 9 0 6 on the remote control.
12.3 Common menu
From this menu you can activate the HDMI CEC function to control, via HDMI, some functions of a CEC compatible external device (for advanced users only) on the TV remote control, set the preferred audio and subtitle languages for TV channels and, in addition, restore the initial settings of only those parameters available on the menu (without deleting the channels list).
12.4 Factory reset (reset)
It is possible to reset the entire television, returning all the settings to the initial condition. To do so, select Settings> Reset in the Home menu (connected Smart/TV mode) and confirm. Another way to do this is: Home> Settings> Other Settings > Common Settings> System Restore.
WARNING
Restoring the factory settings deletes all the customizations made by the user, including stored channels, downloaded applications and changed settings. Furthermore, by confirming the reset, the TV will perform a complete system rebook and then display the first installation wizard on the screen (section 3).
12.5 USB Media player
In the Home menu (Smart/TV mode connected) you can access the APPS>Multimedia section related to the Multimedia Player function, which displays/plays personal multimedia files contained in the TV's internal memory (for expert users only) or in a USB type memory device connected to the USB input of the TV.
NOTE
TELE System
- It is not recommended to avoid using/occupying the TV's internal memory in order to conserve system resources and space for IP applications.
- Compatibility with all FAT32 or NTFS formatted USB 2.0 memory devices and all types of codecs/multimedia formats available on the market is not guaranteed.
- Removing the memory device while writing or reading data can damage the contents and devices involved; always switch off the TV before disconnecting the memory.
Once you've selected the file type (video/music/photo), only the files of the chosen type and recognized as valid by the TV will be shown on the screen. Navigate through folders and files using the arrow keys ◀ / ▶ / ▼ / ▲ and ENTER on the remote control, and finally confirm with ENTER once you're positioned on the name of the file to be played.
During playback, you can manage the content with the usual multimedia function keys: 12 (Play / Pause), 3 (Stop), 5 (Fast Reverse), 6 (Fast Forward), 7 (Previous) and 8 (Next). Instead, press in sequence the SUBTITLE key to enable/change any subtitles for a video (the file containing the external subtitles must be named exactly like the video file). In addition, pressing the MENU button allows you to recall all the settings/functions available for the current media file type.
13 Technical specifications
| Model | |||
| SOUND43 SMART4K | SOUND50 SMART4K | ||
| Panel | Format | 43" - 16:9 wide (109cm) | 50" - 16:9 wide (127cm) |
| Resolution | 3840x2160 (UHD) | ||
| Contrast | 3000:1 | 5000:1 | |
| Brightness | 250 (cd/m2) | ||
| Viewing angle | 178°/178° (Horizontal/Vertical) | ||
| Inputs | Component | x1 - YPbPr (adaptor not included) | |
| HDMI (1) | x3 - HDMI (2) | ||
| SCART | x1 - CVBS e RGB | ||
| A/V in | x1 - CVBS + Audio LR (adaptor not included) | ||
| USB | x2 - USBv2.0, compatible FAT32e NTFS, Media player function | ||
| VGA | x1 - DSUB15 + Audio PC | ||
| LAN | x1 - RJ45, Ethernet 10/100 | ||
| TV Signals | RF input (DTT) | x1- 75 Ω, type IEC, VHF/UHF 7MHz/8MHz | |
| RF input (SAT) | x1 - 75 Ω, F type | ||
| Common Interface | x1 - CI / CI+ | ||
| Video | MPEG-2, MPEG-4, H.265.Main@L4.1-1920*1080@50fps | ||
| Audio (3) | MPEG-1 layer 1/2, MPEG-2 layer 2/Dolby AC3 H.265 | ||
| Speaker | 10Wx2 + 10Wx2 | ||
| General | Power Supply | 100÷240V, 50/60Hz | |
| Energy Consumption | <0,5W in Standby 70W max | <0,5W in Standby 108W max | |
| Supported Formats via USB | AVI/MP4/MKV | ||
| Wi-Fi | IEEE b/g/n, 2,4GHz | ||
| TV dimensions (WxHxD) | with supports | 971x657x205mm | 1131x760x254mm |
| without supports | 971x603x87mm | 1131x697x93mm | |
| Standard wall bracket | VESA200/100 | VESA 200 | |
| Included Accessories | x1 standard remote control x1 instruction manual | ||
(1) The terms HDMI and High-Definition Multimedia Interface HDMI and the HDMI logo are trademarks or registered trademarks of HDMI Licensing, LLC in the United States and other countries.
(2) in order to connect an external 4K/UHD device, use HDMI port 2 and 3 (an High Speed HDMI cable is necessary)
(3) Manufactured under license from Dolby Laboratories. Dolby, Dolby Audio and the double-D symbol are trademarks of Dolby Laboratories.
14 Troubleshooting
| Problems | Possible Causes | What to do |
| The On / Standby LED on the front panel of the TV is not lit. | The power cord is not connected to the electrical outlet. | Make sure the TV is properly powered, then press the θ key on the TV or remote control to turn it on. |
| No Audio/Video signal | The antenna signal is absent or weak. | Check the antenna configuration and the presence of the menu signal (Section. 5.1). |
| The tuned channel is not broadcasting or is obsolete. | Change channel and / or perform a new channel search (Section 5.1). | |
| The audio-video cable (e.g. HDMI, SCART, etc.) is not connected correctly or is faulty. | Check the audio-video connection and the operation of the corresponding cable. | |
| The video resolution of an external device connected via HDMI is not compatible with that of the TV screen. | Properly adjust the resolution of the video output of the external HDMI device. | |
| Low or mute audio volume. | Increase the audio volume level of the TV and/or external AV device connected to the TV. | |
| TV is not switched to the correct audio-video input or mode. | Select the desired TV source correctly (section 4.2). | |
| The channels are not loading. | Antenna signal absent or weak. | Check the antenna setting and the presence of a signal (section 5.1). |
| The selected transponder/frequency is obsolete. | Choose a valid transponder/frequency. | |
| The desired channel transponder is not present in the database or is not updated. | Add or update the transponder manually. | |
| Network error / no internet connection | The TV is not connected to the network. | Check the Ethernet or Wi-Fi connection. See also Step 4 of section 3. |
| Settings made in the menus have not been memorized. | Failure to confirm after changing settings. | Confirm each change by pressing the final save button. |
| The remote control does not work. | The remote control is not properly aimed at the TV. | Check that there are no obstacles between the remote control and the front IR sensor of the TV. |
| The batteries are dead. | Replace the batteries (section 2.4.2). | |
| The remote control has dropped and the internal components have been damaged. | Contact your dealer to purchase a new remote control. | |
| Program information is not displayed. | The selected program does not transmit information about the event. | |
| The receiver's time is not set correctly. | Make sure you have selected the correct Country and Time Zone in the first installation (section 3). | |
| The TV does not respond to the buttons on the remote control or the front keypad. | Temporary lock of the TV. | Unplug the TV from the electrical outlet and reconnect it after a while. |
| Problems with the remote control. | Check the suggestions relating to the remote control of this table. | |
| USB memory is not recognized. | USB memory not properly formatted. | Format the memory with File System FAT32 or NTFS. |
| USB memory not compatible. | Try another USB memory or use the external power supply of the disc. | |
| The only USB port on the TV is not enough to power the memory. | ||
| Multimedia content is not recognized. | File format and / or type of non-compatible audio-video codecs. | Use only TV-compatible files and codecs. |
| The PIN has been forgotten. | See section 5.2. | |
| The TV turns off by itself. | Automatic switch-off activated | See the settings on the Config. Timer menu. |
WARNING
Generally, in the event of the TV's anomalous behavior, a complete restart of the system (remove the plug and restore power to the TV after about ten seconds) or a factory reset via the Factory reset (section. 5.4) can help to solve the problem.
TELE System SOUND43 SMART4K T2S2HEVC
EU Declaration of Conformity
Tele System Digital declares, under its own responsibility, that this product meets the essential requirements of European directives, in accordance with the listed technical standards.
2014/53/EU (Radio Equipment Directive - RED)
2014/30/EU (Electromagnetic Compatibility - EMC)
2014/35/EU (Low Voltage Directive - LVD)
2009/125/EC (Energy related Product - ErP) reg. 642/2009 e 801/2013
| RED | LVD | EN 60065:2014+A11:2017 |
| EMCD | EN 55032:2015/AC:2016-07EN 55035: 2017EN 61000-3-2:2014EN 61000-3-3:2013ETSI EN 301 489-17 V3.1.1 (2017-02)ETSI EN 301 489-1 V2.1.1 (2017-02) | |
| Radio | ETSI EN 300 328 V2.1.1 (2016-11) | |
| Health | EN 62479:2010 | |
| Terrestre | ETSI EN 303 340 V1.1.2 (2016-09) | |
| Satellite | ETSI EN 303 372-2 v1.1.1 (2016-04) |

All documentation to support compliance with directives and Decree cited is available at TELE System Digital Srl.
Bressanvido, 21/09/2018

Flavio De Poli

- TV SOUND SMART 4K HDR
- Impianto SCR/Unicable
- WARNING!
- NOTE
- Index
- Safety
- Product description
- Front
- Keyboard
- Connections
- Remote control
- Keys
- Batteries
- TELE System
- WARNINGS
- First installation
- Step 1, Step 2, Step 3
- Step 4
- Step 5
- ATTENTION!
- Step 6
- Main functions
- Digital TV mode
- Source selection
- Main menu
- The submenus are:
- Smart (Home) mode
- APPS selection
- Settings section
- Advanced functions
- TV channels search
- Terrestrial/Wire
- Satellite
- Antenna system configuration
- NOTES AND WARNINGS
- Single system
- DiSEqC system
- SCR/Uni-cable system
- Channels search
- Menu and channel protection
- WARNING
- Hotel Function
- Common menu
- Factory reset (reset)
- USB Media player
- TELE System SOUND43 SMART4K T2S2HEVC
- EU Declaration of Conformity
Brand : TELE System
Model : SOUND 43 SMART 4K
Category : Television