
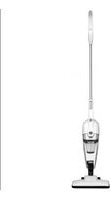
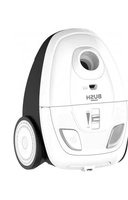
V8211_03 - Vacuum Cleaner BUSH - Free user manual and instructions
Find the device manual for free V8211_03 BUSH in PDF.


| Product Type | Vacuum Cleaner |
| Brand | Bush |
| Model | V8211_03 |
| Dimensions (approx.) | 400 x 280 x 320 mm (L x W x H) |
| Weight (approx.) | 5.2 kg |
| Power Supply | Mains-powered, 230V~50Hz, 1200W |
| Dust Capacity | 2.0 L (bagless or bagged? Assume bagless) |
| Filtration System | HEPA washable filter |
| Cord Length | 6.0 m |
| Cleaning Radius | 9.0 m |
| Suction Power Control | Electronic slider on handle |
| Attachments Included | Crevice tool, dusting brush, upholstery nozzle |
| Maintenance | Empty dust container after each use; wash filter every 3 months |
| Safety | Always unplug before cleaning or servicing; do not vacuum liquids or large debris |
| Spare Parts | Replacement filter (part no. BFILT100), dust container (part no. BDUST200) |
| Repairability | User-replaceable filter and dust container; motor not user-serviceable |
| Warranty | 2 years (subject to terms) |
Frequently Asked Questions - V8211_03 BUSH
User questions about V8211_03 BUSH
0 question about this device. Answer the ones you know or ask your own.
Ask a new question about this device
Download the instructions for your Vacuum Cleaner in PDF format for free! Find your manual V8211_03 - BUSH and take your electronic device back in hand. On this page are published all the documents necessary for the use of your device. V8211_03 by BUSH.
USER MANUAL V8211_03 BUSH
natural_image
Purple and silver vacuum cleaner against a geometric orange and white background (no text or symbols)210.00 mm
You'll soon be enjoying your new vacuum cleaner.
It all begins here, with your instructions. Don't worry, there's nothing too technical coming up. Just simple, step-by-step guidance to get you up and running quickly. Sound good? Then let's get started.
Help and Guidance
We're here to help you get the most from your vacuum cleaner. Should you require any guidance, a simple solution can often be found online at:
www.argos-support.co.uk
If you still require further assistance, call one of our experts on TMTI HELPLINE 0345 604 0105
If you require any technical guidance or find that your product is not operating as intended, a simple solution can often be found in the Troubleshooting section of these instructions.
Contents
1 Safety information
Safety information 6 Electrical 8
2 Getting to know your vacuum cleaner
Ready?Let's begin 10 Accessories 12
3 Installing your vacuum cleaner
Unpacking 14 Assembly 14
4 Using your vacuum cleaner
First use of vacuum cleaner. 16 Using the vacuum cleaner 17
5 Care and maintenance
Cleaning 20 Care and maintenance 21 Technical specification 22
6 Product support
Toupleshooting 24 Help and assistance 25 Declaration of conformance to product 26 Standards Disposal 27
| >100% |
| >100% |
| >100% |
| >100% |
| >100% |
| >100% |
| >100% |
| >100% |
| >100% |
| >100% |
| >100% |
| >100% |
| >100% |
Safety information 1
Safety Information
Important - Please read all instructions before use and keep for future reference
WARNINGS
- This appliance is intended for domestic household use only and should not be used for any other purpose or in any other application, such as for non-domestic use or in a commercial environment.
- If the supply cord is damaged, it must be replaced by the manufacturer, its service agent or similarly qualified persons in order to avoid a hazard.
- Regarding the detailed instructions for the method and frequency of cleaning and the precautions during user maintenance, refer to the section "Care and maintenance" on page 20 of the manual.
- This appliance can be used by children aged from 8 years and above and persons with reduced physical, sensory or mental capabilities or lack of experience and knowledge if they have been given supervision or instruction concerning use of the appliance in a safe way and understand the hazards involved. Children shall not play with the appliance. Cleaning and user maintenance shall not be made by children without supervision.
If you require any technical guidance or find that your product is not operating as intended, a simple solution can often be found in the Troubleshooting section of these instructions.
Safety Information
Important - Please read all instructions before use and keep for future reference
- The plug must be removed from the socket-outlet before cleaning or maintaining the appliance.
- Following objects are strictly banned, otherwise the vacuum cleaner will be damaged or fire calamity will be caused, which bring such accidents as human body injuries:
-Don't pick up large or sharp broken such as glasses.
-Don't pick up harming or erodent liquids (solvent, corrosive, detergent...).
-Don't pick up inflammable or explosive substance such as gasoline or alcohol.
-Don't pick up/ vacuum burning or glowing objects (cigarettes, matches, hot ashes).
or online at www.argos-support.co.uk if you still require further assistance, call one of our experts on 03 45 6 04 0 10 5
Safety Information
Important - Please read all instructions before use and keep for future reference
Electrical
Any electrical work that is required to install this appliance MUST be carried out by a qualified electrician.
Before making any electrical connections, ensure that:
- Do not bend, stretch or pull the supply cable to avoid electric shock.
- Ensure the power socket is suitable for the maximum power of the machine.
- The supply voltage should be the same as that indicated in the technical specifications and the appliance rating plate.
- If the socket outlets in your home are not suitable for the plug supplied with this unit check with a qualified electrician for replacement.
- The use of adapters, multiple connectors or extension cables are not recommended.
- The appliance must be connected to a 220-240 volt 50Hz AC supply by means of a three pin socket, suitably earthed and protected by a 13 amp fuse.
- Should the fuse need to be replaced, a 13 amp fuse approved to BS1362 must be used.
- The plug contains a removable fuse cover that must be refitted when the fuse is replaced. If the fuse cover is lost or damaged, the plug must not be used until a replacement cover has been fitted or the plug is replaced.
- A damaged plug should be cut off as close to the plug body as possible, the fuse should be removed and the plug disposed of safely.
Plug replacement (UK & Ireland only) Should you need to replace the plug; the wires in the power cable are coloured in the following way.
Blue - Neutral 'N'
Brown - Live 'L'
As the colours of the wires in the power cable may not correspond with the coloured markings identifying the terminals in your plug, and proceed as follows:
The blue wire must be connected to the terminal that is marked with the letter N.
The brown wire must be connected to the terminal that is marked with the letter L.
If power supply cord is damaged, it must replaced by the manufacturer or its service agent or a similar qualified person in order to avoid a hazard.

If you require any technical guidance or find that your product is not operating as intended, a simple solution can often be found in the Troubleshooting section of these instructions.
Getting to know your vacuum cleaner
2
Getting to know your vacuum cleaner
You'll be up and running in no time
Ready? Let's begin...
Please read these instructions carefully. They contain important information which will help you get the best from your Vacuum cleaner and ensure safe and correct installation and operation.
If you require any further assistance, our technical experts are happy to help. For full details, refer to the product support section at the end of these instructions.
If you require any technical guidance or find that your product is not operating as intended, a simple solution can often be found in the Troubleshooting section of these instructions.
Getting to know your Vacuum cleaner
You'll be up and running in no time
Components
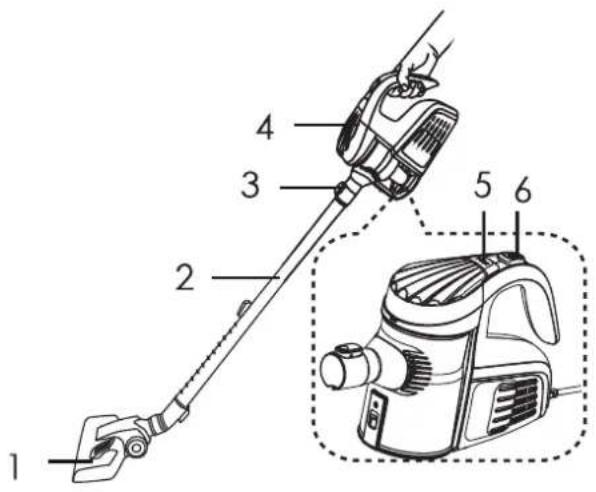
1.Cleaning head
2. Telescopic tubes
3.Tube socket
4.Dust container
5.Dust release button container
6.Power button
or online at www.argos-support.co.uk if you still require further assistance, call one of our experts on 03 45 6 04 0 10 5
| Model no | Specification | Annual energy consumption | Hard floor | Carpet | Dust re-emission class |
| V8211_03 | 230V 50/60Hz 600W | A | C | E | F |
Accessories
This machine includes below accessories, please install these parts by yourself before operating.
- Telescopic tubes
- Tube socket
- Dusting brush
4.Crevice tool
5.Cleaning head

If you require any technical guidance or find that your product is not operating as intended, a simple solution can often be found in the Troubleshooting section of these instructions.
Installing your vacuum cleaner
3
Installing your Lightweight Bagless Vacuum cleaner
Bringing it all together
Unpacking
Unpacking your Vacuum cleaner
Carefully remove all packing materials including the foam base, accessories and dispose them correctly.
ASSEMBLY
Always disconnect the appliance from the mains socket before assembling or disassembling accessories.
-
First connect the tube socket with unit.
-
Insert telescopic tube into the tube socket at the front of the cleaner until you hear a click.
-
Push forward the switch on the telescope tube. Pull the tube to desired length. Then release the switch to lock the telescope tube in place
-
Attach the cleaning head to the end of the telescopic tube.
-
Assemble of part is completed. You can use the product
To remove the cleaning head and tubes, hold each piece tightly and pull firmly apart.
To remove the from the cleaner, tube socket whilst keeping the release tube socket button pressed, pull the out of the tube socket front of the cleaner and then release the button.

natural_image
Line drawing of a manual electric shaver device (no text or symbols)
natural_image
Line drawing of a mechanical device with a long rod and lever (no text or symbols)
natural_image
Close-up of a hand holding a pen or stylus, no visible text or symbols
natural_image
Simple line drawing of a pipe fitting with an arrow indicating direction (no text or symbols)
natural_image
Line drawing of a mechanical component with a pointed tip and internal fan-like structure (no text or symbols)
natural_image
Line drawing of a mechanical tool with a lever and base component (no text or symbols)If you require any technical guidance or find that your product is not operating as intended, a simple solution can often be found in the Troubleshooting section of these instructions.
Using your vacuum cleaner
4
Using your vacuum cleaner
Getting the most from your appliance
First use of vacuum cleaner
CAUTION: Always switch off the vacuum cleaner before connecting or disconnecting the hose/attachments or removing and emptying the dirt container.
IMPORTANT: The vacuum cleaner is equipped with a thermal cut-out. If for any reason the vacuum deaner does overheat, the thermostat will automatically turn the vacuum cleaner off. If this happens, switch the vacuum cleaner off and unplug from electrical socket. Remove and empty the dirt container also check the vacuum deaner for blockages. Allow the vacuum cleaner to cool for approximately 1 hour (if you have cleaned the filters, please wait 24 hours for the filters to fully dry before putting back into the machine).
If you require any technical guidance or find that your product is not operating as intended, a simple solution can often be found in the Troubleshooting section of these instructions.
Using the vacuum cleaner
Operation
Plug the appliance into the mains socket.
Press the power button on top of the appliance to switch on the appliance.
With handheld feature, you can clean from floor to ceiling.

natural_image
Line drawing of a mechanical tool or device with a handle and lever (no text or symbols)Advanced functions/use
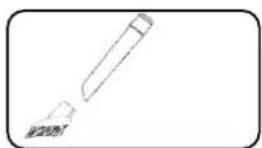
Remove the cleaning head from the tubes then attach the crevice tool to the tubes. You can also attach the crevice tool directly to the front of the cleaner until a click is heard. The crevice tool is used for narrow gaps and hard-to-reach places. Use this crevice tool to vacuum down the side of cushions, corners, edges or small spaces.

natural_image
Illustration of laboratory pipettes and a container with tubes (no text or symbols)Using on wall/curtains
Use the dusting brush by attaching it to the crevice tool to clean more delicate surfaces, e.g. curtains.
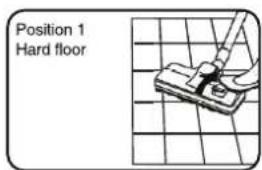
Using on carpet/floor brush
Position1: Bristles extended
for hard floors

Position2:Bristles retracted
for carpets


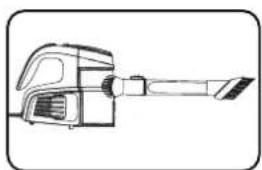
Use on the stairs
This machine can be used on stairs. just connect accessories:tube socket, crevice tool and dusting brush
natural_image
Line drawing of a mechanical device with a lever and handle (no text or symbols)or online at www.argos-support.co.uk if you still require further assistance, call one of our experts on 03 45 6 04 0 10 5
| >100% |
| >100% |
| >100% |
| >100% |
| >100% |
| >100% |
| >100% |
| >100% |
| >100% |
| >100% |
| >100% |
| >100% |
| >100% |
Care and maintenance
5
Care and maintenance
Looking after your appliance
Cleaning
Always switch off the appliance and unplug from the mains socket before carrying out any maintenance or cleaning.
Clean the outside of the appliance with a damp cloth. Dry thoroughly before use.
Never immerse the appliance in the water.
Do not use abrasive or chemical cleaning agents.
Empty the Dust Container
Empty the dust container when the dust reaches the MAX line.
Failure to do this will impair the efficiency of the cleaner.
- Press the dust release container button to remove the dust container.
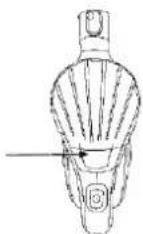
- Hold the dust over a bin container and then push the latch downward to open the cover on the bottom of the dust to allow the dust fall out to bin.

natural_image
Line drawing of a hand holding a small object, possibly a tool or device (no text or symbols present)- After empty the container, close the cover until the click sound created from the latch is heard.

If you require any technical guidance or find that your product is not operating as intended, a simple solution can often be found in the Troubleshooting section of these instructions.
Care and maintenance
Cleaning the HEPA Filter
The high efficiency particulate air (HEPA) filter is an effective system in removing almost all indoor pollutants, dust mites, pollen and mould spores.
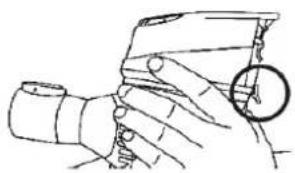
Filters require cleaning at least every 3-6 months (depending on the level of use). Don't use your vacuum cleaner without all the filters in place.
- Pull the clip on the dust cloth forward to remove the lid.
natural_image
Line drawing of a hand holding a device with a magnified circular detail (no text or symbols)-
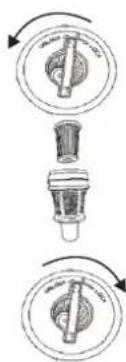
Hold the handle of the HEPA filter to rotate it anticlockwise and remove it.
-
Tap the HEPA filter over a bin to remove the dust.
-
Rotate the filter housing anticlockwise and remove it out of the dust container.
-
Wash the filter under water (max. 40 degree).
DO NOT USE DETERGENTS to clean all parts.
Leave it to dry for 24 hours or until fully dry before placing back in the vacuum cleaner.
-
Place the filter housing into the dust containerit clockwise until it locks into position.
-
Place the filter in the housing and then turn it clockwise until it locks into position.
-
Replace the dust containerberdaster
-
Attach the dust coat, the appliance until a click is heard.
or online at www.argos-support.co.uk if you still require further assistance, call one of our experts on 03 45 6 04 0 10 5
Technical Specifications
| Model Number | V8211_03 |
| Voltage | 220-240V~50/60Hz |
| Energy efficiency class | A |
| Annual energy consumption | 24.4kWh/annum |
| Carpet cleaning performance class | E |
| Hard floor cleaning performance class | C |
| Dust re-emission class | F |
| Sound power level | 80dB(A) |
| Rated input power | 600W |
If you require any technical guidance or find that your product is not operating as intended, a simple solution can often be found in the Troubleshooting section of these instructions.
Product support
6
Product support
Help is always at hand
TROUBLESHOOTING
Please check the following details before you have your appliance repaired by an authorised servicing agent.
- Vacuum cleaner does not work.
You can check if the power plug is firmly inserted into the power outlet.
And if the power switch of the appliances is on.
- Suction power becomes weak.
You can check if the brush or tube is clogged or damaged. Or check if the dust container is full or check if the filter is clogged and if the tubes are correctly attached. The possible solution is to immediately remove the obstruction. Or empty the dust container or clean the filter or reassemble the tubes.
- Vacuum cleaner is overheating
You can check if the filter is blocked. The possible solution is to clean the filter.
- Dust is coming out of the vacuum cleaner
You can check if the dust container is properly fitted to the cleaner. The possible solution is to refit the dust container to the cleaner.
If you require any technical guidance or find that your product is not operating as intended, a simple solution can often be found in the Troubleshooting section of these instructions.
Product support
Help is always at hand
Help and assistance
If you require any technical guidance or find that your wash vacuum cleaner is not operating as intended, a simple solution can often be found in the Troubleshooting section of these instructions or online at
www.argos-support.co.uk
If you still require further assistance, call one of our experts on 0345 604 0105. To help give us give you a fast and efficient service please have the following information ready:
Model Ref.
Serial number
Date of purchase

natural_image
Two empty rectangular boxes with no text, numbers, or symbolsYou can find these on the rating plate - a small information panel (usually a sticker or metal plate) on the rear of your appliance

This will be shown on your receipt
Local call rates applies*
Lines open 8am-7pm Monday to Saturday and 10am-4pm Sunday.
*Calls to Argos enquiry lines may attract a charge and set up fee from residential lines depending on your call plan/tarif. Mobile and other providers costs may vary, see www.bt.com/pricing for details.
For Security and training purposes, telephone calls to and from customer service centres maybe recorded and monitored. Calls from Republic of Ireland will attract international call charges.
or online at www.argos-support.co.uk if you still require further assistance, call one of our experts on 03 45 6 04 0 10 5
Product support

Product support
Help is always at hand

This appliance complies with the following CE directives:
2014/35/EU low voltage directive
2014/30/EU the EMC directive
2011/65/EU the ROHS directive

This is a class II appliance.
Notes on disposal:
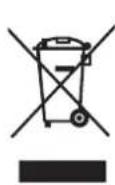
This marking indicates that this product should not be disposed with other household wastes throughout the EU. To prevent possible harm to the environment or human health from uncontrolled waste disposal, recycle it responsibly to promote the sustainable reuse of material resources. To return your used device, please use the collection systems or contact the retailer where the product was purchased. They return and can take this product for environmental safe recycling.
If you require any technical guidance or find that your product is not operating as intended, a simple solution can often be found in the Troubleshooting section of these instructions.
Product support
Help is always at hand

Call us now and activate your 12 month guarantee
Thank you for choosing Bush. Your new product is guaranteed against faults and breakdowns for 12 months. Don't forget to register it with us today so we can provide you with our best possible after-sales service and useful updates.
www.bushregistration.co.uk
FREEPHONE*
0800 597 8548
Lines are open 8am - 8pm, 365 days a year. *Calls may be recorded and monitored.
Your Bush Guarantee
This product is guaranteed for twelve months from the date of original purchase. Any defect that arises due to faulty materials or workmanship will be repaired free of charge (or if applicable the product will be replaced or the purchase price refunded) where possible during this period by the dealer from who your purchased the unit.
The guarantee is subject to the following provisions:
- The guarantee does not cover accidental damage, misuse, cabinet parts, knobs or consumable items.
- The product must be correctly installed and operated in accordance with the instructions contained in the manual.
- It must be used solely for domestic purposes. The guarantee will be rendered invalid if the product is
re-sold or has been damaged by inexpert repair.
- Specifications are subject to change without notice.
- Bush disclaim any liability for loss or damage arising from the breakdown of the product.
- This guarantee is in addition to and does not diminish your statutory or legal rights.
Important Data Protection Information
If you provide us with information about another person, you confirm that they have appointed you to act for them, to consent to the processing of their personal data including sensitive personal data and that you have informed them of our identity and the purposes (as set out in the Important Data Privacy notice displayed overleaf) for which their personal data will be processed.
You are entitled to ask for a copy of the information we hold about you (for which we may charge a small fee) and to have any inaccuracies in your information corrected.
For quality control and training purposes, we may monitor or record your communications with us.
If your personal details change, if you change your mind about any of your marketing preferences or if you have any queries about how we use your information, please let us know by contacting our Data Protection Officer, Domestic & General, Leicester House 17 Leicester Street, Bedworth, Warwickshire CV12 BJP.
Guarantor Argos Limited • 489 • 499 Avstury Bldt • Milton Keynes • MCI 2506
or online at www.argos-support.co.uk if you still require further assistance, call one of our experts on 03 45 6 04 0 10 5
Product support

BUSH
Contact:
www.argos-support.co.uk
Helpline: 0345 604 0105

- Help and Guidance
- Contents
- Safety information
- Getting to know your vacuum cleaner
- Installing your vacuum cleaner
- Using your vacuum cleaner
- Care and maintenance
- Product support
- Safety information 1
- Safety Information
- WARNINGS
- Electrical
- Getting to know your vacuum cleaner
- Ready? Let's begin...
- Accessories
- Installing your vacuum cleaner
- 3
- Installing your Lightweight Bagless Vacuum cleaner
- ASSEMBLY
- Using your vacuum cleaner
- Using the vacuum cleaner
- Operation
- Advanced functions/use
- Using on wall/curtains
- Using on carpet/floor brush
- Use on the stairs
- Care and maintenance
- 5
- Cleaning
- Product support
- TROUBLESHOOTING
- Help and assistance
- Notes on disposal:
- Call us now and activate your 12 month guarantee
- www.bushregistration.co.uk
- Your Bush Guarantee
- The guarantee is subject to the following provisions:
- Important Data Protection Information
- BUSH
Brand : BUSH
Model : V8211_03
Category : Vacuum Cleaner