L7IDPF09 - Digital photo frame Logik - Free user manual and instructions
Find the device manual for free L7IDPF09 Logik in PDF.
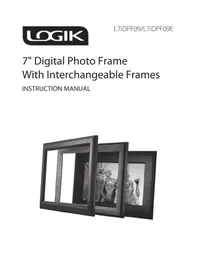


| Product Type | 7" Digital Photo Frame |
| Display | 7" Colour TFT LCD, 480x234 pixels, 16:9 ratio |
| Brightness | 130 cd/m² |
| Contrast Ratio | 150:1 |
| Supported Image Format | JPEG |
| Memory Card Slots | SD/SDHC/MMC/MS/MS Pro/xD/CF Type I |
| Max Memory Card Capacity | SD: 16GB, MMC: 2GB, MS/MS Pro: 8GB, xD: 2GB, USB: 16GB |
| USB Port | Yes (for USB flash drives) |
| Power Supply | 5V DC, 1.5A via included mains adapter |
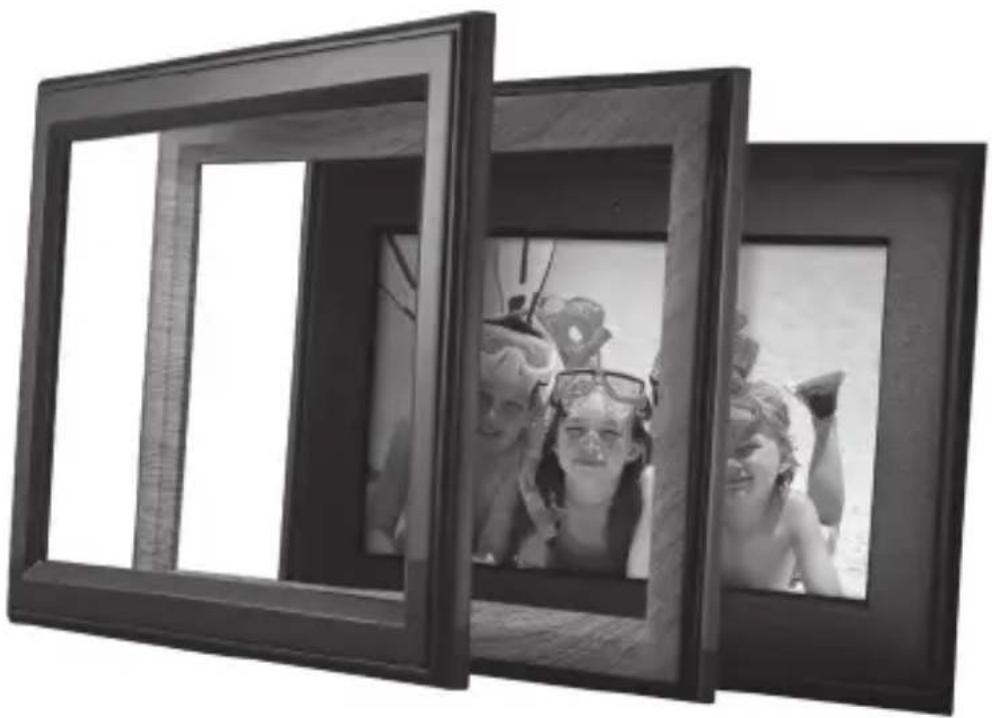
| Changeable Frames | Yes (2 included: Wood and Black plastic) |
| Stand Design | Detachable, supports portrait and landscape orientation |
| Remote Control | Included with CR2025 battery |
| OSD Languages | English, French, German, Italian, Spanish, Portuguese, Dutch, Polish |
| Slideshow Interval | Adjustable: 5s, 10s, 15s, 30s, 1min, 3min, Off |
| Transition Effects | Random, No Effect, Blind Vertical, Blind Horizontal, Wipe Up, Wipe Down |
| Image Rotation | 90° clockwise via button |
| Zoom | 150%, 200%, 25%, 50%, 100% via remote |
| Brightness Adjustment | -6 to +6 levels |
| Thumbnail Mode | Yes (for browsing photos) |
| Dimensions (with stand) | 200 x 138 x 83.7 mm |
| Weight | 340 g |
| Operating Temperature | 0°C to 40°C |
| Safety Precautions | Do not expose to moisture, do not block ventilation, use only specified accessories |
| Cleaning | Wipe with dry cloth; do not use abrasive cleaners |
| Replacement Parts Available | Yes (via Partmaster; see manual for part numbers) |
Frequently Asked Questions - L7IDPF09 Logik
User questions about L7IDPF09 Logik
0 question about this device. Answer the ones you know or ask your own.
Ask a new question about this device
Download the instructions for your Digital photo frame in PDF format for free! Find your manual L7IDPF09 - Logik and take your electronic device back in hand. On this page are published all the documents necessary for the use of your device. L7IDPF09 by Logik.
USER MANUAL L7IDPF09 Logik
7" Digital Photo Frame With Interchangeable Frames
INSTRUCTION MANUAL
Safety Warnings
When using electrical appliances, basic safety precautions should always be followed, including the following:
- Read all the instructions and retain this instruction manual.
- Ensure that all electrical connections (including the mains adapter and power cable) are properly made and in accordance with the manufacturer's instructions. Switch off and withdraw the mains adapter before making or changing connections.
- Consult your dealer if you are ever in doubt about the installation, operation or safety of your unit.
- Do not allow the unit to be exposed to dripping or splashing.
- Never store in hot or very cold areas. Recommended operating temperature is 0\~40°C.
- Do not use the unit in areas with high moisture (e.g. bathroom) or dusty areas.
- Do not place hot objects or naked flame sources such as lighted candles or night lights on or close to the unit. High temperatures can melt plastic and lead to fires.
- Do not obstruct the ventilation openings of the unit with items such as newspapers, tablecloths, curtains, etc. Overheating will cause damage and shorten the life of the unit.
- Do not handle the power cable with wet hands.
- Be careful with the LCD panels on the unit.
- Only use attachments/accessories specified by the manufacturer.
- When the unit is not in use or unattended for a long period of time, disconnect it from the mains socket.
- Do not remove any fixed cover as this may expose dangerous voltages.
- Do not continue to operate the unit if you are in any doubt about it working normally, or if it is damaged in any way - switch off, withdraw the mains adapter and consult your dealer.
- Never let anyone especially children push anything into holes, slots or any other opening on the case - this could result in a fatal electrical shock.
- Route the power cable so that it is not likely to be walked on, crushed, chafed, or subjected to excessive wear, tear or heat.
Note about LCD screen
The LCD screen is manufactured using high-precision technology. However, some tiny black points and/or bright points (red, blue or green in colour) may constantly appear on the LCD screen. These points are generated in the manufacturing process and are normal.
Contents
Safety Warnings 2
Contents.... 3
Introduction...... 4
Unpacking the Photo Frame....4
Product Overview 5
Remote Control....6
- Removing the insulating sheet of remote control....7
- Remote control operation range....7
- Battery replacement of the remote control....7
Preparations 9
- Attaching the stand 9
- Changing the frame 9
- Inserting a Memory Card or USB Flash drive ....10
- Connecting to the mains power....10
Selecting the Memory Drive.... 11
Viewing Photos and Slideshows 11
- Thumbnail Mode 11
- Rotation 12
- Zoom 12
- Adjusting the Brightness 12
Setup Menu 13
Troubleshooting 14
Specifications 15
Introduction
Thank you for purchasing this 7" Digital Photo Frame. You can display your favourite images (JPEG) directly from a memory card or a USB thumb drive without a computer. Read the following instructions for more details.
Unpacking the Photo Frame
Remove all packaging from the digital photo frame. Retain the packaging. If you dispose it please do so according to local regulations.
- Digital Photo Frame
- Instruction manual
(82-270-00460)
- Interchangeable frame x 2
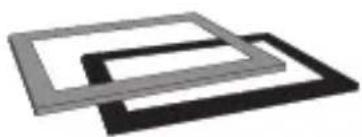
(Wood:60-270-C0405/60-270-C0302
Black: 60-270-C0401/60-270-C0302)
- Mains Adapter
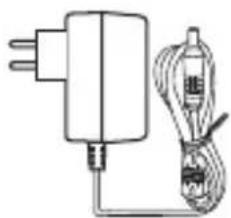
(43-111-00361)
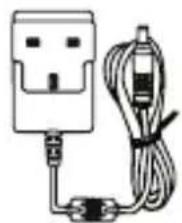
(43-111-00269)
- Photo Frame Stand
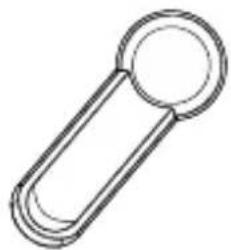
(60-270-C2802)
- Remote Control
(92-270-12080)
If items are missing or damaged, please contact partmaster (UK only).
Tel: 0870 6001 338 for assistance.
Product Overview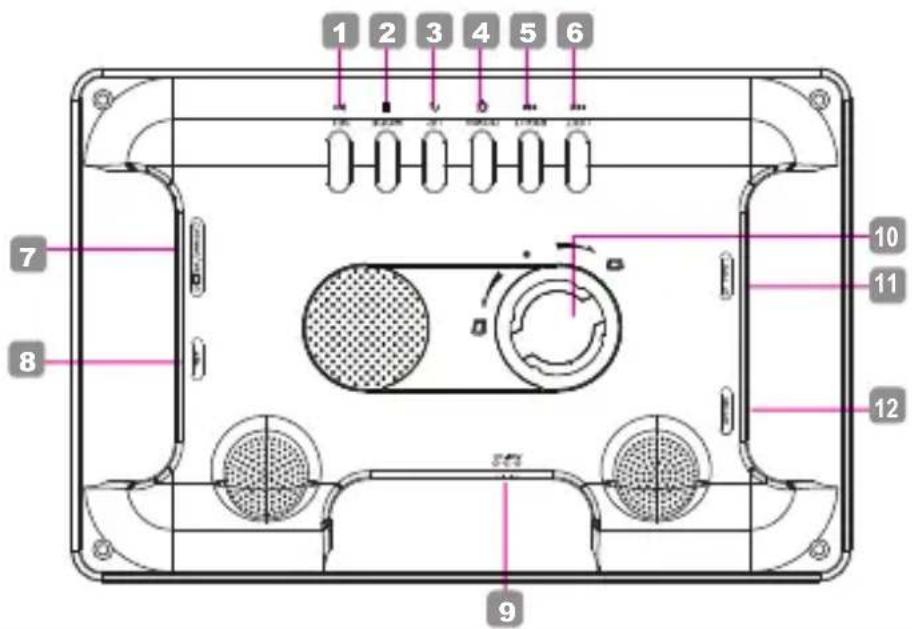
Name Description
| 1 | ▶II (Play/Pause)/SEL. button | • To start/pause the sildeshow• To confirm a setting or function |
| 2 | ■ (Stop)/MODE button | • To stop playback of slideshow• To return to the main menu |
| 3 | UP/(Rotate) button | • To move up in the menu / thumbnail / option settings• To rotate the photo by 90° clockwise |
| 4 | DOWN/(Brightness) button | • To move down in the menu / thumbnail / option settings• To adjust the brightness |
| 5 | RIGHT/(Next) button | • To move right in the menu / thumbnail / option settings• To display the next photo |
| 6 | LEFT/(Previous) button | • To move left in the menu / thumbnail / option settings• To display the previous photo |
| 7 | SD/MMC/MS/xD Slot • To accommodate SD, MMC, MS and xD cards | |
| 8 | USB Port • To accommodate the USB devices such as a portable USB flash drives or flash memory card readers | |
| 9 | DC IN Jack • To connect to the mains power | |
| 10 | Stand receptacle • To attach the supplied stand | |
| 11 | CF Type I Slot • To accommodate CF Type I cards | |
| 12 | Power ON/OFF switch • To turn the photo frame on and off | |
Remote Control
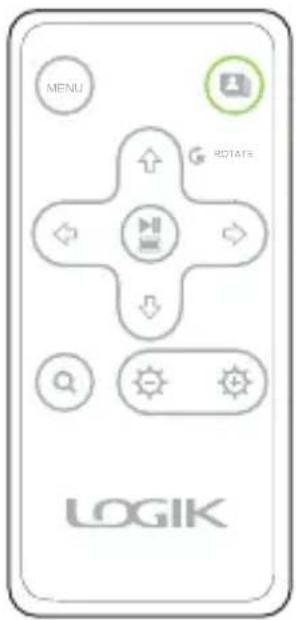
 | Menu: Press to access the menu mode |
 | Slideshow: Press the button to begin a photo slideshow |
 ROTATE ROTATE | Up: Press to move up in the menu / thumbnail / option settingsRotate: Press to rotate the photo by 90° clockwise |
 | Left/Previous: Press to move left in the menu / thumbnail / option settings |
 | Play/Pause/Confirm: Press to start or pause the slideshowPress to confirm selections in menu or settings mode |
 | Right/Next: Press to move right in the menu / thumbnail / option settings |
 | Down: Press to move down in the menu / thumbnail / option settings |
 | Zoom: Press to zoom into an image during slideshow mode |
 | Brightness: Increase/decrease the brightness level |
Remote Control
Removing the insulating sheet of remote control
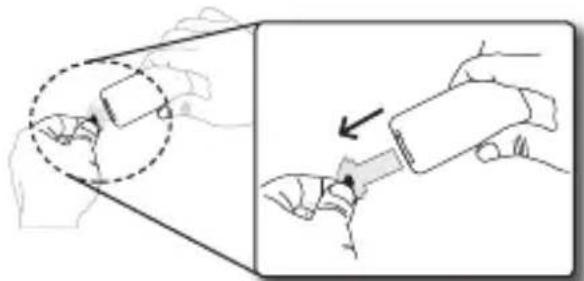
Remote control operation range
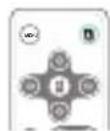
- Remove the insulating plastic sheet from the remote control when used for the first time. It is located at the bottom back side of the remote control.
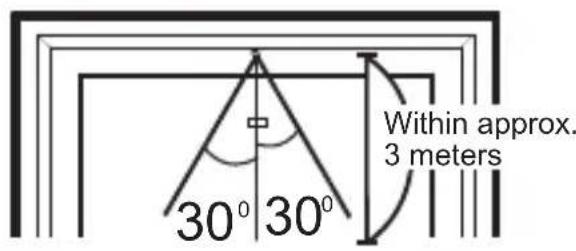
- Point the remote control at the photo frame no more than 3 meters from the remote control sensor on the photo frame and within 60 degrees in front of the photo frame. The operating distance may vary by the brightness of the room.
Battery replacement of the remote control
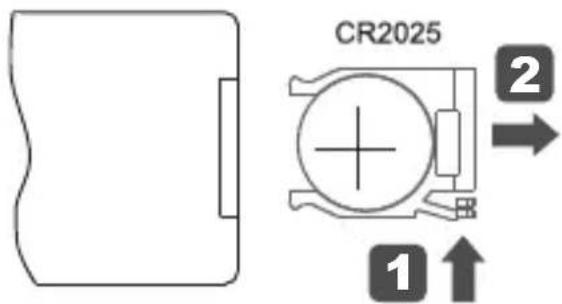
- If the remote control fails to work even when it is operated near the photo frame, replace the battery.
- Press and hold the battery release tab in the direction of arrow 1.
- Pull out the battery holder completely in the direction of arrow 2 as shown on the left.
- Remove the old battery and place a new one in the holder.
- Push the holder back into the remote control.

Use a 3V lithium battery (No. CR2025 or equivalent).
Remote Control

• Be careful of your fingernails when pressing and holding the battery release tab. - Improper or incorrect use of batteries may cause corrosion or leakage, which could result in fire, personal injury, or property damage. - Install batteries correctly, following the polarity (+ and -) indications in the battery compartment. - When batteries are exhausted, the remote will not function. - Use only the types of batteries indicated in this manual. - Do not dispose of used batteries as household waste; dispose of them in accordance with local regulations. - Small button cell batteries, such as the one used in the remote for this photo frame, can be easily swallowed by young children and are dangerous. Keep loose button cells away from young children and ensure the battery holder tray is secure in the remote. Seek medical advice if you believe a cell has been swallowed.
IMPORTANT NOTE:
SPENT OR DISCHARGED BATTERIES MUST BE RECYCLED OR DISPOSED OF PROPERLY IN COMPLIANCE WITH ALL APPLICABLE LAWS. FOR DETAILED INFORMATION, CONTACT YOUR LOCAL COUNTY SOLID WASTE AUTHORITY.
Preparations
Attaching the stand
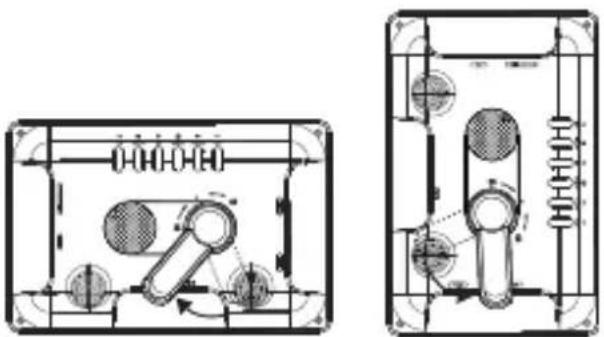
Landscape viewing Portrait viewing
Changing the Frame
![graph TD A["Step (A)"] --> B["Step (B-1)"] B --> C["Step (B-2)"]](/content/2026/05/968693/images/8435b2783432ce9f4974328f32ae8966d75dc72cbcd7f280c8b645fc891ddf64.jpg)
- Insert the round end of the stand into the receptacle.
- Rotate clockwise or counterclockwise as shown until the stand locks in place.

The photo frame can be placed vertically or horizontally for either landscape or portrait display.
A. Removing the Interchangeable Frame
Release all the hooks in the edge of the interchangeable frame by pulling up the interchangeable frame using your fingers.
B. Installing the Interchangeable Frame
- Hold the interchangeable frame and place it on the photo frame.
- Press the interchangeable frame for all the hooks to be fixed in place. Now the interchangeable frame is installed successfully.
Inserting a Memory Card or USB Flash drive
This photo frame can only play images (JPEG). If files in other formats are played, please use your computer to convert the images to a readable format.

Do not attempt to connect SD/MMC/MS/xD Slot and CF Type I Slot at the same time, or it will cause the photo frame work improperly. If this happens, please remove one card and restart the power on the photo frame.
Inserting Memory Card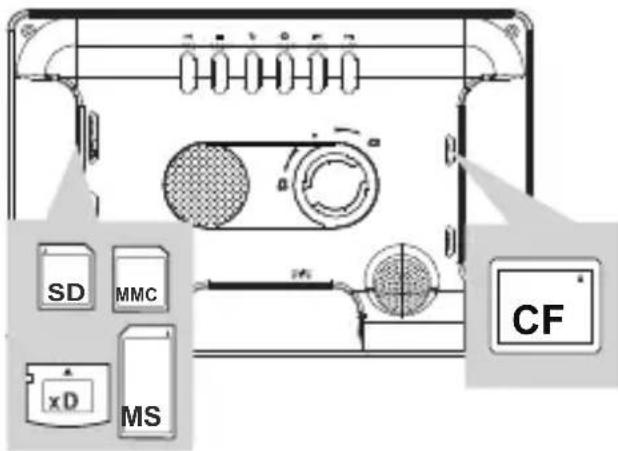
- Insert your memory card into the appropriate slot according to the orientation marked on the photo frame.

- To remove SD/MMC/MS/xD card or CF cards, pull the card straight out.
- Some of the newer higher capacity cards may not be compatible with this frame.
Inserting USB flash drive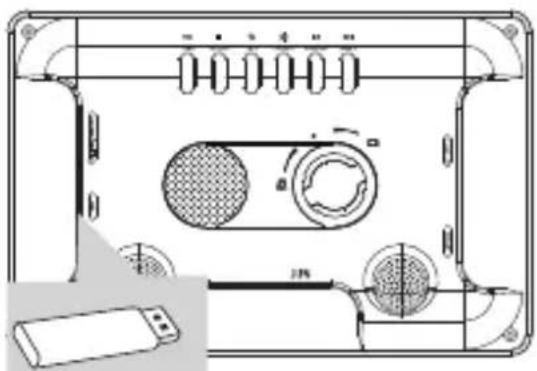
- Insert a USB drive to the USB port.

This device can only display one storage media's contents at a time. If more than one storage media is used, please refer to "Selecting the Memory Drive" section on page 11.
Connecting to the mains power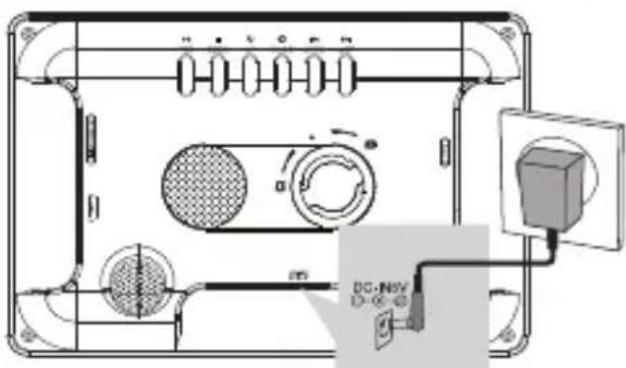
GB-10
- Connect the supplied mains adapter (5V, 1.5A) to the DC IN jack and then plug the other end to the mains socket.
- Switch the power to "I" marking position to turn on the photo frame after inserting a memory card or USB drive.
Selecting the Memory Drive
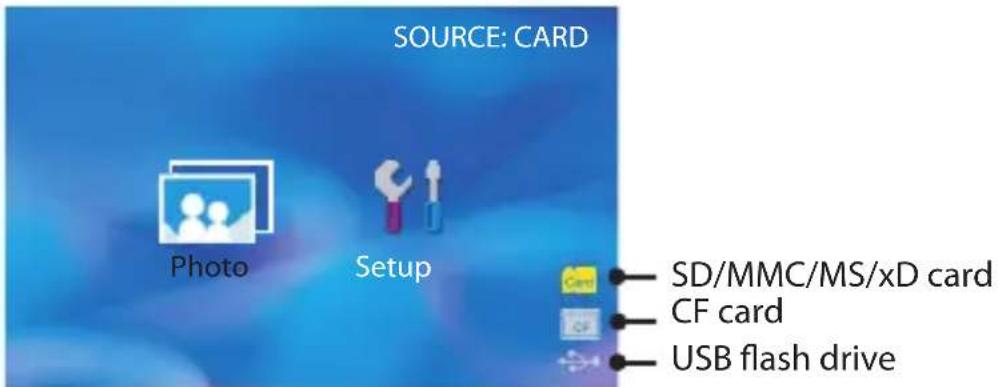
- Press button to display the main menu screen.
- Press or button on remote control to select SD/MMC/MS/xD card (), CF card () or USB flash drive () in the main menu. Then press button to confirm.
Viewing Photos and Slideshows
- Selecting a memory drive in the main menu as described in "Selecting the Memory Drive"
- Press or button to select "Photo" in the main menu, then press button.
- The slideshow will start to play. Or press button to begin slideshow directly.
- To pause the slideshow, press ⏻ button.

- When the photo frame does not operate for few seconds at the main menu, the screen saver will be activated. Press any button to return to the main menu.
- Displaying pictures bigger than 480 x 234 will take a longer time for loading.
Thumbnail Mode
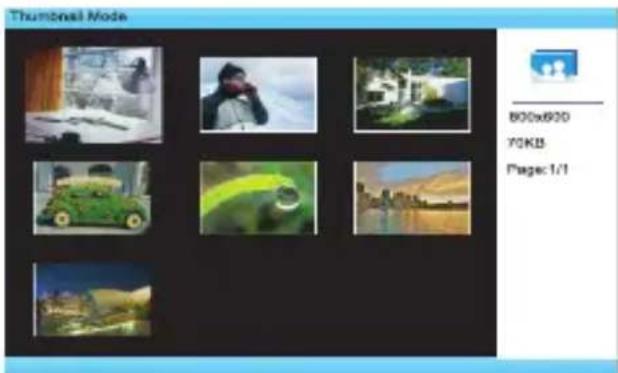
- Press the MODE button on the photo frame during the slideshow to enter the thumbnail mode.
- Press the arrow buttons to select the photo you wish to play, then press the OK button.
- The slideshow starts to play with the selected photo.

- If the thumbnail has more than one page, press the ▶ button repeatedly to turn to the next page. Press the ◀ button repeatedly to return to the previous page. • Refer to the Setup Menu section on Page 13 to set up the slideshow settings.
- Press the MODE button again to return to the main menu.
Rotation
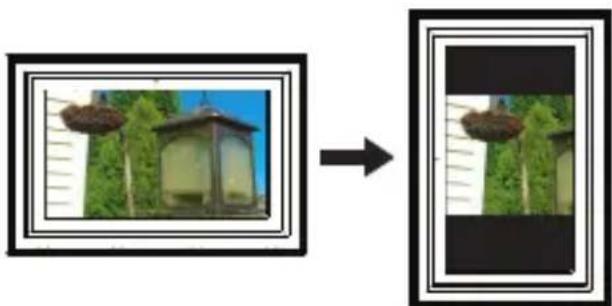
Press the arrow buttons to select the photo you wish to rotate, then press the ROTATE button on the photo frame to rotate by 90° in clockwise direction.

• Each press of the button will rotate the photo by 90° in a clockwise direction. - All the rotate effects will be cancelled when returning to the main menu.
Zoom



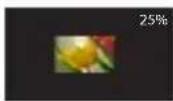
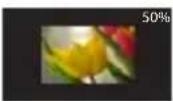

Press the arrow buttons to select the photo you wish to zoom, then press the ZOOM button on the remote control to zoom in or out of the displayed photo.

• Each press of the button will zoom the photo by 150%, 200%, 25%, 50%, 100%. - Press the PLAY button repeatedly to start the slideshow.
Adjusting the Brightness
- Press the BRIGHTNESS button on the remote control to increase or decrease the brightness by among -6~+6.
GB-12
Setup Menu
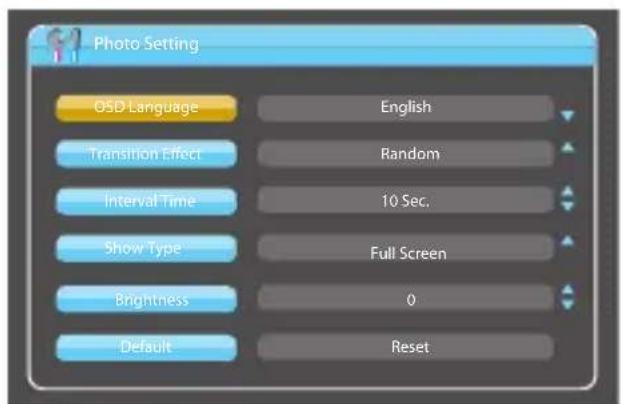
- Press button to enter the Main Menu.
- Press or button to select "Setup" from the main menu, then press button.
- Press or to select an item in OSD menu, and then press or or to select an item from the sub-menu, as shown on the below table.
- Press to confirm.

To leave the Setup Menu, press ⏻ button again.
| OSD menus Sub-menus Description of operations | ||
| OSD Language English, Français, Deutsch, Italiano, Español, Português, Nederlands, Polski | English, Français, Deutsch, Italiano, Español, Português, Nederlands, Polski | Set up the language in which the OSD menu is shown on your screen. |
| Transition Effect Random, No Effect, Blind Vertical, Blind Horizontal, Wipe Up, Wipe Down | Random, No Effect, Blind Vertical, Blind Horizontal, Wipe Up, Wipe Down | Set up the style of transition. |
| Interval Time 5 Sec., 10 Sec., 15 Sec., 30 Sec., 1 Min., 3 Min., Off | 10 Sec., 30 Sec., 1 Min., 3 Min., Off | Set up the interval time for slideshow. |
| Show Type Original Select | Select | "Original" for playing a conventional aspect ratio of images. Black bands appear or left and right screen with a landscape viewing or top and bottom with a portrait viewing. |
| Full Screen | Select "Full Screen" to play the photos in a full screen size. (If the non 16:9 images is displayed, it will cause the image distortion when selecting the "Full Screen"). | |
| Brightness | -6, -5, -4, -3, -2, -1, 0, +1, +2, +3, +4, +5, +6 | Adjust the value of Brightness. |
| Default | Reset | Select Reset to restore to the default settings. |
Troubleshooting
No power
- Check to make sure the mains plug is plugged into the mains sockets.
- Make sure there is power in the mains socket.
Unable to view photos on the Digital Photo Frame
- Not all JPEG files are compatible. Please open the files in the computer and resave them as JPEG files and then try to playback in the photo frame.
- Check if the memory card is compatible.
If the picture display is distorted or cannot display properly
- Go to the setup menu, then the panel setting and change the aspect ratio to match your photo. Original or Full Screen.
If picture display seems slow
- Use lower resolution pictures.
The photo frame does not work properly
- Please switch off the photo frame and on again.
Specifications
| Display | 7" Colour TFT LCD Panel |
| View Area | 480 X 234 pixels, 16:9 ratio |
| Button (6) Left, Right | Down / Brightness, Up / Rotate, Stop, Play/Pause/Select |
| Brightness | 130 |
| Contrast | 150:1 |
| Changeable Frame | Yes |
| Stand Design | Detachable (for Portrait and Landscape) |
| Memory Card Slot | SD/ SDHC/ MMC/ MS/ MS Pro/ xD/ CF type I |
| Supported Max. Memory Card | SD (16G)MMC (2G)MS/ MS Pro (8G)xD (2G)USB (16G) |
| File Format | JPEG |
| Power Adapter | 5V / 1.5A |
| OSD Language | English, French, German, Italian, Spanish, Portuguese, Dutch, Polish |
| Dimensions 200 x 13 | 2.8 x 83.7 mm (with stand) |
| Weight | 340g |
Visit Partmaster.co.uk today for the easiest way to
buy electrical spares and accessories.
With over 1 million spares and accessories available we can deliver direct to your door the very next day.
Visit www.partmaster.co.uk
or call
0870 6001 338
(UK customers only)
Calls charged at National Rate.
| Note: If you require a replacement for any of the items listed below, please quote their corresponding part numbers: | |
| Instruction Manual 82-270-00460 | |
| Remote Control 92-270-12080 | |
| Mains Adapter | For EU: 43-111-00361For UK: 43-111-00269 |
| Photo Frame Stand 60-270-C2802 | |
| Additional interchangeable frames (Wood, Black) | Wood: 60-270-C0405/60-270-C0302 |
| Black: 60-270-C0401/60-270-C0302 | |
This symbol on the product or in the instructions means that your electrical and electronic equipment should be disposed of at the end of its life separately from your household waste. There are separate collection systems for recycling in the EU.
For more information, please contact the local authority or your retailer where you purchased the product.


- DIGITAL PHOTO FRAME WITH INTERCHANGEABLE FRAMES
- SAFETY WARNINGS
- NOTE ABOUT LCD SCREEN
- CONTENTS
- INTRODUCTION
- UNPACKING THE PHOTO FRAME
- REMOTE CONTROL
- REMOVING THE INSULATING SHEET OF REMOTE CONTROL
- REMOTE CONTROL OPERATION RANGE
- BATTERY REPLACEMENT OF THE REMOTE CONTROL
- IMPORTANT NOTE
- PREPARATIONS
- ATTACHING THE STAND
- CHANGING THE FRAME
- REMOVING THE INTERCHANGEABLE FRAME
- INSTALLING THE INTERCHANGEABLE FRAME
- INSERTING A MEMORY CARD OR USB FLASH DRIVE
- SELECTING THE MEMORY DRIVE
- VIEWING PHOTOS AND SLIDESHOWS
- THUMBNAIL MODE
- ROTATION
- ZOOM
- ADJUSTING THE BRIGHTNESS
- SETUP MENU
- TROUBLESHOOTING
- NO POWER
- UNABLE TO VIEW PHOTOS ON THE DIGITAL PHOTO FRAME
- IF THE PICTURE DISPLAY IS DISTORTED OR CANNOT DISPLAY PROPERLY
- IF PICTURE DISPLAY SEEMS SLOW
- THE PHOTO FRAME DOES NOT WORK PROPERLY
Brand : Logik
Model : L7IDPF09
Category : Digital photo frame