004-666 - Saw Meec Tools - Free user manual and instructions
Find the device manual for free 004-666 Meec Tools in PDF.


| Product Type | Circular Saw |
| Model | 004-666 |
| Brand | Meec Tools |
| Power Source | Electric Corded |
| Motor Power | 1400 W |
| Blade Diameter | 184 mm (7-1/4 in) |
| Arbor Size | 20 mm |
| Max Cut Depth at 90° | 60 mm |
| Max Cut Depth at 45° | 40 mm |
| No-Load Speed | 4800 RPM |
| Weight | 4.5 kg |
| Dimensions (L x W x H) | 320 x 250 x 280 mm |
| Power Cord Length | 3 m |
| Blade Guard | Retractable, spring-loaded |
| Depth Stop | Adjustable with scale |
| Bevel Angle | 0° to 45° with positive stops |
| Dust Extraction Port | 35 mm diameter |
| Spindle Lock | For easy blade change |
| Overload Protection | Automatic shutdown |
| Soft Grip Handle | Ergonomic, anti-slip |
| On/Off Switch | Double pole safety switch |
| Maintenance | Regular cleaning of vents; carbon brush replacement after ~100 hrs |
| Spare Parts Available | Blade, brushes, power cord, switch |
| Included Accessories | Blade, wrench, parallel guide |
Frequently Asked Questions - 004-666 Meec Tools
User questions about 004-666 Meec Tools
0 question about this device. Answer the ones you know or ask your own.
Ask a new question about this device
Download the instructions for your Saw in PDF format for free! Find your manual 004-666 - Meec Tools and take your electronic device back in hand. On this page are published all the documents necessary for the use of your device. 004-666 by Meec Tools.
USER MANUAL 004-666 Meec Tools
natural_image
Exterior view of a Meec Tool's metal cutting machine with visible blades and wheels (no text or symbols on the machine itself)
SE BYGGSÄG
Bruksanvisning i original
Operating instructions
(Translation of the original instructions)
Important! Read the user instructions carefully before use.
Save them for future reference.
Värna om miljön!
Care for the environment!
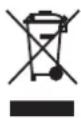
Must not be discarded with household waste! This product contains electrical or electronic components that should be recycled. Leave the product for recycling at the designated station e.g. the local authority's recycling station.
Jula reserves the right to make changes. In the event of problems, please contact our customer service.
www.jula.com
Tillverkare/ Produsent/ Produenci/ Manufacturer
Jula AB, Box 363, 532 24 SKARA
Distributör/ Distributør/ Dystrybutor/ Distributor
Jula Poland Sp. z o.o., ul.
This product was CE marked in year -18
natural_image
Close-up of an electric motor with visible cooling fins and mounting base (no text or symbols)2
natural_image
Close-up of a mechanical component with bolts and metal frame (no visible text or symbols)3
natural_image
Close-up of a mechanical device with a black cylindrical component and control panel (no visible text or symbols)4
natural_image
Close-up of a mechanical assembly with a black cylindrical component mounted on a metal base (no visible text or symbols)5
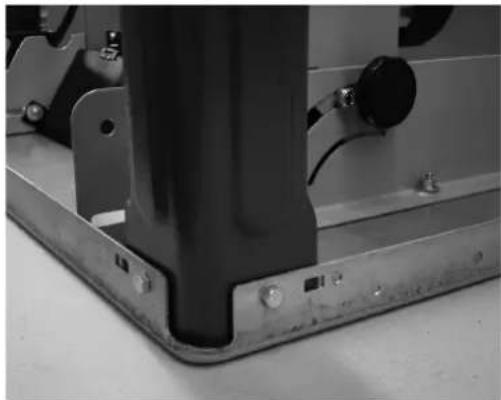
natural_image
Close-up of a mechanical assembly with metal frame and mounting bracket (no visible text or symbols)6
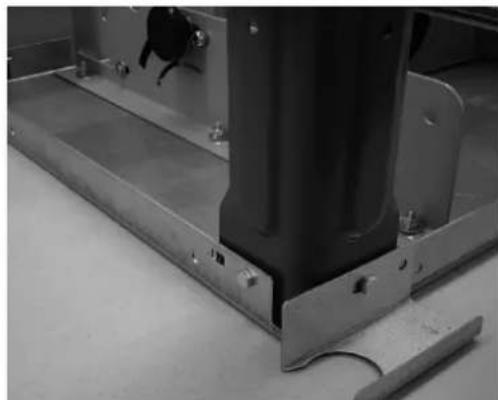
natural_image
Close-up of a metallic structural component with bolts and mounting brackets (no visible text or symbols)7
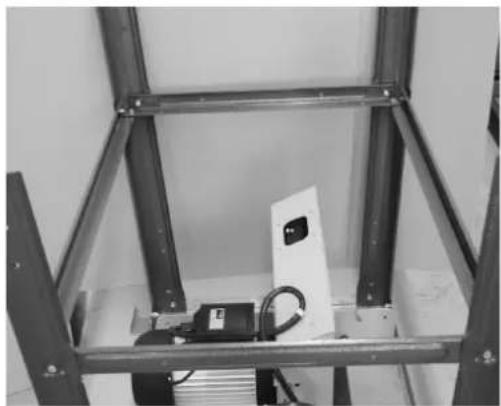
natural_image
Interior view of a metal frame structure with a small electronic device and cable (no visible text or symbols)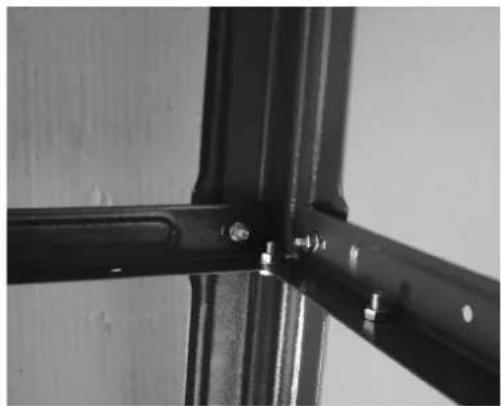
natural_image
Close-up of a metal bracket with bolts and screws, no visible text or symbols8
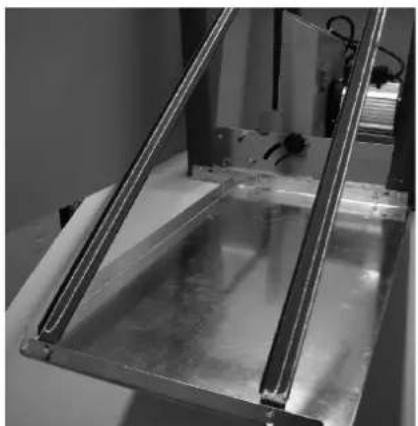
natural_image
Close-up of a metallic mechanical component with metal framing and internal structure (no visible text or symbols)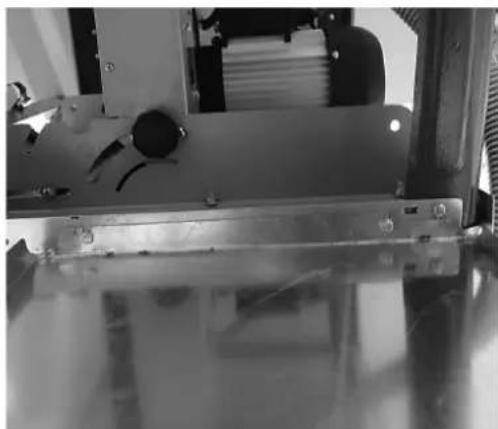
natural_image
Close-up of a mechanical assembly with metallic components and mounting holes (no visible text or symbols)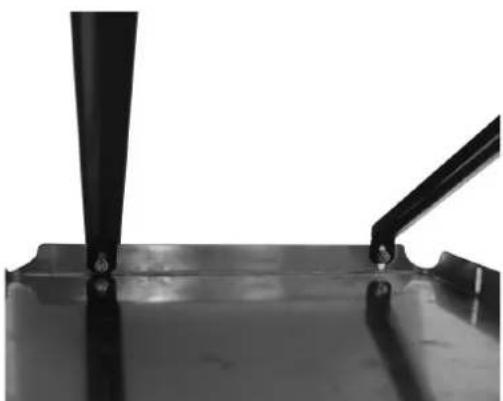
natural_image
Close-up of a metallic metal component with two protruding rods and a pointed tip (no text or symbols visible)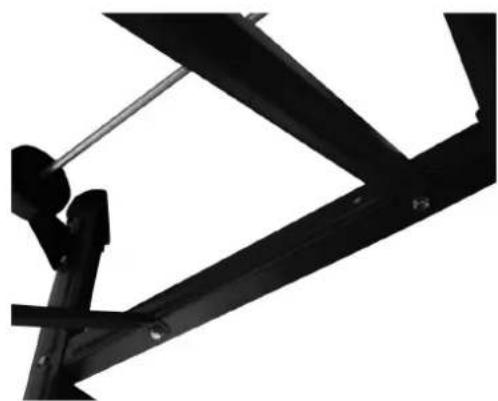
natural_image
Silhouette of a person using a lever mechanism against a white background (no text or symbols)9
natural_image
Close-up of a black metal pipe fitting mounted on a white base plate (no text or symbols visible)10
natural_image
Mechanical lifting device with two pulleys and a lever (no text or symbols visible)11
natural_image
Mechanical assembly with metal frame and mounted components (no visible text or symbols)12
natural_image
Close-up of a black metal structural component with four arms and a coiled cable (no text or symbols visible)13
natural_image
Close-up of a mechanical disc assembly with visible teeth and central hub (no text or symbols)3-8 mm
natural_image
Technical line drawing of a mechanical assembly with spring and nut components (no text or symbols)14
natural_image
Close-up of a metallic cutting board with a serrated edge and holes, no visible text or symbols15
natural_image
Close-up of a white plastic mechanical component with a cylindrical protrusion and a curved cutout (no text or symbols visible)16
natural_image
Interior view of a mechanical machine with coiled tubing and internal components (no visible text or symbols)17
natural_image
Close-up of a black bicycle leg structure with visible brackets and mounting feet (no text or symbols)18
natural_image
Mechanical assembly frame with black frame and visible wiring (no text or symbols)19
natural_image
Close-up of a mechanical device with a metallic handle and wheels (no visible text or symbols)20
natural_image
Technical line drawing of a mechanical assembly with mounting flanges and brackets (no text or symbols)21
22
natural_image
Black plastic sheet metal plate on a white table with a white air conditioner cover in the background (no text or symbols visible)23
natural_image
Close-up of a white electronic device casing with black plastic components and a coiled cable (no visible text or symbols)24
natural_image
Close-up of a hand using a tool to clean or adjust a circular component, with no visible text or symbols.m = 311
natural_image
Industrial machine with a large gear and circular component, no visible text or symbolsSÄKERHETSANVISNINGAR
SÄKERHETSANVISNINGAR
SIKKERHET PÅ ARBEIDSSTEDET
BEZPIECZEŃSTWO W MIEJSCU PRACY
GENERAL SAFETY INSTRUCTIONS
When using power tools the following safety precautions must be observed to avoid electric shock, injury and fire.
WORKPLACE SAFETY
- Keep the work area clean and well lit. Cluttered and poorly lit work areas can lead to accidents.
- Do not use the power tool in explosive environments, such as in the vicinity of flammable liquids, gases or dust. Power tools produce sparks that can ignite dust and gas.
- Keep children and unauthorised persons at a safe distance when working with power tools. If you are disturbed by unauthorised persons you could lose control of the tool.
ELECTRICAL SAFETY
- The plug on the power tool must match the power point. Do not modify the plug. Do not use adapter plugs together with earthed power tools. Non-modified plugs and matching power points reduce the risk of electric shock.
- Avoid body contact with earthed surfaces such as pipes, radiators, cookers and refrigerators. There is an increased risk of electric shock if your body is earthed.
- Do not expose the power tool to rain or moisture. There is a greater risk of electric shock if water gets into a power tool.
- Do not abuse the power cord or use it to carry or hang up the power tool, nor to pull the plug out of a power point. Keep the power cord away from heat, oil, sharp edges and moving machine parts. Damaged or tangled cords increase the risk of electric shock.
- When you working with a power tool outdoors only use extension cords intended for outdoor use. Cords intended for outdoor use reduce the risk of electric shock.
- Use a residual-current device if it is not possible to avoid using the power tool in damp conditions. Using an RCD reduces the risk of electric shock.
PERSONAL SAFETY
- Pay attention to what you are doing and use your common sense. Do not use the power tool if you are tired or under the influence of drugs, alcohol or medication. A moment of inattention can result in serious personal injury when working with a power tool.
• Always wear personal safety equipment and safety glasses. Depending on the type of power tool and how it is used, safety equipment such as dust masks, non-slip safety shoes, safety helmets and ear protection reduce the risk of personal injury. - Avoid accidental starting. Check that the power tool is switched off before plugging it into a power point and/or connecting or removing the battery, picking up or carrying the tool. Carrying a power tool with your finger on the switch or plugging a power tool that is switched on into a power point can cause accidents.
-
Remove all Allan keys/spanners etc. before switching on the power tool. A tool or key in a rotating component can result in personal injury.
-
Avoid awkward postures. Always maintain a firm footing and good balance. This makes it easier to control the power tool in unexpected situations.
- Wear suitable work clothes. Do not wear loose-fitting clothing or jewellery. Keep your hair, clothing and gloves away from moving parts. Loose clothes, long hair and jewellery can get caught in rotating parts.
- When power tools are used with dust extraction equipment, make sure that this equipment is properly connected and used correctly. Using a dust extractor reduces the risks associated with dust. Correct use and handling of power tools
- Do not overload the power tool. Use the right power tool for the actual job. With the right power tool you can do the work more easily and safely within the given power range.
- Do not use a power tool with a defective power switch. A power tool that cannot be switched on or off is dangerous and must be repaired.
- Unplug from the power point and/or remove the battery before adjusting, changing accessories or putting the power tool away. This will prevent unintentional starting of the power tool.
- Store power tools out of the reach of children. Do not allow the power tool to be used by persons who are not familiar with it, or who have not read these instructions. Power tools are dangerous if used by inexperienced persons.
- Look after the power tool carefully. Check that all moving parts work perfectly and do not jam, and that no parts are broken or damaged. Repair all damaged parts before using the power tool. Many accidents are caused by poorly maintained power tools.
- Keep cutting tools sharp and clean. Carefully maintained cutting tools with sharp edges do not jam as easily, and are easier to control.
- Use the power tool, accessories and tool inserts etc. in accordance with these instructions. Take into account the working conditions and the work that is to be done. If the power tool is used in a way it is not intended to be used this can result in dangerous situations.
SERVICE
The tool must only be repaired by qualified personnel using original spare parts. This ensures that the power tool remains safe to use.
SAFETY INSTRUCTIONS FOR TABLE SAWS
- Do not stand on the power tool. Serious personal injury can occur if the power tool tips over or if you accidentally come into contact with the blade.
- Check that the blade guard is working properly. Adjust the blade guard so that it is flush with the workpiece when sawing. Never lock the blade guard in the open position.
- Do not put your hand behind the saw blade to hold the workpiece, to remove sawdust, or for any other reason. Keep your hands away from a rotating saw blade.
• Always move the workpiece towards the rotating blade. Otherwise there is a risk of kickback if the saw blade fastens in the workpiece. - Keep the handles clean, dry and free from oil and grease.
Grease or oil on handles makes them slippery and can cause you to lose control.
- Remove adjusting tools and sawdust etc. from the table before starting the power tool. Small pieces of wood or other objects can be thrown at high speed towards the operator if they come into contact with the rotating saw blade.
- Only saw one workpiece at a time. Putting workpieces on or against each other during the sawing can block the saw blade.
• Always the parallel or mitre fence. This improves precision and reduces the risk of the saw blade jamming. - Use the power tool for recessing and jointing only with a suitable guard (e.g. tunnel guard).
- Do not use the power tool for cutting slots (slots that end in the workpiece).
- Only use the power tool for the materials it is intended to be used for. Otherwise this can overload the power tool.
- If the saw blade get jammed switch off the power tool and hold the workpiece firmly in position until the blade has stopped. To avoid kickback do not move the workpiece until the blade has come to a complete stop. If the blade has jammed clear the blockage before starting the power tool again.
- Do not use blunt, cracked, deformed or damaged saw blades. Saw blades with blunt or incorrectly aligned teeth cause as a result of a narrow kerf increased friction, jamming of the saw blade and kickback.
- Wear safety gloves when fitting saw blades. Touching the saw blade can result in a risk of personal injury.
• Always use the correct size of saw blade with the right centre hole (e.g. diamond or round). Saw blades - that do not fit properly in the saw have an eccentric rotation and can cause you to lose control of the saw.
- Do not use high-alloy, high-speed steel saw blades (HSS). These saw blades break easily.
- Do not touch the saw blade after working until it has cooled. The saw blade gets very hot when in use.
- Never use the power tool without an insert plate. Replace defective insert plates. Only use insert plates in good condition, otherwise there is a risk of damaging the saw blade.
- Check the power cord at regular intervals and if damaged have it repaired at an authorised service centre for Bosch power tools. Replace damaged extension cords. This ensures that the power tool remains safe to use. Store the power tool in a safe place when not in use. The storage area must be dry and lockable. This will keep the power tool safe and prevent it from being used by unauthorised persons.
- Never leave the power tool until it has come to a complete stop. The blade continues to rotate after the tool is switched off and can cause personal injury.
- Do not use a power tool with a defective power cord. Do not touch a damaged power cord; unplug it from the power point if it gets damaged when working. Damaged power cords increase the risk of electric shock.
Symbols
The following symbols provide guidance for how to use your power tool. Make sure you understand the symbols and their significance.
 | Read the instructions. |
 | Wear safety glasses and ear protection. |
 | Wear a breathing mask. |
 | Maximum cutting capacity. |
 | Thickness of riving knife |
 | Circular saw blade data |
 | Approved in accordance with the relevant EU directives. |
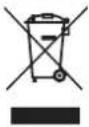 | Recycle as electrical waste. |
TECHNICAL DATA
| Rated voltage 400 V | ~50 Hz |
| Power consumption P1 2800 W | |
| Work mode S 6/40% | |
| Speed 2800 rpm | |
| Safety class I | |
| Motor guard Yes | |
| Undervoltage protection | Yes |
| Table size | 800 x 550 mm |
| Table size extended | 950 x 800 mm |
| Table height with base | 800 mm |
| Saw blade ∅315 x 30 x 3.0 Z24 | |
| Vertical adjustment | 90°/45° 0–83/0–49 mm |
| Angularity | 90°–45° |
| Cutting speed | 46 m/s |
| Length template | 580 mm |
| Weight | 48 kg |
| Sound pressure level* | LpA equ: 102.5 dB(A), K=4 dB |
| Sound power level* | LwA: 112.4 dB(A), K=4 dB |
* In operation
Always wear ear protection.
The declared vibration and noise value, which has been measured by a standardised test method, can be used to compare different tools with each other and for a preliminary assessment of exposure. The measurement values have been determined in accordance with EN 61029-2-1:2012.
WARNING!
The actual vibration and noise level when using power tools may differ from the specified maximum value, depending on how the tool is used and the material. It is therefore necessary to determine which safety precautions are required to protect the user, based on an estimate of exposure in actual operating conditions (taking into account all stages of the work cycle, e.g. the time when the tool is switched off and when it is idling, in addition to the start-up time).
DESCRIPTION
Package contents
- Table saw
• Length stop with angle bar
• Cross angle indicator - Blade guard with screw and wing nut
• Key - Pusher
- Table extension
• 2 table extension supports -
2 castor units
-
Blade key
- Lever
- Extraction hose and clip
- Bag
- Instructions
- Saw blade ∅ 315 x 30 x 3.0 Z24
ASSEMBLY
Carefully remove all the delivered parts from the packaging. Remove all packaging material from the power tool and the supplied accessories. Check that the packaging material under the motor block has been removed.
- Place the table plate on a workbench.
FIG. 1
NOTE:
Remove the packaging material under the motor.
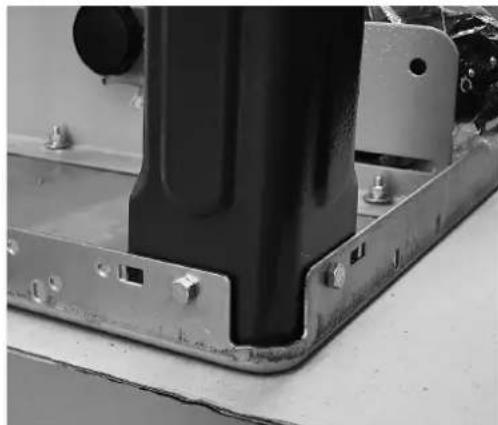
- Fit the leg in the table plate with two hex screws M6 x 16, two washers and two nuts M6. Tighten the screws by hand.
FIG. 2
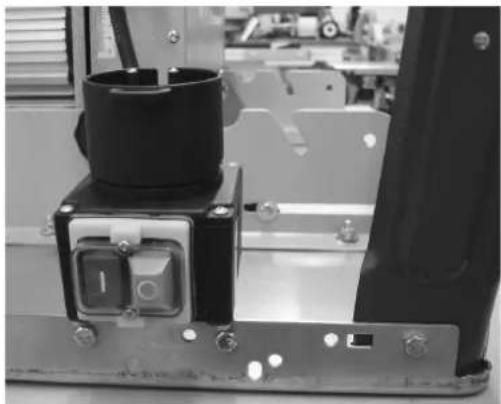
- Fit the power switch in the table plate with two hex screws M6 x 16, two washers and two nuts M6.
FIG. 3
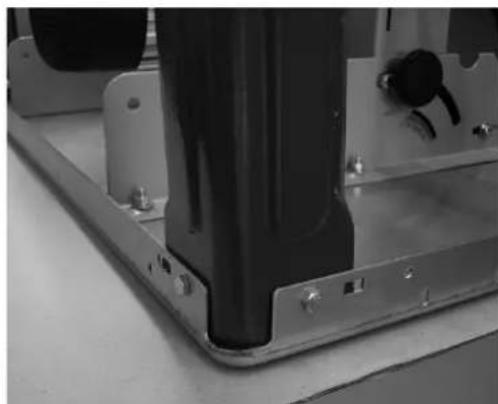
- Fit each leg in the table plate with two hex screws M6 x 16, two washers and two nuts M6. Tighten the screws by hand.
FIG. 4
- Fit the leg in the table plate with two hex screws M6 x 16, two washers and two nuts M6. Tighten the screws by hand.
FIG. 5
- Fit the leg in the table plate with two hex screws M6 x 16, two washers and two nuts M6. Tighten the screws by hand.
FIG. 6
- Fit two longitudinal bars and two crossbars in the legs with twelve hex screws M6 x 16, twelve washers 6 and twelve hex nuts M6. Tighten the screws by hand.
FIG. 7
- Fit the extension plate with two rods in the table place and the crossbar with six hex screws M6 x 16, six washers and six hex nuts M6. Tighten the screws by hand.
FIG. 8
EN
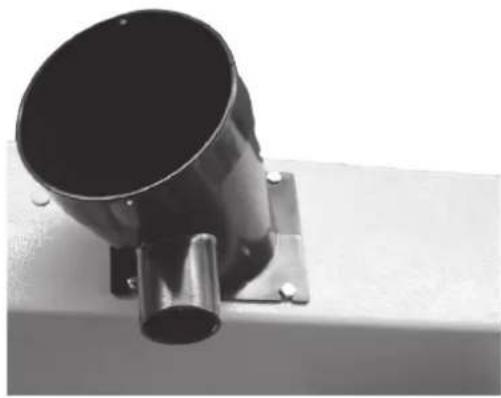
- Fit the extraction sleeve on the lower saw blade guard with four hex screws M4 x 10.
FIG. 9
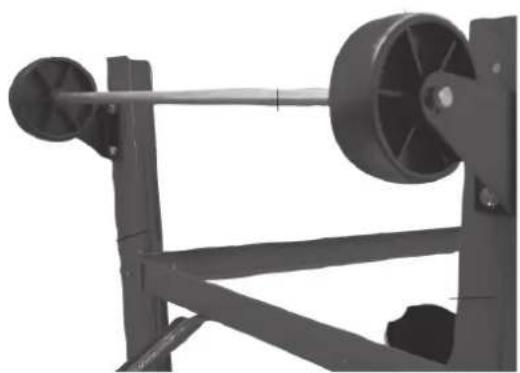
- Fit the roller on the back legs with four hex screws M6 x 16, four washers and four nuts M6. Tighten the screws by hand.
FIG. 10
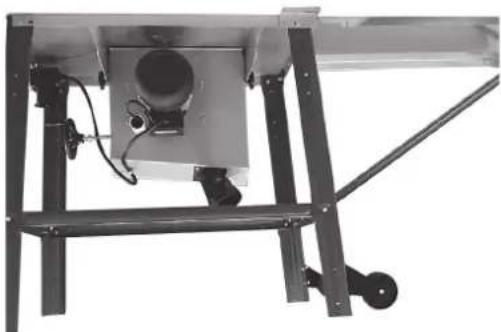
- Place the machine on its feet and firmly tighten all bolts of table, legs and braces (except those of the wheel assembly).
FIG. 11
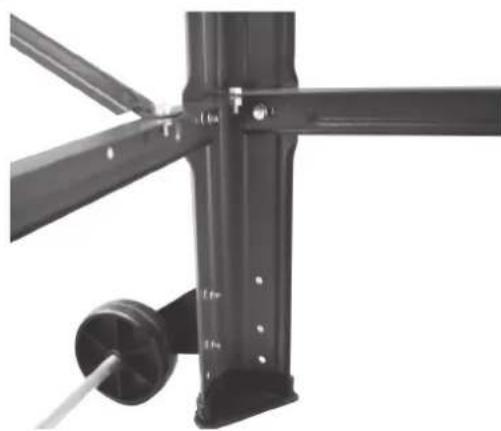
- Tighten the screws for the roller so as to allow the wheels to just touch the floor.
FIG. 12
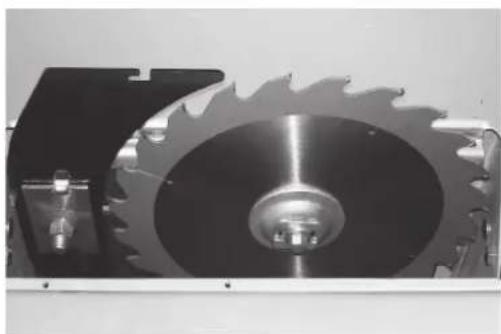
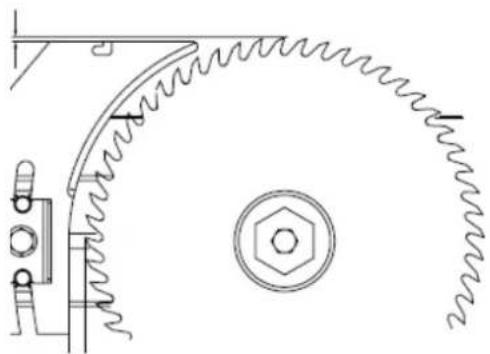
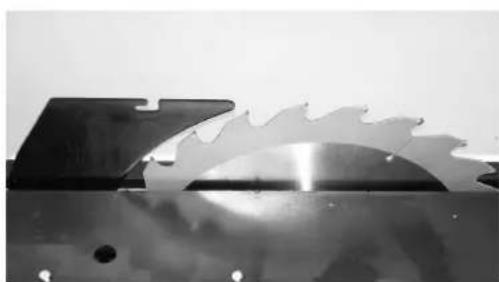
- Adjust the wedge at the saw blade as shown. Undo the screw a little (do not unscrew completely). Retighten the screw after adjusting. The table insert must be removed when adjusting the wedge.
FIG. 13
- When the wedge has been adjusted fasten the table insert again with four flat head screws M6 x 16.
FIG. 14
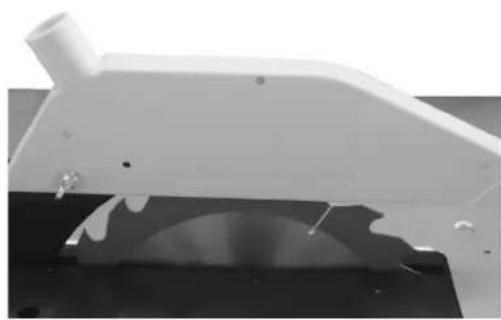
- Fit the guard on the wedge with ball head screw M6 x 25, washer 6 and lock nut.
FIG. 15
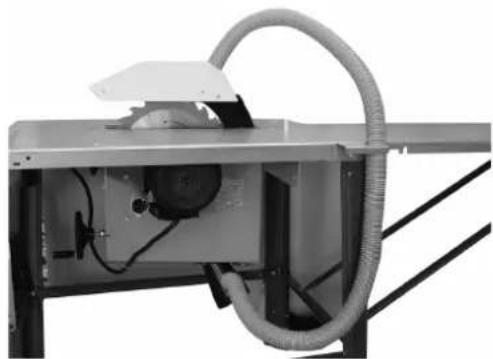
- Fit the hose retainer in the table plate with two hex nuts M6 x 16, two washers and two hex nuts M6, and connect the extraction hose to the extraction cover and sleeve.
FIG. 16
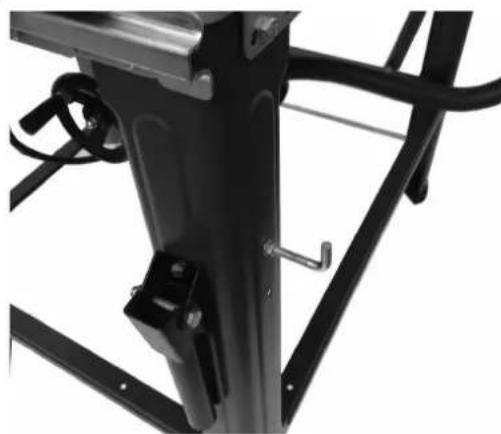
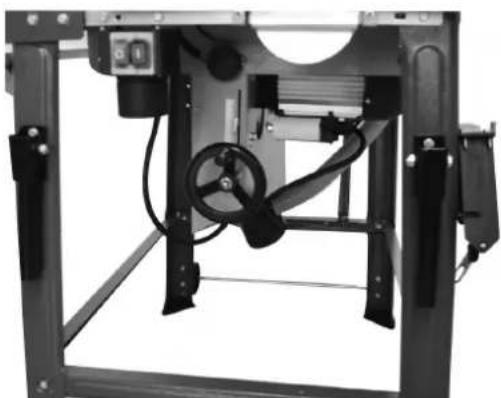
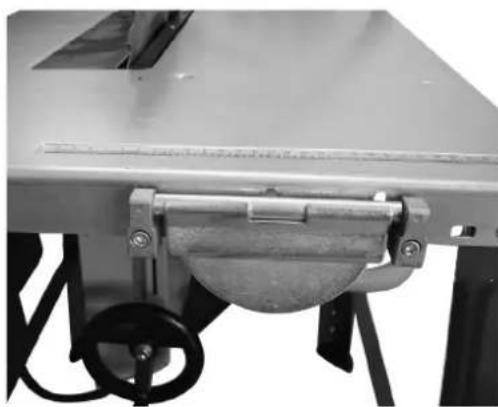
- Fasten the hook screws with two washers and two nuts M6 on the right-hand side of the legs. The blade key and pusher are put here. The two transport handles are fitted on right and left legs on the front of the saw with four hex screws M6 x 16, four washers and four nuts M6.
FIG. 17
FIG. 18
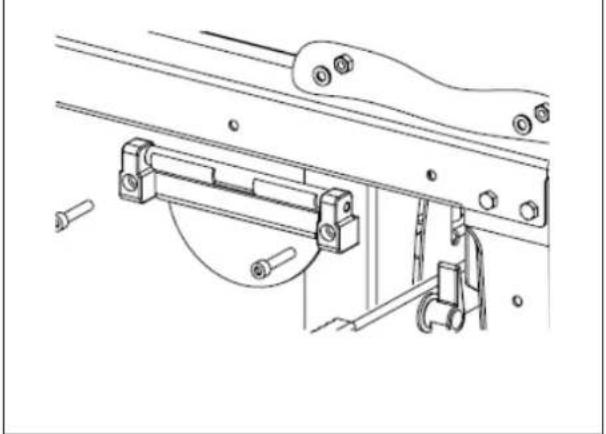
- Fitting the longitudinal fence
- Put the bearing parts on the clamp.
- Fit the clamp with two cylinder screws M6 x 30, two toothed washers A 6.4 and two hex nuts on the table plate.
FIG. 19
FIG. 20
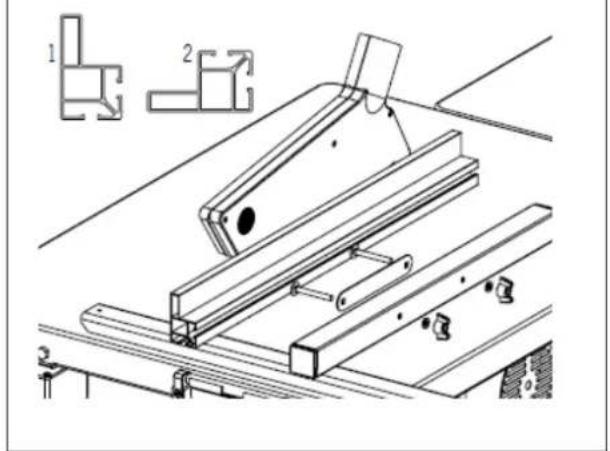
Fitting the fence bar
- Fit the intermediate plate with two smooth round screws M6 x 50, two washers A 6 and two wing nuts on the longitudinal fence.
- Slide the fence bar over the intermediate plate and fasten with the wing nuts.
1 = High fence
2 = Low fence
To brace, pull up the clamp. To release, press down.
FIG. 21
REPLACING THE SAW BLADE
WARNING!
Unplug from power point.
NOTE:
Wear safety gloves when replacing the saw blade - risk of cut injury.
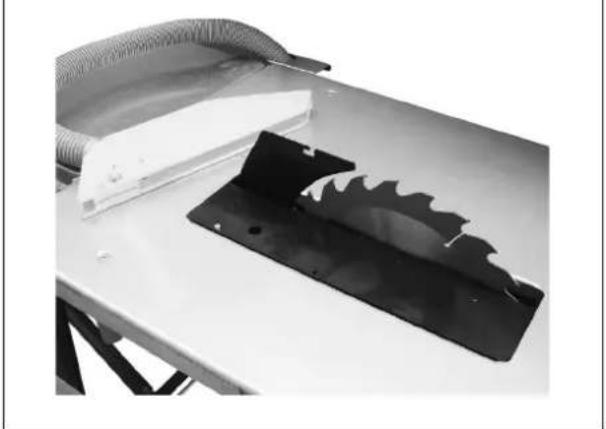
Undo the wing screw from the extraction cover and remove cover.
FIG. 22
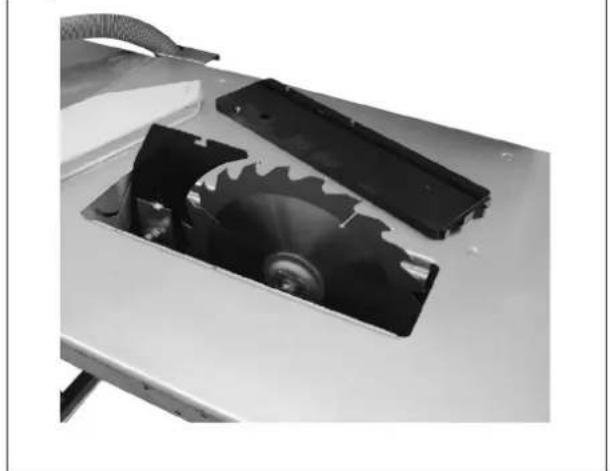
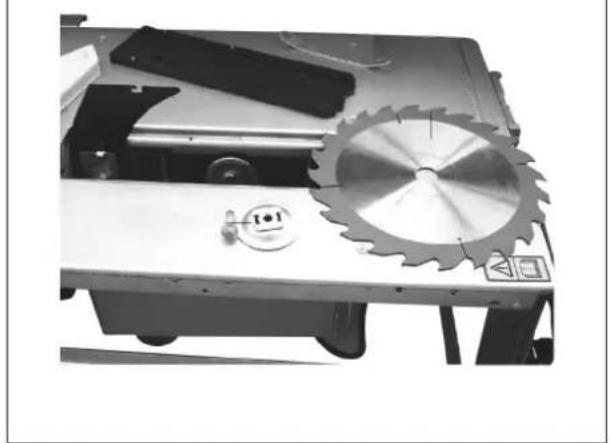
Undo the four star screws from the table insert and remove.
FIG. 23
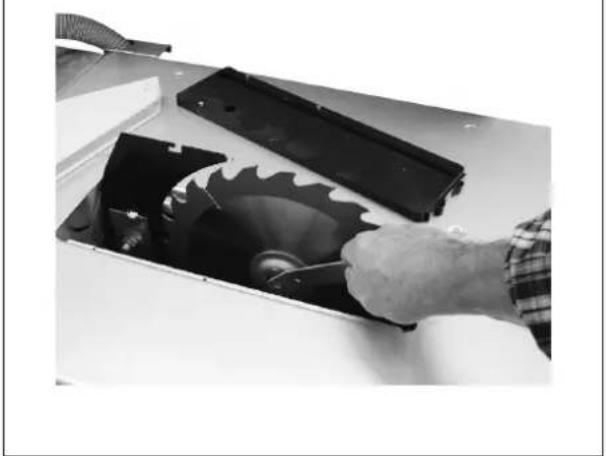
Lift up the saw blade and undo the screw with the key.
FIG. 24
NOTE:
Left-hand thread
Remove the blade flange and saw blade. Put in a new blade. Note the position of flange in the hole. Check the adjustment of the wedge after replacing the blade and refit the table insert and extraction cover.
FIG. 25
USE
POWER SUPPLY
The machine must only be connected to an earthed power point with 3-phase alternating current and with a mains voltage as specified on the type plate. If using an extension cord it must have the correct design basis.
WARNING!
If the power cord gets damaged it must be immediately replaced with an equivalent cord, otherwise there is a risk of short circuiting, electric shock, or fire.
POSITIONING
Prepare the work area. Make sure there is enough space to work safely and without interruption. The machine is designed to work in an enclosed space and must be placed on a level and stable surface. To avoid the machine tipping over screw it to the floor with four screws.
STARTING
Pay attention to the safety instructions.
NOTE:
- Do not start the machine unless all the guards and safety devices have been installed.
- Connect the machine to an extraction system before starting.
-
Lower the extraction nozzle to the workpiece when working.
-
Make sure that long workpieces do not tip up at the end (e.g. with lift table).
- Do not saw through joints or grooves without a suitable guard, for example a tunnel guard placed over the blade.
- Do not use the power tool for sawing firewood.
- Use a suitable blade for the material that is to be sawed.
- Check before starting the machine that all the safety devices and guards are in place according to the instructions.
- Wear appropriate personal safety equipment, which includes:
– Ear protection to reduce the risk of hearing impairment.
- Breathing mask to reduce the risk of inhaling toxic dust.
- Wear heavy-duty gloves when handling saw blades and rough materials. Put saw blades in a container, when possible.
- Connect the power tool to a dust extraction system when sawing wood. The amount of dust produced depends on the type of material, how the machine is screened, and the correct adjustment of the guards and partition walls, etc.
- Do not use high-alloy high-speed steel blades (HSS).
- Use a pusher or handle to move the workpiece safely past the blade.
NOTE:
Always keep the pusher handy when not in use.
- It must be possible to adjust the saw blade so that the teeth reach just over the workpiece.
- The saw blade must be able to move freely. Check for other materials (nails, screws etc.) in old pieces of wood. Remove all foreign material before switching on the power.
- Make sure that the saw blade is correctly installed and that moving parts are unobstructed.
WARNING!
Have the machine checked by a specialist if in doubt. Making assumptions and guessing can be dangerous.
MAINTENANCE
WARNING!
Switch off the machine and pull out the plug before maintenance.
- Check the saw blade at regular intervals.
- Only use saw blades without scratches and deformations.
- Only use tools that comply with the requirements in the European standard EN 847-1.
- Replace a worn table insert immediately.
- Keep the surface of the table free from resin.
• Power tools must be repaired by an authorised electrician. - This power tool complies with the relevant safety regulations.
- Repairs must only be carried out by an authorised electrician using original parts to ensure safe use of the machine.
CLEANING
- Clean the interior parts of the machine at regular intervals from residual sawdust and chips.
- Remove any sawdust blockages at the outlet.
NOTE:
- Keep the machine clean and and wear safety glasses when cleaning
- Do not clean the plastic parts of the table with aggressive detergents. Use a mild detergent and a damp cloth. Do not pour water onto the machine.
TRANSPORT
- The machine is designed to be transported with suitable lifting tackle (crane or fork-lift). Never lift the table. A special lifting device is recommended for frequent lifting within a work area, which is supplied as an accessory.
- When transporting the machine use the devices for this purpose, do not use the safety devices to handle or transport the machine.
- Make sure that the top part of the saw blade is protected when transporting the machine.
TROUBLESHOOTING
| Problem Possible cause | Action | |
| The saw blade is loose The retaining nut is not properly tightened Tighten the nut (left-hand thread M20) | ||
| The motor will not start | Main fuse tripped Check the mains voltage | |
| Defective extension cord Replace extension cord | ||
| Incorrect connection to motor Have it checked by authorised electrician | ||
| Motor or power switch fault Have it checked by authorised electrician | ||
| The saw blade rotates in the wrong direction | Phase reversed Reverse phase | |
| The motor lacks power, or fuse trips | Cross-sectional area of extension cord too small | Use an extension cord with larger cross-sectional area |
| Overloading as a result of worn saw blade Replace with new or sharp blade | ||
| Burns on cut surface | Worn saw blade Replace with new or sharp blade | |
| Wrong type of saw blade Replace with new or sharp blade | ||
- SE BYGGSÄG
- SÄKERHETSANVISNINGAR
- SIKKERHET PÅ ARBEIDSSTEDET
- BEZPIECZEŃSTWO W MIEJSCU PRACY
- GENERAL SAFETY INSTRUCTIONS
- WORKPLACE SAFETY
- ELECTRICAL SAFETY
- PERSONAL SAFETY
- SERVICE
- SAFETY INSTRUCTIONS FOR TABLE SAWS
- Symbols
- Always wear ear protection.
- WARNING!
- DESCRIPTION
- Package contents
- ASSEMBLY
- Remove the packaging material under the motor.
- EN
- REPLACING THE SAW BLADE
- Unplug from power point.
- NOTE:
- Wear safety gloves when replacing the saw blade - risk of cut injury.
- Left-hand thread
- USE
- POWER SUPPLY
- POSITIONING
- STARTING
- Always keep the pusher handy when not in use.
- MAINTENANCE
- Switch off the machine and pull out the plug before maintenance.
- CLEANING
- TRANSPORT
Brand : Meec Tools
Model : 004-666
Category : Saw