
VURCR01 - Remote control AUDIOVOX - Free user manual and instructions
Find the device manual for free VURCR01 AUDIOVOX in PDF.


| Product Type | Remote Control |
| Brand | AUDIOVOX |
| Model | VURCR01 |
| Dimensions (Approx) | 20 x 5 x 2 cm |
| Weight (Approx) | 100 g |
| Power Source | 2 x AAA batteries (not included) |
| Compatible Devices | Most AUDIOVOX TVs, DVD players, and home theater systems |
| Key Functions | Power, Volume +/-, Channel +/-, Mute, Input Source, Menu Navigation, Number Pad |
| Operating Range | Up to 10 meters (typical) |
| Signal Type | Infrared (IR) |
| Programming Method | Automatic code search or manual code entry |
| Battery Life | Approximately 6 months with normal use |
| Low Battery Indicator | LED blinks dimly or no response |
| Material | Plastic casing with rubberized buttons |
| Color | Black |
| Cleaning Instructions | Wipe with a soft, dry cloth. Do not use liquids or abrasives. |
| Storage Temperature | -10°C to 50°C (14°F to 122°F) |
| Safety Precautions | Keep away from water, heat sources, and direct sunlight. Do not drop or impact. |
| Spare Parts / Repairability | Batteries are replaceable. No other user-serviceable parts. Contact AUDIOVOX support for repairs. |
| Manual Availability | Free PDF download at notice-facile.com |
Frequently Asked Questions - VURCR01 AUDIOVOX
User questions about VURCR01 AUDIOVOX
0 question about this device. Answer the ones you know or ask your own.
Ask a new question about this device
Download the instructions for your Remote control in PDF format for free! Find your manual VURCR01 - AUDIOVOX and take your electronic device back in hand. On this page are published all the documents necessary for the use of your device. VURCR01 by AUDIOVOX.
USER MANUAL VURCR01 AUDIOVOX
natural_image
Icon of a hand holding a padlock with Wi-Fi signal above, symbolizing smart home or security (no text present)UNIVERSAL
CAR
REMOTE™

natural_image
Close-up of a black car key with six function buttons (lock, lock, speaker, car, double arrow) and a handle (no text or symbols visible)USER'S GUIDE
Powered By

www.iKeyless.com
Thank you for purchasing the Universal Car Remote. We invite you to visit www.iKeyless.com for a complete line of replacement keys and remotes.
![iKEYLESS My Car's D Items Logis/Register TOLL FREE: [E7] 445-3953 - MON-FRI 9-5 EST SAME DAY SHIPPING On order returned before 30 EST M.E. iKEYLESS 4 & GST STARTED NAME: Select a make... TEAM: MODEL: Welcome to iKeyless! Your one-center button on the wish by we/dare/markdays, loudens entry services, and innovative original endurance you can only get at iKeyless. Take a look inside for more details on our gear products and industry-leading customer service. B2B BUSINESS ZONE home-assisted Programming instructions. Replacement batteries Keyholder 1.8x 100% back track](/content/2026/05/967804/images/1957e85ce4b0c4afba11ff2053cfe509aaf6d5700f89b8b16c7df9a4841485a6.jpg)
natural_image
Smooth gray metal kitchen top (no text or symbols visible)
www.iKeyless.com
Thank you for purchasing the world's first Universal Car Remote!
NOTE: The Universal Car Remote is designed to work on vehicles equipped with a factory installed remote keyless entry system. If you are unsure if your vehicle has a factory installed keyless entry system, please check with a local car dealership. For more information on this topic please see pages 30-32. The Universal Car Remote is a replacement factory remote that is compatible with all vehicles listed in the VEHICLE LOOK UP list found on pages 14-21.
If at any point you experience diffi culty with setup, please refer to the Help section on pages 30-32.
Get to know your Universal Car Remote
Standard buttons for LOCK, UNLOCK, TRUNK and PANIC are included. We've added two additional buttons shown below as FUNCTION I and FUNCTION II. If your vehicle is equipped with keyless entry features such as power sliding door(s) on a van, these FUNCTION buttons will operate those features once the setup process is complete.
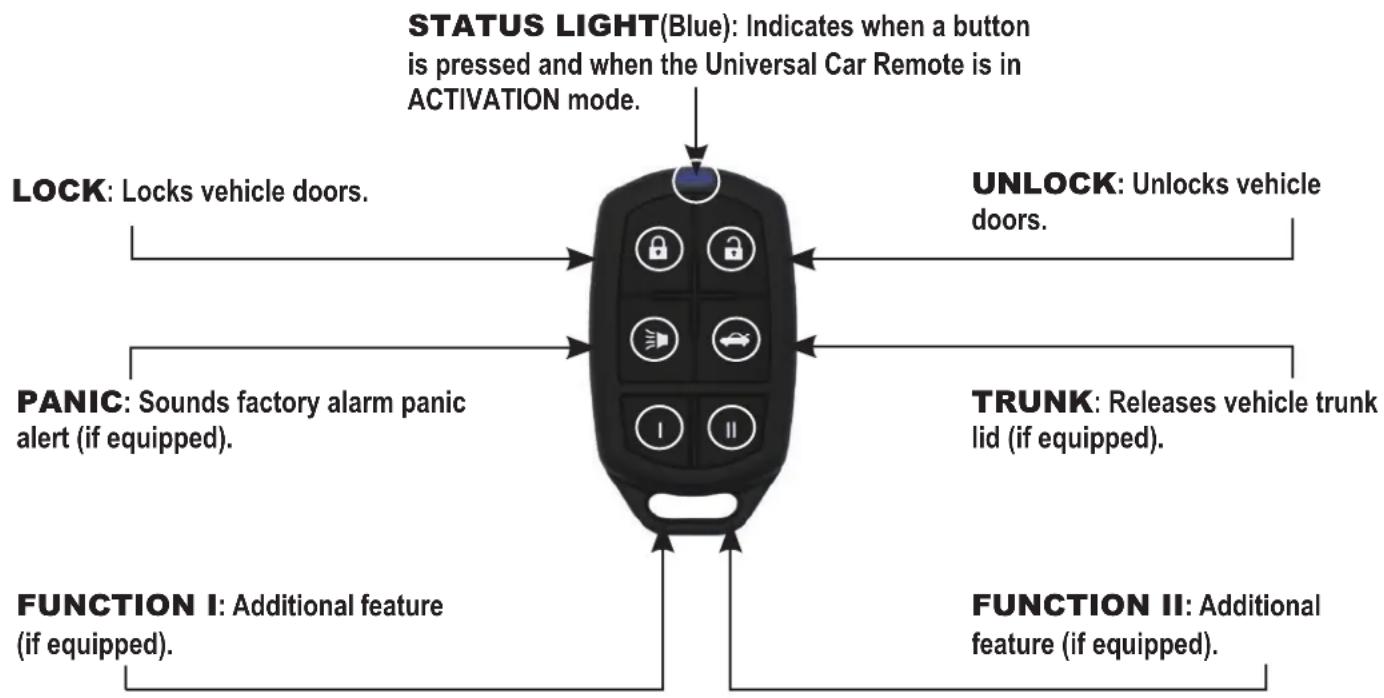
flowchart
graph TD
    A["STATUS LIGHT(Blue): Indicates when a button is pressed and when the Universal Car Remote is in ACTIVATION mode."] --> B["LOCK: Locks vehicle doors."]
    A --> C["UNLOCK: Unlocks vehicle doors."]
    A --> D["PANIC: Sounds factory alarm panic alert (if equipped)."]
    A --> E["TRUNK: Releases vehicle trunk lid (if equipped)."]
    A --> F["FUNCTION I: Additional feature (if equipped)."]
    A --> G["FUNCTION II: Additional feature (if equipped)."]
The Universal Car Remote will work exactly like the original, factory remote for your vehicle.
NOTE: Some vehicles require holding the TRUNK, PANIC, and/or FUNCTION BUTTONS for up to 3 seconds before the feature operates, while some vehicles require these buttons to be pressed twice before the feature operates.
Let's get started
You will perform two steps - “ACTIVATION” and “PAIRING”. ACTIVATION sets the Universal Car Remote to function like the original remote for your vehicle. PAIRING sets the Universal Car Remote to work with your vehicle. A video is available at www.UniversalCarRemote.com with more details on how to do the PAIRING process.
It is important to follow these steps in order to successfully complete setup. If you skip a step, the Universal Car Remote will not work properly, and you'll have to repeat the setup process.
Before you begin, go to the VEHICLE LOOK UP list on pages 14-21. Write down both your ACTIVATION and PAIRING codes for your vehicle's make, model and year. Some vehicles have two ACTIVATION CODES. Try the first code and if you are unsuccessful with PAIRING the Universal Car Remote to your vehicle, try the second.
ACTIVATION CODE \_\_\_\_ PAIRING CODE
STEP 1 (of 2)
Activating your Universal Car Remote
Before you begin, it is highly recommended you read through all the instructions to familiarize yourself with the procedure.
- Press the FUNCTION I and PANIC buttons at the same time and release. The STATUS LIGHT will illuminate steady indicating you have entered "ACTIVATION MODE".
- Within 15 seconds, enter the three digit ACTIVATION CODE using the Universal Car Remote's LOCK button for the first digit, UNLOCK button for the second digit, and TRUNK button for the third digit. For example, if your ACTIVATION CODE is 512, you'll press the LOCK button 5 times, the UNLOCK button 1 time, and the TRUNK button 2 times.
- Now press the FUNCTION I and PANIC buttons at the same time. The STATUS LIGHT will briefly turn off.
- Your remotes STATUS LIGHT will flash back to you the same ACTIVATION CODE sequence. For example, if the ACTIVATION CODE you entered is 512, the STATUS LIGHT will emit a series of flashes that match the ACTIVATION CODE you entered in Step #2.
STEP 2 (of 2)
Pairing your Universal Car Remote to your vehicle
Before you begin, it is highly recommended you read through all the instructions to familiarize yourself with the procedure. You will need any existing remotes for the vehicle present when beginning the PAIRING procedure.
Before continuing, ensure you have the following:
• Universal Car Remote.
- Any existing remotes for the vehicle (if applicable).
• A working ignition key for the vehicle.
-
Locate the PAIRING CODE specific to your vehicle's make, model and year on the VEHICLE LOOK UP list on pages 14-21 if you have not already noted it on page on page 4 and follow the step-by-step instructions.
-
Locate the matching PAIRING CODE number from the PAIRING section in this guide on pages 22-29 and follow the step-by-step instructions
You are now ready to use your Universal Car Remote!
For help see pages 30-32.
REMOTE LOOK UP

REMOTE LOOK UP
 |  |  | 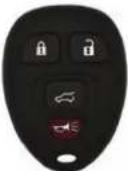 |  | 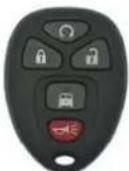 |  | |
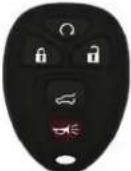
| FCC ID | OUC60270 | OUC60270 | OUC60270 | OUC60270 | OUC60270 | OUC60221 | OUC60221 |
| PART # | 25830632 | 20869054 | 15913416 | 15916015 | 20869962 | 20970808 | 20952477 |
 |  |  |  |  |  |  | |
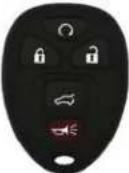
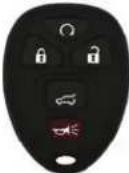
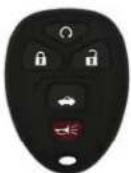
| FCC ID | OUC60221 | OUC60221 | OUC60221 | OUC60270 | OUC60270 | OUC60270 | OUC60270 |
| PART # | 22756459 | 22951509 | 22936101 | 15913415 | 15857839 | 25839476 | 15916016 |
 |  |  |  |  | 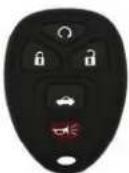 |  | |
| FCC ID | OUC60270 | OUC60270 | OUC60221 | OUC60221 | OUC60270 | OUC60270 | OUC60270 |
| PART # | 20869963 | 20869053 | 20935331 | 22952176 | 15912860 | 20833562 | 10337867 |
| CADILLAC |  |  | 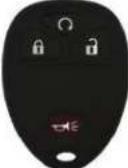 |  |  |  | |
| FCC ID | KOBLEAR1XT | OUC60221 | OUC60221 | OUC60270 | OUC60270 | OUC60270 | |
| PART # | 15042968 | 22936098 | 20952474 | 20868672 | 15913421 | 22759546 | |
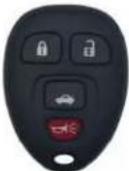 |  |  |  |  |  |  | |
| FCC ID | OUC60221 | OUC60221 | OUC60270 | OUC60270 | OUC60270 | OUC60270 | OUC60221 |
| PART # | 20935330 | 22952177 | 15912859 | 20833561 | 10337866 | 15859329 | 22756460 |
 | 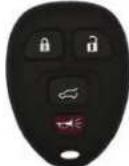 | 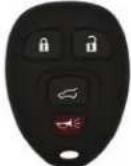 |  |  |  | 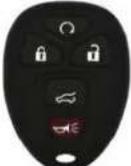 | |
| FCC ID | OUC60270 | OUC60270 | OUC60270 | OUC60270 | OUC60270 | OUC60221 | OUC60221 |
| PART # 20869053 | 30632 | 15913416 | 15916015 | 20869962 | 20970808 | 20952477 | |
 |  |  | 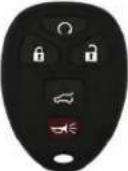 |  | 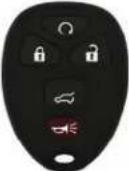 | 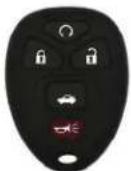 | |
| FCC ID | OUC60270 | OUC60270 | OUC60270 | OUC60270 | OUC60270 | OUC60270 | OUC60221 |
| PART # | 15913415 | 15857839 | 25839476 | 15916016 | 20869963 | 20869053 | 20935331 |
CADILLAC
REMOTE LOOK UP

REMOTE LOOK UP
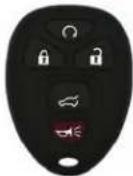 |  |  |  |  | 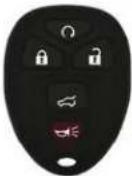 |  | |
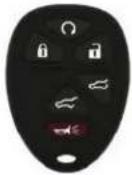
| FCC IDPART # | OUC6027015913415 | OUC6027015857839 | OUC6027025839476 | OUC6027015916016 | OUC6027020869963 | OUC6027020869053 | OUC6022120877109 |
 | 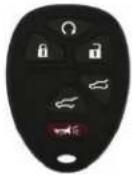 |  |  |  |  |  | |
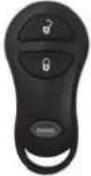
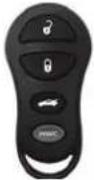
| FCC IDPART # | OUC6022125840696 | OUC6022122756462 | OUC6022122951510 | OUC6027020869057 | OUC6027015913427 | OUC6027015857840 | |
 |  |  |  |  |  |  | |
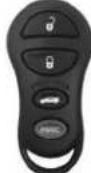
| FCC IDPART # | GQ43VT18T04686481AA | GQ43VT18T04686481AF | GQ43VT18T04686481AB | GQ43VT18T04686481AC | GQ43VT9T GQ43VT9T GQ43VT9T04602260AA 04759008AB 04759008AC | ||
 |  | 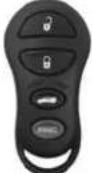 | 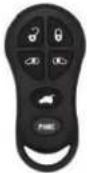 |  | 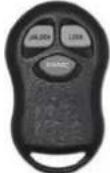 | ||
| FCC IDPART # | GQ43VT9T GQ43VT9T GQ43VT9T04602260AD 04759008AE 04759008AF | GQ43VT18T KYPT03C98JA04686797AB | 4608229AB | KYP T03C98JA4608229AB | |||
 |  |  |  |  |  |  | |
| FCC IDPART # | GQ43VT18T04686481AF | GQ43VT9T04602260AA | GQ43VT9T04759008AB | GQ43VT9T04759008AC | GQ43VT9T04602260AD | GQ43VT9T04759008AE | GQ43VT9T04759008AF |
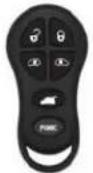 |  |  |  | 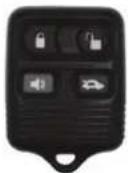 |  | ||
| FCC IDPART # | GQ43VT18T GQ43KYP103C98JA04686797AB | GQ43VT18T GQ43VT18T GQ43VT18T GQ43VT18T GQ43VT18T GQ43VT18T GQ43VT18T GQ43VT18T GQ43VT18T GQ43VT18T GQ43VT18T GQ43VT18T GQ43VT18T GQ43 VT11T F87B-15K601-AA F87B-15K601-AB | GQ43VT11TF87B-15K601-BA | GQ43VT11TF87B-15K601-BB | |||
 |  |  |  |  |  |  | |
| FCC IDPART # | CWTWB1U212CWTU282U322F8DB-15K601-AB F8DB-15K601-BA | GQ43VT11TF8CB-15K601AA | CWTWB1U3458L3T-15K601-AA | CWTWB1U3458L3T-15K601-AB | CWTWB1U3312L3T-15K601-AA | ||
REMOTE LOOK UP
 | 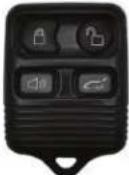 |  |  | 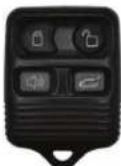 | GMC |  | |
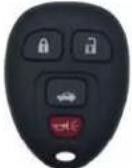
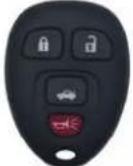
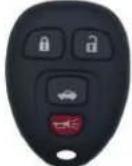
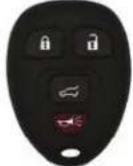
| FCC ID PART # | CWTWB1U331 2L3T-15K601-AB | CWTWB1U331 2L2T-15K601-BA | CWTWB1U331 2S4T-15K601-AB | CWTWB1U331 2S4T-15K601-AA | CWTWB1U322 1L2T-15K601-AA | KOBLEAR1XT 15042968 | |
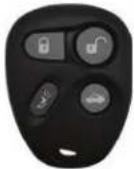 |  |  |  |  |  |  | |
| FCC ID PART # | KOBLEAR1XT 25695955 | KOBLEAR1XT KOBLEAR1XT 100443537 | 15752330 | KOBLEAR1XT 15043458 | OUC60221 22936099 | OUC60221 20952475 | OUC60270 15913420 |
 |  |  |  |  |  |  | |
| FCC ID PART # | OUC60270 20869056 | OUC60221 22936098 | OUC60221 20952474 | OUC60270 20868672 | OUC60270 15913421 | OUC60270 22759546 | OUC60221 20935330 |
 |  |  |  |  |  |  | |
| FCC ID PART # | OUC60221 22952177 | OUC60270 15912859 | OUC60270 20833561 | OUC60270 10337866 | OUC60270 15859329 | OUC60221 20935331 | OUC60221 22952176 |
 |  |  |  |  |  | 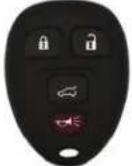 | |
| FCC ID PART # | OUC60270 20877108 | OUC60270 15883405 | OUC60221 22756460 | OUC60270 25830632 | OUC60270 20869054 | OUC60270 15913416 | OUC60270 15916015 |
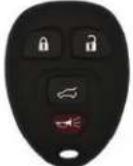 |  |  |  |  |  |  | |
| FCC ID PART # | OUC60270 20869962 | OUC60221 20952477 | OUC60270 15913415 | OUC60270 15857839 | OUC60270 25839476 | OUC60270 15916016 | OUC60270 20869963 |
 | 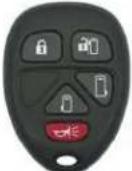 |  |  |  |  |  | |
| FCC ID PART # | OUC60221 20877109 | OUC60270 25840696 | OUC60221 22756462 | OUC60221 22951510 | OUC60270 20869057 | OUC60270 15913427 | OUC60270 15857840 |
GMC
KOBLEAR1XT 15042968
REMOTE LOOK UP

REMOTE LOOK UP
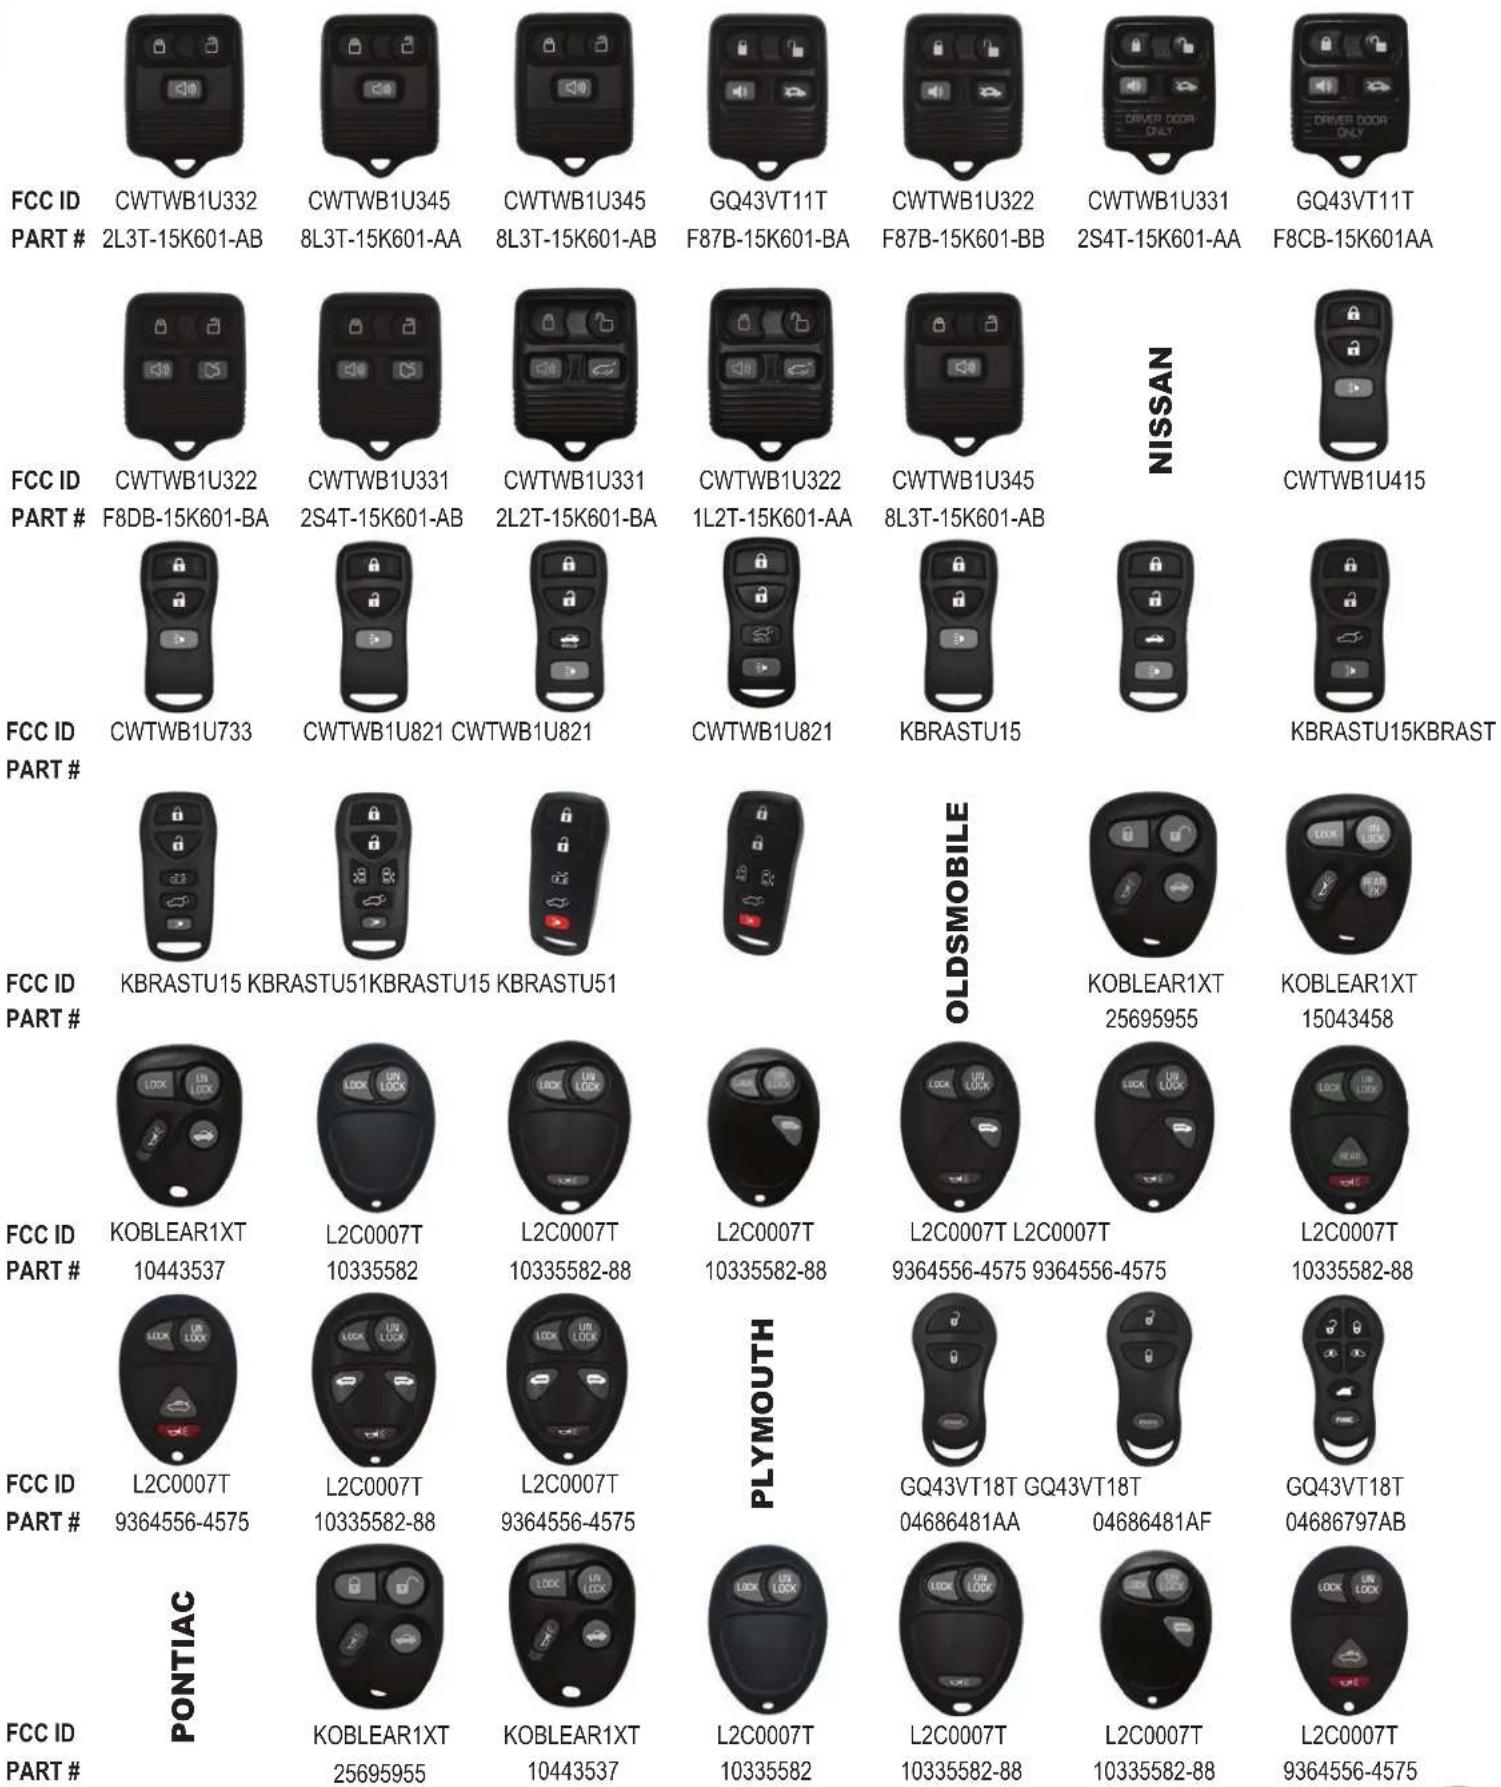
REMOTE LOOK UP
 | 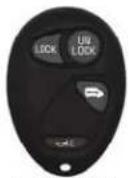 | 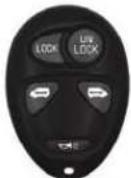 |  | 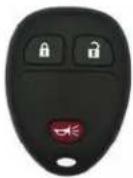 |  |  | |
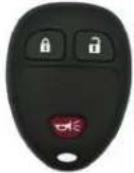
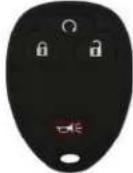
| FCC IDPART # | L2C0007T10335582-88 | L2C0007T9364556-4575 | L2C0007T10335582-88 | L2C0007T9364556-4575 | OUC6022122936099 | OUC6022120952475 | OUC6027015913420 |
 | 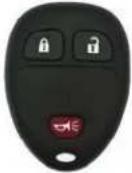 |  |  |  |  | ||
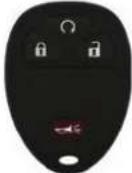
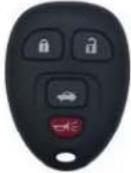
| FCC IDPART # | OUC6027020869056 | OUC6022120952475 | OUC6027015913420 | OUC6027020869056 | OUC6022122936098 | OUC6022120952474 | |
 |  |  |  |  |  | ||
| FCC IDPART # | OUC6027020868672 | OUC6027015913421 | OUC6027022759546 | OUC6022120935330 | OUC6022122952177 | OUC6022122952177 | OUC6027015912859 |
 |  |  |  |  |  | ||
| FCC IDPART # | OUC6027020833561 | OUC6027010337866 | OUC6027015859329 | OUC6022122756460 | OUC6027025830632 | OUC6027020869054 | OUC6027015913416 |
 |  |  |  |  |  | ||
| FCC IDPART # | OUC6027015916015 | OUC6027020869962 | OUC6027015859329 | OUC6022122756460 | OUC6027025830632 | OUC6027020869054 | OUC6027015913416 |
 |  |  |  | 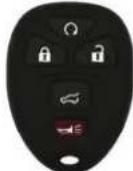 |  | ||
| FCC IDPART # | OUC6027015916015 | OUC6027020869962 | OUC6022120952477 | OUC6022115913415 | OUC6022115857839 | OUC6022125839476 | OUC6022115916016 |
 |  |  | 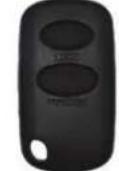 | 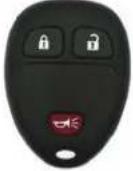 |  | ||
| FCC IDPART # | OUC6022120869963 | OUC6022120869053 | M0ZD01TB | M0ZD02TB | OUC6022122936099 | OUC6022120952475 |
REMOTE LOOK UP
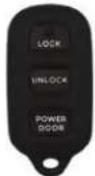
FCC ID PART #

OUC60270 15913420
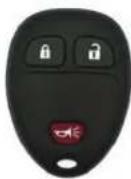
OUC60270 20869056
TOYOTA

GQ43VT14T

GQ43VT14T

GQ43VT14T
GQ43VT14T
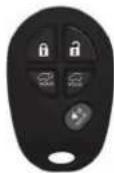
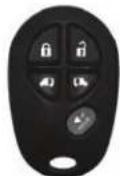
FCC ID PART #

GQ43VT14T GQ43VT14T


GQ43VT20T

GQ43VT20T GQ43VT20T


GQ43VT20T GQ43VT20T
GQ43VT20T GQ43VT20T


GQ43VT20T

GQ43VT20T
VOLKSWAGEN

VEHICLE LOOK UP
MAKE MODEL
YEAR
ACTIVATION CODE
ACTIVATION CODE 2
SPECIAL INSTRUCTIONS
PAIRING CODE
BUICK
Century 12001-2005477
Enclave 242008-2010551
Lucerne 242006-2010552
Regal 12001-2004511
Rendezvous
CADILLAC
DTS
Escalade 2002
435
Escalade
5 5 5
Escalade EXT
CHEVROLET
Avalanche 2002
437
Avalanche
5 5 6
Blazer
Corvette
Equinox 242007-2009 5 5 7
Express 242008-2010 5 6 1
Impala
Impala
Monte Carlo
4 4 7
*2001 model used two possible remotes. This product is compatible with FCC ID KOBLEAR1XT. If you are unsure please contact iKeyless customer service.
*Requires factory radio to program. Aftermarket radio will require dealer or locksmith.
*Requires factory radio to program Aftermarket radio will require dealer or locksmith.
22002-200
242006-200
3
242007-20'
242007-20'
4
242007-20'
42001-200
52001-200
242006-20'
62001-200
62001-200
| VEHICLE LOOK UP | |||||
| MAKE MODEL | YEAR | ACTIVATION CODE | ACTIVATION CODE 2 | SPECIAL INSTRUCTIONS | PAIRING CODE |
| Monte Carlo 242006-2007 | 5 6 3 | ||||
| S-10 32001-2004 | 4 5 1 | *2001 model used two possible remotes. This product is compatible with FCC ID KOBLEAR1XT. If you are unsure please contact iKeyless customer service. | |||
| Silverado 32001-2002 | 4 5 2 | *2001 model used two possible remotes. This product is compatible with FCC ID KOBLEAR1XT. If you are unsure please contact iKeyless customer service. | |||
| Silverado 242007-2010 | 5 7 7 | ||||
| Suburban | 2001-2002 | 4 5 4 | 3 | ||
| Suburban | 2007-2010 | 5 7 7 | 24 | ||
| Tahoe 32001-2002 | 4 5 5 | ||||
| Tahoe 242007-2010 | 5 6 5 | ||||
| Traverse 242007-2010 | 5 6 6 | ||||
| Venture 72001-2005 | 5 1 4 | ||||
| CHRYSLER | *Please see additional important information below on Chrysler, Dodge, Jeep vehicles. | ||||
| Sebring Conv. | 2 7 4 | 92001-2006 | |||
| Sebring Sedan | 2 7 5 | 92001-2006 | |||
| Town and Country | 2 3 7 | 2 5 4 | 92001-2003 | ||
| DODGE | *Please see additional important information below on Chrysler, Dodge, Jeep vehicles. | ||||
| Caravan | 2 4 2 | 2 5 6 | 82001-2003 | ||
| Dakota | 2 4 3 | 82002-2004 | |||
| Durango | 2 4 4 | 82001-2003 | |||
| Grand Caravan | 2 4 5 | 2 5 7 | 92001-2003 | ||
| Ram | 2 4 6 | 102002-2005 | |||
| Stratus Sedan | 2 7 7 | 92001-2006 | |||
*Chrysler, Dodge, Plymouth, and Jeep vehicles require one existing, working remote to pair the Universal Car Remote to the vehicle. Without an existing, working remote the user must seek assistance from a local dealership or qualified automotive locksmith for pairing using a specialized diagnostic computer tool.
| VEHICLE LOOK UP | |||||
| MAKE MODEL | YEAR | ACTIVATION CODE | ACTIVATION CODE 2 | SPECIAL INSTRUCTIONS | PAIRING CODE |
| FORD | |||||
| Crown Victoria | 2007-2010 | 152 | 15 | ||
| Econoline 171999-2014 | 124 | ||||
| Edge 172007-2013 | 123 | ||||
| Escape 172001-2012 | 125 | ||||
| Escort 151999-2003 | 153 | ||||
| Excursion 152000-2005 | 126 | ||||
| Expedition 151999-2012 | 111 | ||||
| Explorer 151998-2010 | 112 | ||||
| Explorer Sport Trac 152001-2005 | 132 | ||||
| Explorer Sport Trac 152007-2010 | 133 | ||||
| F-Series Truck 151998-2013 | 133 | ||||
| Five Hundred | 152005-2007 | 154 | |||
| Flex | 152 | 152009-2012 | |||
| Focus | 2000-2007 | 155 | 16 | ||
| Focus | 2007-2016 | 155 | 15 | ||
| Freestar 152004-2007 | 157 | ||||
| Freestyle | 135 | 152005-2007 | |||
| Fusion | 134 | 152006-2012 | |||
| Mustang | 157 | 151999-2013 | |||
| Ranger | 136 | 151998-2012 | |||
| Taurus | 171 | 151998-2013 | |||
| Taurus X | 137 | 152008-2009 | |||
VEHICLE LOOK UP
| MAKE MODEL | YEAR | ACTIVATION CODE | ACTIVATION CODE 2 | SPECIAL INSTRUCTIONS | PAIRING CODE |
| Thunderbird | 2002-2005 | 175 | 15 | ||
| Windstar 151998-2003 | 142 | ||||
| GMC | |||||
| Acadia 242007-2010 | 567 | ||||
| Savana 242008-2010 | 571 | ||||
| Sierra 32001-2002 | 462 | *2001 model used two possible remotes. This product is compatible with FCC ID KOBLEAR1XT. If you are unsure please contact iKeyless customer service. | |||
| Sierra 242007-2010 | 572 | ||||
| Sonoma 32001-2004 | 463 | *2001 model used two possible remotes. This product is compatible with FCC ID KOBLEAR1XT. If you are unsure please contact iKeyless customer service. | |||
| Yukon 32001-2002 | 573 | *2001 model used two possible remotes. This product is compatible with FCC ID KOBLEAR1XT. If you are unsure please contact iKeyless customer service. | |||
| Yukon 242007-2010 | 464 | ||||
| INFINITI | |||||
| FX 11 | 314 | ||||
| G35 | 2003-2006 | 315 | 11 | ||
| I30 | 2000-2001 | 316 | 11 | ||
| I35 | 2002-2004 | 317 | 11 | ||
| QX4 | 2002-2003 | 323 | 11 | ||
| QX56 11 | 324 | ||||
| JAGUAR | |||||
| XK Series | 117 | 231997-2006 | |||
| JEEP | *Please see additional important information below on Chrysler, Dodge, Jeep vehicles. | ||||
| Liberty | 312 | 92002-2004 | |||
*Chrysler, Dodge, Plymouth, and Jeep vehicles require one existing, working remote to pair the Universal Car Remote to the vehicle. Without an existing, working remote the user must seek assistance from a local dealership or qualified automotive locksmith for pairing using a specialized diagnostic computer tool.
VEHICLE LOOK UP
| MAKE MODEL | YEAR | ACTIVATION CODE | ACTIVATION CODE 2 | SPECIAL INSTRUCTIONS | PAIRING CODE |
LINCOLN
| Aviator 152002-2005 | 1 2 1 | ||
| Mark LT 152006-2008 | 1 4 3 | ||
| Navigator 151999-2010 | 1 2 2 | ||
| Town Car | 1998-2003 | 1 6 6 | 18 |
| Town Car | 2004-2011 | 1 6 6 | 15 |
| Zephyr 152006 | 1 6 7 | ||
MAZDA
| B-Series Truck 151998-2008 | 145 |
| Tribute 152001-2011 | 146 |
MERCURY
| Cougar 151998-2002 | 1 5 3 | ||
| Grand Marquis 152007-2011 | 1 7 2 | ||
| Mariner | 1 7 1 | 152005-2011 | |
| Milan | 1 7 6 | 152006-2011 | |
| Montego | 1 7 3 | 152005-2007 | |
| Monterey | 1 7 4 | 152004-2007 | |
| Mountaineer | 1 2 3 | 151998-2010 | |
| Tracer | 1 5 3 | 151997-1999 | |
| Sable | 1998-05,2008-09 | 1 7 5 | 15 |
| NISSAN | |||
| 350Z | 2003-2008 | 3 2 5 | 11 |
VEHICLE LOOK UP
MAKE MODEL
YEAR
ACTIVATION CODE
ACTIVATION CODE 2
SPECIAL INSTRUCTIONS
PAIRING CODE
Altima 112002-2006
326
Armada 112004-2012
326
215
Frontier 112004-2014
3 3 1
216
Maxima 112002-2006
3 3 2
Murano 112004-2007
3 3 3
217
NV 112012-2016
214
3 3 4
Pathfinder 112002-2004
3 3 5
Pathfinder 112005-2012
217
3 3 5
Quest 112004-2009
212
345
Sentra 112007-2012
3 3 7
2 2 1
Titan 112004-2006
341
Titan 112007-2013
2 2 2
Versa 112007-2013
342
2 2 3
Xterra 112003-2013
2 2 4
343
OLDSMOBILE
Intrigue 2001-2002
521
1
Silhouette 2001-2004
522
7
PONTIAC
Aztek 2001-2005
523
2
Grand Prix 7
524
| VEHICLE LOOK UP | |||||
| MAKE MODEL | YEAR | ACTIVATION CODE | ACTIVATION CODE 2 | SPECIAL INSTRUCTIONS | PAIRING CODE |
| Montana | 2001-2004 | 5 2 5 | 7 | ||
| Torrent | 2007-2009 | 54 | 7 | ||
| Vibe | 2003-2008 | 2 3 2 | 12 | ||
| PLYMOUTH | |||||
| Voyager 81999-2000 | 2 6 1 | 2 5 5 | |||
| Grand Voyager 81999-2000251 | |||||
| SATURN | |||||
| Outlook 242007-2010 | 5 7 5 | 4 2 6 | |||
| SUZUKI | |||||
| Aerio | 5 2 7 | 212001-2004 | |||
| Equator | 3 4 4 | 242010-2012 | |||
| Grand Vitara | 5 2 5 | 242007-2010 | |||
| Vitara | 5 3 3 | 212001-2004 | |||
| XL7 | 5 7 6 | 242007-2009 | |||
| TOYOTA | |||||
| Avalon | 2 6 1 | 122005-2007 | |||
| Camry | 2 2 6 | 122001-2006 | |||
| Corolla | 2 2 7 | 122003-2008 | |||
| Matrix | 2 3 2 | 122003-2008 | |||
| Sienna | 2 3 4 | 131999-2003 | |||
VEHICLE LOOK UP
MAKE MODEL
YEAR
ACTIVATION CODE
ACTIVATION CODE 2
SPECIAL INSTRUCTIONS
PAIRING CODE
Sienna 122004-2008
264
Solara 131999-20032 6 5
Solara 132004-2008
235
Tacoma 122005-2015
266
VOLKSWAGEN
Jetta 221998-1999
541
*Requires two keys to program
Important: read this first
NOTE: These instructions were written by the vehicle manufacturer. They were designed to be easily performed by the consumer to avoid a trip to the dealership. While the instructions are straightforward, some may find them challenging. With practice, you will succeed.
Many of the instructions have timing requirements. Waiting too long between steps may result in your vehicle's computer timing out, requiring you to start over. Once you begin the pairing procedure, be sure to move at a quick and even pace.
1
NOTE: Ensure any existing remotes are present when pairing to vehicle.
- Close the vehicle doors.
- Insert key into ignition and turn to ON (as far as you can without cranking the engine).
- Turn ignition OFF and remove the key from the ignition.
- Press and hold the driver side door lock switch in the UNLOCK position.
- Insert and remove key from ignition 2 times (do not turn the ignition key).
- Insert the ignition key into the ignition (do not turn the key) and leave key in ignition.
- Release the door lock switch. The vehicle will sound three beeps in order to verify the PAIRING MODE has been activated.
- Press the LOCK and UNLOCK buttons together on the keyless entry remote and hold until the vehicle beeps twice to verify paired (this takes approximately 15 seconds).
- Perform the previous step to pair up to four remotes (including your old ones).
- Remove the ignition key in order to exit the PAIRING MODE.
- Test all remotes.
2
NOTE: Ensure any existing remotes are present when pairing to vehicle.
-
Get into vehicle and close all doors.
-
Press and hold the UNLOCK button on door lock switch on driver's door. Hold until instructed to release.
- Insert and remove key from ignition 2 times.
- Insert key in ignition a third time and leave key in ignition (do not turn the ignition key).
- Release door lock switch on driver's door panel. A chime will sound 3 times indicating that you are in PAIRING MODE.
- Press both the LOCK and UNLOCK buttons on the remote. Repeat this step if you are pairing additional remotes.
- Remove key from ignition to exit PAIRING MODE.
- Test all remotes.
3
NOTE: Ensure any existing remotes are present when pairing to vehicle.
- Close all vehicle doors.
- Insert key into ignition.
- Hold down the power UNLOCK button on the driver's door panel - continue to hold down until instructed to release in Step #9.
- Perform Steps #5 through #8 in fairly rapid succession.
- Turn the ignition switch to the ON position (as far as you can go without starting the engine).
- Turn the ignition switch to the OFF position.
- Turn the ignition switch to the ON position.
- Turn the ignition switch to the OFF position.
- Release the power UNLOCK button on the door panel. The vehicle will LOCK and UNLOCK the doors automatically.
- Hold down the LOCK and UNLOCK buttons on
the transmitter simultaneously until the door locks and unlocks. This step may take up to 30 seconds.
-
Repeat step #10 NOW for each additional transmitter (including any existing transmitters).
-
Turn the ignition switch to the ON position in order to exit the transmitter programming mode.
4
NOTE: Ensure any existing remotes are present when pairing to vehicle.
- Close all doors.
- Insert key into ignition.
- Hold down the power UNLOCK button on the driver's door panel, continue to hold down until instructed to release in Step #9.
- Perform Steps #5 through #8 in a fairly rapid succession.
- Turn the ignition to the ON position (as far as you can go without starting the engine).
- Turn the ignition to the OFF position.
- Turn the ignition to the ON position (as far as you can go without starting the engine).
- Turn the ignition to the OFF position.
- Release the power UNLOCK button on the door panel. The vehicle should respond by door locks locking and unlocking automatically.
- Hold down the LOCK and UNLOCK buttons on the remote until the doors lock and unlock. This may take up to 30 seconds.
- Repeat Step #1 now for each additional remote (Including any existing remotes) if applicable. If not, move to Step #10.
- Turn the ignition to the ON position to exit the pairing mode.
- Test all remotes (ignition must be OFF).
5
NOTE: Ensure any existing remotes are present when pairing to vehicle.
-
Turn ignition to ON.
-
Turn radio OFF.
- Press Driver Information Center (DIC) RESET button.
- Press OPTIONS button on DIC until display is blank.
- Press and hold RESET button for 3 seconds.
- Press OPTIONS button until FOB TRAINING is displayed.
- Press RESET button to begin pairing sequence.
- Simultaneously press and hold LOCK and UNLOCK buttons on first remote for 13 seconds. Message will appear when remote is paired.
- Repeat this step for additional remotes.
- Turn ignition OFF and remove keys from ignition.
- Test all remotes.
6
NOTE: Ensure any existing remotes are present when pairing to vehicle.
- Turn the ignition to RUN or ON and the radio to off. Do not crank the engine.
- Press and hold the DISP button on the radio for at least five seconds until settings is displayed.
- Press the SEEK up or down arrows until FOB PROG appears on the display.
- Press the PREV or NEXT button to enter the sub menu. The current selection will have an asterisk next to it. BEGIN will be displayed.
- Press the DISP button to start pairing. When the message PUSH FOB flashes, press and hold the LOCK and UNLOCK buttons on the first remote at the same time for 15 seconds. A chime will be heard to verify the remote is paired.
- Repeat Step #5 for each additional remote up to four remotes total. You do not need to press the DISP button again, just press down the LOCK and UNLOCK buttons on the next remote to be learned to a maximum of four remotes per vehicle.
- The mode you selected is now set. You can either exit the PAIRING MODE by following the instructions later in this section or pair the next feature available on your vehicle.
- You can exit the pairing mode by scrolling to exit and pressing the DISP button.
- Test all remotes (ignition must be OFF).
7
NOTE: Ensure any existing remotes are present when pairing to vehicle.
- Remove the key from the ignition. Remove the BCM PRGRM fuse from the fuse panel. Use the legend on the fuse panel to properly locate the BCM PRGRM fuse. Fuse panel is accessed by opening the front passenger door.
- Close all of the doors.
- Close the lift-gate.
- Insert the key into the ignition, and turn to the ACC position.
- Turn the key to OFF and then back to ACC within 1 second.
- Open and close any vehicle door. A chime will be heard when the system enters into PAIRING MODE.
- Press and hold the remote LOCK and UNLOCK buttons simultaneously for 14 seconds. A chime will be heard after successful pairing.
- Repeat Step #7 for any other remotes.
- Remove key from ignition.
- Replace BCM program fuse that was removed earlier.
- Test all remotes.
8
NOTE: Ensure any existing remotes are present when pairing to vehicle.
- Insert key into the ignition switch. Turn ignition to the RUN position (as far as you can go without cranking engine). Wait for ignition chimes to stop.
- Using any working remote, press the UNLOCK button for 4 to 10 seconds.
- Within the specified 4 to 10 seconds, continue pressing the UNLOCK button and press the PANIC button for 1 second and release both buttons at the same time. A chime will sound within 3 seconds to indicate that the vehicle has entered PAIRING MODE.
- Within 30 seconds of the chime, press and release the LOCK and UNLOCK buttons at the same time, then press and release the UNLOCK button on
the same remote. A chime will sound indicating the remote has been PAIRED.
- Repeat Step #4 for any additional remotes. Turn ignition to OFF and remove key.
- Test all remotes.
9
NOTE: Ensure any existing remotes are present when pairing to vehicle.
- Using the working remote, press LOCK button 5 times at 2 second intervals to resynchronize remote.
- Insert key into the ignition switch. Turn ignition to the RUN position (as far as you can go without cranking engine). Wait for ignition chimes to stop.
- Using the working remote, press and hold the UNLOCK button on the remote for 4 to 10 seconds.
- Still using the working remote, within the specified 4 to 10 seconds, continue pressing the UNLOCK button and then press the PANIC button (on the working paired remote) for 1 second and release both buttons. A chime will sound to indicate that the remote PAIRING MODE has been entered (allow 3 seconds for chime to sound).
- Still using the working remote, within 30 seconds of the chime, press and release the LOCK and UNLOCK buttons simultaneously then press and release just the UNLOCK button. A chime will sound indicating the remote has been paired.
- Using the new replacement remote, press and release the LOCK and UNLOCK buttons simultaneously and then press and release just the UNLOCK button. A chime will sound. This remote has now been paired.
- For each additional new/replacement remote, press and release the LOCK and UNLOCK buttons simultaneously and then press and release the UNLOCK button. A chime should be heard after each remote signaling it has been paired.
- Turn ignition OFF and remove key.
- Test all remotes.
10
NOTE: Ensure any existing remotes are present when pairing to vehicle.
- Enter your vehicle and close all doors.
- Fasten your seat belt (fastening the seat belt will cancel any chiming that may confuse you during the pairing procedure).
- Place key into the ignition.
- Turn the ignition to the ON position (DO NOT START THE ENGINE).
- Press and hold the UNLOCK button on a working remote.
- Continue to hold the UNLOCK button, wait at least 4 seconds, but no longer than 10 seconds, then press and hold PANIC button.
- When a single chime is heard, release both buttons. The chime indicates the system is in PAIRING MODE.
- Press and release both the LOCK and UNLOCK button simultaneously on the remote to be paired.
- A single chime will be heard. The chime indicates the remote was recognized.
- Within 4 seconds of hearing the chime, press and release any button on the remote being paired. A single chime will be heard. The chime indicates the remote has been paired.
- Repeat Steps #8 to #11 for a total of 4 remotes.
- Turn the ignition to the OFF position or wait 60 seconds to exit PAIRING MODE.
- Test all remotes.
11
NOTE: Ensure any existing remotes are present when pairing to vehicle.
- Close and lock all doors with the driver's side power LOCK/UNLOCK switch.
- Insert key into ignition and remove it from the ignition key cylinder at least 6 times within 10 seconds. Your hazard lamps will flash if you have performed this step successfully.
NOTE: Withdraw key completely from ignition cylinder each time. If
this procedure is performed too fast, system will not enter PAIRING MODE.
- Insert key into the ignition cylinder and turn to the ACC position. Within 5 seconds, push ANY button on the remote. Your hazard lamps should flash.
NOTE: Do not press the button more than one time in the above step. If the button is pressed more than one time, the pairing procedure will not be successful.
- If there are any remaining remotes (including old ones), unlock then lock all doors using the driver's side power LOCK/UNLOCK switch and within 5 seconds, push ANY button on the next remote. Your hazard lamps should flash.
- Repeat Step #4 for each remote (including any existing remotes).
- Turn the key to the OFF position, remove keys from the ignition, unlock doors using the driver's side power LOCK/ UNLOCK switch and open the driver side door.
- Test all remotes.
12
NOTE: Ensure any existing remotes are present when pairing to vehicle.
- Start with the key out of the ignition, driver's door is open, and all others are closed and the driver's door is UNLOCKED.
- Perform these steps within 5 seconds.
A. Insert the key into the ignition (Do NOT Tum). Pull key out.
B. Insert the key into the ignition (Do NOT Turn). Pull key out.
- Perform these steps within 40 seconds.
A. Close then open the driver's door.
B. Close then open the driver's door.
C. Insert the key into the ignition (Do NOT Tum). Pull key out.
-
Perform these steps within 40 seconds.
-
A. Close then open the driver's door.
B. Close then open the driver's door.
C. Insert the key into ignition and leave in ignition.
D. Close the driver's door.
E. Turn the ignition to ON (Do NOT Start) then back to OFF.
F. Remove the key from the ignition. -
Within 3 seconds, the power door locks should lock then unlock automatically indicating successful entry into PAIRING MODE. Return to Step #1 if the locks do not cycle at this point.
-
Perform these steps within 40 seconds.
A. Press the LOCK and UNLOCK buttons on the remote simultaneously for 1 second.
B. Immediately after letting go of the lock and unlock buttons press the lock button by itself and hold for 2 seconds.
-
Within 3 seconds, the door locks should lock and then unlock once indicating successful pairing.
-
If the door locks cycle twice, repeat steps A and B as the remote was not accepted.
-
Repeat steps A and B in Step #6 for each new remote.
-
Open driver's door.
-
Test all remotes.
13
NOTE: Ensure any existing remotes are present when pairing to vehicle.
-
Start with key out of the ignition, driver's door is open, all others are closed, and driver's door is unlocked.
-
Insert key into ignition (Do NOT turn) and pull it out.
-
Perform these steps within 40 seconds.
A. Using the power door lock switch on driver's door, perform 5 LOCK/UNLOCK cycles starting with lock. Use an even pace and try to go about one cycle per second. (1 cycle = 1 LOCK and 1 UNLOCK)
B. Close, then open driver's door.
- Perform these steps within 40 seconds.
A. Using the power door lock switch on driver's door perform 5 LOCK/UNLOCK cycles starting with lock. Use an even pace and try to go about one cycle per second. (1 cycle = 1 LOCK and 1 UNLOCK)
B. Insert the key in the ignition cylinder.
C. Turn the ignition to ON (Do NOT Start) then back to OFF.
D. Turn the ignition to ON (Do NOT Start) then back to OFF.
E. Remove the key from the ignition.
-
Within 3 seconds the power door locks should cycle automatically indicating successful entry into PAIRING MODE. Return to Step #1 if the locks do not cycle at this point.
-
Perform these steps within 40 seconds.
A. Press the LOCK and UNLOCK buttons on the remote simultaneously for 1 second.
B. Immediately after letting go of the LOCK and UNLOCK buttons, press the LOCK button by itself and hold for 2 seconds. Within 3 seconds the door locks should cycle once indicating successful pairing. If the door locks don't cycle or cycle twice, repeat steps A and B, your remote has not been accepted.
C. Repeat steps A and B in Step #6 for each new remote.
-
Close driver's door.
-
Test all remotes.
14
NOTE: Ensure any existing remotes are present when pairing to vehicle.
- Turn ignition to run position (as far as you can go without starting engine).
- Using any working remote, press the UNLOCK button for 4 to 10 seconds.
- Within the specified 4 to 10 seconds, continue pressing the UNLOCK button and press the PANIC button for 1 second and
release both buttons at the same time.
- A chime will sound within 3 seconds to indicate that the vehicle has entered remote PAIRING MODE.
- Within 30 seconds of the chime, press any button on all remotes to be paired including previously paired remotes. A chime will sound after each remote is paired.
- Turn ignition to OFF and remove key.
- Test all remotes.
15
NOTE: Ensure any existing remotes are present when pairing to vehicle.
- Close all doors and then open driver's door and press the UNLOCK button on driver's door panel while door is open and insert key in ignition.
- Turn ignition from OFF to RUN 8 times within 10 seconds with the 8th time ending in RUN. Door locks will cycle to confirm you are in PAIRING MODE.
- Within 20 seconds press any button on first remote.
- Door locks will cycle to confirm pairing.
- Within 20 seconds, press any button on second remote. Door locks will cycle again to confirm pairing.
- Turn ignition to OFF. Locks will again cycle to indicate end of PAIRING MODE.
- Test all remotes.
16
NOTE: Ensure any existing remotes are present when pairing to vehicle.
- Fasten seat belts and close all doors.
- Turn ignition from OFF to RUN 4 times within 6 seconds, with the 4th time ending in RUN (OFF is the position where you can remove your key, RUN is the position just shy of starting your car).
- Turn ignition to OFF. Acoustic signal will sound to confirm PAIRING MODE.
- Within 10 seconds, press and hold any button on the first remote. Wait for acoustic sound and
warning lamp to flash (confirming pairing) then release button on remote.
- Wait 2 seconds but within 10 seconds repeat Step #4 for all other remotes. If you only have one remote then continue to Step #5.
- Turn ignition to RUN or wait 10 seconds to end PAIRING MODE.
- Test all remotes.
17
NOTE: Ensure any existing remotes are present when pairing to vehicle.
- Turn ignition from OFF to RUN 8 times within 10 seconds, with the 8th time ending in RUN. Door locks will cycle to confirm PAIRING MODE.
- Within 20 seconds press any button on the first remote. Door locks will cycle to confirm pairing.
- Within 20 seconds, press any button on the second remote. Door locks will cycle again to confirm pairing.
- Turn ignition to OFF. Locks will again cycle to indicate end of PAIRING MODE.
- Test all remotes.
18
NOTE: Ensure any existing remotes are present when pairing to vehicle.
- Turn ignition from OFF to RUN 4 times within 3 seconds, with the 4th time ending in RUN. Door locks will cycle to confirm PAIRING MODE.
- Within 20 seconds, press any button on the first remote. Door locks will cycle to confirm pairing.
- If applicable, within 20 seconds press any button on the second remote. Door locks will cycle to confirm pairing.
- Turn ignition to OFF. Door locks will cycle to indicate end of PAIRING MODE.
- Test all remotes.
19
NOTE: Ensure any existing remotes are present when pairing to vehicle.
- Turn the ignition from OFF to RUN 4 times within 6 seconds.
- Turn the ignition OFF. The LED in the clock/trip computer will light up continuously to confirm PAIRING MODE.
- Within 20 seconds, press any button on the first remote. The LED in the clock will flash 4 times to confirm pairing.
- If applicable, within 20 seconds, press any button on the second remote.
- Turn the ignition to RUN. The LED will turn off to indicate end of PAIRING MODE.
- Test all remotes.
20
NOTE: Ensure any existing remotes are present when pairing to vehicle.
- Turn ignition from OFF to RUN 5 times within 10 seconds, with the 5th time ending in RUN. Door locks will cycle to confirm PAIRING MODE.
- Within 20 seconds press any button on the first remote.
- Door locks will cycle to confirm pairing.
- If applicable, within 20 seconds, press any button on the second remote.
- Door locks will cycle again to confirm.
- Test all remotes.
21
NOTE: Ensure any existing remotes are present when pairing to vehicle.
- Close all doors.
- Open driver's door.
-
Insert key and turn to ON position and within 10 seconds turn key to OFF position and remove key.
-
Within 20 seconds close and open driver's door 3 times.
- Insert key and turn to ON position and within 10 seconds turn key to OFF position and remove key.
- Locks should now lock and unlock automatically to confirm you have entered PAIRING MODE.
- Press the UNLOCK button on remote and locks should cycle to confirm pairing.
- Repeat Step #3 on each additional remote.
- Exit vehicle with keys and remote, close door.
- Test all remotes.
22
NOTE: Ensure any existing remotes are present when pairing to vehicle.
- Put one key in the ON position in the ignition (do not start) and put another key in the driver's door and turn to the unlock position (counter clockwise) and hold until it beeps three times, about 10-15 seconds, then return to center position (leave in the door).
- Press one of the remote buttons (if you have more than one, you must program all the remotes at the same time or else the ones that worked will no longer work).
- The horn will beep once for the number of remotes, example: 1 beep for the first remote, 2 beeps for the second, etc. Then turn the door key back to left until the horn beeps three times to deactivate PAIRING MODE, and remove the ignition key.
- Test all remotes.
23
NOTE: Ensure any existing remotes are present when pairing to vehicle.
- Open driver's door.
- Hold the high beam selector arm towards you and insert ignition key and key to first position (ACC).
- Release the high beam selector and then pull and release the high beam selector 4 times. After the 4th time you will hear a chime.
PAIRING
- Then press the lock button on each remote to pair them.
- Remove key from ignition.
- Test all remotes.
24
NOTE: Ensure any existing remotes are present when pairing to vehicle.
Use this Procedure for Vehicles with Driver Information Center Buttons. This information is in your Owners Manual in the Drivers Information Center Section.
- Insert Key and turn to ON position so you can access Driver Information Center.
- Press the vehicle information button until PRESS TO RELEARN REMOTE KEY displays.
- Press the set/reset button until REMOTE KEY LEARNING ACTIVE will display.
- Press and hold the LOCK and UNLOCK buttons on the keyless remote at the same time for approximatley 15 seconds. A chime will sound indicating that the remote is PAIRED.
- To PAIR additional remotes at this time repeat Step #4. This vehicle can have a maximum of eight remotes paired.
- To exit PAIRING MODE turn key off and remove key.
- Test all remotes.
Use this Procedure for Vehicles with Driver Information Center Buttons. To access this display, the vehicle must be in Park (P) with key in the on position (as far as you can go without cranking engine).
- Press the trip odometer reset stem until RELEARN REMOTE KEY displays.
- Press and hold the trip odometer reset stem for three seconds.
- The message REMOTE KEY LEARNING ACTIVE will display.
- Press and hold the LOCK and UNLOCK buttons on the first keyless remote at the same time for approximately 15 seconds. A chime will sound
indicating that the remote is PAIRED.
- To program additional remotes at this time repeat Step #4.
- This vehicle can have a maximum of eight remotes PAIRED.
- To exit PAIRING MODE turn key off and remove key.
- Test all remotes.
NOTE: Issues when setting up the Universal Car Remote are typically attributed to one of three factors: 1) The vehicle is not equipped with a factory installed keyless entry system, 2) the vehicle is equipped with an aftermarket system or 3) the user is failing to execute the PAIRING instructions properly. A video sample is available at www.UniversalCarRemote.com with a sample of PAIRING instructions. More information on aftermarket systems is found below.
ACTIVATION
Most issues during the ACTIVATION step can be resolved by resetting the Universal Car Remote and beginning from Step #1 on pages 3-5 of the ACTIVATION process. See RESETTING THE UNIVERSAL CAR REMOTE on page 31.
Q. I think I missed the STATUS LIGHT sequence after I entered my vehicle code. Can I check it some way?
A. Yes, you can have the Universal Car Remote display the vehicle code you entered by pressing FUNCTION I and PANIC until the STATUS LIGHT blinks back the code you entered from pages 3-5, then press the TRUNK button.
PAIRING
While most modern vehicles with power locks and power windows are equipped with a factory installed keyless entry system, some are not. If you are unsure if your vehicle is equipped with factory installed keyless entry, it is recommended you contact your local automotive dealer with your VIN number to confirm the presence of the system.
Aftermarket systems are those that are installed by a third-party such as a mobile electronics shop and not originally included with the vehicle. The Universal Car Remote is not compatible with these systems.
Q. The car won't go into PAIRING mode.
-
Check in the VEHICLE LOOK UP list that the PAIRING number is the correct one for your car, and also verify the year of your car, then retry the PAIRING instructions.
-
If you've never had one of the remotes that originally came with the car, it is possible that the car does not have a factory installed keyless entry system.
- The car's original factory keyless entry system may be broken. If you are sure that the car had original remotes, you may want to have a mechanic look at the problem.
- See the MORE HELP section on page 34.
Q. Car is in PAIRING mode, but doesn't respond when the Universal Car Remote buttons are pressed.
- Redo all the steps in the "Activating your Universal Car Remote" section on page 4.
- Try resetting the Universal Car Remote.
- See the MORE HELP section on page 34.
GENERAL TROUBLESHOOTING
SOME OF THE BUTTONS ON THE UNIVERSAL CAR REMOTE ARE NOT WORKING.
The Universal Car Remote is designed to work with hundreds of different factory remotes. As a result, some vehicles use buttons that others will not use. While all vehicles will use the LOCK and UNLOCK buttons, the remaining buttons are strictly optional and may or may not function with your vehicle.
NOTE: Some vehicles require the user to hold a button for up to three seconds before a feature will operate, while others require pressing the button twice within 2 seconds. This is particularly common for PANIC, TRUNK, FUNCTION I and FUNCTION II buttons.
PLEASE DO NOT RETURN THE UNIVERSAL CAR REMOTE TO THE RETAILER. If you are having difficulty PAIRING the Universal Car Remote to your vehicle please contact iKeyless Support at 1-877-4-iKEYLESS.
Q. Can I pair the Universal Car Remote to work with more than one vehicle?
A. The Universal Car Remote is designed to work with one vehicle. You cannot pair it to work with multiple vehicles at a time.
Q. The status light no longer fl ashes when pressing a button but the remote still works with the vehicle.
A. See page 5 for instructions on ENABLING/ DISABLING the STATUS LIGHT.
Q. I successfully paired the Universal Car Remote to my vehicle but my old remote no longer works.
A. All remotes, old and new, must be paired at once. Refer to the PAIRING procedure for your vehicle for more information.
Q. STATUS LIGHT remains lit and will not turn off.
A. See "RESETTING YOUR REMOTE".
AUTOMOTIVE SERVICE DEPARTMENTS
The service department at your local automotive dealership may be able to assist you with questions about your vehicle's keyless entry system. Some dealerships may pair the remote to your vehicle for free as a courtesy.
The Universal Car Remote's STATUS LIGHT can be turned off to conserve battery life by pressing the TRUNK and FUNCTION II buttons simultaneously. The STATUS LIGHT will rapidly flash, then extinguish. To turn it back on, use the same procedure.
RESETTING THE UNIVERSAL CAR REMOTE
You will need:
- Small fl at-head screw driver.
- Small piece of wood or plastic such as a pen-cap or toothpick.
- Insert the screwdriver into the notch on the left side of the remote. Gently twist the top and bottom shell of the remote until it separates.
- Remove the rubber insert and the remote circuit board. Do not place the circuit board on any metal surface!
- Using the wood or plastic tool, carefully push the battery out of the bottom of the holder. Keep battery removed for 10 seconds. Make sure the + mark faces AWAY from the green board, so the + side touches the metal clip.
- Insert the battery and retry pairing or usage with your vehicle.
- If it still does not work correctly try replacing with a new CR1632 battery.
- If you are still having trouble see MORE HELP on page 34.
BATTERY
CHANGING THE CR1632 BATTERY
- Refer to previous section "RESETTING THE UNIVERSAL CAR REMOTE".

natural_image
Exploded view of a battery pack showing internal components and a labeled 'BATTERY' (no other text or symbols visible)MORE HELP
SOLID KEYS USA ONLINE CHAT SUPPORT
Live Chat is available through the www.solidkeysusa.com website. Agents are available to assist Monday - Friday from 9am to 5pm EST.
Solid Keys USA EMAIL SUPPORT
For email support: you can send your questions or concerns to: info@SolidKeysUsa. As with all forms of correspondence, be prepared to provide the following:
- The year, make, and model of your vehicle.
- Product information - the product you are inquiring about, which is the Universal Car Remote.
- Your information - your order number or receipt number, name, and phone number.
Solid Keys USA TELEPHONE SUPPORT
Phone support is available for Universal Car Remotes still covered under the standard warranty. Have the following items ready when you call:
- Purchase receipt.
- The Universal Car Remote.
Call Solid Keys USA Tech Support between the hours of 9am to 5pm EST at:
1-844-KEYSUSA
Solid Keys USA POSTAL MAIL
Solid Keys USA
828 East Market St.
Louisville, KY 40206
United States
FCC ID: X32-MECJ
MODEL: 300-0247
NOTE: This equipment has been tested and found to comply with the limits for a Class B digital device, pursuant to Part 15 of the FCC Rules. These limits are designed to provide reasonable protection against harmful interference in a residential installation. This equipment generates, uses, and can radiate radio frequency energy and, if not installed and used in accordance with the instructions, may cause harmful interference to radio communications. However, there is no guarantee that interference will not occur in a particular installation. If this equipment does cause harmful interference to radio or television reception, which can be determined by turning the equipment off and on, the user is encouraged to try to correct the interference by one or more of the following measures:
• Reorient or relocate the receiving antenna.
- Increase the separation between the equipment and receiver.
- Connect the equipment into an outlet on a circuit different from that to which the receiver is connected.
- Consult the dealer or an experienced radio/TV technician for help.
WARNING: Changes or modifications to this device not expressly approved by (iKeyless LLC) could void the user's authority to operate the equipment.
IC: 8797A-MECJ
MODEL: 300-0247
Under Industry Canada regulations, this radio transmitter may only operate using an antenna of a type and maximum (or lesser) gain approved for the transmitter by Industry Canada. To reduce potential radio interference to other users, the antenna type and its gain should be so chosen that the equivalent isotropically radiated power (e.i.r.p.) is not more than that necessary for successful communication.
This device complies with Industry Canada license-exempt RSS standard(s). Operation is subject to the following two conditions: (1) this device may not cause interference, and (2) this device must accept any interference, including interference that may cause undesired operation of the device.
iKeyless warrants this product against manufacturing defects for a period of three years from the date of purchase. This warranty covers any product defects that result in poor performance of the remote control. It does not cover cosmetic appearance, battery depletion, nor poor performance of the remote control due to damage resulting from impact, exposure to water, exposure to excessive heat, improper handling or improper use. This warranty does not cover customer inability or unwillingness to perform the required procedures that triggers vehicle's keyless entry system to enter 'activation mode' or 'pairing mode', nor does it cover defects in a vehicle's keyless entry system. Warranty claims are limited to the replacement of the product at iKeyless' discretion. To submit a warranty claim, contact iKeyless customer service at 1-877-4-IKEYLESS (877-445-3953). Customer must provide proof of purchase including UPC label from packaging and copy of store receipt showing date of purchase. This warranty gives you specific legal rights and you may also have other rights which vary from state to state. This information may not be reproduced, copied, or distributed by any means without prior written consent from iKeyless.
DISCLAIMER : Customer accepts all responsibility and liability for any and all injuries, damages, costs, or claims as a result of the correct or incorrect use of setup and/or pairing instructions. Some states do not allow the exclusion or limitation of incidental or consequential damages, so the above limitation or exclusion may not apply to you.

natural_image
Illustration of a hand holding a padlock with Wi-Fi signal icon above (no text or symbols)UNIVERSAL CAR REMOTE™
WWW.UNIVERSALCARREMOTE.COM
828 EAST MARKET STREET
LOUISVILLE, KY 40206
TOLL FREE NUMBER: 1-877-445-3953



D&A in the USA
© 2016 iKeyless LLC



- UNIVERSAL
- CAR
- REMOTE™
- Thank you for purchasing the Universal Car Remote. We invite you to visit www.iKeyless.com for a complete line of replacement keys and remotes.
- Thank you for purchasing the world's first Universal Car Remote!
- Get to know your Universal Car Remote
- Let's get started
- ACTIVATION CODE \_\_\_\_ PAIRING CODE
- STEP 1 (of 2)
- Activating your Universal Car Remote
- STEP 2 (of 2)
- Pairing your Universal Car Remote to your vehicle
- Before continuing, ensure you have the following:
- REMOTE LOOK UP
- Important: read this first
- 1
- 2
- 3
- 4
- 5
- 6
- 7
- 8
- 9
- 10
- 11
- 12
- 13
- 14
- 15
- 16
- 17
- 18
- 19
- 20
- 21
- 22
- 23
- PAIRING
- 24
- ACTIVATION
- GENERAL TROUBLESHOOTING
- SOME OF THE BUTTONS ON THE UNIVERSAL CAR REMOTE ARE NOT WORKING.
- AUTOMOTIVE SERVICE DEPARTMENTS
- RESETTING THE UNIVERSAL CAR REMOTE
- BATTERY
- CHANGING THE CR1632 BATTERY
- MORE HELP
- SOLID KEYS USA ONLINE CHAT SUPPORT
- Solid Keys USA EMAIL SUPPORT
- Solid Keys USA TELEPHONE SUPPORT
- 1-844-KEYSUSA
- Solid Keys USA POSTAL MAIL
- FCC ID: X32-MECJ
- MODEL: 300-0247
- IC: 8797A-MECJ
- UNIVERSAL CAR REMOTE™
Brand : AUDIOVOX
Model : VURCR01
Category : Remote control