L1HSTB12A - Media player Logik - Free user manual and instructions
Find the device manual for free L1HSTB12A Logik in PDF.
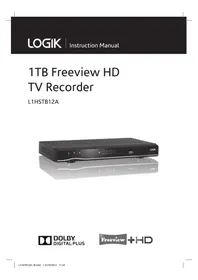


| Product Type | Freeview HD TV Recorder with 1TB Hard Disk Drive |
| Model | L1HSTB12A |
| Brand | Logik |
| Dimensions (W x D x H) | 360 x 280 x 48 mm |
| Weight | 2.82 kg |
| Power Supply | 220-240V AC ~50Hz |
| Maximum Power Consumption | 19.2 W |
| Standby Power Consumption | Less than 1 W (Low Power Standby mode) |
| Hard Disk Capacity | 1 TB |
| Recording Capability | Record up to 2 programmes simultaneously; watch a third |
| Time Shift | Pause and rewind live TV (adjustable duration) |
| Electronic Programme Guide (EPG) | 7-day EPG with search, series recording, and conflict management |
| Media Playback | Music (MP3/WMA), Photos (JPG), Movies (AVI/MPG/MKV/MP4) |
| Connectivity | HDMI, SCART (TV), Optical Audio Out, Ethernet, USB 2.0 |
| Tuner | DVB-T2 (MPEG2/MPEG4 HD) with UHF frequency band |
| Remote Control | Infrared, operates up to 5 metres, 60° angle, uses 2 x AAA batteries |
| Parental Control | Channel lock and menu lock with PIN (default 0000) |
| Auto Standby | Selectable after 2/3/4/6/8 hours or disabled |
| Operating Temperature | 5°C to 40°C |
| Storage Temperature | -15°C to +55°C |
| Safety Features | Overheat protection, ventilation slots, no user-serviceable parts |
| Maintenance | Unplug before cleaning; use dry cloth, no liquids or abrasives |
| Spare Parts and Accessories | Available from Partmaster (UK) – call 0344 800 3456 or visit partmaster.co.uk |
Frequently Asked Questions - L1HSTB12A Logik
User questions about L1HSTB12A Logik
0 question about this device. Answer the ones you know or ask your own.
Ask a new question about this device
Download the instructions for your Media player in PDF format for free! Find your manual L1HSTB12A - Logik and take your electronic device back in hand. On this page are published all the documents necessary for the use of your device. L1HSTB12A by Logik.
USER MANUAL L1HSTB12A Logik
1TB Freeview HD TV Recorder
L1HSTB12A
Contents
Safety Warnings....4
Unpacking....6
Product Overview....7
Front View 7
Rear View....7
Remote Control....8
Battery Replacement of the Remote Control....10
- Handling the Batteries....10
- Handling the Remote Control....10
Remote Control Operation Range....10
Initial Set Up....12
Plug In and Switch On 12
Standby Modes....12
Auto Standby Mode....12
Low Power Standby Mode ....13
First Time Installation....13
Target Region Descriptor....14
Programme Guide (EPG)....15
Switch On / Off Programme Guide 15
Button Functions in a 7 Days Guide ....15
Event Options....16
- Select Channel....16
- Record Programme / Delete Timer....16
- Record Series / Delete Series Number ....16
- Check Conflicts....17
- Split Record....17
- Alternative Timer Record ....17
Guide Search....18
Basic Features 19
Information Bar....19
Volume Adjustment....19
Channel Select....19
TV/RADIO Selection....20
Teletext Selection....20
Language Selection....20
Favourite List....20
Recording 21
Instant Recording....21
EPG Recording....21
Time Shift Recording 22
Manual Timer Programming 23
- Add Timer....23
Play Recorded Programme 24
Viewing the Media Browser 25
Connecting a USB Storage Device 25
Listening to Music 26
Viewing Photos 27
Watching Movies 28
Playing Slideshow 28
File Operations 30
Channel List Setting 31
Select Channel 31
Delete Channel 31
Delete Multiple Channels 32
Rename Channel 32
Lock Channel 32
Lock Multiple Channel 33
Favourite Channel....33
Channel List Filter....34
Info....34
Timers Setting....35
Delete Timer....35
Edit Timer 35
Add Timer....35
Sort Timer....35
Recordings Library Setting 36
Delete Recording....36
Edit Recording....37
Tag Recording....37
Sort Recording....37
Resume Playback Recording....37
Recording Information....37
Play Options....38
Play from Start....38
Resume 38
Play from Offset 38
Manage Chapters 38
Create Archive 38
Chapters Options....39
Archive Management....39
Edit Recording....40
Main Title....41
Recording Title 41
Recordings Setup....42
Configuration Setup....44
Language Setup....47
Installation Setup 48
IP (Internet Protocol) Installation Setup....49
Hints and Tips ....50
Specifications....51

Safety Warnings
- Read all the instructions carefully before using the unit and keep them for future reference.
- Retain the manual. If you pass the unit onto a third party make sure to include this manual.
- Check that the voltage marked on the rating label matches your adapter voltage.
Damage
- Please inspect the unit for damage after unpacking.
- Do not continue to operate the unit if you are in any doubt about it working normally, or if it is damaged in any way - switch off, withdraw the mains adapter and consult your dealer.
Location of Unit
- The unit must be placed on a flat stable surface and should not be subjected to vibrations.
- Do not place the unit on sloped or unstable surfaces as the unit may fall off or tip over.
- The mains socket must be located near the unit and should be easily accessible.
- This unit is designed for indoor, domestic use only.
Temperature
- Avoid extreme temperatures, either hot or cold. Place the unit well away from heat sources such as radiators or gas/electric fires.
- Avoid exposure to direct sunlight and other sources of heat.
Naked Flames
- Never place any type of candle or naked flame on the top of or near the unit.
Moisture
• To reduce the risk of fire, electric shock or product damage, do not expose this unit to rain, moisture, dripping or splashing. No objects filled with liquids, such as vases, should be placed on the unit. - If you spill any liquid into the unit, it can cause serious damage. Switch it off at the mains immediately. Withdraw the mains adapter and consult your dealer.
Ventilation
- To prevent the risk of electric shock or fire hazard due to overheating, ensure that curtains and other materials do not obstruct the ventilation vents.
- Do not install or place this unit in a bookcase, built-in cabinet or in another confined space. Ensure the unit is well ventilated.
Safety
- Always disconnect the unit from the mains supply before connecting/disconnecting other devices or moving the unit.
- Unplug the unit from the mains socket during a lightning storm.
Mains Adapter Cable
- Make sure the unit or unit stand is not resting on top of the mains cable, as the weight of the unit may damage the mains cable and create a safety hazard.
- If the mains cable is damaged it must be replaced by the manufacturer, its service agent, or similarly qualified persons in order to avoid a hazard.
Interference
- Do not place the unit on or near appliances which may cause electromagnetic interference. If you do, it may adversely affect the operating performance of the unit, and cause a distorted picture or sound.
Standby
- The button on the remote control does not switch off the unit completely. The unit will continue to draw electricity from the mains supply while in standby. In the interests of safety and to avoid unnecessary energy consumption, never leave the unit in standby while unattended for long periods of time, e.g. overnight, while on holiday or while out of the house. Switch it off and disconnect the mains adapter from the mains socket.
Batteries
- Batteries used in the remote control for this unit are easily swallowed by young children and this is dangerous.
- Keep loose batteries away from young children and make sure that the battery holder tray is secure in the remote control. Seek medical advice if you believe a cell has been swallowed.
- Please dispose of batteries correctly by following the guidance in this manual.
- The batteries shall not be exposed to excessive heat such as sunshine, fire or the like.
Supervision
- Children should be supervised to ensure that they do not play with the unit and the remote control.
- Never let anyone especially children push anything into the holes, slots or any other openings in the case - this could result in a fatal electric shock.




The lightning flash with arrowhead symbol, within an equilateral triangle, is intended to alert the user to the presence of uninsulated "dangerous voltage" within the unit's enclosure that may be of sufficient magnitude to constitute a risk of electric shock.

The exclamation point within an equilateral triangle is intended to alert the user to the presence of important operating and maintenance (servicing) instructions in the manual accompanying the unit.
Service
- To reduce the risk of electric shock, do not remove screws. The unit does not contain any user-serviceable parts. Please leave all maintenance work to qualified personnel.
- Do not open any fixed covers as this may expose dangerous voltages.
Maintenance
- Ensure to unplug the unit from the mains socket before cleaning.
- Do not use any type of abrasive pad or abrasive cleaning solutions as these may damage the unit's surface.
- Do not use liquids to clean the unit.
- The wall socket plug is used as a disconnect device, the disconnect device should be readily accessible.
Thank you for purchasing your new Logik Freeview HD TV Recorder. We recommend that you spend some time reading this instruction manual in order that you fully understand all the operational features it offers. You will also find some hints and tips to help you resolve any issues. Read all the safety instructions carefully before use and keep this instruction manual for future reference.

Unpacking
Remove all packaging from the unit. Retain the packaging. If you dispose of it please do so according to local regulations.
The following items are included:
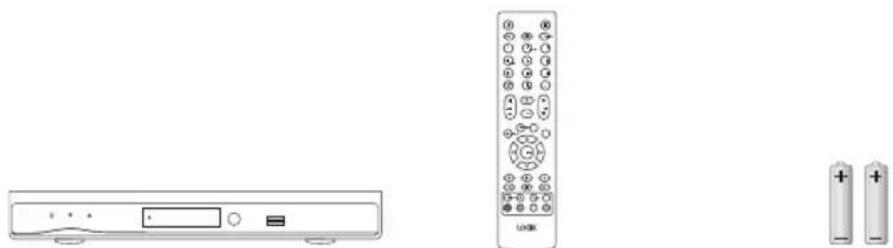
Main unit AAA Batteries X 2Remote Control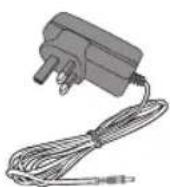
HDMI CableMains Adapter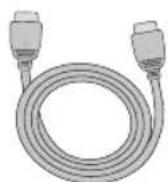
Quick Start Guidelnstruction Manual

If items are missing, or damaged please contact Partmaster (UK only).
Tel: 0344 800 3456 for assistance.

Product Overview
Front View
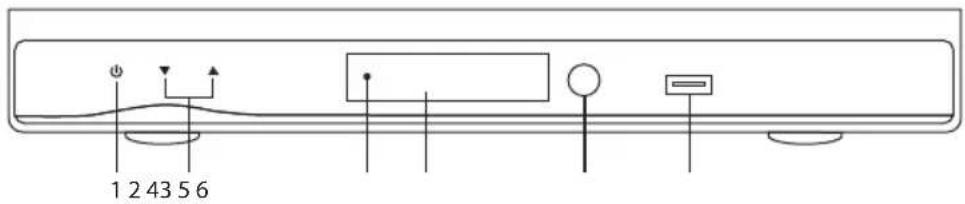
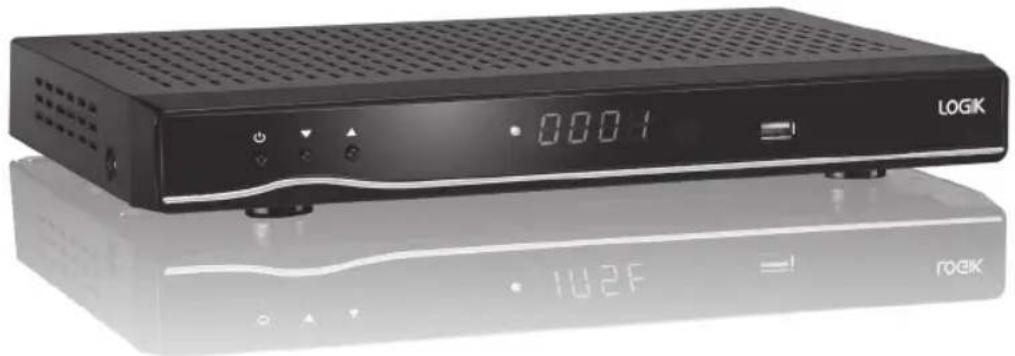
1. Button
- Switches the unit between the ON and STANDBY modes.
2. ▲▼ Button
• To change channels.
3. Power indicator
- Lights up red when the unit is in STANDBY mode. • Lights up green when the unit is on.
4. LED Display
- Display is blank when in standby mode. • Displays the current programme number after the unit is turned on.
5. Remote Control Sensor
6. USB Socket
Rear View
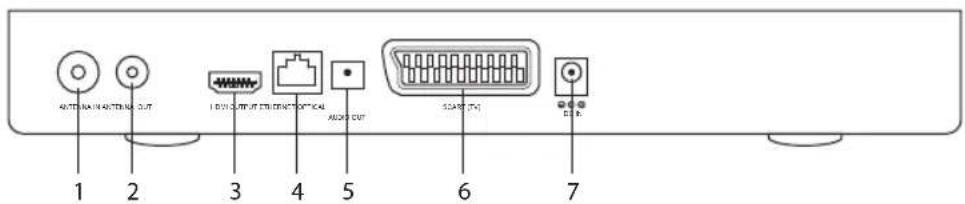
- Aerial IN Socket
- Aerial OUT Socket
- HDMI Socket
- Ethernet Socket
- OPTICAL Socket
- SCART TV Socket
- DC IN Socket
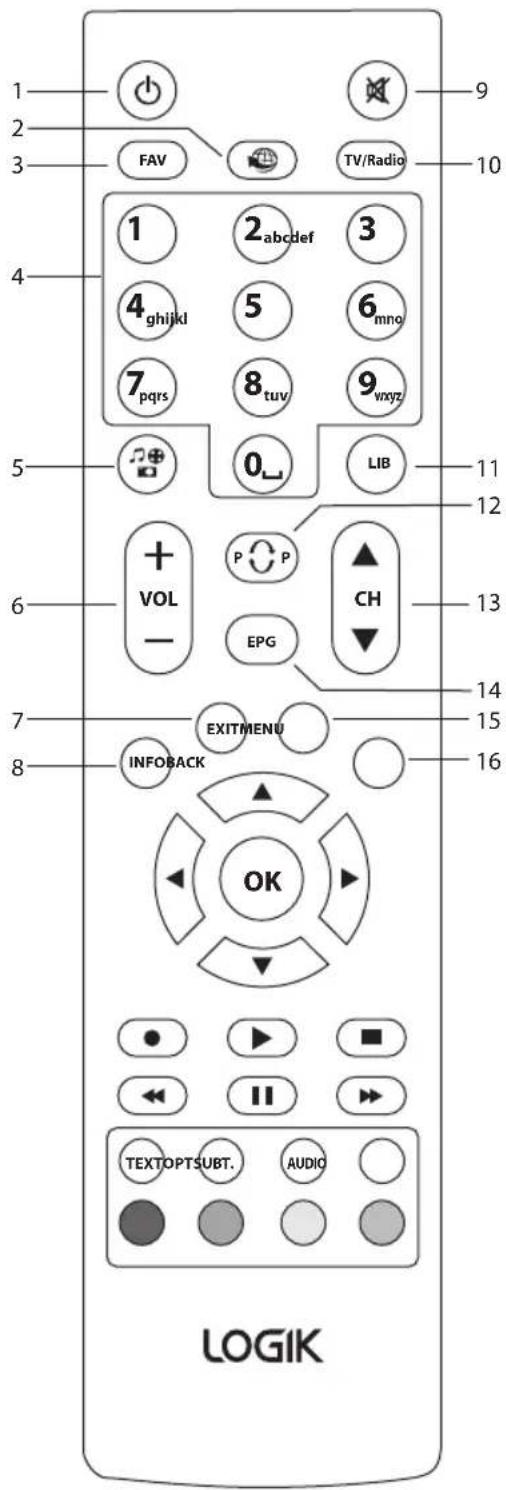
Remote Control
1. Standby Button
• Switches the unit on and off.
2. No Function
3. FAV Button
• Displays the favourite menu.
4. 0-9 Buttons
- Selects a channel.
- Enter numeric values in the set-up menus.
- Selects characters for renaming.
5. MEDIA Button
- Opens the Media browser.
6. VOL + / - Button
- Adjusts the volume up and down.
7. EXIT Button
- Exits a menu and returns to normal TV viewing.
8. INFO Button
• Displays channel and programme information.
9. MUTE Button
- Mute and restore your unit's sound.
10. TV/RADIO Button
- A short-cut to switch between TV and Digital radio channels.
11. LIB Button
• Displays the library menu where your programmes are recorded.
12. P-P (Previous Program) Button
• Switches back to the last channel watched
13. CH ▲/▼Button
- Switches to the next or previous channel.
- Moves one page up or down in the channel list.
14. EPG Button
• Displays the Programme Guide.
15. MENU Button
• Displays the Main menu.
16. BACK Button
- Returns to the previous menu.
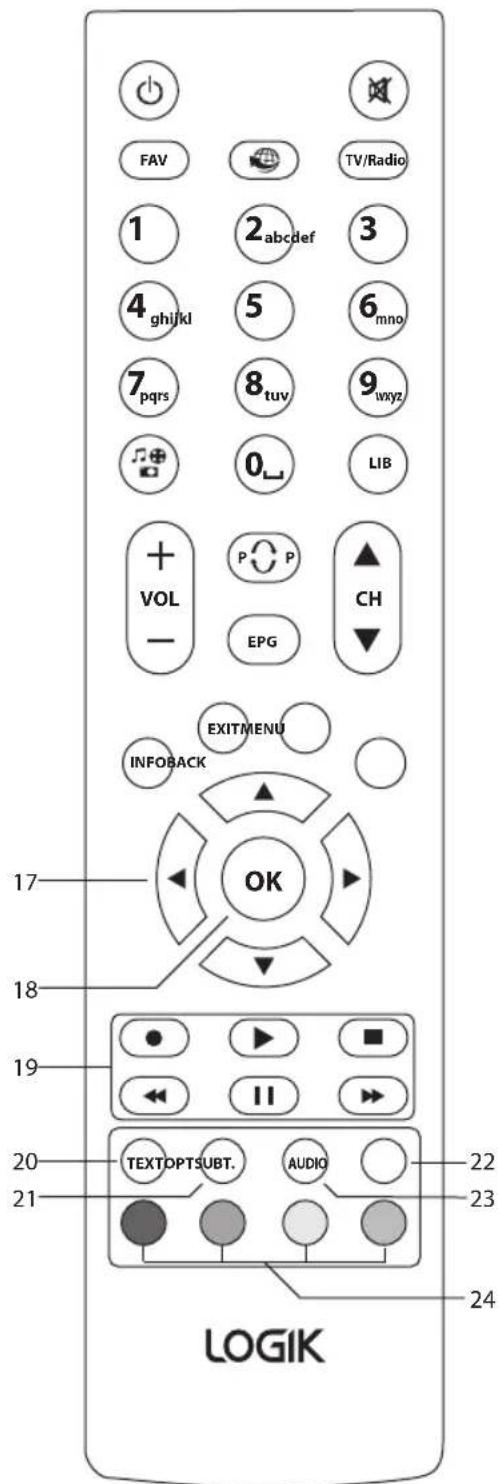
17. ▶ Buttons
- Navigates menus and programme guides.
18. OK Button
- Confirms a selection in the OSD menu. - Displays the channel list.
19. ◀ Button
- Allows fast reversing / fast forwarding of the recorded programmes.
PLAY Button
- Start / resume playback.
Button
• Stops playback or recording.
11 Button
- Pause playback. - Start time-shift function. - Play the playback forward frame by frame.
- Button
• Records programme and scheduled recordings.
20. TEXT Button
- Displays interactive and digital text services (where available).
21. SUBTITLE Button
• To select subtitles which are broadcast with the programme (if available).
22. OPTION Button
• Displays the Setup menu.
23. AUDIO Button
• Displays the Current language menu to select an audio/subtitle language.
24. Coloured Buttons (Red/Green/Yellow/Blue)
- For interactive functions. - To access the teletext item or select the group channel.
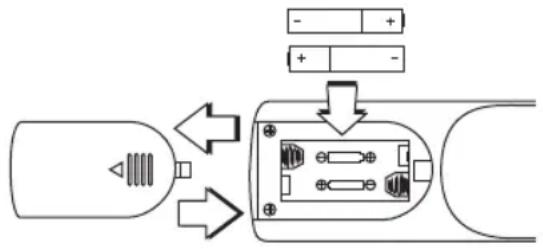
Battery Replacement of the Remote Control
- Slide the battery cover off the remote control.
- Insert two AAA size batteries (included). Ensure the polarities (+ and −) of the batteries match the (+) and (−) ends indicated in the battery compartment.
- Slide the battery cover back onto the remote control.
Handling the Batteries
- Improper or incorrect use of batteries may cause corrosion or battery leakage, which could cause fire, personal injury or damage to property.
- Only use the battery type indicated in this manual.
- When the batteries are exhausted, the remote will not function. Replace both batteries at the same time with new ones.
- Do not install new batteries with used ones and do not mix different types of batteries.
- Do not dispose of used batteries as domestic waste. Dispose of them in accordance with local regulations.
Handling the Remote Control
- Do not drop or cause impact to the remote control.
- Do not spill water or any liquid on the remote control.
- Do not place the remote control on a wet object.
- Do not place the remote control under direct sunlight or near sources of excessive heat.
- Remove the battery from the remote control when not in use for a long period of time, as it could cause corrosion or battery leakage and may result in physical injury and/or property damage including fire.
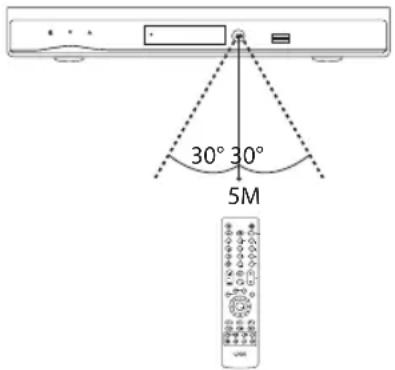
Remote Control Operation Range
Keep the remote control within approx. 5 metres of the remote control sensor on the unit and within 60° in front of the unit. The operating distance may vary depending on the brightness of the room.
System Connection
![graph TD A["TV"] --> B["Internet"] B --> C["RF Coaxial Cable (not included)"] B --> D["HDMI Cable (included)"] B --> E["SCART Cable (not included)"] B --> F["To SCART socket"] B --> G["To HDMI socket"] B --> H["To Mains Socket"] B --> I["To SPDIF socket"] B --> J["Digital Optical Cable (not included…](/content/2026/05/967149/images/29077e71886c9730a9b3ecd1c07b870a91d395d04f83d47b3e073b88b6d3b646.jpg)
- Ensure your TV and any other equipment you are connecting to are switched off.
- Connect one end of the RF coaxial cable (not supplied) to the aerial socket on the wall and the other end to the ANTENNA IN socket on the rear panel of the unit.
- Connect another RF coaxial cable (not supplied) to the ANTENNA OUT socket on the rear panel of the unit and the other end to your TV.
- Connect the supplied HDMI cable to the HDMI socket at the back of the unit and an HDMI socket on your TV. There may be more than one HDMI socket on your TV. If you are not sure which one to use, check the TV's instruction manual.

If your TV has no HDMI socket, then it must be connected to the unit with a SCART cable, and you will not be able to watch channels in high definition.
- If your TV has no HDMI socket, connect one end of the SCART cable (not supplied) to the SCART (TV) socket on the rear panel of the unit and the other end to the SCART socket on your TV.
- You can also connect the unit to a stereo or surround sound system, so that you can listen to the TV sound through the sound system instead of (or as well as) the TV's speakers. You will connect one end of the Digital Optical cable (not supplied) to the OPTICAL AUDIO OUT socket on the rear panel of the unit and the other end to the audio system.

If you require additional assistance please call our UK Call Centre on 0344 561 1234. Our UK Customer Contact Centre is open Monday-Saturday 8am-8pm and Sunday 8am-6pm.

Initial Set Up
Plug In and Switch On
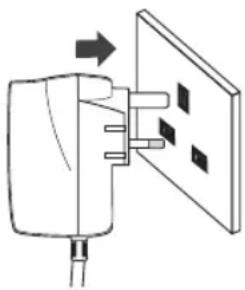
- Connect the mains adapter cable to the mains socket after you have completed all the connections and switch on. At this stage, the unit switches to standby mode. The red LED indicator will illuminate on the front panel of the unit.
- Switch your TV on and select the HDMI or SCART input.
- Press the ⏻ Standby button to turn the unit on. The red LED indicator will turn green. The first installation screen will show on the television screen.

The unit will take a while to load.

Standby Modes
This unit contains 2 standby modes.
Auto Standby Mode
The unit will automatically switch to standby mode 3 hours after the last time the remote control was used. A reminder screen will pop up and count down before the unit switches to standby mode.
To turn off the auto standby function, press the MENU button to display the main menu. Press the ▲▼ buttons to select the Setup option and then press the OK button to enter the Setup menu. Press the ▲▼ buttons to select the Configuration option and then press the OK button. Press the ▲ buttons to select Auto Standby option and then press the buttons to select 2 Hours / 3 Hours / 4 Hours / 6 Hours / 8 Hours / Disabled. Press the EXIT button to exit the main menu.
Low Power Standby Mode
When the unit is in On mode, press the Standby once, the unit will enter the active standby mode and the power indicator will illuminate red. To turn the unit on again, press the button again. The power indicator will illuminate green.
The unit enters low power standby mode after approximately 1 minute. The LED display will be blank.
To turn the unit on again, press the Standby to turn the unit on, the power indicator will illuminate green. It may take a minute until the unit is initialised.

- If you press the Standby button during recording or if any EPG programme recordings and/or manual recordings are set, the unit does not switch to low power mode and remains in active standby mode until recording tasks have been finished.
- The unit initializes from time to time to receive updates from the EPG broadcast in order to synchronize EPG recording tasks properly. After getting updates, the unit switches to low power mode automatically. This takes a short while and it is not a malfunction.

First Time Installation
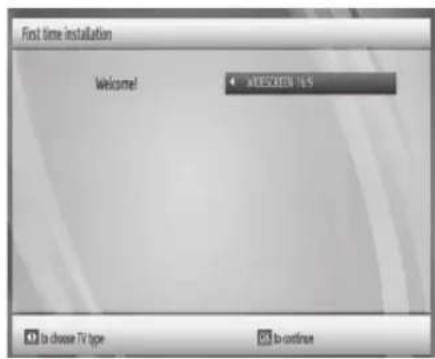
- When your unit is switched on for the first time, it will go straight into the First Time Installation menu.

The unit will take a while to load.
- Press the buttons to select the TV type and then press the OK button to confirm.
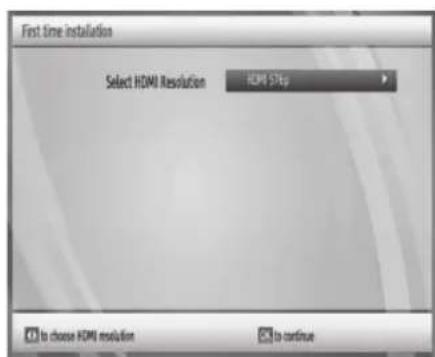
- Press the buttons to select the correct HDMI resolution for your TV and then press the OK button to confirm.
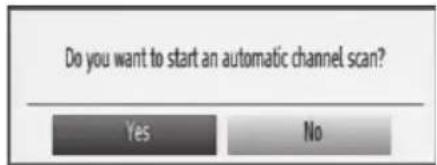
- Press the ◀ buttons to select Yes and then press the OK button to begin automatic channel scan.
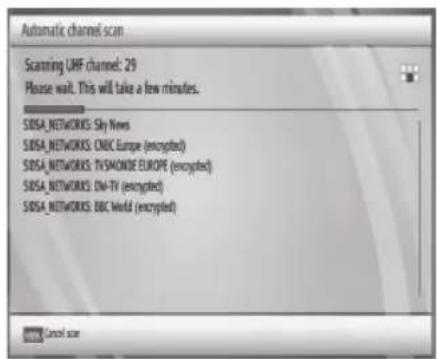
- The tuning progress screen will be displayed, showing you how many channels have been found and saved. The tuning may take several minutes to complete. You can press the MENU button to cancel the auto tuning.
Target Region Descriptor
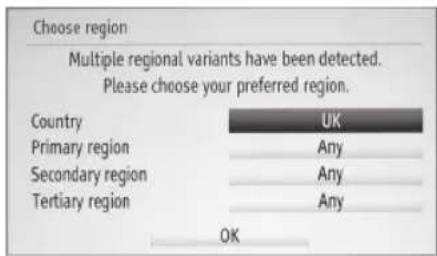
During tuning your TV may have received signals from more than one transmitter. If this has occurred the Target Region Descriptor screen will be displayed. This will enable you to select the correct regional transmission for the local news service that you require.
- Press the ◀ buttons to adjust each option's setting and then press the OK button to confirm.
| Country This will be shown as UK for the UK. | |
| Primary Region | This will show the regional country (e.g. England, Wales, Scotland, NI). |
| Secondary Region | This will allow you to set the region for your local news service. |
| Tertiary Region | You may receive signals from more than one transmitter within the Secondary Region (e.g Beds and Cambs may have Luton or Sandy Heath). |
- When the tuning is complete, a message will be displayed on the screen. Press the OK button to restart the unit after 3-5 seconds. The channels are arranged in a preset order. When the search progress is completed, you can watch saved broadcasts after the restart process.

Programme Guide (EPG)
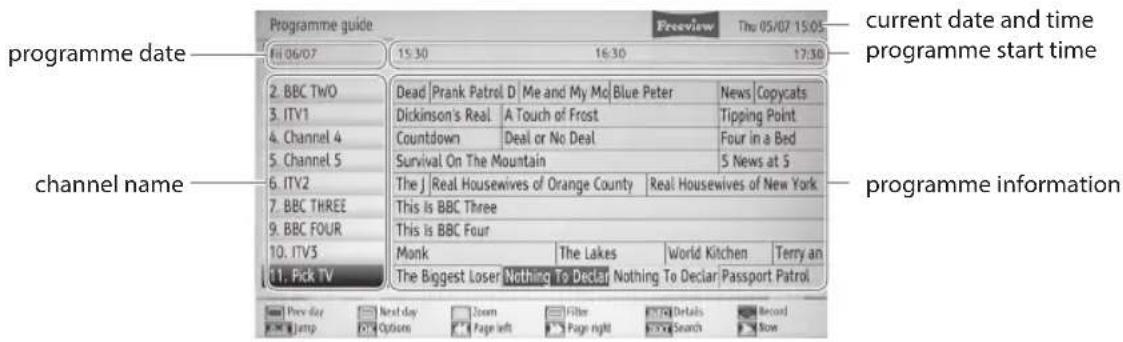
This system has an Electronic Programme Guide (EPG) to help you navigate through all the possible viewing options. The Programme Guide supplies information such as programme listings, start and end times for all available services (the availability and amount of programme information will vary, depending on the particular broadcaster). The Programme Guide displays the programme details for the next 7 days.
Switch On / Off Programme Guide
- Press the EPG button or press the MENU button and then press the ▲▼ buttons to select Programme Guide.
- Press the EPG button again or press the BACK button to switch off Programme Guide and return to normal TV viewing.
Button Functions in a 7 Days Guide
| Remote Control Button Function | |
| ▲ or ▼ selects a channel. | |
| ◀ or ▶ Selects a channel programme. | |
| RED (Prev Day) Displays the programmes of previous day. | |
| Green (Next Day) Displays the programmes of next day. | |
| Yellow (Expand) Expands programme information. | |
| Blue (Filter) | Views filtering options. (For more details, please refer to section Channel List Filter.) |
| INFO Displays the detail Information for the selected programme. | |
| ● | Record the selected programme. |
| Numeric (0-9) Jumps to the preferred channel directly. | |
| OK | Displays the Event Options. (For more details, please refer to section Event Options.) |
| ◀ or ▶ | Displays previous or next page. |
| TEXT (Search) | DisplaysGuide Searchmenu. (For more details, please refer to sectionGuide Searchpage 17.) |
| ▶ PLAY | Shows the current programme. |
| EPG | Exit Programme Guide and return to normal TV viewing. |
Event Options
- Press the buttons to select the desired channel and then press the <buttons to select the desired programme.
- Press the OK button to display the Event Options.
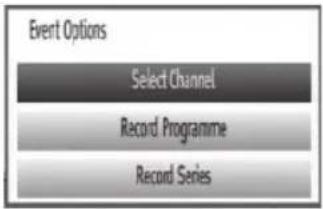

If there is an HD alternative to the selected programme, there will be an additional entry at the bottom of the menu, called, "HD Alternative".
Select Channel
Press the ▲▼ buttons to select Select Channel and then press the OK button to switch to channel of the programme which is selected.
Record Programme / Delete Timer
Press the ▲buttons to select the programme to be recorded, then press the button to set the recording.
To cancel an already set recording, select that programme and press the OK button to display the Event Options. Press the ▲▼ buttons to select Delete Timer and then press the OK button again to confirm.
Record Series / Delete Series Number
Press the ▲ buttons to select Record Series and then press the OK button to record a programme and all of its following parts within 7 days. The information belonging to the selected programme will be saved from the software and following parts of the selected programme which are not included in the period of 8 days, will be automatically added day by day. The letter "s" denotes that these recordings are series recordings.
![Programme guide. File: 04/07 15:05. Dead | Prank Patrol | [Me and My Me] Blue Peter. News Copycats. 1. ITV1: Dickinson's Real | A Touch of Frost, Tipping Point. 4. Channel 4: Countdown | Seal or No Deal, Four in a Bed. 5. Channel 5: Survival On The Mountain, 5 News at 5. 6. ITV2: The | Real Housewiv…](/content/2026/05/967149/images/f8f8169a4df2fea9c7d57ab72f73f7e4a37401a6241d72449d03b43326ee7c09.jpg)

Series programme information, where available, will be broadcast by the broadcaster.
To cancel a series that has been set to record, select that programme and press the OK button to display the Event Options. Press the ▲▼ buttons to select Delete Series and then press the OK button again to confirm.
Check Conflicts
If more than two programmes are set for recording in the same time interval or if more than two reminders have the same starting time, a conflict is caused.
The Too Many Timers window will automatically open. (For more details, please refer to the section Alternative Timer Record.)
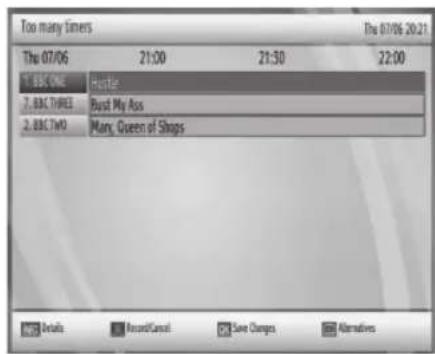
Split Record
If you select a programme to be recorded, with this feature, if there is another part of the programme available, it will also be set to automatically record.
For example if you see the programme with a red underline, the following episode is also underlined. To do this, you have to press only the ● button once. The rest will be done automatically.
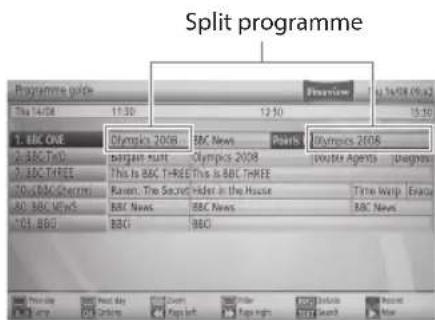

Split programme information, where available, will be broadcast by the broadcaster.
Alternative Timer Record
If more than two programmes are set for recording in the same time interval or if more than two reminders have the same starting time, a conflict is caused.
The Too Many Timers window will automatically open. Press the Red button to display the Alternative Window. Select an alternative for one of those programmes or cancel one of the reminders.
If there is still a conflict and you leave this menu by pressing the OK button, you will see the warning message: "There are still conflicts!".
If you fail to resolve the conflicts, the two earliest programmes will be recorded and any later conflicting programme will fail.
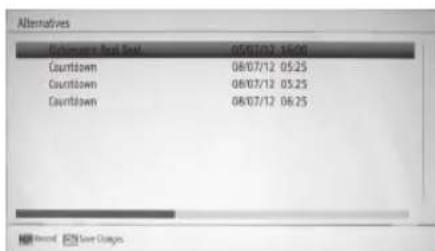
Guide Search
You can search the EPG for upcoming programmes. From the EPG view, press the TEXT button to display the Guide Search menu.
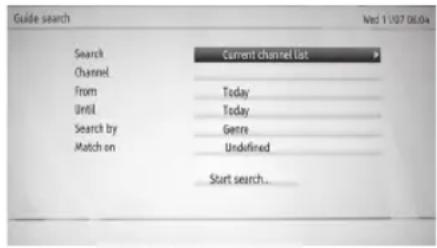
Press the ▲buttons to select the following options:
| Search | Select from: Current Channel List / Single channel / All channels / All TV channels / All Radio channels. |
| Channel Select the channel for a single channel search. | |
| From Select the day to start the search. | |
| Until Select the day to finish the search. | |
| Search by Select from: Genre / Name match | |
| Match on | If Genre is selected above then select from the Genre list. If Name match is selected above then enter the name using the 0-9 buttons as you would when entering text on a mobile phone. |

Basic Features
Information Bar
Press the INFO button to display information about the current programme.
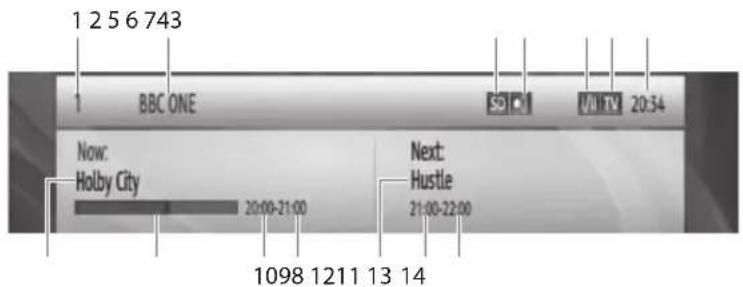
- Channel number currently viewed
- Channel name currently viewed
- Definition of programme (High Definition or Standard Definition)
- Audio Description is available
- Programme can be received in two languages (dual language)
- Programme mode (TV or Radio)
- Current time
- Current programme name
- Programme progress bar
- Current programme start time
- Current programme end time
- Next programme name
- Next programme start time
- Next programme end time
Volume Adjustment
- Press the VOL + / - buttons on the remote control to adjust the volume.
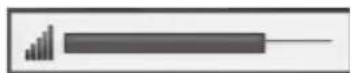
- Press the MUTE button on the remote control to switch the sound off. Press the MUTE button again or press the VOL + / - buttons to cancel this function.
Channel Select
- Press the CH /▲ buttons on the remote control repeatedly or the 0-9 buttons on the remote control to select the channel.
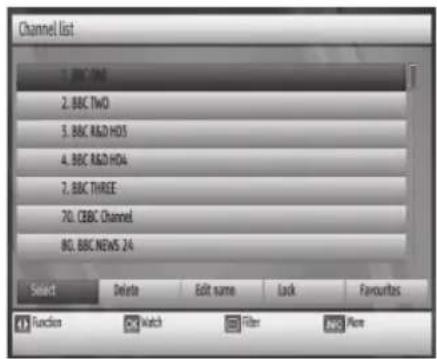
- Press the OK button to enter the Channels List. Then use the ▲▼ buttons to select the channel and then press the OK button to watch.

- When a channel is locked, a valid password must be entered. The default password is "0000".
- If you change the password, be sure to remember the new password! If you forget the new password, press the master password "4725".
TV/RADIO Selection
Press the TV/RADIO button to switch between TV and Digital radio channels.
Teletext Selection
Digital teletext can access special digital teletext services and specific services which broadcast digital teletext.
- First, ensure the Subtitle function is turned off. Press the TEXT button to enter Teletext. (If Teletext is transmitted.)
- Follow the instructions on digital teletext and move onto the next step by pressing OK, ▲◀▶▼, RED, GREEN, YELLOW, BLUE or 0-9 buttons etc.
- To change digital teletext service, select a different service by pressing the 0-9 buttons.
- Press the INFO button to display the INFO bar or bring up a menu the teletext screen will continue to be displayed behind the INFO bar or menu.
- Press the TEXT button again to exit the Teletext.
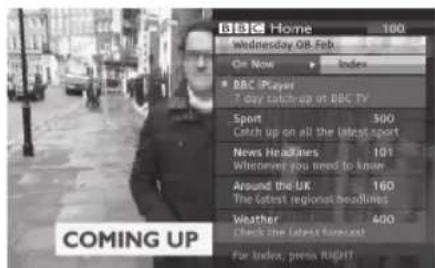
Language Selection
Press the AUDIO button to change the audio and subtitle language (only applicable when the TV programme supports this feature).
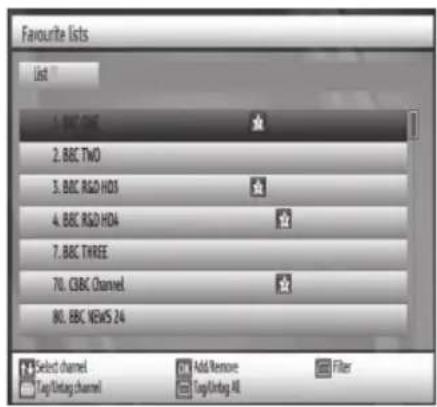
Favourite List
- To create your Favourite List, press the OK button to display the Channel List.
- Press the ▲▼ buttons to select the desired channel to be set as favourite. Press the OK button to confirm. The favourite programme icon will be displayed.
- Press the BLUE button to display the filtering options. (For more details, please refer to section Channel List Filter.)
- Press the YELLOW button to tag or untag a channel. (For more details, please refer to section Tag Recording.)
- To remove a favourite channel from the Favourite List, press the FAV button to display the Favourite List, then press the ▲▼ buttons to select the desired favourite channel. Press the OK button to cancel.
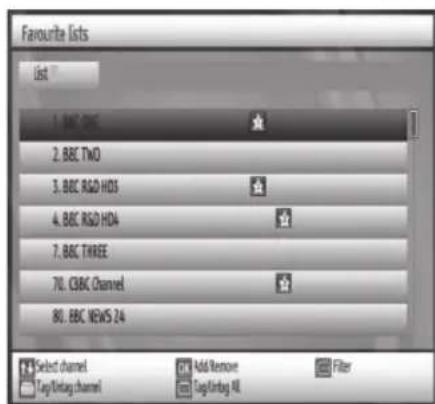

Press the FAV button to display your Favourite List.

Recording
Your unit allows you to record 2 programmes at the same time and you can still watch a third programme. If you are recording 2 programmes at the same time, you will not be able to timeshift or set any reminders.

Make sure that the unit's built-in HDD has enough available memory space.
Instant Recording
Use this function to record the TV programme you are watching on the main screen and save it for future viewing.
- Press the ● button to record the programme you are currently watching. The Instant Recording screen will be displayed for a short time.
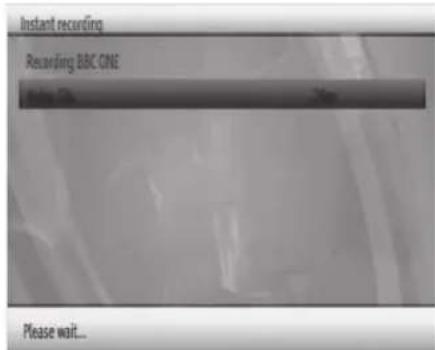
- Press the button to stop recording, then press the < buttons to select YES to stop recording.
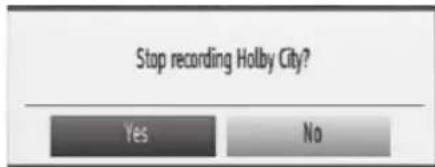

- If you want to turn off your unit during recording, press the Standby button. The LED display will show the time.
- When the programme is recording, please do not unplug the unit from the mains socket as this will damage the unit's HDD.
- When two recordings are active, you can only watch recorded channels. You are only allowed to schedule up to 2 events for Instant Record at any one time.
EPG Recording
This allows you to preset some programmes to be recorded in standby mode or on mode. For more details, please refer to the section Programme Guide (EPG).
Time Shift Recording
This function allows the unit to virtually record the live viewing broadcast programme.

- Time shift and recording functions may not work if the signal strength is weak.
- Recording will stop automatically when the disk is full.
- During time shift, changing channels will cause time shift to terminate.
- The duration of time shift can be adjusted from Recordings in the Configuration menu. (For more details, please refer to the Configuration Setting section.)
During normal TV viewing, you may press the I button to virtually pause the live broadcast programme if you want to go out for a while (e.g., going to the bathroom or kitchen).
"11 will be shown in the time shift progress bar and displayed on the screen for a short while.
Press the INFO button to display the time shift progress bar again.
When you have returned, press the ▶ PLAY button to play the missed broadcast programme.
There may be a few seconds delay in video and sound when the unit starts to playback the missed broadcast programme. It will return to normal.
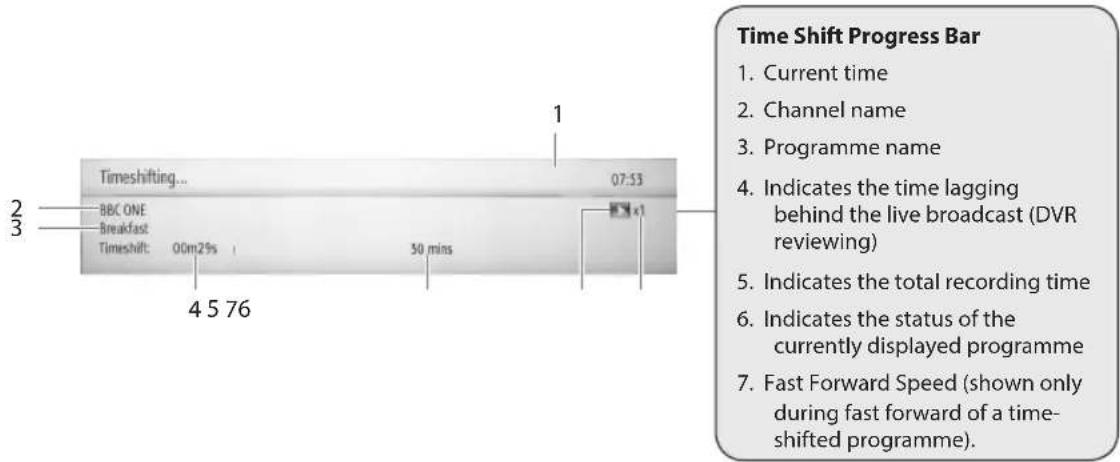
| Remote Control Button | Function |
| II | During playback, press the I button to display a still screen and then press the ▶PLAY button again to resume playback. |
| ◀ or ▶ | When playing,Press the ◀ button repeatedly to speed up ◀2 / x 4 / x 8 / x 16 / x 32.Press the ▶ button repeatedly to speed up ▶2 / x 4 / x 8 / x 16 / x 32.During fast forward / fast backward state, press the ▶ PLAY button to return to normal playback. |
| ▶ PLAY | Press the ▶ button to resume playback from a still screen.During fast forward / fast backward state, press the ▶ PLAY button to return to normal playback. |
| ■ | If you want to exit the time shift and return to the current live broadcast, press the I button. |
Manual Timer Programming
This function is used to perform scheduled recording.
The recording from timer programme or direct recording may have a little bit of delay when it starts to record the broadcast programme.
- Press the MENU button then ▼ to highlight Timers. Then press the OK button.
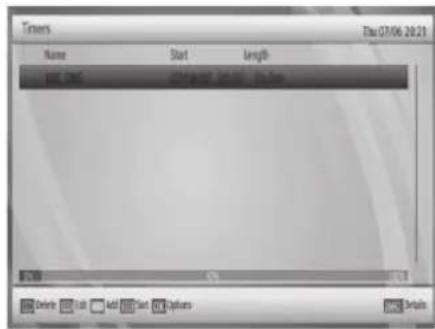
- You can edit the Timers menu by using the following Colour buttons:
| Remote Control Button | Function |
| Red (Delete) Delete the timer event. | |
| Green (Edit) Edit the timer event. | |
| Yellow (Add) Add a new timer event. | |
| Blue (Sort) | Sort timer events by time or alphabetical order. Please see Timers setting on page 34. |
Add Timer
- Press the MENU button then to highlight Timers. Then press the OK button.
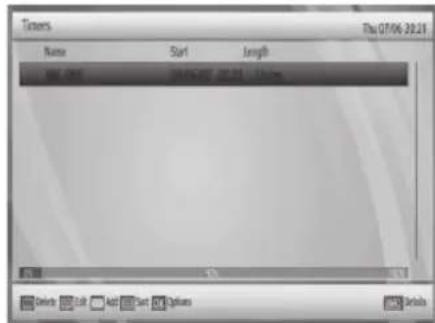
- Press the YELLOW button to display the Add Timer menu.
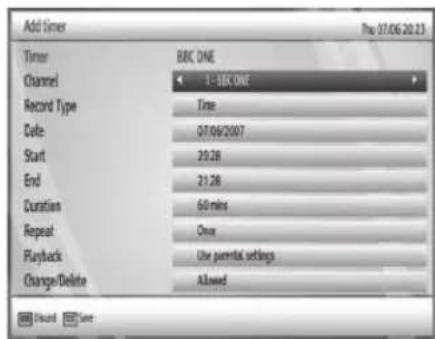
- Press the buttons to select the following options and the or 64 buttons to change the settings.
| Channel Navigate through the TV or Radio list. | |
| Record Type Display the recording type. | |
| Date Start Date. | |
| Start Start Time. | |
| End End Time. | |
| Duration Displays the duration of the recording. | |
| Repeat Sets the repeating preference. | |
| Playback Permit or block playback for other users. | |
| Change / Delete Permit or prohibit any modifications for other users. |
- Press the Green button to save the timer or the RED button to discard the settings and exit the menu.

Play Recorded Programme
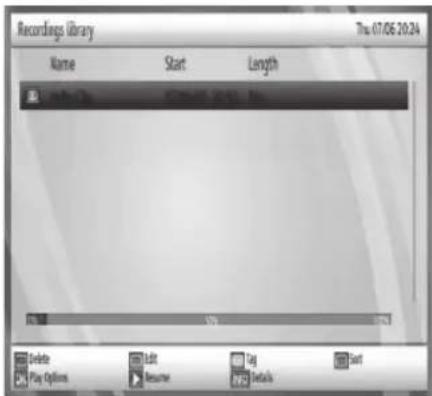
You can play a recorded programme from the Recordings Library.
- Press the LIB button or the MENU button and then press the ▲▼ buttons to select Recordings Library menu to display the Recording Library.
- Press the ▲▼ buttons to select your recorded programme and then press the▶ PLAY button to start playback from the last stopped position or press the OK to enter Play Options menu. (For more details, please refer to section Play Options.)
- Press the ■ button to stop the current playback.

A "Playback Progress Bar" will be displayed only during fast-forward/-rewind mode.

Viewing the Media Browser
Connecting a USB Storage Device
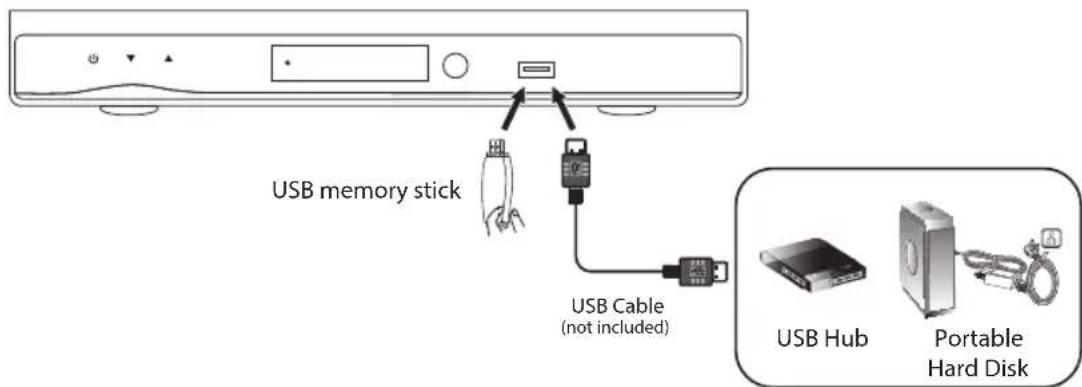

- Some versions of portable hard disk may require more power than the unit USB socket can provide. To ensure correct operation please use the power adapter for that device.
- If a USB hub is used, make sure its mains adapter is connected to the mains supply as the total current consumption may exceed 500mA.
- Disconnect the USB storage device if it is not in use.
- Some USB compliant devices may not be supported.
- Switch off the unit before connecting any USB storage device.
- Connect your USB storage device to the USB port of your unit.
- Plug the connected devices into the mains socket before switching on the unit.
- Press the ⏻ Standby button to turn on your unit and your USB storage device.
Listening to Music
- Press the MEDIA button. The Media Browser menu will be displayed.
- Press the ▲▼ buttons to select your storage device and then press the OK button to display the file list.
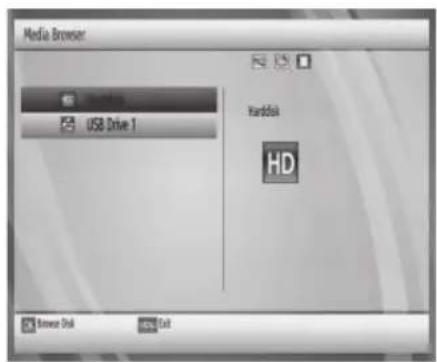
- Press the buttons to navigate in the file list. Press the buttons according to the following list.
![Media Browser MASCENEER Adobe Aerial [CD 1] Aerial [CD 2] Auria Morissette Alison Moylet All My Loving Allow Us To Be Frank Eat Out Of Hell III, The Monster L... SHECYCLEIN File Operations](/content/2026/05/967149/images/1b484f9ded4aef40c4eb3ed1fc338851801e056bcbccaba1d22c7b30cf5e4da0.jpg)
| Remote Control Button | Function |
| OK(Play This) Plays the selected track. | |
| ▶PLAY | Plays all media files in the folder starting with the selected track. |
| ■(Stop) Stop the playing file. | |
| Red(Shuffle) | Plays the files randomly. If shuffle mode is enabled previous / next functions will also jump to the tracks randomly. |
| Green(Loop) | Plays all media files starting with the selected file repeatedly. |
| 0-9(Jump) Jumps to the selected file. | |
| ◀(Previous / Next) | Jumps to previous or next file to play. |
| BLUE(File Operation) | Copy or move Copy or move the folder / sub-folder / track (file) from USB to hard disk or vice versa. (For more details, please refer to section File Operation.) from USB to hard disk or vice versa. (For more details, please refer to section File Operation.) |
- Press the BACK button to return to the previous menu or the MENU button to exit.

- Some audio file formats will not be supported.
• Supported file formats: mp3 / wma.
Viewing Photos
- Press the MEDIA button. The Media Browser menu will be displayed.
- Press the ▲▼ buttons to select your storage device and then press the OK button to display the file list.
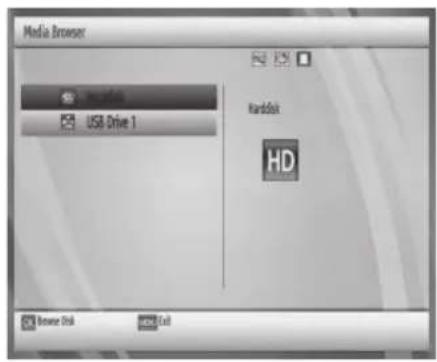
- Press the buttons to navigate in the file list. Press the buttons according to the following list.
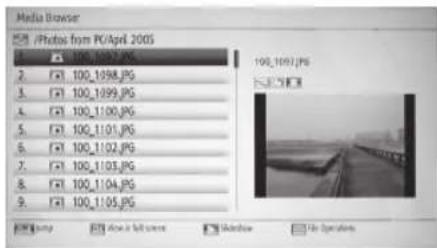
| Remote Control Button | Function |
| 0-9 (Jump) Jumps to the selected photo. | |
| OK(View in Full Screen) | Views the selected photo in full screen. |
| ▶ PLAY(Slideshow) | Plays all photos in the folder starting with the selected photo. (For more details, please refer to section Playing Slideshow.) |
| BLUE(File Operation) | Copy or move the folder / sub-folder / photo from USB to hard disk or vice versa. (For more details, please refer to section File Operation.) |

File format supported: JPG.
- Press the BACK button to return to the previous menu or the MENU button to exit.
Playing Slideshow
- Press the buttons to select photos in media browser and then press the OK button.
- Press the ▶ PLAY button to start slideshow.
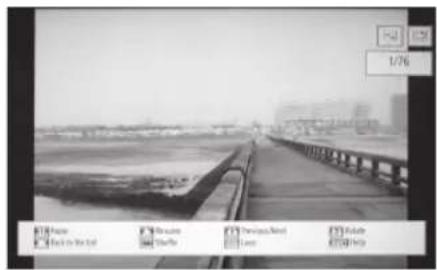
- Use the following buttons to select options.
| Remote Control Button | Function |
| ▶ PLAY (Slideshow) | Plays all photos in the folder starting with the selected photo. |
| ■ (Back to file list) | Stop the slideshow and back to the file list. |
| ▲▼ (Rotate) Rotate the photo. | |
| ◀▶(Previous / Next) | Jumps to previous or next file of slideshow. |
| INFO Activates the operation bar. | |
| RED (shuffle) | Plays the files randomly. If shuffle mode is enabled previous / next functions will also jump to the tracks randomly. |
| Green (Loop) | Plays all media files starting with the selected photo repeatedly. |
Watching Movies
- Press the MEDIA button. The Media Browser menu will be displayed.
- Press the ▲▼ buttons to select your storage device and then press the OK button to display the file list.
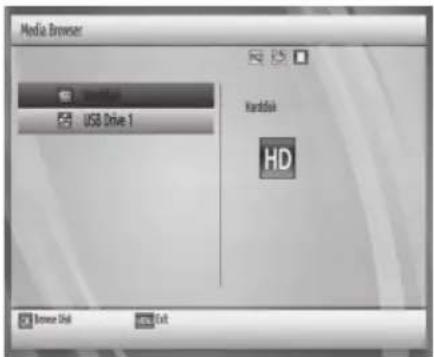
- Press the buttons to navigate in the file list. Press the buttons according to the following list.
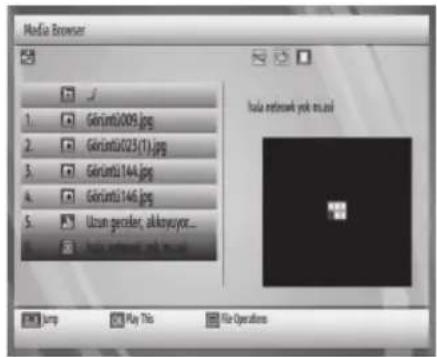
| Remote Control Button | Function |
| 0-9 (Jump) Jumps to the selected movie. | |
| OK (Play This) Plays the selected movie. | |
| BLUE (File Operation) | Copy or move the folder / sub-folder / file from USB to hard disk or vice versa. (For more details, please refer to section File Operation.) |

File format supported: avi, mpg, mkv, mp4.
- While playback, press the following buttons to select the function.
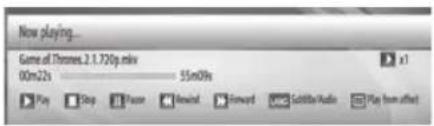
| Remote Control Button | Function |
| ▶ PLAY | Plays the movie. |
| ■ (Stop) Stop | playback. |
| II | During playback, press the I button to pause the playback. Press the ▶PLAY button again to resume playback. |
| ◀ or ▶ | When playing,Press the ◀ button repeatedly to speed up ◀ 2 / x 4 / x 8 / x 16.Press the ▶ button repeatedly to speed up ◀ 2 / x 4 / x 8 / x 16.During fast forward / fast backward state, press the ▶ PLAY button to return to normal playback. |
| AUDIO Select | subtitle or audio. |
| GREEN (Play from offset) | Play the movie from the time which is entered. |
- Press the BACK button to return to the previous menu or the MENU button to exit.
File Operations
You can move or copy your files to hard disk from external USB.
- Press the MEDIA button. The Media Browser menu will be displayed.
- Press the ▲▼ buttons to select your storage device and then press the OK button to display the file list.
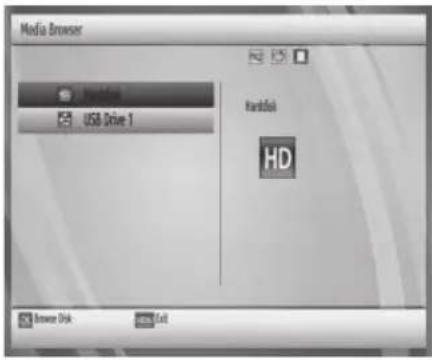
- In file list, press the ▲▼ buttons to select folder / sub-folder / track (file) and then press the BLUE button to enter to File Operations menu.

Only one folder, sub-folder or track (file) can be selected at any one time. Use the [cursor] buttons to select the folder / subfolder / track (file) to be copied, moved or played.
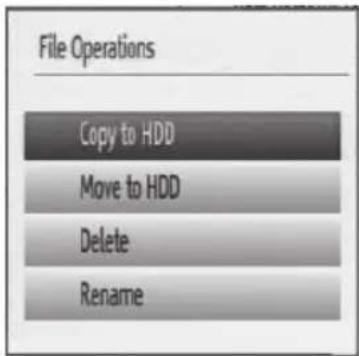
- Use the buttons to select the following options and then press the OK button.
| Copy to HDD | Copy the folder / sub-folder / track (file) from USB to hard disk or vice versa. |
| Move to HDD | Move the folder / sub-folder / track (file) from USB to hard disk or vice versa. |
| Delete Delete | the selected folder / sub-folder / track (file). |
| Rename Rename | me the selected folder / sub-folder / track (file). |

Channel List Setting
- Press the MENU button to display the main menu.
| Menu |
| Channel list |
| Programme guide |
| Timers |
| Recordings library |
| Setup |
| Media Browser |
- Press the buttons to select Channel List and then press the OK button. The Channel List menu will be displayed.

You can press the OK button to display the Channel List directly.
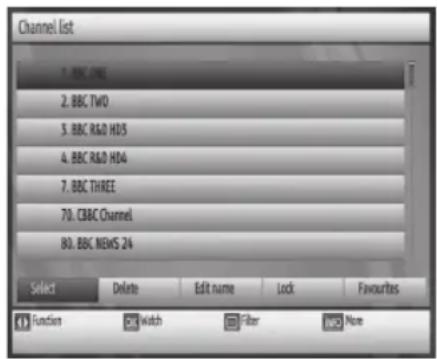
Select Channel
- Press the buttons to select the channel.
- Press the ◀ buttons to select Select and then press the OK button to watch.

- When a channel is locked, a valid password must be entered. The default password is "0000".
- If you change the password, be sure to remember the new password! If you forget the new password, press the master password "4725".
Delete Channel
- Press the buttons to select the desired channel you want to delete.
- Press the ◀ buttons to select Delete and then press the OK button.
- A message will be displayed on the screen. Press the ▶ buttons to select YES to confirm or NO to exit the menu.

You can't delete the channel that you are currently watching.
Delete Multiple Channels
- Press the buttons to select the desired channel you want to delete.
- Press the YELLOW button to tag the channel. The selected channel will be marked.

You can press the GREEN button to tag all channels in the list at once.
- Repeat step 2 until all desired channels have been marked.
- Press the ◀ buttons to select Delete and then press the OK button.
- A message will be displayed on the screen. Press the ▶ buttons to select YES to confirm or NO to exit the menu.
Rename Channel
- Press the buttons to select the desired channel you want to rename.
- Press the ◀ buttons to select Edit name and then press the OK button.
- The name appears on the middle of the screen with the first character highlighted. Use the ◀ buttons to move to the previous/next character and use the ▲ buttons to toggle the current character. Or use 0-9 buttons to replace the highlighted character with the characters printed above the button one by one as the button is pressed.
- Press the OK button to confirm the new name or press the MENU button to cancel the editing.
Lock Channel
Lock Channel is designed to prevent children watching unsuitable programmes. When a channel is blocked, a valid password must be entered.
- Press the ▲▼ buttons to select the desired channel you want to lock.
- Press the ◀ buttons to select Lock and then press the OK button.
- Use the 0-9 buttons to input a 4-digit password and then press the OK button. The lock icon will be displayed in the front of the selected channel.

- When a channel is locked, a valid password must be entered. The default password is "0000".
- If you change the password, be sure to remember the new password! If you forget the new password, press the master password "4725".
- To cancel the lock channel, repeat the steps 1-3.
Lock Multiple Channel
- Press the buttons to select the desired channel you want to lock.
- Press the YELLOW button to tag the channel. The selected channel will be marked.

You can press the GREEN button to tag all channels in the list at once.
- Repeat step 2 until all desired channels have been marked.
- Press the ◀ buttons to select Lock and then press the OK button.
- Use the 0-9 buttons to input a 4-digit password and then press the OK button. The lock icon will be displayed in the front of the selected channel.

- When a channel is locked, a valid password must be entered. The default password is "0000".
- If you change the password, be sure to remember the new password! If you forget the new password, press the master password "4725".
- To cancel the lock channel, repeat steps 1-4.
Favourite Channel
- Press the buttons to select your desired channel.
- Press the ◀ buttons to select Favourites and then press the OK button to confirm. The favourite programme icon will be displayed.
- Press the BLUE button to display the filtering options. (For more details, please refer to section Channel List Filter.)
- Press the YELLOW button to tag or untag a channel. (For more details, please refer to section Tag Recording.)
- To remove the favourite channel from the Favourite List, press the ▲▼ buttons to select your desired favourite channel. Press the OK button to cancel.
Channel List Filter
It is possible to filter the channel list to show only the channels that suit your criteria. To filter the channel list in either EPG view or channel list view, press the Blue button to display the Channel List Filter. Press the ▲▼ buttons to select the following options.
| TV/Radio | Select from: TV Only / Radio Only / Text Only. |
| Free/CAS | Select from: All / Free / Encrypted. |
| A-Z Select by alphabetical list. | |
| Favourites Select from: All / Favourites. | |
| Channel list filter | |
| TV/Radio | TV only |
| Free/CAS | All |
| A-Z | All |
| Favourites | All |

This product cannot receive encrypted channels.
Info
- Press the buttons to select the desired channel.
- Press the INFO button to display the information of the channel.

Timers Setting
- Press the MENU button to display the main menu.
| Menu |
| Channel list |
| Programme guide |
| Timers |
| Recordings library |
| Setup |
| Media Browser |
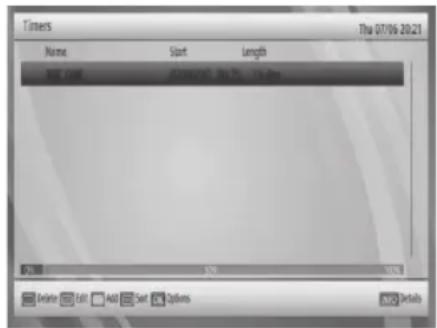
- Press the buttons to select Timers and then press the OK button. The Timers menu will be displayed.

You can press the TIMERS button to access the Timers menu directly.
Delete Timer
- Press the buttons to select the desired programme you want to delete.
- Press the RED button to delete the timer.
Edit Timer
- Press the buttons to select the desired programme you want to edit.
- Press the Green button to edit the saved timers.
Add Timer
For more details, please refer to the section Manual Timer Recording.
Sort Timer
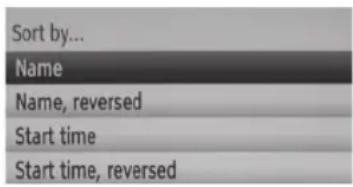
While viewing the list of upcoming timer events, you can sort them into your preferred order. Options include: Name, Name reversed, Start time, and Start time reversed.
- Press the Blue button to display the Sort options list.
- Press the ▲▼ buttons to select the desired sort option.
- Name: Sort the timer events in alphabetical order of the programme title.
- Name, reversed: Sort the timer events in reverse alphabetical order of the programme title.
- Start time: Sort the timer events in time order with the earliest time at the top.
- Start time, reversed: Sort the timer events in time order with the latest time at the top.

Recordings Library Setting
- Press the MENU button to display the main menu.
| Menu |
| Channel list |
| Programme guide |
| Timers |
| Recordings library |
| Setup |
| Media Browser |
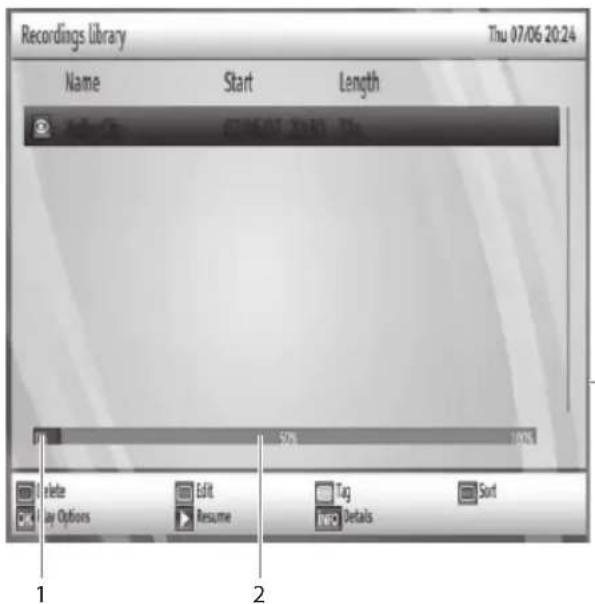
- Press the ▲▼ buttons to select Recordings library and then press the OK button. The Recordings Library menu will be displayed with the saved recorded programmes.

You can press the LIB button to access the Recording library menu directly.
Capacity Space of Hard Disk
- Red bar: indicates the used space of the recordings on the hard disk.
- Green bar: shows the free space on the hard disk.
Delete Recording
- Press the buttons to select the recorded programme you want to delete.
- Press the RED button to delete recording.
Edit Recording
- Press the buttons to select the recorded programme you want to edit.
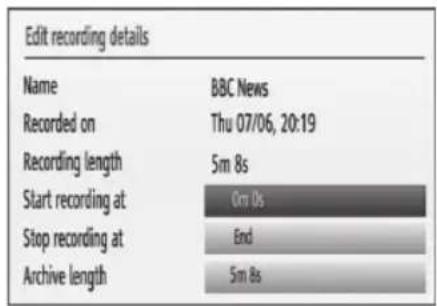
- Press the GREEN button to enter Edit Recording Details menu.
- Only the Start recording at and Stop recording at options are active. If you have already separated recording, you could select any chapter to begin with the archiving and stop it. If it is not separated in chapters, the beginning and ending time of the recording will automatically be the beginning and ending time of the archiving.
| Edit recording details | |
| Name | BBC News |
| Recorded on | Thu 07/06, 20:19 |
| Recording length | 5m 8s |
| Start recording at | Cmi 0s |
| Stop recording at | End |
| Archive length | 5m 8s |
Tag Recording
- Press the buttons to select the recorded programme you want to tag.
- Press the YELLOW button to mark the recorded programme for archiving. (For more details, please refer to section Create Archive (Archive Management).)
Sort Recording
- Press the buttons to select the recorded programme you want to sort.
- Press the BLUE button and the ▲▼ buttons to move to the selected programme and then press the BLUE button to confirm.
Resume Playback Recording
- Press the buttons to select the recorded programme you want to play.
- Press the ▶ PLAY button to start playback from the last stopped position.
Recording Information
- Press the buttons to select the recorded programme.
- Press the INFO button to display the programme in detail.

Play Options
- Press the MENU button and then press the ▲▼ buttons to select Recordings Library or the LIB button to display the Recording Library menu.
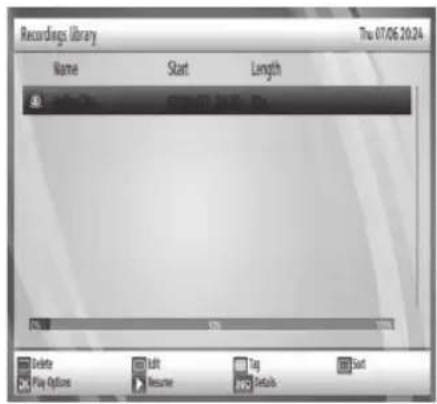
- In Recordings library menu, press the ▲▼ buttons to select the recorded programme you want to play.
- Press the OK button to enter Play Options menu.
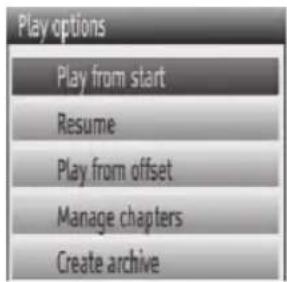
Play from Start
Press the ▲▼ buttons to select Play from start and then press the OK button to play the recorded programme from the beginning.
Resume
Press the ▲▼ buttons to select Resume and then press the OK button to play the recorded programme from the last stopped position.
Play from Offset
Press the ▲▼ buttons to select Play from offset and then press the OK button to play the recorded programme from the time which is entered.
Manage Chapters
Press the ▲▼ buttons to select Manage chapters and then press the OK button. It will display any marked chapters (for more details on marked chapters, please refer to section Chapter Options) and begin with playback from the selected chapter.
Create Archive
To archive the recorded programmes to an external device like a DVD player. (For more details, please refer to section Achieve Management.)

Chapters Options
- During playback, press the MENU button to display the Chapter Options menu.
- Press the ▲▼ buttons to select the following options and then press the OK button.
| Create New Chapter Mark | Set a chapter mark anywhere your want. |
| Forwards to Next Chapter | If there is more than one chapter, go to the next chapter. |
| Back to Start of Chapter | Go to the beginning of the current chapter. |
| Back to Previous Chapter | Back to the previous Chapter. |
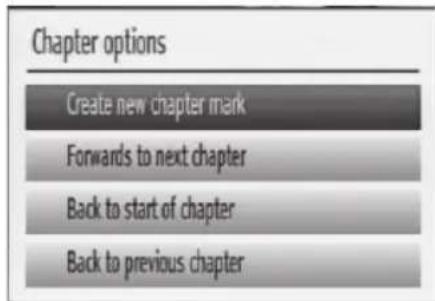
- Press the MENU button to exit the menu.

Archive Management
- Press MENU button and then press the ▲▼ buttons to select Recordings Library or the LIB button to display the Recording Library menu.
- Press the ▲▼ buttons to select a recorded programme you want to archive. Press the YELLOW button to mark the recorded programme.
- Press the OK button to enter the Play Options menu.
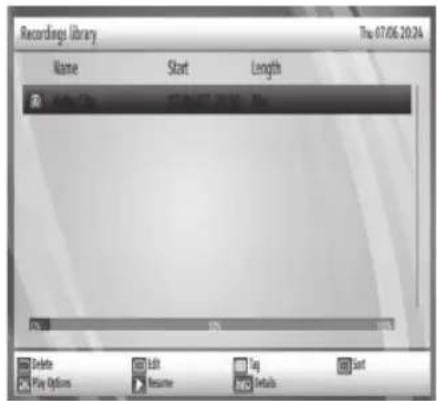
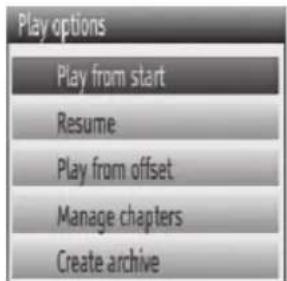
- Press the ▲▼ buttons to select the Create Archive and the press the OK button to display Archive Management menu.
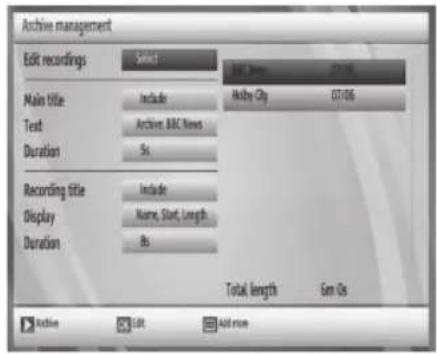
Edit Recording
- Press the buttons in Edit recordings tab to go to recorded programme list on the right side of the menu.
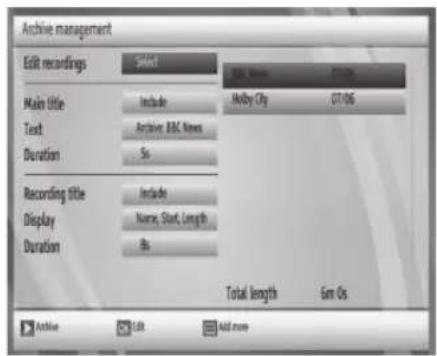
- Press the buttons and then press the OK button to select the recorded programme you want to edit. The Edit Recording Details menu will be displayed.
- Only the Start recording at and Stop recording at options are active. If you have already separated the recording into chapters, you can select any chapter to begin archiving and stop it. If it is not separated into chapters, the beginning and ending times of the recording will automatically be the beginning and ending times of the archiving.
- Press the BACK button to return to the previous menu or the MENU button to exit.
Main Title
- Press the buttons to select Main title.
- Press the ◀▶ buttons to select Include to display a main title or Skip to disable.

If you select Skip in the Main Title tab, the options Text and Duration below will also be disabled.
- Use the ▲▼ buttons to select the following options and then press the OK button.
| Text Edit the main title. | |
| Duration Set | the duration of the appearances of the main title on the screen. |
Recording Title
- Press the buttons to select Recording title.
- Press the ◀▶ buttons to select Include to display a recording title or Skip to disable.

- If you select Skip in the Recording Title tab, the options Display and Duration below will also be disabled.
- While archiving, you can decide to show the names of the saved recordings on the screen.
- Press the buttons to select the desired options and then press the OK button.
| Display | You could decide, which of the following items should be displayed in the recording title: Name, Start date/time, Length. Press the▲▼ buttons to select the options and the◀buttons to selectIncludeorSkip. |
| Duration | Set the duration of the appearance of the Recording title on the screen. |

Recordings Setup
- Press the MENU button to display the main menu.
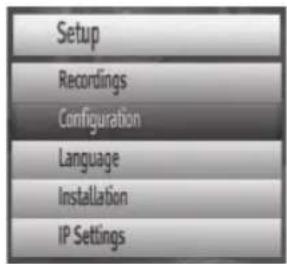
- Press the buttons to select Setup and then press the OK button. The Setup menu will be displayed.
- Press the buttons to select Recordings and then press the OK button. The Recording Configuration menu will be displayed.
| Menu |
| Channel list |
| Programme guide |
| Timers |
| Recordings library |
| Setup |
| Media Browser |
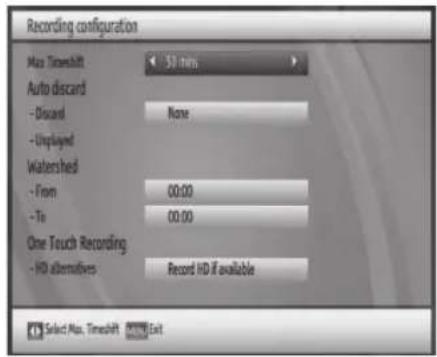
- Use the buttons to select the following options and the buttons to adjust the settings.
| Max Timeshift | Selects the maximum time allowed for timeshifting. For more details, please refer the section Time Shift Recording. | ||
| Auto Discard | Discard | When the HDD is full and a timer is set to record, the unit will automatically discard previous recordings based on this setting. The options are as follows: | |
| None | The unit will not discard any recordings and the timer will not record the requested programme. | ||
| Oldest | Starting with the oldest, recordings will be deleted to make space for the requested timer. | ||
| Longest | Starting with the longest, recordings will be deleted to make space for the requested timer. | ||
| Shortest | Starting with the shortest, recordings will be deleted to make space for the requested timer. | ||
| Unplayed | Excluded | Unplayed recordings WILL NOT be deleted. | |
| Included | Unplayed recordings WILL be deleted. | ||
| Watershed | Sets the watershed time period. Any recording which is made during the watershed period will have "Playback" set to "Disallowed" when it appears in the recordings library. You need to enter the PIN before play the recording. Any recording which is made during the watershed period will have "Playback" set to "Disallowed" when it appears in the recordings library. You need to enter the PIN before play the recording. | ||
| One Touch Recording | HD Alternatives Adjusts the setting to suit your preference. | ||
- Press the BACK button to return to the previous menu or the MENU button to exit.

Configuration Setup
- Press the MENU button to display the main menu.
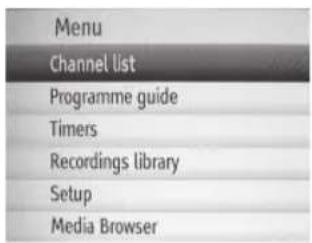
- Press the ▲▼ buttons to select Setup and then press the OK button. The Setup menu will be displayed.
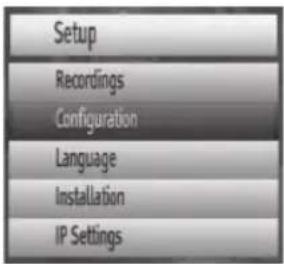
- Press the buttons to select Configuration and then press the OK button. The Configuration menu will be displayed.
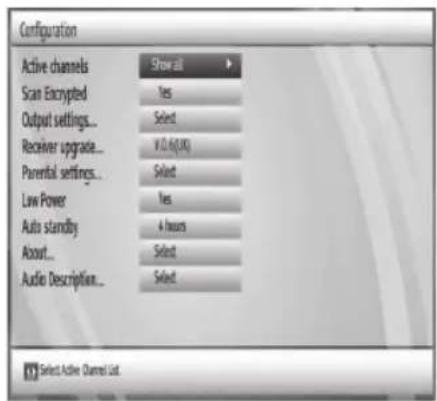
- Use the buttons to select the following options and the buttons to adjust the settings.
| Active Channels | Select broadcasts type to be listed in the Channel List: TV Only / Radio Only / Text Only / Favourites / Show All (if available). |
| Scan Encrypted | Allow you to enable or disable to search encrypted channels. |
| Output Settings | TV Type | Allows you to select 16:9 / 4:3. | |
| 16:9 | Widescreen picture shown in the full screen. | ||
| 4:3 | Widescreen picture shown in the full screen with black bars on the top and bottom of the screen. | ||
| TV Out | Allows you to select from CVBS / RGB from the SCART socket.Note: Select CVBS to output a standard composite video. Select RGB to output a better picture quality. | ||
| AC3 Audio Turn On / Off AC3 Audio function. | |||
| SPDIF Delay | If you find the sound and picture falling out of sync, you can delay the sound output by a small amount to compensate. | ||
| Digital Audio | Selects from PCM or Bitstream. | ||
| HDMI Resolution | Selects the correct resolution for your TV. | ||
| Receiver Upgrade | Auto OAD (Over Air Download) | The unit auto detects the latest firmware through the DTV signal and allows you to accept or refuse the firmware upgrade service. The unit automatically powers up at 3.00 A.M. each day and searches for any new information which may be broadcast and will download this to your receiver automatically. This operation will normally take approximately 30 minutes. If you have an important recording to make at 3.00 A.M. which must not have a 30 minutes interrupt then you can disable the auto OAD. | |
| Scan for Upgrade | Press the ▲▼ buttons to select Scan for upgrade and then press the OK button to upgrade the receiver. | ||
| USB Upgrade | This function is only for servicing purposes. Any update information for this TV (if any) will be available at the following website:http://knowhow.com/ or call our UK Call Centre on 0344561 1234. Our UK Customer Contact Centre is open Monday-Saturday 8am-8pm or Sunday 8am-6pm. | ||
| Parental Control | The Lock System is designed to prevent accidental retuning of the TV / losing channels and prevent children watching unsuitable programmes. To access the menus, you must enter the password. Enter the default password "0000" for first time use. If you change the password, be sure to remember the new password! If you forget the new password, press the master password "4725". | ||
| Menu Lock | Disable: All menus are unlocked.All Menus: The user cannot add, delete, rename channels and set timers.Installation Menu: The user cannot add channels. | ||
| Guidance Enables or disables the menu access. | |||
| Set PIN | Input the new 4-digit password. Re-enter new password for confirmation. | ||
| Low Power | In low power mode, the power consumption is less then 1 W and the front display will show no time information in standby mode.If low power mode is deactivated, all functions will be reactivated. | ||
| Auto Standby | The unit will automatically switch to standby mode 3 hours after the last time the remote control was used. A reminder screen will pop up and count down before the unit switches to standby mode.Select the Auto Standby options: 2 Hours / 3 Hours / 4 Hours / 6 Hours / 8 Hours / Disabled. | ||
| About Displays system information. | |||
| Audio Description | Audio Description is an auxiliary audio function that provides an additional audio track for visually challenged persons. This function handles the Audio Stream for the AD (Audio Description), when it is sent along with the main audio from the broadcaster. | ||
| Audio Description | • Set to "Off" for normal broadcasting sound coming out from speakers.• Set to "On" to activate the description sound track if available. | ||
| Available Lang. | Select your desired primary audio language. | ||
| Preferred Lang. | Select your desired secondary audio language. (Available for digital channels if multiple audio languages are broadcast.) | ||
| Relative Volume | Adjusts the Audio Description volume level. | ||
- Press the BACK button to return to the previous menu or the MENU button to exit.

Language Setup
- Press the MENU button to display the main menu.
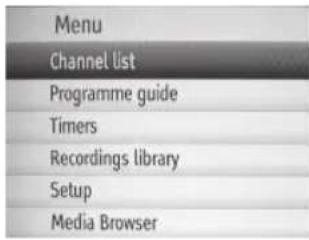
- Press the ▲▼ buttons to select Setup and then press the OK button. The Setup menu will be displayed.
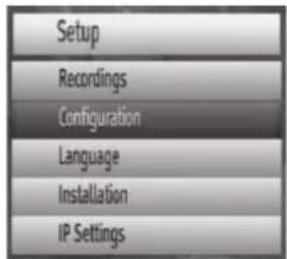
- Press the buttons to select Language and then press the OK button. The Language settings menu will be displayed.
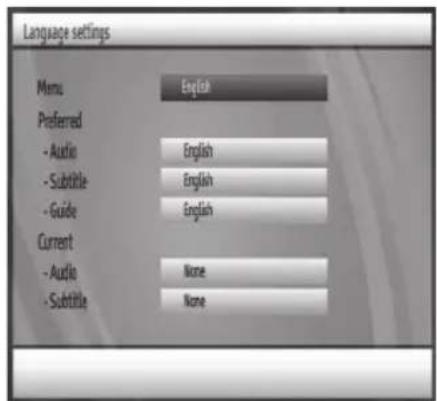
- Use the buttons to select the following options and the buttons to adjust the settings.
| Menu Displays the language of the system. | ||
| Preferred | Audio | Select your desired primary audio language. (Available for digital channels if multiple audio languages are broadcast.) |
| Subtitle | Select your desired primary subtitle language. (Available for digital channels if multiple subtitle languages are broadcast.) | |
| Guide Select the guide language. | ||
| Current | Audio | Select your desired secondary audio language. (Available for digital channels if multiple audio languages are broadcast.) |
| Subtitle | Select your desired secondary subtitle language. (Available for digital channels if multiple subtitle languages are broadcast.) | |
- Press the BACK button to return to the previous menu or the MENU button to exit.

Installation Setup
- Press the MENU button to display the main menu.
| Menu |
| Channel list |
| Programme guide |
| Timers |
| Recordings library |
| Setup |
| Media Browser |
- Press the ▲▼ buttons to select Setup and then press the OK button. The Setup menu will be displayed.
| Setup |
| Recordings |
| Configuration |
| Language |
| Installation |
| IP Settings |
- Press the buttons to select Installation and then press the OK button. The Installation menu will be displayed.
| Installation |
| Automatic channel scan / Return |
| Manual channel scan |
| Format disk |
| First time installation |
- Use the buttons to select the following options and then press the OK button.
| Automatic Channel Scan / Retune | Use this to automatically find and store all available channels. This is normally recommended if some channels have been added or removed by the broadcaster or if you have moved house. |
| Manual Channel Scan | Allows you to make manual fine tuning adjustments to the channel. |
| Format Disk | Format the internal hard disk. To access the menus, you must enter the password. Enter the default password "0000" for first time use. If you change the password, be sure to remember the new password! If you forget the new password, press the master password "4725". All data stored on the hard disk will be lost. All data stored on the hard disk will be lost. |
| First Time Installation | Restores all settings to the factory defaults. All channel and user settings will be lost and the unit will revert to "First Time Installation". All channel and user settings will be lost and the unit will revert to "First Time Installation". |
- Press the BACK button to return to the previous menu or the MENU button to exit.

IP (Internet Protocol) Installation Setup
- Press the MENU button to display the main menu.
| Menu |
| Channel list |
| Programme guide |
| Timers |
| Recordings library |
| Setup |
| Media Browser |
- Press the ▲▼ buttons to select Setup and then press the OK button. The Setup menu will be displayed.
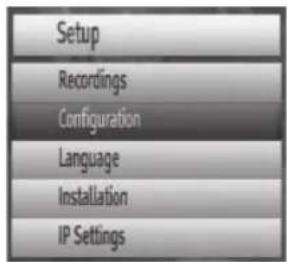
- Press the buttons to select IP Settings and then press the OK button. The IP Settings menu will be displayed.
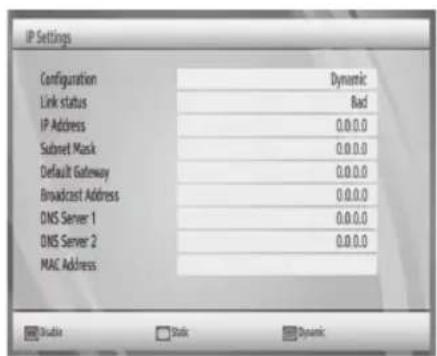
- Press the RED button to Disable IP configuration.
If your broadband modem/router is not compatible with DHCP (Dynamic Host Configuration Protocol), you will need to set the addresses manually. Press the YELLOW button to change the configuration to Static and for each of the addresses in turn (IP Address, Subnet Mask, Router Address, and DNS Address). It is necessary to configure the IP settings to enable access to On Demand services such as BBC iPlayer.
In order for the ethernet host to work correctly with your internet connection. It needs to have a unique IP address. Press the BLUE button to set to Dynamic.
- Press the BACK button to return to the previous menu or the MENU button to exit.

Please check the user manual for your modem/router for this information.
If a problem does occur, it may often be due to something very minor. The following table contains various tips. If you require additional assistance please call our UK Call Centre on 0344 561 1234. Our UK Customer Contact Centre is open Monday-Saturday 8am-8pm or Sunday 8am-6pm.
| Problem Possible Cause Solution | ||
| Standby Indicator Off | • Mains adapter disconnected • | Check mains adapter connection on unit and mains socket |
| "No signal" message | • Aerial cable is disconnected • | Check the aerial cable connection at the unit. Consult your installer if necessary |
| No picture or sound | • Unit not switched on• SCART cable disconnected• TV not switched to SCART input | • Switch on unit• Check SCART cable connections at the unit and the TV• Select TV's SCART input |
| No sound • Your TV | volume may need adjusting | • Adjust the volume on your TV and Set top box to hear the desired volume level |
| Picture appears in wrong ratio | • Mismatched TV screen aspect ratio | • Choose the correct TV Type to suit your TV |
| Picture freeze or has block effects | • Bad record signal • Reposition | the aerial for better reception |
| No response with remote control | • Unit in standby mode• Remote control not aimed at the unit correctly• Remote sensor on the front of the unit is obstructed• Out of battery | • Switch on the unit• Aim remote control at the unit• Check for obstructions in front of the unit• Install new batteries. Ensure that the batteries are installed with the correct polarity (+ to +, - to -) |
| The unit switches off after 3 hours | • Auto Standby is on • Turn off the | Auto Standby in the Configuration menu |
| Cannot view a channel | • Wrong channel number used• Channel locked | • Choose the channel from the channel list• Enter the PIN. |
| No digital text or interactive services | • Services not available on chosen channel | • Switch to a channel broadcasting interactive services |
| Can't record a channel | • Insufficient hard disc space • | Delete some old files.• Refer to the section Recording Setup for details. |

Specifications
| Model L1HSTB12A | |
| General Characteristics | |
| Supply Voltage 220-240V AC ~50Hz | |
| Input Frequency 470 Mhz - 862 Mhz | |
| Frequency Band UHF | |
| Maximum Power Consumption 19.2 W | |
| Standby Power Consumption 1 W | |
| Operating Temperature 5°C to 40°C | |
| Storage Temperature -15°C to +55°C | |
| Humidity 25 to 75 % rel | |
| Physical Dimensions 360 x 280 x 48 mm | |
| Weight 2.82 kg | |
| Hardware Configuration | |
| Main Processor BCM7230 | |
| Flash Memory 64 MB | |
| DDRRAM DDR3-256 MB / 512 MB (Optional) | |
| Digital Capabilities | |
| Transmission Standards | MPEG2, MPEG4 HD DVB-T-2 |
| Demodulation | |
| COFDM | with 2K/8K FFT mode |
| FEC | for all DVB Modes.(Automatically found) |
| Video | |
| All MPEG-2 MP@ML Video Decoder | |
| Aspect Ratio | 4:3, 16:9 with pan vector |
| RGB Analogue Outputs | BW ≥ 5MHz at 0.5 to 5 MHz sweep signal |
| CVBS Analogue Output | |
| Audio | |
| MPEG Layer 1 and 2 | |
| Sampling Frequencies Supported | 32 kHz (Stereo), 44.1 kHz (Left Only) or 48 kHz (Right Only) |
| Wide Dynamic Range | 16-bit resolution |
| Hard Disk | 1TB |
Features and specifications are subject to change without prior notice.

For general information about this appliance and handy hints and tips, please visit www.knowhow.com/knowledgebank or call (UK) 0344 5611234 or (Ireland) 1 890 818 575.

Visit Partmaster.co.uk today for the easiest way to buy electrical spares and accessories. With over 1 million spares and accessories available we can deliver direct to your door
the very next day. Visit www.partmaster.co.uk or call 0344 800 3456 (UK customers only). Calls charged at National Rate.

The symbol on the product or its packaging indicates that this product must not be disposed of with your other household waste. Instead, it is your responsibility to dispose of your waste equipment by handing it over to a designated collection point for the recycling of waste electrical and electronic equipment. The separate collection and recycling of your waste equipment at the time of disposal will help conserve natural resources and ensure that it is
recycled in a manner that protects human health and the environment.
For more information about where you can drop off your waste for recycling, please contact your local authority, or where you purchased your product.
Notes for battery disposal
The batteries used with this product contain chemicals that are harmful to the environment. To preserve our environment, dispose of used batteries according to your local laws or regulations. Do not dispose of batteries with normal household waste.
For more information, please contact the local authority or your retailer where you purchased the product.
The Freeview service is subject to coverage. An aerial upgrade may be required. The FREEVIEW, FREEVIEW+, FREEVIEW HD and FREEVIEW+ HD words and logos are trade marks of DTV Services LTD. © DTV Services Ltd
Manufactured under license from Dolby Laboratories. Dolby and the double-D symbol are trademarks of Dolby Laboratories
All trademarks are the property of their respective owners and all rights are acknowledged.
DSG Retail Limited (Registered in England No. 504877) Maylands Avenue, Hemel Hempstead, Hertfordshire HP2 7TG. UK
(IB-L1HSTB12A-141031V1)
- TB FREEVIEW HD TV RECORDER
- CONTENTS
- SAFETY WARNINGS
- UNPACKING
- PRODUCT OVERVIEW
- INITIAL SET UP
- STANDBY MODES
- FIRST TIME INSTALLATION
- PROGRAMME GUIDE (EPG)
- BASIC FEATURES
- RECORDING
- PLAY RECORDED PROGRAMME
- VIEWING THE MEDIA BROWSER
- CHANNEL LIST SETTING
- TIMERS SETTING
- RECORDINGS LIBRARY SETTING
- PLAY OPTIONS
- CHAPTERS OPTIONS
- ARCHIVE MANAGEMENT
- RECORDINGS SETUP
- CONFIGURATION SETUP
- LANGUAGE SETUP
- INSTALLATION SETUP
- IP (INTERNET PROTOCOL) INSTALLATION SETUP
- HINTS AND TIPS
- SPECIFICATIONS
- DAMAGE
- LOCATION OF UNIT
- TEMPERATURE
- NAKED FLAMES
- MOISTURE
- VENTILATION
- SAFETY
- MAINS ADAPTER CABLE
- INTERFERENCE
- STANDBY
- BATTERIES
- SUPERVISION
- SERVICE
- MAINTENANCE
- FRONT VIEW
- BUTTON
- ▲▼ BUTTON
- POWER INDICATOR
- LED DISPLAY
- REMOTE CONTROL SENSOR
- USB SOCKET
- REAR VIEW
- REMOTE CONTROL
- STANDBY BUTTON
- NO FUNCTION
- FAV BUTTON
- BUTTONS
- MEDIA BUTTON
- VOL + / - BUTTON
- EXIT BUTTON
- INFO BUTTON
- MUTE BUTTON
- TV/RADIO BUTTON
- LIB BUTTON
- P-P (PREVIOUS PROGRAM) BUTTON
- CH ▲/▼BUTTON
- EPG BUTTON
- MENU BUTTON
- BACK BUTTON
- OK BUTTON
- ◀ BUTTON
- PLAY BUTTON
- TEXT BUTTON
- SUBTITLE BUTTON
- OPTION BUTTON
- AUDIO BUTTON
- COLOURED BUTTONS (RED/GREEN/YELLOW/BLUE)
- BATTERY REPLACEMENT OF THE REMOTE CONTROL
- HANDLING THE BATTERIES
- HANDLING THE REMOTE CONTROL
- REMOTE CONTROL OPERATION RANGE
- SYSTEM CONNECTION
- PLUG IN AND SWITCH ON
- AUTO STANDBY MODE
- LOW POWER STANDBY MODE
- TARGET REGION DESCRIPTOR
- SWITCH ON / OFF PROGRAMME GUIDE
- BUTTON FUNCTIONS IN A 7 DAYS GUIDE
- EVENT OPTIONS
- SELECT CHANNEL
- RECORD PROGRAMME / DELETE TIMER
- RECORD SERIES / DELETE SERIES NUMBER
- CHECK CONFLICTS
- SPLIT RECORD
- ALTERNATIVE TIMER RECORD
- GUIDE SEARCH
- INFORMATION BAR
- VOLUME ADJUSTMENT
- CHANNEL SELECT
- TV/RADIO SELECTION
- TELETEXT SELECTION
- LANGUAGE SELECTION
- FAVOURITE LIST
- INSTANT RECORDING
- EPG RECORDING
- TIME SHIFT RECORDING
- MANUAL TIMER PROGRAMMING
- ADD TIMER
- CONNECTING A USB STORAGE DEVICE
- LISTENING TO MUSIC
- VIEWING PHOTOS
- PLAYING SLIDESHOW
- WATCHING MOVIES
- FILE OPERATIONS
- DELETE CHANNEL
- DELETE MULTIPLE CHANNELS
- RENAME CHANNEL
- LOCK CHANNEL
- LOCK MULTIPLE CHANNEL
- FAVOURITE CHANNEL
- CHANNEL LIST FILTER
- INFO
- DELETE TIMER
- EDIT TIMER
- SORT TIMER
- CAPACITY SPACE OF HARD DISK
- DELETE RECORDING
- EDIT RECORDING
- TAG RECORDING
- SORT RECORDING
- RESUME PLAYBACK RECORDING
- RECORDING INFORMATION
- PLAY FROM START
- RESUME
- PLAY FROM OFFSET
- MANAGE CHAPTERS
- CREATE ARCHIVE
- MAIN TITLE
- RECORDING TITLE
- NOTES FOR BATTERY DISPOSAL
Brand : Logik
Model : L1HSTB12A
Category : Media player