
OR 646 VIT - Cooker Orima - Free user manual and instructions
Find the device manual for free OR 646 VIT Orima in PDF.


| Product Type | Freestanding Cooker |
| Brand | Orima |
| Model | OR 646 VIT |
| Energy Source | Electric |
| Hob Type | Ceramic glass |
| Number of Cooking Zones | 4 |
| Oven Type | Electric, multifunction |
| Oven Capacity | 65 L |
| Dimensions (H x W x D) | 85.0 x 60.0 x 60.0 cm |
| Weight | Approx. 45 kg |
| Power Supply | 230 V ~ 50 Hz |
| Energy Efficiency Class | A |
| Cleaning Type | Easy-clean enamel oven |
| Safety Features | Child lock, automatic shut-off, residual heat indicators |
| Grill Function | Yes, with rotisserie |
| Convection | Yes, fan-assisted |
| Display | Digital timer and temperature display |
| Door Type | Drop-down, cool-touch glass |
| Spare Parts Availability | Replacement hobs, knobs, oven elements available |
| Repairability Index | 7/10 |
Frequently Asked Questions - OR 646 VIT Orima
User questions about OR 646 VIT Orima
0 question about this device. Answer the ones you know or ask your own.
Ask a new question about this device
Download the instructions for your Cooker in PDF format for free! Find your manual OR 646 VIT - Orima and take your electronic device back in hand. On this page are published all the documents necessary for the use of your device. OR 646 VIT by Orima.
USER MANUAL OR 646 VIT Orima
natural_image
Exterior view of a modern stainless steel electric stove with open door and top panel (no visible text or symbols)www.orima.pt
facebook.com/orima.pt

GILUPO MMA
MÁRIO MELANDA DE ALMEIDA
FOGÃO
Cooker | Estufa | Cuisinière
OR-646-VIT
SERVIÇO DE APOIO AO CLIENTE
Apoio ao Cliente:
Tel.: (+351) 231 467 436 E: apoiocliente@orima.pt
Serviço Pós Venda:
Tel.: (+351) 231 467 427 E: assistencia@orima.pt
UK Thank you for purchasing this ORIMA product. Please read this manual carefully before using the appliance.
natural_image
Pure technical line drawing of a mechanical assembly without any text, numbers, or symbols17.2*
natural_image
Pure technical line drawing of a mechanical assembly without any text, numbers, or symbolsnatural_image
Four black silhouette icons showing cooking pots and a steaming pot, no text or symbols presentRestvarmeindikator
Restvarmeindikator
Restvarmeindikator
natural_image
Technical line drawing of a mechanical assembly with arrows indicating direction (no text or symbols)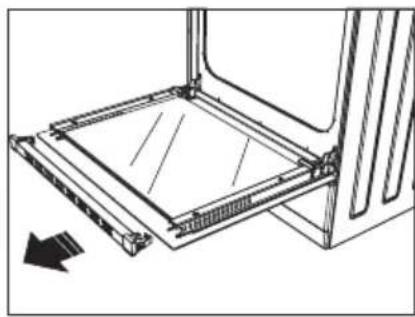
natural_image
Technical line drawing of a mechanical assembly with no visible text or symbols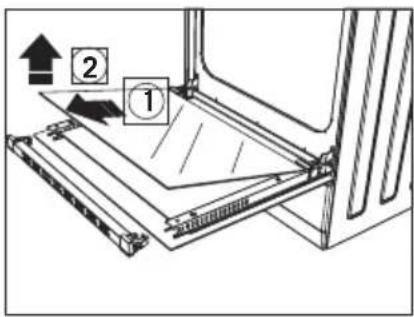
Figura 1 Figura 2 Figura 3
natural_image
Line drawing of a hand adjusting a car seatbelt with a circular knob (no text or symbols)Figura 4
natural_image
Line drawing of a mechanical component with a knob and lever mechanism (no text or symbols)Figura 5
MONTAGEM DA PORTA DO FORNO
natural_image
Line drawing of an open oven with four circular burners and a handle, showing internal structure without any text or symbols.Figura 6
natural_image
Line drawing of an open kitchen oven with four burners and a door open, showing internal components (no text or labels)Figura 7
natural_image
Four circular diagrams showing internal structural components of a vehicle or vehicle frame, with no visible text or symbols.Figura 6.1 Figura 6.2 Figura 7.1 Figura 7.2
natural_image
Pure geometric diagram of a square frame with rounded corners and no text or symbolsTabuleiro Fundo\*
natural_image
Pure geometric diagram of a square frame with internal lines and dots, no text or symbols present.Tabuleiro
natural_image
Line drawing of a rectangular grid pattern with parallel lines, no text or symbols presentGrelha de Arame
natural_image
Technical line drawing of a mechanical support or rod assembly (no text or symbols)natural_image
Isometric view of a rectangular metal grate with parallel slats and two side clips (no text or symbols)Grelha de Arame no Tabuleiro\*
natural_image
Pure technical line drawing of three identical heat exchanger or cooling unit panels without any text or symbolsGrelha de Arame Inferior e Superior\*
natural_image
Line drawings of two open kitchen appliances with ventilation grilles, shown from different angles (no text or symbols)Figura 8 Figura 9 Figura 10
PAREDES CATALÍTICAS\*
natural_image
Line drawing of a window with two hands inserting a component into the air gap (no text or symbols)Figura 11
Remover as paredes catalíticas
natural_image
Technical line drawing of a mechanical device interior with no visible text or symbolsFigura 12
natural_image
Symbol of a trash bin crossed with a diagonal line, no text or labels presentWe aim to provide you with a high quality product manufactured in our modern factory with great care and in compliance with total quality control principles.
Therefore, we suggest you read the user manual carefully before using the product and, keep it safe for future reference.
Warning : All our appliances are only for domestic use, not for commercial use.
Note:
This user manual covers more than one model. Some of the features specified in the Manual may not be available in your appliance.
* Mark the products as option.
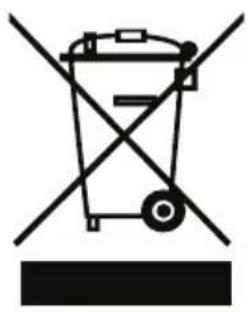
"Conforms with the WEEE Regulations."
CONTENS
Important Warnings 24
Introduction Of The Appliance 26
Important Warnings 27
Electrical Connection Scheme 28
Chain Connection Scheme 28
Installation Of Your Oven 29
Technical Features Of Your Oven 29
If The Appliance Does Not Operate 30
Description Of The Oven And
Control Panels 30
Control Panels 31
Using Hot Plates 31
Using Oven Section 32
Cooking Time Table 33
Using And Description Of Hob Section
For Vitroceramic 33
Maintenance And Cleaning 35
Cleaning And Maintenance Of The
Oven's Front Door Glass 35
Installation Of The Oven Door 36.
Changing The Oven Lamp
Accesories
Using The Grill Deflector Sheet
Catalytic Walls
Chicken Roasting
Environmentally-Friendly Disposal and
Package Information
IMPORTANT WARNINGS
- WARNING: To avoid electrocution, ensure that the electrical circuit of the product is open before replacing the lamp.
- WARNING: Before touching the connection terminals, all supply circuit should be disconnected.
3.WARNING:While operating the grill, the reachable sections can be hot. Keep the children away.
4.WARNING:Any inadvertent cooking made with fats and oils can be dangerous and cause fire. - WARNING: Risk of fire; do not store the food materials on the cooking surface.
6.WARNING:If the surface is cracked, unplug the device to prevent any risk of electric shock. - WARNING: During usage the reachable sections can be hot. Keep the small children away.
8.WARNING:The appliance and its reachable sections become hot during usage. - The setting conditions of this appliance is indicated on the label. (Or data tag)
- This appliance is not connected to a combustion product discharge system. This appliance shall be connected and installed as per the applicable installation legislation. Consider the requirements related with ventilation.
- The reachable sections can become hot when the grill is used. Keep the small children away.
12.WARNING:The appliance is intended for cooking only. It must not be used for other purposes like room heating.
GB
13.There are additional protective equipment to prevent inadvertent touching to the oven doors. This equipment should be installed if there are children.
- "These instructions are applicable for countries of which symbols are indicated on the appliance. If the country symbol is not available on the appliance, in order to adapt the appliance to the conditions of such country, the technical instructions should be read."
15.Do not use steam cleaners to clean the appliance.
-
Before opening the oven door clean the remnants on it. Before closing the oven door, let it cool.
-
NEVER try to extinguish a fire with water, first disconnect the mains supply and then using, for example a lid or blanket, cover the fire.
-
Do not use hard and abrasive cleaning agents or hard metal scrapers to clean the oven door glass as they may scratch and shatter the surface.
-
After placing a dish, ensure that the door is firmly closed.
-
Unless continuous supervision is provided, the children of age 8 or below should be kept away.
-
Pay attention for not to touch the heating elements.
-
This appliance can be used by children aged from 8 years and above and persons with reduced physical, sensory or mental capabilities or lack of experience and knowledge if they have been given supervision or instruction concerning use of the appliance in a safe way and understand the hazards involved.
INTRODUCTION OF THE APPLIANCE
natural_image
Technical line drawing of a mechanical assembly with no visible text or symbols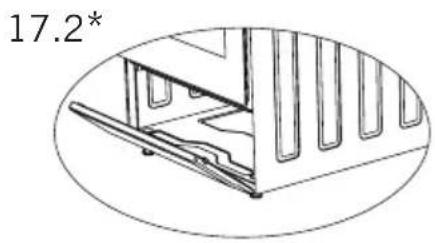
natural_image
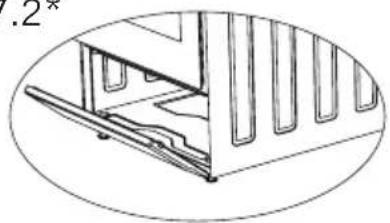
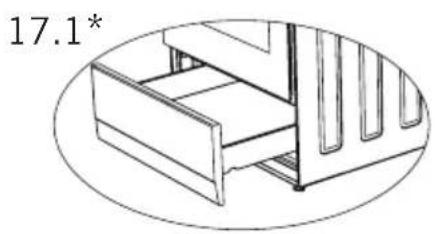
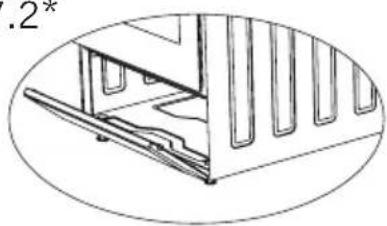
Technical line drawing of a mechanical assembly with no visible text or symbolsFigure 17.1 and 17.2 are optional for ovens with dimensions 50x60 and 60x60. (*)
Figure 17.1 is not available for oven with dimension 50x55 and 17.2 is optional. (*)
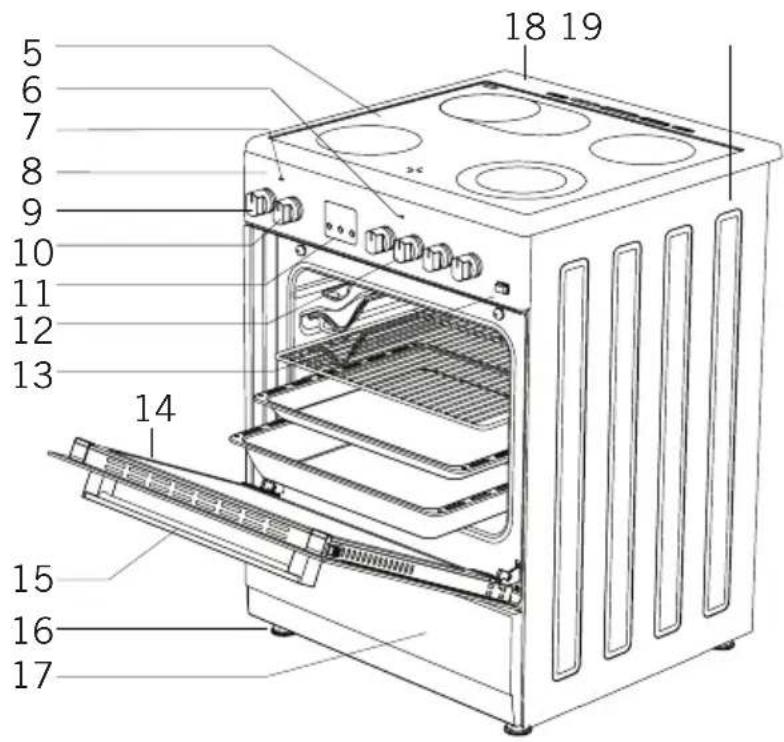
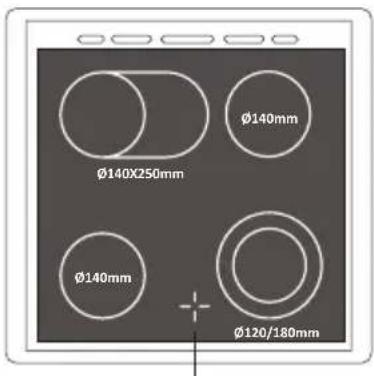
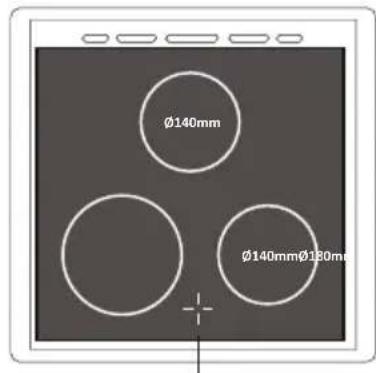
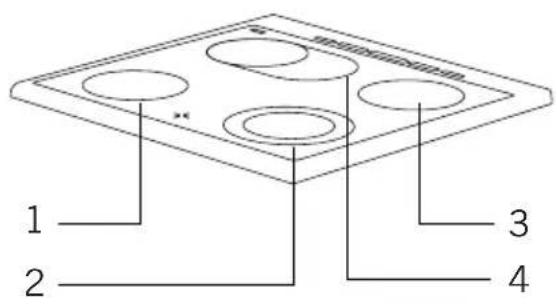
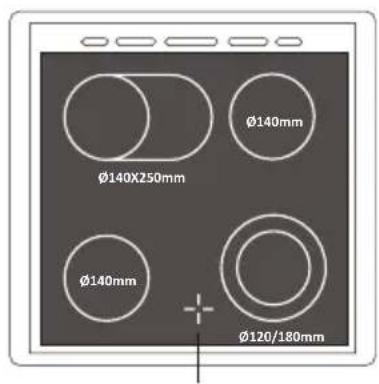
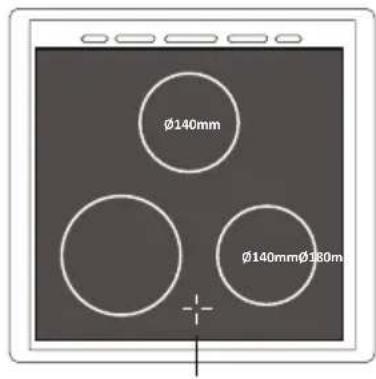
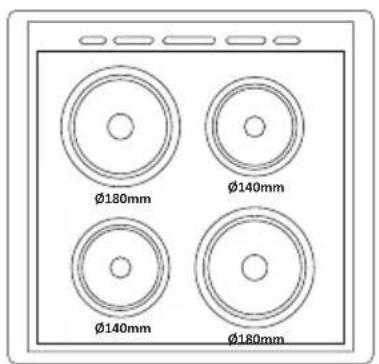
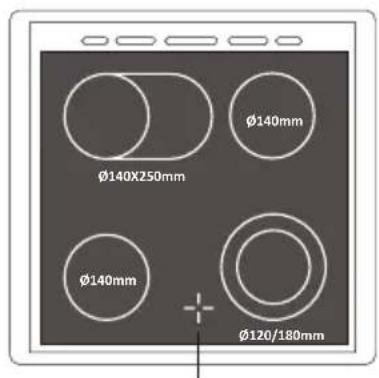
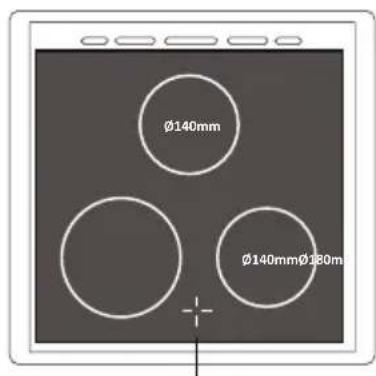
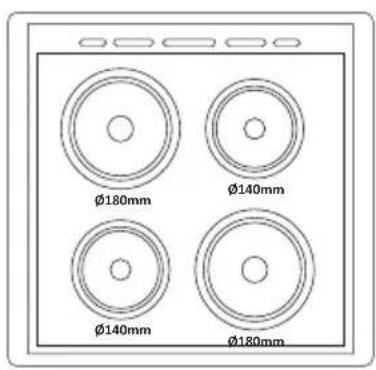
- Heating Place ∅140mm
- Heating Place ∅120 / 180mm
- Heating Place ∅140mm
- Heating Place Ovaldual ∅140 / 250mm
- Glass Top Plate
- Cooker Section Led Lamp
- Oven Section Led Lamp
-
Control Panel
-
Thermostat Knob
- Command Knob For Oven
- Digital Timer (Optional)
- Regulators For Vitroceramic Hobs
- Glass Oven Door Oven Traycavity
- Glass Oven Door Oven Traycavity
-
Handle
-
Plastic Leg
- Lower Cabinet Door
17.1. Drawer
17.2. Flap Door - Metal Top Plate
- Side Panel
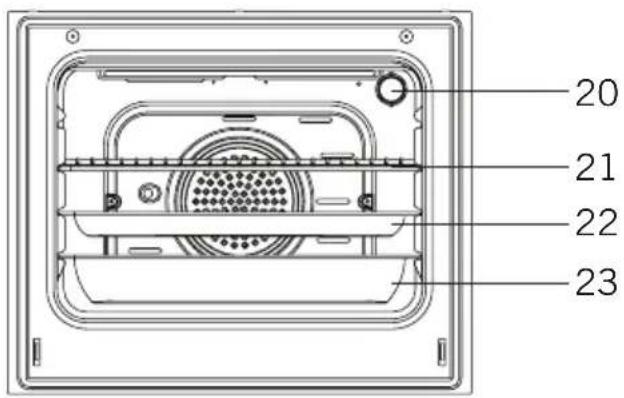
- Lamp
- Grill
- Standard Tray
- Deep Tray*
IMPORTANT WARNINGS
Electrical Connection and Security
- Your oven requires 40 Amp fuse for mono phase or 3x16 Amp fuse for 3 phase supply according to electrical power for cooker section has 4 ceramic heater and oven section has electric models. Installation by a qualified electrician is mandatory.
- Your oven is adjusted in compliance with 220-240V / 380-415V AC, 50/60Hz. electric supply. If the mains are different from this specified value, contact your authorized service.
- Electrical connection of the oven should only be made to connections / sockets with an earth system installed in compliance with local regulations. If there are no connections/sockets with an earth system in place where the oven will be installed, immediately contact a qualified electrician to install. The manufacturer is not responsible for damages that will arise because of the appliance not be connected to an earth system.
- If your supply cable gets damaged, it should be replaced by an authorized service agent or qualified electrician in order to avoid danger or electric shock.
- Electrical cable should not touch the hot parts of the appliance.
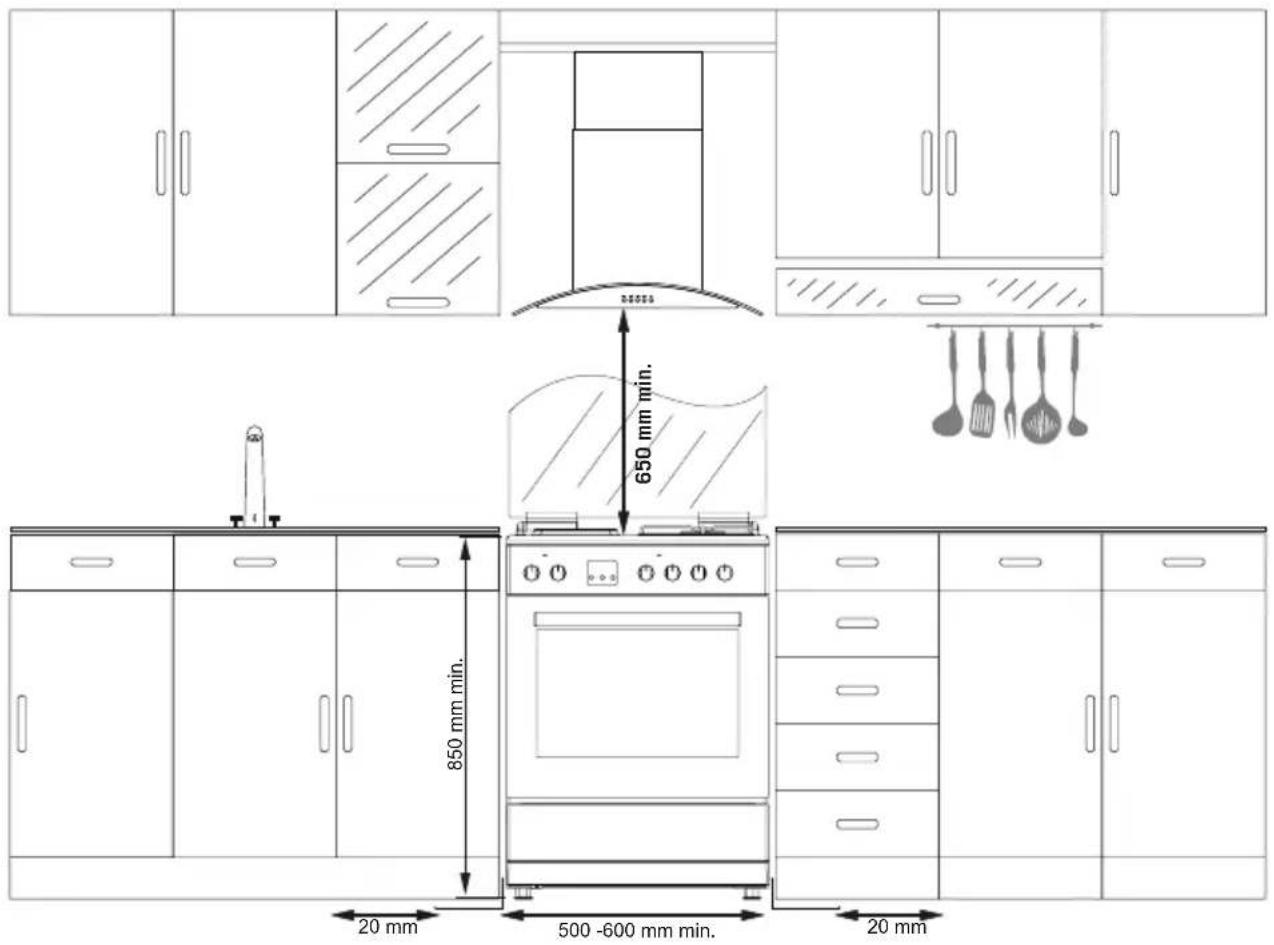
- The oven should be using a well ventilation place and should be install on flat ground.
- Operate your oven in dry atmosphere.
- When placing your oven to its location, ensure that it is at the counter level. Bring it to the counter level by adjusting the feet if necessary.
ELECTRICAL CONNECTION SCHEME
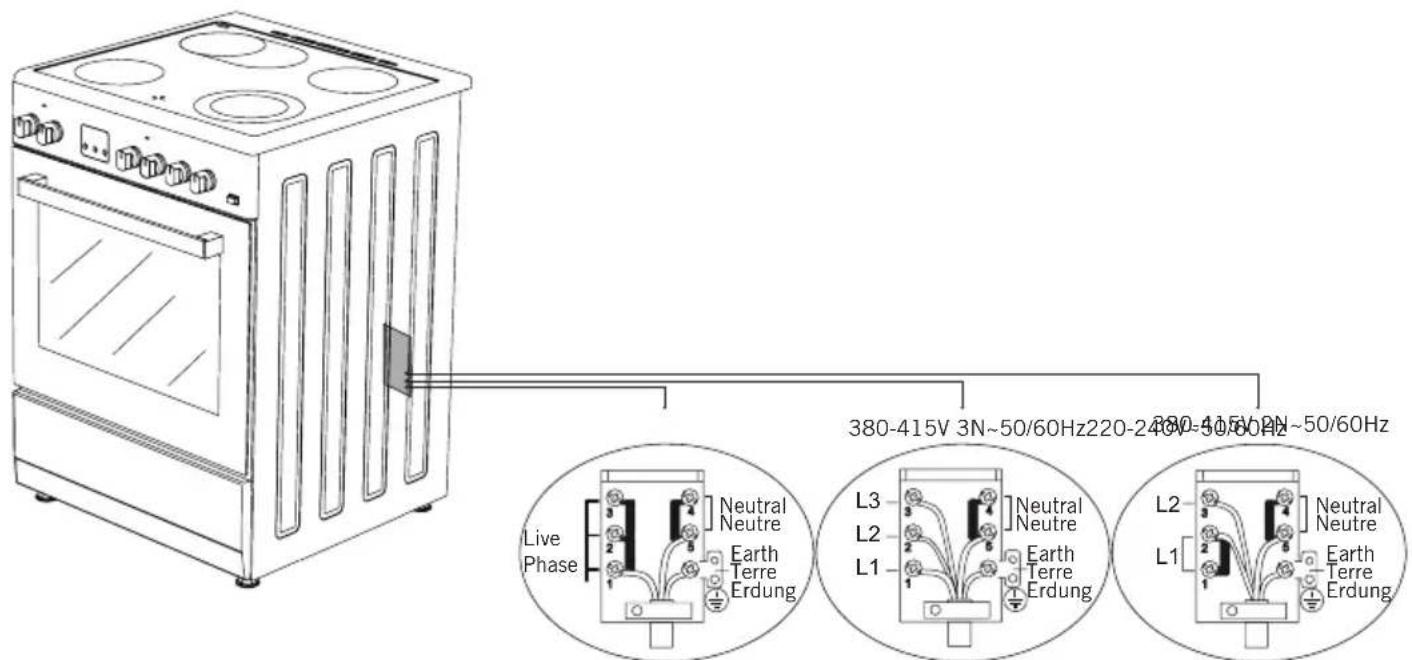
H05 VV-F 3G 4mm² H05 VV-F 5G 1.5mm² H05 VV-F 4G 1.5mm²
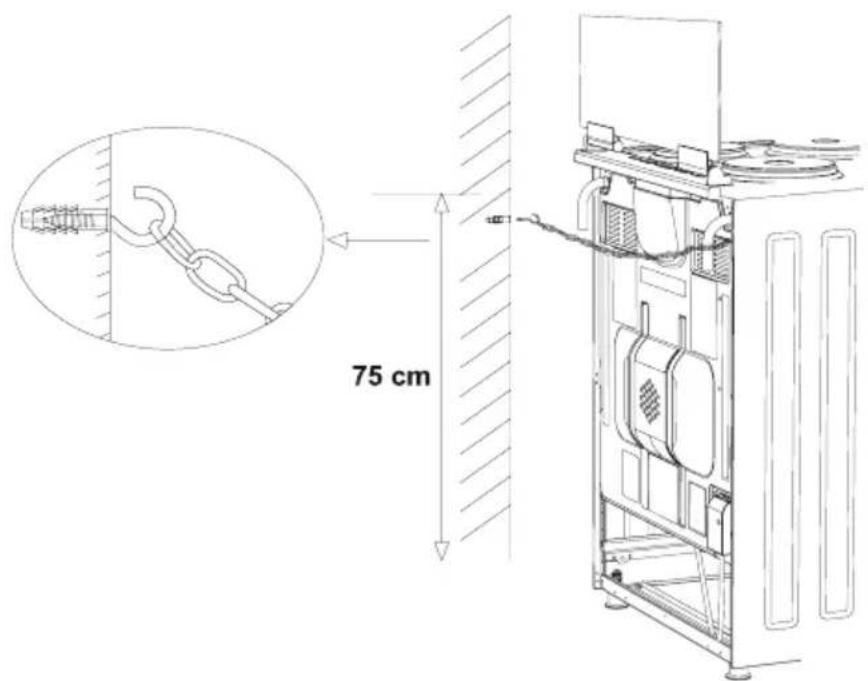
CHAIN CONNECTION SCHEME
Before using the appliance, in order to ensure safe use, be sure to fix the appliance to the wall using the chain and hooked screw supplied. Ensure that the hook is screwed into the wall securely.
INSTALLATION OF YOUR OVEN
| TECHNICAL FEATURES OF YOUR OVEN | |||
| SPECIFICATIONS 50x55 50x60 | 60x60 | ||
| Outer Width 500mm 500mm | 600mm | ||
| Outer Depth 560mm 630mm | 630mm | ||
| Outer Height 855mm 855mm | 855mm | ||
| Lamp Power 15W | |||
| Thermostat 40-240°C | |||
| Bottom Heating Element 1000W | 1000W 1200W | ||
| Top Heating Element 800W | 800W 1000W | ||
| Turbo Heating Element ---- | 1800W 2200W | ||
| Grill Heating Element 1500W | 1500W 2000W | ||
| Supply Voltage | 220-240/380-415V,50/60 Hz | ||
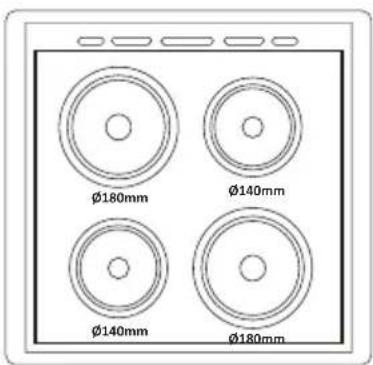
| Ceramic Heater ∅140 | 1200W | ||
| Ceramic Heater ∅180 | 1700W/1800W | ||
IF THE APPLIANCE DOES NOT OPERATE
- Please check the plug of power supply cord has a well connection with wall socket or not.
- Please check the electric network.
- Please check the fuse.
- Please check power supply cord for any damage problems.
- If you can not solve the problem, get in contact with manufacturer supplier service agent or similar qualified persons.
DESCRIPTION OF THE OVEN and CONTROL PANELS
 | Turnspit Fan |  | |
 | Top + Bottom heating element |  | Turbo heating + Fan |
 | Lamp |  | Bottom + Top heating elements + Fan |
 | Bottom heating element + Fan |  | Grill heating element+Fan |
 | Grill heating element |  | Grill burner / Grill heating element |
 | Grill heating element+Lamp | Top  ating element ating element | |
 | Electrical timer |  | Oven burner / Bottom heating element |
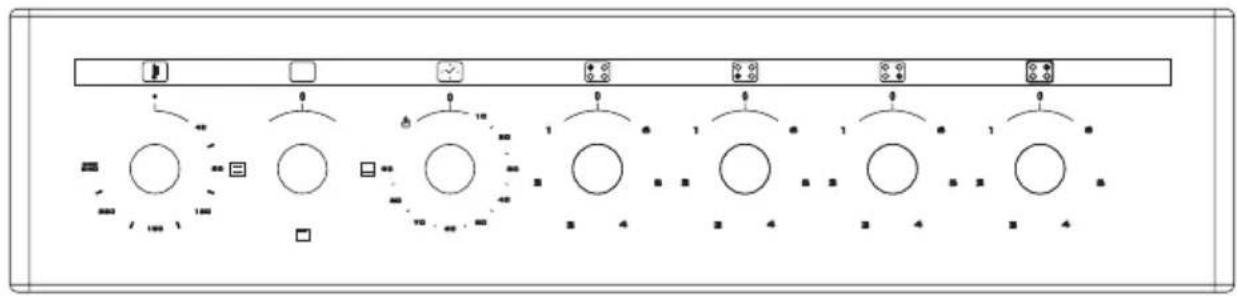
Thermostat Knob; In order to operate the oven, thermostat must be adjusted to desire temperature. Your thermostat has a feature of adjustment to 40 °C - 240 °C degree.
Mechanic Timer Knob ^* ; In order to operate the oven, timer switch should be adjusted to desired time.
CONTROL PANELS

flowchart
graph TD
    A["输入"] --> B["处理1"]
    B --> C["处理2"]
    C --> D["处理3"]
    D --> E["处理4"]
    E --> F["输出"]
    style A fill:#f9f,stroke:#333
    style F fill:#bbf,stroke:#333
flowchart
graph LR
    A["Input"] --> B{Decision}
    B -->|Yes| C["Process Step 1"]
    B -->|No| D["Process Step 2"]
    C --> E["Output"]
    D --> F["Output"]
USING HOT PLATES
| LEVEL 1 LEVEL 2 LEVEL 3 LEVEL 4 LEVEL 5 LEVEL 6 | ||||||
| ∅80mm | 200W 2 | 50W 450W | --- --- --- | |||
| ∅145mm | 250W 7 | 50W 1000W | --- --- --- | |||
| ∅180mm | 500W 7 | 50W 1500W | --- --- --- | |||
| ∅145mm Rapid | 500W 1 | 000W 1500W | --- --- --- | |||
| ∅180mm Rapid | 850W 1 | 150W 2000W | --- --- --- | |||
| ∅145mm | 95W 15 | 5W 250W | 400W 750W | 1000W | ||
| ∅180mm | 115W 1 | 75W 250W | 600W 850W | 1500W | ||
| ∅145mm Rapid | 135W 1 | 65W 250W | 500W 750W | 1500W | ||
| ∅180mm Rapid | 175W 2 | 20W 300W | 850W 1150W | 2000W | ||
| ∅220mm 220W 3 | 50W 560W | 910W 14 | 60W 2000W | |||
- Electric hotplates have standard of 6 temperature levels. (as described herein above)
- In order to operate the hotplates, turn its relative knob that is fixed on the control panel.
-
Hotplates have six temperature levels as stated in the table. Please operate hotplates at '6' numbered-position for five minutes when you use for the first time while nothing is on the hotplate. This operation provides removing the protection material from the hotplate surface. At this operation an odor and smoke spread out from the hotplate. This is normal; not a manufacturing defect.
-
Please use long-handled pot which is well placed on the hotplate and suitable for the hotplate surface.
USING OVEN SECTION
Using oven heating elements
- When your oven is operated first time, an odor will be spread out which will be sourced from using the heating elements. In order to get rid of this, operate it at 240 °C for 45-60 minutes while it is empty.
- Oven control knob should be positioned to desired value; otherwise oven does not operate.
- Kinds of meals, cooking times and thermostat positions are given in cooking table. The values given in the cooking table are characteristic values and were obtained as a result of the tests performed in our laboratory. You can find different flavors suitable for your taste depending on your cooking and using habits.
- You can make chicken revolving in your oven by means of the accessories.
- Cooking times: The results may change according to the area voltage and material having different quality, amount and temperatures.
- During the time when cooking is being performed in the oven, the lid of the oven should not be opened frequently. Otherwise circulation of the heat may be imbalanced and the results may change.
- Using cake forms while cooking cake gives better result.
- 5-10 min. preliminary heating should be done prior cooking.

natural_image
Four black silhouette icons showing cooking pots: lid, pot, steaming pan, and fire extinguisher (no text or symbols)True False False False
COOKING TIME TABLE
| Foods Cooking | Function Temperature (°C) | Rack Position | Cooking Duration (min.) | |
| Cake (Tray/Mold) Statik / Statik+Fan 170-180 | 2 35-45 | |||
| Small Cakes Statik / Turbo+Fan 170-180 2 25-30 | ||||
| Patty Statik / Statik+Fan 180-200 2 35-45 | ||||
| Pastry Statik 180-190 2 25-30 | ||||
| Cookie Statik 170-180 3 20-25 | ||||
| Apple Pie Statik / Turbo+Fan 180-190 2 50-70 | ||||
| Sponge Cake Statik | 200/150* | 2 20-25 | ||
| Pizza | Statik+Fan | 180-200 3 20-30 | ||
| Lasagna | Statik 180-200 2 25-40 | |||
| Meringue | Statik | 100 | 2 60 | |
| Chicken | Statik+Fan / Turbo+Fan | 180-190 2 45-50 | ||
| Grilled Chicken** | Grill | 200-220 4 25-30 | ||
| Grilled Fish** | Grill+Fan | 200-220 4 25-30 | ||
| Sirloin Steak** | Grill+Fan | Max. 4 15-20 | ||
| Grilled Meat Balls** | Grill | Max. 4 20-25 |
*Without pre-heating. Half of the cooking should be 200°C and then second half should be 150°C.
**During the half of cooking, meal should be turned around.
USING AND DESCRIPTION OF HOB SECTION FOR VITROCERAMIC
| LEVEL 1 | LEVEL 2 | LEVEL 3 | LEVEL 4 | LEVEL 5 | LEVEL 6 | LEVEL 7 | LEVEL 8 | LEVEL 9 | MAX. | |
| ∅140mm Commutator | 130 W | 206 W | 350 W | 500 W | 850 W | 1200 W | --- | --- | --- | --- |
| ∅180mm Commutator | 180 W | 470 W | 790 W | 850 W | 1230 W | 1700 W | --- | --- | --- | --- |
| ∅180mm Regulator | 1800 W | 1800 W | 1800 W | 1800 W | 1800 W | 1800 W | 1800 W | 1800 W | 1800 W | --- |
| ∅140/250mm | 1000 W | 1000 W | 1000 W | 1000 W | 1000 W | 1000 W | 1000 W | 1000 W | 1000 W | 1800 W |
| ∅120/180mm Dual Hilight | 700 W | 700 W | 700 W | 700 W | 700 W | 700 W | 700 W | 700 W | 700 W | 1700 W |
GB
- You operate the hob with the ring switches on the control panel of oven. This switch regulates the energy in order to reach desired temperature set by you.
- In order to have a good cooking result from the hob, the pans bottom should be as thick and flat as possible.
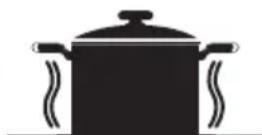
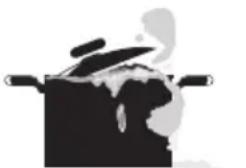
- Bottom of pans and cooking zones should be the same size. If possible, always place lids on the pans. Always place cookware on the cooking zone before it is switched on. Switch cooking zones off before the end of the cooking time, to take advantage of residual heat.
- Turn the knob to clockwise for starting to operate. Temperature set up by the knob position on the line gradually increasing up to max. (Single zone)
- For dual cooking zone the first ring operating like single zone; second ring starts to operate after extra turning by some more force to clock wise on the “max” region end of the ring sign. When you turn to counter clock wise, the first ring will operate as maximum range and the second ring’s power will reduce up to you desire temperature.
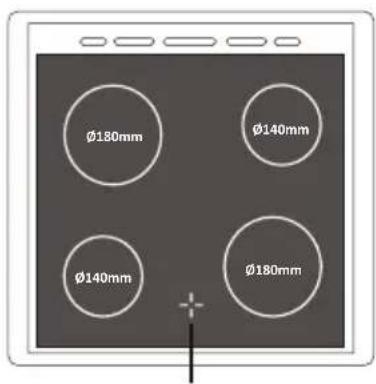
Restvarmeindikator
Restvarmeindikator
Restvarmeindikator
MAINTENANCE and CLEANING
- Disconnect the plug supplying electricity for the oven from the socket.
- While oven is operating or shortly after it starts operating, it is extremely hot. You must avoid touching from heating elements.
- Never clean the interior part, panel, lid, trays and all other parts of the oven by the tools like hard brush, cleaning mesh or knife. Do not use abrasive, scratching agents and detergents.
- After cleaning the interior parts of the oven with a soapy cloth, rinse it and then dry thoroughly with a soft cloth.
- Clean the glass surfaces with special glass cleaning agents.
- Do not clean your oven with steam cleaners.
- Before opening the upper lid of the oven, clean spilled liquid off the lid. Also, before closing the lid, ensure that the cooker table is cooled enough.
- Never use inflammable agents like acid, thinner and gasoline when cleaning your oven.
- Do not wash any part of your oven in dishwasher.
- In order to clean the front glass lid of the oven; remove the fixing screws fixing the handle by means of a screwdriver and remove the oven door. Than clean and rinse it thoroughly. After drying, place the oven glass properly and re-install the handle.
CLEANING AND MAINTENANCE OF THE OVEN'S FRONT DOOR GLASS
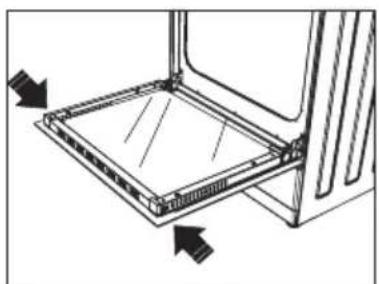
Remove the profile by pressing the plastic latches on both left and right sides as shown in Figure 1 and pulling the profile towards yourself as shown in Figure 2. Then remove the inner-glass as shown in Figure 3. If required, middle glass can be removed in the same way. After cleaning and maintenance are done, remount the glasses and the profile in reverse order.
Make sure the profile is properly seated in its place.
natural_image
Technical line drawing of a mechanical assembly with arrows indicating direction (no text or symbols)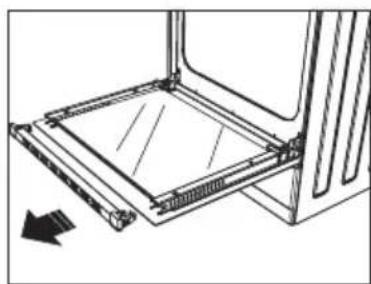
natural_image
Technical line drawing of a mechanical assembly with no visible text or symbols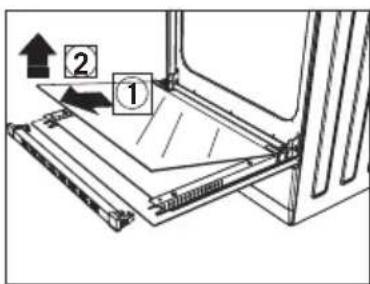
Figure 1 Figure 2 Figure 3
INSTALLATION OF THE OVEN DOOR
natural_image
Line drawing of an open oven with four circular burners and a tray, showing internal structure without any text or symbols.Figure 4
natural_image
Line drawing of an open kitchen oven with four burners and a door open, showing internal components (no text or symbols)Figure 5
natural_image
Four-panel line drawing showing a vehicle interior with structural components, no text or symbols presentFigure 4.1 Figure 4.2 Figure 5.1 Figure 5.2
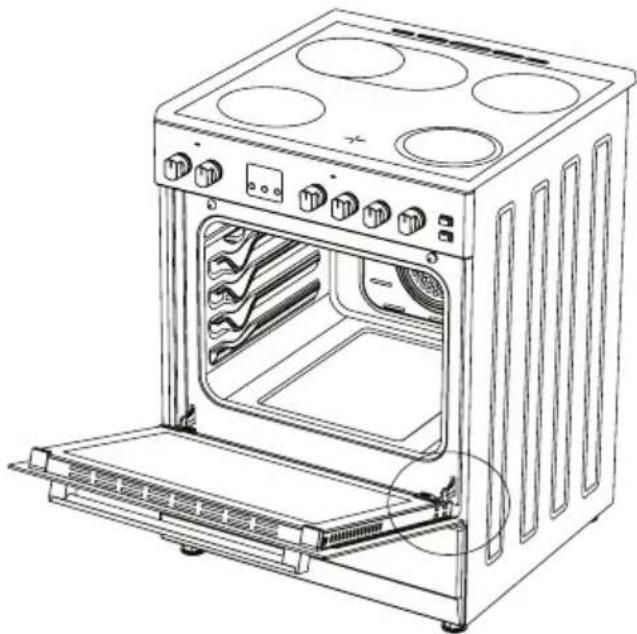
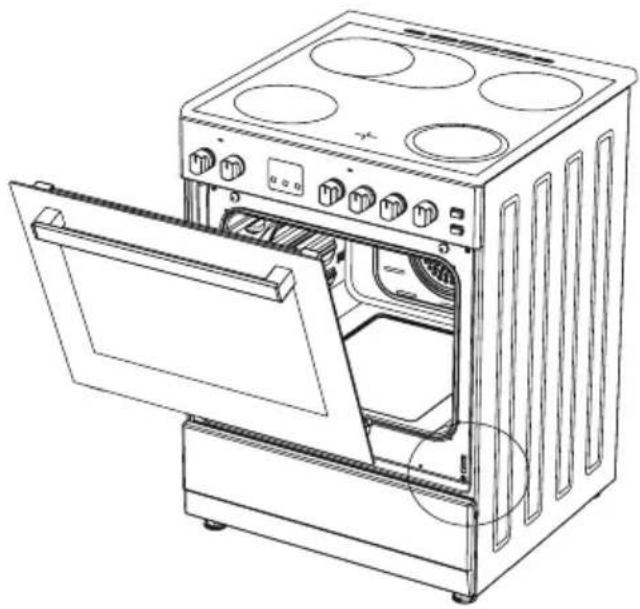
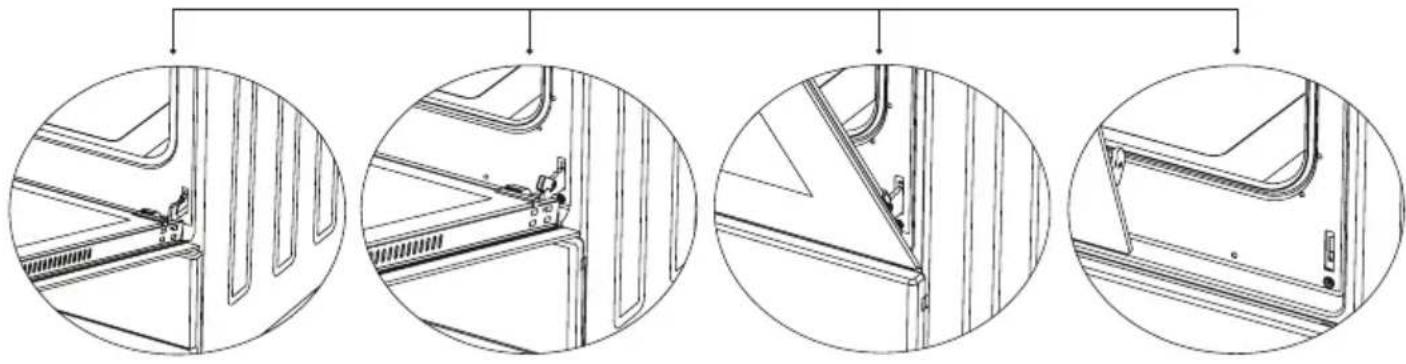
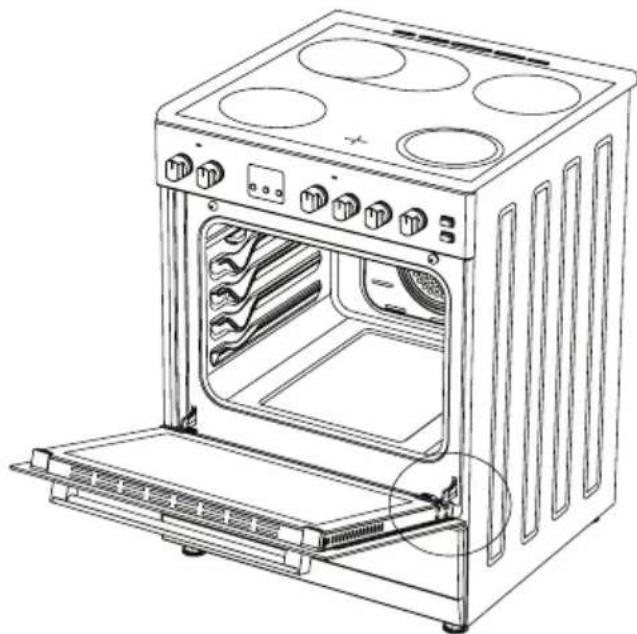
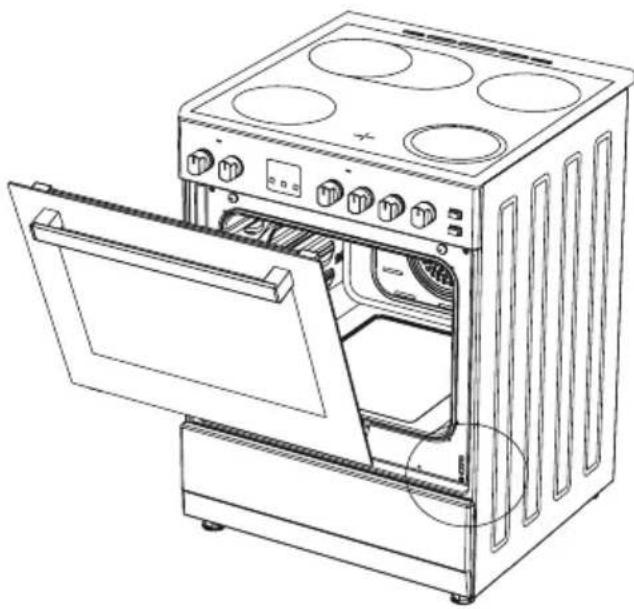
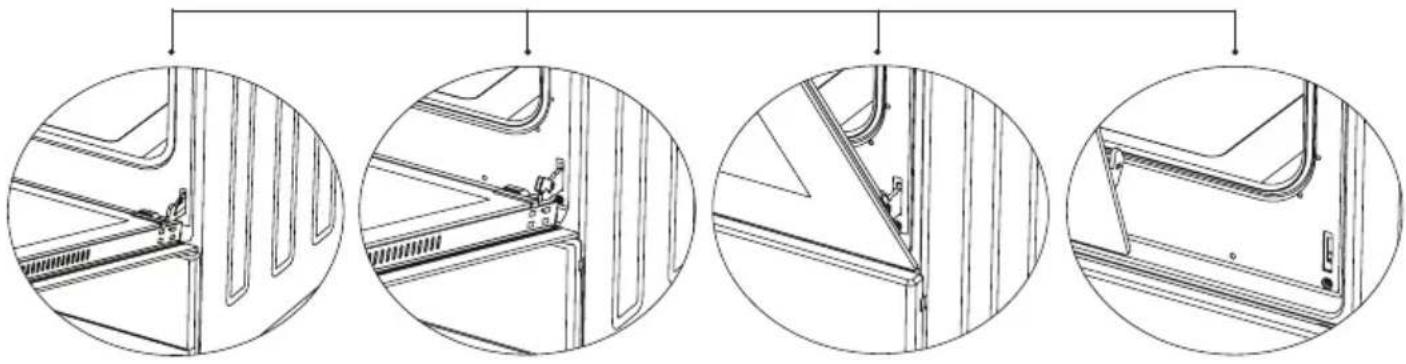
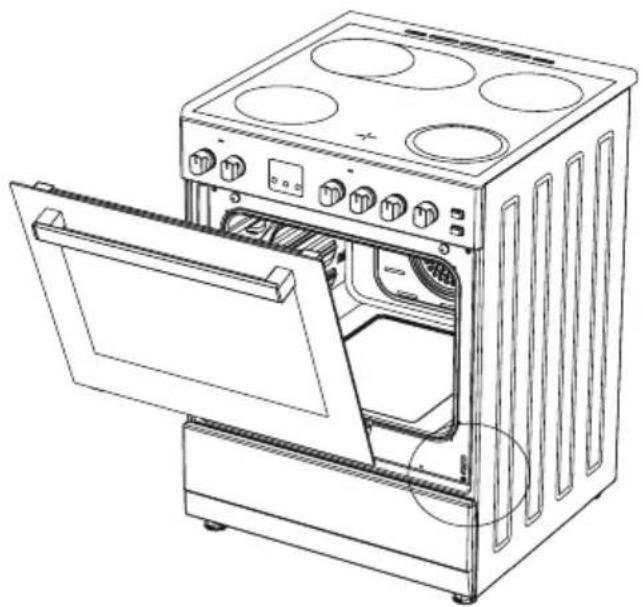
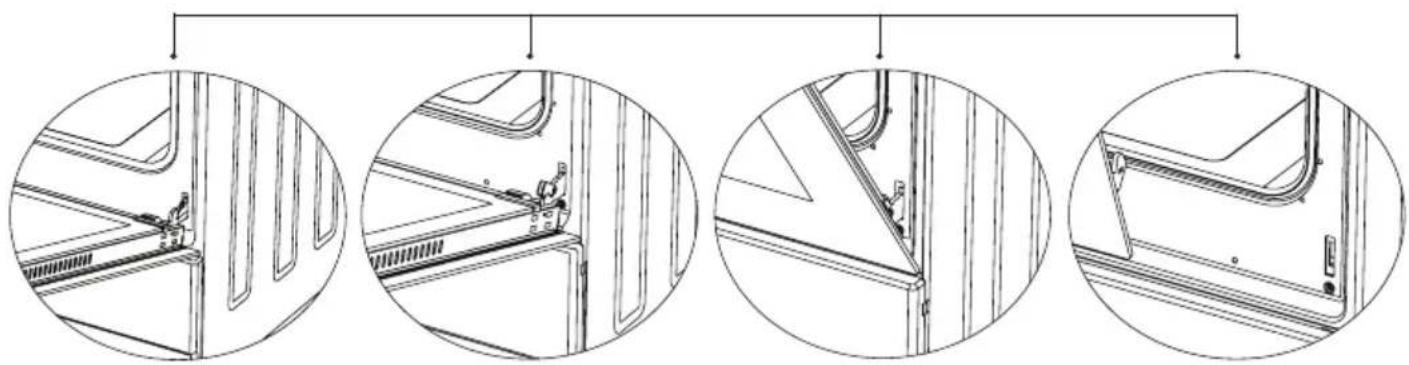
Completely open the oven door by pulling it to yourself. Afterwards, perform the un-locking process by pulling the hinge lock upwards with the help of a screw driver as shown in
Bring the hinge lock to the widest angle as shown in Figure 4.2. Bring both hinges connecting the oven door to the oven to the same position.
Afterwards, close the oven door as to lean on the hinge lock as shown in
Figure 5.1.
To remove the oven door, pull it upwards by holding it with both hands when close to the closed position as shown in Figure 5.2.
Figure 4.1.
In order to re-place the oven door, perform the abovementioned steps in reverse.
CHANGING THE OVEN LAMP
In order to avoid the possibility of an electric shock, ensure that the circuit of the appliance is open before changing the lamp.
(The open circuit is an electrical circuit that does not conduct current)
- First of all, cut the electrical connection of the appliance and ensure that the appliance is cooled down.
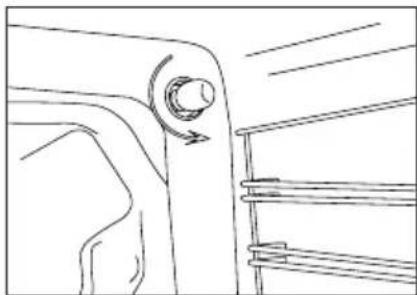
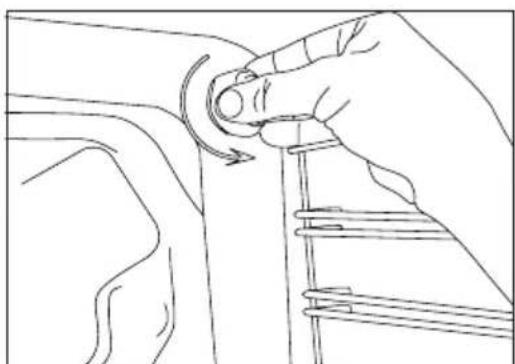
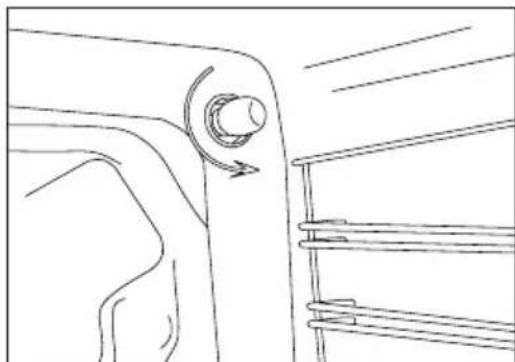
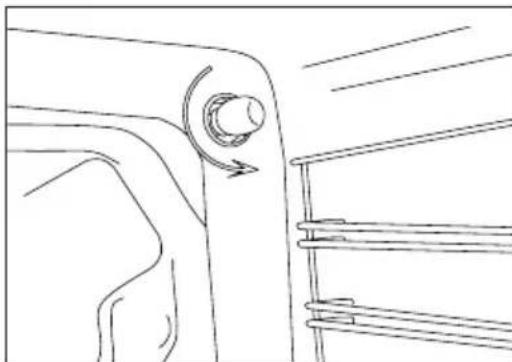
- Remove the glass protection by turning as shown in the figure. If you have difficulty in turning it, the use of plastic gloves will help you.
- Afterwards, remove the lamp by turning and install the new lamp with the same specifications. The specifications of the lamp should be as follows:
-230 V AC,
-15 W,
-Type E14
- Place the glass protection and complete the replacing process by plugging in the electric cable of the appliance. Now, you can use your oven.
natural_image
Line drawing of a hand adjusting a car seatbelt with a curved arrow indicating rotation (no text or symbols)Figure 6
natural_image
Line drawing of a mechanical component with a knob and arrow indicating rotation (no text or symbols)Figure 7
ACCESORIES
natural_image
Simple line drawing of a square frame with rounded corners and a central hole (no text or symbols)Deep Tray\*
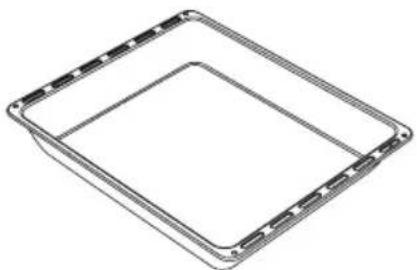
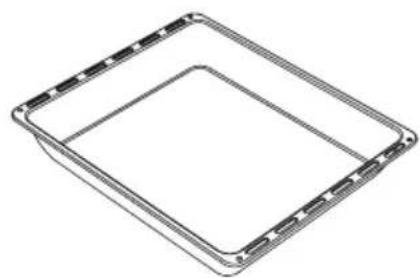
Used for pastries, deep fried foods and stew recipes. In case of frying directly on the grill for cakes, frozen foods and meat dishes, it can be used of oil pick-up tray.
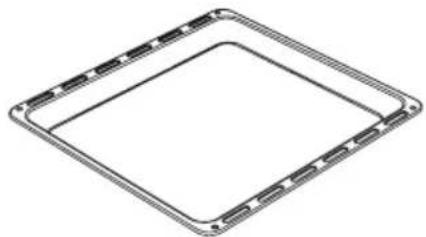
natural_image
Pure geometric diagram of a square frame with rounded corners and internal lines, no text or symbols present.Tray
Used for pastries (cookies, biscuits etc.) and frozen foods.
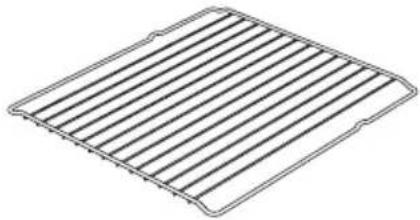
natural_image
Line drawing of a rectangular grid structure with parallel lines, no text or symbols presentWire Grill
Used for frying and/or placing the foods to be baked, fried and frozen foods on the desired rack.
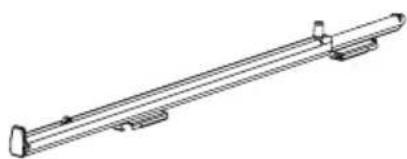
natural_image
Technical line drawing of a mechanical support or rod assembly (no text or symbols)Telescopic Rail\*
With the help of telescopic rails, the trays and/or wire racks can be easily placed and removed.
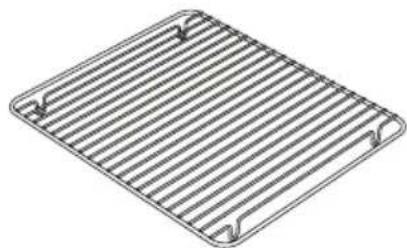
natural_image
Line drawing of a rectangular metal grate with slats and two side handles (no text or symbols)In Tray Wire Grill\*
Foods that can stick while cooking such as beef are placed on in tray grill. Thus, the contact and sticking of the food is prevented.
natural_image
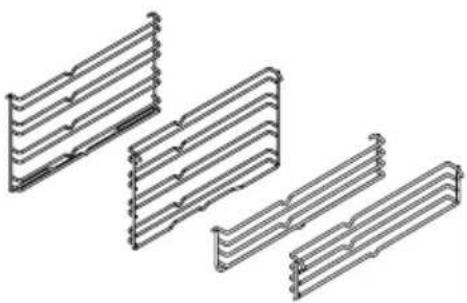
Pure technical line drawing of a multi-layered mechanical component with no text or symbolsLower and Upper Wire Racks\*
While cooking, you can place the deep tray and tray on the lower and upper wire racks.
USING THE GRILL DEFLECTOR SHEET (option)\*
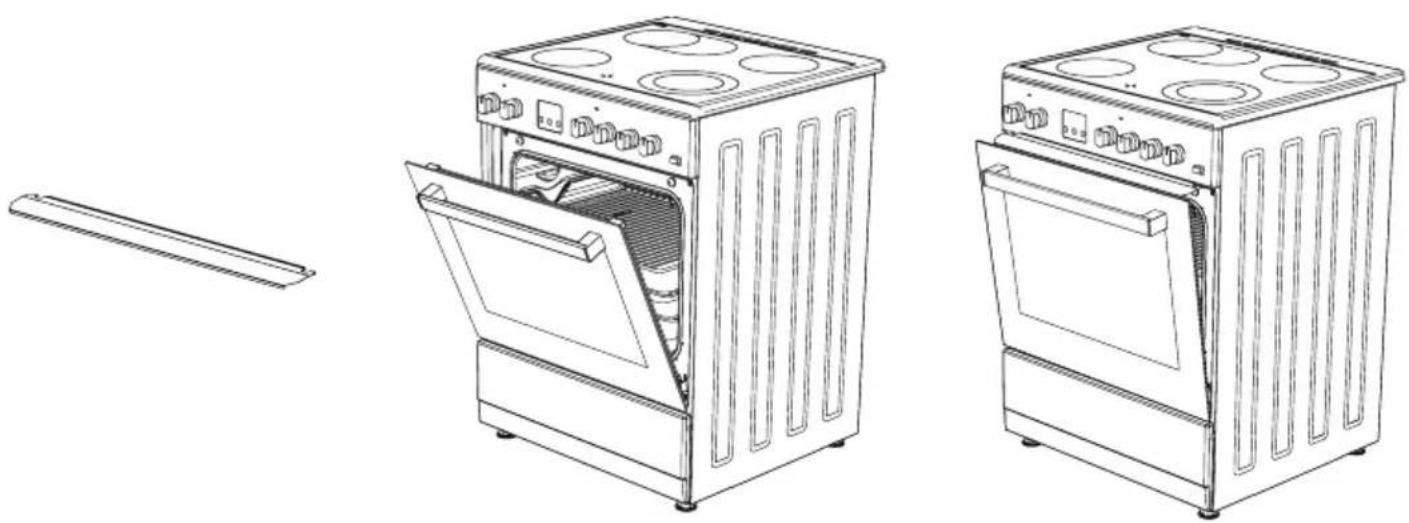
- A safety panel is designed to protect control panel and the buttons when the oven is in Grill mode (Figure 8)
- Please use this safety panel in order to avoid the heat to damage control panel and the buttons when the oven is Grill mode.
WARNING: Accessible parts may be hot when the grill in use. Young children should be kept away.
- Place the safety panel under control panel by opening the oven front cover glass (Figure 9)
- And then secure the safety panel in between oven and front cover by gently closing the cover. (Figure 10)
- It is important for cooking to keep the cover open in specified distance when cooking in grill mode.
- Safety panel will provide an ideal cooking circumstance while protecting control panel and buttons.
If the cooker has the “CLOSED GRILL FUNCTIONED” option with thermostat, you can keep the oven door closed during operation; in this case the grill deflector sheet will be unnecessary.
natural_image
Line drawings of two open kitchen appliances with doors and ovens, showing exterior and interior views (no text or symbols)Figure 8 Figure 9 Figure 10
CATALYTIC WALLS\*
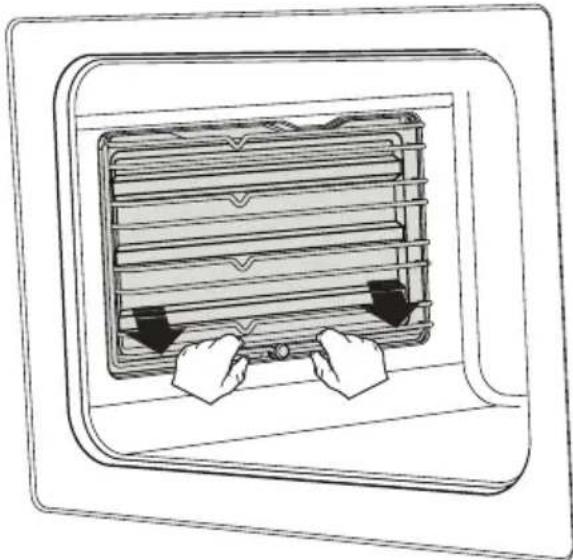
Catalytic walls are located on the left and the right side of cavity under the guides. Catalytic walls banish the bad smell and obtain the best performance from the cooker. Catalytic walls also absorb oil residue and clean your oven while it's operating.
natural_image
Line drawing of a window with two hands inserting a component into the air gap (no text or symbols)Figure 11
Removing the catalytic walls
In order to remove the catalytic walls; the guides must be pulled out. As soon as the guides are pulled out, the catalytic walls will be released automatically. The catalytic walls must be changed after 2-3 years.
CHICKEN ROASTING\*
natural_image
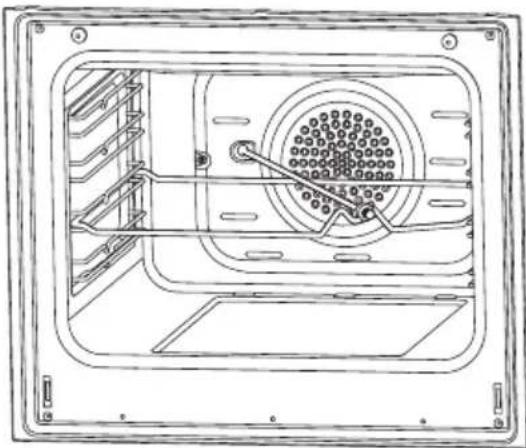
Technical line drawing of a mechanical assembly with internal components and mounting holes (no text or symbols)Figure 12
Place the spit on the frame. Slide turn spit frame into the oven at the desired level. Locate a dripping pan through the bottom in order to collect the fast. Add some water in dripping pan for easy cleaning. Do not forget to remove plastic part from spit. After grilling, screw the plastik handle to the skewer and take out the food from oven.
"ALWAYS GRILL WITH THE OVEN DOOR CLOSED"
ENVIRONMENTALLY-FRIENDLY DISPOSAL
natural_image
Symbol of a trash bin crossed with diagonal lines, no text or labels presentDispose of packaging in an environmentally-friendly manner.
This appliance is labelled in accordance with European Directive 2012/19/EU concerning used electrical and electronic appliances (waste electrical and electronic equipment - WEEE). The guideline determines the framework for the return and recycling of used appliances as applicable throughout to the EU.
PACKAGE INFORMATION
Packaging materials of the product are manufactured from recyclable materials in accordance with our National Environment Regulations. Do not dispose of the packaging materials together with the domestic or other wastes. Take them to the packaging material collection points designated by the local authorities.
natural_image
Technical line drawing of a mechanical assembly with no visible text or symbols17.2*
natural_image
Pure technical line drawing of a mechanical assembly without any text, numbers, or symbols| NIVEL 1 NIVEL 2 NIVEL 3 NIVEL 4 NIVEL 5 NIVEL 6 | ||||||
| ∅80mm 200W 250W | 450W --- | --- --- | ||||
| ∅145mm 250W 750W | 1000W | --- --- --- | ||||
| ∅180mm 500W 750W | 1500W | --- --- --- | ||||
| ∅145mm Rápido 500W | 1000W | 1500W --- | --- --- | |||
| ∅180mm Rápido 850W | 1150W | 2000W --- | --- --- | |||
| ∅145mm 95W 155W | 250W 400W | 750W | 1000W | |||
| ∅180mm 115W 175W | 250W 600W | 850W | 1500W | |||
| ∅145mm Rápido 135W | 165W | 250W 500W | 750W | 1500W | ||
| ∅180mm Rápido 175W | 220W | 300W 850W | 1150W | 2000W | ||
| ∅220mm 220W 350W | 560W 910W | 1460W | 2000W | |||
| NIVEL 1 | NIVEL 2 | NIVEL 3 | NIVEL 4 | NIVEL 5 | NIVEL 6 | NIVEL 7 | NIVEL 8 | NIVEL 9 | MÁX. | |
| ∅140mm Conmutador | 130 W | 206 W | 350 W | 500 W | 850 W | 1200 W | --- --- | --- | --- | |
| ∅180mm Conmutador | 180 W | 470 W | 790 W | 850 W | 1230 W | 1700 W | --- | --- --- | --- | |
| ∅180mm Regulador | 1800 W | 1800 W | 1800 W | 1800 W | 1800 W | 1800 W | 1800 W | 1800 W | 1800 W | --- |
| ∅140/250mm | 1000 W | 1000 W | 1000 W | 1000 W | 1000 W | 1000 W | 1000 W | 1000 W | 1000 W | 1800 W |
| ∅120/180mm Doble | 700 W | 700 W | 700 W | 700 W | 700 W | 700 W | 700 W | 700 W | 700 W | 1700 W |
Derecho
Falso
Falso
natural_image
Silhouette of a cooking pot with steam rising (no text or symbols)Falso
ES
Restvarmeindikator
Restvarmeindikator
Restvarmeindikator
MANTENIMIENTO Y LIMPIEZA
natural_image
Technical line drawing of a mechanical assembly with arrows indicating direction (no text or symbols)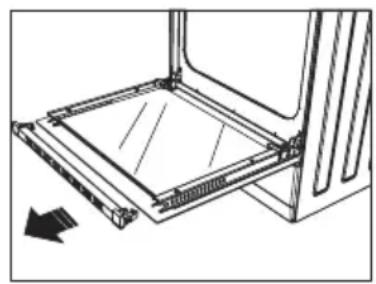
natural_image
Technical line drawing of a mechanical assembly with a rectangular frame and an arrow indicating direction (no text or symbols)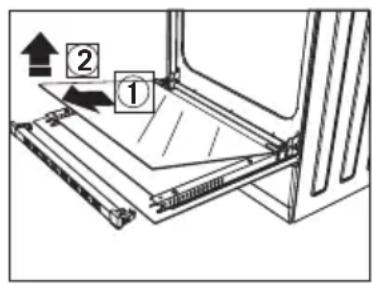
Figura 1 Figura 2 Figura 3
natural_image
Line drawing of an open oven with four circular burners and a door, showing internal structure without any text or symbols.Figura 4
natural_image
Line drawing of an open oven with four stovels and a door, showing internal components (no text or symbols)Figure 5
natural_image
Four circular diagrams showing mechanical assembly steps in different orientations (no text or symbols)Figura 4.1 Figura 4.2 Figura 5.1 Figura 5.2
natural_image
Line drawing of a hand adjusting a car seatbelt with a curved arrow indicating rotation (no text or symbols)Figura 6
natural_image
Line drawing of a mechanical component with a knob and arrow indicating rotation (no text or symbols)Figura 7
ACCESORIOS
natural_image
Pure geometric diagram of a square frame with rounded corners and no text or symbolsBandeja Profunda\*
natural_image
Pure geometric diagram of a square frame with side tick marks, no text or symbols presentBandeja
natural_image
Line drawing of a rectangular grid pattern with parallel lines, no text or symbols presentParrilla de Alambre
natural_image
Technical line drawing of a long cylindrical mechanical component with mounting brackets (no text or symbols)Reil Telescópico\*
natural_image
Line drawing of a rectangular metal grate with slats and two side supports (no text or symbols)Parrilla de Alambre Dentro de Bandeja\*
natural_image
Pure technical line drawing of three identical mechanical components arranged in a zigzag pattern (no text or symbols)natural_image
Line drawing of a door with a rack and two hands inserting down the drawer (no text or symbols)Figura 11
natural_image
Technical line drawing of a mechanical or electrical component with internal components and mounting holes (no text or symbols)Figura 12
natural_image
Symbol of a trash bin crossed with no visible text or labels- MONTAGEM DA PORTA DO FORNO
- Tabuleiro Fundo\*
- Tabuleiro
- Grelha de Arame
- Grelha de Arame no Tabuleiro\*
- Grelha de Arame Inferior e Superior\*
- PAREDES CATALÍTICAS\*
- Remover as paredes catalíticas
- Note:
- CONTENS
- IMPORTANT WARNINGS
- GB
- INTRODUCTION OF THE APPLIANCE
- Electrical Connection and Security
- ELECTRICAL CONNECTION SCHEME
- CHAIN CONNECTION SCHEME
- IF THE APPLIANCE DOES NOT OPERATE
- CONTROL PANELS
- USING HOT PLATES
- USING OVEN SECTION
- Using oven heating elements
- MAINTENANCE and CLEANING
- CLEANING AND MAINTENANCE OF THE OVEN'S FRONT DOOR GLASS
- INSTALLATION OF THE OVEN DOOR
- CHANGING THE OVEN LAMP
- ACCESORIES
- Deep Tray\*
- Tray
- Wire Grill
- Telescopic Rail\*
- In Tray Wire Grill\*
- Lower and Upper Wire Racks\*
- USING THE GRILL DEFLECTOR SHEET (option)\*
- CATALYTIC WALLS\*
- Removing the catalytic walls
- CHICKEN ROASTING\*
- ENVIRONMENTALLY-FRIENDLY DISPOSAL
- PACKAGE INFORMATION
- ES
- MANTENIMIENTO Y LIMPIEZA
- ACCESORIOS
- Bandeja Profunda\*
- Bandeja
- Parrilla de Alambre
- Reil Telescópico\*
- Parrilla de Alambre Dentro de Bandeja\*
Brand : Orima
Model : OR 646 VIT
Category : Cooker