
7270 - Mobile Phone BLACKBERRY - Free user manual and instructions
Find the device manual for free 7270 BLACKBERRY in PDF.


| Product Type | Smartphone / PDA |
| Dimensions | 113 x 74 x 22 mm (4.45 x 2.91 x 0.87 in) |
| Weight | 136 g (4.80 oz) |
| Display | Monochrome LCD, 160x160 pixels |
| Keyboard | Full QWERTY keyboard |
| Operating System | BlackBerry OS |
| Battery | Li-Ion 1000 mAh, removable |
| Talk Time | Up to 4 hours |
| Standby Time | Up to 200 hours |
| Connectivity | GSM 850/900/1800/1900, GPRS, Bluetooth v1.1 |
| Data Input | QWERTY keyboard, trackwheel navigation |
| Main Functions | Email, Phone, SMS, Address Book, Calendar, Tasks, Notes, Web Browser |
| Memory | 16 MB internal, expandable via SD card |
| SIM Card | Mini-SIM (2G) |
| Power Supply | AC adapter (input: 100-240V, output: 5V 0.5A) |
| Cleaning | Wipe with dry cloth; do not use solvents |
| Security | Device password, password lock for SIM |
| Spare Parts | Battery, charger, USB cable, holster available |
| Repairability | Removable battery, SIM and SD card accessible |
| General Information | Released 2004; supports push email via BlackBerry Enterprise Server |
Frequently Asked Questions - 7270 BLACKBERRY
User questions about 7270 BLACKBERRY
0 question about this device. Answer the ones you know or ask your own.
Ask a new question about this device
Download the instructions for your Mobile Phone in PDF format for free! Find your manual 7270 - BLACKBERRY and take your electronic device back in hand. On this page are published all the documents necessary for the use of your device. 7270 by BLACKBERRY.
USER MANUAL 7270 BLACKBERRY
Last modified: 11 March 2005
Part number: SWD_X_HH(EN)-034.000
At the time of publication, this documentation complies with handheld software version 4.0.1.
© 2005 Research In Motion Limited. All Rights Reserved. The BlackBerry and RIM families of related marks, images, and symbols are the exclusive properties of Research In Motion Limited. RIM, Research In Motion, "Always On, Always Connected", the "envelope in motion" symbol, BlackBerry, and the BlackBerry logo are registered with the U.S. Patent and Trademark Office and may be pending or registered in other countries.
Microsoft and Outlook are registered trademarks of Microsoft Corporation in the United States and/or other countries. IBM, Lotus, Domino, and Lotus Notes are trademarks of IBM in the United States. Novell and GroupWise are registered trademarks of Novell, Inc. in the United States and other countries. JavaScript is a trademark or registered trademark of Sun Microsystems, Inc. in the U.S. or other countries. All other brands, product names, company names, trademarks, and service marks are the properties of their respective owners.
The BlackBerry handheld and/or associated software are protected by copyright, international treaties, and various patents, including one or more of the following U.S. patents: 6,278,442; 6,271,605; 6,219,694; 6,075,470; 6,073,318; D445,428; D433,460; D416,256. Other patents are registered or pending in various countries around the world. Visit www.rim.com/patents.shtml for a current listing of applicable patents.
This document is provided "as is" and Research In Motion Limited (RIM) assumes no responsibility for any typographical, technical, or other inaccuracies in this document. RIM reserves the right to periodically change information that is contained in this document; however, RIM makes no commitment to provide any such changes, updates, enhancements, or other additions to this document to you in a timely manner or at all. RIM MAKES NO REPRESENTATIONS, WARRANTIES, CONDITIONS, OR COVENANTS, EITHER EXPRESS OR IMPLIED (INCLUDING, WITHOUT LIMITATION, ANY EXPRESS OR IMPLIED WARRANTIES OR CONDITIONS OF FITNESS FOR A PARTICULAR PURPOSE, NON-INFRINGEMENT, MERCHANTABILITY, DURABILITY, TITLE, OR RELATED TO THE PERFORMANCE OR NON-PERFORMANCE OF ANY SOFTWARE REFERENCED HEREIN, OR PERFORMANCE OF ANY SERVICES REFERENCED HEREIN). IN CONNECTION WITH YOUR USE OF THIS DOCUMENTATION, NEITHER RIM NOR ITS AFFILIATED COMPANIES AND THEIR RESPECTIVE DIRECTORS, OFFICERS, EMPLOYEES, OR CONSULTANTS SHALL BE LIABLE TO YOU FOR ANY DAMAGES WHATSOEVER BE THEY DIRECT, ECONOMIC, COMMERCIAL, SPECIAL, CONSEQUENTIAL, INCIDENTAL, EXEMPLARY, OR INDIRECT DAMAGES, EVEN IF RIM HAS BEEN ADVISED OF THE POSSIBILITY OF SUCH DAMAGES, INCLUDING, WITHOUT LIMITATION, LOSS OF BUSINESS REVENUE OR EARNINGS, LOST DATA, DAMAGES CAUSED BY DELAYS, LOST PROFITS, OR A FAILURE TO REALIZE EXPECTED SAVINGS.
This document might contain references to third-party sources of information, hardware or software, and/or third-party web sites ("Third-Party Information"). RIM does not control, and is not responsible for, any Third-Party Information, including, without limitation, the content, accuracy, compatibility, performance, trustworthiness, copyright compliance, legality, decency, links, or any other aspect of Third-Party Information. The inclusion of Third-Party Information in this document does not imply endorsement by RIM of the third party in any way. Any dealings with third parties, including, without limitation, compliance with applicable licenses, and terms and conditions are solely between you and the third party. RIM shall not be responsible or liable for any part of such dealings.
Research In Motion Limited
295 Phillip Street
Waterloo, ON N2L 3W8
Canada
Research In Motion UK Limited
Centrum House, 36 Station Road
Eqham, Surrey TW20 9LF
United Kingdom
Published in Canada
Contents
Messages 7
Search 13
Attachments 15
Synchronizing data 17
Backing up and restoring handheld data ..... 19
Typing 21
Phone 23
Browser 27
Downloading 31
Contacts 33
Calendar 37
Tasks 41
Memos 43
Alarm 45
Calculator 47
Date and time 49
Profiles 51
Screen display 53
Power and battery 55
Network coverage – frequently asked questions 57
Network configuration 59
Security 61
BrickBreaker 67
Service books 69
Frequently asked questions 71
Messages – frequently asked questions .....73
Attachments – frequently asked questions ..... 79
Synchronization – frequently asked questions . 83
Phone – frequently asked questions 85
Browser — frequently asked questions ...... 87
Contacts – frequently asked questions ...... 91
Calendar – frequently asked questions ...... 93
Security – frequently asked questions ...... 95
Tips 97
Legal notice 103
Index 105
Messages
- Open a message
- Send a message
- Save draft messages
- Add contacts to a message
- Set the importance level
- Change sent messages
- Manage messages
- File messages
- View filed messages
- Search the messages list
- Search the handheld
- Add an auto signature
- Set an out of office reply
- Create a filter
- Set folder redirection
- Delete multiple messages at one time
- Mark a message as opened or unopened
- Save a copy of messages sent from the handheld
- Messages – frequently asked questions
Open a message
An unopened message appears in the messages list with a closed envelope icon. After you open the message, the closed envelope changes to an open envelope.
Send a message
- In the messages list, click the trackwheel.
-
Click Compose Email.
-
Click [Use Once].
- Click Email.
- Type an email address.
- Click the trackwheel.
- Click Continue.
- Type a message.
- Click the trackwheel.
- Click Send.
Notes:
If you have added contacts to the address book, you can select a contact from the list after you click Compose Email.
If your handheld is integrated with multiple services, you can select the service from which your message should be sent. At the top of the message, in the Using field, press the Space key until the preferred service appears. All subsequent messages to the current recipient are also sent from this service.
Save draft messages
To save a draft of a message, click the trackwheel. Click Save Draft.
Add contacts to a message
To send a message to multiple contacts, click the trackwheel. Click Add To, Add Cc, or Add Bcc.
To attach a contact to a message, click the trackwheel. Click Attach Address.
Set the importance level
When composing a message, click the trackwheel. Click Options. Set the Importance field to High or Low. Save your changes.
Change sent messages
To change the text in a sent message and resend it, open the message. Click the trackwheel. Click Edit. Change the text. Click the trackwheel. Click Send.
To change the recipient of a sent message and resend it, open the message. Click the trackwheel. Click Edit. Select a contact. Click the trackwheel. Click Change Address. Click a new contact. Send your message.
To resend your message to the same contact, open the message. Click the trackwheel. Click Resend.
Manage messages
Open a message. Click the trackwheel. Perform one of the following actions:
- Save
- Reply
- Forward
- Reply To All
- Delete
To delete the original message from a reply, click the trackwheel. Click Delete Original Text.
File messages
To file a message, click the message. Click File. Click a folder. Click File.
Notes:
To expand a folder, click a folder with a plus sign (+) beside it. Click Expand.
To collapse a folder, click a folder with a minus sign (-) beside it. Click Collapse.
Related topics
- Can I file messages?
• View filed messages
View filed messages
To display all filed messages in the messages list, in the messages options, click General Options. Set the Hide Filed Messages field to No.
To view messages within a specific folder, in the messages list, click the trackwheel. Click View Folder. Click a folder. Click Select Folder.
Note:
To view sent messages, in the messages list, click the trackwheel. Click View Folder. Click Sent Items. Click Select Folder.
Delete multiple messages at one time
To delete multiple messages, hold the Shift key and select a series of messages. Press the Delete key.
To delete sent and received messages prior to and including a date, click a date. Click Delete Prior.
Note:
When you reconcile your handheld with your mailbox, any messages that you deleted from your handheld using the Delete Prior option are not deleted from your mailbox.
Related topic
- Reconcile deleted messages
Mark a message as opened or unopened
To change the status of a message, click a message. Click Mark Opened or Mark Unopened.
To change the status of multiple unread messages to read, click a date field. Click Mark Prior Opened.
Save a copy of messages sent from the handheld
Set this option to save messages sent from your handheld in the Sent Items folder of your mailbox.
- In the messages options, click Email Settings.
- Set the Save Copy In Sent Folder field to Yes.
- Click the trackwheel.
- Click Save.
Note:
Set the save copy option for each message service on your handheld.
Related topic
- View filed messages
About auto signatures
The signature is added to your messages after you send them. It does not appear on your handheld when you compose the message.
To add a signature to messages sent from your handheld, your handheld must be integrated with an account using the BlackBerry Enterprise Server™ version 4.0. Alternatively, you can add a signature in the BlackBerry Desktop Software.
Note:
Set an auto signature for each message service on your handheld.
Add an auto signature
- In the messages options, click Email Settings.
- Set the Use Auto Signature field to Yes.
- Type a signature.
- Click the trackwheel.
- Click Save.
Related topic
- About auto signatures
About out of office reply
The out of office reply is automatically sent to your contacts the first time that the contact sends you a message.
To set an out of office reply from your handheld, your handheld must be integrated with an account using the BlackBerry Enterprise Server™ version 4.0. Alternatively, you can set an out of office reply in your mailbox.
Note:
Set an out of office reply for each message service on your handheld.
Set an out of office reply
- In the messages options, click Email Settings.
- Set the Use Out Of Office Reply field to Yes.
- Type a reply.
- If you use a Lotus Notes® mailbox, in the Until field, set the date on which the out of office reply should be disabled.
- Click the trackwheel.
- Click Save.
Related topic
- About out of office reply
About filters
You create filters to specify which messages are forwarded to your handheld and which messages remain in your mailbox. To forward messages to your handheld, select Forward with Level 1 Notification (sends messages with higher priority) or Forward header only (sends messages with only the To, Sent, and From fields).
If the message does not meet any filter criteria and should not be forwarded, set the If no filters apply, send email to handheld field to No.
Filters are applied to messages based on the order in which they appear. If you create multiple filters that could apply to the same message, you must decide which one to apply first by placing that filter higher in the list.
To create filters on your handheld, your handheld must be integrated with an account using the BlackBerry Enterprise Server ^™ version 4.0. Alternatively, you can use the BlackBerry Desktop Software to create filters.
Note:
Set filters for each message service on your handheld.
Create a filter
- In the messages options, click Email Filters.
- Click the trackwheel.
- Click New.
- Set the filter information.
- Click the trackwheel.
- Click Save.
Notes:
To add a contact to the From or Sent to fields, click the trackwheel. Click Select Name. Click a name. Click Continue.
To make the filter detect messages from multiple contacts, use semicolons to separate your contacts in the From or Sent to fields.
Related topics
- About filters
- Use filters
- Create a filter quickly
Use filters
Click a filter. Perform one of the following actions:
- Enable filter
- Disable filter
• View - Edit
- Delete
- Move up
- Move down
Create a filter quickly
In the messages list, click a message on which to base your filter.
To create a filter based on the sender, click Filter Sender. Add a title and save the filter.
To create a filter based on the subject, click Filter Subject. Add a title and save the filter.
About folder redirection
If rules within your mailbox direct new messages into different folders, you must specify which desktop folders should forward messages to your handheld.
To set folder redirection, your handheld must be integrated with an account using the BlackBerry Enterprise Server™ version 4.0. Alternatively, you can use the BlackBerry Desktop Software to specify folder redirection settings.
Note:
Set folder redirection for each message service on your handheld.
Set folder redirection
- In the messages options, click Email Settings.
-
Click the trackwheel.
-
Click Folder Redirection.
- Select the check boxes.
- Click the trackwheel.
- Click Save.
Notes:
Verify that you selected the Inbox check box. If you do not select the Inbox check box, messages are not forwarded from this folder.
To specify all of your folders for redirection, including your Sent Items folder, select the Select All check box. All messages sent from your mailbox also appear on your handheld.
Related topics
- About folder redirection
- View filed messages
- How do I make changes to the folders on my handheld?
Search
- About search
- Search the messages list
- Search the handheld
About search
You can search the messages list using criteria that you set and save those searches for future use. You can also search for contacts or search for all messages containing similar text.
You can also search the handheld to find content across all programs. With the global search, files that appear in the search results can be used just as they would in the original program. For example, you can manage messages in your search results the same way that you would in the messages list.
Search the messages list
- In the messages list, click the trackwheel.
- Click Search.
- Set the search criteria.
- Click the trackwheel.
- Click Save.
- Add a name and a shortcut key for your search.
- Click the trackwheel.
- Click Save.
Note:
You can search without saving the details for the search. After you set the criteria, click the trackwheel. Click Search.
Related topics
- Use saved searches
- Search for a specific contact
- Search for a subject
Use saved searches
To view your saved searches, in the messages list, click the trackwheel. Click Search. Click the trackwheel. Click Recall.
Click a search. Perform one of the following actions:
- View
- Edit
- Delete
To view the terms of your last search quickly, in the list of searches, click the trackwheel. Click Last.
Search for a specific contact
To search for all messages from a specific sender, click the message. Click Search Sender.
To search for all messages to a specific recipient, click the message. Click Search Recipient.
Search for a subject
To search for all messages with the same subject, click a message. Click Search Subject.
Search the handheld
- In the search program, type text in the Text field to search the records on your handheld.
- In the Name field, type text to search using the names of contacts in your address book, calendar, or messages list.
- Select the check boxes for the programs to search.
- Click Search.
Notes:
If you type more than one word in the Text or Name field, all the words must appear in the same field for the search to be successful.
File attachments are not searched when you search across the handheld programs.
To expand a folder, click a folder with a plus sign (+) beside it. Click Expand.
To collapse a folder, click a folder with a minus sign (-) beside it. Click Collapse.
Related topic
- How do I search for text within a file attachment?
Attachments
- About attachments
- Use address book attachments
- Open a file attachment
- Open an image attachment
- Navigate attachments
- Attachments – frequently asked questions
About attachments
Address book attachments enable recipients of your messages to view and add contacts to their handheld address books. When you open a message that contains an address book attachment, a book icon appears at the bottom of the message with the name of the attached contact.
You can view certain types of file attachments on your handheld, including .zip, .htm, .html, .doc, .dot, .ppt, .pdf, .wpd, .txt, and .xls files. You can also view .bmp, .gif, .jpg, .png, and .tif image attachments.
A message with a file attachment appears in the messages list with a paper clip icon.
Related topic
- Can I view file attachments on my handheld?
Use address book attachments
To view an address book attachment, in an open message, click the trackwheel. Click View Attachment.
To add the contact information to your address book, when viewing an address book attachment, click the trackwheel. Click Add to Address Book. To update contact information, when viewing an address book attachment, click the trackwheel. Click Update Address.
Open a file attachment
- Place your cursor in the name of the file attachment.
- Click the trackwheel.
- Click Open Attachment.
- Select Table of Contents to open an automatically generated table of contents for the file attachment, or select Full Content to open the complete file attachment.
- Click the trackwheel.
- Click Retrieve.
Open an image attachment
- Place your cursor in the name of the image attachment.
- Click the trackwheel.
- Click View Attachment.
Navigate attachments
To open content that is embedded within a document or spreadsheet, click a content link. Click Retrieve. Examples of embedded content include tables, images, footnotes, text boxes, or comments. Press the Escape button to return to the main attachment content.
To scroll horizontally in a spreadsheet, hold the Alt key and roll the trackwheel.
To move to a specific cell within a spreadsheet, click the trackwheel. Click Go to Cell. Type the cell co-ordinates and click the trackwheel.
To display the contents of a specific cell in a spreadsheet, click the trackwheel. Click View Cell.
To switch to a different worksheet in a spreadsheet, click the trackwheel. Click Select Worksheet. Click a worksheet.
To view the previous worksheet in a spreadsheet, click the trackwheel. Click Prev Sheet.
To view the next worksheet in a spreadsheet, click the trackwheel. Click Next Sheet.
To pan horizontally across an image, hold the Alt key and roll the trackwheel.
To zoom into or out of an image, click the trackwheel. Click Zoom In or Zoom Out.
To zoom to the original image size, click the trackwheel. Click Zoom 1:1.
To turn an image 90 degrees in a clockwise direction, click the trackwheel. Click Rotate.
To view an image in more detail after zooming in, click the trackwheel. Click Enlarge Area.
Synchronizing data
- About message reconciliation
- Set wireless message reconciliation
- Reconcile deleted messages
- About PIM synchronization
- Set wireless PIM synchronization
- Synchronization — frequently asked questions
About message reconciliation
Reconciliation means that any message you file or delete on your handheld will also be filed or deleted in your mailbox. Likewise, any changes that you make to messages in your mailbox are reflected on your handheld.
If your handheld integration option supports wireless message reconciliation, changes are automatically reconciled over the wireless network.
You can also configure wireless message reconciliation options using the handheld.
If your handheld integration option does not support wireless message reconciliation, changes are reconciled using the BlackBerry Desktop Software. For more information on manual message reconciliation, refer to the BlackBerry Desktop Software Online Help.
Related topic
- Can I reconcile messages over the wireless network?
Set wireless message reconciliation
In the messages options, click Email Reconciliation. Set the Wireless Reconcile field to On.
Note:
Set the Wireless Reconcile option for each message service on your handheld.
Related topic
- Can I reconcile messages over the wireless network?
Reconcile deleted messages
To set how deleted messages are reconciled between your handheld and mailbox, in the messages options, click Email Reconciliation. Set the Delete On field.
Note:
Set the Email Reconciliation option for each message service on your handheld.
Related topic
- Delete multiple messages at one time
About PIM synchronization
You can synchronize personal information management (PIM) items such as tasks, memos, contacts, and calendar entries so that the entries on your handheld and in your desktop email program are similar.
If your handheld is integrated with an account using the BlackBerry Enterprise Server™ version 4.0 and wireless PIM synchronization is enabled, PIM items are synchronized over the wireless network automatically. You can turn wireless PIM synchronization on and off using the handheld.
If your handheld is integrated with an account using a BlackBerry Enterprise Server™ version 4.0 or later and wireless calendar synchronization is enabled, you can synchronize your calendar entries over the wireless network. You can synchronize all other PIM items using the BlackBerry Desktop Software. For more information on synchronizing PIM items manually or configuring wireless calendar synchronization using the desktop software, refer to the BlackBerry Desktop Software Online Help.
Related topic
- Can I synchronize PIM items over the wireless network?
Set wireless PIM synchronization
If you have been using your handheld with wireless PIM synchronization disabled or are enabling wireless PIM synchronization for the first time, synchronize your handheld using the desktop software before you enable wireless PIM synchronization.
In the tasks, memo, address book, or calendar options, set the Wireless Synchronization field to Yes.
You can set wireless calendar synchronization using the BlackBerry Desktop Software. For more information, refer to the BlackBerry Desktop Software Online Help.
Note:
If you enable wireless PIM synchronization on the handheld, you cannot synchronize PIM items using the desktop software.
Related topic
- Can I synchronize PIM items over the wireless network?
Backing up and restoring handheld data
- About backing up handheld data
- About restoring handheld data
About backing up handheld data
If your handheld is integrated with an account using the BlackBerry Enterprise Server™ version 4.0, settings on your handheld that would not be saved in your desktop email program are backed up over the wireless network automatically. These settings include fonts, bookmarks, and other handheld settings. Any information saved as part of personal information management synchronization or wireless message reconciliation is not backed up.
If you are using the BlackBerry Desktop Software with your handheld, you can back up your handheld data using the Backup and Restore tool. For more information on manual handheld data backup, refer to the BlackBerry Desktop Software Online Help.
About restoring handheld data
If you are using the BlackBerry Desktop Software with your handheld and you have a backup of your handheld data on your computer, you can restore the data using the Backup and Restore tool. For more information on restoring handheld data manually, refer to the BlackBerry Desktop Software Online Help.
Typing
- Use AutoText
- Create an AutoText entry
- Change AutoText entries
- Cut or copy text
- Paste text
- Typing tips
- Enable tones when pressing keys
- Set the cursor speed
- Typing – frequently asked questions
Use AutoText
AutoText automatically replaces text that you type. Use AutoText to correct spelling and to replace abbreviations with complete words.
Your handheld has built-in AutoText entries that correct common mistakes. For example, AutoText changes hte to the.
You can create AutoText entries for your common typing mistakes or for abbreviations. For example, you might create an AutoText entry that replaces ttyl with talk to you later.
To use AutoText, type an AutoText entry. Press the Space key.
Create an AutoText entry
- In the handheld options, click AutoText.
- Click the trackwheel.
- Click New.
- In the Replace field, type the text to replace.
- In the With field, type the text to appear.
- In the Using field, set whether the entry is capitalized exactly as typed (Specified Case)
or whether the entry is capitalized according to its context (SmartCase).
- Set the language.
- Click the trackwheel.
- Click Save.
Related topic
• What is the Insert Macro menu item?
Change AutoText entries
To view your AutoText entries, in the handheld options, click AutoText.
Click an AutoText entry. Perform one of the following actions:
- Edit
- Delete
Cut or copy text
Click the trackwheel. Click Select. Select content. Click the trackwheel. Click Cut or Copy.
Paste text
Place the cursor where you want to insert the cut or copied text. Click the trackwheel. Click Paste.
Related Topic
- Copy and paste a calculation
Typing tips
To type the alternate character on a key, press the Alt key + the key.
To insert a symbol, press the Symbol key.
To insert an accent, hold a letter and roll the trackwheel.
To turn on CAP lock, press the Alt key + the Right Shift key.
To turn on NUM lock, hold the Right Shift key + press the Alt key.
To turn off CAP lock or NUM lock, press the Right Shift key.
Enable tones when pressing keys
In the handheld options, click Screen/Keyboard. Set the Key Tone field to On. Save your changes.
Set the cursor speed
In the handheld options, click Screen/Keyboard. Set the Key Rate field to Slow or Fast. Save your changes.
Typing – frequently asked questions
• What is the Insert Macro menu item?
- Why can't I use shortcuts on the Home screen?
What is the Insert Macro menu item?
Use the Insert Macro menu item to insert common variables, such as the current date or current time, into your AutoText entries.
Why can't I use shortcuts on the Home screen?
The Dial From Home Screen option overrides using shortcuts on the Home screen, in favor of making calls. To use shortcuts in the general phone options, set the Dial From Home Screen field to No.
Phone
• Find your phone number
- Make a call
- Use speed dial
- Check your voice mail
- Answer a call
- Mute a call
- Adjust the phone volume
- Phone features
- Dial using letters
- Assign a speed dial letter
- Change speed dial assignments
- Log calls
- Use call logs
- Set voice mail options
- Set the default call volume
- Reset call timers
- Enable VoIP
- Set default country and area codes
- Phone – frequently asked questions
Find your phone number
In the phone, the My Number field displays your phone number.
Make a call
- In the phone, type a phone number or select a contact.
- Press the Enter key.
- To end the call, hold the Escape button.
Notes:
If the contact that you want to call is not listed, click the trackwheel. Click Call By Name to select a contact from your address book.
You can also make a call on the Home screen. Type the number and press the Enter key.
Related topics
- Add a pause or wait
- Can I use the phone when the handheld or keyboard is locked?
Use speed dial
In the phone, press and hold the key that is assigned to the contact or phone number.
Note:
You can also use speed dial to make a phone call on the Home screen or in the messages list.
Check your voice mail
In the phone, click the trackwheel. Click Call Voicemail.
Answer a call
To answer a call, click Answer. If you do not want to answer the call, click Ignore.
If you are already connected to a call and receive another call, click Answer - Drop Current to end your current call and answer the incoming call.
To end the call, hold the Escape button.
Related topic
- Can I use the phone when the handheld or keyboard is locked?
Mute a call
To mute a call, press the Phone button. Press the Phone button again to turn mute off.
Adjust the phone volume
During a call, roll the trackwheel up to increase the volume or roll the trackwheel down to decrease the volume.
Phone features
During a call, your handheld has functions that are available to a regular phone, such as mute.
To alternate between two connected calls, click the trackwheel. Click Swap.
To use other applications during a call, click the trackwheel. Click Home Screen.
Dial using letters
To type a letter during a call, press the Alt key. Type the letter.
To type multiple letters during a call, press the Right Shift key + the Alt key. Type letters. To type numbers again, press the Right Shift key.
Note:
When you type a letter in a phone number, your handheld dials the number that is associated with the letter on a conventional phone keypad.
Assign a speed dial letter
In the phone, select a contact or phone number. Press and hold any unassigned letter key. Click OK.
Related topic
- Assign a speed dial number to a contact in your address book
Assign a speed dial number to a contact in your address book
- In the phone, click the trackwheel.
- Click View Speed Dial List.
- Select an unassigned letter.
- Click the trackwheel.
- Click New Speed Dial.
- Select a contact.
- Click the trackwheel.
- Click Add Speed Dial To
.
Change speed dial assignments
In the phone, click the trackwheel. Click View Speed Dial List. Select a contact or phone number. Click the trackwheel. Perform one of the following actions:
- Change the contact assigned to a speed dial letter: Click Edit. Click a new contact. Click Speed Dial
. - Assign the contact to a different speed dial letter: Click Move. Click a different speed dial letter.
- Remove a contact from the speed dial list: Click Delete.
Log calls
Call logs appear when you open the phone. Missed call logs also appear in the messages list.
To set whether call logs appear in the messages list, in the phone options, click Call Logging. Select the call log type that you want to appear in the messages list. Press the Space key.
If you do not want any call logs to appear in the messages list, select None. Press the Space key.
Related topic
- Can I set the Phone to display frequently called numbers?
Use call logs
In the phone, or in the messages list, open a call log. Click the trackwheel. Perform one of the following actions:
- Add Notes
- Edit Notes
- Forward
To delete notes, in the open phone call log, click the trackwheel. Click Edit Notes. Click the trackwheel. Click Clear Field.
About smart dialing
You can specify default country and area codes so that any numbers specified as links, or any numbers in your address book that do not contain these codes, are dialed correctly.
Set default country and area codes
- In the phone options, click Smart Dialing.
- Set the Country Code and Area Code fields.
- In the National Number Length field, set the default length for phone numbers in your country.
- Click the trackwheel.
- Click Save.
Note:
When calculating the default length for phone numbers, include your area code and local number, but do not include your country code or the National Direct Dialing prefix.
Related topic
- About smart dialing
Set voice mail options
- In the phone options, click Voicemail.
- Type a voice mail access number and any additional numbers, such as a password or extension.
- Click the trackwheel.
- Click Save.
Notes:
If your handheld is provisioned for voice mail, the voice mail access number might already be completed. Contact your system administrator for more information on voice mail.
If your handheld is not provisioned for voice mail, you can type the access number for a different voice mail system.
About default call volume
You can specify a default volume level for any call, regardless of whether you adjusted the volume during a previous call.
Set the default call volume
- In the phone options, click General Options.
- Set the Default Call Volume field.
- Click the trackwheel.
- Click Save.
Related topic
- About default call volume
Reset call timers
- In the phone, click the trackwheel.
- Click Status.
- Click Last Call or Total Calls.
- Click Clear Timer.
-
Click the trackwheel.
-
Click Save.
Browser
- About the browser
- Go to a web page
- Use the browser
- View images
- Copy a link, image, or web page address
- Send a link or image in a message
- Save an image
- Manage saved images
- Save web page requests
- Create a bookmark
- Change bookmarks
- Clear the browser caches
- About TLS
- About WTLS
- Browser – frequently asked questions
About the browser
The BlackBerry Browser is optimized for viewing HTML web pages. If your handheld is integrated with an account using the BlackBerry Enterprise Server, the BlackBerry Browser also enables you to view your corporate intranet. For more information, contact your system administrator.
Go to a web page
In the browser, click the trackwheel. Click Go To. Type a web address. Click OK.
Notes:
To insert a period, press the Space key.
To insert a slash mark (/), press the Shift key + the Space key.
The Go To dialog box tracks the web addresses that you type. To go to a web page on the list, select the web address and click the trackwheel.
Use the browser
Navigate web pages using your handheld browser the same way that you navigate using a desktop browser.
To select text and images when you scroll through a web page, click the trackwheel. Click Select Mode.
To select only links and fields when you scroll through a web page, click the trackwheel. Click View Mode.
To follow a link, click the link. Click Get Link.
To stop loading a web page, click the trackwheel. Click Stop.
To view the previous web page in the history, click the trackwheel. Click Back.
To view the next web page in the history, click the trackwheel. Click Forward.
To go to your home page, click the trackwheel. Click Home.
To view a list of the last 20 web pages, click the trackwheel. Click History.
To refresh the current web page, click the trackwheel. Click Refresh.
To view the address for the current web page, click the trackwheel. Click Page Address.
To view the address for a link, click the link. Click Link Address.
To view the address for an image, click the image. Click Image Address.
To move the browser to the background to use another program, click the trackwheel. Click Hide.
To close the browser, click the trackwheel. Click Close.
View images
To set how images load in your browser, in the browser options, click Browser Configuration. To load images while the page is loading, set the Show Images field. To show image placeholders if images do not load, set the Show Image Placeholders field to Yes.
To view an image on its own page, click the trackwheel. Click Full Image. To return to the web page, click the trackwheel. Click Back.
If you set the Show Images field to No, images are not loaded when you load the web page. To load some of the images after the web page is loaded, click the trackwheel. Click More Images. To load all the images, click the trackwheel. Click All Images.
Copy a link, image, or web page address
On a web page, click a link or image. Click Link Address, Image Address, or Page Address. Click Copy Address.
To paste the link address, image address, or page address, place the cursor where you want to insert the copied text. Click the trackwheel. Click Paste.
Related topic
- How do I select images and text on a web page?
Send a link or image in a message
- On a web page, click a link or image.
- Click Link Address or Image Address.
- Click Send Address.
- Click a contact.
- Click Message
. - Send your message.
Note:
To send a web page address in a message, on the web page, click the trackwheel. Click Send Address. Click a contact. Click Message
Related topic
- How do I select images and text on a web page?
Save an image
You can save .jpeg, .png, .gif, and .bmp web page images in the pictures list. Saving an image in the pictures list enables you to open the image at any time. On a web page, click an image. Click Save Image. Save your changes.
Notes:
The Save Image field is only available for BlackBerry Wireless Handhelds with color screens.
Related topics
- Set the Home screen background image
- How do I select images and text on a web page?
Manage saved images
In the pictures list, click an image. Perform one of the following actions:
- Open
- Delete
Save web page requests
While a web page is loading, you can save the web page request in the messages list. Saving the request to the messages list enables you to use other programs while you are waiting for the web page to load. Click the trackwheel. Click Save Request.
You can also save a web page that has finished loading in the messages list. Saving a fully loaded web page enables you to open the text on the web page at any time. On the web page, click the trackwheel. Click Save Page.
Note:
A saved web page displays content that was current at the time the web page was saved. To update the content on a saved page, click the trackwheel. Click Refresh.
Create a bookmark
Navigate to the web page that you want to bookmark. Click the trackwheel. Click Add Bookmark.
Change bookmarks
In the bookmarks list, click a bookmark. Perform one of the following actions:
- Edit Bookmark
- Delete Bookmark
Related topic
- Organize bookmarks into folders
Organize bookmarks into folders
In the bookmarks list, click a folder. Perform one of the following actions:
- Add a folder: Click Add Subfolder.
- Open a bookmark folder with subfolders: Click Expand.
- Close a bookmark folder with subfolders: Click Collapse.
- Rename a folder: Click the trackwheel. Click Rename Folder.
To move a bookmark into a folder, click a bookmark. Click Move Bookmark. Roll the trackwheel to the new location. Click the trackwheel.
Clear the browser caches
In the browser options, click Cache Operations. Click the trackwheel. Click the button for the type of cache that you want to clear.
About TLS
Transport Layer Security (TLS) provides additional authentication and security when you browse web pages using the BlackBerry Browser.
If you are using the BlackBerry Desktop Software, you can load TLS using the Application Loader tool. For more information on TLS, or on loading optional programs, refer to the BlackBerry Desktop Software Online Help or contact your system administrator.
Related topic
- What options can I set for BlackBerry Browser security?
About WTLS
Wireless Transport Layer Security (WTLS) is the WAP Browser security layer that provides security for WAP services.
If you are using the BlackBerry Desktop Software, you can load WTLS using the Application Loader tool. For more information on loading optional programs, refer to the BlackBerry Desktop Software Online Help.
If you are not using the BlackBerry Desktop Software, contact your system administrator for information on using WTLS on your handheld.
Related topic
- What options can I set for WAP Browser security?
Downloading
- Download an application
- Manage applications
- Prevent third-party applications from transmitting data
- Download a ring tone
- Manage downloaded ring tones
- Enable browser push
- Downloading – frequently asked questions
Download an application
On a web page, click the link for the application. Click Get Link. Click Download. Click OK.
Related topics
- Why did a new program appear on my handheld?
- Legal notice
Manage applications
To view a list of applications, in the handheld options, click Applications.
To view details for any third-party applications, click an application. Click Properties.
To delete a third-party application, click an application. Click Delete.
Related topic
- Legal notice
Download a ring tone
- On a web page, click the .mid file link.
- Click Get Link.
- Click Save.
-
Type a name for the ring tone.
-
Click Save.
- Click OK.
Related topics
- Can I listen to a ring tone before I download it?
- Manage downloaded ring tones
- Set profiles
- Legal notice
About browser push
Browser push enables you to receive content from web applications without requesting it. For example, you can receive updates or notifications for weather, stock quotes, or news.
Set notification for different types of browser push information, including service load information (web pages or applications), service indication information (web page addresses or messages), or other types of information.
When you receive a notification, an icon appears in the messages list. Depending on how you configure browser push, other notifications might also appear.
Notes:
If you set the browser push notification to Auto, a dialog box might also appear, if specified by the sender.
If you set the browser push notification to Prompt, a dialog box always appears.
If you set the browser push notification to Reject, you receive no additional notification.
Enable browser push
-
In the handheld options, click Browser Push.
-
Select one or more of the check boxes.
- Set the options for the types of browser push notification.
- Click the trackwheel.
- Click Save.
Related topic
- About browser push
Downloading – frequently asked questions
- Why can't I load a new program onto my handheld?
- Why did a new program appear on my handheld?
- What software version do I have on my handheld?
- Can I listen to a ring tone before I download it?
Why can't I load a new program onto my handheld?
Verify that your handheld radio is turned on and that you are within an area of sufficient wireless coverage. For more information on wireless coverage levels, refer to the printed documentation that accompanied your handheld.
Your handheld must also have sufficient available memory to load a program.
If the program still does not load and your handheld is integrated with an account using a BlackBerry Enterprise Server ^™ , certain programs might not be available to you. For more information, contact your system administrator.
Why did a new program appear on my handheld?
If your handheld is integrated with an account using BlackBerry Enterprise Server™ version 4.0, your system administrator can provision selected programs over the wireless network. For more information, contact your system administrator.
Can I listen to a ring tone before I download it?
Yes. On a web page, click the .mid file link. Click Get Link. To preview the ring tone, click the Play button. To stop listening to the ring tone, click the Stop button.
Contacts
- Add a contact
- Manage contacts
- Create a mailing list
- Manage mailing lists
- Create a category
- Apply categories to contacts
• View contacts by category - Delete categories
- Add a pause or wait
- Add contacts from your company address book
- Contacts – frequently asked questions
Add a contact
In the address book, click the trackwheel. Click New Address. Type the contact information.
Note:
To add a contact from a message, memo, call log, or web page, click the contact information. Click Add to Address Book. Type any additional information. Click the trackwheel. Click Save.
Manage contacts
Click a contact. Perform one of the following actions:
• View
- Edit
- Delete
Create a mailing list
- In the address book, click the trackwheel.
-
Click New Group.
-
Type a name for the mailing list.
- Click the trackwheel.
- Click Add Member.
- Click a contact.
- Click Continue.
- Click the trackwheel.
- Click Save Group.
Manage mailing lists
To manage mailing lists, click a mailing list. Perform one of the following actions:
- View Group
- Edit Group
- Delete Group
To manage contacts in a mailing list, click a contact. Perform one of the following actions:
- View Member
- Change Member
- Delete Member
- Add Member
Note:
When you delete members from a group or delete a group, your contacts remain in the address book.
About categories
You can create categories in which to group your contacts. You can also narrow the contacts displayed in the address book based on categories.
More than one category can apply to a contact. Category names are not case sensitive.
Categories are shared between the address book, the task list, and the memos list. Therefore, category changes made in the address book are also made in the memos list and task list.
Create a category
- In the address book, click the trackwheel.
- Click Filter.
- Click the trackwheel.
- Click New.
- Type a name for the category.
- Click the trackwheel.
Related topic
- About categories
Apply categories to contacts
When creating or editing a contact, click the trackwheel. Click Categories. To select the categories that apply to the contact, press the Space key. Save your changes.
View contacts by category
To view all contacts within a category, in the address book, click the trackwheel. Click Filter. Select a category. Press the Space key.
To view all contacts again, click the trackwheel. Click Filter. To clear the check boxes beside any selected categories, press the Space key.
Delete categories
In the address book, click the trackwheel. Click Filter. Click a category. Click Delete. The category is deleted, but any contacts that applied to the category remain in the address book.
Add a pause or wait
Use a wait or a pause to separate additional numbers, for example a password or extension, from the main phone number. When the main phone number is dialed, your handheld either pauses before dialing the additional numbers (pause) or prompts you to type them (wait).
When creating or editing a contact, in a phone number field, click the trackwheel. Click Add Wait or Add Pause. Type the additional numbers.
About remote address book search
To find and add contacts from your company address book, your handheld must be integrated with an account using the BlackBerry Enterprise Server™ version 4.0 or later for Microsoft® Exchange, or BlackBerry Enterprise Server version 4.0 or later for IBM® Lotus® Domino®, or BlackBerry Enterprise Server version 4.0 or later for Novell® GroupWise®. For more information, contact your system administrator.
Add contacts from your company address book
- In the address book, click the trackwheel.
- Click Lookup.
- Type the name of the contact.
- Click the trackwheel.
- After the search is complete, click the trackwheel.
- Click View Lookup.
- Click a contact.
- Click Add.
Notes:
You can also type part of the contact name to widen the search results.
To add all the contacts found during the search, click Add All.
Related topics
- About remote address book search
- Manage remote address book search results
Manage remote address book search results
To view information for a contact, in the search results, click a contact. Click View.
To delete a contact from the search results, click the trackwheel. Click Delete.
To delete the search results, click the trackwheel. Click Delete Lookup.
Calendar
- About the calendar
- Change the calendar view
- Use the calendar
- Schedule an appointment
- Schedule an appointment quickly
- Schedule a meeting
- Manage appointments and meetings
- Respond to meeting invitations
- Change meeting participants
- Calendar – frequently asked questions
About the calendar
With the handheld calendar, you can view your appointments and meetings in one of four views. Day, Week, and Month views show all of your appointments for the selected time period, while Agenda view shows all of your scheduled appointments in a list.
Change the calendar view
To change to another calendar view (Day, Week, Month, or Agenda), click the trackwheel. Click a view.
To change the default view when you open the calendar, in the calendar options, set the Initial View field.
Use the calendar
To go to a specific date, click the trackwheel. Click Go to Date.
To go to the current date, click the trackwheel. Click Today.
To move forward or back by a time period, click the trackwheel. Click Prev or Next.
Schedule an appointment
- In the calendar, click the trackwheel.
- Click New.
- Type the appointment details.
- Set whether the appointment should recur.
- Click the trackwheel.
- Click Save.
Notes:
If your appointment recurs:
Set the Every field to change the frequency of the appointment. For example, to set an appointment to recur every three days, set the Every field to 3.
Select the Relative Date check box for the appointment to recur on a relative date. For example, set an appointment to recur on the last Friday of each month, or on the 28th of each month.
In the Days field, set the days on which the weekly appointment should recur. To select a day, press the Enter key.
Related topics
- Change the default reminder time
- About power off and reminders
Schedule an appointment quickly
- In the calendar options, verify that the Enable Quick Entry field is set to Yes.
-
In Day view, beside the start time, type the subject of the appointment.
-
Type a location in parentheses.
- To change the start and end times, hold the Right Shift key and roll the trackwheel.
- Click the trackwheel.
Related topics
- Change the default reminder time
- About power off and reminders
Change the default reminder time
In the calendar options, set the Default Reminder field to the amount of time before the appointment that the handheld reminds you. The default is 15 minutes.
Related topic
- About power off and reminders
Schedule a meeting
- In the calendar, click the trackwheel.
- Click New.
- Type the meeting details.
- Set whether the meeting should recur.
- Click the trackwheel.
- Click Invite Attendee.
- Click a contact.
- Click Invite.
- Click the trackwheel.
- Click Save.
Notes:
If your meeting recurs:
Set the Every field to change the frequency of the appointment. For example, to set an appointment to recur every three days, set the Every field to 3.
Select the Relative Date check box for the appointment to recur on a relative date. For example, set an appointment to recur on the last Friday of each month, or on the 28th of each month.
In the Days field, set the days on which the weekly appointment should recur. To select a day, press the Enter key.
Related topics
- Change the default reminder time
- About power off and reminders
Manage appointments and meetings
In Month view, to view your list of appointments, click a day. Click View Appts.
To view or change the appointment or meeting details, click the appointment or meeting. Click Open. If you change a meeting, you are prompted to notify the contacts invited to the meeting.
To delete an appointment or meeting, click the appointment or meeting. Click Delete. If you delete a meeting, you are prompted to notify the contacts invited to the meeting.
Respond to meeting invitations
In an open meeting invitation, click the trackwheel. Perform one of the following actions:
- Accept or Accept with comments
- Tentative or Tentative with comments
- Decline or Decline with comments
To check your calendar when replying to a meeting invitation, click the trackwheel. Click View Calendar.
Note:
If you delete a meeting invitation from the messages list before you accept or decline it, the appointment is deleted from your desktop calendar.
Change meeting participants
Open the meeting. In an Accepted or Declined field, click a contact. Perform one of the following actions:
- Invite Attendee
- Change Attendee
- Remove Attendee
Tasks
- Create a task
- Use tasks
- Change task status
- Create a category
- Apply categories to tasks
• View tasks by category - Delete categories
- Tasks – frequently asked questions
Create a task
- In the task list, click the trackwheel.
- Click New.
- Type the task details.
- Set a due date for the task.
- Set whether the task should recur.
- Click the trackwheel.
- Click Save.
Notes:
If your task recurs:
Set the Every field to change the frequency of the task. For example, to set a task to recur every three days, set the Every field to 3.
Select the Relative Date check box for the task to recur on a relative date. For example, set a task to recur on the last Friday of each month, or on the 28th of each month.
In the Days field, set the days on which the weekly task should recur. To select a day, press the Enter key.
Use tasks
Click a task. Perform one of the following actions:
- Open
- Mark Completed
- Mark In Progress
- Delete
- Delete Completed
Change task status
To change the status for a task to Waiting or Deferred, edit the Status field for the task.
About categories
You can create categories in which to group your tasks. You can also narrow the tasks displayed in the task list based on categories.
Category names are not case sensitive. More than one category can apply to a task. If you use Lotus Notes® as your desktop email program, you can apply more than one category to a task on your handheld, but only one category will synchronize with the task in your desktop email program.
Categories are shared between the address book, the task list, and the memos list. Therefore, category changes made in the task list are also made in the address book and the memos list.
Create a category
- In the task list, click the trackwheel.
- Click Filter.
- Click the trackwheel.
- Click New.
-
Type a name for the category.
-
Click the trackwheel.
Related topic
- About categories
Apply categories to tasks
When creating or editing a task, click the trackwheel. Click Categories. To select the categories that apply to the task, press the Space key. Save your changes.
View tasks by category
To view all tasks within a category, in the task list, click the trackwheel. Click Filter. Select a category. Press the Space key.
To view all tasks again, click the trackwheel. Click Filter. To clear the check boxes beside any selected categories, press the Space key.
Delete categories
In the task list, click the trackwheel. Click Filter. Click a category. Click Delete. The category is deleted, but any tasks applied to the category remain in the tasks list.
Tasks – frequently asked questions
- Can I remove the prompt that appears before I delete contacts, calendar entries, tasks, or memos?
- Can I change how my contacts, tasks, or memos are displayed?
- Can I clear all the categories that apply to a contact, task, or memo?
- How do I know how many contacts, calendar entries, tasks, or memos I have saved?
Memos
- Write a memo
- Use memos
- Create a category
- Apply categories to memos
• View memos by category - Delete categories
- Memos – frequently asked questions
Write a memo
In the memos list, click the trackwheel. Click New. Type a title. Type the body of the memo.
Use memos
Click a memo. Perform one of the following actions:
• View
- Edit
- Delete
About categories
You can create categories in which to group your memos. You can also narrow the memos displayed in the memos list based on categories.
Category names are not case sensitive. More than one category can apply to a memo.
Categories are shared between the address book, the task list, and the memos list. Therefore, category changes made in the memos list are also made in the address book and the task list.
Create a category
- In the memos list, click the trackwheel.
-
Click Filter.
-
Click the trackwheel.
- Click New.
- Type a name for the category.
- Click the trackwheel.
Related topic
- About categories
Apply categories to memos
When creating or editing a memo, click the trackwheel. Click Categories. To select the categories that apply to the memo, press the Space key. Save your changes.
View memos by category
To view all memos within a category, in the memos list, click the trackwheel. Click Filter. Select a category. Press the Space key.
To view all memos again, click the trackwheel. Click Filter. To clear the check boxes beside any selected categories, press the Space key.
Delete categories
In the memos list, click the trackwheel. Click Filter. Click a category. Click Delete. The category is deleted, but any memos applied to the category remain in the memos list.
Memos – frequently asked questions
- Can I remove the prompt that appears before I delete contacts, calendar entries, tasks, or memos?
- Can I change how my contacts, tasks, or memos are displayed?
- Can I clear all the categories that apply to a contact, task, or memo?
- How do I know how many contacts, calendar entries, tasks, or memos I have saved?
Alarm
- Set the alarm
- Set the alarm volume
- Silence the alarm
- Turn off the alarm
- Alarm – frequently asked questions
Set the alarm
- In the alarm, set the Daily Alarm field to On.
- Set the time when the alarm should sound.
- Set whether to snooze the alarm and the length of the snooze.
- Set the type of notification for the alarm.
- Click the trackwheel.
- Click Save.
When you set the alarm, a bell icon appears beside the date in the handheld status section of the screen.
Related topic
- About power off and reminders
Set the alarm volume
When you set the alarm, you can specify the type of notification, including the tune, the volume level, and the number of times that the tune plays.
Silence the alarm
Press any key. If snooze is enabled, in the Daily Alarm dialog box, click Snooze.
Turn off the alarm
In the alarm, set the Daily Alarm field to Off.
Alarm – frequently asked questions
- Why didn't my alarm notify me on a Saturday or Sunday?
• What is the escalating volume level? - Can I set a snooze feature for my alarm?
Why didn't my alarm notify me on a Saturday or Sunday?
In the alarm, verify that the Active on Weekends field is set to Yes. If this field is set to No, your alarm does not sound on Saturdays or Sundays.
Can I set a snooze feature for my alarm?
Yes. In the alarm, change the Snooze field from Off to a number. When the alarm sounds, press any key to snooze it for the specified amount of time.
Calculator
- Use the calculator memory
• Copy and paste a calculation - Convert measurements
Use the calculator memory
To store a number in the memory, type a number. Click MS.
To recall the memory, click MR.
To delete the memory, click MC.
To add to the number that is currently stored in the memory, type a number. Click M+.
Copy and paste a calculation
Click the trackwheel. Click Copy.
To paste the value back into the display or into another application, click the trackwheel. Click Paste.
Convert measurements
In the calculator, type a number. Click the trackwheel. To convert the number from imperial to metric, click To Metric. To convert the number from metric to imperial, click From Metric. Click a conversion type.
Date and time
- Set the date and time
Set the date and time
- In the handheld options, click Date/Time.
- Set the Time Zone field.
- Set the Date/Time Source field to BlackBerry.
- Click the trackwheel.
- Click Update Time.
- Click the trackwheel.
- Click Save.
Note:
To use the BlackBerry network as your date and time source, set the Date/Time Source field to BlackBerry. To set the date and time yourself, set the Date/Time Source field to Off and then set the other fields on the Date/Time screen to display the correct date and time. Save your changes.
To set the date and time in the alarm, click the trackwheel. Click Change Date/Time.
Profiles
- Set profiles
- Create a notification profile
- Use notification profiles
- Manage downloaded ring tones
- Silence your handheld
- Set the alarm
- Set the alarm volume
• What is the escalating volume level?
Set profiles
Notification profiles alert you of appointment and task reminders, incoming messages, calls, and browser content. You can create a profile that specifies which sounds to use, whether to notify you when the handheld is in or out of the holster, and what volume level to use. You can use different sounds for each type of item.
The handheld has five preset notification profiles: Quiet, Loud, Vibrate, Default, and Phone Only. You can edit these default profiles, but you cannot delete them.
In the profiles list, click a notification profile. Click Enable.
Note:
To change the current notification profile quickly, select a profile. Press the Space key.
Create a notification profile
- In the profiles list, click the trackwheel.
- Click New.
- Type a name for the profile.
- Click an item.
-
Click Edit.
-
Set how you want to be notified for that item.
- Click the trackwheel.
- Click Save.
- Click the trackwheel.
- Click Save.
Use notification profiles
Click a profile. Perform one of the following actions:
- Edit
- Delete
Manage downloaded ring tones
In the profiles list, click a profile. Click Show Tunes. Click a ring tone.
Perform one of the following actions:
- Listen to the ring tone
- Delete the ring tone
Silence your handheld
To silence your handheld, in the profiles list, enable the Quiet profile.
To receive only vibrate notification, in the profiles list, enable the Vibrate profile.
To turn notification back on, in the profiles list, select a different profile. Press the Space key.
Related topic
- Silence the alarm
What is the escalating volume level?
If you use the escalating volume level, the notification volume level consistently increases until the handheld reaches the loudest volume level.
Screen display
- Use the handheld in the dark
- Set the display language
- Set the Home screen background image
- Set the font
Use the handheld in the dark
To turn on the backlighting, press the Power button. If you do not use your handheld for a period of time, the backlighting turns off automatically. To turn off backlighting manually, press the Power button.
To set how long the backlighting stays on if you do not use your handheld, in the handheld options, click Screen/Keyboard. Set the Backlight Timeout field.
Set the Home screen background image
You can set an image that you saved from a web page as your Home screen background. In the pictures list, click an image. Click Set As Home Screen Image.
To clear the Home screen background, in the pictures list, click the trackwheel. Click Reset Home Screen Image.
Note:
The Home screen background setting is only available for BlackBerry Wireless Handhelds with color screens.
Related topic
- Save an image
Set the font
- In the handheld options, click Screen/Keyboard.
- Set the Font Family, Font Size, and Font Style fields.
- For large fonts, set the Antialias mode field.
- Click the trackwheel.
- Click Save.
Note:
Setting a specific font family is only available for BlackBerry Wireless Handhelds with color screens.
Apply a theme to your handheld
On some BlackBerry Wireless Handhelds with color screens, you set themes to control the appearance of items such as applications, indicators, words, and icons. Themes might be pre-loaded on your handheld, or you can download themes in .cod format.
In the handheld options, click Theme. Click a theme name. Click Activate.
Note:
To activate a theme quickly, select a theme name. Press the Space key.
Delete themes
In the handheld options, click Theme. Click a theme name. Click Delete.
Note:
You might not be able to delete themes that are pre-loaded on your handheld.
Power and battery
- Turn the handheld on and off automatically
- Check the battery level
- Extend battery life
- Reset the handheld
About power off and reminders
If you turn off your handheld using the Power button, or by clicking Turn Power Off on the Home screen and selecting Turn Off, your handheld turns itself on at the following times:
- when the alarm turns on
- when the handheld is set to turn on automatically
To turn on your handheld when calendar reminders occur, set the handheld to turn on and off automatically.
If you turn off your handheld by clicking Turn Power Off on the Home screen and selecting Full Power Off, your handheld does not turn on until you press the Power button.
Turn the handheld on and off automatically
- In the handheld options, click Auto On/Off.
- Set the Weekday field to Enabled.
- Specify the times that the handheld should turn on and off on weekdays.
- Set the Weekend field to Enabled.
- Specify the times that the handheld should turn on and off on weekends.
- Click the trackwheel.
- Click Save.
Related topic
- About power off and reminders
Check the battery level
In the handheld options, click Status.
Extend battery life
Use the Auto On/Off feature.
Turn off the radio when you are not in an area of wireless coverage.
Delete the original message when you send a reply.
Send a message to multiple contacts using Add To, Add Cc, or Add Bcc.
Charge your handheld regularly.
Reset the handheld
Remove and reinsert the battery.
Network coverage – frequently asked questions
- Turn the wireless radio on and off
Turn the wireless radio on and off
To turn on the wireless radio, on the Home screen, click Turn Wireless On.
To turn off the wireless radio, on the Home screen, click Turn Wireless Off.
Network configuration
- About VPN
- Enable VPN
- Log in to a VPN
- About WLAN
- Set WLAN configurations
- Connect to a WLAN automatically
- Connect to a preferred WLAN
- About VoIP
- Enable VoIP
About VPN
Depending on your network environment, you might need to enable your handheld to connect to the wireless network through a Virtual Private Network (VPN). Contact your system administrator for more information.
Enable VPN
- In the handheld options, click VPN.
- Select the Enable VPN checkbox.
- Click the trackwheel.
- Click Change Option.
- Click the trackwheel.
- Click Save.
Log in to a VPN
- In the handheld options, click VPN.
- Click Empty.
- Click New.
-
Select a server.
-
Type the settings using your VPN configuration information provided by your system administrator.
- Click the trackwheel.
- Click Save.
- Select the Enable VPN check box.
- Click Log in.
Notes:
If you do not select Save Passphrase checkbox after you type your username and password, you are prompted to retype your VPN password each time that you log in.
Depending on your network settings, you might also be prompted to retype your VPN password if you leave and then return to a sufficient wireless coverage area or if you reset your handheld.
If you cannot edit some fields on the VPN Configurations screen, you might not have permission to change those settings. Contact your system administrator for more information.
About WLAN
Your handheld connects to a wireless Local Area Network (WLAN) using the IEEE 802.11b standard. Depending on your network settings, you might have to configure your WLAN settings manually. Contact your system administrator for more information.
Set WLAN configurations
- In the handheld options, click WLAN.
- Click the Empty field.
-
Click New.
-
Type settings using WLAN configuration information provided by your system administrator.
- Click the trackwheel.
- Click Save.
Note:
If you cannot edit some fields on the WLAN Configurations screen, you might not have permission to change those settings. Contact your system administrator for more information.
Connect to a WLAN automatically
- In the handheld options, click WLAN.
- Set the Select mode field to Automatic.
- Click the trackwheel.
- Click Save.
Note:
To rearrange your list of configured WLANs, click a configured WLAN. Click Move. Move the selected WLAN to a new location in the list. Click the trackwheel.
Connect to a preferred WLAN
- In the handheld options, click WLAN.
- Set the Select mode field to Manual.
- To specify which WLAN to connect to, click a configured WLAN and click Use as current.
- Click the trackwheel.
- Click Save.
About VoIP
Your handheld makes phone calls using Voice Over Internet Protocol (VoIP), which uses Internet Protocol to send and receive information instead of using a cellular wireless network. Contact your system administrator for more information about your VoIP system.
Enable VoIP
- In the handheld options, click VoIP.
- Click Empty.
- Click New.
- Type settings using VoIP configuration information provided by your system administrator.
- Click the trackwheel.
- Click Save.
Note:
If you cannot edit some fields on the VoIP Configurations screen, you might not have permission to change those settings. Contact your system administrator for more information.
Security
- Set a handheld password
- Lock the handheld
- Lock the keyboard
- Protect your handheld content
- Reduce handheld content size
- Regenerate encryption keys
- Store a password
- Create a random password
- Use the password keeper
- Copy a password
- Verify security software
- Prevent third-party applications from transmitting data
- Clear the handheld
- Set owner information
- Security – frequently asked questions
About the handheld password
If you type your handheld password incorrectly five times, you must type blackberry before you can continue. On subsequent password attempts, the characters that you type are displayed.
If you type your handheld password ten times incorrectly, all information is erased from your handheld for security reasons.
If your handheld is integrated with an account using a BlackBerry Enterprise Server, some security settings might differ. For more information, contact your system administrator.
Set a handheld password
-
In the handheld options, click Security.
-
Set the Password field to Enabled.
- Set the security options.
- Click the trackwheel.
- Click Save.
- Type a handheld password.
- Click the trackwheel.
- Retype the handheld password.
- Click the trackwheel.
Related topics
- About the handheld password
- Change the handheld password
- Disable the handheld password
Change the handheld password
- In the handheld options, click Security.
- Click the trackwheel.
- Click Change Password.
- Type your current handheld password.
- Click the trackwheel.
- Type a new handheld password.
- Click the trackwheel.
- Retype the new handheld password.
- Click the trackwheel.
Related topics
- About the handheld password
- Disable the handheld password
Disable the handheld password
-
In the handheld options, click Security.
-
Set the Password field to Disabled.
- Click the trackwheel.
- Click Save.
- Type the handheld password.
- Click the trackwheel.
Related topic
- About the handheld password
Lock the handheld
With a handheld password set, on the Home screen, click Lock.
To unlock your handheld, on the Lock screen, roll the trackwheel. In the Enter password dialog box, type your password.
Related topic
- About the handheld password
About keyboard lock
If you do not set a handheld password, you can lock your keyboard to prevent accidentally placing calls or typing characters.
Lock the keyboard
On the Home screen, click Keyboard Lock.
To unlock the keyboard, double-click the trackwheel.
Related topic
- About keyboard lock
About content protection and compression
Content protection encrypts your handheld data. When your handheld is password locked, an open lock in the handheld status section of the screen indicates that encryption is in progress. A closed lock indicates that encryption is complete. After you type your handheld password, data on your handheld is decrypted as you access it.
To use content protection, you must have a handheld password enabled.
Content compression reduces the size of the data stored on your handheld while maintaining the integrity of that data.
Protect your handheld content
- In the handheld options, click Security.
- Set the Content Protection field to Enabled.
- Click the trackwheel.
- Click Save.
- Type your handheld password.
- Click the trackwheel.
Note:
If you have not enabled your handheld password before you enable content protection, you are prompted to set a handheld password when you save the security settings.
Related topic
- About content protection and compression
Reduce handheld content size
- In the handheld options, click Security.
- Set the Content Compression field to Enabled.
- Click the trackwheel.
-
Click Save.
-
If you have enabled a handheld password, type your password.
- Click the trackwheel.
Related topic
- About content protection and compression
About encryption keys
If your handheld is integrated with an account using the BlackBerry Enterprise Server, encryption keys protect data as it travels between your BlackBerry Enterprise Server and the handheld. Encryption keys are generated automatically, but you can manually regenerate keys at any time.
Regenerate encryption keys
If your handheld is integrated with an account using the BlackBerry Enterprise Server version 4.0, you can regenerate encryption keys from the handheld. In the security options, select a current service. Click the trackwheel. Click Regenerate Encryption Key.
Related topic
- About encryption keys
About the password keeper
Use the password keeper to create and store all of your passwords. The password keeper is locked with a single password, so you can maintain all your passwords in one place.
You can use the password keeper to generate random passwords containing letters, numbers, and symbols.
The first time that you open the password keeper, you must create a password keeper password. Information in the password keeper is encrypted and is only decrypted when you type this password.
Note:
Passwords stored in the password keeper are encrypted; however, if you copy a password, you can paste it into other applications on the handheld. While the password is copied on the clipboard, it is not encrypted.
Store a password
- In the password keeper, click the trackwheel.
- Click New.
- Type the information for the password.
- Click the trackwheel.
- Click Save.
Related topic
- About the password keeper
Create a random password
- In the password keeper, click the trackwheel.
- Click New.
- Type a title for the password.
- Click the trackwheel.
- Click Random Password.
- Type any additional password information.
- Click the trackwheel.
- Click Save.
Use the password keeper
Click a password entry. Perform one of the following actions:
• View
- Edit
- Delete
To change your password keeper password, click the trackwheel. Click Change password. Click Yes.
Type your new password. Confirm your new password. Click OK.
Copy a password
In the password keeper, select a password entry. Click the trackwheel. Click Copy to Clipboard.
To clear the password from the clipboard, in the password keeper, click the trackwheel. Click Clear Clipboard.
To paste the password, place the cursor where you want to insert it. Click the trackwheel. Click Paste.
Warning:
Passwords copied to the clipboard are not encrypted.
About security self tests
The security self tests program verifies that security software is implemented properly on your handheld. The tests run automatically when your handheld restarts.
Verify security software
In the handheld options, click Security. Click the trackwheel. Click Verify Security Software.
Related topic
- About security self tests
About firewall settings
If you have third-party applications on your handheld, the firewall option prevents these applications from transmitting data without your knowledge.
Related topic
- Legal notice
Prevent third-party applications from transmitting data
When a third-party application on your handheld attempts to transmit data, a dialog box appears on your screen. Accept or deny the connection request.
To reset the firewall settings at any time, in the handheld options, click Firewall. Click the trackwheel. Click Reset Settings.
Related topics
- About firewall settings
- Legal notice
Clear the handheld
Warning:
Performing this procedure disables all services and removes all data, including passwords and encryption keys, from the handheld. Before clearing your handheld, verify that a backup copy of your data is available.
- In the handheld options, click Security.
- Click the trackwheel.
- Click Wipe Handheld.
- Click Continue.
- Type blackberry.
Related topic
- How do I restore my handheld after clearing it?
Set owner information
In the handheld options, click Owner. Type your contact information. Click the trackwheel. Click Save.
Note:
Owner information appears on the screen when you lock your handheld.
BrickBreaker
- Play BrickBreaker
• How do I set the speed of the paddle? - How do I set the paddle to accelerate as I roll the trackwheel?
Play BrickBreaker
The object of this game is to destroy bricks using a paddle and a ball. To move the paddle, roll the trackwheel. To release the ball when in catch mode, or to shoot the laser or gun, press the Space key.
During the game, the following capsules fall from the bricks that you destroy:
- Long makes the paddle longer.
- Slow slows down the speed of the ball.
- Gun enables you to shoot three bullets at the bricks.
- Laser enables you to shoot unlimited laser beams at the bricks.
- Multi multiplies the number of balls.
- Catch enables you to catch and hold the ball.
- Skip advances you to the next level.
- Flip changes the direction of the paddle.
• 1-up gives you an additional life.
How do I set the speed of the paddle?
In the BrickBreaker options, set the Paddle Movement Speed field.
How do I set the paddle to accelerate as I roll the trackwheel?
In the BrickBreaker options, set the Paddle Acceleration field.
Service books
- About service books
- Receive new service books
- Accept a new service book
- Manage service books
- Restore a deleted service book
About service books
Service books determine which services are available on your handheld. If your handheld is integrated with an account using a BlackBerry Enterprise Server ^™ , your system administrator can send service books that determine whether features such as remote address lookup and wireless calendar synchronization are available.
Receive new service books
Service books arrive on your handheld in one of the following ways:
• over the wireless network when your system administrator makes a change on the BlackBerry Enterprise Server™
- through the BlackBerry Desktop Software when you connect your handheld to your computer
Accept a new service book
Service books should be automatically accepted by your handheld. If a new service book is available and it is not automatically accepted, a book icon appears in the handheld status section of the screen.
To accept the service book manually, in the handheld options, click Service Book. Click the new service book. Click Accept.
Manage service books
In the handheld options, click Service Book. Click a service book. Perform one of the following actions:
• View
- Delete
Restore a deleted service book
In the handheld options, click Service Book. Click the trackwheel. Click Undelete.
Frequently asked questions
- Why are some of the features described not available on my handheld?
• What software version do I have on my handheld? - Messages – frequently asked questions
- Attachments – frequently asked questions
- Phone – frequently asked questions
- Browser – frequently asked questions
- Downloading – frequently asked questions
- Contacts – frequently asked questions
- Calendar – frequently asked questions
- Tasks – frequently asked questions
- Memos – frequently asked questions
- Synchronization – frequently asked questions
- Typing – frequently asked questions
- Alarm – frequently asked questions
• Network coverage – frequently asked questions - Security – frequently asked questions
Why are some of the features described not available on my handheld?
Depending on the type of account that you are using, some features might not be available on your handheld. In addition, your handheld might not have been provisioned for certain features by your system administrator. For more information, contact your system administrator.
What software version do I have on my handheld?
To view handheld information such as your handheld type, software version, and copyright information, in the handheld options, click About. To return to the handheld options, press the Escape button twice.
Messages – frequently asked questions
• Why can't I send messages?
• Why can't I receive messages?
- Why is the menu option to send a message not available?
- Can I stop a message from being sent?
- Why are some messages already on my handheld?
- How do I create and use links in messages?
- Why is "More available" appearing at the end of my message?
- Can I file messages?
- Why can't I see a new message in the messages list even though I received notification?
- Why is there a different icon beside some items in the messages list?
- How do I show more of a subject line for my messages?
- Can I remove the prompt that appears before I delete messages?
- Why were some of my messages deleted from the handheld?
- How do I change how long messages remain in the messages list?
- How do I restrict the types of messages that are sent to my handheld?
• How do I create a generic filter?
- Why are some messages sent to my handheld even though I have created a filter?
- Why can't I specify some folders from which messages are redirected?
- How do I make changes to the folders on my handheld?
- How do I stop messages from being sent to my handheld?
Why can't I send messages?
Verify that your handheld radio is turned on and that you are in an area of sufficient wireless coverage. For more information on wireless coverage levels, refer to the printed documentation that accompanied your handheld.
If you send a message and you are not in an area of sufficient wireless coverage, the handheld sends the message when you return to an area of sufficient wireless coverage.
Why can't I receive messages?
Verify that your handheld radio is turned on and that you are in an area of sufficient wireless coverage. For more information on wireless coverage levels, refer to the printed documentation that accompanied your handheld.
If you are not receiving messages, verify that filters, which restrict the messages that are sent to your handheld, are not enabled. For more information, see:
"Use filters"
Verify that message redirection to your handheld is enabled. If you are using the BlackBerry Desktop Software, in the Redirector Settings tool, verify that the Redirect incoming messages to your handheld check box is selected.
If your handheld is integrated with an account using the BlackBerry Enterprise Server™ version 4.0, in the messages options, click Email Settings. Verify that the Redirect to handheld field is set to Yes. If you have configured specific folders to redirect messages to your handheld, on the Folder Redirection screen, verify that the correct folders from which messages are redirected are selected.
Why is the menu option to send a message not available?
If you do not have an email address saved for your contact, the option to send a message to that contact does not appear. In the address book, add a email address for your contact.
Can I stop a message from being sent?
Yes, if the handheld radio is turned off or you are in an area of insufficient wireless coverage. If a clock icon appears beside the message, delete the message to stop it from being sent.
If the radio is turned on and you are in an area of sufficient wireless coverage, any pending messages are sent immediately, so you cannot stop the message from being sent.
Why are some messages already on my handheld?
When you first receive your handheld and every time that you update the software, several welcome messages appear. These messages provide information and tips for using the handheld.
If your handheld is integrated with an account using the BlackBerry Enterprise Server™ version 4.0, a number of your recent messages might also appear on your handheld when you turn on your handheld radio for the first time. For more information, contact your system administrator.
How do I create and use links in messages?
Links appear in your messages as underlined text. Messages can contain links to various items such as phone numbers, web sites, and email addresses. When you receive a message containing a link, click the link. In the menu, click the actions that apply to the type of link selected.
The handheld automatically recognizes most items as links.
Why is "More available" appearing at the end of my message?
Long messages are sent to your handheld in sections. As you read the first section, the next section is sent to your handheld automatically, if you are in an area of sufficient wireless coverage. However, it might take several seconds before your handheld receives the next section.
To send only the first section of long messages to your handheld, in the messages options, click General Options. Set the Auto More field to No. The next time that you receive a long message, More available appears at the bottom. To request more of the message, click the trackwheel. Click More. To view the rest of the message, click More All.
Can I file messages?
Yes. If you have enabled wireless message reconciliation for your handheld, any messages that you file on your handheld are also filed in your mailbox.
If your handheld is not enabled for wireless message reconciliation, your handheld must be integrated with an account using the BlackBerry Enterprise Server™ to file messages. You must perform an initial message reconciliation with the BlackBerry Desktop Software so that the folders in your mailbox appear on your handheld. For more information on configuring manual message reconciliation, refer to the BlackBerry Desktop Software Online Help.
Why can't I see a new message in the messages list even though I received notification?
If messages are sent to your handheld from specific mailbox folders and, in the general messages options, you set the Hide Filed Messages option to Yes, a new message sent to your handheld is filed automatically, and it might not appear in the messages list. To view all of your messages, set the Hide Filed Messages field to No.
Why is there a different icon beside some items in the messages list?
Different icons are used in the messages list to indicate various items, such as message status, saved web pages, call logs, and messages with attachments.
When you make or receive a call, the handheld creates a call log containing information about the call. To disable call logs, in the phone options, click Call Logging. Set the Show Logs in Message List field to No.
How do I show more of a subject line for my messages?
If you want to show more of the subject line for your messages, you can hide the time that the message was received and the name of the sender or recipient of the message. In the messages options, click General Options. Set the Display Time and Display Name fields to No.
Can I remove the prompt that appears before I delete messages?
Yes. In the messages options, click General Options. Set the Confirm Delete option to No.
Why were some of my messages deleted from the handheld?
If your handheld memory is full, your handheld deletes the oldest messages from the messages list to accommodate new ones. It will not delete saved messages.
If you have enabled wireless message reconciliation, messages that you delete in your mailbox are also deleted on your handheld. Messages that you delete on your handheld are also deleted in your mailbox.
If you deleted multiple messages using Delete Prior, the messages are only deleted from your handheld.
How do I change how long messages remain in the messages list?
To change the number of days your handheld will keep messages on the messages list, in the message options, click General Options. Set the Keep Messages field.
Messages sent to your handheld that are older than the number of days that you specify in the Keep Messages field are removed from your handheld. The messages can be restored, however, if you set the Keep Messages field to a longer period of time. When you increase the amount of time in this field, any messages sent to your handheld during that period of time appear in the messages list.
How do I restrict the types of messages that are sent to my handheld?
You can create filters to send only specific messages to your handheld. For more information, see:
"Create a filter".
To stop messages that do not meet any filter criteria from being sent to your handheld, in the message options, click Email Filters. Set the If no filters apply, send email to handheld field to No.
How do I create a generic filter?
To create a generic filter, use wildcards when specifying the contacts to which the filter applies. In the From field, specify part of the sender's address and use an asterisk (*) in place of the remaining part.
Why are some messages sent to my handheld even though I have created a filter?
A filter must be enabled before it applies to your messages. In the filters messages options, verify that the check boxes beside all of the filters that you want to apply to your messages are enabled. Verify that the filters are in the correct order so they can be applied to your messages properly.
Why can't I specify some folders from which messages are redirected?
On the Folder Redirection screen, if the check boxes beside the folder names appear with broken borders, those folders are not enabled for redirection. If your handheld is integrated with an account using the BlackBerry Enterprise Server™ version 4.0, the folders are enabled automatically after a short period of time. To manually enable all folders for redirection, on the Message Reconciliation screen, set the Wireless Reconcile field to Off. Save your changes. Open the Message Reconciliation screen again and set the Wireless Reconcile field to On. Save your changes.
How do I make changes to the folders on my handheld?
You cannot add, edit, or delete folders from your handheld. To add, edit, or delete the folder, change it in your mailbox and reconcile your messages with your handheld.
If your handheld is enabled for wireless message reconciliation, changes that you make to the folders in your mailbox are synchronized with your handheld over the wireless network.
If your handheld is not enabled for wireless message reconciliation, reconcile your messages manually using the BlackBerry Desktop Software. For more information, refer to the BlackBerry Desktop Software Intellisync Online Help.
How do I stop messages from being sent to my handheld?
If you are using the BlackBerry Desktop Software, in the Redirector Settings tool, clear the Redirect incoming messages to your handheld check box.
If your handheld is integrated with an account using the BlackBerry Enterprise Server™ version 4.0, in the messages options, click Email Settings. Set the Send Email To Handheld field to No.
Attachments – frequently asked questions
- Can I view file attachments on my handheld?
- Why are some file attachment features not available on my handheld?
- How do I view password-protected file attachments?
- How do I view information about attached files?
- Can I set the amount of memory that my handheld uses for file attachments?
- How do I change how file attachments are displayed?
- How do I view cell contents in spreadsheet attachments?
- Why is "More available" appearing at the end of my file attachment?
- How do I search for text within a file attachment?
• What does skipped content mean? - Can I see tracked changes in document attachments?
Can I view file attachments on my handheld?
Yes, if attachment viewing is enabled for your handheld. When you receive a message with an attachment, click the trackwheel. If Open Attachment appears in the menu, you can view attachments on your handheld.
If Open Attachment does not appear in the menu, your handheld might not be enabled for attachment viewing.
To view document and spreadsheet attachments, your handheld must be integrated with an account using the BlackBerry Enterprise Server™ version 4.0 or later for Microsoft® Exchange, the BlackBerry Enterprise Server version 4.0 or later for IBM® Lotus® Domino®, or the BlackBerry Enterprise Server version 4.0 or later for Novell® GroupWise®.
To view .zip, .htm, or .html attachments, your handheld must be integrated with an account using the BlackBerry Enterprise Server version 4.0 or later for Microsoft® Exchange, the BlackBerry Enterprise Server version 4.0 or later for IBM® Lotus® Domino®, or the BlackBerry Enterprise Server version 4.0 or later for Novell® GroupWise®.
To view image attachments, your handheld must be integrated with an account using the BlackBerry Enterprise Server version 4.0.
For more information, contact your system administrator.
Why are some file attachment features not available on my handheld?
If your BlackBerry Wireless Handheld has 8 MB of memory, some image attachment viewing features are not available.
How do I view password-protected file attachments?
You can only view password-protected .pdf files. If you receive a .pdf file that is password-protected, you must type the password to view the file. On the Attachment screen, select the file name. Click the trackwheel. Click Password. Type the password. Click the trackwheel.
How do I view information about attached files?
To view the file size, title, and other information about an attached file without retrieving the file, on the Attachment screen, select the file name. Click the trackwheel. Click Retrieve Info.
Can I set the amount of memory that my handheld uses for file attachments?
Yes. In the attachment options, set the Cache Size field.
How do I change how file attachments are displayed?
Open the full content for a file attachment. Click the trackwheel. Click Options.
To change the font for your file attachments, set the Font Family and Font Size fields. You can only set the Font Family field on BlackBerry Wireless Handhelds with color screens.
In document attachments, to use font sizes that reflect those in the original document, set the Reflect Original Font Sizes field to Yes.
To show a grid when viewing spreadsheet attachments, set the Show Gridlines field to Yes.
To label spreadsheet columns with letters and label spreadsheet rows with numbers, set the Display Labels field.
How do I view cell contents in spreadsheet attachments?
When you select a cell, the contents appear at the top of the screen. If the contents are too long to see, click the cell. Click View Cell.
To view the contents of all the cells in a column, click the column label at the top of the screen. Click Fit. All the cells for that column expand to the size of the cell with the longest content.
To change the column size for all of the columns in a spreadsheet, click the unmarked column label in the top left corner of the screen. Click the preferred size.
To change the default column size for all spreadsheet attachments, open the attachment options. Set the Column Width field to Large.
Why is "More available" appearing at the end of my file attachment?
Long attachments are sent to your handheld in sections. As you read the first section, the next section is sent to your handheld automatically, if you are in an area of sufficient wireless coverage. However, it might take several seconds before your handheld receives the next section.
To send only the first section of long attachments to your handheld, in the messages options, click General Options. Set the Auto More field to No. The next time that you receive a long attachment, More available appears at the bottom. To request more of the file attachment, click the trackwheel. Click More. To view the rest of the attachment, click More All.
How do I search for text within a file attachment?
In the attachment, click the trackwheel. Click Find. Type the text. Click the trackwheel.
To make the Find feature case sensitive when searching, select the Case Sensitive Search check box.
If you have not retrieved all of the text for a file attachment, the server side search dialog box appears. If you want to search the remaining text in the attachment, click Yes. If the search term is found, the content is retrieved automatically.
To view the text on your handheld, verify that your handheld radio is turned on and that you are in an area of sufficient wireless coverage. For more information on wireless coverage levels, refer to the printed documentation that accompanied your handheld.
What does skipped content mean?
The skipped content bar appears in a document attachment when more content is available but has not been retrieved. To retrieve skipped content, click the skipped content bar. Click More.
Can I see tracked changes in document attachments?
Some document formats enable editors to track changes in a document. With tracked changes showing, new and deleted text is displayed in the document. To view tracked changes, click the trackwheel. Click Show Changes. To hide tracked changes, click the trackwheel. Click Hide Changes. You can only view tracked changes on BlackBerry Wireless Handhelds with color screens.
Synchronization – frequently asked questions
- Can I reconcile messages over the wireless network?
- Can I synchronize PIM items over the wireless network?
- How do I handle conflicts between my handheld and mailbox?
- Why are some of my messages not reconciling over the wireless network?
- Can I reconcile with my personal folders?
- Can I remotely empty the deleted messages folder on my computer?
Can I reconcile messages over the wireless network?
Yes. If your handheld is integrated with an account using the BlackBerry Enterprise Server™ version 4.0 or later for Microsoft® Exchange, the BlackBerry Enterprise Server version 4.0 or later for IBM® Lotus® Domino®, or the BlackBerry Enterprise Server version 4.0 or later for Novell® GroupWise®, verify that wireless message reconciliation is enabled in the messages options.
Can I synchronize PIM items over the wireless network?
If your handheld is integrated with an account using the BlackBerry Enterprise Server™ version 4.0, verify that wireless synchronization is enabled in the tasks, memo, address book, and calendar options.
If your handheld is integrated with an account using the BlackBerry Enterprise Server version 4.0 or later, calendar appointments and meetings might be the only PIM items that can be synchronized over the wireless network. For more information on setting wireless calendar synchronization, refer to the BlackBerry Desktop Software Online Help.
Your handheld radio must be on and you must be in an area of sufficient wireless coverage for PIM items to synchronize over the wireless network. For more information on wireless coverage levels, refer to the printed documentation that accompanied your handheld.
How do I handle conflicts between my handheld and mailbox?
A conflict might occur if you edit the same item on both your handheld and mailbox before synchronization takes place.
If you enable wireless message reconciliation, you can set whether the handheld or mailbox takes precedence when a conflict occurs. In the messages options, click Email Reconciliation. Set the On Conflict field to the preferred option. You can set this option for each message service on your handheld.
If you enable wireless PIM synchronization, the information in your desktop email program automatically takes precedence over the data on your handheld when a conflict occurs. If you disable wireless PIM synchronization and make changes to a PIM entry in your desktop email program and on the handheld, the conflicting information on the handheld is replaced by the
information in your desktop email program when you enable wireless PIM synchronization again. If you want to manually select how conflicts are handled, synchronize your handheld using the desktop software before you enable wireless PIM synchronization.
If you use the BlackBerry Desktop Software to enable wireless calendar synchronization, you can adjust the calendar conflict resolution settings in the desktop software. For more information, refer to the BlackBerry Desktop Software Online Help.
Why are some of my messages not reconciling over the wireless network?
If you are not in an area of sufficient wireless coverage, your messages will not be reconciled over the wireless network. For more information on wireless coverage levels, refer to the printed documentation that accompanied your handheld.
If you are in an area of sufficient wireless coverage and you want to initiate message reconciliation from the handheld, in the messages list, click the trackwheel. Click Reconcile Now.
Can I reconcile with my personal folders?
Yes. If you are a Microsoft® Exchange user, and you use personal folders, you can only reconcile messages with personal folders using the BlackBerry Desktop Software. For more information, refer to the BlackBerry Desktop Software Online Help.
Note:
Even if you have enabled wireless message redirection on your handheld, you must use the desktop software with personal folders.
Can I remotely empty the deleted messages folder on my computer?
Yes. In the messages options, click Email Reconciliation. Click the trackwheel. Click Purge Deleted Items. Click Yes.
To use this feature, your handheld must be integrated with an account using the BlackBerry Enterprise Server™ version 4.0 or later for Microsoft® Exchange, and wireless message reconciliation must be enabled. Verify that your handheld radio is turned on and that you are in an area of sufficient wireless coverage. For more information on wireless coverage levels, refer to the printed documentation that accompanied your handheld.
Phone – frequently asked questions
• Why can I not make calls?
• Why am I no longer receiving calls?
• How do I make calls from the Home screen?
- Can I use the phone when the handheld or keyboard is locked?
- Can I set the Phone to display frequently called numbers?
- How do I stop my handheld from answering or ending calls automatically?
Why can I not make calls?
Verify that your handheld radio is turned on and that you are in an area of sufficient wireless coverage. For more information on wireless coverage levels, refer to the printed documentation that accompanied your handheld.
Why am I no longer receiving calls?
Verify that your handheld radio is turned on and that you are in an area of sufficient wireless coverage. For more information on wireless coverage levels, refer to the printed documentation that accompanied your handheld.
How do I make calls from the Home screen?
In the phone options, click General Options. Verify that the Dial From Home Screen field is set to Yes. You can make calls from the Home screen, but you cannot use Home screen shortcuts.
Can I use the phone when the handheld or keyboard is locked?
If your handheld is integrated with a corporate messaging account, you might be able to make calls when your handheld is locked. For more information, contact your system administrator.
If you receive a call when the keyboard is locked, the keyboard unlocks when you answer the call.
If you receive a call when the handheld is password locked, you can answer the call, but your handheld remains password locked during the call. You can perform regular phone actions, such as mute and hold. When you end the call, the handheld remains password locked.
Can I set the Phone to display frequently called numbers?
Yes. You can set the phone to display a list of frequently or recently called numbers instead of call logs. In the phone options, click General Options. Set the Phone List View field.
How do I stop my handheld from answering or ending calls automatically?
To stop your handheld from answering calls automatically when you remove it from the holster, in the phone options, click General Options. Set the Auto Answer Calls field to No.
To stop your handheld from ending calls automatically when you insert it in the holster, in the phone options, click General Options. Set the Auto End Calls field to No.
Browser – frequently asked questions
- Why is there no browser available on my handheld?
- Can I use the BlackBerry Browser?
- How do I change the browser home page?
- How do I change the type of content that the browser accepts?
- How do I select images and text on a web page?
- Can I override the character set encoding of web pages?
- What is the Available Offline check box that appears when I'm adding a bookmark?
- Can I view web pages that contain JavaScript or animated graphics?
- Why did the web page form not submit?
• How do I use the browser queue? - How do I control when scripts are run on my handheld?
- On my browser home page, when I hold the Escape button, the application closes. Can I change this?
- What options can I set for WAP Browser security?
- What options can I set for BlackBerry Browser security?
Why is there no browser available on my handheld?
Verify that your handheld radio is turned on and that you are in an area of sufficient wireless coverage. For more information on wireless coverage levels, refer to the printed documentation that accompanied your handheld.
Can I use the BlackBerry Browser?
Yes, if your handheld is integrated with an account using the BlackBerry Enterprise Server version 4.0 or later for Microsoft® Exchange or the BlackBerry Enterprise Server version 4.0 or later for IBM® Lotus® Domino®. For more information on the BlackBerry Browser, contact your system administrator.
How do I change the browser home page?
In the browser options, click Browser Configuration. In the Home Page Address field, change the web page address. Save your changes.
How do I change the type of content that the browser accepts?
In the browser options, click Browser Configuration. In the Content Mode field, set the type of content that the browser accepts. Save your changes.
How do I select images and text on a web page?
To select text and images that are not links, click the trackwheel. Click Select Mode. In select mode, you can scroll through content one line at a time and select images. To switch your browser back to view mode, click the trackwheel. Click View Mode. In view mode, you can scroll through web page content quickly and the cursor will select only links.
Can I override the character set encoding of web pages?
Yes. On a web page, click the trackwheel. Click Set Encoding. Clear the Auto mode check box. Set the Default Charset field. Click OK. The browser uses the default character set to display all web pages.
What is the Available Offline check box that appears when I'm adding a bookmark?
The Available Offline check box enables you to view the web page when you are not connected to the wireless network or when you are outside an area of wireless coverage. When you view the web page offline, it displays the information that was current when you last viewed the bookmark online. To change this check box, you must create the bookmark again.
Can I view web pages that contain JavaScript or animated graphics?
Yes. Use the BlackBerry Browser to view .html web pages that contain JavaScript™ or animated graphics. In the browser options, click General Properties. Select the Support JavaScript check box and set the Repeat Animations field. Save your changes.
To view .html web pages containing JavaScript or animated graphics, your handheld must be integrated with an account using the BlackBerry Enterprise Server version 4.0. To view web pages with JavaScript, your handheld must be enabled for JavaScript support. The BlackBerry Browser does not support some style sheets or dynamic HTML. For more information, contact your system administrator.
Why did the web page form not submit?
Verify that your handheld radio is turned on and that you are in an area of sufficient wireless coverage. For more information on wireless coverage levels, refer to the printed documentation that accompanied your handheld.
How do I use the browser queue?
The browser queue lists all of the forms submitted when you were not within an area of sufficient wireless coverage.
To view a form in the queue, in the browser options, click Offline Queues. Click a form. Click Get Link.
To delete a form in the queue, click the form. Click Delete.
How do I control when scripts are run on my handheld?
In the browser options, click General Properties. Select the Prompt Before Running WML Scripts check box. You are prompted before browser scripts are run.
On my browser home page, when I hold the Escape button, the application closes. Can I change this?
Yes. In the browser options, click General Properties. Select the Prompt Before Closing Browser On Escape check box. You receive a prompt before the browser closes.
What options can I set for WAP Browser security?
To set WAP Browser security, in the handheld options, click WTLS. In the Encryption Strength field, set the encryption level for connecting to your WAP gateway. In the Prompt for Server Trust field, set whether to prompt for WTLS connection authentications if the handheld cannot authenticate the connection automatically.
What options can I set for BlackBerry Browser security?
Transport Layer Security (TLS) can apply to the connection from your BlackBerry Enterprise Server to a web server, or it can apply to the entire connection from your handheld to a web server.
To set BlackBerry Browser security, in the handheld options, click TLS.
To apply TLS to the connection from your BlackBerry Enterprise Server to a web server, set the TLS Default field to Proxy. Set the Allow HTTPS Redirections field and the Trusted Hosts field.
To apply TLS to the entire connection from your handheld to a web server, set the TLS Default field to Handheld. Set the Algorithm, Server Authentication, and Client Authentication fields.
In the Algorithm field, set the type of algorithm, the encryption strength, and whether only Federal Information Processing Standards (FIPS)-approved key algorithms are supported.
In the Server Authentication field, set whether to prompt about server security issues. If an item is set to False, connections are prevented if a server security issue occurs.
In the Client Authentication field, set whether to prompt about client security issues. If an item is set to False, connections are prevented if a client security issue occurs.
Contacts – frequently asked questions
- How do I add multiple contacts with the same name to my contact list?
- Can I change how my contacts, tasks, or memos are displayed?
- What are the User 1, User 2, User 3, and User 4 fields on the New Address screen?
- Can I clear all the categories that apply to a contact, task, or memo?
- Can I remove the prompt that appears before I delete contacts, calendar entries, tasks, or memos?
- How do I know how many contacts, calendar entries, tasks, or memos I have saved?
How do I add multiple contacts with the same name to my contact list?
In the address book options, set the Allow Duplicate Names field to Yes.
Can I change how my contacts, tasks, or memos are displayed?
Yes. In the address book, tasks, or memo options, change the Sort By field.
What are the User 1, User 2, User 3, and User 4 fields on the New Address screen?
These fields are extra fields where you can add information for your contacts, such as birthdays or anniversaries. You can edit the name of the field for all your contacts and set up your BlackBerry Desktop Software to synchronize with the corresponding field in your desktop email program.
To change the field name for a custom field, click the trackwheel. Click Change Field Name.
Can I clear all the categories that apply to a contact, task, or memo?
Yes. When editing the contact, task, or memo, click the trackwheel. Click Categories. Click the trackwheel. Click Clear Selection.
Can I remove the prompt that appears before I delete contacts, calendar entries, tasks, or memos?
Yes. In the address book, calendar, tasks, or memo options, set the Confirm Delete option to No.
How do I know how many contacts, calendar entries, tasks, or memos I have saved?
In the address book, calendar, tasks, or memo options, the Number of Entries field displays how many contacts, calendar entries, tasks, or memos are saved.
Calendar – frequently asked questions
- Can I synchronize PIM items over the wireless network?
- Are there any restrictions for using the calendar with Lotus Notes®?
- How do I expand the number of hours that are shown in the calendar?
- How do I change the day of the week that is shown first when viewing the calendar in Week view?
- Can I remove the prompt that appears before I delete contacts, calendar entries, tasks, or memos?
- How do I scroll through the calendar in each view?
- How do I change how long appointments remain in the handheld calendar?
- How do I know how many contacts, calendar entries, tasks, or memos I have saved?
Are there any restrictions for using the calendar with Lotus Notes®?
Yes. If you are a Lotus Notes® user, you cannot create appointments that span multiple days. Also, you can only edit the Subject, Location, Reminder, and Notes fields and the Mark as Private check box when editing the series for a recurring appointment or meeting. When editing a recurring meeting that you created, you can also edit the meeting participants.
How do I expand the number of hours that are shown in the calendar?
In the calendar options, change the Start of Day and End of Day fields.
How do I change the day of the week that is shown first when viewing the calendar in Week view?
In the calendar options, change the First Day Of Week field.
How do I scroll through the calendar in each view?
In Day view, roll the trackwheel to move through the hours in a day. Roll the trackwheel to the top of the screen to select a day in the navigation bar. Click the trackwheel to view the selected day. Hold the Alt key and roll the trackwheel to move from one day to the next.
In Week view, roll the trackwheel to move vertically through the hours in a day. Hold the Alt key and roll the trackwheel to move horizontally through the days of the week.
In Month view, roll the trackwheel to move horizontally through the days of the month. Hold Alt and roll the trackwheel to move vertically between weeks.
In Agenda view, roll the trackwheel to move through the appointments. Hold the Alt key and roll the trackwheel to move through days.
How do I change how long appointments remain in the handheld calendar?
To change the number of days your handheld will keep appointments in the calendar, in the calendar options, set the Keep Appointments field.
Appointments in your handheld calendar that are older than the number of days that you specify in the Keep Appointments field are removed from your handheld. The appointments can be restored, however, if you set the Keep Appointments field to a longer period of time. When you increase the amount of time in this field, any appointments in your calendar during that period of time appear in your handheld calendar.
Security – frequently asked questions
- What does the Verifying Security Software dialog box mean when I restart my handheld?
- How do I restore my handheld after clearing it?
- How do I reduce the size of data stored on my handheld?
- How do I prevent passwords from accidentally being copied to the clipboard?
- How do I specify the criteria for randomly generated passwords?
- Why do additional security features appear in the handheld options?
- How do I prevent passwords from appearing on the screen in the password keeper?
What does the Verifying Security Software dialog box mean when I restart my handheld?
When this dialog box appears, the handheld is verifying that all security software is implemented properly on your handheld. The tests run automatically when your handheld restarts.
How do I restore my handheld after clearing it?
If your handheld is integrated with an account using the BlackBerry Enterprise Server ^™ version 4.0, contact your system administrator to initiate enterprise activation.
If you are using the BlackBerry Desktop Software, restore handheld data and services using the Backup and Restore tool. For more information, refer to the BlackBerry Desktop Software Online Help.
How do I reduce the size of data stored on my handheld?
To reduce the size of data stored on your handheld, enable content compression.
How do I prevent passwords from accidentally being copied to the clipboard?
In the password keeper options, set the Allow Clipboard Copy field to False.
How do I specify the criteria for randomly generated passwords?
In the password keeper options, set the password length and specify whether randomly generated passwords must contain letters, numbers, or symbols.
Why do additional security features appear in the handheld options?
Additional security options such as Certificate Servers, Certificates, Key Stores, S/MIME, or Memory Cleaning might be available in the handheld options. You can use these options with the Secure Multipurpose Internet Mail Extensions (S/MIME) Support Package. For more information, refer to the S/MIME Support Package User Guide Supplement
How do I prevent passwords from appearing on the screen in the password keeper?
In the password keeper options, set the Show Password field to False.
Tips
- Home screen
- Searching
- Options and fields
- Navigating screens
- Typing
- Editing text
- Messages
- Attachments
- Phone
- Browser
- Calendar
- Calculator
Home screen
To use the handheld in the dark, press the Power button.
To lock the handheld, set a password. Click Lock.
To lock the keyboard, on the Home screen, click Keyboard Lock. To unlock the keyboard, double-click the trackwheel.
To move an icon on the Home screen, select an icon. Hold the Alt key and click the trackwheel. Click Move Application. Move the icon. Click the trackwheel.
To hide an icon on the Home screen, select an icon. Hold the Alt key and click the trackwheel. Click Hide Application.
To show a hidden icon on the Home screen, hold the Alt key and click the trackwheel. Click Show All. Hold the Alt key and click a crossed-out icon. Click Hide Application.
To switch to another application, hold the Alt key and press the Escape button. Continue to hold the Alt key and select an application. Release the Alt key to switch to that application.
To use shortcut keys to open an application from the Home screen, open the phone options. Click General Options. Change the Dial From Home Screen field to No. The shortcut keys are underlined on the Home screen. You can use these keys, but you cannot make calls from this screen.
Searching
To search for text, click the trackwheel. Click Find. Type the text.
To find a contact, type the contact name or initials separated by a space.
Options and fields
To select a check box, press the Space key. To clear the check box, press the Space key again.
To change an option field, hold the Alt key. Click a value.
To move to an item in a list or menu, type the first letter of the item.
To clear a field, click the trackwheel. Click Clear Field.
Navigating screens
To move the cursor, roll the trackwheel.
To move the cursor in a different direction, hold the Alt key and roll the trackwheel.
To exit a screen or dialog box, press the Escape button.
To click an icon or menu item, roll the trackwheel to select the item. Click the trackwheel.
To select multiple items or characters, hold the Shift key and roll the trackwheel.
To page up or down in a list, hold the Alt key and roll the trackwheel.
To move to the top of a screen, press T.
To move to the bottom of a screen, press B.
To move down a screen, press the Space key.
To move up a screen, press the Shift key + the Space key.
To move to the next item, press N.
To move to the previous item, press P.
Typing
To capitalize a letter, hold the letter key until the capitalized letter appears.
To insert a period, press the Space key twice. The next letter is capitalized.
To type the alternate character on a key, hold the Alt key and press the character key.
To type a symbol, press the Symbol key. Click a symbol.
To type an accented or special character, hold the letter key and roll the trackwheel.
To turn on CAP lock, press the Alt key + the Right Shift key.
To turn on NUM lock, press the Right Shift key + the Alt key.
To turn off NUM lock or CAP lock, press the Right Shift key.
To type numbers in a number field, press the number keys. You do not need to press the Alt key.
To type a letter in a number field, hold the number key until the letter appears.
To insert the at sign (@) and periods in an Email field, press the Space key.
Editing text
To select a line of text, press the Shift key and roll the trackwheel.
To select text character by character, hold the Shift key and roll the trackwheel.
To cut the selected text, press the Shift key + the Backspace key.
To copy the selected text, press the Alt key and click the trackwheel.
To paste the selected text, press the Shift key and click the trackwheel.
Messages
To open the selected message, press the Enter key.
To compose a message from the messages list, press C.
To reply to a message, press R.
To forward a message, press F.
To reply to all, press L.
To file a message, press I.
To search for text within a message, press S. To search for the next occurrence of the text, press S again.
To move down a page, press the Enter key.
To move up a page, press the Alt key + the Enter key.
To view sent messages, in the messages list, press the Alt key + O.
To view received messages, in the messages list, press the Alt key + I.
To view phone call logs, in the messages list, press the Alt key + P.
To view voice mail messages, in the messages list, press the Alt key + V.
To move to the next unopened item, press U.
To move to the next related message, press J.
To move to the previous related message, press K.
To mark a message as opened or unopened, press the Alt key + U.
To move to the last cursor position in a received message, press G.
To view the email address of a sender or a recipient, in the To or From field of a received message, select a name. Press Q. To show the display name again, press Q.
To delete selected messages, press the Delete key.
Attachments
To switch between viewing the generated table of contents and the full content for a document attachment, press V.
To switch to a different worksheet within a spreadsheet attachment, press V. Select a worksheet and press the Enter key.
To change the column size, press W.
To turn on or turn off column and row labels, press H.
To move to a specific cell, press G.
To display the contents of a specific cell, press the Space key.
To pan horizontally across an image, hold the Alt key and roll the trackwheel.
To zoom into an image, press I. To continue zooming into an image, hold the Left Shift key and roll the trackwheel.
To zoom out of an image, press O. To continue zooming out of an image, hold the Left Shift key and roll the trackwheel.
To zoom to the original image size, press W.
To rotate an image, press R.
Phone
To open the phone, press the Phone button or press the Space key.
To end a call, hold the Escape button.
To call a selected name or phone number, press the Enter key.
To call a speed dial number, hold the assigned letter key.
To type an extension, press the Alt key + the 8 key. Type the extension number.
To dial the last number that you typed, press the Space key + the Enter key.
To call your voice mail access number, hold 1.
To type letters in phone numbers, hold the Alt key and type letters.
To mute a call, press the Phone button. To turn mute off, press the Phone button again.
To change the volume during a call, roll the trackwheel.
To move to the top of the Phone screen while viewing the list of contacts, press the Space key.
To insert a wait when typing a phone number, press B.
To insert a pause when typing a phone number, press N.
Browser
To return to the last page that you viewed, press the Escape button.
To insert a period in the Go To dialog box, press the Space key.
To insert a slash mark (/) in the Go To dialog box, press the Shift key + the Space key.
To go to the home page, press H.
To edit a web address in the Go To dialog box, hold the Alt key and roll the trackwheel. Select an address. Edit the text. Click the trackwheel.
To open the bookmarks screen, press K.
To add a bookmark, press A.
To refresh a web page, press R.
To search for a word on a page, press F. To find the next instance of a word on a page, press the Alt key + F.
To view the history, press I.
To move to the next page in the history, press N.
To move to the previous page in the history, press the Delete key.
To view, copy, or send the address for a link, press L.
To view, copy, or send the address for a page, press P.
To view more images, press M.
To view all images, press Q.
To open the browser options, press O.
To move down a page, press the Space key.
To move up a page, press the Shift key + the Space key.
To save a web page to the messages list, press S.
To stop a web page from loading, press the Escape button.
To move to a specific web page, press G.
To move between full-screen mode and normal mode, press U.
To move the browser to the background to use another application, press D.
To close the browser, hold the Escape button.
Calendar
For these tips to work in Day view, in the calendar options, set the Enable Quick Entry field to No.
To change to Agenda view, press A.
To change to Day view, press D.
To change to Week view, press W.
To change to Month view, press M.
To move to the current date, press T.
To move to a specific date, press G.
To create an appointment, press C.
To move to the next day, week, or month, press the Space key.
To move to the previous day, week, or month, press the Shift key + the Space key.
To move the cursor horizontally in Week view, hold the Alt key and roll the trackwheel.
To move the cursor vertically in Month view, hold the Alt key and roll the trackwheel.
Calculator
To add, press I.
To subtract, press U.
To multiply, press A.
To divide, press G.
To clear the screen, press Y.
To clear the last entry, press T.
To find the square root, press V.
To use the percent function, press B.
To add a number to the memory, type the number and press L.
To recall the memory, press J.
To replace the memory, type a number and press K.
To clear the memory, press H.
To display the result of your calculation, press the Enter key.
Legal notice
© 2005 Research In Motion Limited. All rights reserved. The BlackBerry and RIM families of related marks, images and symbols are the exclusive properties and trademarks of Research In Motion Limited. RIM, Research In Motion, 'Always On, Always Connected' and BlackBerry are registered with the U.S. Patent and Trademark Office and may be pending or registered in other countries.
Microsoft and Outlook are registered trademarks of Microsoft Corporation in the United States and/or other countries. IBM, Lotus, Domino, and Lotus Notes are trademarks of IBM in the United States. Novell and GroupWise are registered trademarks of Novell, Inc. in the United States and other countries. JavaScript is a trademark or registered trademark of Sun Microsystems, Inc. in the U.S. or other countries.
All other brands, product names, company names, trademarks, and service marks are the properties of their respective owners.
The BlackBerry handheld and/or associated software are protected by copyright, international treaties, and various patents, including one or more of the following U.S. patents: 6,278,442; 6,271,605; 6,219,694; 6,075,470; 6,073,318; D445,428; D433,460; D416,256. Other patents are registered or pending in various countries around the world. Visit www.rim.com/patents.shtml for a current listing of applicable patents.
This document is provided "as is" and Research In Motion Limited (RIM) assumes no responsibility for any typographical, technical, or other inaccuracies in this document. RIM reserves the right to periodically change information that is contained in this document; however, RIM makes no commitment to provide any such changes, updates, enhancements, or other additions to this document to you in a timely manner or at all. RIM MAKES NO REPRESENTATIONS, WARRANTIES, CONDITIONS, OR COVENANTS, EITHER EXPRESS OR IMPLIED (INCLUDING, WITHOUT LIMITATION, ANY EXPRESS OR IMPLIED WARRANTIES OR CONDITIONS OF FITNESS FOR A PARTICULAR PURPOSE, NON-INFRINGEMENT, MERCHANTABILITY, DURABILITY, TITLE, OR RELATED TO THE PERFORMANCE OR NON-PERFORMANCE OF ANY SOFTWARE REFERENCED HEREIN, OR PERFORMANCE OF ANY SERVICES REFERENCED HEREIN). IN CONNECTION WITH YOUR USE OF THIS DOCUMENTATION, NEITHER RIM NOR ITS AFFILIATED COMPANIES AND THEIR RESPECTIVE DIRECTORS, OFFICERS, EMPLOYEES, OR CONSULTANTS SHALL BE LIABLE TO YOU FOR ANY DAMAGES WHATSOEVER BE THEY DIRECT, ECONOMIC, COMMERCIAL, SPECIAL, CONSEQUENTIAL, INCIDENTAL, EXEMPLARY, OR INDIRECT DAMAGES, EVEN IF RIM HAS BEEN ADVISED OF THE POSSIBILITY OF SUCH DAMAGES, INCLUDING, WITHOUT LIMITATION, LOSS OF BUSINESS REVENUE OR EARNINGS, LOST DATA, DAMAGES CAUSED BY DELAYS, LOST PROFITS, OR A FAILURE TO REALIZE EXPECTED SAVINGS.
This document might contain references to third-party sources of information and/or third-party web sites ("Third-Party Information"). RIM does not control, and is not responsible for, any Third-Party Information, including, without limitation, the content, accuracy, copyright compliance, legality, decency, links, or any other aspect of Third-Party Information. The inclusion of Third-Party Information in this document does not imply
endorsement by RIM of the third party in any way. Any dealings with third parties, including, without limitation, compliance with applicable licenses, and terms and conditions are solely between you and the third party. RIM shall not be responsible or liable for any part of such dealings.
You are solely responsible for the selection, implementation, and performance of any third-party applications that you use with the handheld or desktop software. Research In Motion does not in any way endorse or guarantee the security, compatibility, performance, or trustworthiness of any third-party application and shall have no liability to you or any third-party for issues arising from such third-party applications.
Index
A
accept
meeting invitation 38
service books 69
accessibility, default volume 25
adding
applications 31
auto signature 9
call notes 25
contacts 33
contacts from attachments 15
contacts to messages 7
meeting invitees 39
members to mailing lists 33
multiple contacts to filters 10
pauses and waits 34
ring tones 31, 32
See also creating
address book
customizable fields 91
managing remote search results 35
searching remote 34
updating contacts from attachments 15
See also contacts
address book attachments
about 15
adding 7
opening 15
addresses
image 28
link 28
web page 27
alarm
frequently asked questions 45
notification 45
reminders and power off 55
setting 45
setting date and time in 49
silencing 45
snooze 45
turning off 45
volume 45
weekend notification 45
alpha-dialing 24
answering calls 23
applications
adding 31
deleting 31
downloading 31
frequently asked questions 32
switching between 97
third-party and data transmission 64
viewing details 31
viewing list 31
appointments
changing 38
deleting 38
number of 91
opening 38
recurring 37
scheduling 37
scheduling quickly 37
area codes, setting default 25
attachments
adding contacts from 15
opening 15
tips 99
updating contacts from 15
See also file attachments; address book
attachments; images
auto signature
about 9
adding 9
AutoText
creating entries 21
deleting entries 21
editing entries 21
example 21
inserting macros 22
specified case and smartcase 21
using 21
viewing entries 21
available features 71
B
backlight
configuring 53
using 53
backup
about 19
type of handheld data backed up 19
battery
about 55
extending life 55
level 55
book icon, See service books
bookmarks
adding folders 29
available offline 88
changing 29
creating 29
deleting 29
moving 29
organizing 29
renaming folders 29
BrickBreaker
paddle speed 67
playing 67
tips 67
browser
about 27
changing content type 87
changing home page 87
clearing cache 29
closing 28
controlling scripts 88
frequently asked questions 87
hiding 28
home page 27
JavaScript support 88
navigating 27
receiving content from web applications 31
requirements for using 87
selecting content 27, 87
sending images 28
sending links 28
sending web page address 28
tips 100
using queue 88
viewing content 27, 87
viewing history 27
viewing images 28
See also web pages
browser push
about 31
enabling 31
notification options 31
C
cache, browser 29
calculator
converting measurements 47
memory 47
tips 101
calendar
about 37
changing default reminder length 38
changing first day of week 93
changing views 37
default view 37
expand hours shown 93
frequently asked questions 93
navigating 93
reminders and power off 55
restrictions for Lotus Notes users 93
scheduling appointments 37
scheduling appointments quickly 37
scheduling meetings 38
setting notification for 51
synchronizing 17
tips 101
today 37
view agenda 37
view day 37
view month 37
view week 37
viewing next or previous 37
viewing specific date 37
call logs
adding notes 25
deleting notes 25
editing notes 25
forwarding notes 25
using 24
calls
alternating between 24
answering 23
default volume 25
dialing using letters 24
ending 23
ignoring 23
logging 24
making 23
making from Home screen 85
making using speed dial 23
reset timers 25
setting notification for 51
smart dialing 25
See also phone
categories
about 33, 41, 43
applying 34, 42, 43
clearing all 91
creating 34, 41, 43
deleting 34, 42, 43
viewing contacts by 34
viewing memos by 43
viewing tasks by 42
changing
appointments 38
bookmarks 29
browser content type 87
browser home page 87
calendar views 37
date 49
default calendar reminder 38
first day of week in calendar 93
handheld password 61
mailing list members 33
meeting invitees 39
meetings 38
message recipients8
message status 8
messages 8
task status 41
time 49
See also editing; setting
checking voice mail 23
clearing
all categories 91
browser cache 29
fields 97
handheld data 64
conflicts, with mailbox data 83
contacts
adding 33
adding from company address book 34
adding to messages 7
allowing duplicate 91
applying categories 34
assigning speed dial 24
calling 23
categories 33
clearing all categories 91
creating categories 34
deleting 33
deleting categories 34
editing 33
frequently asked questions 91
managing remote search results 35
number of 91
searching in remote address book 34
sorting 91
synchronizing 17
viewing 33
viewing by category 34
See also address book
content compression
about 62
enabling 62
content protection
about 62
enabling 62
converting measurements 47
copying
passwords 64
text 21
country codes, setting default 25
creating
AutoText entries 21
bookmarks 29
categories 34, 41, 43
filters 10
filters quickly 10
generic filters 76
links 74
mailing lists 33
messages 7
profiles 51
random passwords 63
tasks 41
See also adding
cursor speed, setting 22
customizing, See setting
cutting text 21
D
date, setting 49
decline meeting invitation 38
default
length of calendar reminder 38
profiles 51
deleted items, emptying folder 84
deleting
appointments 38
AutoText entries 21
bookmarks 29
call notes 25
categories 34, 42, 43
contacts 33
downloaded ring tones 51
filters 10
images 29
mailing lists 33
meetings 38
memos 43
message reconciliation 17
messages 8
multiple messages 8
over the wireless network 17
password keeper passwords 63
prior messages 8
profiles 51
remote address book search results 35
saved searches 13
service books 69
speed dial 24
tasks 41
theme 53
third-party applications 31
See also removing
dialing
add pause 34
add wait 34
using letters 24
disabling
alarm 45
filters 10
handheld password 61
display
options 53
distribution lists, See mailing lists
downloading
applications 31
frequently asked questions 32
preview ring tones 32
ring tones 31
draft messages, saving 7
E
editing
AutoText entries 21
call notes 25
contacts 33
filters 10
mailing lists 33
memos 43
password keeper passwords 63
profiles 51
saved searches 13
speed dial 24
task status 41
tips 98
See also setting, changing
email, See messages
emptying deleted items folder 84
enabling
alarm snooze 45
browser push 31
content compression 62
content protection 62
filters 10
handheld password 61
VPN 59
encryption keys
about 63
regenerating 63
ending, calls 23
escalating volume 52
extending battery life 55
F
file attachments
about 15
changing display of 80
file information 80
frequently asked questions 79
images 15
increasing detail in images 16
memory use 80
navigating 15
opening 15
opening table of contents 15
paning images 16
password protected 80
receiving more of long attachments 80
requirements for viewing 79
retrieving embedded content 15
rotating images 16
searching within 80
showing tracked changes 81
skipped content 81
supported file formats 15
viewing spreadsheet cells 80
zooming images 16
filing messages 8, 74
filters
about 9
adding multiple contacts 10
based on sender 10
creating 10
creating generic 76
creating quickly 10
frequently asked questions 76
managing 10
order of 10
filters, See filters
finding
phone number 23
software version 71
firewall 64
folder redirection, setting 10
folders
adding for bookmarks 29
available for message redirection 76
changing 76
collapsing 8, 29
expanding 8, 29
redirecting messages from 10, 84
redirecting sent items 11
renaming for bookmarks 29
viewing filed messages 8
font, setting 53
forwarding
call notes 25
messages 8
frequently asked questions
alarm 45
applications 32
automatic wireless backup 19
browser 87
calendar 93
contacts 91
downloading 32
file attachments 79
filters 76
memos 43
message redirection 73
messages 73
phone 85
security 95
synchronization 83
tasks 42
typing 22
full content, opening 15
G
generating new encryption keys 63
groups, See mailing lists
H
handheld
backing up data 19
changing folders on 76
resetting 55
restoring 19
silencing 51
turning off automatically 55
turning on automatically 55
handheld data
backed up during wireless backup 19
clearing 64
reducing size 95
restoring 95
handheld password
about 61
changing 61
disabling 61
setting 61
hiding
applications 97
browser 28
tracked changes in attachments 81
high importance, setting 7
home page, viewing 27
|
ignoring calls 23
images
address 28
copying addresses 28
deleting 29
opening 15, 29
saving 28
selecting 27, 87
sending from browser 28
showing placeholders on web pages 28
viewing in browser 28
importance, setting 7
increasing detail in images 16
inserting macros in AutoText entries 22
invitation, responding to 38
K
key rate, setting 22
key tones, enabling 22
keyboard lock 62
keys, encryption 63
L
light 53
links
address 28
copying addresses 28
creating 74
selecting 27, 87
sending from browser 28
using 74
loading programs 32
locking
handheld 62
keyboard 62
logging calls 24
logging in
VPN 59
M
mailbox
add out of office reply from handheld 9
conflicts 83
mailing lists
adding members 33
changing members 33
creating 33
deleting 33
deleting members 33
editing 33
viewing 33
viewing members 33
making
calls 23
marking messages opened and unopened 8
measurements, converting 47
meetings
changing 38
changing attendees 39
deleting 38
inviting attendees 39
number of 91
opening 38
recurring 38
removing attendees 39
requirements for creating 83
responding to invitations 38
scheduling 38
memory, changing cache size 80
memos
applying categories 43
categories 43
clearing all categories 91
creating categories 43
deleting 43
deleting categories 43
editing 43
number of 91
synchronizing 17
viewing 43
viewing by category 43
writing 43
message reconciliation
about 17
deleted messages 17
handling conflicts 83
over the wireless network 17
requirements for using 83
with personal folders 84
message redirection
frequently asked questions 73
redirecting from folders 10, 76, 84
messages
adding contacts 7
adding signature 9
changing 8
deleting 8, 75
deleting multiple 8
different icons 75
filing 8, 74
filtering 76
forwarding 8
frequently asked questions 73
from a specific service 7
marking opened 8
marking unopened 8
opening 7
preloaded on handheld 74
receiving more of long messages 74
redirecting from folders 10, 76, 84
requirements for filing 74
resending 8
restricting 76
saving draft 7
saving sent 9
searching 13
searching by recipient 13
searching by sender 13
searching by subject 13
sending 7
sending images in 28
sending links in 28
sending web page addresses in 28
setting importance 7
setting notification for 51
setting search criteria 13
stop forwarding 76
stop from sending 74
tips 98
viewing filed 8
viewing longer subject line 75
moving
bookmarks 29
message filter position 10
speed dial contact 24
N
navigating
browser 27
calendar 93
file attachments 15
tips 97
notification profiles, See profiles
notification, for browser push 31
numbers
finding phone 23
0
opening
address book attachments 15
appointments 38
file attachments 15
images 15, 28, 29
meetings 38
messages 7
tasks 41
See alsoviewing
order, filters 10
organizing bookmarks 29
out of office reply
about 9
disabling automatically 9
setting 9
owner information, setting 64
P
paning images 16
password keeper
about 63
changing password 64
copying passwords 64
deleting passwords 63
editing passwords 63
options 95
viewing passwords 63
password protected attachments 80
passwords
copying 64
creating random 63
displaying in password keeper 95
keeping 63
preventing copying 95
random 95
storing 63
See also handheld password
pasting text 21
pause, adding 34
personal folders, reconciling with 84
phone
assigning speed dial 24
checking voice mail 23
dialing using letters 24
finding number 23
frequently asked questions 85
set default country and area codes 25
smart dialing 25
tips 99
using other applications 24
using speed dial 23
using when handheld is locked 85
voice mail 25
volume 24
See also calls
phone calls, See calls
PIN messages
frequently asked questions 73
viewing longer subject line 75
power
about 55
turning off 55
turning off automatically 55
turning on automatically 55
preview ring tones 32
priority of messages, setting 7
profiles
about 51
alarm 45
creating 51
deleting 51
editing 51
enabling 51
escalating volume 52
See also ring tones
programs, loading 32
protecting handheld content 62
R
recalling saved searches 13
recipient, searching by 13
recurring appointments, See appointments
recurring meetings, See meetings
redirecting messages 10, 76
reducing data size 62, 95
refreshing web pages 27
reminders
calendar 38
power off 55
remote address book search 34
removing
meeting invitees 39
See also deleting
replying
messages 8
requirements
browser 87
filing messages 74
message reconciliation 83
viewing file attachments 79
wireless PIM synchronization 83
resending
messages 8
resetting
call timers 25
handheld 55
restoring
about 19
deleted service books 69
handheld 95
handheld data 19
ring tones
adding 31, 32
deleting 51
downloading 31
listening 51
previewing 32
showing 51
testing 51
See also profiles
rotating images 16
S
saving
draft messages 7
images 28
searches 13
sent messages 9
web page requests 29
web pages 29
scheduling
appointments 37
appointments quickly 37
meetings 38
screen
home screen background 53
lighting 53
options 53
scrolling
horizontally in attachments 15
in opposite direction 98
through calendar views 93
search criteria, setting 13
searches
deleting saved 13
editing saved 13
recalling saved 13
saving 13
viewing last 13
viewing saved 13
searching
about 13
across the handheld 13
by recipient 13
by sender 13
by subject 13
remote address book 34
set search criteria 13
tips 97
within attachments 80
security
additional features 95
Certificate Servers 95
Certificates 95
changing handheld password 61
content compression 62
content protection 62
disabling handheld password 61
encryption keys 63
firewall settings 64
frequently asked questions 95
Key Stores 95
locking handheld 62
Memory Cleaning 95
password keeper 63
regenerating encryption keys 63
S/MIME 95
self tests 64, 95
storing passwords 63
third-party applications 64
TLS 29
verify software 64
WTLS 29
sender, searching by 13
sending
address book attachments 7
images in messages 28
links in messages 28
messages 7
messages from a specific service 7
web page addresses 28
sent items
redirecting to handheld 11
saving 9
viewing 8
service books
about 69
accepting 69
deleting 69
receiving 69
restoring deleted 69
viewing 69
service, sending messages from specific 7
setting
alarm 45
alarm volume 45
cursor speed 22
date 49
default volume for calls 25
folder redirection 10
font 53
handheld password 61, 62
home screen background 53
importance level of messages 7
out of office reply from handheld 9
owner information 64
profiles 51
search criteria 13
theme 53
time 49
TLS 89
voice mail options 25
WTLS 89
See also editing; changing
showing
applications 97
tracked changes 81
silencing
alarm 45
handheld 51
skipped content 81
smart dialing
about 25
default area code 25
default country code 25
smartcase, definition 21
snooze
enabling 45
using 45
software version 71
sounds, See profiles
specified case, definition 21
speed dial
assign letters 24
assigning to contact 24
deleting 24
editing 24
moving contact 24
using 23
viewing list 24
spreadsheet attachment 80
subject
searching by 13
viewing more of 75
switching tasks 97
synchronization
frequently asked questions 83
over the wireless network 18
synchronizing
calendar 17
contacts 17
memos 17
messages, See message reconciliation
tasks 17
T
table of contents, opening for file attachments 15 task switcher 97
tasks
applying categories 42
categories 41
changing status of 41
clearing all categories 91
creating 41
creating categories 41
deleting 41
deleting categories 42
frequently asked questions 42
number of 91
opening 41
setting notification for 51
switching 97
synchronizing 17
viewing by category 42
text
cutting or copying 21
pasting 21
tips for editing 98
theme
deleting 53
setting 53
third-party applications 64
time
setting 49
timers, resetting 25
tips
for attachments 99
for calculator 101
for calendar 101
for changing options 97
for clearing fields 97
for editing text 98
for messages 98
for navigating screens 97
for searching 97
for typing 21, 98
for using the browser 100
for using the phone 99
home screen shortcuts 22
on Home screen 97
TLS
about 29
setting 89
tracked changes, viewing 81
transport layer security, See TLS
tunes, See ring tones; profiles
turning off
alarm 45
handheld automatically 55
wireless radio 57
turning on
handheld automatically 55
wireless radio 57
typing
CAP lock 22
copy text 21
cut text 21
enabling tones 22
frequently asked questions 22
home screen shortcuts 22
NUM lock 22
paste text 21
setting cursor speed 22
tips 21, 98
using AutoText 21
U
unlocking
handheld 62
keyboard 62
user-defined fields 91
v
version, software 71
viewing
application details 31
AutoText entries 21
by category 34, 42, 43
contacts 33
filed messages 8
filters 10
list of applications 31
mailing lists 33
memos 43
next and previous web pages 27
password keeper passwords 63
saved searches 13
sent items 8
service books 69
specific date in calendar 37
speed dial list 24
spreadsheets 16
table of contents of file attachments 15
terms of last search 13
See also opening
voice mail
checking 23
setting options 25
VoIP
about 60
enabling 60
volume
adjusting for phone 24
alarm 45
escalating 52
setting default for calls 25
VPN
about 59, 60
enabling 59
enabling VPN 59
loggin in 59
W
wait, adding 34
web pages
address 27
animated graphics 88
canceling requests 27
copying addresses 28
opening 27
refreshing 27
saving 29
saving requests 29
select mode 27, 87
sending addresses 28
setting notification for 51
showing placeholders 28
submitting forms 88
view mode 27, 87
viewing home page 27
viewing next and previous 27
See also browser
wireless
backup 19
message reconciliation 17
wireless PIM synchronization
about 17
requirements 83
setting 18
wireless radio
turning off 57
turning on 57
wireless transport layer security, SeeWTLS
WLAN
about 59
configuring 59
connecting automatically 60
connecting manually 60
connecting to a preferred 60
worksheet, selecting in attachments 16
WTLS
about 29
setting 89
Z
zooming images 16
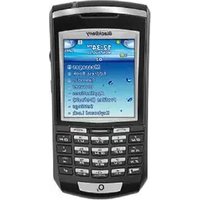
- Contents
- Messages
- Open a message
- Send a message
- Notes:
- Save draft messages
- Add contacts to a message
- Set the importance level
- Change sent messages
- Manage messages
- File messages
- Related topics
- View filed messages
- Note:
- Delete multiple messages at one time
- Related topic
- Mark a message as opened or unopened
- Save a copy of messages sent from the handheld
- About auto signatures
- Add an auto signature
- About out of office reply
- Set an out of office reply
- About filters
- Create a filter
- Use filters
- Create a filter quickly
- About folder redirection
- Set folder redirection
- Search
- About search
- Search the messages list
- Use saved searches
- Search for a specific contact
- Search for a subject
- Search the handheld
- Attachments
- About attachments
- Use address book attachments
- Open a file attachment
- Open an image attachment
- Navigate attachments
- Synchronizing data
- About message reconciliation
- Set wireless message reconciliation
- Reconcile deleted messages
- About PIM synchronization
- Set wireless PIM synchronization
- Backing up and restoring handheld data
- About backing up handheld data
- About restoring handheld data
- Typing
- Use AutoText
- Create an AutoText entry
- Change AutoText entries
- Cut or copy text
- Paste text
- Typing tips
- Enable tones when pressing keys
- Set the cursor speed
- Typing – frequently asked questions
- What is the Insert Macro menu item?
- Why can't I use shortcuts on the Home screen?
- Phone
- Find your phone number
- Make a call
- Use speed dial
- Check your voice mail
- Answer a call
- Mute a call
- Adjust the phone volume
- Phone features
- Dial using letters
- Assign a speed dial letter
- Assign a speed dial number to a contact in your address book
- Change speed dial assignments
- Log calls
- Use call logs
- About smart dialing
- Set default country and area codes
- Set voice mail options
- About default call volume
- Set the default call volume
- Reset call timers
- Browser
- About the browser
- Go to a web page
- Use the browser
- View images
- Copy a link, image, or web page address
- Send a link or image in a message
- Save an image
- Manage saved images
- Save web page requests
- Create a bookmark
- Change bookmarks
- Organize bookmarks into folders
- Clear the browser caches
- About TLS
- About WTLS
- Downloading
- Download an application
- Manage applications
- Download a ring tone
- About browser push
- Enable browser push
- Downloading – frequently asked questions
- Why can't I load a new program onto my handheld?
- Why did a new program appear on my handheld?
- Can I listen to a ring tone before I download it?
- Contacts
- Add a contact
- Manage contacts
- Create a mailing list
- Manage mailing lists
- About categories
- Create a category
- Apply categories to contacts
- View contacts by category
- Delete categories
- Add a pause or wait
- About remote address book search
- Add contacts from your company address book
- Manage remote address book search results
- Calendar
- About the calendar
- Change the calendar view
- Use the calendar
- Schedule an appointment
- Schedule an appointment quickly
- Change the default reminder time
- Schedule a meeting
- Manage appointments and meetings
- Respond to meeting invitations
- Change meeting participants
- Tasks
- Create a task
- Use tasks
- Change task status
- Apply categories to tasks
- View tasks by category
- Tasks – frequently asked questions
- Memos
- Write a memo
- Use memos
- Apply categories to memos
- View memos by category
- Memos – frequently asked questions
- Alarm
- Set the alarm
- Set the alarm volume
- Silence the alarm
- Turn off the alarm
- Alarm – frequently asked questions
- Why didn't my alarm notify me on a Saturday or Sunday?
- Can I set a snooze feature for my alarm?
- Calculator
- Use the calculator memory
- Copy and paste a calculation
- Convert measurements
- Date and time
- Set the date and time
- Profiles
- Set profiles
- Create a notification profile
- Use notification profiles
- Manage downloaded ring tones
- Silence your handheld
- What is the escalating volume level?
- Screen display
- Use the handheld in the dark
- Set the Home screen background image
- Set the font
- Apply a theme to your handheld
- Delete themes
- Power and battery
- About power off and reminders
- Turn the handheld on and off automatically
- Check the battery level
- Extend battery life
- Reset the handheld
- Network coverage – frequently asked questions
- Turn the wireless radio on and off
- Network configuration
- About VPN
- Enable VPN
- Log in to a VPN
- About WLAN
- Set WLAN configurations
- Connect to a WLAN automatically
- Connect to a preferred WLAN
- About VoIP
- Enable VoIP
- Security
- About the handheld password
- Set a handheld password
- Change the handheld password
- Disable the handheld password
- Lock the handheld
- About keyboard lock
- Lock the keyboard
- About content protection and compression
- Protect your handheld content
- Reduce handheld content size
- About encryption keys
- Regenerate encryption keys
- About the password keeper
- Store a password
- Create a random password
- Use the password keeper
- Copy a password
- Warning:
- About security self tests
- Verify security software
- About firewall settings
- Prevent third-party applications from transmitting data
- Clear the handheld
- Set owner information
- BrickBreaker
- Play BrickBreaker
- How do I set the speed of the paddle?
- How do I set the paddle to accelerate as I roll the trackwheel?
- Service books
- About service books
- Receive new service books
- Accept a new service book
- Manage service books
- Restore a deleted service book
- Frequently asked questions
- Why are some of the features described not available on my handheld?
- What software version do I have on my handheld?
- Messages – frequently asked questions
- Why can't I send messages?
- Why can't I receive messages?
- Why is the menu option to send a message not available?
- Can I stop a message from being sent?
- Why are some messages already on my handheld?
- How do I create and use links in messages?
- Why is "More available" appearing at the end of my message?
- Can I file messages?
- Why can't I see a new message in the messages list even though I received notification?
- Why is there a different icon beside some items in the messages list?
- How do I show more of a subject line for my messages?
- Can I remove the prompt that appears before I delete messages?
- Why were some of my messages deleted from the handheld?
- How do I change how long messages remain in the messages list?
- How do I restrict the types of messages that are sent to my handheld?
- How do I create a generic filter?
- Why are some messages sent to my handheld even though I have created a filter?
- Why can't I specify some folders from which messages are redirected?
- How do I make changes to the folders on my handheld?
- How do I stop messages from being sent to my handheld?
- Attachments – frequently asked questions
- Can I view file attachments on my handheld?
- Why are some file attachment features not available on my handheld?
- How do I view password-protected file attachments?
- How do I view information about attached files?
- Can I set the amount of memory that my handheld uses for file attachments?
- How do I change how file attachments are displayed?
- How do I view cell contents in spreadsheet attachments?
- Why is "More available" appearing at the end of my file attachment?
- How do I search for text within a file attachment?
- What does skipped content mean?
- Can I see tracked changes in document attachments?
- Synchronization – frequently asked questions
- Can I reconcile messages over the wireless network?
- Can I synchronize PIM items over the wireless network?
- How do I handle conflicts between my handheld and mailbox?
- Why are some of my messages not reconciling over the wireless network?
- Can I reconcile with my personal folders?
- Can I remotely empty the deleted messages folder on my computer?
- Phone – frequently asked questions
- Why can I not make calls?
- Why am I no longer receiving calls?
- How do I make calls from the Home screen?
- Can I use the phone when the handheld or keyboard is locked?
- Can I set the Phone to display frequently called numbers?
- How do I stop my handheld from answering or ending calls automatically?
- Browser – frequently asked questions
- Why is there no browser available on my handheld?
- Can I use the BlackBerry Browser?
- How do I change the browser home page?
- How do I change the type of content that the browser accepts?
- How do I select images and text on a web page?
- Can I override the character set encoding of web pages?
- What is the Available Offline check box that appears when I'm adding a bookmark?
- Can I view web pages that contain JavaScript or animated graphics?
- Why did the web page form not submit?
- How do I use the browser queue?
- How do I control when scripts are run on my handheld?
- On my browser home page, when I hold the Escape button, the application closes. Can I change this?
- What options can I set for WAP Browser security?
- What options can I set for BlackBerry Browser security?
- Contacts – frequently asked questions
- How do I add multiple contacts with the same name to my contact list?
- Can I change how my contacts, tasks, or memos are displayed?
- What are the User 1, User 2, User 3, and User 4 fields on the New Address screen?
- Can I clear all the categories that apply to a contact, task, or memo?
- Can I remove the prompt that appears before I delete contacts, calendar entries, tasks, or memos?
- How do I know how many contacts, calendar entries, tasks, or memos I have saved?
- Calendar – frequently asked questions
- Are there any restrictions for using the calendar with Lotus Notes®?
- How do I expand the number of hours that are shown in the calendar?
- How do I change the day of the week that is shown first when viewing the calendar in Week view?
- How do I scroll through the calendar in each view?
- How do I change how long appointments remain in the handheld calendar?
- Security – frequently asked questions
- What does the Verifying Security Software dialog box mean when I restart my handheld?
- How do I restore my handheld after clearing it?
- How do I reduce the size of data stored on my handheld?
- How do I prevent passwords from accidentally being copied to the clipboard?
- How do I specify the criteria for randomly generated passwords?
- Why do additional security features appear in the handheld options?
- How do I prevent passwords from appearing on the screen in the password keeper?
- Tips
- Home screen
- Searching
- Options and fields
- Navigating screens
- Editing text
- Legal notice
- Index
- A
- B
- C
- call logs
- calls
- categories
- changing
- D
- deleting
- dialing
- disabling
- display
- E
- editing
- enabling
- encryption keys
- F
- folders
- G
- H
- |
- K
- L
- M
- meetings
- moving
- N
- 0
- P
- R
- S
- TLS
- U
- v
- viewing
- W
Brand : BLACKBERRY
Model : 7270
Category : Mobile Phone