
RAC-09CH7 - Air conditioner HITACHI - Free user manual and instructions
Find the device manual for free RAC-09CH7 HITACHI in PDF.


| Product Type | Split Air Conditioner |
| Brand | Hitachi |
| Model | RAC-09CH7 |
| Cooling Capacity | 2.5 kW (approx. 9,000 BTU/h) |
| Power Supply | 220-240V, 50Hz, 1 Phase |
| Rated Cooling Current | 4.5 A |
| Dimensions (Indoor Unit) | 790 x 290 x 210 mm (WxHxD) |
| Dimensions (Outdoor Unit) | 660 x 530 x 280 mm (WxHxD) |
| Weight (Indoor Unit) | 9 kg |
| Weight (Outdoor Unit) | 25 kg |
| Refrigerant Type | R410A |
| Air Flow Rate (Indoor) | 650 m³/h (max) |
| Noise Level (Indoor) | 32-42 dB(A) |
| Noise Level (Outdoor) | 52 dB(A) |
| Energy Efficiency Ratio (EER) | 3.5 |
| Operating Modes | Cooling, Fan, Dehumidify |
| Air Filter | Washable, removable for cleaning |
| Remote Control | Yes, infrared |
| Timer Function | 24-hour programmable timer |
| Sleep Mode | Yes |
| Self-Diagnosis | Indicator lights for error codes |
| Maintenance | Clean filter every 2 weeks; professional service annually |
| Safety Features | Overload protection, auto restart after power failure |
| Spare Parts Availability | Filters, remote control, fan motors through authorized service |
Frequently Asked Questions - RAC-09CH7 HITACHI
User questions about RAC-09CH7 HITACHI
0 question about this device. Answer the ones you know or ask your own.
Ask a new question about this device
Download the instructions for your Air conditioner in PDF format for free! Find your manual RAC-09CH7 - HITACHI and take your electronic device back in hand. On this page are published all the documents necessary for the use of your device. RAC-09CH7 by HITACHI.
USER MANUAL RAC-09CH7 HITACHI
SPLIT TYPE AIR CONDITIONER
To obtain the best performance and ensure years of trouble free use, please read this instruction manual completely.
- Please read the "Safety Precaution" carefully before operating the unit to ensure correct usage of the unit.
- Pay special attention to signs of “Warning” and “Caution”. The “Warning” section contains matters which, if not observed strictly, may cause death or serious injury. The “Caution” section contains matters which may result in serious consequences if not observed properly. Please observe all instructions strictly to ensure safety.
● The sign indicate the following meanings.
| Make sure to connect earth line. | The sign in the figure indicates prohibition. |
| Indicates the instructions that must be followed. |
- Please keep this manual after reading.
PRECAUTIONS DURING INSTALLATION
| WARNING | ● Do not reconstruct the unit.Water leakage, fault, short circuit or fire may occur if you reconstruct the unit by yourself. |  |
| ● Please ask your sales agent or qualified technician for the installation of your unit. Water leakage, short circuit or fire may occur if you install the unit by yourself. | ||
| ● Please use earth line.Do not place the earth line near water or gas pipes, lightning-conductor, or the earth line of telephone. Improper installation of earth line may cause electric shock. |  | |
| CAUTION | ● A circuit breaker should be installed depending on the mounting site of the unit. Without a circuit breaker, the danger of electric shock exists. | 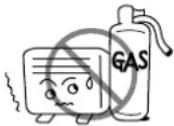 |
| ● Do not install the unit near a location where there is flammable gas.The outdoor unit may catch fire if flammable gas leaks around it. | ||
| ● Please ensure smooth flow of water when installing the drain hose. |
PRECAUTIONS DURING SHIFTING OR MAINTENANCE
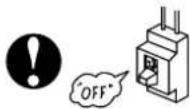
 | ● Should abnormal situation arises (like burning smell), please stop operating the unit and turn off the circuit breaker. Contact your agent. Fault, short circuit or fire may occur if you continue to operate the unit under abnormal situation. | 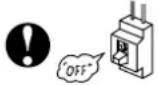 |
| ● Please contact your agent for maintenance. Improper self maintenance may cause electric shock and fire. | ||
| ● Please contact your agent if you need to remove and reinstall the unit. Electric shock or fire may occur if you remove and reinstall the unit yourself improperly. |
PRECAUTIONS DURING OPERATION
| WARNING | ● Avoid an extended period of direct air flow for your health.  | |
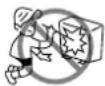 | ● Do not insert a finger, a rod or other objects into the air outlet or inlet. As the fan is rotating at a high speed, it will cause injury. Before cleaning, be sure to stop the operation and turn the breaker OFF. | |
● Do not use any conductor as fuse wire, this could cause fatal accident.  | ||
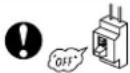 | ● During thunder storm, disconnect and turn off the circuit breaker. | |
● This unit has UV LED which emits ultra violet light. AVOID DIRECT EYE EXPOSURE.  | ||
PRECAUTIONS DURING OPERATION
- The product shall be operated under the manufacturer specification and not for any other intended use.
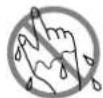
- Do not attempt to operate the unit with wet hands, this could cause fatal accident.
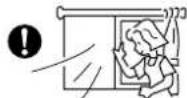
- When operating the unit with burning equipments, regularly ventilate the room to avoid oxygen insufficiency.
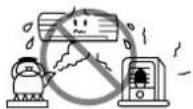
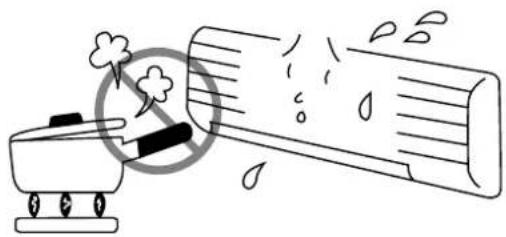
- Do not direct the cool air coming out from the air-conditioner panel to face household heating apparatus as this may affect the working of apparatus such as the electric kettle, oven etc.
- Please ensure that outdoor mounting frame is always stable, firm and without defect. If not, the outdoor unit may collapse and cause danger.
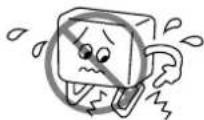
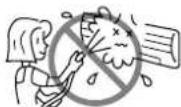
- Do not splash or direct water to the body of the unit when cleaning it as this may cause short circuit.
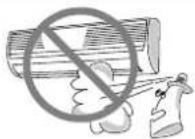
- Do not use any aerosol or hair sprays near the indoor unit. This chemical can adhere on heat exchanger fin and blocked the evaporation water flow to drain pan. The water will drop on tangential fan and cause water splashing out from indoor unit.
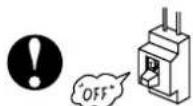
- Please switch off the unit and turn off the circuit breaker during cleaning, the high-speed fan inside the unit may cause danger.
- Turn off the circuit breaker if the unit is not to be operated for a long period.
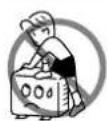
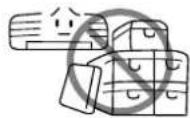
- Do not climb on the outdoor unit or put objects on it.
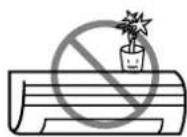
- Do not put water container (like vase) on the indoor unit to avoid water dripping into the unit. Dripping water will damage the insulator inside the unit and causes short-circuit.
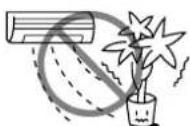
- Do not place plants directly under the air flow as it is bad for the plants.
- When operating the unit with the door and windows opened, (the room humidity is always above 80% ) and with the air deflector facing down or moving automatically for a long period of time, water will condense on the air deflector and drips down occasionally. This will wet your furniture. Therefore, do not operate under such condition for a long time.
- If the amount of heat in the room is above the cooling or heating capability of the unit (for example: more people entering the room, using heating equipments and etc.), the preset room temperature cannot be achieved.
INDOOR UNIT
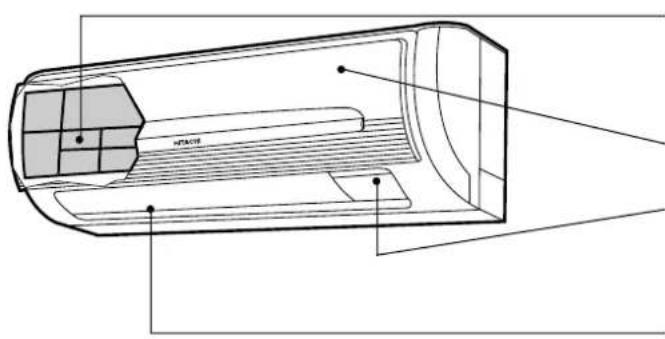
Air filter
To prevent dust from coming into the indoor unit. (Refer page 21)
Front panel
Indoor unit indicators
Light indicator showing the operating condition. (Refer page 5)
Horizontal deflector ● Vertical deflector (Air Outlet)
(Refer page 16)
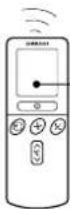
Remote controller
Send out operation signal to the indoor unit. So as to operate the whole unit. (Refer page 6)
OUTDOOR UNIT
RAC-07CH7
RAC-09CH7
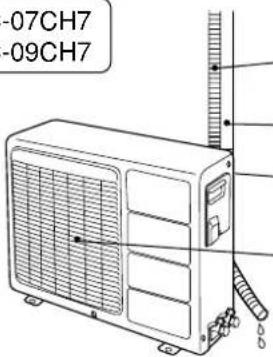
Drain pipe
Condensed water drain to outside.
Connecting cord and insulation pipe for piping
Air inlet (Back, Left side)
Air outlet
RAC-14CH7
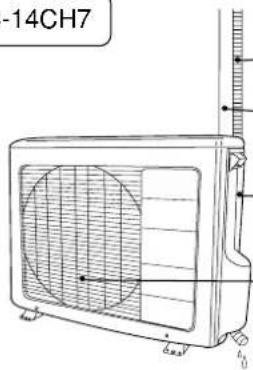
Drain pipe
Condensed water drain to outside.
Connecting cord and insulation pipe for piping
Air inlet (Back and Left side)
Air outlet
MODEL NAME AND DIMENSIONS

CAUTION
- When heating operation, drain or defrosted water flows out from outdoor unit. Don't close drain outlet portion in chilly area so as not to freeze these.
| MODEL | WIDTH (mm) | HEIGHT (mm) | DEPTH (mm) |
| RAS-07CH7/09CH7/14CH7 | 780 | 280 | 210 |
| RAC-07CH7/09CH7 | 700 | 570 | 210 |
| RAC-14CH7 | 750 | 570 | 280 |
INDOOR UNIT INDICATORS
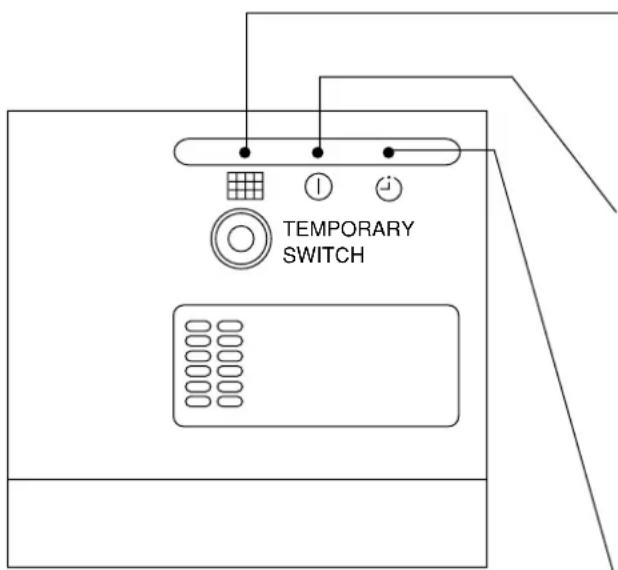
FILTER LAMP
When the device is operated for a total of about 100 hours, the FILTER lamp lights to indicate that it is time to clean the filter. The lamp goes out when the POWER SWITCH set to OFF and ON again.
OPERATION LAMP
This lamp lights during operation.
The OPERATION LAMP flashes in the following cases during heating.
(1) During preheating
For about 2–3 minutes after starting up.
(2) During defrosting
Defrosting will be performed about once every one hour when frost forms on the heat exchanger of the outdoor unit, for 5–10 minutes each time.
TIMER LAMP
This lamp lights when the timer is working.
OPERATION INDICATOR
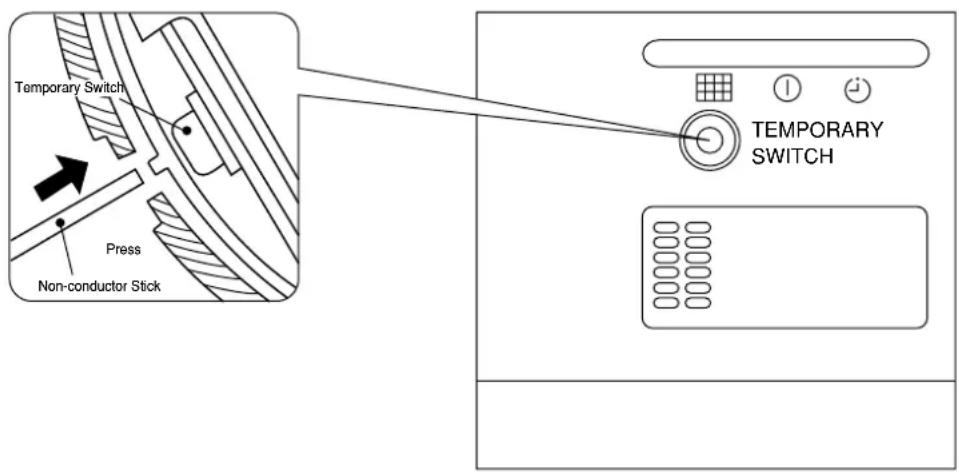
TEMPORARY SWITCH
Use this switch to start and stop when the remote controller does not work. [Use non-conductor stick (example toothpick)]
- By pressing the temporary switch, the operation is done in previously set operation mode.
- When the operation is done using the temporary switch after the power source is turned off and turn on again, the operation is done in automatic mode.
REMOTE CONTROLLER
- This controls the operation of the indoor unit. The range of control is about 7 meters. If indoor lighting is controlled electronically, the range of control may be shorter.
This unit can be fixed on a wall using the fixture provided. Before fixing it, make sure the indoor unit can be controlled from the remote controller. - Handle the remote controller with care. Dropping it or getting it wet may compromise its signal transmission capability.
- After new batteries are inserted into the remote controller, the unit will initially require approximately 10 seconds to respond to commands and operate.
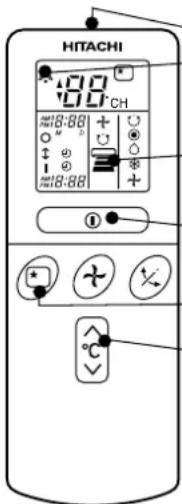
●Signal emitting window/transmission sign
Point this window toward the indoor unit when controlling it.
The transmission sign blinks when a signal is sent.
●Display
This indicates the room temperature selected, current time, timer status, function and intensity of circulation selected.
●START/STOP button
Press this button to start operation. Press it again to stop operation.
●SLEEP button
Use this button to set the sleep timer.
●TEMPERATURE buttons
Use these buttons to raise or lower the temperature setting. (Keep pressed, and the value will change more quickly.)
●TIME button
Use this button to set and check the time and date.
●RESET buttons
●FUNCTION selector
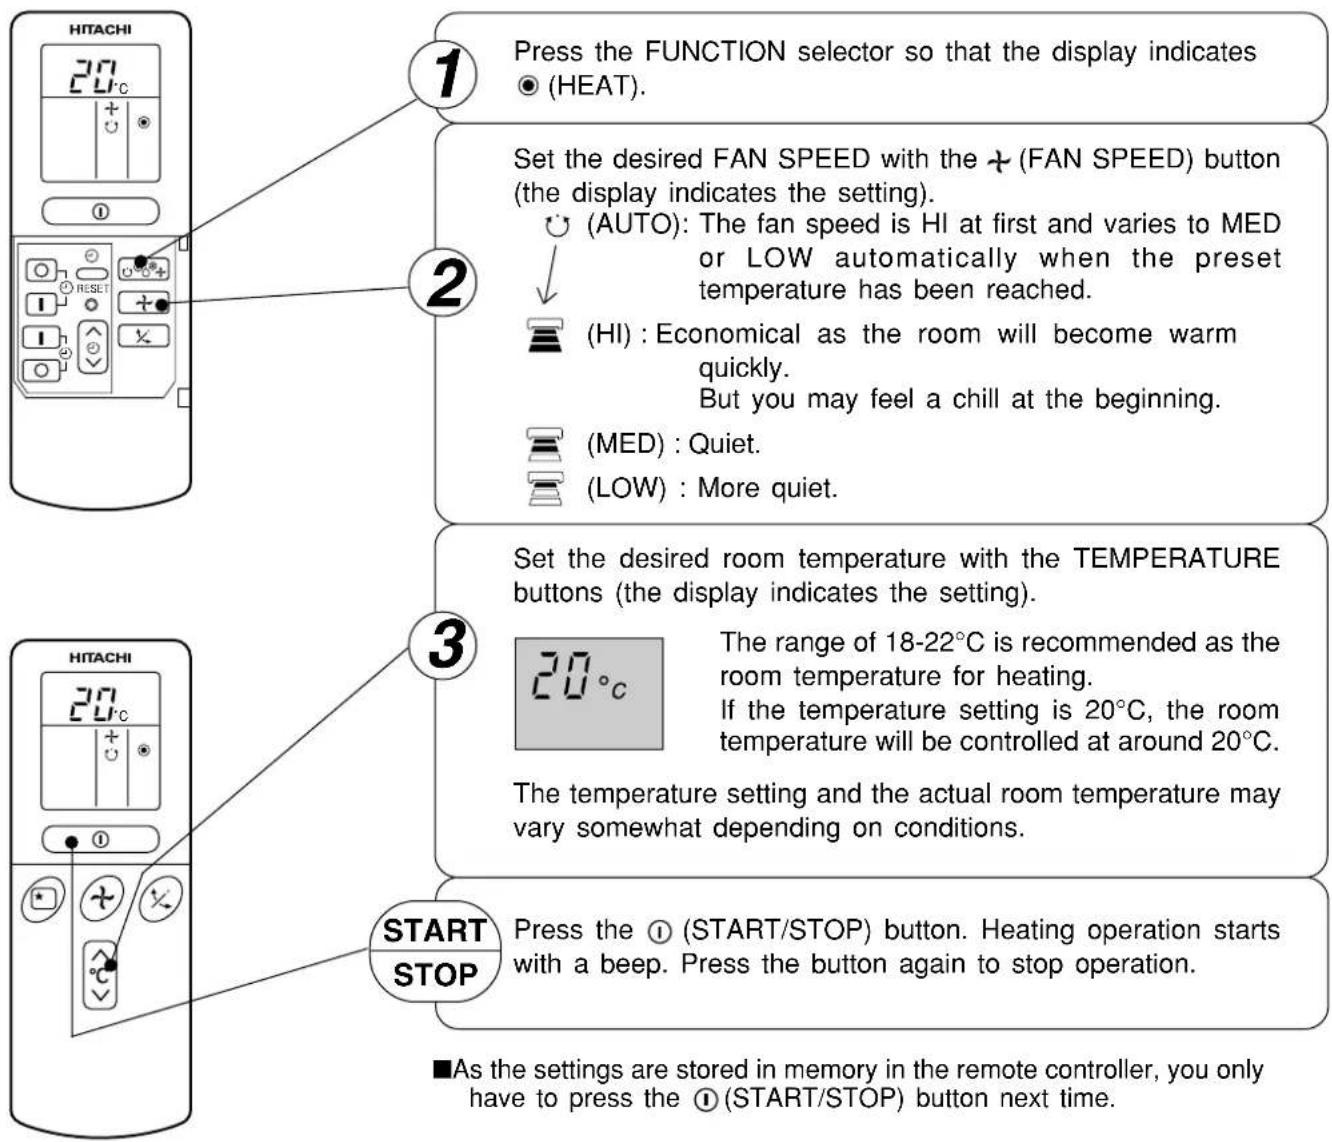
Use this button to select the operating mode. Every time you press it, the mode will change from ⬙ (AUTO) to ⭕ (HEAT) to ⭊ (DEHUMIDIFY) to ⬇ (COOL) and to ✝ (FAN) cyclically.
●FAN SPEED selector
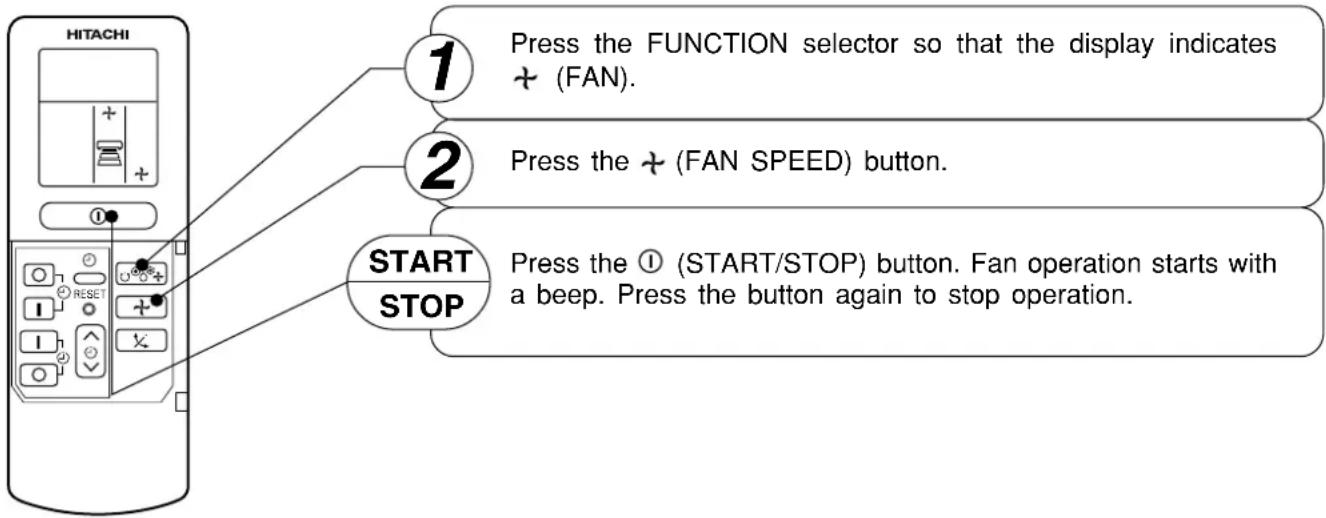
This determines the fan speed. Every time you press this button, the intensity of circulation will change from Ⓧ (AUTO) to ≡ (HI) to ≡ (MED) to ≡ (LOW) (during the + (FAN) mode, from ≡ HI to ≡ MED to ≡ LOW).
●AUTO SWING button
Controls the angle of the horizontal air deflector.
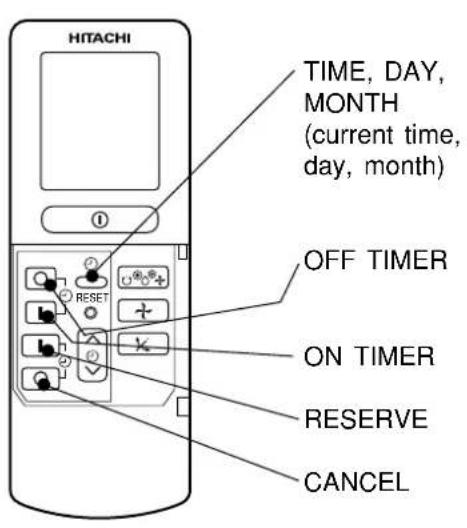
●TIMER control
Use this button to set the timer.
●OFF-TIMER button Select the turn OFF time.
●ON-TIMER button Select the turn ON time.
●RESERVE button Time setting reservation.
●CANCEL button Cancel time reservation.
| AUTO | |
| HEAT | |
| DEHUMIDIFY | |
| COOL | |
| FAN | |
| FAN SPEEDLOWMLDHI | |
| SLEEPING | |
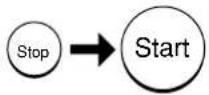
| STOP (CANCEL) | |
| START (RESERVE) | |
| START/STOP | |
| TIME | |
| TIMER SET | |
| TIMEH SELECTIONON TIMEROFF TIMER | |
| AUTO SWING |
Precautions for Use
●Do not put the remote controller in the following places.
●Under direct sunlight.
●In the vicinity of a heater.
●Handle the remote controller carefully. Do not drop it on the floor, and protect it from water.
- Once the outdoor unit stops, it will not restart for about 3 minutes (unless you turn the power switch off and on or unplug the power cord and plug it in again).
This is to protect the device and does not indicate a failure.
- If you press the FUNCTION selector button during operation, the device may stop for about 3 minutes for protection.
The device will automatically determine the mode of operation, HEAT, COOL or DEHUMIDIFY depending on the initial room temperature. The selected mode of operation will not change when the room temperature varies.
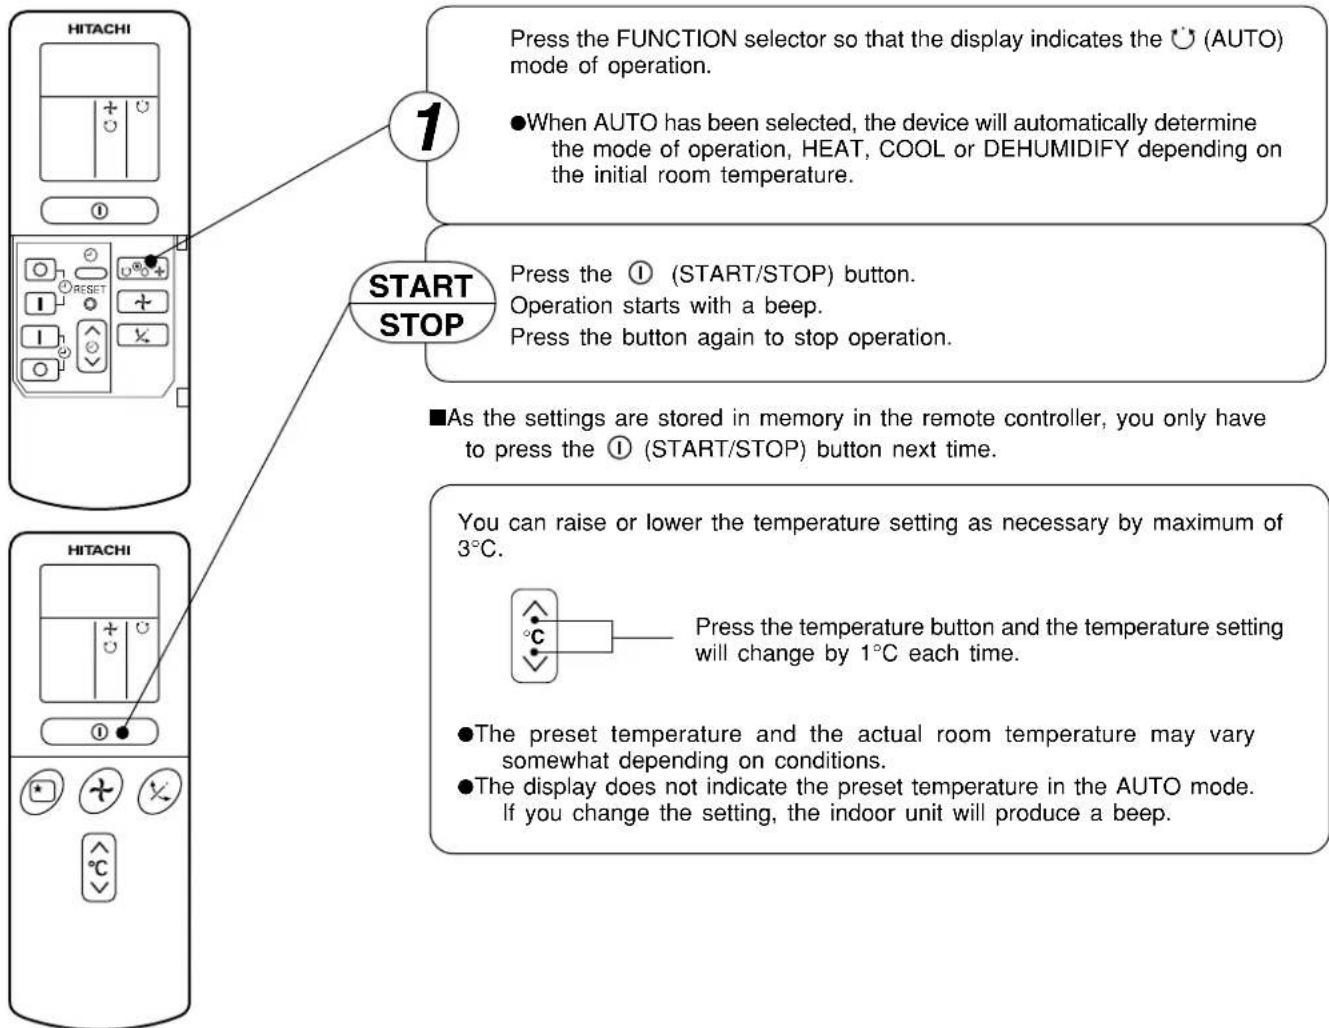
■Condition of Automatic Operation
| Initial room temperature (approx.) | Temperature settingFunction | FAN SPEED | |
| Over 27°C COOL → | 27°C | HI at start, MED or LOW after the preset temperature is reached | |
| 23~27°C → | DEHUMIDIFY | Slightly lower than the room temperature | LOW |
| Under 23°C HEAT → | 23°C | HI at start, MED or LOW after the preset temperature is reached | |
- Use the device for heating when the outdoor temperature is under 21°C.
When it is too warm (over 24°C), the heating function may not work in order to protect the device. - In order to keep reliability of the device, please use this device above -10^ of the outdoor temperature.
Use the device for dehumidifying when the room temperature is over 16°C.
When it is under 15^ C, the dehumidifying function will not work.
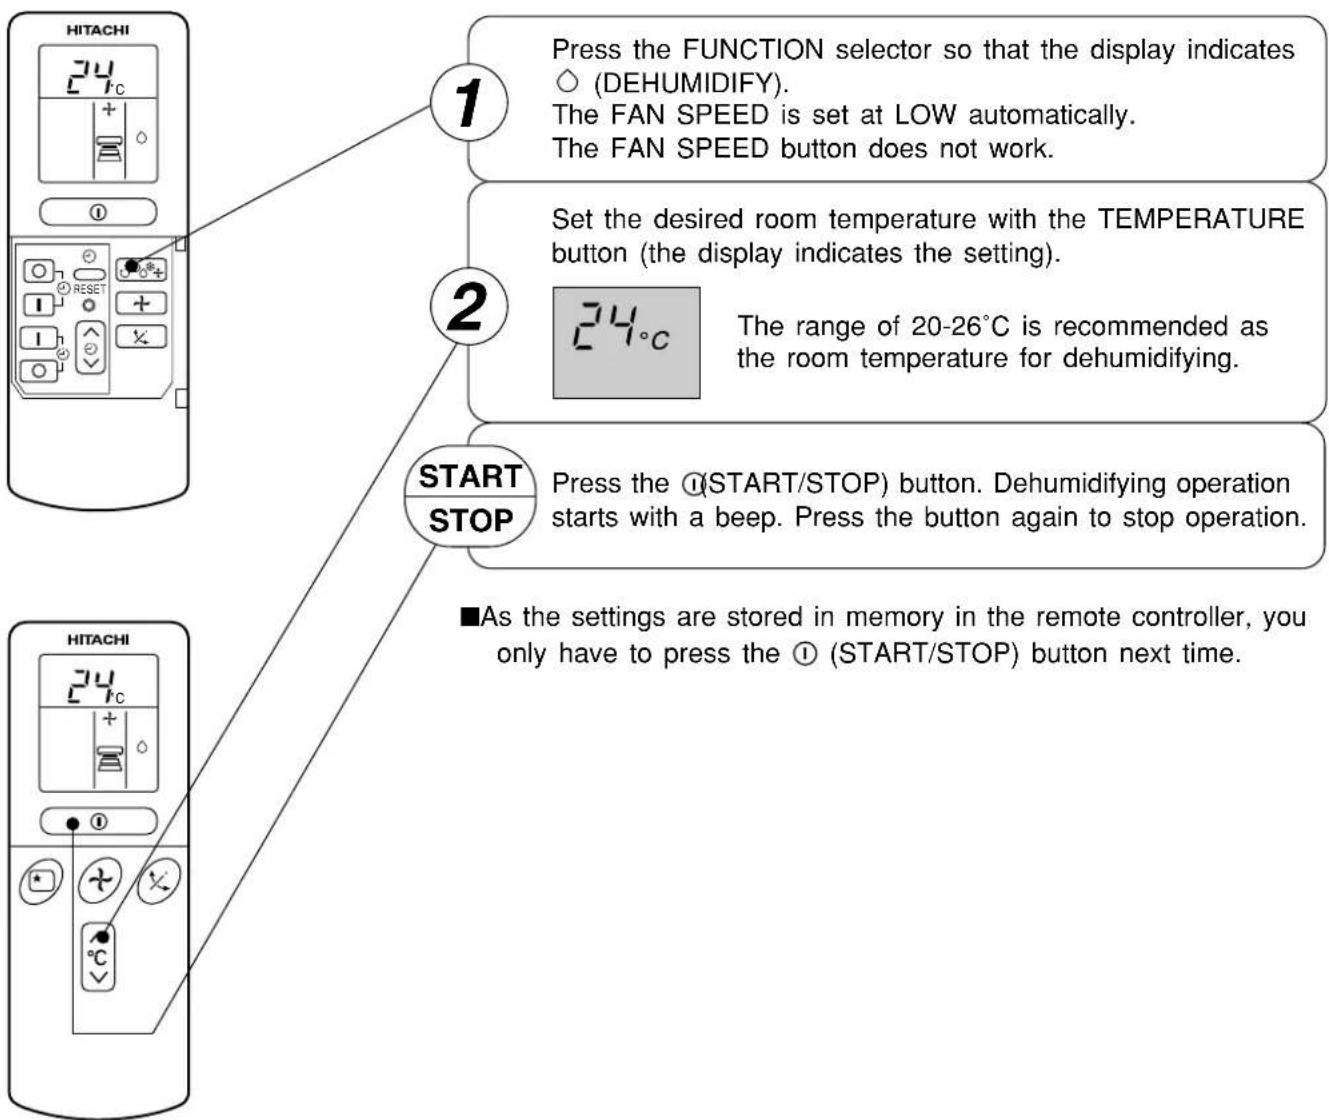
flowchart
graph TD
    A["1: Press the FUNCTION selector so that the display indicates (DEHUMIDIFY). The FAN SPEED is set at LOW automatically. The FAN SPEED button does not work."] --> B["2: Set the desired room temperature with the TEMPERATURE button (the display indicates the setting)."]
    B --> C["3: The range of 20-26°C is recommended as the room temperature for dehumidifying."]
    C --> D["4: Press the (START/STOP) button. Dehumidifying operation starts with a beep. Press the button again to stop operation."]
    D --> E["5: As the settings are stored in memory in the remote controller, you only have to press the (START/STOP) button next time."]
■Dehumidifying Function
When the room temperature is higher than the temperature setting: The device will dehumidify the room, reducing the room temperature to the preset level.
When the room temperature is lower than the temperature setting: Dehumidifying will be performed at the temperature setting slightly lower than the current room temperature, regardless of the temperature setting. The function will stop (the indoor unit will stop emitting air) as soon as the room temperature becomes lower than the setting temperature.
Use the device for cooling when the outdoor temperature is 22-42°C.
If indoor humidity is very high (over 80%), some dew may form on the air outlet grille of the indoor unit.
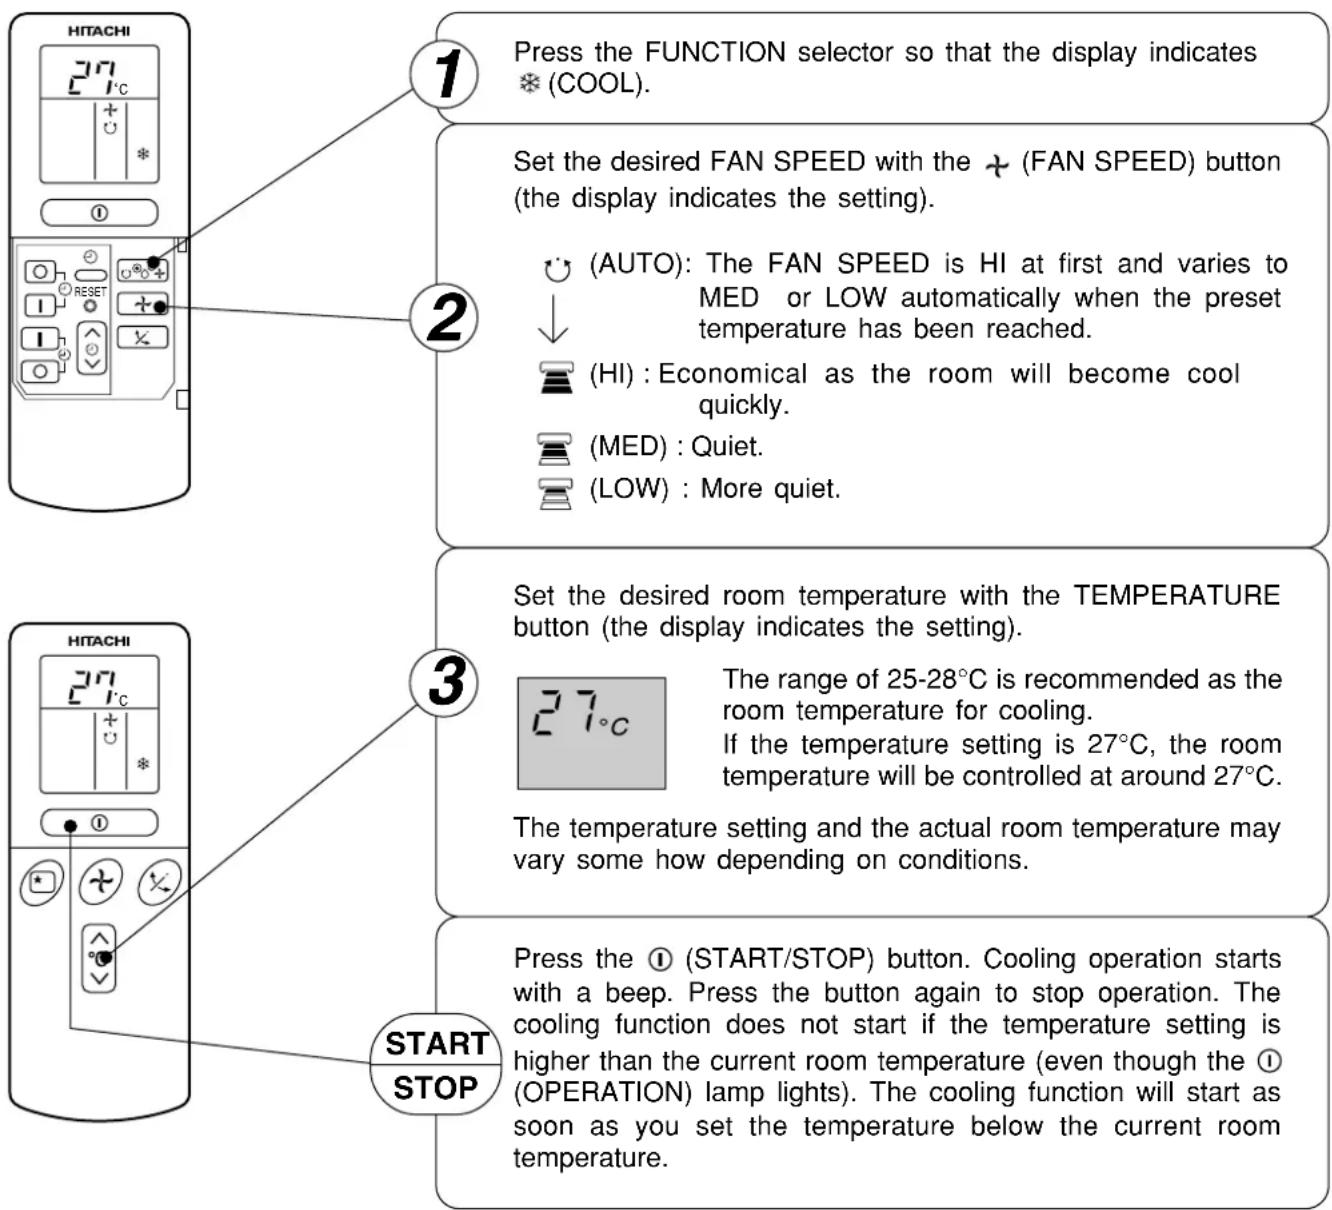
■As the settings are stored in memory in the remote controller, you only have to press the Ⓞ (START/STOP) button next time.
You can use the device simply as an air circulator. Use this function to dry the interior of the indoor unit at the end of summer.
FAN SPEED (AUTO)
…… When the AUTO fan speed mode is set in the cooling/heating operation:
| For the heating operation | ●The fan speed will automatically change according to the temperature of discharged air.●When the difference of room temperature and setting temperature is large, fan starts to run at HI speed.●When the room temperature reaches setting temperature, fan speed changes to LOW automatically. |
| For the cooling operation | ●When the difference of room temperature and setting temperature is large, fan starts to run at HI speed.●After room temperature reaches the preset temperature, the cooling operation, which changes the fan speed and room temperature to obtain optimum conditions for natural healthful cooling will be performed. |
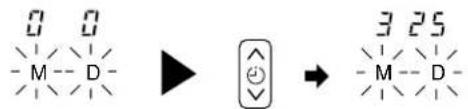
Time, Day, Month
After you change the batteries;
OFF-Timer
You can set the device to turn off at the present time.
1 Set the current month and day with the TIMER control button.
1 Press the _OFF-TIMER button. The (OFF) mark blinks on the display.
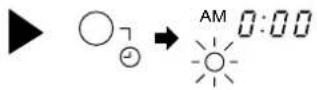
ON-Timer
- The device will turn on at the designated times.
1 Press the ⚫ (ON-TIMER) button the ⚪ (ON) mark blinks on the display.
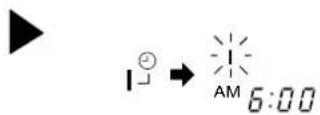
ON/OFF-Timer

●The device will turn on (off) and off (on) at the designated times.
●The switching occurs first at the preset time that comes earlier.
●The arrow mark appearing on the display indicates the sequence of switching operations.
1 Press the _ON-OFF button so that the (OFF) mark blinks.
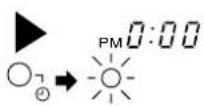
2 Set the turn-off time with the TIMER control button.
Press the | (RESERVE) button.
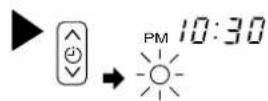
3 Press the I (ON-TIMER) button so that the ○ (OFF) mark lights and the I (ON) mark blinks.
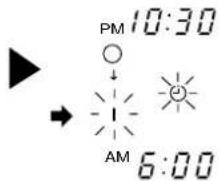
How to Cancel Reservation
Point the signal window of the remote controller toward the indoor unit, and press the ○ (CANCEL) button.
The ⏻(RESERVED) sign goes out with a beep and the ⏻(TIMER) lamp turns off on the indoor unit.
NOTE
You can set only one of the OFF-timer, ON-timer and ON/OFF-timer.
2 Press the ⏻ (TIME) button.
3 Set the current time with the TIMER control button.
4 Press the ⏻ (TIME) button again. The time indication starts lighting instead of flashing.
![▶ → [IMAGE] → [●] → [●] AM 10:88 PM 90:88 1:30](/content/2026/05/962054/images/2d614810b538f8d6ec4a943f42abb665d03a19712152f521f956c012303e080c.jpg)
Example: The current time is 1:30 p.m.
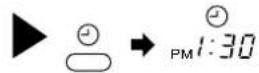
●The time indication will disappear automatically in 10 second.
●To check the current time setting, press the ⏻ (TIME) button twice.
The setting of the current time is now complete.
2 Set the turn-off time with the TIMER control button.
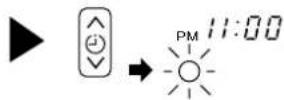
3 Point the signal window of the remote controller toward the indoor unit, and press the I (RESERVE) button.
The ○ (OFF) mark starts lighting instead of flashing and the sign ⏻ (RESERVED) lights. A beep occurs and the ⏻ (TIMER) lamp lights on the indoor unit.
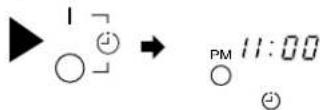
Example: The device will turn off at 11:00p.m.
The setting of turn-off time is now complete.
2 Set the turn-on time with the TIMER control button.
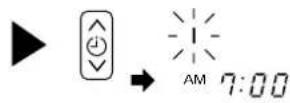
3 Point the signal window of the remote controller toward the indoor unit, and press the I (RESERVE) button.
The I (ON) mark starts lighting instead of flashing and the ⏻(RESERVED) sign lights. A beep occurs and the ⏻(TIMER) lamp lights on the indoor unit.
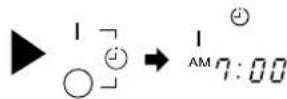
Example:
The device will automatically turn on earlier so that the preset temperature can be reached at 7:00 a.m.
The setting of the turn-on time is now complete.
4 Set the turn-on time with the TIMER control button.
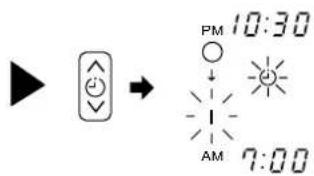
5 Point the signal window of the remote controller toward the indoor unit, and press the I (RESERVE) button.
The I (ON) mark starts lighting instead of flashing and the ⏻ (RESERVED) sign lights. A beep occurs and the ⏻ (TIMER) lamp lights on the indoor unit.
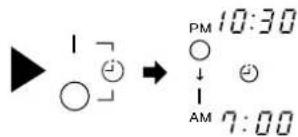
Example:
The device will turn off at 10:30 p.m. and then automatically turn on earlier so that the preset temperature can be reached at 7:00 a.m.
The settings of the turn-on/off times are now complete.
- The timer may be used in three ways: off-timer, on-timer, and ON/OFF (OFF/ON)-timer. Set the current time at first because it serves as a reference.
- As the time settings are stored in memory in the remote controller, you only have to press the I (RESERVE) button in order to use the same settings next time.
Set the current time at first if it is not set before (see the pages for setting the current time). Press the ☐ (SLEEP) button, and the display changes as shown below.
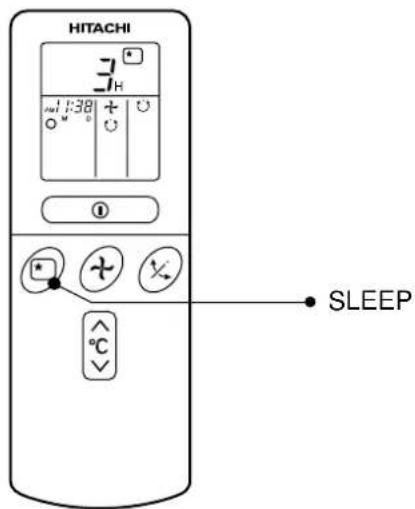
| Mode | Indication |
| Sleep timer | 1 hour 2 hours - 3 hours - 7 hours Sleep timer off |
Sleep Timer: The device will continue working for the designated number of hours and then turn off.
Point the signal window of the remote controller toward the indoor unit, and press the SLEEP button.
The timer information will be displayed on the remote controller. The TIMER lamp lights with a beep from the indoor unit. When the sleep timer has been set, the display indicates the turn-off time.
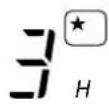
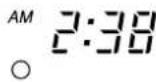
Example: If you set 3 hours sleep time at 11:38 p.m., the turn-off time is 2:38 a.m.
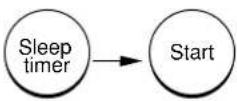
The device will be turned off by the sleep timer and turned on by on-timer.
1 Set the ON-timer.
2 Press the ☐ (SLEEP) button and set the sleep timer.
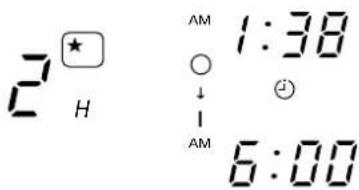
Example:
In this case, the device will turn off in 2 hours (at 1:38 a.m.) and turn on early so that the preset temperature will be almost reached at 6:00 next morning.
How to Cancel Reservation
Point the signal window of the remote controller toward the indoor unit, and press the ○ (CANCEL) button.
The ⏻ (RESERVED) sign goes out with a beep and the ⏻ (TIMER) lamp turns off on the indoor unit.
Explanation of the sleep timer
The device will control the FAN SPEED and room temperature automatically so as to be quiet and good for people's health.
You can set the sleep timer to turn off after 1, 2, 3 or 7 hours. The FAN SPEED and room temperature will be controlled as shown below.
Operation with the sleep timer
| Function Operation | |
| Heating“ ⬤ ” | The room temperature will be controlled 5°C below the temperature and the FAN SPEED will be set to LOW setting 60 minutes after the setting of the sleep timer. [7527] |
| Cooling“ ⬤ ”and dehumidifying“ ⭕ ” | The room temperature will be controlled 2°C above the temperature and the FAN SPEED will be set to LOW setting 60 minutes after the setting of the sleep timer. 2°C Sleep timer set 6 hours later 2 hours later 3 hours later 60 minutes later 7 hours later |
| Fan“ ⬤ ” | The settings of room temperature and circulation are varied. |
NOTE
- If date or current time is not set, sleep timer can not be set.
- If you set the sleep timer after the off-, on/off- or off/on-timer has been set, the sleep timer becomes effective instead of the off-, on/off- or off/on-timer set earlier.
●You can not set other timer during sleep timer operation. - After sleep timer time is up and when press sleep button again, the sleep timer will be set as last setting.
●Sleep timer effective only once.

Adjustment of the conditioned air in the upward and downward directions.
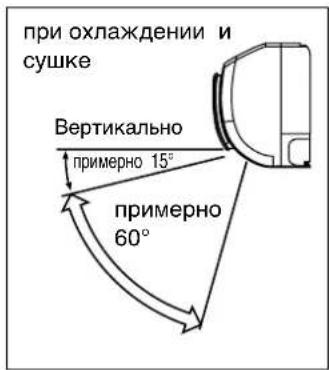
The horizontal air deflector is automatically set to the proper angle suitable for each operation. The deflector can be swung up and down continuously and also set to the desired angle using the “☒” (AUTO SWING)” button.
- If the “(AUTO SWING)” button is pressed once, the horizontal air deflector swings up and down. If the button is pressed again, the deflector stops in its current position. Several seconds (about 6 seconds) may be required before the deflector starts to move.
- Use the horizontal air deflector within the adjusting range shown on the right.
- When the operation is stopped, the horizontal air deflector moves and stops at the position where the air outlet closes.
CAUTION
- In "Cooling" operation, do not keep the horizontal air deflector swinging for a long time. Some dew may form on the horizontal air deflector and dew may drop.

Adjustment of the conditioned air to the left and right.
Hold the vertical air deflector as shown in the figure and adjust the conditioned air to the left and right.
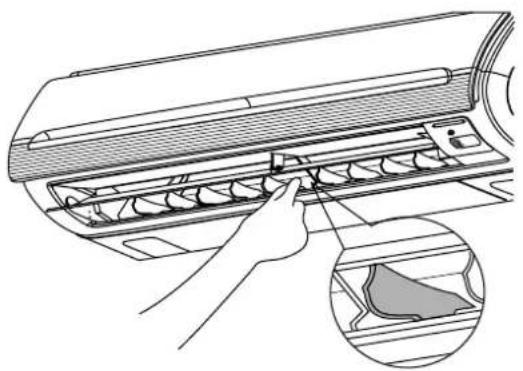
natural_image
Diagram of a hand pressing down on the back panel of an air conditioner (no text or symbols present)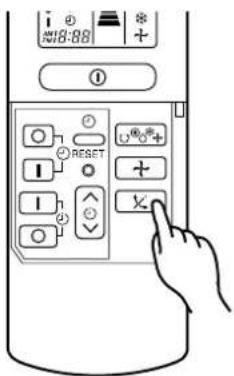
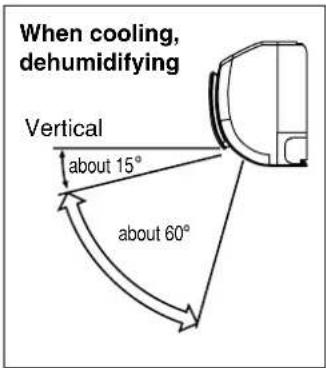
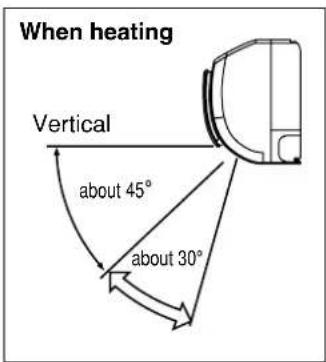
CAUTION
When operating the unit in cooling operation with the air deflector facing down and moving automatically for a long period of time, water will condensed on the air deflector and drips down occasionally. This will wet your furniture.
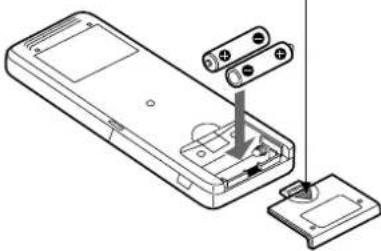
1 Remove the cover as shown in the figure and take out the old batteries.

2 Install the new batteries. The direction of the batteries should match the marks in the case.
CAUTION
- Do not use new and old batteries, or different kinds of batteries together.
- Take out the batteries when you do not use the remote controller for 2 or 3 months.
Push and pull to the direction of arrow
natural_image
Diagram of a remote control panel with labeled components and wiring (no text or symbols present)Suitable Room Temperature Ins
natural_image
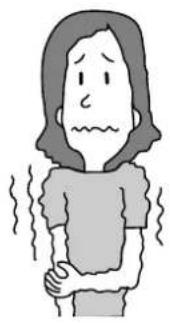
Illustration of a person with wavy lines indicating discomfort or pain (no text or symbols)Warning
Freezing temperature is bad for health and a waste of electric power.
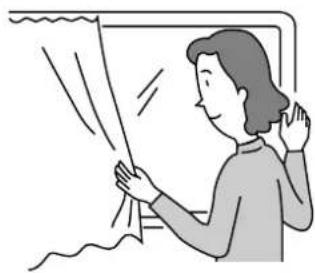
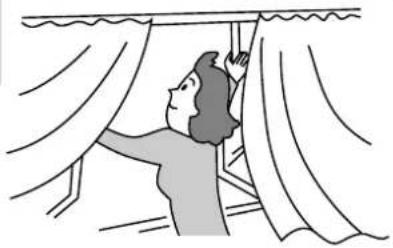
curtain or blinds
natural_image
Illustration of a person opening a window with curtains, no text or symbols presentIt is possible to reduce heat entering the room through windows.
Ventilation Effective Us
Caution
Do not close the room for a long period of time. Occasionally open the door and windows to allow the
entrance of fresh air.
natural_image
Illustration of a person opening curtains with draped curtains (no text or symbols)Of Timer
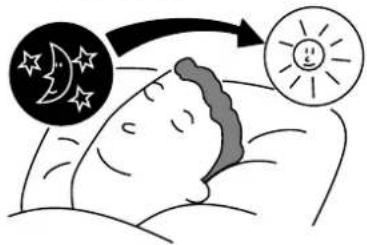
At night, please use the "OFF or ON timer operation mode", together with your wake up time in the morning. This will enable you to enjoy a comfortable room temperature. Please use the timer effectively.
Do Not Forget To Clean The Air Filter
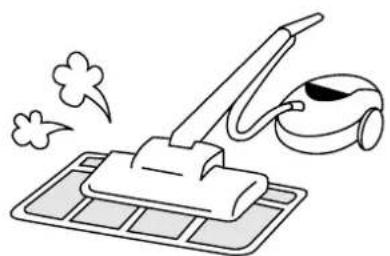
Dusty air filter will reduce the air volume and the cooling efficiency. To prevent from wasting electric energy, please clean the filter every 2 weeks.
natural_image
Line drawing of a vacuum cleaner with smoke and foam dust (no text or symbols)Please Adjust Suitable Temperature For Baby And Children
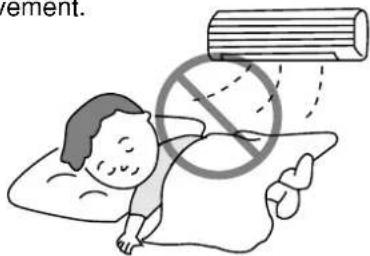
Please pay attention to the room temperature and air flow direction when operating the unit for baby, children and old folks who have difficulty in movement.
The Air Conditioner And The Heat Source In The Room

Caution
If the amount of heat in the room is above the cooling capability of the air conditioner (for example: more people entering the room, using heating equipments and etc.), the preset room temperature cannot be achieved.
natural_image
Illustration of a steam locomotive emitting exhaust smoke next to a cylindrical container with visible liquid and bubbles (no text or symbols)Not Operating For A Long Time
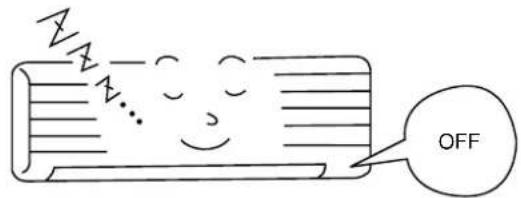
When the indoor unit is not to be used for a long period of time, please switch off the power from the mains. If the power from mains remains "ON", the indoor unit still consumes about 8W in the operation control circuit even if it is in "OFF" mode.
When Lightning Occurs

Warning
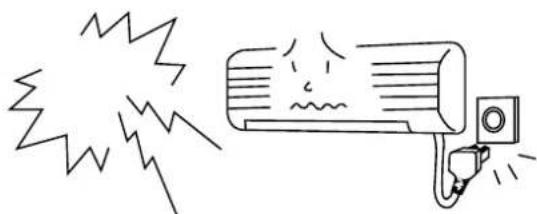
To protect the whole unit during lightning, please stop operating the unit and remove the plug from the socket.
natural_image
Simple line drawing of an air conditioner emitting sound waves (no text or symbols)UV-LED
UV-LED will be "ON" when the START/STOP button is pressed except for FAN only operation. During selected operation, this UV-LED will be "ON" and "OFF". Light UV glare is visible when the UV-LED is "ON" and this is normal (not malfunction).
Interference From Electrical Products

Caution
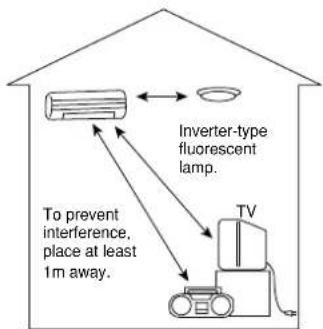
To avoid noise interference, please place the indoor unit and its remote controller at least 1m away from electrical products.
CAUTION
Cleaning and maintenance must be carried out only by qualified service personal. Before cleaning, stop operation and switch off the power supply.

Open the front panel.
●Pull up the front panel by holding it at both sides with both hands.
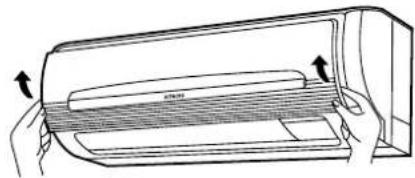
natural_image
Diagram of a mechanical component with arrows indicating direction, no text or symbols present
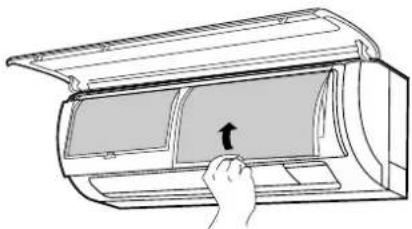
Remove the filter.
●Push upward to release the claws and pull out the filter.
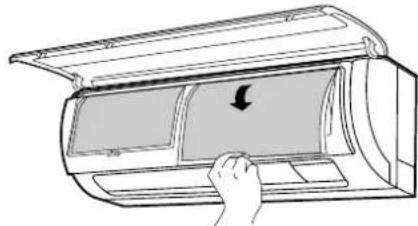
natural_image
Line drawing of a hand pressing down on a curved air conditioner cover (no text or symbols)
Attaching the air cleansing and deodorizing filters to the filter.
- Attach the air cleansing and deodorizing filters to the frame by gently compress its both sides and release after insertion into filter frame.
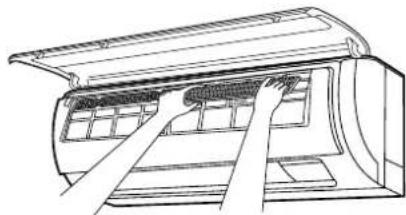
natural_image
Line drawing of a car air conditioner unit with hand placement on the door (no text or symbols)CAUTION
Do not bend the air cleansing and deodorizing filter as it may cause damage to the structure.
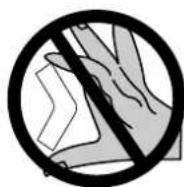
natural_image
Line drawing of a hand pressing down on a curved air conditioner cover (no text or symbols)
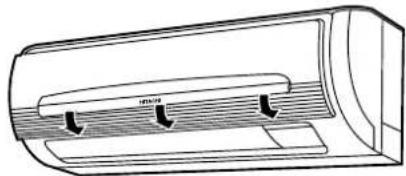
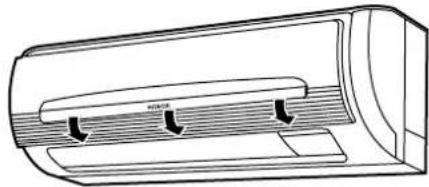
Attach the filters.
- Attach the filters by ensuring that the surface written "FRONT" is facing front.
●After attaching the filters, push the front panel at three arrow portion as shown in figure and close it.
natural_image
Technical line drawing of a cylindrical device with internal channels and directional arrows (no text or symbols)NOTE
- In case of removing the air cleansing and deodorizing filters, please follow the above procedures.
- The cooling capacity is slightly weakened and the cooling speed becomes slower when the air cleansing and deodorizing filters are used. So, set the fan speed to "HIGH" when using it in this condition.
- Air cleansing and deodorizing filters are washable and reusable up to 20 times by using vacuum cleaner or water rinse under running tap water. Type number for this air cleansing filter is
. Please use this number for ordering when you want to renew it. - Do not operate the air conditioner without filter. Dust may enter the air conditioner and fault may occur.
CAUTION
Cleaning and maintenance must be carried out only by qualified service personal. Before cleaning, stop operation and switch off the power supply.
1. AIR FILTER
Clean the air filter, as it removes dust inside the room. In case the air filter is full of dust, the air flow will decrease and the cooling capacity will be reduced. Further, noise may occur. Be sure to clean the filter following the procedure below.
PROCEDURE

Open the front panel and remove the filter
● Gently lift and remove the air cleansing and deodorizing filter from the air filter frame.

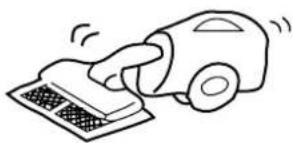
Vacuum dust from the air filter and air cleansing and deodorizing filter using vacuum cleaner. If there is too much dust, rinse under running tap water and gently brush it with soft bristle brush. Allow filters to dry in shade.
natural_image
Simple line drawing of a hand using a vacuum cleaner to clean or remove a surface (no text or symbols)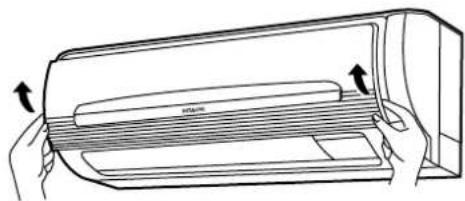
natural_image
Illustration of hands holding a rectangular device with a scroll, showing internal layered structure (no text or symbols)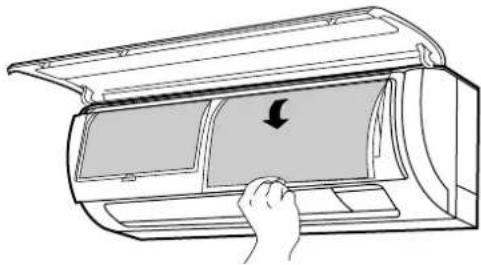
natural_image
Line drawing of a hand pressing down on an air conditioner cover panel (no text or symbols)
- Re-insert the air cleansing and deodorizing filter to the filter frame. Set the filter with "FRONT" mark facing front, and slot them into the original state.
● After attaching the filters, push the front panel at three arrow portions as shown in figure and close it.
natural_image
Technical line drawing of a mechanical component with internal channels and arrows indicating motion (no text or symbols)NOTE:
- Air cleansing and deodorizing filter should be cleaned every month or sooner if noticeable loading occurs. When used overtime, it may lose its deodorizing function. For maximum performance, it is recommended to replace it every 3-6 months depending on application requirements.
CAUTION
- Do not wash with hot water at more than 40°C. The filter may shrink.
- When washing it, shake off moisture completely and dry it in the shade; do not expose it directly to the sun. The filter may shrink.
- Do not use detergent on the air cleansing and deodorizing filter as some detergent may deteriorate the filter electrostatic performance.
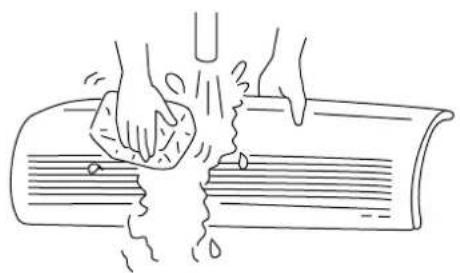
2. Washable Front Panel
- Remove the front panel and wash with clean water.
Wash it with a soft sponge.
After using neutral detergent, wash thoroughly with clean water. - When front panel is not removed, wipe it with a soft dry cloth. Wipe the remote controller thoroughly with a soft dry cloth.
●Wipe the water thoroughly.
If water remains at indicators or signal receiver of indoor unit, it causes trouble.
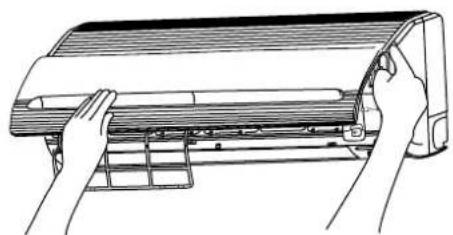
Method of removing the front panel.
Be sure to hold the front panel with both hands to detach and attach it.
Removing the Front Panel
natural_image
Line drawing of hands installing or adjusting a large air conditioner cover (no text or symbols)- When the front panel is fully opened with both hands, push the right arm to the inside to release it, and while closing the front panel slightly, put it out forward.
natural_image
Line drawing of hands washing a book with liquid, no text or symbols present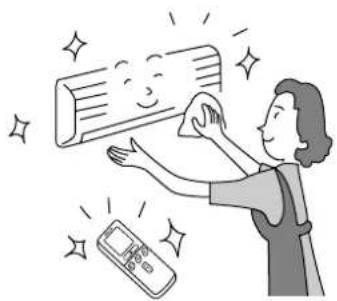
natural_image
Illustration of a person cleaning a wall with a digital remote (no text or symbols)Attaching the Front Panel
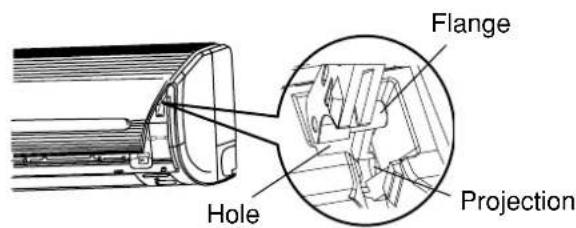
- Move the projections of the left and right arms into the Flanges in the unit and securely insert them into the holes.
CAUTION
- Do not splash or direct water to the body of the unit when cleaning it as this may cause short circuit.
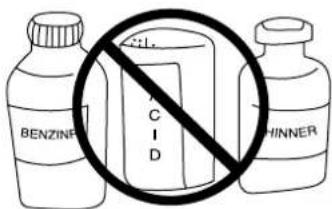
- Never use hot water (above 40°C), benzine, gasoline, acid, thinner or a brush, because they will damage the plastic surface and the coating.
3. MAINTENANCE AT BEGINNING OF LONG OFF PERIOD
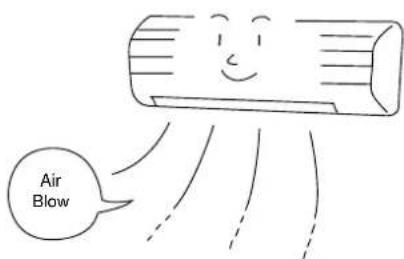
- Run the unit by setting the operation mode to + (FAN) and the fan speed to HI for about half a day on a fine day, and dry the whole of the unit.
●Switch off the power plug.
CAUTION
- Please use earth line.
Do not place the earth line near water or gas pipes, lightning-conductor, or the earth line of telephone. Improper installation of earth line may cause electric shock.

- A circuit breaker should be installed depending on the mounting site of the unit. Without a circuit breaker, the danger of electric shock exists.
IMPORTANT
The wires in this mains lead are coloured in accordance with the following code:
Green-and-yellow : Earth
Blue : Neutral
Brown : Live
As the colours of the wires in the mains lead of this appliance may not correspond with the coloured markings identifying the terminals in your plug, proceed as follows:
The wire which is coloured green-and-yellow must be connected to the terminal in the plug which is marked with the letter E or by the earth symbol ⏻ or coloured green or green-and-yellow.
The wire which is coloured blue must be connected to the terminal which is marked with the letter N or coloured black.
The wire which is coloured brown must be connected to the terminal which is marked with the letter L or coloured red.
NOTE
If the supply cord is damaged, it must be replaced by the special cord obtainable at authorized service/parts centers.
CAUTION
Cleaning and maintenance must be carried out only by qualified service personal. Before cleaning, stop operation and switch off the power supply.
REGULAR INSPECTION
PLEASE CHECK THE FOLLOWING POINTS BY QUALIFIED SERVICE PERSONAL EITHER EVERY HALF YEARLY OR YEARLY. CONTACT YOUR SALES AGENT OR SERVICE SHOP.
| 1 | 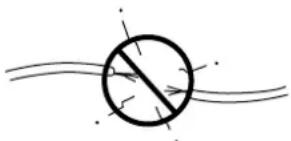 | Is the earth line disconnected or broken? |
| 2 | 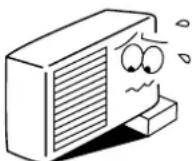 | Is the mounting frame seriously affected by rust and is the outdoor unit tilted or unstable? |
| 3 | 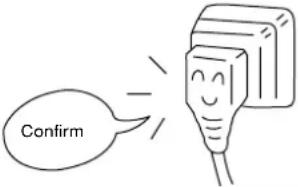 | Is the plug of power line firmly plugged into the socket?(Please ensure no loose contact between them). |
WHEN ASKING FOR SERVICE, CHECK THE FOLLOWING POINTS.
| CONDITION CHECK THE FOLLOWING POINTS | |
| When it does not operate | ●Is the fuse all right?●Is the voltage extremely high or low?●Is the circuit breaker “ON”? |
| When it does not cool wellWhen it does not hot well | ●Was the air filter cleaned?●Does sunlight fall directly on the outdoor unit?●Is the air flow of the outdoor unit obstructed?●Are the doors or windows opened, or is there any source of heat in the room?●Is the set temperature suitable? |

natural_image
Illustration of a smiling man in a suit pointing upward with both hands (no text or symbols)Notes
●In quiet operation or stopping the operation, the following phenomena may occasionally occur, but they are not abnormal for the operation.
(1) Slight flowing noise of refrigerant in the refrigerating cycle.
(2) Slight rubbing noise from the fan casing which is cooled and then gradually warmed as operation stops.
●The odor will possibly be emitted from the room air conditioner because the various odor, emitted by smoke, foodstuffs, cosmetics and so on, sticks to it. So the air filter and the evaporator regularly must be cleaned to reduce the odor.
- Please contact your sales agent immediately if the air conditioner still fails to operate normally after the above inspections. Inform your agent of the model of your unit, production number, date of installation. Please also inform him regarding the fault.
- Power supply shall be connected at the rated voltage, otherwise the unit will be broken or could not reach the specified capacity.
Please note:
On switching on the equipment, particularly when the room light is dimmed, a slight brightness fluctuation may occur. This is of no consequence.
The conditions of the local Power Supply Companies are to be observed.
Note
- Avoid to use the room air conditioner for cooling operation when the outside temperature is below 21°C (70°F).
The recommended maximum and minimum operating temperatures of the hot and cold sides should be as below:
| Cooling Heating | |||||
| Minimum Maximum Minimum Maximum | |||||
| Indoor | Dry bulb °C | 2 | 1 | 3 | 2 |
| Wet bulb °C | 1 | 5 | 2 | 3 | |
| Outdoor | Dry bulb °C | 2 | 1 | 4 | 3 |
| Wet bulb °C | 1 | 5 | 2 | 6 | |
MEMO
HITACHI
Inspire the Next
natural_image
Technical line drawing of a mechanical component with internal layered structure (no text or symbols)RAC-07CH7
RAC-09CH7
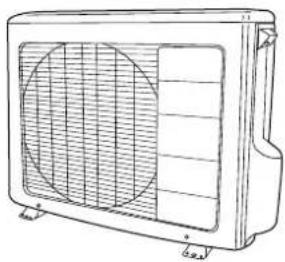
natural_image
Line drawing of a multi-free air conditioner unit with fan grille and ventilation slots (no text or symbols)RAS-07CH7
RAS-09CH7
RAS-14CH7
RAC-14CH7
Instruction manual Page 1\~26
To obtain the best performance and ensure years of trouble free use, please read this instruction manual completely.
ЛАМПА ФИЛЬТРА
natural_image
Line drawing of a hand inserting air filters into a rack, with an inset showing the blade detail (no text or symbols)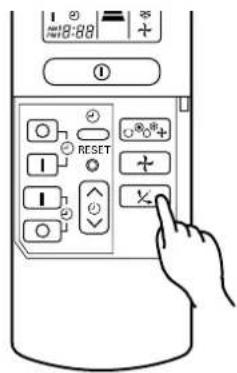
natural_image
Line drawing of a remote control panel with an open rear panel and internal components (no text or symbols)natural_image
Illustration of a person with wavy lines indicating discomfort or pain (no text or symbols)Предупреждение
Холодная
температура в
помещении
неблагоприятно
Воздействует на
здоровье и вызывает
излшнний расход
электрознергии.
natural_image
Illustration of a person opening a window with curtains, no text or symbols presentС их
ПОМОЩЬЮ
МОЖНО
СНИЗИТЬ
жару,
проникающую
в комнату,
через окна.
Вентиляция
Осторожно
natural_image
Illustration of a person opening curtains with draped fabric (no text or symbols)natural_image
Illustration of a vacuum cleaner on a grid base with smoke and bubbles (no text or symbols)natural_image
Simple line drawing of a steam locomotive emitting exhaust smoke next to a cylindrical object (no text or symbols)natural_image
Simple line drawing of an air conditioner with exhaust plume and fan (no text or symbols)UV-LED
natural_image
Diagram of hands holding a device with arrows indicating movement or force (no text or symbols)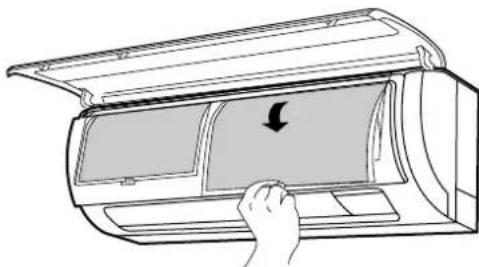
natural_image
Line drawing of a hand pressing down on a computer ventilation cover with a downward arrow (no text or symbols)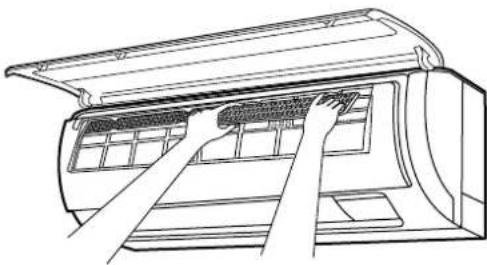
natural_image
Line drawing of a car air conditioner unit with hands installing or adjusting the panel (no text or symbols)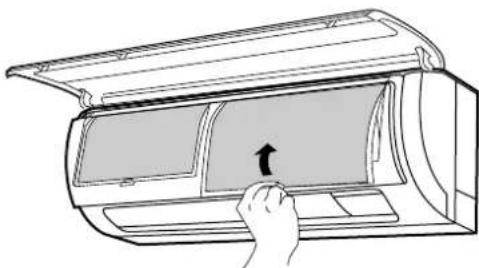
natural_image
Line drawing of a hand pressing down on a device's front panel with an arrow indicating the press (no text or symbols present)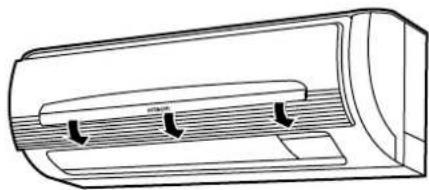
natural_image
Technical line drawing of a cylindrical device with internal channels and mounting base (no text or symbols)ПРИМЕЧАНИЕ:
natural_image
Diagram of hands holding a device with arrows indicating movement or force (no text or symbols present)
natural_image
Simple line drawing of a hand using a vacuum cleaner to clean or store items (no text or symbols)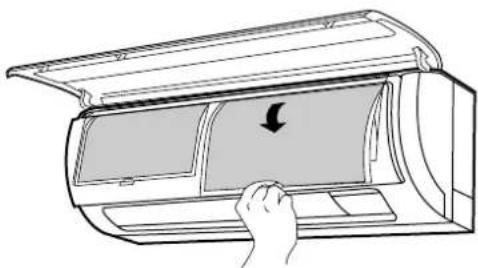
natural_image
Line drawing of a hand pressing down on a curved air conditioner cover with a downward arrow (no text or symbols)
natural_image
Technical line drawing of a mechanical component with internal channels and directional arrows (no text or symbols)ПРИМЕЧАНИЕ:
natural_image
Line drawing of hands washing a book with liquid dripping (no text or symbols)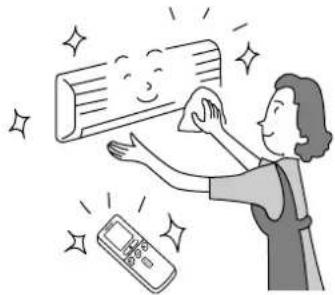
natural_image
Illustration of a woman cleaning a wall-mounted device with sparkles (no text or symbols)natural_image
Line drawing of hands installing or adjusting a large air conditioner cover (no text or symbols present)natural_image
Cartoon illustration of a smiling man in a suit giving two thumbs up (no text or symbols)Примечания
- SPLIT TYPE AIR CONDITIONER
- PRECAUTIONS DURING OPERATION
- INDOOR UNIT
- Air filter
- Front panel
- Indoor unit indicators
- Horizontal deflector ● Vertical deflector (Air Outlet)
- Remote controller
- OUTDOOR UNIT
- Drain pipe
- Connecting cord and insulation pipe for piping
- MODEL NAME AND DIMENSIONS
- CAUTION
- FILTER LAMP
- OPERATION LAMP
- During preheating
- During defrosting
- TIMER LAMP
- OPERATION INDICATOR
- TEMPORARY SWITCH
- ●Signal emitting window/transmission sign
- ●Display
- ●START/STOP button
- ●SLEEP button
- ●TEMPERATURE buttons
- ●TIME button
- ●RESET buttons
- ●FUNCTION selector
- ●FAN SPEED selector
- ●AUTO SWING button
- ●TIMER control
- ●OFF-TIMER button Select the turn OFF time.
- ●RESERVE button Time setting reservation.
- Precautions for Use
- ■Dehumidifying Function
- FAN SPEED (AUTO)
- Time, Day, Month
- OFF-Timer
- ON-Timer
- ON/OFF-Timer
- How to Cancel Reservation
- NOTE
- Explanation of the sleep timer
- Suitable Room Temperature Ins
- curtain or blinds
- Ventilation Effective Us
- Of Timer
- Do Not Forget To Clean The Air Filter
- Please Adjust Suitable Temperature For Baby And Children
- The Air Conditioner And The Heat Source In The Room
- Not Operating For A Long Time
- When Lightning Occurs
- Warning
- UV-LED
- Interference From Electrical Products
- Open the front panel.
- Remove the filter.
- Attaching the air cleansing and deodorizing filters to the filter.
- Attach the filters.
- AIR FILTER
- PROCEDURE
- NOTE:
- Washable Front Panel
- MAINTENANCE AT BEGINNING OF LONG OFF PERIOD
- IMPORTANT
- REGULAR INSPECTION
- WHEN ASKING FOR SERVICE, CHECK THE FOLLOWING POINTS.
- Notes
- MEMO
- HITACHI
- Inspire the Next
- Instruction manual Page 1\~26
- ЛАМПА ФИЛЬТРА
- Предупреждение
- Вентиляция
- Осторожно
- ПРИМЕЧАНИЕ:
- Примечания
Brand : HITACHI
Model : RAC-09CH7
Category : Air conditioner