
PHRM22 - Sports Watch Pyle - Free user manual and instructions
Find the device manual for free PHRM22 Pyle in PDF.


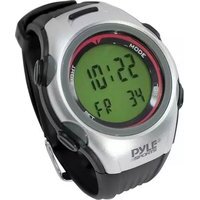
| Product Type | Sports Watch |
| Brand | Pyle |
| Model | PHRM22 |
| Dimensions (approx.) | 50 x 50 x 15 mm |
| Weight (approx.) | 50 g |
| Power Source | 1 x CR2032 battery |
| Display | Digital LCD |
| Water Resistance | 50 meters (5 ATM) |
| Main Functions | Time, date, stopwatch, alarm, backlight, step counter |
| Strap Material | Rubber |
| Clasp Type | Buckle |
| Care & Cleaning | Wipe with soft cloth; avoid solvents. |
| Safety Precautions | Not for diving; avoid extreme heat or cold. |
| Spare Parts Available | Battery, strap |
| Repairability | Battery replacement by user; other repairs by service center. |
| General Information | Ideal for daily fitness and outdoor activities. |
Frequently Asked Questions - PHRM22 Pyle
User questions about PHRM22 Pyle
0 question about this device. Answer the ones you know or ask your own.
Ask a new question about this device
Download the instructions for your Sports Watch in PDF format for free! Find your manual PHRM22 - Pyle and take your electronic device back in hand. On this page are published all the documents necessary for the use of your device. PHRM22 by Pyle.
USER MANUAL PHRM22 Pyle
Latest 3D Technology for Speed + Distance & Heart Rate - Built in USB.
3D SENSOR MEASURES YOUR MOVEMENT ACCURATELY


natural_image
Technical line drawing of a symmetrical mechanical component with central circular feature (no text or symbols)HEART RATE BELT
This unit is operated by four different buttons:
- MODE/SET
- LAP/SAVE/-
- ST/SP/+
- EL/RESET
FEATURES:
- Time and Date
- Daily Alarm
- Chronograph with 100 Laps Memory Record
- 4 Training Modes (2 for User's Preset Distances, Half Marathon, Full Marathon)
- Current, Average, Maximum, Minimum Heart Rate
- Current, Average, Maximum Speed
- Step Counting, Calories and Fat Burnt
- Intelligent Step Filter Function (Initiate Step Counting after 10 Continuous Steps)
- Total & Target Distance
- 3 Target Zone Alert Alarms
- Target Calories Alert Alarm
- Calibration Function
- USB PC-Link Upload & Download with Interface Program(Plug & play)
- EL Backlight
- Chime
- Key Tone
- Low Battery Detection
- Energy Saving Function
3D SENSOR FROM GERMANY-MEASURES YOUR MOVEMENT ACCURATELY
-The 3D technology in the accelerator is an accelerometer Sensor to measure acceleration in walking or running.
-3D Sensor has intelligent step filter function-steps only count when the unit detects
-3D Sensor allows users to customize to their specific body type for Walking/Running style
The Complete Training System
Thank you for choosing Pulse Sonic The Complete Training System as your personal trainer. In order to be able to make the best use of this device, please read the instruction manual carefully. Do not discard keep the manual for future reference.
Wear the Heart Rate Belt on your chest with the sensor over your heart for detection of the heart rate.
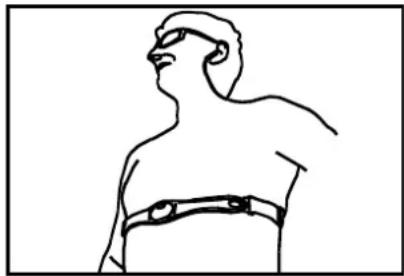
natural_image
Line drawing of a human torso wearing a full-body medical device (no text or symbols)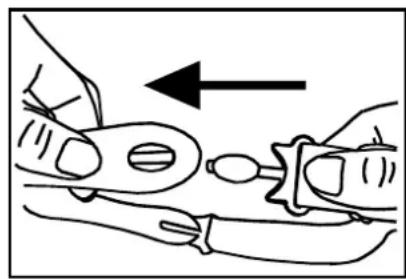
natural_image
Line drawing of hands holding a tool with an arrow indicating direction (no text or symbols)You will notice that there are two noticeably different patches on the inside of the Heart Rate Belt. These are the sensor for detecting your Heart Rate. Before you wear the Heart Rate Belt, wet these two patches lightly so that the sensor can detect your heart rate more easily. faster and with increased accuracy.

natural_image
Illustration of three different hand tools: a faucet with liquid, a finger holding a test tube, and a wrench (no text or symbols present)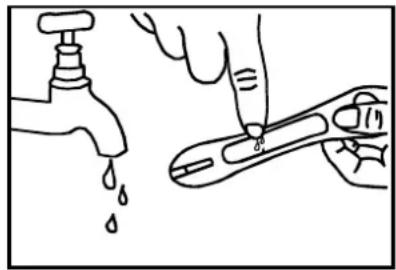
natural_image
Illustration of a hand using a pipette to lift water from a faucet, with another hand holding a tool partially visible (no text or symbols)
natural_image
Line drawing of a hand pressing down on a mechanical component (no text or symbols)Important: Please note that the Heart Rate Monitor is NOT a medical device and is not to be used as such.
TIPS:
The position of the chest belt affects its performance .Move the chest belt along strap so that it falls above your heart.
Avoid areas with dense chest hair.
In dry, cold climates, it may take several minutes for the chest belt to function steadily.
This is normal and should improve with several minutes of exercise.
The chest belt is splash proof and should not be worn for underwater activities.
WARNING: Signal interference can be caused in the environment due to electromagnetic disturbances. These may occur near high voltage power lines, traffic lights, overhead lines of electric railways, electric bus lines or trams, televisions, computers, car motor, bike computer, some motor driven exercise equipment, cellular phones or when you walk through electric security gates.
The USB connector must not come in contact with the water as this will oxidize the metal contact points and will damage the connection between the USB and the computer.

natural_image
Line drawing of a futuristic helmet with water droplets and a red X mark (no text or symbols)CONTENTS
Getting Start....2
Wearing the chest belt and Watch 2
Using the watch function.... 3
Symbol on LCD 4
Configuring Personal Information....5
Mode Flow Chart....5
Time / Date Setting.... 5
Alarm Setting....7
Chronograph Mode....7
Training Mode....9
Training Setting Mode....10
Chronograph Memory Mode....11
Training Memory Mode....12
User Setting Mode....14
Heart Rate Setting Mode....15
Stride Calibration Mode....16
Download/Installing PC-Link Program....17
PC Link Program Operation....18
PC Link Communication Mode....18
Installing the Battery 19
Specification 20
Caution....21
USING THE WATCH FUNCTIONS
IMPORTANT!
- Before the units are transported, the watches are switched off for energy saving purposes. The user will need to turn it on by pressing the MODE key when they have purchased the product
NORMAL WALKING AND CHRONOGRAPH RUNNING
-There are two-step counting features, one is for the daily walking mode and the other is the chronograph running mode. For each individual modes of step counting, calibration of stride length is required separately for both
-The watch may take a bit of time before it starts to sense that you are walking. During that time, it will not display a step count. Once the watch determines that you are walking it will display your entire step count from the beginning of your walk, including the steps you took while the watch was not displaying a step count.
NOTE
- When you walk or run for around 10 seconds, the unit sensor will pick this up and a display showing current pace for the walk or run will appear.
- If you wish to have the most accurate fitness index calculated by the unit, the user must use the calibration feature for both walking and running. They will also need to input their personal user settings
- Your watch is designed to count your steps when it is worn on your left hand. It will not count your steps correctly if you wear it on your right wrist or on your belt, or if you have it in your bag.
In order to maximize the accuracy of the step counting feature of the watch, please wear the watch properly as shown in the diagram (strap of the watch must fasten tightly around the wrist and it must not be loose; display must also be perpendicular to the forearm and wrist; the watch must only be worn on the left wrist and not the right to maximize the accuracy of step counting) The design and accuracy of the watch for step counting is based on the positioning of the watch.
The 3D sensor of the watch will automatically count the steps. By wearing the watch correctly, the steps counted during the daily walk and, or run will be more accurate.
Please take off the strap from your wrist before you take out the watch unit.


natural_image
Hand holding a wristwatch with a red checkmark indicating a detail (no text or symbols present)
natural_image
Technical line drawing of a mechanical device with a top component (no text or symbols)USING THE USB CONNECTOR
- When sliding the USB connector in and out from beneath the watch, please press and slide the USB connector where there is the thumb slide pivot. Please take care and do not push the USB connector back into place when it is locked in its extended position otherwise this will permanently damage the USB connector.


natural_image
Illustration of hands holding a mechanical component with a red X mark (no text or symbols)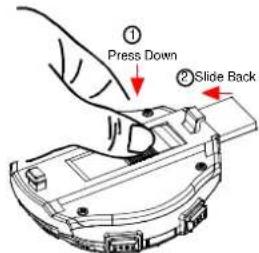
- Low battery detection
- Chime
LAP - Lap No.
ZONE - Heart rate zone select 1/2/3
Kmi/h - Kilometer or mile per hour
♥ - Heart rate detection
MAX - Maximum
Avg - Average
Min - Minimum - Memory record
/min - Heart beat per minute - Alarm 1 or 2
CAL - Calories alert on
9FAT - Unit of fat burnt
Kcal - Unit of calories burnt
Step - Step you have walk
AM' - Time from 0:00.00 to 11:59.59
PM - Time from 12:00.00 to 23:59.59

CONFIGURING PERSONAL INFORMATION
You need to preset the following personal information before using the watch.
The Unit You Want To Use
Your Normal Walking Stride Length
Your Chronograph Running Stride Length
Your Current Weight
Your Current Height
Your Gender
Your Age
You need to enter the USER SETTING MODE to configure your personal information settings.
MODE FLOW CHART
Press the Mode/Set key to change between the following modes.
TIME/DATE MODE- ALARM MODE- CHRONOGRAPH MODE- TRAINING MODE - MEMORY DATA RECALL(FOR CHRONOGRAPH) -MEMORY DATA RECALL(FOR TRAINING)-SETTING MODE (USER/HR ZONE/CALIBRATION)

flowchart
graph TD
    A["TIME/DATE MODE"] --> B["ALARM MODE"]
    B --> C["CHRONOGRAPH MODE"]
    C --> D["TRAINING MODE"]
    D --> E["MEMORY DATA RECALL(FOR CHRONO)"]
    E --> F["MEMORY DATA RECALL(FOR TRAINING)"]
    F --> G["SETTING MODE (USER/HR ZONE/CALIBRATION)"]
TIME / DATE MODE
- Press mode/set key to enter time/date mode.
Date Time Display : Day of week, Hour, Minute, Walk, Month, & Date. - Press ST/SP/+ or LAP/SAVE/- to toggle Walk or Run
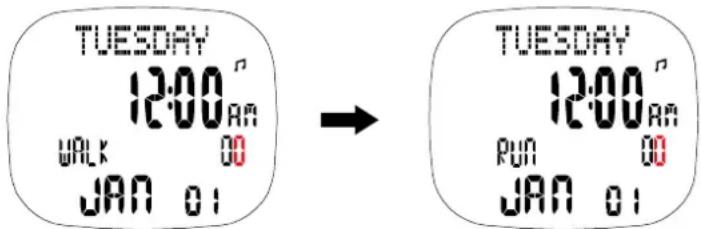
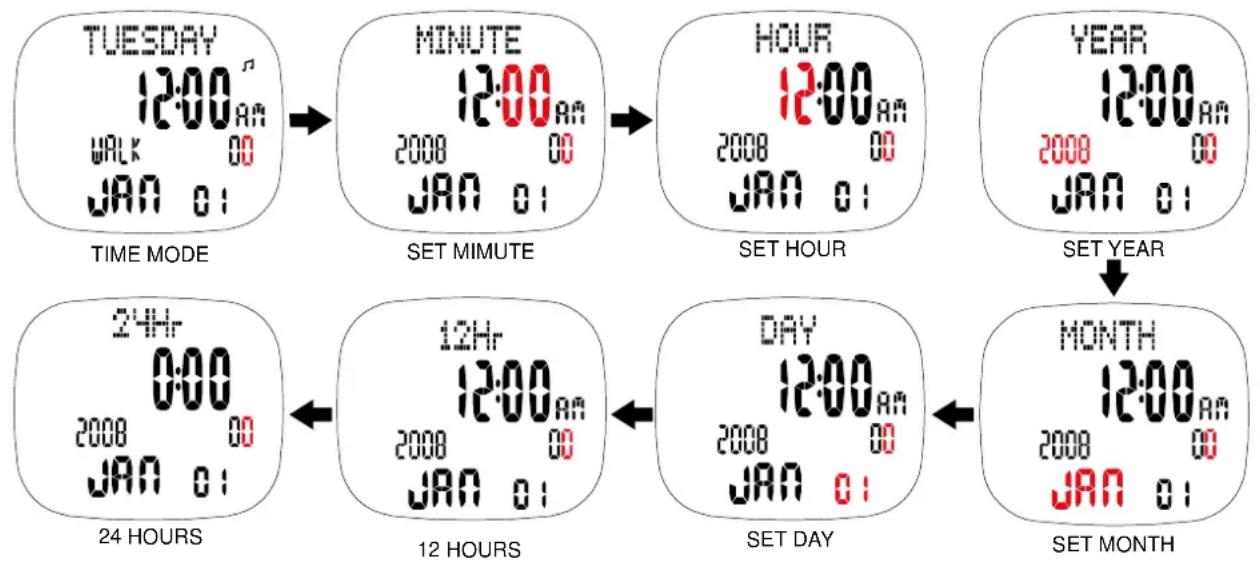
- Press and hold the MODE/SET button for around 2 seconds and the minute digits will start flashing
- To increment the minute digits, press the ST/SP/+ button and to decrement the minute digits, press the LAP/SAVE/- button.
- Once you have set the minute digits, press the MODE/SET button to set the hour
-
To increment the hour digits, press the ST/SP/+ button and to decrement the hour digits, press the LAP/SAVE/- button
-
To confirm the hour settings, press the MODE/SET button to move on to set the year
- To increment the year digits, press the ST/SP/+ button and to decrement the year digits, press the LAP/SAVE/- button
- Press the MODE/SET button to confirm the year and continue to adjust the month
- To change the month, press the ST/SP/+ or LAP/SAVE/- button until you have reached the desire month
- Press the MODE/SET button to confirm the month and continue to adjust the day.
-
To change the day, press the ST/SP+ or LAP/SAVE- button until you have reached the desire day.
-
Press mode/set key to select the setting item in the following sequence: Minute – Hour – Year – Month – Day – 12/24 Hr
flowchart
graph TD
    A["TUESDAY\n12:00 AM\nWALK 00\JAN 01"] --> B["MINUTE\n12:00 AM\n2008 00\JAN 01"]
    B --> C["HOUR\n12:00 AM\n2008 00\JAN 01"]
    C --> D["YEAR\n12:00 AM\n2008 00\JAN 01"]
    D --> E["SET YEAR\n24 HOURS"]
    E --> F["12 HOURS\n12:00 AM\n2008 00\JAN 01"]
    F --> G["SET DAY\n12:00 AM\n2008 00\JAN 01"]
    G --> H["MONTH\n12:00 AM\n2008 00\JAN 01"]
    H --> I["SET MONTH"]
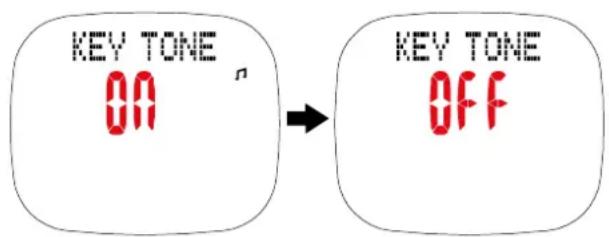
- Press the MODE/SET key to confirm the format and press either ST/SP/+ or LAP/SAVE/- button to turn ON/OFF the key tone
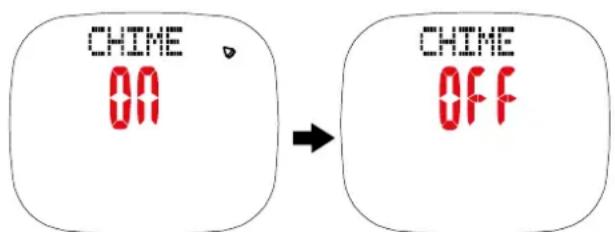
- Press the MODE/SET key to confirm the format and press either ST/SP/+ or LAP/SAVE/- to turn the CHIME feature ON/OFF
Remarks:
- If there are no keys pressed or held for 60 seconds, it will automatically return to the default time and date mode.
- Press and hold the MODE SET button anytime to quit the setting mode immediately and all the revised setting will be saved.
Daily Alarm:
- Press the MODE/SET key until you have arrived at the daily alarm setting and the display should show ALARM 1 in the top section of the screen and you can set up to two separate alarms.

-
To set the alarm, press and hold the MODE/SET key for around 3 seconds and select which alarm to set by pressing the ST/SP/+ or LAP/SAVE/- button.
-
Confirm the selected alarm by pressing the MODE/SET key and set the hour digits. To increment the hour digits, press the ST/SP+ button and to decrement the hour digits, press the LAT/SAVE/- button.
(Daily alarm icon will be turned on if the setting is changed)
- Confirm by pressing the MODE/SET key and to increment the minute digits, press the ST/SP/+ button and to decrement the minute digits, press the LAP/SAVE/- button

- After so, turn ON/OFF the alarm by pressing the ST/SP+ or LAP/SAVE/- button and confirm by pressing MODE/SET key

- To exit the daily alarm setting mode, press and hold the MODE/SET key for around 3 seconds or wait for one minute when it will automatically exit the mode itself and return to the default but previous settings will remain unchanged
Note:
- The alarm time will last for approximately 30 seconds and to switch off the alarm, press any keys to switch off the alarm. If no buttons have been pressed for one minute when setting the daily alarm mode, the previous setting will remain unchanged. Any changes must be confirmed by exiting through holding MODE/SET key.
- If the unit is in sleep condition and the alarm is triggered, if alarm is stopped in regardless of whether the user stops it or not, the unit will return to its energy saving mode.
Chronograph Mode:
- Press the MODE/SET key until a screen which displays chronograph appears

- Once heart rate receiver is turned on, the heart icon should be darkened and press and hold the EL/RESET key if you wish to see the number of steps instead of calories burnt which will show steps, average heart rate, lap number and distance.
- Press and hold the EL/RESET keys for around 3 seconds again to see the combination of chronograph with calorie, current heart rate, lap number and speed.
- Press the ST/SP/+ button to start chronograph and this will automatically enable the step counting function and first speed reading will appear after approximately 6 seconds
- To pause, press the ST/SP/+ button and to resume, press the same button once again
- To have a lap record created, press the LAP/SAVE/ - button and this will freeze lap time for around 3 seconds
- To finish one exercise session, press the ST/SP/+ button to stop chronograph mode and then press and hold the LAP/SAVE/- button to save the data
- To save or not save the lap, press the ST/SP/+ button to choose yes or no.


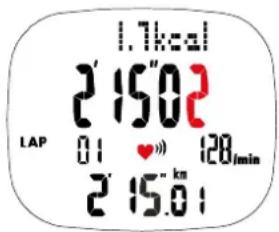

- To confirm, press and hold the LAP/SAVE/- for around 3 seconds to save or erase the data entirely
Note:
-If there is no heart rate signal for 2 minutes, the heart rate reception will be disabled and the heart rate icon will be turned off.
-When the user saves or clears the chronograph record on chronograph mode, the maximum, average and minimum heart rate record are saved and cleared at the same time.
-If heart rate signal is lost, the last heart rate value will remain on display for around 8 more seconds before the screen will show"--". The watch will continue to try to detect the signal for 2 more minutes before logging out.
-If the heart rate belt is on low batteries, the watch will display the low battery icon.
-When chronograph has been activated, training mode cannot be activated at the same time or vice versa.
Training Mode:
- Press the MODE/SET key until you have reached a screen entitled training
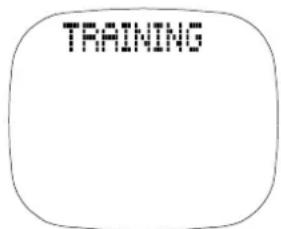
- It should show current heart rate and target distance and to switch to training 2, press and hold the EL/RESET button for around 3 seconds and repeat this to access training 3 and 4 or back to 1 again

flowchart
graph LR
    A["TRAINING1<br>00000<br>1.00 min"] --> B["TRAINING2<br>00000<br>5.00 min"]
    B --> C["TRAINING3<br>00000<br>HALF<br>MAPATH"]
    C --> D["TRAINING4<br>00000<br>FULL<br>MAPATH"]
- The default training screen should show speed, current heart rate, training 1 and distance

- The user can toggle through different data combinations by pressing LAP/SAVE/ - button to average heart rate, training 1 and remaining distance and a combination of calorie, maximum heart rate, training 1 and fat burnt before returning to first cycle

- To start training, press the ST/SP/+ button and first speed reading will show after approximately 6 seconds. To stop or pause training, press ST/SP/+ button again.

- To save data, press and hold the LAP/SAVE/-button for around 3 seconds and to select whether to save or erase data use the ST/SP/+ button. And to hold the LAP/SAVE/-key for around 3 seconds to confirm your decision.
Note:
-If there is no heart rate signal for 2 minutes, the heart rate reception will be disabled and the heart rate icon will be turned off.
-When the user saves or clears the chronograph record on chronograph mode, the maximum, average and minimum heart rate record are saved and cleared at the same time.
-If heart rate signal is lost, the last heart rate value will remain on display for around 8 more seconds before the screen will show"---". The watch will continue to try to detect the signal for 2 more minutes before logging out.
-If the heart rate belt is on low batteries, the watch will display the low battery icon.
-When chronograph has been activated, training mode cannot be activated at the same time or vice versa
Training Setting Mode:
Training time with Current Heart Rate and Target distance
-
Press the MODE/SET key until you have reached a screen entitled training
-
Press and hold the MODE/SET key until training 1 banner starts flashing and select training 1 or 2 by pressing LAP/SAVE/ - or ST/SP/+ button
Confirm choice by pressing MODE/SET key and adjust distance by press the ST/SP/+ button and to increment distance, press the LAP/SAVE/ - button to decrement distance
-
Press MODE/SET key to confirm
-
To exit the setting mode, press and hold the MODE/SET key for around 3 seconds or wait for one minute when it will automatically exit the mode itself but previous settings will remain unchanged
Note:
- It can only enter training setting mode if training is stopped.
- It can only enter training setting mode when data in training record is cleared.
- When quitting the training setting mode, it will return back to previous display before entering the training mode.
Chronograph Memory Recall
-
Press MODE/SET key to enter memory data where the screen showing RECALL with Chrono will appear after around 2 seconds
-
To increment the laps, press the ST/SP/+ button and to decrement the laps, press the LAP/SAVE/- button


- Press and hold the MODE/SET button for about 3 seconds to enter the lap data record and press the ST/SP/+ button to scroll through the data stored

- To delete any data records, exit this screen to return to memory recall lap selection by holding the MODE/SET button for around 3 seconds
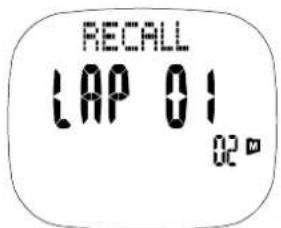
- Then increment the laps, press the ST/SP/+ button and to decrement the laps, press the LAP/SAVE/- button to your selected lap

- Hold the EL/RESET key for around 3 seconds to delete and toggle all yes, or no by pressing the LAP/SAVE/- or ST/SP/+ button

- Press MODE/SET key to confirm

Note:
- Press and holding the MODE/SET key will quit the mode immediately and go back to Lap/Training Record Selection Mode.
- In Memory recall mode, if there is no key press or key hold for 60s, it will return to Clock mode.
- In Chronograph memory recall mode, if there is an error on reading the data, then an error display is shown:

Training Memory Recall
- Press MODE/SET key to enter memory data where the screen showing RECALL with Training will appear after approximately 2 seconds

- To increment the data record, press the ST/SP/+ button and to decrement the data record, press the LAP/SAVE/- button
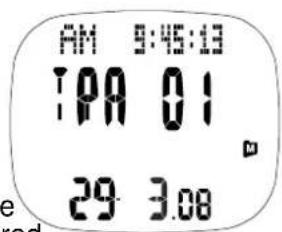
- Press and hold the MODE/SET button for around 3 seconds to enter the data record and press the ST/SP/+ button to scroll through the data stored

- To delete any data records, exit this screen to return to memory recall record selection by holding the MODE/SET button for approximately 3 seconds
- Then increment the laps, press the ST/SP/+ button and to decrement the laps, press the LAP/SAVE/- button to your selected lap
- Hold the EL/RESET key for around 3 seconds to delete and toggle yes or no or all by pressing the LAP/SAVE/- or ST/SP/+ button


- Press MODE/SET key to confirm
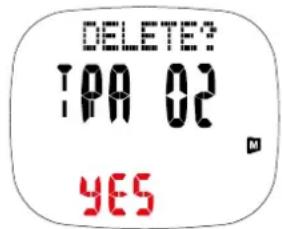

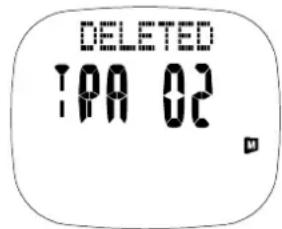


Note:
- Press and holding the MODE/SET key will quit the mode immediately and go back to Lap/Training Record Selection Mode.
- In Memory recall mode, if there is no key press or key hold for 60s, it will return to Clock mode.
- In Chronograph memory recall mode, if there is an error on reading the data, then an error display is shown:


USER SETTING MODE
- Press the MODE/SET key until you have reached the SETTING mode which will have a banner showing USER displaying SETUP
- Press and hold the MODE/SET button for around 3 seconds to enter into configuring the user setting
- The first setting is the unit in which you wish your measurements to be measured and recorded in. There are two options which is the combination of CM for height and KG for weight or IN for height and LB for weight which can be manipulated by press the LAP/SAVE/- or ST/SP/+ button
- Press MODE/SET key to confirm. The next setting is gender and this again can be selected by scrolling through the sexes via the ST/SP/+ or LAP/SAVE/- button
- Press MODE/SET key to confirm and set your age. To increment the age, press the ST/SP/+ button and to decrement the age, press the LAP/SAVE/- button
- Confirm by pressing MODE/SET key and to increment the weight, press the ST/SP/+ button and to decrement the weight, press the LAP/SAVE/- button
- Confirm by pressing MODE/SET key and to increment the height, press the ST/SP/+ button and to decrement the height, press the LAP/SAVE/- button
- To exit the setting mode, press and hold the MODE/SET key for around 3 seconds or wait for one minute when it will automatically exit the mode itself but previous settings will remain unchanged

![UNIT [ A - I G ]](/content/2026/05/961605/images/7f0de664375d389c890fa359f6d54f150597edc330b667b3604c19a8060c563f.jpg)


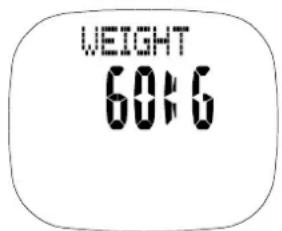
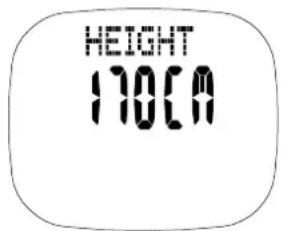
Heart Rate Zone Setting Mode
- Press the MODE/SET key until you have reached the SETTING mode which will have a banner showing USER displaying SETUP
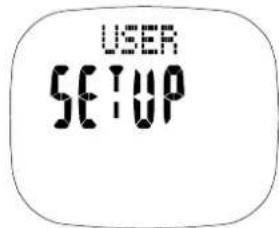
- Press the LAP/SAVE/ - button to enter Heart Rate Zone Setting Mode and holding the MODE/SET key

flowchart
graph LR
    A["HR ZONE SETUP"] --> B["CALIBRATION OF STRIDE"]
    B --> C["STRIDE 71CA WALK"]
    C --> D["STRIDE 120CA RUN"]
- To increment the activity level, press the ST/SP/+ button and to decrement the activity level, press the LAP/SAVE/ - button and press MODE/SET key to confirm
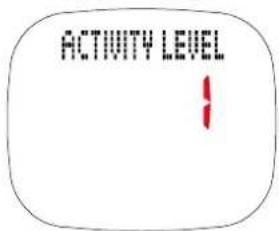
- Turn the zone alert ON/OFF by using the LAP/SAVE/- or ST/SP/+ button and press MODE/SET key to confirm

- If zone alert is ON, to increment the zone, press the ST/SP/+ button and to decrement the zone, press MODE/SET key to confirm but if zone alert is OFF, it will automatically proceed to setting Calories alert
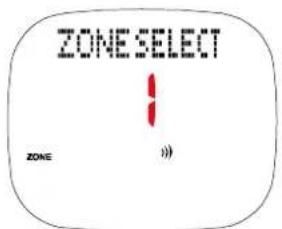
- Set upper limit of zone by using ST/SP/+ or LAP/SAVE/- button to increment and decrement setting and press MODE/SET key to confirm

- Set lower limit of zone using ST/SP/+ or LAP/SAVE/- button to increment and decrement setting and press MODE/SET key to confirm

- Set calories alert by using ST/SP/+ or LAP/SAVE/- button to increment and decrement setting and press MODE/SET key to confirm of each of the five digits

flowchart
graph TD
    A["CALORIES AL\n00500"] --> B["CALORIES AL\n00500"]
    B --> C["CALORIES AL\n00500"]
    C --> D["CALORIES AL\n00500"]
    D --> E["CALORIES AL\n00500"]
- Press ST/SP+ or LAP/SAVE- button to select calories alert ON or OFF.

- Press MODE/SET button for approximately 3 seconds to exit heart rate set up mode.
Stride calibration mode
- Press the MODE/SET key until you have reached the SETTING mode which will have a banner showing USER displaying SETUP
- Press LAP/SAVE/- button to enter stride calibration mode and press ST/SP/+ button to scroll through walking stride length and running stride length
To calibrate the stride lengths, press and hold the MODE/SET key to set distance for calibration. To increment the distance in metres, press the ST/SP/+ button and to decrement the distance, press the LAP/SAVE/- button and press MODE/SET key to confirm.
- Then select whether this set stride length distance for calibration is for walk or run using the LAP/SAVE/ - or ST/SP/+ button and press MODE/SET key to confirm.

flowchart
graph TD
    A["STRIDE\n71CA\nVALK"] --> B["CALIBRATION\n400A\nVALK"]
    B --> C["CALIBRATION\n400A\nVALK"]
    C --> D["CALIBRATION\n400A\nPUN"]
    D --> E["CALIBRATION\n0\n00\nVALK"]
    E --> F["CALIBRATION\n0\n00A\nVALK"]
    F --> G["CALIBRATION\n0F\nSPR I DE"]
    G --> H["CALIBRATION\n0F\nSPR I DE"]
    H --> I["CALIBRATION\n0\n00A\nVALK"]
    I --> J["CALIBRATION\n0\n00A\nVALK"]
    J --> K["CALIBRATION\n0\n00A\nVALK"]
    K --> L["CALIBRATION\n0\n00A\nVALK"]
    L --> M["CALIBRATION\n0\n00A\nVALK"]
    M --> N["CALIBRATION\n0\n00A\nVALK"]
    N --> O["CALIBRATION\n0\n00A\nVALK"]
    O --> P["CALIBRATION\n0\n00A\nVALK"]
    P --> Q["CALIBRATION\n0\n00A\nVALK"]
    Q --> R["CALIBRATION\n0\n00A\nVALK"]
    R --> S["CALIBRATION\n0\n00A\nVALK"]
    S --> T["CALIBRATION\n0\n00A\nVALK"]
    T --> U["CALIBRATION\n0\n00A\nVALK"]
    U --> V["CALIBRATION\n0\n00A\nVALK"]
    V --> W["CALIBRATION\n0\n00A\nVALK"]
    W --> X["CALIBRATION\n0\n00A\nVALK"]
    X --> Y["CALIBRATION\n0\n00A\nVALK"]
    Y --> Z["CALIBRATION\n0\n00A\nVALK"]
    Z --> AA["CALIBRATION\n0\n00A\nVALK"]
    AA --> AB["CALIBRATION\n0\n00A\nVALK"]
    AB --> AC["CALIBRATION\n0\n00A\nVALK"]
    AC --> AD["CALIBRATION\n0\n00A\nVALK"]
    AD --> AE["CALIBRATION\n0\n00A\nVALK"]
    AE --> AF["CALIBRATION\n0\n00A\nVALK"]
    AF --> AG["CALIBRATION\n0\n00A\nVALK"]
    AG --> AH["CALIBRATION\n0\n00A\nVALK"]
    AH --> AI["CALIBRATION\n0\n00A\nVALK"]
    AI --> AJ["CALIBRATION\n0\n00A\nVALK"]
    AJ --> AK["CALIBRATION\n0\n00A\nVALK"]
    AK --> AL["CALIBRATION\n0\n00A\nVALK"]
    AL --> AM["CALIBRATION\n0\n00A\nVALK"]
    AM --> AN["CALIBRATION\n0\n00A\nVALK"]
    AN --> AO["CALIBRATION\n0\n00A\nVALK"]
    AO --> AP["CALIBRATION\n0\n00A\nVALK"]
    AP --> AQ["CALIBRATION\n0\n00A\nVALK"]
    AQ --> AR["CALIBRATION\n0\n00A\nVALK"]
    AR --> AS["CALIBRATION\n0\n00A\nVALK"]
    AS --> AT["CALIBRATION\n0\n00A\nVALK"]
    AT --> AU["CALIBRATION\n0\n00A\nVALK"]
    AU --> AV["CALIBRATION\n0\n00A\nVALK"]
    AV --> AW["CALIBRATION\n0\n00A\nVALK"]
    AW --> AX["CALIBRATION\n0\n00A\nVALK"]
    AX --> AY["CALIBRATION\n0\n00A\nVALK"]
    AY --> AZ["CALIBRATION\n0\n00A\nVALK"]
    AZ --> BA["CALIBRATION\n0\n00A\nVALK"]
    BA --> BB["CALIBRATION\n0\n00A\nVALK"]
    BB --> BC["CALIBRATION\n0\n00A\nVALK"]
    BC --> BD["CALIBRATION\n0\n00A\nVALK"]
    BD --> BE["CALIBRATION\nO\nSTRI DE"]
Note:
- If no keys are pressed or held for 60 seconds, it will return to the existing mode.
- Press and hold the MODE/SET key for 3 seconds at anytime during the setting mode to exit and all revised setting will be saved.
- The stride length range is limited to 20 \~ 180cm (8" to 5' 11") for both run and walk. If the calibration result is outside this range, the previous stride length is used.
- During stride length calibration, holding the MODE/SET key will terminate the calibration process and "FAIL" will appear on the screen.
- If calibration has not been performed before, the stride length will be set based on the height formula.
Once the stride is calibrated, it will replace the default stride value calculated based on Height value.
Downloading/Installing PC-Link Program
Please visit our website at http://www.hrmpclink.com/g-series.htm to download the interface program.
Note: Windows Vista may not allow the download of the program due to its security protection software therefore we advise you to download the program using D drive.
PC-LINK PROGRAM OPERATION
First User:
Click " NEW USER " button to enter one's USER NAME and then enter password .

PC LINK COMMUNICATION MODE
- Press "UPLOAD" button on the pc-link program and will automatically upload the data to PC.


- Press Mode/Set will back to Time/Date mode.
The Watch will exit and go back to Time/Date mode automatically if you do not perform any operation or no step input after around 60 seconds. - Login the program and enter to the Main Screen.
- Click the color bar shown in the left top corner of the main screen to select the desired report.

Total Step - Total Distance - Total Calories - Heart Rate - Exercise Report
- Press Calendar button will show all the exercise record. Double click on the date with walking icon of your desired report.
- Press the Print button and a dialogue box will come out.
- Select the record of the date you would like to print and save it as a PDF report on your PC before printing.
INSTALLING THE BATTERY
The Watch uses 2 pieces CR 2032 batteries (one each for watch and heart rate belt). Use only the recommended batteries.
NOTE : Changing the battery will erase the data in the watch previously input into the device and you can then/will need to re-set the watch all over again.
Watch
- The battery compartments located at the back of the watch.
- To install/replace the battery, unscrew the battery compartment with the screw driver and simply slide out afterwards.
- Take out the old battery and dispose of properly.
- Gently place a new battery into the battery slot of the battery compartment, making sure that the poles are correctly placed.
- Screw back the battery compartment, when finished as in the diagram below

natural_image
Exploded view diagram of a mechanical device showing internal components and mounting holes (no text or labels)Heart Rate Belt
Hold the Heart Rate Belt firmly. Insert a coin into the slit of the compartment lid and turn it clockwise. The lid should come off easily. (Remove used battery CR2032) (Diagram 1) Gently place the battery into the battery slot of the battery compartment. (Diagram 2) Put the compartment lid back into place and tighten it firmly by turning it anti-clockwise with the help of coin.

natural_image
Illustration of a hand holding a wrist with a finger pointing to a circular object, labeled 'Diagram 1' (no text or symbols on the diagram itself)Diagram 1

Diagram 2
IMPORTANT BATTERY INFORMATION
● Battery installation and removal should be performed by an adult
- Use only batteries recommended in this instruction sheet
- Be sure to install the batteries with the correct polarity, as indicated
- Remove all batteries when replacing
- Only batteries of the same and equivalent type as recommended are to be used
- Do not short-circuit the supply terminals
- Exhausted batteries should be removed from the product
● Non-rechargeable batteries are not to be recharges
● Rechargeable batteries are to be removed from the product before being charged
● Rechargeable batteries are only to be charged under adult supervision
● Different types of batteries or new and used batteries are not to be mixed.
SPECIFICATIONS
| Time Format | : | Year, month, date, day, hour, minute, second, am/pm |
| : | 12/24 hours | |
| Calendar System | : | Full Auto-calendar pre-programmed from 2000 to 2099 |
| Features | : | Current / average /Maximum Speed, Step counting, calories consumption, fat burnt, Exercise time, Current/max/min & average heart rate. |
| Measurement Range | : | Calories Consumption : 0 - 99999.9 kcalFat Burnt : 0 - 9999.9Number of step : 0 - 999999Distance : 0 - 9999.99 km50 Chrono Memory Record in Chrono Mode |
| Memory Data | : | 10 Training Memory Record in Training Mode. |
| Chronograph | : | Measuring Unit : 1/100 secondMeasuring Capacity : 9 hr 59 m 59s 99 |
| Age Rang | : | 10-99 |
| Weight Rang | : | 20-220KG/44lb-485lb |
| Height Rang | : | 100-240CM/3'3"-7'10" |
CAUTION
Should you encounter any problems with the Speed & Distance Heart Rate System (e.g. malfunctioning of a parameter, static electricity, interferences within the product or the need to re-set the device), please press four buttons at the same time to reset the watch (the watch should not connect with computer). All data previously input into the device will be erased and you can then/will need to re-set the watch all over again. Should this fail to correct the situation, remove the batteries and then put them back into the battery compartment.
Then follow all the steps mentioned above in order to input the necessary data once more. The content of this manual is subject in order to change without further notice. Due to printing limitation, the displays shown in this manual may differ from the actual display. The manufacturer and its suppliers hold no responsibility to you or any other persons for any damage expenses, lost-profits, or any other claims arisen by using this product. The contents of this manual may not be reproduced without the permission of the manufacturer.
3D sensor for steps counting
Produced in Europe, the 3D sensor is of very high quality which has shown great accuracy in detecting and counting steps from walking, jogging and running, In order to maximize the accuracy of the step counting feature, this sensor is able to filter movements that do not belong to the categories of walking. Jogging and running, The daily pedometer step count can be switched off if the user does not wish to count or view his daily step count which will help the unit to save energy. However, the chronograph feature with step counting cannot be switched off.
If at any time of the day you wish to count the number of steps for a particular walking/jogging/running event, you may restart the daily pedometer to 0 and switch the daily pedometer feature off once the walking/jogging/running event is over and the number of steps recorded for that particular event will be automatically saved to the memory of the watch.
- HEART RATE BELT
- FEATURES:
- 3D SENSOR FROM GERMANY-MEASURES YOUR MOVEMENT ACCURATELY
- The Complete Training System
- CONTENTS
- USING THE WATCH FUNCTIONS
- IMPORTANT!
- NORMAL WALKING AND CHRONOGRAPH RUNNING
- NOTE
- USING THE USB CONNECTOR
- CONFIGURING PERSONAL INFORMATION
- MODE FLOW CHART
- TIME / DATE MODE
- Remarks:
- Daily Alarm:
- Note:
- Chronograph Mode:
- Training Mode:
- Training Setting Mode:
- Chronograph Memory Recall
- Training Memory Recall
- USER SETTING MODE
- Heart Rate Zone Setting Mode
- Stride calibration mode
- Downloading/Installing PC-Link Program
- PC-LINK PROGRAM OPERATION
- PC LINK COMMUNICATION MODE
- Total Step - Total Distance - Total Calories - Heart Rate - Exercise Report
- INSTALLING THE BATTERY
- Watch
- IMPORTANT BATTERY INFORMATION
- CAUTION
- 3D sensor for steps counting
Brand : Pyle
Model : PHRM22
Category : Sports Watch