FF250IH - Refrigerator White Knight - Free user manual and instructions
Find the device manual for free FF250IH White Knight in PDF.


| Product Type | Freestanding Refrigerator |
| Brand | White Knight |
| Model | FF250IH |
| Total Capacity | 250 L |
| Refrigerator Capacity | 180 L |
| Freezer Capacity | 70 L |
| Energy Class | A+ |
| Annual Energy Consumption | 220 kWh |
| Noise Level | 42 dB |
| Climate Class | N-ST |
| Dimensions (H x W x D) | 160 x 60 x 65 cm |
| Weight | 55 kg |
| Power Supply | 220-240 V, 50 Hz |
| Functions | Adjustable thermostat, reversible door, interior light |
| Defrost Type | Automatic (refrigerator), manual (freezer) |
| Shelves | 3 adjustable glass shelves |
| Door Storage | 3 door balconies + egg tray |
| Freezer Drawers | 2 drawers |
| Refrigerant | R600a |
| Maintenance | Clean with warm soapy water, avoid abrasive cleaners |
| Safety Features | Child lock (freezer), temperature warning light |
| Spare Parts Availability | Replacement shelves, door gaskets, thermostats available |
| Repairability Index | 7.5 / 10 |
| Warranty | 2 years |
Frequently Asked Questions - FF250IH White Knight
User questions about FF250IH White Knight
0 question about this device. Answer the ones you know or ask your own.
Ask a new question about this device
Download the instructions for your Refrigerator in PDF format for free! Find your manual FF250IH - White Knight and take your electronic device back in hand. On this page are published all the documents necessary for the use of your device. FF250IH by White Knight.
USER MANUAL FF250IH White Knight
natural_image
Black circular icon with a white chess piece silhouette (no text or symbols)White Knight
Integrated Fridge Freezer
FF250IH
Instruction Manual
The appliance is for indoor use only please remove the door before you dispose your refrigerator
BEFORE USING THE APPLIANCE
- Your new appliance is designed exclusively for domestic use
For best use of your appliance, carefully read the user handbook which contains a description of the appliance and advice on storing and preserving food.
Keep this handbook for future consultation.
Please keep the products away from the fire or similar glowing substance before you dispose the refrigerator.
I. After unpacking, make sure that the appliance is undamaged and that the door closes properly. Any damage must be reported to your dealer within 24 hours after delivery of the appliance.
-
Wait at least two hours before switching the appliance on in order to ensure the refrigerant circuit is fully efficient.
-
Installation of the appliance and electrical connections must be carried out by a qualified electrician, in accordance with the manufacturer's instructions and local safety regulations
4 Clean the inside of the appliance before using it
WARNING
This appliance can be used by children aged from 8 years and above and persons with reduced physical, sensory or mental capabilities or lack of experience and knowledge if they have been given supervision or instruction concerning use of the appliance in a safe way and understand the hazards involved.
Children shall not play with the appliance. Cleaning and user maintenance shall not be made by children without supervision
PRECAUTIONS AND GENERAL RECOMMENDATIONS
- Use the refrigerator compartment only for storing fresh food and beverages and use the freezer compartment only for storing frozen food, freezing fresh food and making ice cubes.
- During installation, make sure the appliance does not damage the power cable.
- Do not store glass containers with liquids in the freezer since they may burst.
- Do not eat ice cubes or ice lollies immediately after taking them out of the freezer since they may cause cold burns.
- Before servicing or cleaning the appliance, unplug it from the mains or disconnect the electrical power supply.
• Make sure that the appliance is not near a heat source.
- Do not store or use petrol, gas or flammable liquids in the vicinity of the appliance or other electrical appliances. The fumes can create a fire hazard or explosion.
- To ensure adequate ventilation, leave a space on both back and bottom the appliance and follow the installation instructions.
- Keep the appliance ventilation openings free.
• Install and level the appliance on a floor strong enough to take its weight and in an area suitable for its size and use.
- The appliance must be handled and installed by two or more persons.
- Place the appliance in a dry and well-ventilated place. The appliance is set for operation at specific ambient temperature ranges, according to the climatic class indicated on the data plate: The appliance may not work properly if it is left for a long period at a temperature above or below the indicated range.
| Climatic Class | Amb. T. (°C) | Amb. T. (°F) |
| SN | From 10 to 32 | From 50 to 90 |
| N | From 16 to 32 | From 61 to 90 |
| ST | From 16 to 38 | From 61 to 100 |
| T | From 16 to 43 | From 61 to 110 |
- Be careful not to damage the floors when you move the appliance (e.g. parquet flooring).
- Do not use mechanical, electric or chemical means other than those recommended by the Manufacturer to speed up the defrost process.
- Do not damage the refrigerator's refrigerant circuit pipes.
- Do not use or place electrical appliances inside the compartments if they are not of the type expressly authorised by the Manufacturer.
• To avoid the risk of children being trapped and therefore suffocating, do not allow them to play or hide inside the appliance. - Power cable modification or replacement must only be carried out by qualified personnel.
- Do not use single/multiple adapters or extension cables.
- It must be possible to disconnect the appliance from the mains by unplugging it or by means of a two-pole switch fitted upline of the socket.
- Ensure that the voltage indicated on the appliance data plate corresponds to the domestic supply voltage
- Do not swallow the contents (non-toxic) of the ice packs (if provided).
- The Manufacturer declines any liability if the above recommendations and precautions are not respected.
SAFEGUARDING THE ENVIRONMENT
I. Packing

The packaging material is entirely recyclable, and marked with the recycling symbol. Follow local regulations for scrapping. Keep the packaging materials (plastic bags, polystyrene parts, etc.) out of reach of children, as they are potentially dangerous.
2. Scrapping
The appliance is manufactured using recyclable material.
This appliance is marked according to the European directive 2002/96/EC on Waste Electrical and Electronic Equipment (WEEE).
By ensuring that this appliance is scrapped suitably, you can help prevent potentially damaging consequences for the environment and health.
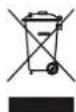
The symbol ☐ on the appliance, or on the accompanying documents, indicates that this appliance should not be treated as domestic waste but must be taken to a suitable collection point for the recycling of electrical and electronic equipment. Before scrapping, make the appliance unusable by cutting off the power cable and removing the doors and shelves so that children cannot easily climb inside the appliance.
Disposal must be carried out in accordance with local environmental regulations for waste disposal. Deliver the appliance immediately to an authorized dump; do not leave it unattended even for a few days, since it is potentially dangerous for children. For further information on the treatment, recovery and recycling of this appliance, contact your competent local authority, the collection service for household waste or the shop where you purchased the appliance.
Information:
This appliance does not contain CFCs (the refrigerant circuit contains R134a) or HFCs (the refrigerant circuit contains R600a) (see the rating plate inside the appliance).
Appliances with Isobutane (R600a): isobutane is a naturally occurring, low environmental impact gas. Caution is required, however, because isobutane is flammable. Therefore, ensure that the pipelines of the refrigerant circuit do not get damaged.
Declaration of conformity
- This appliance is designed to store food and is manufactured in conformity with European Directive 90/128/EEC, 02/72/EEC and Regulation (EC) No. 1935/2004
CE
This product has been designed, manufactured and marketed in compliance with:
• the safety objectives prescribed in the Low Voltage Directive 2006/95/EC
• the protection requirements of the EMC Directive 2004/108/EC
Electrical safety of the appliance can only be guaranteed if it is correctly connected to an approved earthing system.
natural_image
Simple line drawing of a tree with rounded canopy and trunk (no text or symbols)HOW TO OPERATE THE REFRIGERATOR COMPARTMENT
Switching on the appliance
Starting up the appliance
The appliance features internal controls.
Plug in the appliance.
When the appliance is connected to the mains, the inside light switches on each time the door is opened. The thermostat, located inside the refrigerator compartment, is used to adjust the temperature of both the refrigerator compartment and low temperature compartment (if fitted).
Appliance temperature adjustment:
Temperature setting:
The thermostat is used to automatically adjust the internal temperature of the refrigerator compartment and the compartment.
The thermostat knob can be turned from position 1 to 7 (coldest setting) to make the internal temperature colder.
When set to O the appliance is switched off.
To store food for a short period of time, set the thermostat between 1 (Min) and 3 (Med).
- To store food for long periods of time in the compartment, set the thermostat to 3 or 4.
Note:
The ambient air temperature, frequency of door opening and the position of the appliance can affect internal temperatures. These factors must be taken into account when setting the thermostat.
How to use the refrigerator compartment
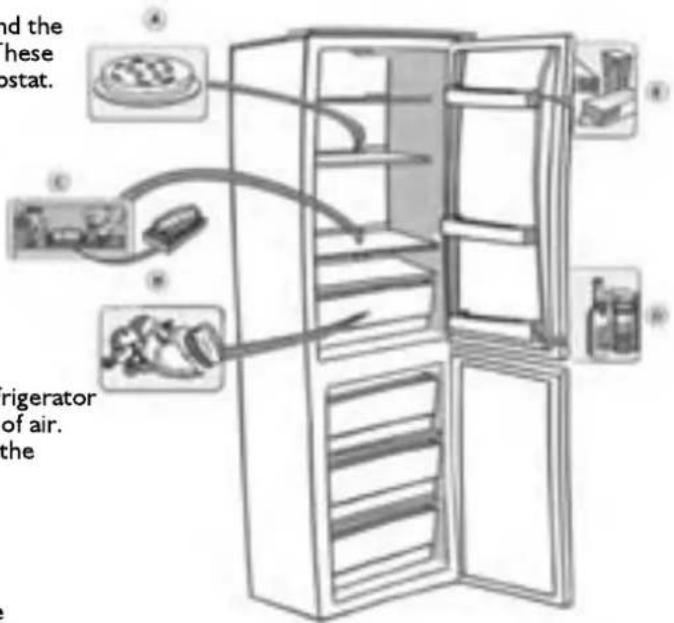
Position the food as shown in the figure.
A Cooked food
B Fruit and vegetables
C Fish, meat
D Bottles
E Cheese
Notes:
- The space between the shelves and the rear wall of the refrigerator compartment must be unobstructed to allow circulation of air.
- Do not place food in direct contact with the rear wall of the refrigerator compartment.
- Do not place hot food in the refrigerator.
• Store liquids in closed containers.
Important
Storing vegetables with high water content can cause condensation to form on the glass shelf of the crisper drawer: this will not affect the correct operation of the appliance.
The freezer compartment is 📄. It can be used to freeze fresh food.
The quantity of fresh food that can be frozen in 24 hours is shown on the rating plate.
Note:
In the event of a power cut, the low temperature compartment will maintain a sufficiently low temperature for food storage. However, it is advisable to avoid opening the compartment door during such periods.
Freezing fresh food
Important
- Before freezing, wrap and seal fresh food in: aluminium foil, cling film, air and water-tight plastic bags, polythene containers with lids or freezer containers suitable for freezing fresh food.
- Arrange the fresh food in the top compartment, leaving sufficient space around each pack for the air to circulate.
- For optimum freezing, turn the thermostat down by half a point when placing fresh foods in the freezer compartment.
• The food will be completely frozen in 24 hours.
The table alongside shows the recommended maximum storage time for frozen fresh foods.
When purchasing frozen food products:
- ensure that the packaging is not damaged (frozen food in damaged packaging may have deteriorated). If the package is swollen or has damp patches, it may not have been stored under optimal conditions and defrosting may have already begun.
- When shopping, leave frozen food purchases until last and transport the products in a thermally insulated cool bag.
- Place the items in the low temperature compartment as soon as you get home.
- If food has defrosted even partially, do not re-freeze it. Consume within 24 hours.
- Avoid, or reduce temperature variations to the minimum. Respect the best-before date on the package.
• Always observe the storage information on the package.
Making ice cubes
- Fill the ice cube tray 2/3 full and place it in the low temperature compartment
- Do not use sharp or pointed instruments to detach the tray if it is stuck to the low temperature compartment bottom.
- Bend the ice tray slightly to remove the cubes.
| MONTHS | FOOD |
| 1-3 | |
| 4-7 | |
| 8-12 |
HOW TO DEFROST AND CLEAN THE REFRIGERATOR
Before any cleaning or maintenance operation, unplug the appliance from the mains or disconnect the electrical power supply.
Defrosting of the refrigerator compartment is completely automatic.
Droplets of water on the rear wall of the refrigerator compartment indicate that the periodic automatic defrost cycle is in progress.
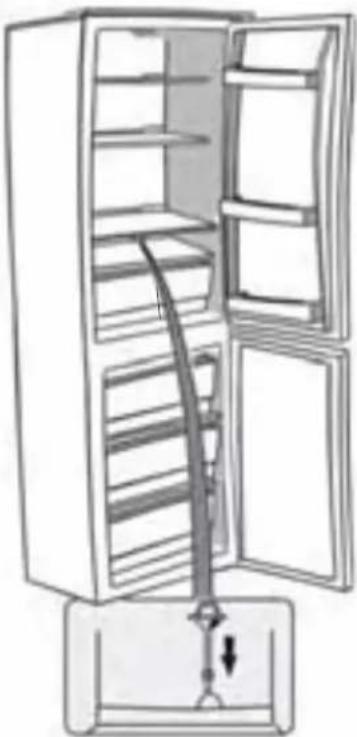
The defrost water is automatically routed to a drain outlet and into a container from which it evaporates.
Defrosting the freezer compartment
Defrost the freezer compartment once or twice a year or when the ice formation is excessive.
It is perfectly normal for ice to form. The amount of ice which forms and the rate at which it accumulates will depends on room temperature and humidity, and on the frequency with which the door is opened. Ice formation is concentrated at the top of the compartment and does not affect the efficiency of the appliance.
If possible, defrost the freezer when it is nearly empty.
- Remove the food from the freezer, wrap in newspaper and group together in a cool place or in a portable cooler.
- Leave the door open to allow the frost to melt.
- Clean the interior with a sponge soaked in warm water and/or neutral detergent. Do not use abrasive substances.
- Rinse the interior and dry thoroughly.
- Put the food back into the freezer.
- Close the door.
- Plug in the appliance once again.
- Switch the appliance on.
natural_image
Line drawing of an open refrigerator with a handle inserted into the drawer (no text or symbols)CARE AND MAINTENANCE
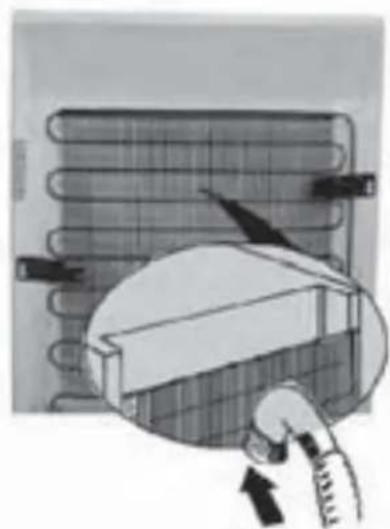
• Periodically clean air vents and the condenser at the rear of the appliance with a vacuum cleaner or a brush.
- Clean the outside using a soft cloth.
Prolonged disuse
I. Empty the refrigerator.
2. Disconnect the appliance from the power supply.
3. Defrost and clean the interior.
4. In the event of prolonged disuse, leave the door open to prevent the formation of mould, odours and oxidation.
-
Clean the appliance.
-
Clean the inside of the low temperature compartment (where fitted) when defrosting.
- Periodically clean the inside of the refrigerator compartment with a sponge dampened in warm water and/or neutral detergent. Rinse and dry with a soft cloth. Do not use abrasive products.
- Clean the outside with a soft damp cloth. Do not use abrasive products, scourers, stain-removers (e.g. acetone, trichloroethylene) or vinegar.
natural_image
Illustration of a hand holding a tool interacting with a coiled heating element (no text or symbols visible)INSTALLATION INSTRUCTIONS
Installation Kit
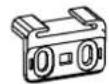

Guide x 4 Guide Cover x 4

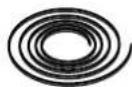
Screw x 20 Rubber Seal x 1
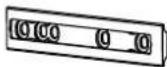
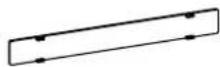
Slider Cover x 4Slider x 4
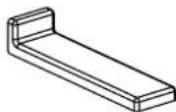
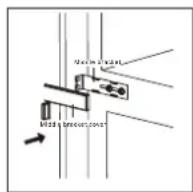
Middle Bracket Cover x 1
Installing the appliance
- Ensure the size of cabinet and ventilation are enough.
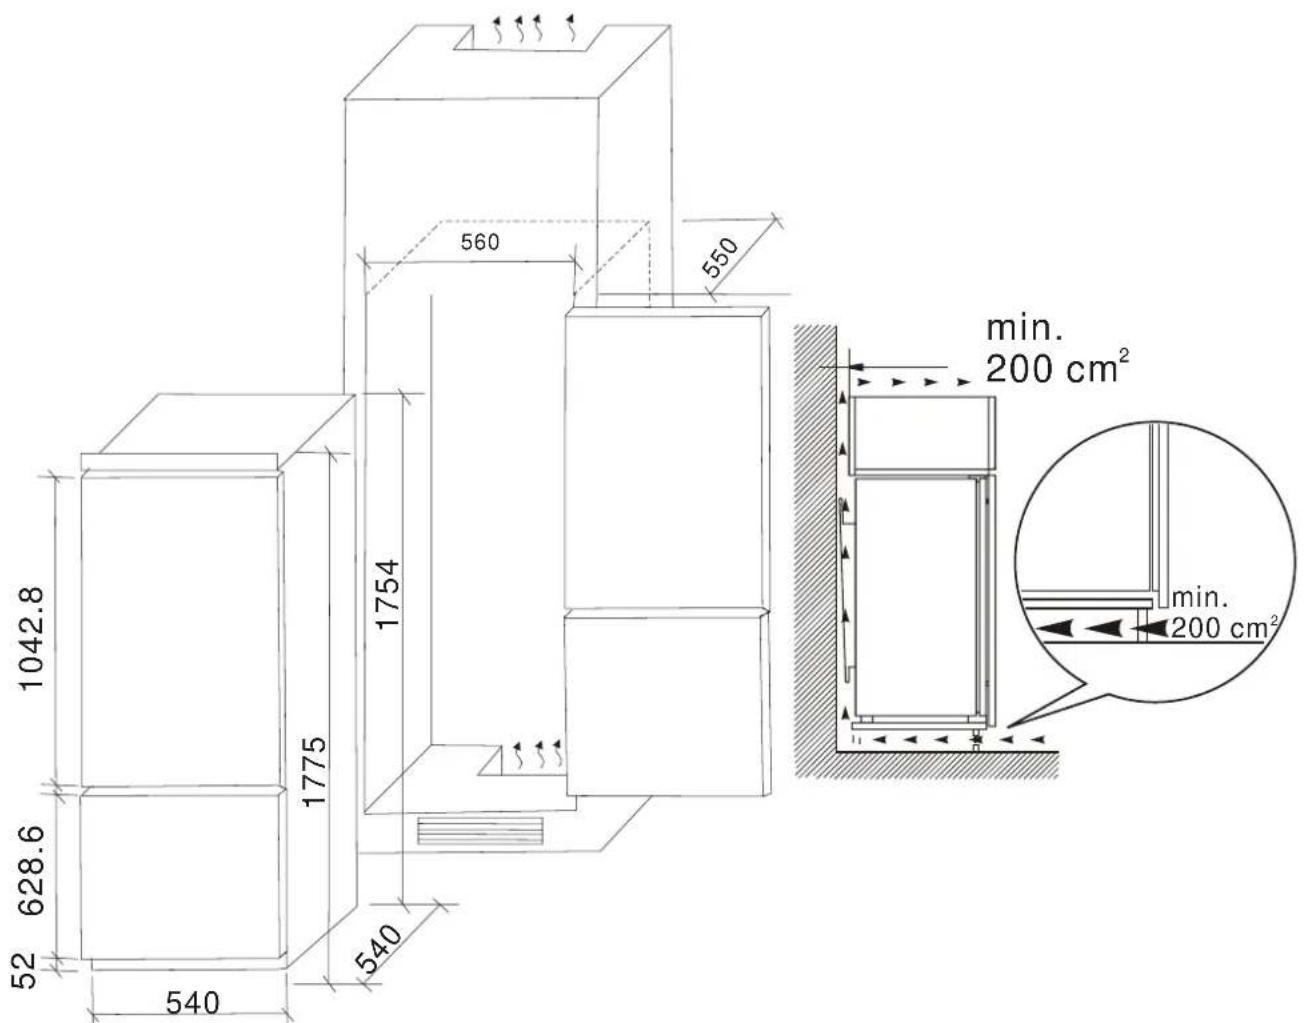
-
Attach the cabinet doors to the cabinet using your cabinet hinges. The hinges should be positioned on the same side of the cabinet as the hinges on the appliance doors. (The door opening direction can be changed if required). Adjust the hinges to ensure that the cabinet doors are level and open and close properly.
-
Slowly and carefully push the appliance into the cabinet. Ensure the opening side is as close to the cabinet wall as possible.
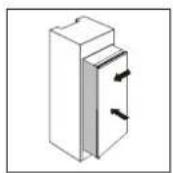
Installation Instructions (Cont'd)
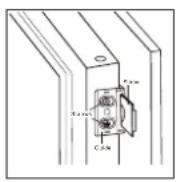
- Fix a guide to the holes in the side of the appliance door. Insert a slider into the guide then fully open and close the appliance and cabinet doors together to check that the cabinet door can be fully opened and closed.
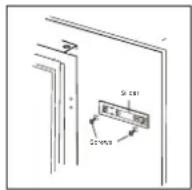
- Open the appliance and cabinet doors together and mark the position of the slider (Approx. 2cm in from the edge of the cabinet door), such that the slider engages with the guide when the door is opened and closed. Take the slider out of the guide and fix the slider to the cabinet door with 2 screws. Then fix the slider cover onto the slider.
- Unscrew the guide from the appliance door.
- Repeat steps 4 to 6 to fix the other three sliders and covers to the cabinet doors.
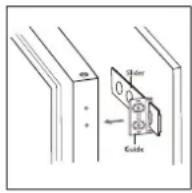
- Fit the four guides onto the sliders and then fix them to the sides of the appliance doors. Fit the guide covers onto the guides.
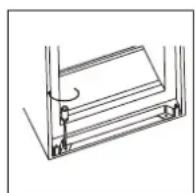
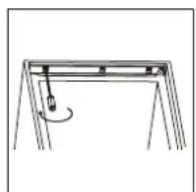
- Double check that the doors can open and close smoothly and that the appliance doors seal properly. If not, slightly adjust the unit. Fix the bottom bracket of the appliance to the cabinet.
- Fix the top bracket of the appliance to the cabinet.
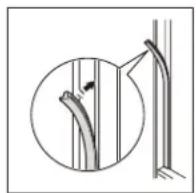
- Insert the rubber seal into the gap between the appliance and the cabinet, at the door opening side.
- Fix the middle bracket to the side of the cabinet. Clip the middle bracket cover onto the bracket.
Door Swing Reversal
Reversing the door swing
The refrigerator has the capability of opening the door from either the left or the right side. The unit is delivered to you with the door opening from the left side. To change the opening direction, please follow these instructions.
Note: Before reversing the door swing, unplug the appliance from the mains or disconnect the electrical power supply.
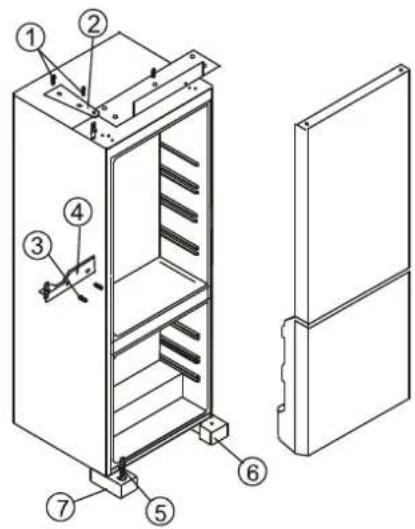
I. Remove the two screws (1) holding the top hinge (2) (right side) to the frame. Remove the hinge (2).
2. Lift the upper door off the middle hinge pin and place it on a non-scratching surface.
3. Remove the two screws (3) holding the middle hinge (4). Remove the hinge (4).
4. Lift the lower door off the bottom hinge pin and place it on a non-scratching surface.
5. Remove the hinge pin(5) from the right bottom hinge (6) to the left bottom hinge(7).
6. Lower the lower door onto the left bottom hinge pin(5).
7. Reverse the direction of the hinge (4). Reassemble the hinge (4) on the middle left hand side using the two screws (3).
8. While holding the lower door in the closed position, reassemble the middle hinge (4) on the left hand side using the two screws (3). Do not tighten the screws (3) until the top of the lower door is level with the counter top.
9. Lower the upper door onto the left middle hinge (4) pin.
10. While holding the upper door in the closed position, reassemble the top hinge (2) on the left hand side using the two screws (1). Do not tighten the screws (1) until the top of the door is level with the counter top.
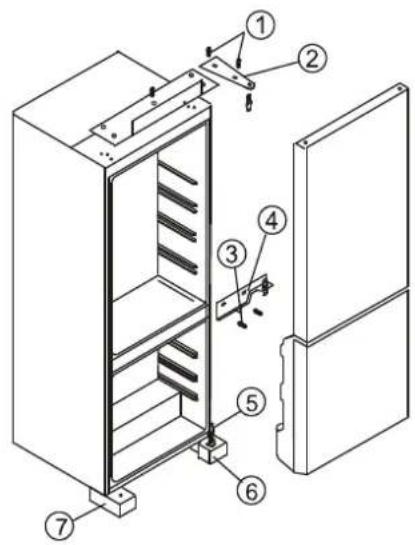
Door opening from left side
fig. 1
Door opening from right side
fig. 2
TROUBLESHOOTING GUIDE
IMPORTANT: If your fridge freezer appears not to be operating properly, before contacting the Customer Care Department, please refer to the checklist below.

My fridge freezer does not appear to be working/there is no power to my appliance.
- Check that the plug is fully inserted into the power socket.
- Check that there is power to your mains supply (e.g. that there hasn't been a power cut or that the fuse hasn't blown).
- Check that the thermostat has not been turned to the off position.
- Check that your mains supply voltage, corre sponds to the voltage stated on the rating plate of your appliance.

My fridge freezer appears to be performing poorly
- Check that the appliance isn't overloaded and that food hasn't been packed too tightly into it.
• The thermostat setting is too low; you should turn the thermostat up higher. - Ensure that the door is closing properly and that the door has not been opened for a prolonged period in error.
- Ensure that there is adequate ventilation for your appliance.

My fridge freezer is noisy
- The refrigerant gas that circulates the pipework of the appliance may make a slight noise, even if the compressor is not running.
- If the noise worsens or the appliance gets louder than normal; check that it is levelled off correctly that nothing is touching the rear of the fridge freezer and that nothing placed inside the appliance is rattling.

Ice has formed on the inner back wall of my fridge
- Check that food has not been pushed too far back inside the appliance, so that it is in contact with the inner back wall.
- IMPORTANT: It is normal to get some ice drop lets forming on the back wall of the appliance. The formation of ice droplets does not indicate an appliance fault.

There is water in the base of the fridge or leaking out of my fridge.
• Is the defrost water drain blocked?
DO NOT ATTEMPT TO REPAIR THE APPLIANCE YOURSELF.
- Please note that if an engineer is asked to attend whilst the product is under guarantee and finds that the problem is not the result of an appliance fault, then you may be liable for the cost of the call out charge. The appliance must be accessible for the engineer to perform any necessary repair. If your appliance is installed in such a way that an engineer is concerned that damage will be caused to the appliance or your kitchen, then he will not complete a repair.
- This includes situations where appliances have been tiled in sealed in with sealant have wooden obstructions laced in front of the appliance, like plinths.
CE
Crosslee plc, Halifax, HX3 8DE, UK
- White Knight
- Integrated Fridge Freezer
- FF250IH
- Instruction Manual
- BEFORE USING THE APPLIANCE
- WARNING
- PRECAUTIONS AND GENERAL RECOMMENDATIONS
- SAFEGUARDING THE ENVIRONMENT
- Packing
- Scrapping
- Information:
- Declaration of conformity
- CE
- HOW TO OPERATE THE REFRIGERATOR COMPARTMENT
- Switching on the appliance
- Starting up the appliance
- Appliance temperature adjustment:
- Temperature setting:
- Note:
- How to use the refrigerator compartment
- Notes:
- Important
- Freezing fresh food
- The table alongside shows the recommended maximum storage time for frozen fresh foods.
- When purchasing frozen food products:
- Making ice cubes
- HOW TO DEFROST AND CLEAN THE REFRIGERATOR
- Defrosting the freezer compartment
- CARE AND MAINTENANCE
- Prolonged disuse
- INSTALLATION INSTRUCTIONS
- Installing the appliance
- Installation Instructions (Cont'd)
- Door Swing Reversal
- Reversing the door swing
- TROUBLESHOOTING GUIDE
- DO NOT ATTEMPT TO REPAIR THE APPLIANCE YOURSELF.
Brand : White Knight
Model : FF250IH
Category : Refrigerator