W100FW - Washing machine Creda - Free user manual and instructions
Find the device manual for free W100FW Creda in PDF.


| Product Type | Freestanding Washing Machine |
| Brand | Creda |
| Model | W100FW |
| Dimensions (H x W x D) | 85 x 60 x 60 cm |
| Weight | 70 kg |
| Rated Voltage | 220-240 V |
| Frequency | 50 Hz |
| Power Consumption | 2000 W |
| Capacity | 7 kg |
| Spin Speed | 1000 rpm |
| Programs | Cotton, Synthetics, Delicates, Quick Wash, Wool, Rinse & Spin |
| Temperature Range | Cold to 90°C |
| Water Connection | Cold water inlet |
| Energy Efficiency Class | A++ |
| Noise Level (Wash/Spin) | 58 dB / 76 dB |
| Maintenance | Clean filter regularly, check inlet hose, descale periodically |
| Safety Features | Child lock, overflow protection, unbalanced load detection |
| Spare Parts Availability | Through authorized service centers |
| Repairability Index | 7.5 / 10 |
| Warranty | 2 years |
Frequently Asked Questions - W100FW Creda
User questions about W100FW Creda
0 question about this device. Answer the ones you know or ask your own.
Ask a new question about this device
Download the instructions for your Washing machine in PDF format for free! Find your manual W100FW - Creda and take your electronic device back in hand. On this page are published all the documents necessary for the use of your device. W100FW by Creda.
USER MANUAL W100FW Creda
natural_image
Model W120VW washing machine shown in black and white photo (no text or symbols on the device itself)Washing Machine
W100FW / W120FW / W120VW
Retention of this Instruction Book
Keep this book in a handy place for reference. It contains important details on the safe and proper use of your appliance. If you sell the appliance, pass it on to someone else, move house and leave it behind, make sure that you provide this book so that the new owner can become familiar with the appliance and safety warnings.
Please remember your new appliance is a complex piece of equipment. DIY repairs or unqualified and untrained service people may put you in danger, could damage the appliance and might mean you lose cover under Creda's Part Guarantee.
Dear Customer,
Congratulations on the purchase of your new 'Creda' appliance. We recommend for your own safety and to get the best possible results from your machine that you read through this handbook thoroughly before using your appliance for the first time.
★Transit Brackets MUST be removed before using the appliance.
★DO NOT plug in and switch on at the mains until installation is complete.
Contents
Electrical requirements 2
Recycling & Disposal Information Choosing a Location Adjusting the Feet
Installation Instructions 3-4
Transit Bracket Removal Connecting to the Water Supply Removing the Polystyrene Pyramid Connecting to a Drainage System
Getting to Know your Machine 5
Wash Load Guides Interlocking Door System Washcare tips
A Typical Wash Programme 6
Controls 7
Choosing A Wash Programme 8
Optional Wash Features 9
Dispenser Drawer 10-11
Care and Cleaning 12 Maintenance Wash
Regular Checks and Stain Removal 13
Something wrong with your appliance 14
Service Cover 15
Key Contact Numbers Back page
Electrical Requirements
This appliance should be connected to the mains supply via a suitable switched socket in an accessible position.
WARNING: This appliance must be earthed.
FUSES
Your appliance comes fitted with a plug and a 13A fuse. If you need to replace the fuse, only those rated at 13A and ASTA approved to BS1362 should be used. To change fuse, lift holder to vertical position and lift fuse out. To replace, insert fuse and push fuse holder down into locked position. Correct replacement is identified by colour coding, or marking on base of plug.
WARNING: Do not use plug unless fuse holder is in locked position.
CHANGING THE PLUG
Cut off and dispose of the supplied plug if it does not fit your socket.
WARNING: To avoid a shock hazard do not insert this plug into a socket anywhere else.
IMPORTANT: WIRES IN THE MAINS LEAD ARE COLOURED IN ACCORDANCE WITH THE
FOLLOWING CODE:
Green/Yellow - Earth Blue - Neutral
Brown - Live
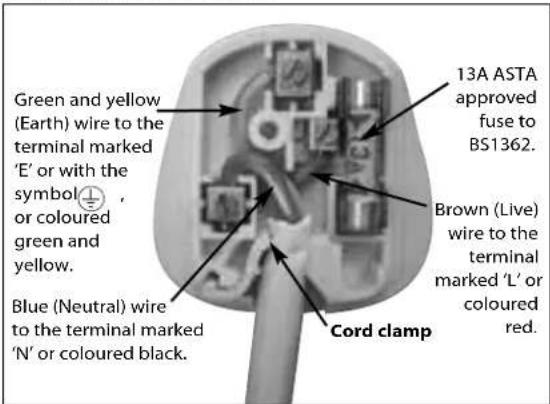
If you change the plug, the colour of wires in the mains lead may not correspond with the colour of the markings identifying terminals in the plug. You should therefore wire it as shown (see illustration). If the mains lead needs to be replaced at any time, it should be replaced by a special lead obtainable from your local authorised Creda Service Centre. A charge will be made if you have damaged the existing lead or require a longer one. It is strongly advised that this work is carried out by a qualified electrician.
CE marking certifies that this appliance complies with requirements laid down in EEC Directive 89:336 (Electromagnetic compatibility) and subsequent modifications and Low Voltage Directive 73/23/EEC.
Positioning & Adjusting the feet
Choosing the position of your appliance will influence its performance.
★ Position where possible on a solid floor. Some vibration may occur with a wooden floor.
★ Take care with vinyl floor coverings. The weight of the appliance may cause indentations in some vinyl floor coverings.
★ For your safety and to comply with IEE regulations, you should not install your appliance in a bath or shower room. Seek professional advice if you wish to do so.
★ Ensure sufficient space is allowed for the appliance. Dimensions should be a minimum of: 600mm Wide (23 ^5/8 "), 600mm Deep (23 ^5/8 ) and 900mm High (35 ^1/2 ).
★ Ensure the electrical socket and water taps are easily accessible and that the water supply can be isolated if necessary.
Your appliance may become noisy or move about the floor if it is not stabilised.
To adjust your appliance it must be in an upright position, then :-
★Release locking rings on the two front feet.
★ Screw feet in or out until the appliance is standing firm and level.
★Ensure all feet are in firm contact with the floor.
★Tighten the locking rings on the front feet.
Recycling & Disposal Information
As part of Creda's continued commitment to helping the environment, Creda may use quality recycled components to keep down customer costs and minimise material wastage. Please dispose of packaging and old appliances carefully. To minimise risk of injury to children, remove the door, plug and cut mains cable off flush with the appliance. Dispose of separately to ensure that the appliance can no longer be plugged into a mains socket.

Transit Bracket Removal
natural_image
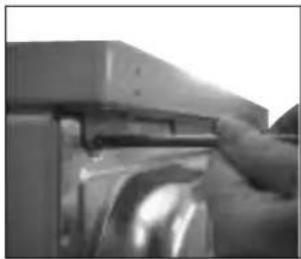
Close-up of a hand adjusting a mechanical component (no visible text or symbols)- Remove the 3 screws from back of work top lid.
natural_image
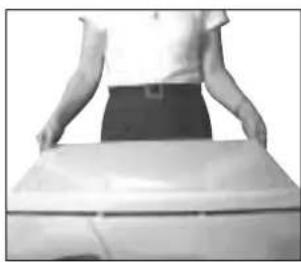
Person standing with hands placed on a large rectangular object (no visible text or symbols)- From the rear of appliance, grip the sides of the work top lid, lift, slide and pull towards you to remove.
natural_image
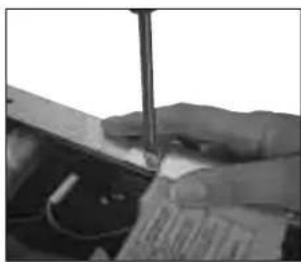
Close-up of a hand using a screwdriver to press or install electronic components (no visible text or symbols)- Remove 1 screw and clamp. Retain for future use.
natural_image
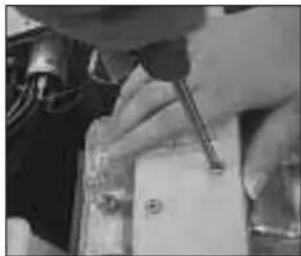
Close-up of hands using a tool to adjust or install electronic components (no visible text or symbols)- Remove 2 screws and transit bracket. Retain for future use.
natural_image
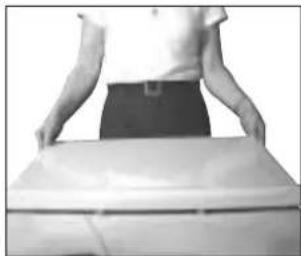
Person standing behind a large rectangular object, possibly a container or box (no visible text or symbols)- Slide and push work top lid into position ensuring it is located on the console correctly.
natural_image
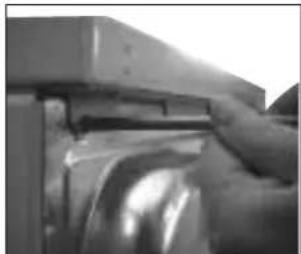
Close-up of a hand operating a mechanical device with a metallic component (no visible text or symbols)- Replace the 3 screws into the back of the work top lid.
natural_image
3D rendered mechanical component with a stepped cylindrical body and an arrow indicating direction (no text or symbols)Connecting to the Water Supply
Hot and Cold Fill Connection
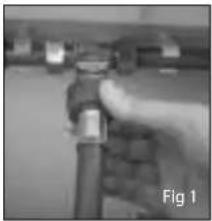
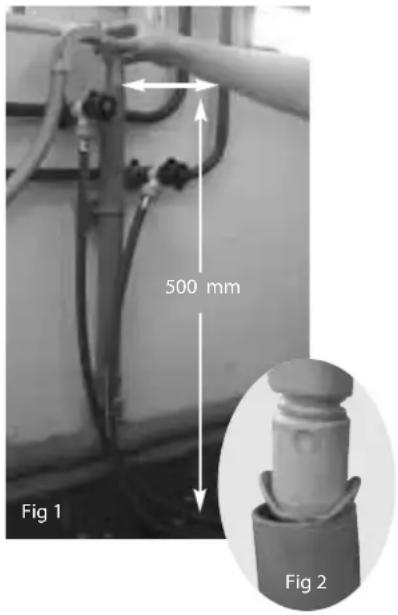
- Connect the straight end of the supplied RED or GREY hose to the HOT water supply tap (Fig 1). Connect the straight end of the supplied BLUE hose to the COLD water supply tap.
- Hand tighten connectors sufficiently to ensure water does not leak from the hose connections.
- Before connecting each of the hoses to the appliance, confirm the water supply is flowing by holding the free end of each hose in a bucket, turn the relevant water supply taps on and then off.
- Connect the angled end of the RED or GREY hose to the white plastic inlet valve marked 'H'(Fig 2) and the angled end of the BLUE hose to the white plastic inlet valve marked 'C' at the back of the appliance.
- Hand tighten connectors sufficiently to ensure water does not leak from the hose connections.
- Turn on the water supply taps and check for leaks from the connectors. In the event of a leak, turn off supply tap, remove connector and check that the sealing washer is in place. Refit the connector and tighten. Turn on water supply taps.
Cold Fill Only Connection
A Cold Fill Adaptor is available from your local Creda authorised Service Centre.
- Connect angled end of supplied hoses to hot and cold inlets at the back of appliance
- Connect straight end of hoses to cold fill adaptor.
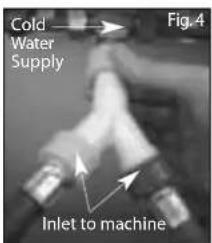
- Connect adaptor to cold water supply.
NOTE: Hand tighten sufficiently to ensure water is not leaking from the tap hose connections.
Fill Hoses
Ensure the supplied hoses are not kinked when connected.
2m long extension fill hoses are available from your local retailer or Genuine Parts and Accessories UK 08709 077 077.
Water Pressure
Incoming hot and cold water pressure should be between 3 and 150 psi (21 - 1034 Kpa).
The temperature of the incoming household hot water supply should ideally be 60^ C and no higher than 70^ C as this could cause damage to both your laundry and appliance.
Methods of Plumbing
The water supply taps must be easily accessible when the appliance is installed. Your taps should be in good condition or it may leak when turned full on. Mixer taps are unsuitable, if you have them you will need to use permanent plumbing. Adaptors are required to connect to sink taps.
Permanent Plumbing
There must be taps or stopcocks so that the water supply can be turned off, isolating the appliance from the household supply.
Existing Plumbing
If you have an existing installation please check that this includes taps or stopcocks to isolate the appliance. The appliance must be connected to the water supply using the new hose set supplied, old hose sets should not be used.
Removing the Polystyrene Pyramid
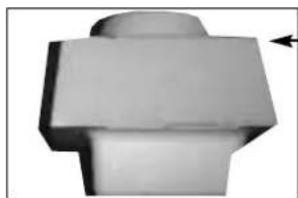
After removing the packaging from the machine, ensure that the polystyrene pyramid (shown at the side) has come away from the underside of the machine, with the polystyrene base.
If it has not come away, remove it by tilting the machine backwards until the pyramid can be seen and then remove.
natural_image
Close-up of a hand holding a cylindrical tool or pipe, with no visible text or symbols.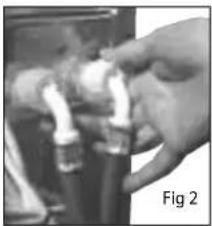
natural_image
Close-up of hands holding a white cylindrical object with a white filament, labeled 'Fig 2' (no other text or symbols visible)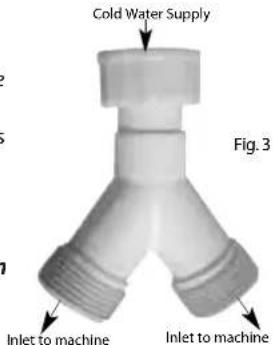
Connect to a drainage system
●Do not remove hooked end support from drainage hose.
●Do not position standpipe near an electrical outlet.
For drainage into a standard work top sink ensure outlet pipe has a minimum bore of 32 mm. To avoid syphoning ensure the end of the drainage hose is above the water level in the sink. If your sink is inset, the front edge of the basin must be less than 75 mm from the front edge of your work top.
We recommend one of the following methods:-
Into a Standpipe
Ensure the standpipe has a minimum bore of 38mm (1 1/2").
- Ensure the top of the standpipe is at least 500mm (20") from the floor.
- Untie GREY drainage hose and place approximately 100mm (4") into the standpipe.
- If the end of your GREY drainage hose is fitted with 'Retaining Flaps' ensure they are fully inserted into the standpipe as shown (Fig. 2)
Into a Sink Waste System
Ensure the sink outlet pipe has a minimum diameter of 32mm (1 14 ).
- Untie drainage hose from rear of the appliance.
- Reposition the Hooked End Support as required along the GREY drainage hose.
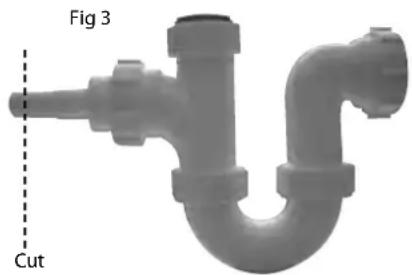
- If fitting an under sink waste disposal unit (Fig 3), cut out the membrane or blanking plug.
- Attach the end of the GREY drainage hose to the undersink waste disposal securely as shown using a hose clip (Fig 4).
- Raise the hose to a minimum height of 800 mm to avoid syphoning.
natural_image
3D model of a U-shaped pipe fitting with a cut line and labeled Fig 3 (no text or symbols on the object itself)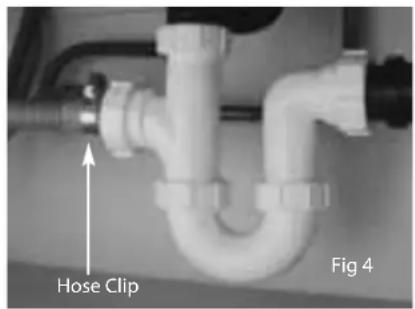
Getting to know your machine
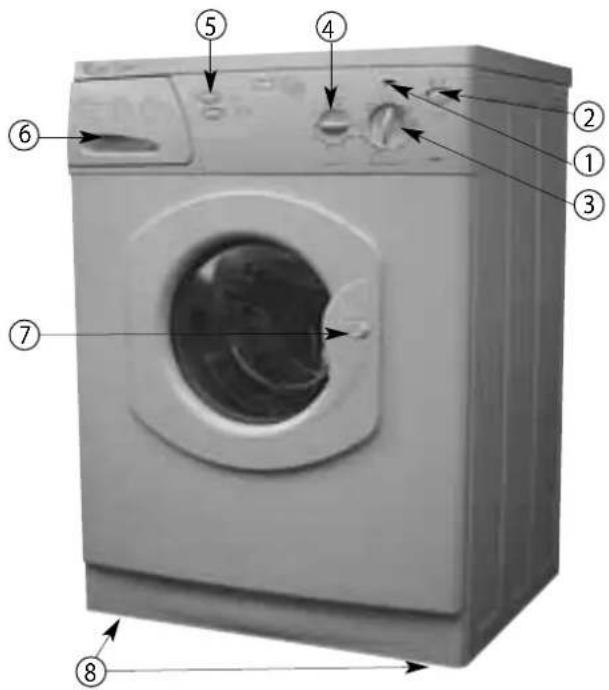
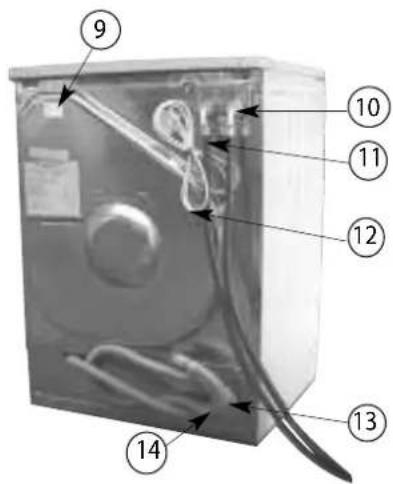
Model Shown W120VW
Model W120VW shows the maximum features available on a Creda washing machine
Front
- Door Locked Indicator
- Mains On/Off Button
- Wash Dial
- Variable Spin Speed Control Dial (Model W120VW only)
- Optional Wash Feature Buttons ENERGY SAVE DEEP RINSE
- Detergent/Fabric Conditioner Drawer
- Interlocking Door & Release Button
- Adjustable Feet
Back
- Rating Plate
- Cold Water Inlet Point and Hose (Blue)
- Hot Water Inlet Point and Hose (Red or Grey)
- Mains Cable
- Drainage Hose
- Hose Retaining Clip
Interlocking Door System
The interlock activates 3-4 seconds after the machine has been switched on. The door will lock and the indicator will remain lit throughout the programme.
Approximately 1-2 minutes after the programme has finished the indicator light will go out and the door can be opened. The machine will not operate if the door is not closed properly.
WARNING: Do not overload your machine! It may damage items of clothing and reduce the quality of the wash. WARNING: Do not allow children to play with the appliance or tamper with the controls.
Load guide
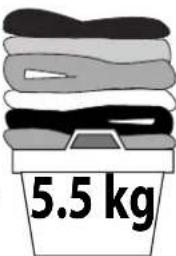
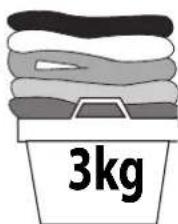
Two examples of a typical full wash load
Cotton Load
2 Bath Towels
5 Shirts
6 Blouses
1 Set of Pyjamas
4 Sets of Underwear
Or
Synthetic Load
2 Children's Dresses
4 Shirts
4 Blouses
1 Set of Pyjamas
4 Sets of Underwear
Washcare Tips
★We strongly recommend that your do not wash underwired bras in this machine. Should the wires become detached they could cause damage to your clothes and the machine. If the washcare label states that the garment is machine washable then we advise placing it in a sealed pillow case or similar washbag.
★Pre-treat stains before washing.
★Close zips, tie belts, strings etc... and press studs to prevent tangling.
★Remove sharp objects or coins from pockets before washing as they may damage clothes.
★Limit size of absorbent loads ie; towels, to 3kg (7lb) to give good washing/rinsing results.
★Place small items in a wash bag.
★Check wash labels as some items may require a cool programme.
★Wash non-colour fast items, woollens or really dirty clothes separately as they may affect other items.
★Clothes will not wash properly if you over load your machine.
★Clothes which do not have a wash label should not be machine washed.
A typical wash programme
Before selecting any programme ensure the mains button is in the 'off' position.
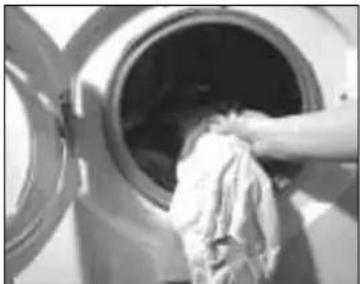
natural_image
Close-up of a hand washing a cloth inside a large industrial machine (no visible text or symbols)- Sort laundry into same wash requirements.
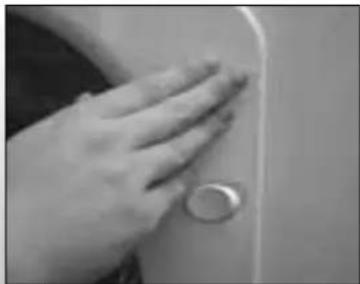
natural_image
Close-up of hands touching a door handle (no visible text or symbols)- Close door, applying pressure only at the 2 o'clock position.
natural_image
Close-up of a mechanical component or fixture with no visible text or symbols- Add detergent/ conditioner (See manufacturer's instructions).
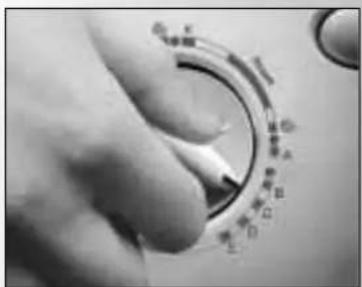
natural_image
Close-up of a hand holding a small white tool on a circular dial, with no visible text or symbols.- Select wash programme by turning the wash dial clockwise.
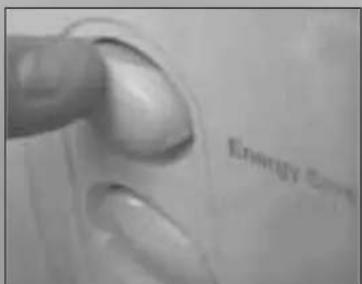
- Select optional wash features by pressing required button.
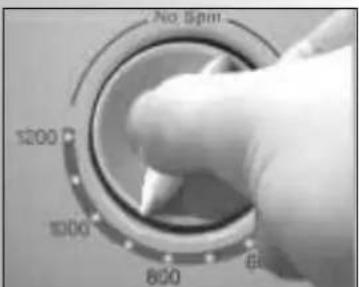
- Select reduced spin (Model W120VW only), if required, by turning the control dial.
natural_image
Close-up of a hand adjusting a pipe fitting with a tool (no visible text or symbols)- Check water and electricity are switched on at mains.
natural_image
Close-up of a white plastic funnel-shaped object with a coiled cable, placed indoors near a wall (no visible text or symbols)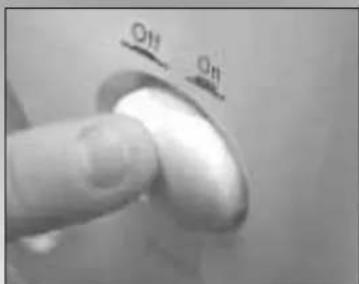
- Press the Power button to Start the programme. After a few seconds the Door Locked indicator will illuminate.
natural_image
Close-up of a hand pressing down on a white toilet (no visible text or symbols)- Approximately 1-2 minutes after the programme has finished the indicator light will go out and the door can be opened. Press the Power button to 'OFF'.
We recommend, on completion of your wash programme that you switch 'Off' both the the electricity and water supply to the appliance.
Wash dial and symbols
Before selecting a programme, ensure the mains button is in the 'OFF' position.
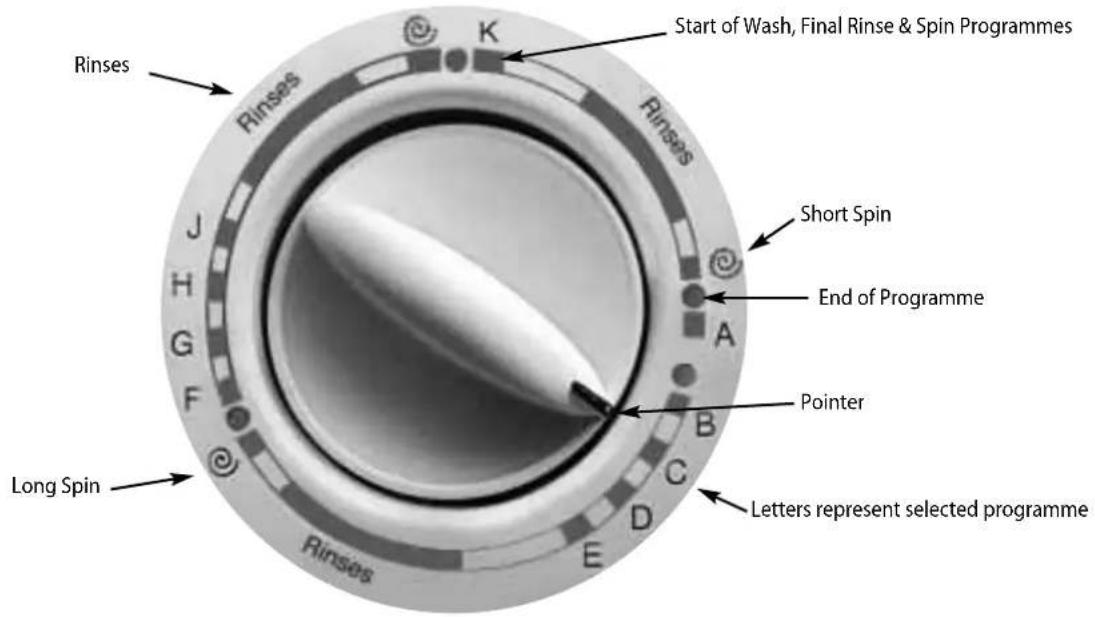
Turn the dial slowly clockwise. You will hear as the pointer aligns with the start of the selected wash programme, final rinse or spin.
Note: Failure to correctly align the pointer to the start of a wash programme will result in detergent not being dispensed from the drawer.
Variable spin speed control dial (Model W120VW only)
natural_image
Close-up of a rotary dial with no visible text or symbols (pure electrical circuit lines)To reduce the maximum spin speed for the selected programme, turn the dial before or during a programme.
Note: Spin speed cannot be increased again whilst the appliance is spinning.
Spin only option
Before selecting a programme, ensure the mains button is in the 'OFF' position.
To select long spin, turn the wash dial clockwise until the pointer aligns with

For a short spin align the pointer to

Press the mains button 'ON'.
Choosing a wash programme
IMPORTANT INFORMATION:
The temperature of the incoming water supply or selection of wash features: ie. Energy Save or Deep Rinse will affect the programme times.
Before selecting a programme, ensure the mains button is in the 'OFF' position.
| ITCLProg. | Codes | Fabric | Temp °C | Full Load | ApproxProg.Time(mins)based on hotand cold fill | MaximumSpin Speed(rpm)depending onModel |
| APrewash |  | Heavily soiled loads. On completion, switch 'OFF' mains button before selecting wash programme.WARNING: Not for woollen or delicate items. | 40 | 3kg to 5.5kg 15 - 25 | 400 | |
| B |  | Heavily soiled white cotton loads (includes a prewash). | 95 | 5.5kg 120 - 130 | *1200 | |
| C |  | White cotton and linen without special finishes. | 95 | 5.5kg 100 - 110 | *1200 | |
| D |  | Colourfast cotton, linen or viscose without special finishes. | 60 | 5.5kg 90 - 100 | *1200 | |
| E |  | Non-colourfast cotton, linen or viscose. | 40 | 5.5kg 60 - 70 | *1200 | |
| F |  | Colourfast nylon, polyester, acrylic/cotton mixtures, cotton or viscose with special finishes (eg. drip dry), coloured polyester/ cotton mixtures. | 50 | 3kg 50 - 60 | 1000 | |
| G |  | Acrylics, acetates and tri-acetate blends of these fabrics with wool, polyester/wool blends. | 40 | 3kg 45 - 50 | 1000 | |
| H |  | Silk and printed acetate fabrics with colours not fast at 40°C | 30 | 1.4kg 35 - 40 | 1000 | |
| J |  | Quickwash for freshening up lightly soiled items.WARNING: Not for woollen items. | Incoming household supply | 0.9kg 30 - 35 | 1000 | |
| K |  | Woollen blankets, wool mixtures with cotton or rayon, silk | 40 | 2.7kg | 40 - 45 | 1000 |
| [40] | Shrink resistant machine washable wool | 40 | 1.4kg | 40 - 45 | 1000 |
* Maximum spin speed for Models W120FW and W120VW only.
Optional wash features
BUTTON SELECTION
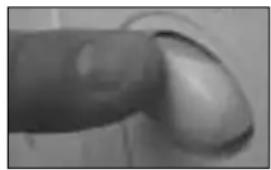
To select, press the button and the button comes out. To cancel, press again and the button is flush with the console.
Remember to cancel buttons after use!
natural_image
Close-up of a finger pressing a button (no visible text or symbols)ENERGY SAVE
Save money and time on lightly soiled loads.
Lightly soiled loads are washed at the temperature of the incoming household water supply.
- Programme 'A' is heated to a reduced temperature of 30 °C.
- Option NOT available with programme 'J'.
DEEP RINSE
For large wash loads, wash items for young children and people with sensitive skin.
Increases the water level of the last two rinses on all programmes except programme 'A' and the wool programme 'K', which increases automatically.
Automatic wash features
PULSE SPIN (Models W120FW and W120VW only)
Helps reduce wear and tear on your wash items.
Pulse spin is an automatic function where a long steady spin is followed by a 30 second burst at the maximum speed of your appliance to enable safer, more efficient water extraction.
INTELLIGENT CARE
Your appliance has an inbuilt feature to prevent it spinning with an unbalanced load, avoiding excessive vibration and prolonging the life of the appliance.
The Dispenser Drawer
IMPORTANT INFORMATION:
The Main Wash Indicator has been preset to dispense powder detergent only. If you wish to dispense liquid detergent see instructions for 'Changing the Main Wash Indicator', next page.
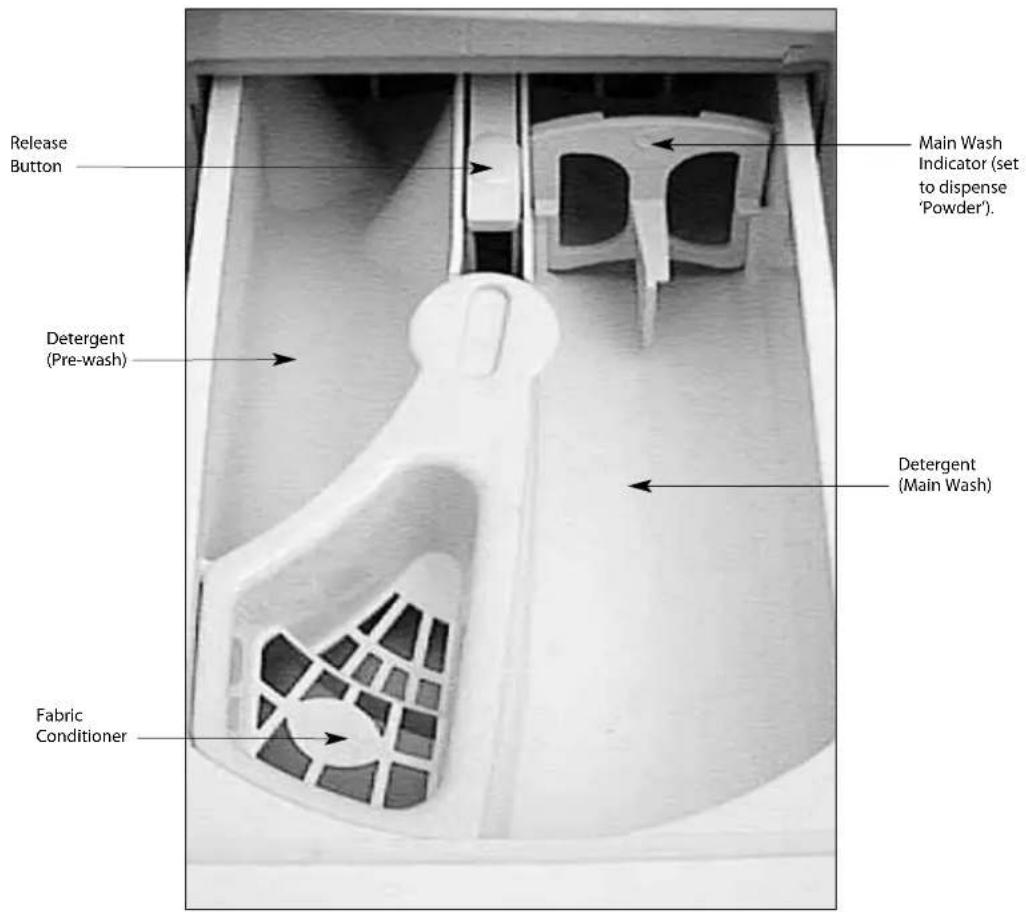
CHOOSE A SUITABLE DETERGENT
★ Select 'low suds' automatic washing powder, designed specifically for automatic washing machines or washer dryers.
★ Follow manufacturer's dosage recommendations. Do not under dose, you will not achieve a clean wash.
★ You will need up to 50% more detergent in hard water than in soft water areas to obtain the same wash results.
CHANGING THE MAIN WASH INDICATOR
The Main Wash Indicator has been fitted, ready to dispense 'Powder' detergent only.
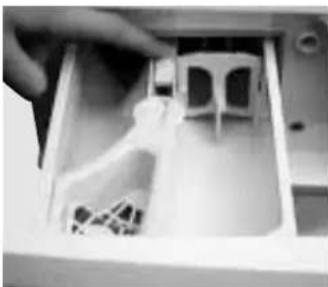
1 Pull drawer out until it reaches its stop.
natural_image
Close-up of a hand placing a small white plastic object into a transparent container (no visible text or symbols)2 Press down on button to release drawer latch, remove drawer.
natural_image
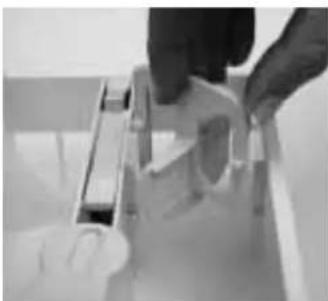
Close-up of hands operating a mechanical device with a handle (no visible text or symbols)3 Lift 'Powder' indicator out of slots, rotate and reposition for 'Liquid' ensuring it is secure.
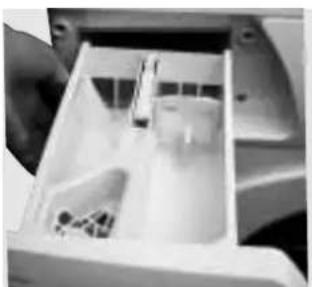
natural_image
Interior view of a white plastic container with internal compartments and a handle (no visible text or symbols)4 Re-locate drawer and push firmly back into place.
Dispensing Liquid Detergent
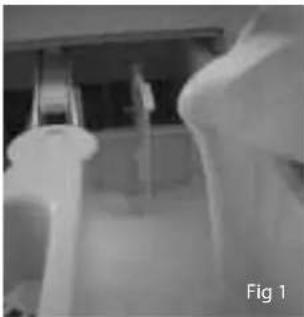
natural_image
Interior view of a kitchen sink with visible shower and showerhead (no text or symbols)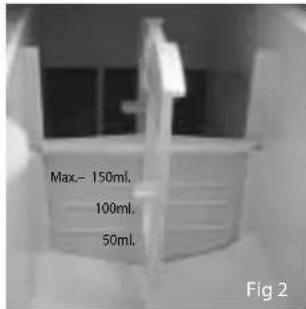
Refer to detergent manufacturer's instructions for dosage and pour liquid into the compartment (Fig 1).
Note: The 'Liquid Detergent' Main Wash Indicator features 3 lines which represent the dosage of liquid to be used (Fig 2). We recommend that you do not exceed the maximum limit of 150ml.
Dispensing
Powder Detergent
To achieve optimum wash results we recommend that you use the detergent manufacturer's dispensing cup to dispense no more than 300 ml of powder (Fig 3).
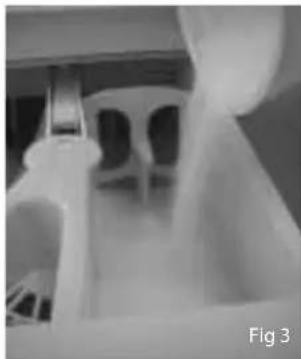
natural_image
Interior view of a mechanical or laboratory apparatus with no visible text or symbolsDispensing Fabric Conditioner
Pour fabric conditioner into compartment (Fig 4). We recommend that you do not exceed the maximum level indicated.
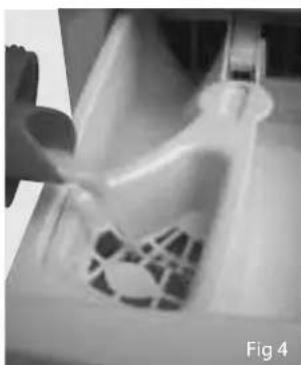
natural_image
Close-up of a hand pouring liquid into a plastic container with a patterned lid (no visible text or symbols)Using a Dosing Ball
natural_image
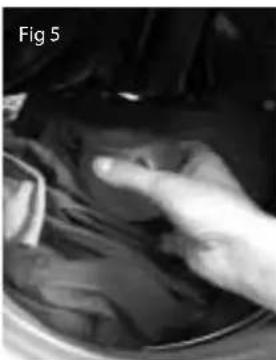
Close-up of a hand interacting with fabric in a container (no visible text or symbols)To obtain claimed energy label wash performance for a 60°C cotton wash, dispense powder detergent in a dosing ball, placed in an upright position in the centre of the wash load (Fig 5).
WARNING
- Do not dispense detergent tablets from the dispenser drawer. Refer to detergent manufacturer's instructions.
Care and Cleaning
WARNING
- Do not clean any part of your appliance with abrasive cleaners, scouring agents, acids, chlorine based bleach or metal polish as they may cause damage.
REMOVING AND CLEANING THE DISPENSER DRAWER AND COMPARTMENTS
Note: It is advisable to clean the dispenser drawer regularly.
natural_image
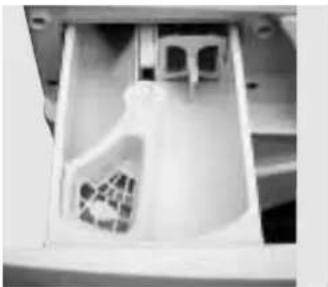
Close-up of a white plastic container with internal structure and mounting holes (no visible text or symbols)1 Pull the dispenser drawer out until it reaches its stop.
natural_image
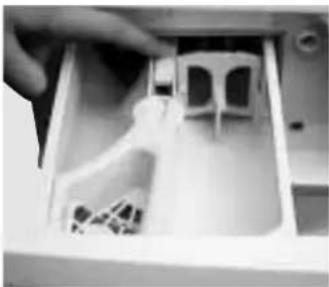
Close-up of a hand inserting a plastic component into a white plastic housing (no visible text or symbols)2 Press button to release drawer latch and remove the dispenser drawer.
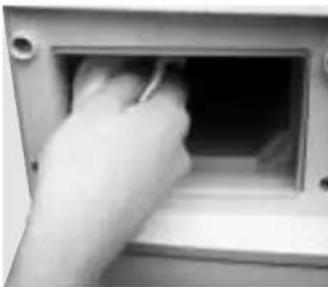
natural_image
Close-up of a hand inserting a cable into a device (no visible text or symbols)3 Clean and dry all parts of the dispenser drawer and internal fixed compartment thoroughly.
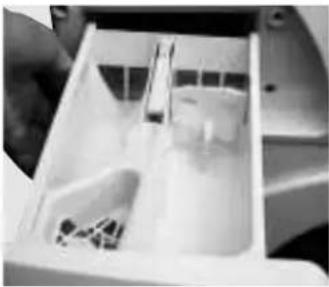
natural_image
Close-up of a white plastic container with internal compartments and a hand holding the lid (no visible text or symbols)4 Re-locate drawer and push firmly back into place.
CLEANING THE EXTERIOR
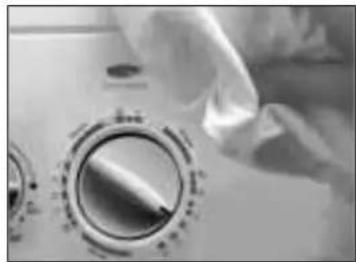
natural_image
Close-up of a rotary dial with a knob, set against a soft background with fabric and cloth (no visible text or symbols)Use a damp cloth or silicon polish to clean the exterior surfaces of the appliance.
CLEANING THE DOOR BOWL
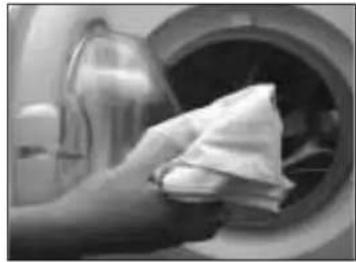
natural_image
Close-up of a hand cleaning a washing machine with a cloth (no text or symbols visible)Open the door, clean the internal surface of the door bowl and the rubber door seal with a damp soft cloth, dry thoroughly.
A build up of soap powder and water hardness residue may result in water leaking from the door.
Maintenance wash
If you use liquid detergent regularly or wash at low temperatures, we recommend that you carry out a maintenance wash two or three times a year.
To avoid build up of greasy deposits and water hardness residue, simply run the machine programme 'C' with the usual amount of detergent, but without any clothes in the drum.
Regular Checks and Stain Removal
Regular checks
As with any major appliance, there are certain aspects which require regular attention. Listed below are a number of such key areas which you should check regularly. Before calling out a service engineer, ensure that the checks below have been carried out. Should the service engineer find nothing wrong with the machine, we regret that we will have to charge for the service call.
KEY REGULAR CHECK ITEMS
1. Water leaks
1.1 From back of machine
- Are the inlet hoses securely tightened? (see page 3).
– Is the outlet hose correctly and securely positioned?
1.2 From front of machine
- Check that there is no dirt or lint trapped between the lip of the rubber door seal and the door glass.
- Check that the detergent dispenser is not prevented from closing tightly due to a build-up of detergent. Remove and clean (see opposite).
2. Machine vibrating
- Check that the transit bracket has been removed (see Installation Instructions and back of machine).
– Check that the machine is level.
3. Option buttons
- Check after use that all the option buttons are in the Off position.
OPTIONAL EXTRAS
Longer fill hoses and drain hose extension kits are available where it is not possible to move the home plumbing closer to the machine.
You will need a special adaptor if only a cold water supply is available. This is available as an optional extra.
These can be obtained from your local retailer or Creda Limited, see separate spares and service leaflet.
PLUMBING SERVICE
Creda Limited offers a washing machine plumbing-in service for Creda appliance owners at competitive rates. If you require your washing machine to be professionally installed please contact any of the telephone numbers listed on the separate spares and service leaflet.
Stain Removal
- Always treat as soon as possible. Rinse in cold water or warm solution before washing.
- Never rub a stain, 'pinch out' as much as you can, using a clean cloth or paper tissue.
- Some stains need special treatment.
- With solvents work from outside towards centre of stain, holding an absorbent pad underneath the cloth behind the stain.
- Do not use amyl acetate on acetate or triacetate.
- Test for colour fastness before removing stain.
Note: Take great care with poisonous chemicals and flammable liquids. Only use solvents in a well ventilated place. Keep chemicals, flammable liquids and solvents out of reach of children and pets.
Never mix any chemical products.
| Carbon paper Methylated spirits Absorbent pad methodChewing gumGlue Cold water or Wash in cold solution Waterproof glue | Methylated spirits | Absorbent pad method | Or rub with ice and pick off by hand |
| amyl acetate for soluble glues | should be treated with | amyl acetate using absorbent pad method | |
| GrassGrease/OilInk (biro, felt tip)Lipstick and face creamsMildew – white cottons and linensMildew – all other white fabrics | Methylated spirits Sponge with methylated spiritsProprietary solventMethylated spirits Absorbent pad methodProprietary solventChlorine bleachHydrogen peroxide | Absorbent pad methodAbsorbent pad methodSoak white cottons and linens in 1 part bleach in 100 parts waterSoak other white fabrics in 1 part hydrogen peroxide 20 vol. to 4 parts water | Coloureds cannot be treated except for regular washingRinse well. There is no safe home treatment for coloureds but regular washing will reduce marks |
| Nail varnishPaint – emulsionPaint – oilPerspiration | Amyl acetateWaterTurpentine, or amyl acetateHydrogen peroxide | Absorbent pad methodSponge immediately with cold waterAbsorbent pad method | Dried stains are permanentColour removed by perspiration cannot be restored |
| Rust/Iron mould– for all fabrics | Lemon juice | 20 vol. to 4 parts water and washSoak stains in lemon juice and iron under damp cloth. Repeat if necessary | |
| Rust/Iron mould - for white cottons and linens)Shoe polishTar | Oxalic acid (very poisonous)Glycerine and proprietary solventProprietary solvent | Use 12 teaspoon of oxalic acid in 12 pint of hot waterLubricate with glycerine and use solvent with absorbent pad methodScrape off surplus, soften with butter and wipe off, apply solvent and wash immediately |
Something wrong with your appliance
Before calling your nearest Service Office, look at this list, to find a possible solution to your problem.
My appliance will not fill or take in detergent...
★Is the machine plugged in and switched on?
★Is the socket OK? Try another appliance in the socket.
★Is the fuse in the machine plug OK? If not, replace it.
★Did you check the water supply was flowing before connecting the hoses to the appliance inlet valves? (see, 'Hot and Cold Fill Connection').
★Are the hoses correctly connected, unkinked and the water supply taps fully turned on?
★Have you pressed the On/Off button?
★Have you closed the door firmly?
It will not pump out the water...
★Has the drain hose been installed correctly? (see, 'Connect to a Drainage System').
★Is the hose kinked?
★If you have connected your appliance to a sink waste system ensure that you have cut out the membrane on the U bend pipe fitted to the sink and check the unit is not blocked with lint.
The door will not open...
Has the programme finished?
Your appliance has an interlocking door system which cannot be opened when a programme has been selected, the machine switched 'ON' and the indicator light is illuminated.
On completion of a programme the indicator light will take approximately 1-2 minutes to go out before the door can be opened.
The door release is stuck...
Switch off the mains button, press gently on the door handle to unlock the latch, pull handle to open the door.
It's Leaking...
★Are the fill hoses tightened correctly?
Perhaps the washers are not sealing properly?
★Is the standpipe blocked?
Or is your household drain blocked?
★ If you cannot clear the blockage you will need to call a plumber.
Steam is coming from the dispenser drawer...
During hot washes the machine is designed to vent steam from the dispenser drawer during hot washes.
The clothes are not dry enough...
★Did you use a short spin programme on a non-synthetic load?
★Did the water pump out? Check your waste plumbing setup.
★Was the wash load out of balance?
The programme takes a long time...
Some programmes do take a long time.
Other things which can extend programme times include:
★Low water pressure
★Low temperature of the incoming hot water
It makes a noise or vibrates during spin...
Your appliance will make some noise, especially during spin cycles. Small loads of heavy or bulky items (towels etc) can occasionally cause out of balance conditions, but the machine will usually sort itself out. If the noise is excessive you should check the following:
★Has the transit bracket been removed?
★Have you removed loose items such as coins etc... from the pockets as these can rattle about inside the appliance drum and cause damage.
★Have you adjusted the feet to stabilise the appliance?
The dispenser drawer will not close properly...
★Is the drawer clogged with detergent?
Suds are coming from the dispenser drawer...
★Have you used the correct amount of detergent suitable for automatic washing machines?
If you have used the wrong type, flush out your appliance by selecting a rinse programme.
★Follow instructions on the detergent pack, taking into consideration load size, soiled loads and water hardness.
There is water in the fabric conditioner compartment...
★Clean dispenser drawer and compartments.
If your Machine Does Not Spin...
Your machine has detected an unbalanced load and has finished the programme without completing the spin. Do not immediately call out a service engineer. Redistribute the washed clothes by hand and reselect the appropriate spin only programme.
NOTE: If washing only one item add another to help balance the load.
Creda Service Cover
THANK YOU FOR CHOOSING CREDA ...
We appreciate you choosing this quality appliance from Creda and are sure that it will give you many years of excellent service.
Now that you've chosen Creda, not only have you bought a first class appliance, you've also bought a commitment from us to look after your appliance. We believe our Creda Care Service is the best in the business and yet another good reason you'll be glad you chose Creda.
Every Creda appliance has been designed and manufactured to the highest standards. However, in the event of any problem developing, our trained professional engineers are just a phone call away with one real objective - to satisfy you by providing an efficient, effective and courteous service, at a time convenient to you.
CREDA - your GUARANTEE ...
The guarantee is subject to the provision(s) that the appliance:
a) Has been used solely in accordance with the instruction book.
b) Has been properly connected to a suitable electricity supply voltage as stated on the rating plate attached to the equipment.
c) Has not been subjected to misuse or accident or been modified or repaired by any person other than an authorised employee or agent of Creda.
d) Has been correctly installed.
e) Has been used solely for domestic purposes and is on domestic premises. Your guarantee is only applicable in the U.K. and the Republic of Ireland.
If you suspect a fault with your appliance, to avoid unnecessary inconvenience and expense please ensure that the checks detailed on 'Something wrong with your appliance" on page 11 have been carried out before contacting the SERVICE NETWORK.
Should you require service our receptionist will require the following information:
★Your post code, name and address, type of appliance, model number (found on the appliance rating plate or in the handbook). Guarantee/Contract/Insurance Policy Details. Date of Purchase, and where you purchased it from.
EASY PAYMENT METHODS...
You can pay for any of our services offered either by Credit Card (Visa, MasterCard), Cheque and Debit Card. Or in installments by Direct Debit provided you include a Creda Care Plus scheme.
CREDA CARE - HIGH QUALITY
AFTER-SALES SERVICE LEVELS
★IN GUARANTEE (Year 1)
All appliances carry a FREE fully inclusive 12 months parts and labour guarantee.
If service under your Year 1 Guarantee is required please have available evidence of your date of purchase when the engineer calls.
★OUT OF GUARANTEE (Years 2-10)
Once an appliance is over 12 months old, and goes out of guarantee, Creda offer you a very simple choice of service levels:
CREDA CARE LEVEL 1: No advance fee payable, no registration necessary.
Should a repair be needed in years 2-10, (i.e. over 12 months old) your Creda Regional Service Centre will advise you of the fixed labour charge we will make. Although this charge will vary according to your location and the type of Creda appliance you own, it is fixed regardless of the time taken or the number of visits needed to complete the repair.
The cost of parts where required will be charged additional to the fixed labour charge, but again this cost will have a maximum level of which you will be advised by your Regional Service Centre. The repair itself is fully guaranteed for 12 months.
CREDA CARE LEVEL 2: Annual fee payable all inclusive cover provided.
You may prefer the peace of mind of an all-inclusive type of cover: this is provided by our Creda Care Plus Scheme which, for an annual fee covers the cost of any parts or labour. This applies on appliances up to 10 years old. To join simply call UK: 08709 088 088 or Republic of Ireland: 1850 302 200.
For your convenience this fee can be paid in installments by Direct Debit. Payments can also be made by Credit Card (Visa, MasterCard), Cheque and Debit Card.
CREDA CARE LEVEL 3: Creda Kitchen Cover
For an extra fee, you can also purchase Kitchen Cover for all your Creda appliances provided they are under 10 years old. To join simply call UK: 08709 088 088 or Republic of Ireland: 1850 302 200 and register.
CREDA EASY ACCESS REPAIR SERVICE
One number - 08709 066 066 connects you automatically to your U.K. Regional Service Centre to arrange for your local engineers to call. Office opens
7 days a week, 364 days a year, Monday - Friday 8am - 8pm, Saturday 8am - 6pm, Sunday 10am - 6pm.
For the Republic of Ireland call 1850 302 200, Monday - Friday 8am - 5.30pm, Saturday 9.00am - 12.30pm.
This is the largest appliance manufacturer service team in Europe. Trained specialists covering all our appliances (and directly employed by us).
If contacted before 10am, we try to offer a service call the same day where required or the next working day. (Monday to Friday). On request, your service call can be the first or last of the day with am or pm timings always available. We can also cater to meet your specific needs ie. avoiding school hours whenever we can.
A chargeable service is offered on the basis of payment on completion to our service engineer, who will issue a receipt.
Creda Service Engineers drive recognisable vans, wear uniforms and carry identity cards.
Creda Service Engineers will only fit genuine Creda parts.
CREDA ANSWER CENTRE
Information and advice regarding specific appliance features and pricing on any Creda appliance, before or after purchase. From anywhere in the U.K., telephone
08701 54 64 74 from 8.45am - 5.30pm, Monday - Friday.
CREDA PARTS AND ACCESSORIES NATIONAL MAIL ORDER HOTLINE
The Spare Parts Mail Order Hotline enables you to order parts directly from the manufacturer over the phone. A wide range of parts and accessories are available for your Creda appliance.
Telephone: 08709 077 077 Fax: 08709 076 076
Republic of Ireland Parts Telephone: 01 842 6836
Monday - Friday 8.30am - 5.30pm, Saturday 8.30am - 12 noon.
Ring quoting your appliance model number and we will help you get the right parts. National Warehouse comprehensively stocked over 33,000 parts lines. Parts stocked for all models. Parts carried for all appliances up to 10 years old, (15 on Creda Heating appliances). Optional
24 hour express courier service. (Additional charge).
CARE FOR THE DISABLED
We offer a range of accessories which enable our blind arthritic or disabled customers to use most of our appliances. Simply call 08709 077 077 and provide the model number details.
All the above are offered as an extra benefit and do not affect your statutory rights.
Key Contacts
Service
UK:08709 066 066
Republic of Ireland: 1850 302 200
Genuine Spares & Accessories
Mail Order Hotline
UK:08709 077 077
Republic of Ireland: (01) 842 68 36
Extended Warranty
To join: UK 08709 088 088
Republic of Ireland: 1850 502 200

For more information on our exciting product range ring
Creda Answer Centre 08701 54 64 74

General Domestic Appliances Limited
Morley Way, Peterborough, PE2 9JB.
Web.http://www.creda.co.uk
In line with our continuing policy of research and development, and in the interests of everyone, we reserve the right to amend model specifications and services without notice. Colour reproductions of products in this brochure are as accurate as pricing will allow
specifications and services without notice. Colour reproductions of products in this brochure are as accurate as printing will allow.
© Copyright General Domestic Appliances Limited 1998
- Washing Machine
- W100FW / W120FW / W120VW
- Retention of this Instruction Book
- Dear Customer,
- Contents
- Electrical requirements 2
- Installation Instructions 3-4
- Getting to Know your Machine 5
- A Typical Wash Programme 6
- Controls 7
- Choosing A Wash Programme 8
- Optional Wash Features 9
- Dispenser Drawer 10-11
- Care and Cleaning 12 Maintenance Wash
- Regular Checks and Stain Removal 13
- Something wrong with your appliance 14
- Service Cover 15
- Key Contact Numbers Back page
- Electrical Requirements
- WARNING: This appliance must be earthed.
- FUSES
- CHANGING THE PLUG
- WARNING: To avoid a shock hazard do not insert this plug into a socket anywhere else.
- IMPORTANT: WIRES IN THE MAINS LEAD ARE COLOURED IN ACCORDANCE WITH THE
- FOLLOWING CODE:
- Brown - Live
- Positioning & Adjusting the feet
- Choosing the position of your appliance will influence its performance.
- Your appliance may become noisy or move about the floor if it is not stabilised.
- Recycling & Disposal Information
- Transit Bracket Removal
- Connecting to the Water Supply
- Hot and Cold Fill Connection
- Cold Fill Only Connection
- Fill Hoses
- Water Pressure
- Methods of Plumbing
- Permanent Plumbing
- Existing Plumbing
- Removing the Polystyrene Pyramid
- Connect to a drainage system
- Into a Standpipe
- Into a Sink Waste System
- Getting to know your machine
- Model Shown W120VW
- Front
- Back
- Interlocking Door System
- Load guide
- Cotton Load
- Or
- Synthetic Load
- Washcare Tips
- A typical wash programme
- Wash dial and symbols
- Variable spin speed control dial (Model W120VW only)
- Spin only option
- Choosing a wash programme
- IMPORTANT INFORMATION:
- Optional wash features
- BUTTON SELECTION
- ENERGY SAVE
- DEEP RINSE
- Automatic wash features
- PULSE SPIN (Models W120FW and W120VW only)
- INTELLIGENT CARE
- The Dispenser Drawer
- CHOOSE A SUITABLE DETERGENT
- CHANGING THE MAIN WASH INDICATOR
- Dispensing Liquid Detergent
- Dispensing
- Powder Detergent
- Dispensing Fabric Conditioner
- Using a Dosing Ball
- WARNING
- Care and Cleaning
- REMOVING AND CLEANING THE DISPENSER DRAWER AND COMPARTMENTS
- CLEANING THE EXTERIOR
- CLEANING THE DOOR BOWL
- Maintenance wash
- Regular Checks and Stain Removal
- Regular checks
- KEY REGULAR CHECK ITEMS
- Water leaks
- Machine vibrating
- Option buttons
- OPTIONAL EXTRAS
- Stain Removal
- Something wrong with your appliance
- My appliance will not fill or take in detergent...
- It will not pump out the water...
- The door will not open...
- The door release is stuck...
- It's Leaking...
- Steam is coming from the dispenser drawer...
- The clothes are not dry enough...
- The programme takes a long time...
- It makes a noise or vibrates during spin...
- The dispenser drawer will not close properly...
- Suds are coming from the dispenser drawer...
- There is water in the fabric conditioner compartment...
- If your Machine Does Not Spin...
- Creda Service Cover
- THANK YOU FOR CHOOSING CREDA ...
- CREDA - your GUARANTEE ...
- EASY PAYMENT METHODS...
- CREDA CARE - HIGH QUALITY
- AFTER-SALES SERVICE LEVELS
- ★IN GUARANTEE (Year 1)
- ★OUT OF GUARANTEE (Years 2-10)
- CREDA CARE LEVEL 1: No advance fee payable, no registration necessary.
- CREDA CARE LEVEL 2: Annual fee payable all inclusive cover provided.
- CREDA CARE LEVEL 3: Creda Kitchen Cover
- CREDA EASY ACCESS REPAIR SERVICE
- CREDA ANSWER CENTRE
- CREDA PARTS AND ACCESSORIES NATIONAL MAIL ORDER HOTLINE
- CARE FOR THE DISABLED
- Key Contacts
Brand : Creda
Model : W100FW
Category : Washing machine