
DC 4050 - Dash cam BLAUPUNKT - Free user manual and instructions
Find the device manual for free DC 4050 BLAUPUNKT in PDF.


| Product Type | Portable Audio System with CD and FM Radio |
| Brand | Blaupunkt |
| Model | DC 4050 |
| Dimensions (W x H x D) | 200 mm x 150 mm x 50 mm |
| Weight | 0.5 kg |
| Power Supply | AC 230V, 50 Hz or DC 6V (4 x AA batteries) |
| Power Consumption | 10 W |
| Supported Disc Formats | CD, CD-R, CD-RW, MP3 |
| Radio Band | FM 87.5 - 108 MHz |
| Audio Output | 2 x 2W RMS stereo speakers |
| Headphone Jack | 3.5 mm stereo |
| Display | LCD with backlight |
| Control Buttons | Play/Pause, Stop, Skip, Volume, Preset |
| Remote Control | Included (CR2025 battery) |
| Additional Features | Program playback, Repeat, Shuffle, Sleep timer |
| Cleaning Instructions | Wipe with a soft, dry cloth. Do not use liquids. |
| Safety Precautions | Read manual before use. Keep away from moisture. |
| Spare Parts Availability | Contact Blaupunkt service center for replacement parts. |
| Repairability | Repairs should be done by qualified personnel only. |
| Operating Temperature | 5°C to 35°C |
Frequently Asked Questions - DC 4050 BLAUPUNKT
User questions about DC 4050 BLAUPUNKT
0 question about this device. Answer the ones you know or ask your own.
Ask a new question about this device
Download the instructions for your Dash cam in PDF format for free! Find your manual DC 4050 - BLAUPUNKT and take your electronic device back in hand. On this page are published all the documents necessary for the use of your device. DC 4050 by BLAUPUNKT.
USER MANUAL DC 4050 BLAUPUNKT


Enjoy it.
PRECAUTIONS
- Please read this manual very carefully before using the camera or installing it, and keep it safe for future reference. It will be helpful if you have any questions or encounter any operational problems.
- An SD card up to 256GB, Ultra High Speed 3 for 2K video, is required for your new BLAUPUNKT Dash Cam. Micro SD card specifications vary from one brand to another, and it may not function as expected.
- Please insert the micro SD card in the right direction to avoid damage to the card or to your new BLAUPUNKT Dashcam. If there is a voice prompt asking you to format the micro SD card, or the mobile app shows an error message, please format the micro SD card on the camera or from the mobile app. If the error continues, please replace the micro SD card. We recommend you format your micro SD card every month for recording stability.
Note: All files will be deleted when formatting the micro SD card. Please back up important files before formatting.
- When installing your new BLAUPUNKT Dashcam, make sure it is firmly attached to the windshield for recording stability and to avoid any damage.
- Please do NOT plug or unplug the rear-view camera while your BLAUPUNKT DC 4050 DashCam is ON, and do NOT install the rear camera outside the car. Incorrect operation will lead to damage to the dash cam.
- Do not use your BLAUPUNKT Dashcam in a dusty or wet environment, as it is not waterproof.
- To obtain clear images, please clean the windshield and cameras of your dashcam regularly. Do not record or take pictures in direct sunlight or in a high electromagnetic environment.
- The operating temperature of your dashcam is -20°C to 70°C. Continuous exposure to sunlight, especially when the dashcam is mounted in a vehicle where the temperature exceeds 70°C, may cause malfunction, camera/image color change, or image distortion.
- Incorrect operation could lead to a system crash. Please long press the Power button to restart your BLAUPUNKT Dashcam.
- If you leave your vehicle for a long time, we advise that you remove your BLAUPUNKT Dashcam from the vehicle, because the temperature inside the vehicle can exceed the specified range above, depending on your geographical and weather conditions.
Disclaimer:
- In no event shall BLAUPUNKT be liable for any direct, indirect, punitive, incidental, special, or consequential damages, to property or life, or for improper storage, whatsoever arising out of or connected with the use or misuse of our products.
- This device is NOT intended to be used for illegal purposes, surveillance, and shall not be used in any form as evidence for claim purposes.
- Some countries prohibit drivers from mounting anything on the windshield, or restrict mounting to specific areas of the windshield. It is the owner's responsibility to mount the device in compliance with local laws.
- Errors may occur depending on the surrounding environment and the voltage of the vehicle.
- BLAUPUNKT is not liable/responsible for non-recorded events, missing files, etc.
- Do not operate the device while driving. Using this device does not change the requirement for a driver to take full responsibility for his or her behavior. This responsibility includes observing all traffic rules and regulations in order to avoid accidents, personal injury, or property damage.
FEATURES
- 2K Quad HD Resolution @30fps
- Full HD 1080P Rear Camera
- 170° Ultra-wide A+ View Angle
- Emergency Video Lock Button
- Built-in WiFi for Live View
- Mobile APP for iOS & Android
- Built-in Voice Prompt
- Support Gravity Sensor
- Built-in Microphone & Speaker 10. Time & Date, Car Numbers Stamp Support 11. Support Rear Camera Mirror ON/OFF 12. Storage Media Ultra High Speed 3 Micro SD up to 256GB
13. Supports 24-hour parking mode with time-lapse recording (hardwire kit required)
PACKAGE CONTENTS
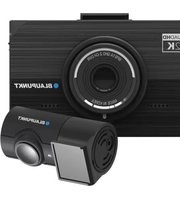
1 x Main Dash Cam, 1 x Rear Camera, 1 x Charger, 1 x Charger Cable, 1 x User Manual, 1 x Warranty Card, 2 x Electrostatic Films, 2 x Tape Mount Stickers (1 piece put on the Tape Mount)
PRODUCT OVERVIEW


- Power Button / Emergency Lock
- Working Light Indicator
- Rear Camera Port
- Type C Power Input
- Lens
- Windshield Tape Mount
- Snapshot / Default Button
- Micro SD Card Slot
- Speaker
- Mount
- Tape Mount Latch
- Rear-view Camera
SHORTCUTS & UNDERSTANDING BUTTONS
| BUTTON IMAGE | BUTTON NAME | SHORTCUTS / FUNCTIONS |
 | POWER BUTTON/EMERGENCY LOCK | To Turn ON The Camera: Long press power button and hold for 3-4 seconds |
| To Turn OFF The Camera: Long press power button and hold for 3-4 seconds | ||
| Press Once - to Lock the Current Loop Cycle Video File while Video is being recorded | ||
 | SNAP SHOT/DEFAULT SETTINGS | Press Once while video is being recorded to take a quick snap shot. |
| LONG PRESS and hold for 3-4 Seconds - to Go Back to Default Setting |
VOICE PROMPTS
This feature is designed to give you voice alerts when the DashCam is working. You will know its working status and can operate it accordingly.
Here are the voice prompts for your BLAUPUNKT DC 4050-2K Dash Cam.
Welcome to Blaupunkt WiFi dash cam. ➢ Please press the Power button to format your memory card. Turning off ▶ Successfully took a photo. The card is full of locked videos, please delete unnecessary files in time. Start recording/Stop recording ➢ Please insert the memory card. The video is locked. ➢ Detection error, please check the memory card insertion status. SD card error, please format it or replace it with a new one.
DC 4050
➢ Formatting the memory card
Formatted ➢ Failed to format the card, please replace it. ➢ Memory card space is full, please format the memory card. ➢ Please use a high-speed card. ➢ Please remove the memory card after the upgrade is complete. Start/Stop recording a time-lapse video. Restoring to factory settings. Upgrading, do not remove the card. Audio Disabled/Enabled
LED STATUS LIGHT INDICATOR
NO BLUE LED - Camera is Turned OFF
SOLID BLUE LED - Not Recording Video
BLUE LED BLINKING EVERY 1 SECOND -
Loop Recording
BLUE LED BLINKING EVERY 3 SECONDS -
Time-lapse Recording in Parking Mode
(Hardwire kit is required)
BLUE LED BLINKING EVERY 5 SECONDS -
Abnormal Micro SD Card
BLUE LED FAST BLINKING EVERY 1 SECOND -
Software Upgrading

POSITION
Your new BLAUPUNKT Dashcam comes with default settings that allow you to start using your camera right out of the box without changing any settings. Make sure to format the memory card before first use.
Most users will install the dash cam behind the rear view mirror. Install the rear camera at the top and middle of the back windshield.


Please install your new BLAUPUNKT Dashcam once your vehicle is turned off and parked in a safe and well-lit place.
INSTALLATION
1. Make sure to clean your front windshield from dust particles and any evaporated grease from the dashboard surface. 2. Attach your BLAUPUNKT Dashcam with the provided windshield tape mount. Set the camera lens pointing forward to the center when installing it.
Note: Make sure that the camera's view is not obstructed by any window tint or any other objects. If your vehicle has side curtain airbags, please be very careful when running any cables along your vehicle windows. Ensure you are not running cable past any of the airbags as this can prevent the airbags from deploying.
③ Attach the Windshield Tape Mount by peeling off the electrostatic sticker film and hold it tight against the windshield to remove any air between the electrostatic sticker and the windshield. Then remove the film on the tape mount and attach the camera in the same way.
DC 4050
④ Clean the back windshield and put on the electrostatic sticker in the same way as above. Attach the rear camera to the top and middle of the back windshield. ⑤ Plug the charger cable into the charger to connect the type-C port of the camera to the car's cigarette lighter socket.
Caution: Only use the provided charger and charger cable to power the camera, otherwise the camera may frequently reboot due to insufficient power.
⑥ Start the engine and verify that your dashcam works properly.
Do not remove the Micro-SD card while your dashcam is ON as it may cause loss of data or damage to your memory card. Always remove or insert the memory card while the dashcam is OFF.
⑦ Organize and hide the power cable so that it doesn't interfere with the driver's vision. ⑧ Adjust the lens angle of the front and rear camera (1/3 angle of the camera towards the sky is the best viewing angle).
Caution: Make sure to remove the plastic lens screen protector from the lens before recording, otherwise your videos will look blurry and blocked.
CHARGING
Only use the supplied charger and charger cable to power your BLAUPUNKT Dashcam. There is a spare USB port for charging your mobile phones or other devices with max. 2.4 AMP.
① Plug the charger cable into the charger to connect to the car cigarette lighter. ② Do NOT connect the camera to PC for charging. ③ The dashcam will power on automatically and record as soon as power is supplied, and the dashcam will save the last video file and power off automatically after cutting the power supply. ④ The dashcam has a built-in button cell and it is NOT intended to supply power for recording. Make sure to always keep the camera plugged into the power.
TURNING YOUR CAMERA ON/OFF
Auto Power ON/OFF
- Auto Power ON: BLAUPUNKT Dash Cam is designed to turn ON and start recording automatically when it receives power, i.e. when the car engine is started.
- Auto Power OFF: the camera is also pre-configured to turn itself OFF automatically when the power gets disconnected, i.e. when the car key is turned to the LOCK position.
Caution: Some trucks/cars' 12V cigarette outlet is always HOT, which means it provides constant power even when the car is turned OFF and LOCKED.
If this is the case for your vehicle, then the auto ON/OFF feature will not work. And if you leave the camera continuously recording when the car is turned off, then it will drain your car/truck's battery and you might not have enough power to start your car for next time. To remedy this situation, you can do one of the two options:
- Hardwire your dash cam to your car's fuse box with 3-Lead Auto Trigger Hardwire Kit (Hardwire kit is not included, please contact us to purchase separately)
- Change the connection in the fuse box for your 12V outlet to socket which only supplies power when car key is turned to ACC or ON position.
Manual Power ON/OFF
• To manually turn ON: Long press and hold power button for 3-4 seconds
- To manually turn OFF: Press and hold the power button for 3-4 seconds, the camera will automatically save the last file and shut down.
Note: Be sure to insert the memory card before powering up the device. Do NOT insert/remove the memory card while the camera is turned ON.
INSERTING/REMOVING A MICRO SD CARD
- Must use only Brand Name, Class U3 or higher speed Micro-SD Card. Max support 256GB.

① TO INSTALL
Make sure the camera is turned OFF First. Then align the GOLD CONTACTS facing towards the front of the camera (Lens Side). Then insert the memory card half way in. Then use the finger nail or a paper clip to push the card all the way inward until it clicks and locks in place.
② TO REMOVE
To remove the MicroSD card, gently push its edge inward until it clicks, and then pops out, then simply pull it out of the slot.
NOTE:
If you experience camera FREEZING or LAGGING or STOPS Recording or NO Recording Files after few seconds. Then It is the issue of the MEMORY CARD. (NOT THE CAMERA ISSUE) - Please CHANGE MicroSD card.
BLAUPUNKT Dash Camera is High Bit-Rate 2K Video recording device. Which requires High Speed Rating SPECIFIC Micro-SD Cards.
FORMATTING MEMORY CARD
① Press Power button to format the memory card when you hear Voice Prompt - "Please press the Power button to format your memory card" ② You can also connect your BLAUPUNKT Dashcam to your smart phone directly by using built-in Wi-Fi feature (See Page 11) to format the Micro-SD Card.


Note:
- We recommend that you format the memory card every month to keep it clean for smooth operation.
- Please note that memory cards have their self life span, after so many uses of writing data over and over, eventually they will become inoperable. When that happens, please replace your memory card.
USING WIFI FEATURE
What is a WiFi Feature?
The WiFi feature has been designed so you can pair your dash camera wirelessly with your smartphone and access your recording instantly from the dash cam. Here you can view, download and share your videos easily with your friends and family.
What is the WiFi Range?
The WiFi signal range is about 10FT when there are NO obstructions in the middle. Please NOTE that just like your home WiFi network, you can't have WiFi signal outside your home, the same way, WiFi range is 10FT from this small device.
Can I watch the videos or surveillance around my car remotely?
NO. BLAUPUNKT DC 4050-2K dash cam is NOT made to broadcast footage over the cloud or internet. It is NOT a cloud or an IP camera and it is NOT meant to do that. You can get live video and footage on BLAUPUNKT DC 4050-2K's APP as long as you stay within the 10FT range from the dash cam.
Pairing your BLAUPUNKT DC 4050-2K with your Smart Phone using WiFi
WiFi Name (SSID): Blaupunkt-DC4050-XXXXXXXXX
Password: 12345678
Power ON your BLAUPUNKT DC 4050-2K with the provided charger and charger cable. To connect your phone to your BLAUPUNKT DashCam, follow the next steps:
① Go to your phone's WiFi settings. ② Select Blaupunkt-DC4050-XXXXXXXXX and enter the password: 12345678. ③ Your phone will pair with your BLAUPUNKT dash cam.
BLAUPUNKT IN DashCam APP
App Download
Search BLAUPUNKT IN in the App Store or Google Play Store to download the App.

Download on the App Store

GET IT ON Google Play
Note: When using the BLAUPUNKT App for the first time, please make sure to authorize the album, location, WLAN & Cellular Data, otherwise the App will not work properly.

To View/Save Video Files to your Phone via WiFi, follow the next steps:
① Download the BLAUPUNKT IN App. ② Pair your BLAUPUNKT dashcam with your Smart Phone (see how above). ③ Open your BLAUPUNKT IN App to access the dashcam settings, view videos/photos, or even download them directly to the phone. ④ When done, disconnect WiFi on your BLAUPUNKT IN App.
Note: If your BLAUPUNKT IN App does not show live broadcast or video/photo files cannot be viewed, please quit the BLAUPUNKT IN App and turn off the phone's WiFi, then reconnect WiFi according to the previous steps.
Understanding the BLAUPUNKT IN App
DASHCAM SETTINGS
Owing to no screen display on your BLAUPUNKT DC 4050-2K, please set up the dash cam using WiFi with BLAUPUNKT IN App. Tap Settings to enter Camera Settings.
Note: The dashcam will stop recording when you set up the camera or playback. It will start recording again when you go back to Live View.
Video Settings
Voice Recording
Your new BLAUPUNKT Dashcam has a built-in microphone to record video with audio. You can choose to record mute video by choosing OFF. You can also tape 🔒 to mute/un-mute while video is being recorded.
On (default)
off
Video Resolution
You can choose the video resolution you like. Higher resolution videos will take more storage space.
- Resolution options:
• F:2560 X1440 R:1920 X1080 (default) • F:1920 X1080 R:1920 X1080
Loop Recording
This feature allows your dashcam to continuously record loop by loop so it can delete the oldest video file automatically when the memory card becomes full so you don't have to manually delete them.
This feature will split each video files to appropriate length based on your selection.
1minute (default)
3 minutes
5 minutes
Speaker Volume
This feature allows you to set the volume level for voice prompts through the built-in speaker of the dashcam.
You can choose between:
Off
Low
Medium (default)
High
Gravity Sensor
The gravity sensor is a 3-axis impact gravitational accelerometer designed to detect physical and gravitational forces on the camera.
While video is being recorded: when the G-sensor is triggered due to physical or
gravitational impact force on the dashcam, the current loop cycle length of the video file will be locked so it will NOT be deleted by the loop recording function.
Off
Low
Medium (default)
High
Caution: In the event of an accident, please make sure you backup your footage before using your dashcam again to prevent the loss of important video files due to the loop recording function. If the force was minor, it will NOT trigger the gravity sensor to lock video files automatically. The best practice and recommended to you is to backup all necessary video footage after any event of an accident before using your dashcam again to prevent the loss of important video files.
Time & Date Stamp
This stamp's menu allows you to choose whether Date & Time is displayed at the bottom of the video or not. The Date & Time is synchronous with your phone's settings.
By default it is ON.
You can choose between:
On (default)
Off
Car Number Display
This stamp's menu allows you to choose whether Car Number is displayed at the bottom of the video or not. By default it is ON.
You can choose between:
On
Off (default)
Car Number
This feature will allow you to insert custom car number or vehicle ID to be stamped on video. 10 digits are available including all numbers and letters. Special characters are NOT allowed.
Date Format
This feature will allow you to set your preferred date format.
You can choose between:
YYYY/MM/DD
MM/DD/YYYY
DD/MM/YYYY (default)
Rear Camera Mirror
This feature will allow you to set a mirror/non-mirror image of the rear camera. You can choose between:
On (default)
off
Parking Mode Settings
Note: BLAUPUNKT's custom-designed 3-Lead Hardwire Kit is required to use Parking Mode feature. You can contact us to purchase separately.
Parking Mode Timing
This feature allows you to set a duration for Parking Mode. In parking mode, the camera will go into time lapse recording. When time is out, the dashcam will power off to avoid draining the car battery out. However, if the camera detects a collision, it will power on again automatically and record 1-minute video at the normal 30fps rate until the hardwire kit is in low voltage protection mode. To save your car battery and make sure enough power to start your car, 12 hours is recommended. You can choose between:
12 Hours (default)
24 Hours
48 Hours
Time-lapse Recording
Time Lapse recording mode allows you to capture specific images per second at a much lower rate. So when you combine and play those images at the normal 30fps rate, everything seems to be moving faster in time lapse.
off
1 second (Smooth)
2 seconds (Smoother)
3 seconds (Smoothest)
Note: Time-Lapse is 1 second by default. It will stay ON all the time even after camera restarts. So all your videos will be in time-lapse speed (Faster Playing). It is also programmed to set to OFF and you will get videos at the normal 30fps rate.
Parking Monitoring Collision Detection
This function always works with Time-lapse Recording function: (See how this feature works)
You can choose between:
off
Low
Medium (default)
High
① When this feature is set to ON and BLAUPUNKT's 3-Lead Hardwire Kit is installed properly. ② Then, when you turn OFF the car's engine and turn the key to the lock position. ③ Then the camera will STOP the continuous video recording and it will go into the time-lapse recording mode automatically. ④ Now while this time lapse is being recorded, if someone hits your car and if the impact reaches the presetting Gravity sensor level, then the camera will stop the time-lapse recording and start to record 1 minute continuous video instead, save and lock that video in Locked folder. Then it returns to time-lapse recording again until the hardwire kit is in low voltage protection mode. ⑤ Now when you start your car for the next time, the camera will automatically STOP the time-lapse recording and quit Parking Mode. Then it will go into normal video mode automatically to start the loop recording.
General Settings
WiFi Name
This feature will allow you to insert custom WiFi name for your BLAUPUNKT dashcam. Name only supports 6-22 digits including all numbers and letters. Special characters are NOT allowed. The dash cam will restart automatically after you finish the change.
WiFi Password
This feature will allow you to insert custom WiFi password for your BLAUPUNKT dashcam. Password only supports 8-16 digits including all numbers and letters. Special characters are NOT allowed. The dash cam will restart automatically after you finish the change.
Format
This feature will allow you to format inserted memory card, all the data will be deleted. You can check the storage of inserted memory card into the camera.
• Total: (Memory Card Capacity) • Left: (Free Space in memory card)
Default
Here you can restore all the settings to factory default settings.
Camera Version
Here you can check the current firmware version installed on your camera. You will need this information in the future to check if newer version of firmware is available.
RESETTING THE CAMERA
Resetting Hardware & Software are two different things.
① Reset The Hardware/Camera
Long press and hold Power button for 3-4 seconds or cut off the power supply to reset the dashcam if the dashcam is freezing or stuck with no response. This will restart the camera
② Setting Firmware/Camera to the default settings
If you get stuck with any settings or if you would like to set all settings back to factory default, please long press and hold photo button for 3-4 seconds or go to Settings of Blaupunkt IN App to reset. This will restart the camera
HOW TO PLAYBACK/TRANSFER VIDEOS TO PC/MAC/Smart Phone?
- Insert memory card directly to your PC/MAC to view or download them.
There are 6 folders in mSD card as below
PICTURE_B: pictures/photos taken by rear camera
PICTURE_F: pictures/photos taken by front camera
VIDEO_B: loop recording /time-lapse recording videos taken by rear camera (the time lapse videos ends with GAP)
VIDEO_B_LOCK: Locked & protected videos taken by rear camera when gravity sensor got activated or manual lock both in Video Mode and Parking Mode
VIDEO_F: loop recording /time-lapse recording videos taken by front camera (the time lapse videos ends with GAP)
VIDEO_F_LOCK: Locked & protected videos taken by front camera when gravity sensor got activated or manual lock both in Video Mode and Parking Mode
- We recommend VLC Media Player to view your videos. You can get it free at www.videolan.org

NOTE: Do NOT use Windows Media Player. It is NOT made to play 2K videos, so your video playback will lag.
- WiFi: You can also connect the BLAUPUNKT DC 4050-2K DashCam to your smartphone directly by using the built-in Wi-Fi feature. (See Page 11)
There are 4 folders in the BLAUPUNKT IN App as below:
Loop - loop recording taken by front & rear cameras
Locked - Locked & protected videos taken by front and rear cameras when the gravity sensor is activated or manual lock is used, both in Video Mode and Parking Mode
Parking - time-lapse recording videos taken by front & rear cameras
Snapshot - pictures/photos taken by front & rear cameras
CAMERA SPECIFICATION
| Lens | 170° diagonal A+ Ultra HD Wide Angle (front camera) 150° diagonal A+ Full HD Wide Angle (rear camera) |
| Video Resolution | 1296P 2304X1296/1080P 1920X1080 (front camera) 1080P 1920X1080 ( rear camera ) |
| WiFi | Built-in |
| Photo / Video Format | JPEG / ts |
| Gravity Sensor | Built-in 3-Axis Impact Accelerometer Gravitational Sensor to lock & protect current video |
| Rear View Mirror | Support |
| Multi Language Support | Follow Phone Language |
| Loop Recording | Support - seamless recording |
| Parking Mode | Support - 24hr Auto Trigger Parking Mode |
| Time-lapse Recording | Support (hardwire kit is required) |
| Car Number Display | Support |
| Voice Prompt | Support |
| Emergency Video Lock Button | Support |
| Memory Card | Micro SD Card UHS 3 Speed, Max Support 256GB |
| Anti Flicker | 50HZ |
| Power Port | Type C 5V/2.4A + 2.4A |
| Battery Capacity | Built-in button cell |
| Microphone/Speaker | Built-in |
| Auto Power ON/OFF | Support |
| Sound Recording | Support |
| Time & Date Stamp | Support |
| Net Weight | 59g |
| Dimension (W X H X D) | 91X 36 X 34mm |
Note: Specifications may change due to upgrades without prior notice.
TROUBLESHOOTING
Q1. Dashcam can't power on
a. Please make sure the dashcam is correctly connected with the provided charger. Since the built-in cell button is to save the last file in an emergency, powering on with the provided charger connected is suggested. ONLY use the charger that comes with the device, do NOT use a standard vehicle USB port.
b. Let the DashCam stay charging for about 10 minutes. Sometimes, due to storage and delivery, the battery may run completely flat. This is normal.
Q2. Stop recording or "Card Full" Error Message/Voice Prompt
a. UHS 3 or higher micro SD card is recommended. Micro SD card specifications vary from one brand to another, which may not function as expected when used with the DVR. Please test for micro SD compatibility before purchasing a micro SD card.
b. Usually caused by too many "locked" files. Go to Mobile APP settings, Format, delete all data. If road conditions are too bumpy, this may also cause locked files, lower the G-Sensor to Low.
c. Restart dashcam with long press Power button.
Q3. "Abnormal Card" Error Message
a. Please confirm that the micro SD Card is inserted correctly and "clicks" to lock. If not, the SD Card is most likely inserted wrong.
b. Format SD card from mobile APP settings.
c. Replace UHS 3 or higher micro SD card.
Q4. Date & Time are incorrect
a. Restore factory default from the mobile APP Settings.
b. If the internal battery runs completely flat, then the dashcam needs to be fully charged.
c. Restart the dash cam and connect with smart phone to synchronize the date & time.
Q5. Blurry video or picture or horizontal stripe interference on image
a. Make sure all protective adhesive is peeled off the lens.
b. Please clean the lens with soft cotton cloth and don't touch the lens. No dirt and finger print.
c. The quality will be affected in front lighting and back lighting environment.
d. Make sure to power the dashcam with the provided charger and charger cable.
Q6. Built-in battery cannot support recording.
This is normal. The built-in button cell is small and is designed to save footage when the unit loses power.
Q7. The device has frozen after quick-operating press.
Please wait at least 1 or 2 seconds to finish your last press before you start the next one. Do NOT press buttons thick and fast.
Q8. The device has frozen/stopped working after recording for a while.
a. Check if you formatted the SD card using the mobile app before first use. b. We always recommend that you make your purchase from a reputable vendor and steer clear of generic brands. c. Check the speed of the micro SD card. UHS 3 or higher is recommended for the highest data transfer, especially if the file size is larger. d. Restart the dashcam with a long press of the Power Button.
Q9. I find no files for front/rear camera when attempting to play back a file.
a. Check if the capacity of the SD card is occupied by many "locked" files and not enough. Go to Mobile App settings, Format, delete all data. b. The files may have been overwritten in a record cycle (looping). c. There may be some corrupt data sectors on the SD card, please format the SD card using the mobile app. d. Replace with an Ultra High Speed 3 or higher micro SD card if still no videos are found in the memory card.
Q10. Can't play back files (.ts and .jpg).
The computer does not have the proper codec to play this file. We recommend VLC Media Player to view your videos.
Q11. My memory card has degraded and needs to be replaced.
All micro SD memory cards wear out after they are overwritten over and over for a long time. Periodically formatting the card can extend its lifetime and improve performance. Owing to the dashcam recording continuously, you may need to replace the memory card periodically. Your dashcam detects memory card errors automatically and alerts you when it is time to format or replace your memory card.
You can take these actions to help extend the lifetime of the memory card.
a. Format the memory card at least once every three months. We recommend to format
Q11. My memory card has degraded and needs to be replaced.
every month for recording stability.
b. If the dashcam gives a memory card error message or voice alert, first try to format the
memory card and then, if necessary, replace the memory card.
c. Turn off the dashcam when your vehicle is not in use
d. If your dashcam is not connected to an ignition-switched vehicle power outlet, you
should turn off the dashcam when your vehicle is not in use to prevent the dashcam
from recording. Transfer saved video footage to a computer. The memory card lasts
longer when more free space is available on the card.
e. Use a memory card with a higher storage capacity because higher-capacity memory
cards are overwritten less frequently, they usually last longer.
f. Use a high quality micro SD card with Ultra High Speed 3 or higher speed.
g. Purchase your memory card from a reputable brand vendor.
Q12. I got no voice in the video, no G-Sensor, and no date and time.
There may be abnormal use to cause loss of function, please set the factory default in
the Settings of Mobile APP.
Q13. Camera gets hot while it is operating.
It is normal for the camera to run slightly hot, especially while it is recording high-resolution video or transmitting a WiFi signal.
resolution video or transmitting a WiFi signal.
a. You are viewing high-bit rate version of video files. Slower PC may have problem with faster data processing. Please record videos at lower resolution and try again.
a. You are viewing the high-bit rate version of video files. A slower PC may have problems with faster data processing. Please record videos at a lower resolution and try again.
b. We recommend VLC Media Player to view your videos. You can get it free at
Q15. My video recordings are choppy or incomplete.
Q15. My video recordings are choppy or incomplete.
a. Use a high-quality memory card with Ultra High Speed 3 or higher speed. A slower memory card may not record video quickly enough.
b. If you are viewing videos on your smartphone using a wireless connection to the camera, try viewing them in another location with less wireless interference, or download videos to the smartphone.
c. Transfer important recordings to a computer or smartphone, and format the memory card.
d. If the dashcam gives a memory card error alert, first try to format the memory card and then, if necessary, replace the memory card.
e. Update your dashcam to the latest software version.
DC 4050
Q16. My Dashcam cannot connect with the Mobile App.
a. Go back to your smartphone's Settings and check if connected with the camera's WiFi. b. Make sure your phone is not connected with Wireless Apple CarPlay/Android Auto. Wireless Apple CarPlay/Android Auto also connect to your phone through a WiFi hotspot. Please disconnect them temporarily while connecting your phone to the dashcam to set up or view/download videos from the dashcam. c. Make sure if the inserted micro SD card is damaged or abnormal. Please replace with a UHS 3 or higher speed micro SD card.
Q17. Parking Mode feature is not working.
A separate Hardwire kit which is connected with the Fuse Box of the Car is required for Parking Mode. You can contact us to purchase it separately.
Q18. My Dashcam keeps powering ON and OFF continuously.
a. Make sure if the inserted micro SD card is damaged or abnormal. Please replace with a UHS 3 or higher speed micro SD card. b. Please check if you power the dashcam with the provided charger and charger cable. Insufficient voltage and current will restart the dashcam continuously.
BPIN Private Limited
47, Atlanta Society, Nariman Point, Mumbai - 400 021. Maharashtra. India.
Toll Free: 1800 209 6820 | info@blaupunktcar.in | Shop Online at www.blaupunktcar.in


- PRECAUTIONS
- DISCLAIMER
- FEATURES
- PACKAGE CONTENTS
- PRODUCT OVERVIEW
- VOICE PROMPTS
- DC
- LED STATUS LIGHT INDICATOR
- POSITION
- INSTALLATION
- CHARGING
- TURNING YOUR CAMERA ON/OFF
- INSERTING/REMOVING A MICRO SD CARD
- ① TO INSTALL
- ② TO REMOVE
- NOTE
- FORMATTING MEMORY CARD
- WHAT IS A WIFI FEATURE
- WHAT IS THE WIFI RANGE
- CAN I WATCH THE VIDEOS OR SURVEILLANCE AROUND MY CAR REMOTELY
- BLAUPUNKT IN DASHCAM APP
- DASHCAM SETTINGS
- VIDEO RESOLUTION
- RESOLUTION OPTIONS
- LOOP RECORDING
- SPEAKER VOLUME
- GRAVITY SENSOR
- TIME & DATE STAMP
- CAR NUMBER DISPLAY
- CAR NUMBER
- DATE FORMAT
- REAR CAMERA MIRROR
- PARKING MODE SETTINGS
- PARKING MODE TIMING
- TIME-LAPSE RECORDING
- PARKING MONITORING COLLISION DETECTION
- GENERAL SETTINGS
- WIFI NAME
- WIFI PASSWORD
- FORMAT
- DEFAULT
- CAMERA VERSION
- RESETTING THE CAMERA
- ① RESET THE HARDWARE/CAMERA
- ② SETTING FIRMWARE/CAMERA TO THE DEFAULT SETTINGS
- HOW TO PLAYBACK/TRANSFER VIDEOS TO PC/MAC/SMART PHONE
- TROUBLESHOOTING
Brand : BLAUPUNKT
Model : DC 4050
Category : Dash cam