
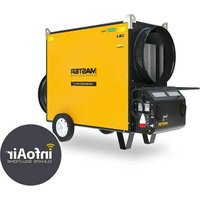
MH-425A-120 - Heating Master - Free user manual and instructions
Find the device manual for free MH-425A-120 Master in PDF.


| Product Type | Electric Fan Heater |
| Model Number | MH-425A-120 (240V version: MH-425A-240) |
| Power Supply | 240V~60Hz, 15.6 Amps, 3750 Watts |
| Heat Output | 12,800 BTU |
| Heating Area | Up to 388 sq ft |
| Heat Settings | 1 (full power) |
| Mounting Options | Portable (floor) or wall/ceiling mounted |
| Dimensions (approx.) | Not specified; estimated 12" x 12" x 18" |
| Weight | Not specified; estimated 12 lbs |
| Minimum Clearance | Front: 3 ft, Top: 1 ft, Sides: 1 ft, Rear: 1 ft |
| Safety Features | Overheat protection (thermal cutout at 194°F), caution light, tip-over switch (not mentioned but typical) |
| Control Type | Thermostat dial, power switch |
| Plug Type | NEMA 6-20P (240V, 20A) |
| Cord Length | Not specified; estimated 6 ft |
| Construction | Steel housing, stainless steel heating element |
| Warranty | 1 year limited warranty |
| Maintenance | Clean exterior with mild detergent; do not use solvents |
| Accessories Included | Wall/ceiling bracket, handle, mounting hardware |
| Intended Use | Indoor comfort heating only; not for commercial/industrial |
Frequently Asked Questions - MH-425A-120 Master
User questions about MH-425A-120 Master
0 question about this device. Answer the ones you know or ask your own.
Ask a new question about this device
Download the instructions for your Heating in PDF format for free! Find your manual MH-425A-120 - Master and take your electronic device back in hand. On this page are published all the documents necessary for the use of your device. MH-425A-120 by Master.
USER MANUAL MH-425A-120 Master
– Following these instructions will prevent difficulties that might occur during the installation and use of this heater. Studying the instructions first may save considerable time and trouble during installation, in addition to providing important safety information. Make sure to save these instructions for future use.
WARNING
USE THIS HEATER ONLY AS DESCRIBED IN THIS MANUAL. ANY OTHER USE NOT RECOMMENDED BY THE MANUFACTURER MAY CAUSE FIRE, ELECTRIC SHOCK, OR INJURY TO PERSONS.
WARNING
FIRE OR EXPLOSION MAY OCCUR! Heater has hot arcing or sparking parts inside. Do not use it in areas where gasoline, paint or flammable liquids are used or stored.
⚠ WARNING
RISK OF FIRE. To prevent a possible fire, Do not block intakes or exhaust in any manner. Do not use on soft surfaces, like a bed where openings may become blocked. Heater must be kept clear of all foot minimum clearance from front and 12 inches from sides and rear an of lint, dirt, and debris (see maintenance instructions Page 10).
WARNING
RISK OF FIRE. DO NOT use heater with extension cord. Plug the MH-425A-240 heater directly into a 208-240VAC receptacle. For alternating current only.
WARNING
BURN HAZARD. This heater is hot when in use. To avoid burns, do not let bare skin touch hot surfaces. If provided, use handles when moving the heater. Allow the heater to cool down before touching it.
▲WARNING
RISK OF ELECTRIC SHOCK OR INJURY. Do not run cord under carpeting, Do not cover cord with throw rugs, runners or similar coverings. Do not route cord under furniture or appliances. Arrange
cord away form the traffic area where it will not cause a tripping hazard. Do not operate any heater with a damaged cord or plug, or after heater malfunctions, or has been dropped or damaged in any manner. Disconnect power at service panel. Discard heater, or return to authorized service facility for examination and / or repair.
▲WARNING
RISK OF ELECTRICAL SHOCK. Connect to properly grounded outlets only. Do not insert or allow foreign objects to enter any ventilation or exhaust opening as
this may cause an electric shock or fire, or damage the heater. Unplug heater before performing any maintenance or when not in use, to disconnect heater, turn control to low, then remove plug from outlet.

Intertek
4003787

Look for this icon throughout the manual for helpful tips on how to assemble, use and clean your Electric Fan Heater.

PINNACLE
CLIMATE TECHNOLOGIES
Sauk Rapids, MN 56379 USA • Toll Free (800) 641-6996
Fax: 320-251-2922 • Web: www.masterindustrialproducts • Email: info@pinnacleclimate.com
NEVER LEAVE HEATER UNATTENDED WHILE
CONNECTED TO A POWER SOURCE
SAFETY INFORMATION CONTINUED
WARNING
OVERHEATING OR FIRE MAY OCCUR. Do not place heater
behind doors.
WARNING
CALIFORNIA RESIDENTS: This product contains chemicals, including
lead, known to the State of California to cause birth defects or other
reproductive harm. Wash hands after handling.

CAUTION – RISK OF ELECTRIC SHOCK
DO NOT OPEN HEATER SHELL
NO USER-SERVICEABLE PARTS INSIDE
WARNING
Turn the electrical power off at the electrical panel board
(circuit breaker or fuse box) and lock or tag the panel board
door to prevent someone from turning on the power while you
are working on the heater. This heater is hot when in use. To avoid burns, do not let bare skin touch hot surfaces. Keep combustible materials, such as furniture, pillows, bedding, papers, clothes, etc. and curtains at least 3 feet (.9 m) from the front of the heater and keep them away from the sides and rear.
WARNING
Read all
instructions before
using this heater.
WARNING
CAUTION!
HOT WHILE IN
OPERATION.
DO NOT TOUCH. KEEP CHILDREN,
ANIMALS, CLOTHING AND
COMBUSTIBLES AWAY FROM HEATER.
WARNING
RISK OF ELECTRIC
SHOCK!
CAUTION
This heater may
include an visual
alarm to warn that
parts of the heater are getting excessively
hot. If the alarm illuminates, immediately turn the heater off and inspect for any objects on or adjacent to the heater that may have blocked the airflow or otherwise caused high temperatures to have occurred. DO NOT OPERATE THE HEATER WITH THE ILLUMINATING.
| Minimum Clearance From Combustibles | |
| MH-425A-240 | |
| Front | 3 ft. |
| Top 1 ft. | |
| Sides 1 ft. | |
| Rear 1 ft. | |
- Extreme caution is necessary when any heater is used by or near children or invalids whenever the heater is left operating and unattended.
- Do not use outdoors. Not for commercial/industrial use.
- This heater is not intended for use in bathrooms, laundry areas and similar indoor locations. Never locate heater where it may fall into a bathtub or other water container.
- Do not use heater in wet or moist locations.
- Always locate heater on a stable and level surface.
- Do not place the heater against paperboard or low-density fiberboard surfaces.
- Avoid using an extension cord because the extension cord may overheat and cause a risk of fire.
- ALWAYS use only the electrical power (voltage and frequency) specified on the model plate of the heater.
- ALWAYS use only three-prong, grounded outlet and extension cord.
- ALWAYS unplug the heater when not in use.
- To disconnect heater, turn controls to off, and turn off power to heater circuit at main disconnect panel or unplug from the power outlet.
– ALWAYS install the heater so that it is not directly exposed to water spray, rain, dripping water, or wind.
- Keep all combustible materials away from this heater
NEVER LEAVE HEATER UNATTENDED WHILE CONNECTED TO A POWER SOURCE
SAFETY INFORMATION CONTINUED
- DO NOT modify this heater. Use it only as described in this manual. Any other use is not recommended by the manufacturer and may cause fire, electrical shock, or injury.
- The output air may be very hot in temperature. At times hot enough to burn exposed skin. Use of this heater is not recommended for persons with reduced sensitivity to heat or an inability to react to avoid burns.
- BURN HAZARD: This heater is hot when it is in use. To avoid burns, do not touch the case, grill, or interior parts of the heater when in use. Use handles when moving the heater. Allow the heater to cool down before touching it.
- When installing heater reference the INSTALLATION INSTRUCTIONS for additional warnings and precautions.
- This heater is intended for comfort heating applications and not intended for use in special environments. Do not use damp or wet locations such as marine or greenhouses. Do not use in areas where corrosive or chemical agents are present.
- For safe and efficient operation, and to extend the life of your heater, keep your heater clean. Reference the MAINTENANCE INSTRUCTIONS.
- WARNING - RISK OF ELECTRIC SHOCK
OR FIRE: Make sure electric power is disconnected at main electrical panel before attempting to connect heater to branch circuit. Verify branch circuit voltage is same as noted on heater nameplate. Connecting heater to a voltage greater than the heater nameplate rating could damage the heater and cause a fire.
- DO NOT PLUG INTO LOOSE FITTING OUTLET. Check periodically for a secure plug/outlet fit. If the plug does not fit snugly into the outlet or if the plug becomes very hot, your outlet may need to be replaced.
- Always plug heaters directly into a wall outlet/receptacle. Never use with an extension cord or transportable power tap (outlet/power strip).
- DO NOT plug this heating unit into power strips or surge protectors.
– Always unplug the heater when not in use. - To prevent overloading a circuit, DO NOT plug the heater into a circuit that is already supplying power to other appliances.
- CAUTION - RISK OF ELECTRIC SHOCK: DO NOT OPEN HEATER CASE WHEN PLUGGED INTO AN ELECTRICAL OUTLET.
CONSUMER: READ AND SAVE THESE IMPORTANT INSTRUCTIONS
NEVER LEAVE HEATER UNATTENDED WHILE CONNECTED TO A POWER SOURCE
SPECIFICATIONS
| Model # MH-425A-240 | |
| BTU 12,800 | |
| Watts 3,750 | |
| Heating Area (ft ^2 ) 388 | |
| Power (Volts) 240V~60Hz | |
| Amps 15.6 | |
| Heat Settings 1 | |
Specifications subject to change without notice.
FEATURES - MH-425A-240

- Front Guard
- Fan
- Thermostat
- Error Indicator Light
- Power Light
- Power Switch
- Heat Coil
- Handle/Mounting Bracket
Figure 1
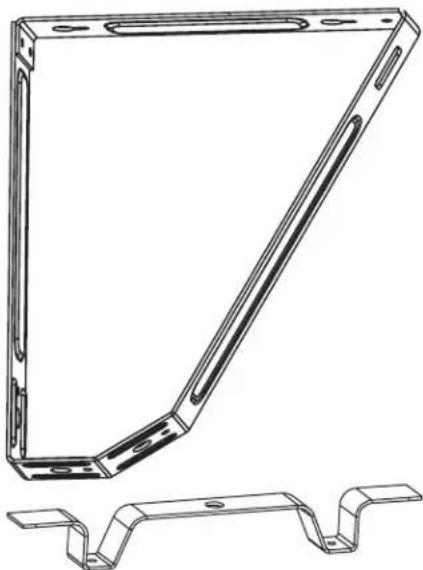
WHAT'S IN THE BOX
natural_image
Technical line drawing of a metal bracket with two separate views below (no text or symbols)Wall/Ceiling Bracket (1) Handle (1)
natural_image
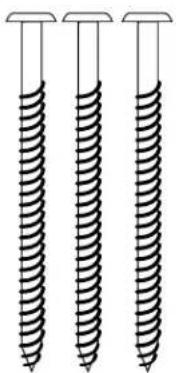
Three identical screwdrivers arranged vertically (no text or symbols)65 mm Screws (3)

20 mm Screw (1)

10 mm Screw (1)

Lock Washer (1)
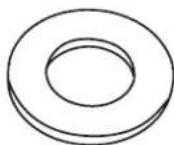
10 mm Washer (2)

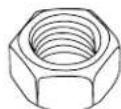
10 mm Nut (1)5 mm Nut
NEVER LEAVE HEATER UNATTENDED WHILE
CONNECTED TO A POWER SOURCE
INSTALLATION INSTRUCTIONS
WARNING
To prevent a
possible fire,
injury to persons
or damage to the heater, adhere to the following:
Installation
- Install only in a location where the power-supply connection will be available
- This heater can be used as a portable heater or can be mounted to a wall or ceiling.
- Place heater on level and stable surface while used as a portable heater.
– Follow steps below to mount this heater to a wall or ceiling.
– Use only on 20 ampere branch circuit. - The mounting bracket is designed to support the weight of the heater only.
- Disconnect all power coming to heater at main service panel before wiring or servicing.
- All wiring procedures and connections must be in accordance with the National and Local Codes having jurisdiction and the heater must be grounded.
- Verify the power supply voltage coming to heater matches the ratings as shown on the heater nameplate.
- CAUTION: High temperature, risk of fire, keep electrical cords, drapery, furnishings, and other combustibles at least 3 feet (0.9 m) from front of heater. Do not install heater behind doors, below towel racks, or in an area where it is
CAUTION
ENERGIZING
HEATER AT A
VOLTAGE GREATER
THAN THE VOLTAGE PRINTED ON THE NAMEPLATE WILL DAMAGE THE HEATER AND VOID THE WARRANTY AND COULD CAUSE A FIRE.
subject to being blocked by furniture, curtains or storage materials. Hot air from the heater may damage certain fabrics and plastics.
- To reduce the risk of fire do not store or use gasoline or other flammable vapors and liquids in the vicinity of the heater.
- When heater is to be wall or ceiling mounted, the anchoring provision must be sufficient strength to support the total weight of the heater plus the weight of the mounting provisions. Failure to properly secure the supporting members of the building structure could allow the heater to fall.
- The following minimum clearances must be maintained: 30^ Tilted, Bottom of Heater to Floor: 6' (1.8 M) minimum, 11' (3.3 M) recommended maximum Horizontal Airflow, Bottom of Heater to Floor: 6' (1.8 M) minimum, 8' (2.4 M) recommended maximum.
- Do not use this heater for dry out as paint, plaster, sawdust and drywall sanding dust will permanently damage the heater and must be kept out of the heater.
- Make sure the installation and wire connection are conducted by certain technician otherwise the electric shock or other hazard would be possible.
NEVER LEAVE HEATER UNATTENDED WHILE
CONNECTED TO A POWER SOURCE
INSTALLATION INSTRUCTIONS CONTINUED
Locating the Heater
The heater should be installed out of traffic areas and at least 6' off the floor. The direction of airflow should not be restricted (i.e. by columns or machinery) and the airflow should not be directed at exposed walls. When more than one heater is used in an area, the heaters should be arranged so that the airflow of each heater supports the airflow of the others to provide best circulation of warm air as shown below (See Figure 1.2).
WARNING
NEVER suspend any object from a mounted heater!

natural_image
Isometric line drawing of a rectangular prism with internal arrows indicating light or force direction (no text or symbols)
flowchart
graph TD
    A["Block 1"] --> B["Block 2"]
    B --> C["Block 3"]
    C --> D["Block 4"]
    D --> A
    style A fill:#f9f,stroke:#333
    style B fill:#f9f,stroke:#333
    style C fill:#f9f,stroke:#333
    style D fill:#f9f,stroke:#333
Figure 1.2
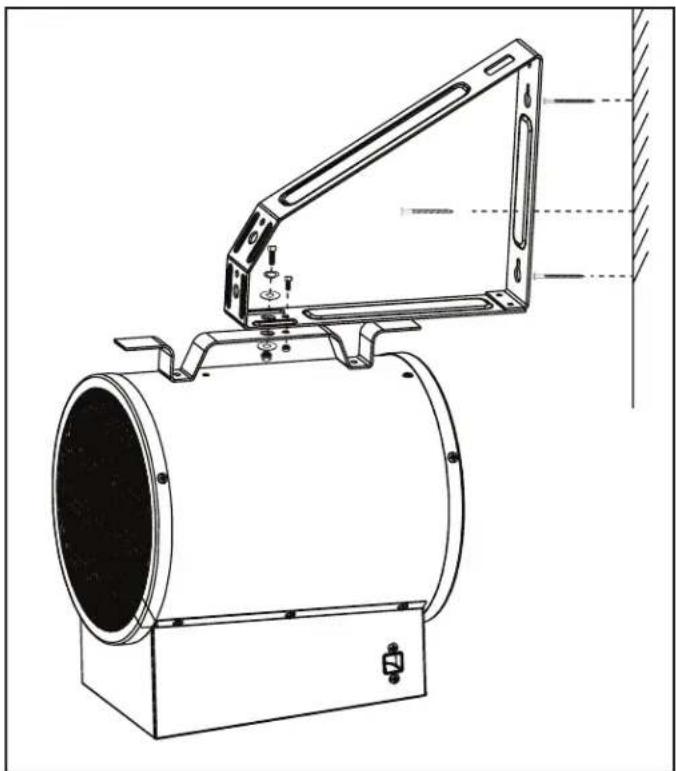
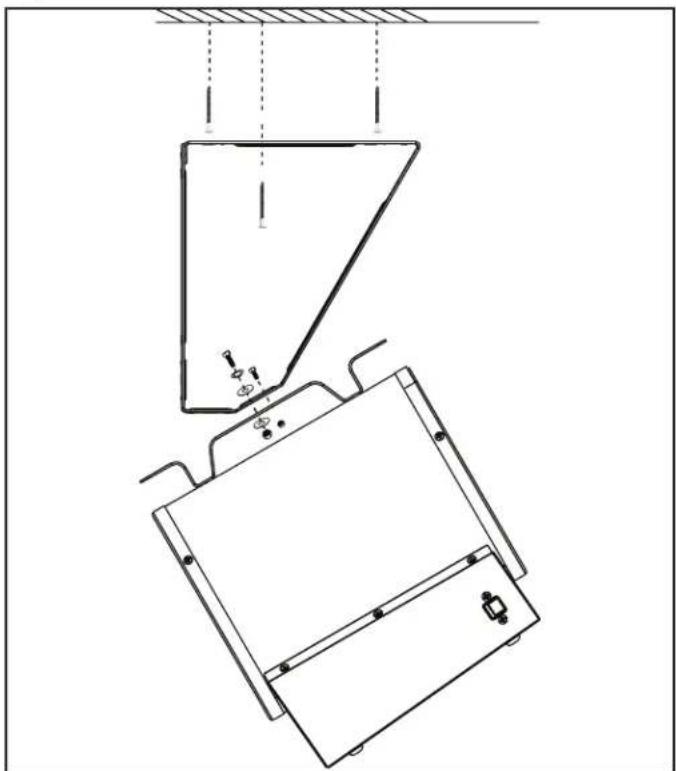
Wall/Ceiling Mounting
See Assembly Figure 3
- Line up holes on bracket with holes on the heater handle.
-
Attach heater to bracket with 20 mm screw, lock washer, 10 mm washer, and 10 mm nut in the larger holes.
-
Also use 10 mm screw and 5 mm nut to secure bracket to handle in smaller holes.
- Locate wood stud in wall or joist in ceiling to mount heater.
NOTE: Wall stud must be able to support 12 lbs. continuously.
- Use holes in bracket to mark 2 holes for drilling.
- Pre-drill 2 holes for 65 mm screws.
- Secure two 65 mm screws and washers to wall/ceiling joist leaving 1/8" exposed. Two (2) screws must be attached securely to a wood stud (min. 1.5")
- Attach bracket to exposed screw head by sliding through keyholes on bracket and pushing down to lock the bracket into place.
- Tighten screws against bracket to secure.
- Secure one 65 mm screw and washer to bracket that is against the wall or ceiling stud (see assembly instructions page 7).
▲WARNING
The heater must be properly installed before use.
Wall mounting Ceiling Mounted Ceiling Mounted with 30° Tilt


NEVER LEAVE HEATER UNATTENDED WHILE CONNECTED TO A POWER SOURCE
ASSEMBLY INSTRUCTIONS

Figure 2
natural_image
Technical line drawing of a cylindrical device mounted on a base, with no visible text or symbols.Figure 3

natural_image
Technical line drawing of a cylindrical industrial device with a metal frame and mounting bracket (no text or symbols)Figure 4

natural_image
Technical line drawing of a mechanical assembly with no visible text or symbolsFigure 5
NEVER LEAVE HEATER UNATTENDED WHILE
CONNECTED TO A POWER SOURCE
OPERATION INSTRUCTIONS
Operation
- Position the fan heater so that it is upright on a firm, level surface and at a safe distance from wet environments and flammable objects.
- Connect the fan heater to the proper electrical power. See Grounding instructions below.
- Set the thermostat dial to the maximum temperature.
- The fan heater will switch on when the ambient air temperature is lower than the desired thermostat setting.
- Once the room reaches the desired temperature, turn the thermostat dial back until heating element turns off.
Automatic Overheat Safety Control
- This heater is equipped with safety internal heat limiting thermostat and overheat protection circuit. When a potential overheat temperature is reached, the system will automatically shut the heater off at 194 °F (90 °C).
- The location, function, and operation of each control of the heater are designed to reduce the risk of fire, electric shock, or injury to persons. Do not tampering with such devices.
Grounding Instructions
MH-425A-240:
- This heater is for use on 240 (or 208) volts. The cord has a plug as shown in D (below). No adapter is available for this blade configuration, and none should be used. The type outlet is a 240 (or 208) volt grounding outlet. When properly installed, it provides a ground connection through the cord to the heater to protect the operator from electric shock.
Caution Light
- The Caution Light will illuminate when the Overheat Safety Control is activated. The heating element will be shut off until the unit has cooled to a safe level.
– The fan will continue to operate. - Once the heater has reached a safe level (158 °F / 70 °C), the heater will turn back on automatically.
Thermostat Instructions
- At first, set the thermostat to “+” and let the heater operate with full power input. When the room temperature reaches the required value, turn the thermostat to the left until it switches off.
- The thermostat will then switch on and off automatically to control the room temperature according to the preset value and keep the room temperature constant.
- When using the heater for the first time, you may notice a slight emission of smoke. This is quite normal and it stops after a short time. The heating element is made of steel and was coated with a layer of protective oil during production. The smoke is caused by the leftover oil as it is heated.
GROUNDING METHODS

natural_image
Pure electrical plug diagram without any text, numbers, or symbolsC
GROUNDING MEANS
20 AMP. 240V NEMA #6-20P

natural_image
Simple electrical symbol for a three-phase power supply (no text or labels)D
Figure 6
NEVER LEAVE HEATER UNATTENDED WHILE
CONNECTED TO A POWER SOURCE
WIRING DIAGRAM

NEVER LEAVE HEATER UNATTENDED WHILE
CONNECTED TO A POWER SOURCE
MAINTENANCE INSTRUCTIONS
Cleaning and Maintenance
– Before cleaning the appliance, disconnect it from the outlet and let it cool down.
- The enclosure is easy to get dirty. Wipe it often with a soft sponge. For very dirty parts, wipe with a sponge dipped in < 122^ water and mild detergent, then dry the heater enclosure with a clean cloth. Be careful not to let the water enter the inside of the appliance
- In order to protect the enclosure, do not splash water onto the heater, and never use a solvent like gasoline, isoamyl acetate, toluene, etc. to clean the heater.
TROUBLESHOOTING
Locating Your Serial Number:
Your serial number can be found on the heater's rating label. It will begin with the letters MEFH followed by 9 digits. For Example: MEFH-00-00-00000. Have your Serial Number ready before calling customer service at 800-641-6996.
| Problem Cause Solution | ||
| Fan stays on when heat shuts off. | 1. Fan runs continuously while the heater is operating. | 1. Heater is operating correctly. |
| Fan speed stays the same when changing settings. | 1. Fan speed stays constant. Setting changes amount of heat output only. | 1. Heater is operating correctly. |
| Heating element does not glow red. | 1. Heating element is made of stainless steel and will not glow red to produce heat. | 1. Heater is operating correctly. |
| Do not feel heat or air flow. | 1. No power to heater.2. Desired room temperature reached.3. Heater does not heat area in front of heater, it will disperse heat throughout room to heat entire space. | 1. Check power connections / connect heater to power supply.2. Thermostat will shut off once desired room temperature is reached. Heater is operating correctly.3. Heater is operating correctly. |
NEVER LEAVE HEATER UNATTENDED WHILE CONNECTED TO A POWER SOURCE
LIMITED WARRANTY
Pinnacle Climate Technologies, Inc. warrants this heater to the original retail purchaser only, to be free from defects in material and workmanship for a period of one (1) year from the date of initial purchase. This product must be properly installed, maintained and operated in accordance with the instructions provided.
Pinnacle Climate Technologies, Inc. requires reasonable proof of your date of purchase from an authorized retailer or distributor. Therefore, you should keep your sales slip, invoice or cancelled check from the original purchase. This Limited Warranty shall be limited to the repair or replacement of parts, which prove defective under normal use and service within the warranty period, and which Pinnacle Products International, Inc. shall determine at its reasonable discretion.
This warranty does not apply to products purchased for rental use.
This Limited Warranty does not cover any failures or operating difficulties due to normal wear and tear, accident, abuse, misuse, alteration, misapplication, improper installation or improper maintenance and service by you or any third part. Failure to perform normal and routine maintenance on the heater, shipping damage, damage related to insects, birds or animals of any kind, and damage due to weather conditions are also not covered. In addition, the Limited Warranty does not cover damage to the finish, such as scratches, dents, discoloration, rust or other weather damage, after purchase.
All transportation costs for the return of damaged product or parts will be the responsibility of the purchaser. Upon receipt of damaged item, Pinnacle Climate Technologies, Inc. will examine the item and determine if defective. Pinnacle Climate Technologies, Inc. will repair or replace and return the item, freight pre-paid.
If Pinnacle Climate Technologies, Inc. finds the item to be in normal operating condition, or not defective the item will be returned freight collect. This Limited Warranty is in lieu of all other express warranties. Pinnacle Climate Technologies, Inc. disclaims all warranties for products that are purchased from sellers other than authorized dealers or distributors.
AFTER THE PERIOD OF THE ONE (1) YEAR EXPRESS WARRANTY EXPIRES, Pinnacle Climate Technologies, Inc. DISCLAIMS ANY AND ALL IMPLIED WARRANTIES, INCLUDING WITHOUT LIMITATION THE IMPLIED WARRANTIES OF MERCHANTABILITY AND FITNESS FOR A PARTICULAR APPLICATION. FURTHER, Pinnacle Climate Technologies, Inc. SHALL HAVE NO LIABILITY WHATSOEVER TO PURCHASER OR ANY THIRD PARTY FRO ANY SPECIAL, INDIRECT, PUNITIVE INCIDENTAL, OR CONSEQUENTIAL DAMAGES. Pinnacle Climate Technologies, Inc. assumes no responsibility for any defects caused by third parties. This Limited Warranty gives the purchaser specific legal rights; a purchaser may have other rights depending upon where he or she lives. Some states do not allow the exclusion or limitation of special, incidental or consequential damages, or limitations on how long a warranty lasts, so the above exclusion and limitations may not apply to you.
Pinnacle Climate Technologies, Inc. does not authorize any person or company to assume for it any other obligation or liability in connection with the sale, installation, use, removal, return or replacement of its equipment, and no such representations are binding on Pinnacle Climate Technologies, Inc.
Always be sure to specify the model number and serial number when making any claim with Pinnacle Climate Technologies, Inc. For your convenience, use the space provided below to list this information.
Locating Your Serial Number:
Your serial number can be found on the heater's rating label. It will begin with the letters MEFH followed by 9 digits. For Example: MEFH-00-00-00000. Have your Serial Number ready before calling customer service
at 800-641-6996.
Model #:
Serial #:
Date of Purchase: ____

Modelos N.°
MH-425A-240
natural_image
Technical line drawing of a metal bracket with two separate views of a support structure (no text or symbols)natural_image
Three identical screwdrivers arranged vertically (no text or symbols)Tornillos de 65 mm (3)
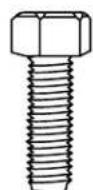
Tornillo de
20 mm (1)

Arandela de 10 mm (2)

Tornillo de 10 mm (1)

Tuerca de 5 mm (1)
natural_image
Technical line drawing of a cylindrical device mounted on a base, with no visible text or symbols.Figura 3

natural_image
Technical line drawing of a cylindrical industrial device with a metal frame and mounting bracket (no text or symbols)Figura 4
natural_image
Technical line drawing of a mechanical assembly with no visible text or symbolsFigura 5
natural_image
Simple electrical circuit symbol with three dots and two lines inside a circle (no text or labels)D
Figura 6
- WARNING
- ⚠ WARNING
- ▲WARNING
- NEVER LEAVE HEATER UNATTENDED WHILE
- CONNECTED TO A POWER SOURCE
- SAFETY INFORMATION CONTINUED
- CAUTION – RISK OF ELECTRIC SHOCK
- DO NOT OPEN HEATER SHELL
- NO USER-SERVICEABLE PARTS INSIDE
- CAUTION
- NEVER LEAVE HEATER UNATTENDED WHILE CONNECTED TO A POWER SOURCE
- CONSUMER: READ AND SAVE THESE IMPORTANT INSTRUCTIONS
- FEATURES - MH-425A-240
- WHAT'S IN THE BOX
- INSTALLATION INSTRUCTIONS
- Installation
- THAN THE VOLTAGE PRINTED ON THE NAMEPLATE WILL DAMAGE THE HEATER AND VOID THE WARRANTY AND COULD CAUSE A FIRE.
- INSTALLATION INSTRUCTIONS CONTINUED
- Locating the Heater
- Wall/Ceiling Mounting
- See Assembly Figure 3
- NOTE: Wall stud must be able to support 12 lbs. continuously.
- ASSEMBLY INSTRUCTIONS
- OPERATION INSTRUCTIONS
- Operation
- Automatic Overheat Safety Control
- Grounding Instructions
- MH-425A-240:
- Caution Light
- Thermostat Instructions
- MAINTENANCE INSTRUCTIONS
- Cleaning and Maintenance
- TROUBLESHOOTING
- Locating Your Serial Number:
- LIMITED WARRANTY
- Modelos N.°
- MH-425A-240
Brand : Master
Model : MH-425A-120
Category : Heating