MP40DAB - Portable digital radio MPMAN - Free user manual and instructions
Find the device manual for free MP40DAB MPMAN in PDF.


User questions about MP40DAB MPMAN
0 question about this device. Answer the ones you know or ask your own.
Ask a new question about this device
Download the instructions for your Portable digital radio in PDF format for free! Find your manual MP40DAB - MPMAN and take your electronic device back in hand. On this page are published all the documents necessary for the use of your device. MP40DAB by MPMAN.
USER MANUAL MP40DAB MPMAN
please read this manual carefully before operation
Precaution
- Do not throw the product into fire to avoid danger of explosion.
● Place the product far away from heat sources, and protect the product from direct sunlight. - Do not charge the internal rechargeable battery longer than specified to prevent danger of fire. Overcharging rechargeable batteries may shorten their life span.
- Do not unplug the unit during file transfer. It may cause Malfunction to your PC and the unit.
- Do not plug in the ear buds or audio cable during file transfer.
- Do not use the product where electric appliances are prohibited.
● Protect the product from violent impact and vibration.
● No compensation responsibility for malfunctions caused by improper use.
● It is prohibited to conduct illegal audio recording.
● Downloading can be delayed if there are too many folders or files. - Do not attempt to disassemble or alter any part of the unit that is not expressly described in this guide. Internal inspections, alternations and repairs should be conducted by qualified service personnel.
- Save the data in the memory of the product to other storage device before repair. No compensation responsibility if the data are lost during repair
Features
● DAB plus support
Auto Search.
Manual Search and Local / Full Scan functions.
DAB plus recording capability support
Up to 20 channels preset and saving
● FM Radio support
FM recording capability support
Up to 20 stations preset and saving
● Multi-format Photo Player JPEG, BMP, GIF, etc.
● Multi-format Video Player Support AVI formats, 128*128 pixel
● Multi-Format Digital Music Playback Support MP3, WMA format Lyrics sync & ID3 display support 6 Preset equalizers
● Date and time display
Packing contents
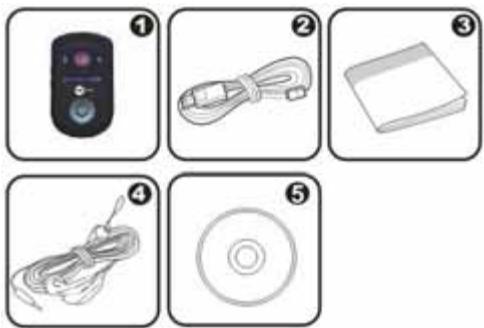
- DAB plus & MP4 player
- USB cable
- Manual
- Earphone
- CD
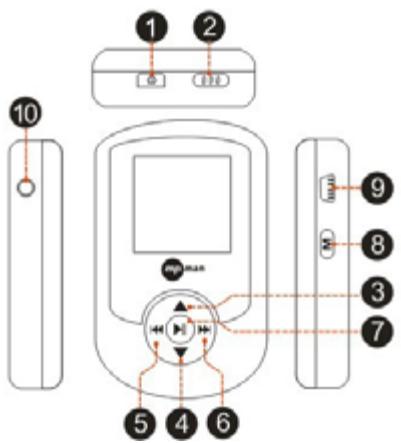
Button Description
text_image
Diagram of a remote control device with numbered components and labeled ports- Power/Information
- Key Lock
- Volume +/Up
- Volume - /Down
-
Previous
-
Next
- Menu Select/Play/Pause
- Menu Return
- USB
- Earphone jack
Main Menu
After power on, there is the main menu as following:
Radio Music Recorder Photo
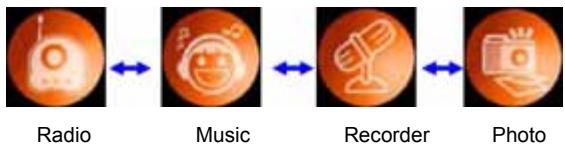
flowchart
graph LR
    A["Radio"] <--> B["Music"]
    B <--> C["Recorder"]
    C <--> D["Photo"]
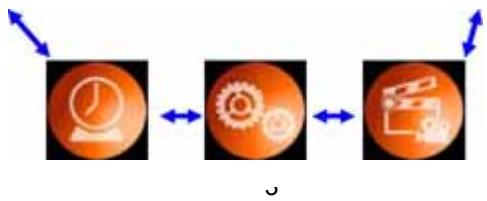
flowchart
graph LR
    A["Clock Icon"] <--> B["Gear Icon"]
    B <--> C["Clapper Icon"]
Time
Setting
Movie
You can press < 📁 >/< ➤ ➤ > to select between and press < ➤ ➤ > to confirm the selection
Radio
1. FM Radio Mode
text_image
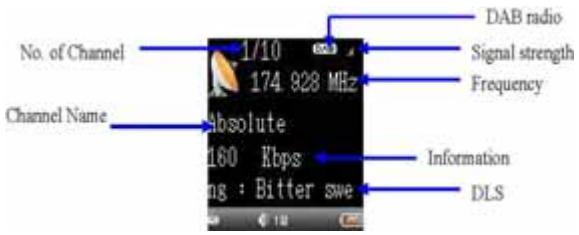
No. of Channel Channel Name 1/10 174 928 MHz Absolute 160 Kbps ng : Bitter swe DAB radio Signal strength Frequency Information DLSUnder FM Radio Mode you can press < 📄>/< ▶▶> to adjust radio frequency. Press and hold for available Radio Frequency seeking.
You can also press < ▶> to enter menu selection under FM Radio screen. The selection includes:
◆ Save Preset: Save Preset FM radio frequencies in the Flash
Press < ▶▶▶ >, then it will ask
Save Station?
Press < ▶▶> again to confirm the saving
Once you have saved the station, press < ▶> will show
Station Exist
◆ Load Preset: Load Preset FM radio frequencies generated by Auto Scan Press < ▶> to confirm the loading.
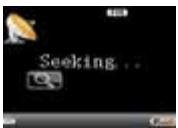
◆ Auto Scan: Auto scanning available radio frequencies and save in Preset Press < ▶> to choose this selection, then it will show the following screen:
text_image
Seeking...◆ Delete Preset: Delete Preset radio frequencies
Press < ▶> to confirm the deleting.
◆ Recording: Record FM with format setting (WAV or MP3)
Press < ▶> to enter "Recording" menu. Then the screen shows that recording is "preparing"
Press < ▶▶▶ > again to start recording.
When recording, press < ▶▶> to pause
In recording/pause state, press < M > to stop recording and return to previous menu.
Then press < M > once again the screen shows "Build Playlist", the recorded FM file will then be saved in music playlist.
Notice: It is necessary to plug in earphone before FM radio operation
2. DAB Radio Mode
Auto scanning will process when enter DAB Radio first time. The DAB Radio Screen will display as following.

text_image
No. of Channel Channel Name 1/10 174 928 MHz Absolute 160 Kbps ng : Bitter swe DAB radio Signal strength Frequency Information DLS◆ Under DAB Radio Mode, press < ▶>/< ▶> to browse available channel, and press < ▶> to select.
◆ You can press < ▶> to enter DAB menu selection as following:
Save Preset: Save Preset DAB radio stations in the Flash
Load Preset: Load Preset DAB radio stations generated by Auto Scan
Delete Preset: Delete preset DAB radio station
DAB Scan:
Manual Scan: Manually select the available DAB Frequencies
Auto Scan: Browse automatically the region DAB Frequencies and save available channel as Preset
DAB Location: Select the region of DAB available between China/Korea/Euro/UK. After location selected, auto scan will process.
DAB Record: Record the DAB with MP2 format and DAB+ with AAC format
DRC Setting: Keep default setting
The key operation is like FM radio mode.
Notice: It is necessary to plug in earphone before DAB radio operation
Music
◆ Music can be sorted by Artist, Album, Genre, Level, All, Playlist and Dir List.
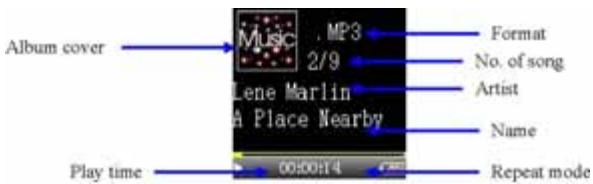
You can navigate with one of the sorted type by pressing < ▶>/< ▶>. Press < ▶> to confirm and list the music files. Press < ▶> again to confirm and play the selected music as following.
text_image
Album cover Music . MP3 2/9 Lene Marlin A Place Nearby Play time 00:00H 4 Format No. of song Artist Name Repeat modeWhen playing music, press< >/< ▶> to select previous /next music. Press < /< > to adjust volume.
◆ You can also press < 📁 >/< ▶> and hold for speedy backward/forward.
◆ Press
Music menu:
1. Artist:
Press < ▶> to enter "Artist" menu, then you will see the artists of your music. The "Unknown" selection is listed in the first line. It includes the music with unknown artists, such as the recorded files (FM file, DAB file and recorder file).
◆ After entering “Artist” menu, press < ▶> to select the artist. Press < ▶> again to confirm and play the music of the selected artist.
2. Album:
◆ Press < ▶> to enter “Album” menu, then you will see the album names of your music. The “Unknown” selection is listed in the first line. It includes the music with unknown album, such as the recorded files (FM file, DAB file and recorder file).
◆ After entering “Artist” menu, press < ▶▶▶ > to select the album. Press < ▶▶▶ > again to confirm and play the music that belongs to the selected album.
3. Genre:
It lists the genre names of your music, such as blue, jazz, pop and other
◆ The key operation is like" 1. Artist"
- Level; level of your music shown in maximum five stars.
◆ The key operation is like" 1. Artist"
5. All:
It lists all of your music names including sound files
◆ The key operation is like" 1. Artist"
6. Playlist: "My playlist['
◆ The key operation is like" 1. Artist"
7. Dir List:
It lists the directories in your DAB player made by yourself
◆ The key operation is like" 1. Artist"
Recorder
◆ Press < ▶> to enter "Recorder" menu. Then the screen shows that recording is "preparing"
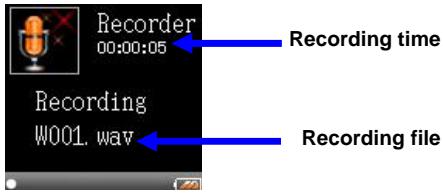
◆ Press < ▶▶▶ > again to start voice recording as following:.
text_image
Recorder 00:00:05 Recording W001. wav Recording time Recording file◆ When recording, press < ▶▶▶ > to pause
In recording/pause state, press < M > to stop recording and return to previous menu. Then press < M > once again the screen shows" Build Playlist", the recorded FM file will then be saved in music playlist.
Photo and Movie
◆ Press < ▶>/< ▶> to browse the photo/movie directory and press < ▶> to confirm and select as following.

natural_image
Grid of 12 colorful and abstract images including animals, frames, and shapes (no text or symbols)Play photo

natural_image
Illustration of a baby being lifted by adult dogs, with no visible text or symbolsPlay movie
◆ Press < |>|>/< ▶|> for previous/next photo/movie select. For movie, you can press < ||>/< ▶|> and hold for speedy backward/forward.
◆ Supported photo format: PEG, BMP, GIF
◆ Supported video format:
MPEG4 SP up to QVGA display in AVI, FLV formats
Setting
1. Display
Brightness:
Press < ▶> to enter 'Brightness" menu. The screen is shown as;
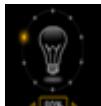
Use< >/< > to adjust brightness of screen, and press < ▶> to confirm.
◆
Backlight:
- Press < ▶> to enter 'Backlight" menu.
Use< >/< > to adjust backlight turn-off time while keypad idle with options of 5 S, 10S, 30 S, and Always on. Then press < ▶> to confirm.
◆ Auto Power Off:
- Press < ▶> to enter 'Auto Power Off:" menu.
Use< >/< > to adjust auto power off time while keypad idle with options of 5 Minute, 10 Minute, 30 Minute, and Never. Then press < ▶> to confirm.
2. Language:
Use < >/< > to browse the language directory and press < ▶> to confirm.
3. Music:
◆ EQ:
♦ Normal, Classic, Pop, Jazz, Bass, and Rock.
You can browse by pressing < >/< > and press ◀> to confirm.
◆ Play Mode:
You can browse the directory by pressing < >/< > and press<▶> to confirm.
| Repeat One | Repeat current song only |
| Normal | Play music according to index (no repeat) |
| Repeat all | Repeat all songs |
| Shuffle | Play songs randomly from current folder |
| Repeat shuffle | Repeat songs randomly |
◆ Display Mode: You can enable ID3 data or disable.
Select "ID3", then the screen will display the additional message of the playing music, which is convenient for you to manage your music.
- Select 'None' to disable ID3 data.
4. Recorder
◆ Format:
You can select the format for your recording file.
The format includes: WAV (ADPCM) and MP3
Quality:
You can select the recording quality by pressing < >/< > and pressing < ▶II> to confirm.
Low (16Kbps) and High (44.1Kbps) recording quality
5. Time
Use >/< > to adjust time value, Use < ||> /< >>| > to select previous/next item and confirm with <▶|| >.
6. Others
◆ Reset all; Press <▲>/<▼> to select resetting the DAB player or not, and press <▶||> to confirm.
◆ Disk Capacity: press < ▶> to enter this menu to know about the capacity information of your DAB player.
◆ About: It displays some data information of your DAB player.
7. Format;
Press <▲>/<▼> to choose formatting your DAB player or not, and press <▶II> to confirm.
Once you format your DAB player, the data you have stored in it will be all gone.
Time
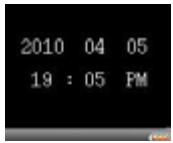
Show current date and time as following.
text_image
2010 04 05 19 : 05 PMInstruction
1. Connecting to a PC
- Before connecting your DAB player to your PC, you can either keep your DAB player power-on or power-off.
Using the USB cable, attach one end to the DAB player and the other to a USB port on your PC.
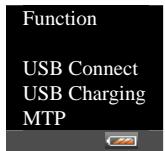
- Then it enters the 'Function' menu. Press <>/<> to select and press <||> to confirm.
text_image
Function USB Connect USB Charging MTP(1) USB Connect
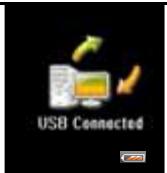
(If you do not select any, the DAB player enter "USB Connected" interface automatically)
text_image
USB ConnectedAt the bottom right hand corner of the PC, a symbol will appear. This means that your DAB player is now connected and ready to use.
(Note that when it is in connected mode, any key operation takes no effect)
Then simply go into [MY COMPUTER] and you should see the new device listed as a removable disk.
After you have transferred data between your DAB player and PC, click "Safely Remove Hardware "to exit.
The screen shows "Build Playlist".
Then the DAB player enters main menu. Now in this mode key operation takes effect. Press < 📋 > to turn off the DAB player and then it enters charging mode. After complete charging pull out the USB cable to stop charging from your PC. (Note that in this USB charging mode you can not turn on your DAB player)
(2) USB Charging
- Press < ▶> to enter USB charging mode.
The DAB player enters main menu directly. Key operation takes effect. Press < ⏻> to turn off the DAB player and then it enters charging mode. After complete charging pull out the USB cable to stop charging from your PC.
(Note that in this USB charging mode you can not turn on your DAB player)
(3) MTP
- Press < ▶> to enter MTP operation.
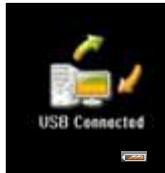
The DAB player shows "USB Connected" interface
text_image
USB ConnectedAt the bottom right hand corner of the PC, a Symbol will appear. This means that your DAB player is now connected and ready for synchronization operation.
Frequently Asked Questions
Question
-
Why won't my songs play on my DAB player but they will play on my PC?
-
My DAB player won't stay on and keeps turning off?
-
My PC won't display the DAB driver/device?
-
Why can't I view the video files I have added to my DAB player?
-
Why can't I view the pictures I have added to my DAB player?
-
Why can't I view the files that I have stored to my DAB player?
Answer
Check that your songs are stored in the correct format in order for the DAB player to playback.
Make sure you have given the DAB player a full 6-hour charge before use, and check your power-off settings are ok.
Ensure the USB cable is firmly connected to both devices. Check by using other USB slots on your PC and also by using a separate USB cable as sometimes cables can become faulty.
Make sure that the video file format is correct
Make sure that the picture files are stored in the correct format before they have been added to your DAB player.
The file type that you are trying to view may be incorrect, check that the files you are trying to view are in either MP3, WAV, WMA or AMV and JPEG depending what type of file you want to playback, either music, video or pictures.
Technical Specifications
| Item | Specification | |
| Display | 1.5" TFT 128*128 Color Display | |
| Languages | English first and support Multi language | |
| Speed | USB 2.0 High Speed | |
| Document formats | Music MP1, MP2, MP3, WMA, WAV(IMA-ADPCM), MPEG-2/4 AAC LCVideo: MPEG4 SP in AVI, FLV formatsPhoto: JPEG, BMP and GIFRecording AAC, WAV,MP2,MP3 | |
| Size (Approximation) | 44 x 76 x 16.5 mm | |
| Battery life | 10 hours MP3 playtime and 4 hours DAB Playtime | |
| Power | Built-in 520 mAh rechargeable Lithium battery | |
| Working temperature | -5 - 40 | |
| System requirement | Windows XP/2K/Vista/Window 7 and Mac OS (please refer to driver installation details | |
| Item | Specification | |
| Ports | Built-in standard mini-B Type USB Port3.5mm Stereo headphone jack | |
| Decoder | SMI 342 + FCI 8000 + SI4703 | |
| Bit Rate | MP3/WMA: 8kbps~320kbps | |
| Audio Recording | DAB MP2 recordingDAB AAC recordingFM Wav/MP3 recordingMicrophone voice recording | |
| Audio S/N Ratio | >85dB | |
| Maximum Output | 4.4mW @ 32 | |
| DAB Sensitivity | Typical BER 1e-4@-100dBmRang -98dBm to -103dBm | |
| Frequency Response | BANDIII DAB/DAB+: 174MHz~245MHzFM: 87.5MHz~108.0MHzAudio: 20Hz~20KHz | |
| Photo View | Manual / Slide Show / Thumbnail | |
| Equalizer | Normal, X-Bass, Rock, Classical, Pop, Jazz | |
| Music play mode | Normal, Repeat one, Repeat all, Shuffle, Repeat Shuffle | |
| Firmware | Flash based, user upgradeable | |
For more information please check our website
www.mpmaneurope.com