Bridge - Battery charger Hive - Free user manual and instructions
Find the device manual for free Bridge Hive in PDF.


| Product Type | Smart Bridge for Solar/Battery System |
| Brand | Hive |
| Model | Bridge (MBR1) |
| Connectivity | RJ-45 (RS485) to inverter, Wireless (Zigbee) to Hive Hub |
| Power Supply | 5V DC via USB cable (included) |
| LED Indicators | Green, Amber, Red, Purple for power, pairing, and connection status |
| Operating Environment | Indoor use only, not waterproof |
| Compatibility | Sunsynk inverter, Hive Hub (sold separately) |
| Installation | Requires qualified professional, inverter must be powered down |
| Mounting | Wall mountable (screws not included, use 3.5mm/size 6 or 8 screws) |
| Cable Requirement | Shielded Cat-5 Ethernet cable (not included) |
| Frequency Range | 2402 - 2480 MHz |
| Max Radiated Power | < 10 dBm |
| Compliance | Directive 2014/53/EU |
| Maintenance | Disconnect before cleaning, no user-serviceable parts, keep away from liquids |
| Included Accessories | Wall mount bracket, USB power cable |
| Dimensions (approx.) | 70 x 70 x 20 mm |
| Weight (approx.) | 50 g |
| Color | White |
| Control | Via Hive app on smartphone or tablet |
| Reset Function | Factory reset via 10-second button press |
Frequently Asked Questions - Bridge Hive
User questions about Bridge Hive
0 question about this device. Answer the ones you know or ask your own.
Ask a new question about this device
Download the instructions for your Battery charger in PDF format for free! Find your manual Bridge - Hive and take your electronic device back in hand. On this page are published all the documents necessary for the use of your device. Bridge by Hive.
USER MANUAL Bridge Hive
natural_image
White square electronic device with a small green dot on its side, placed on a dark blue surface (no text or symbols visible)
HIVE
Welcome to Hive
Before installing the Hive Bridge, please make sure the customer has a Hive account. If they don't, it's quick and simple to set one up.
- Ask them to download the Hive app and follow the instructions
- Or they can visit hivehome.com/register and enter their details
Once the account has been confirmed, you'll be able to use the Hive app to start pairing devices.
Download the Hive app:




About the Hive Bridge
The Hive Bridge connects the Sunsynk Solar and Battery system to the Hive ecosystem. The Bridge connects wirelessly to the Hive Hub (sold separately), which allows customers to control all their connected devices from their phone or tablet, anytime and anywhere.
Important! Installing the Hive Bridge involves opening the front casing of the inverter and should only be attempted by a suitable qualified individual. The Hive Bridge is also not waterproof and should only be installed indoors.
GettingStarted
1 Find a convenient location for the Hive Bridge.
- Ensure the inverter is fully powered down.
- Remove the front cover from the inverter and locate the RJ-45 connector labelled RS485 as illustrated in the available ports as highlighted in the below diagram
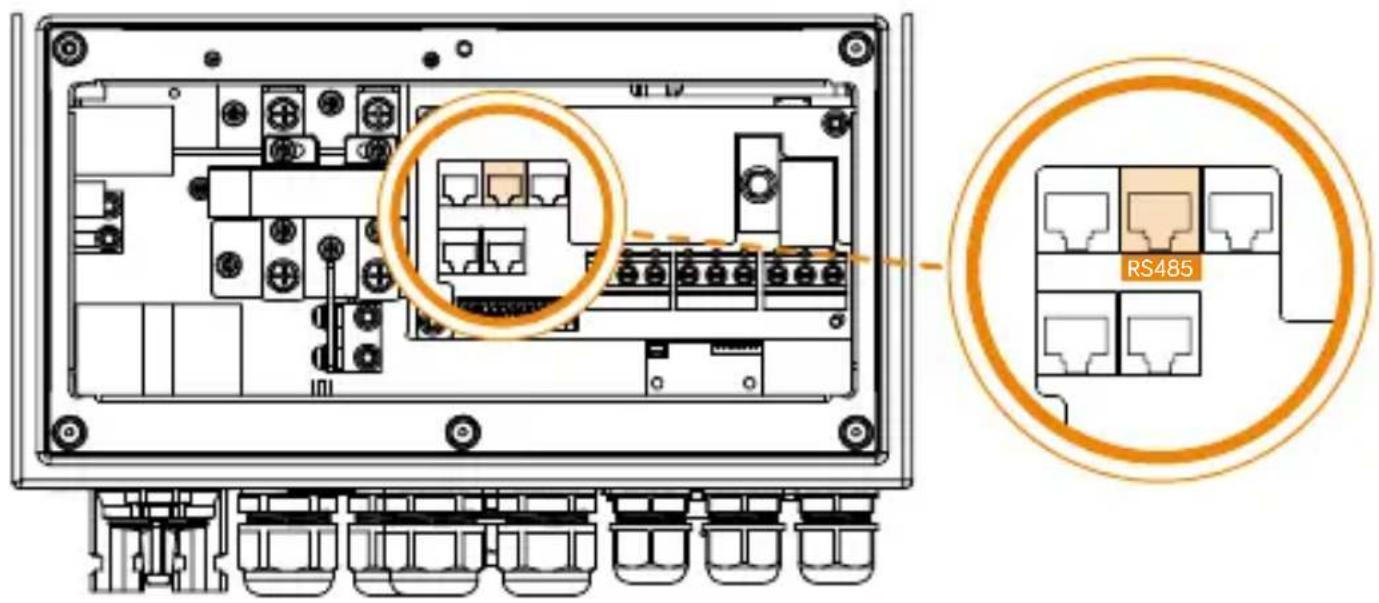
Tip! To connect the Hive Bridge to the Inverter you will need a suitably shielded Cat-5 (Ethernet) cable. If installing to an inverter with a combined canbus/RS485 port a suitable splitter will be required to complete the install.
GettingStarted
② Thread the Cat-5 (ethernet) cable through one of the lands in the bottom of the inverter and plug into the RJ-45 connector labelled RS485. Try and avoid sharp bends in the routing.
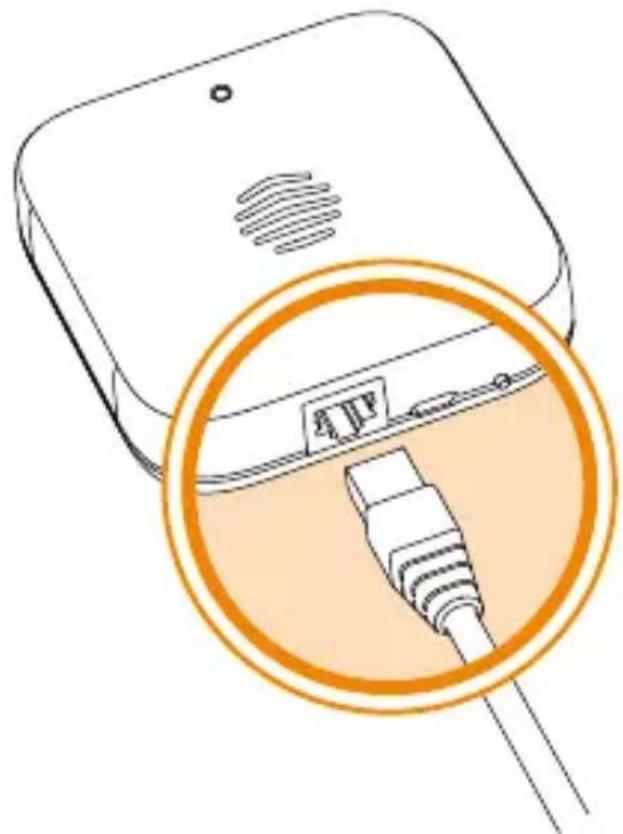
3 Connect the other end of the cable to the RJ-45 connector on the Hive Bridge
natural_image
Illustration of a smartphone connected to a USB cable, with a magnified circular detail showing the cable being inserted (no text or symbols present)GettingStarted
4
Power up the inverter.
5
Power up the Hive Bridge. The LED should show green for 3 seconds and then start double flashing green (flashing red/amber indicates that the Bridge is not connected to the inverter). The double flashing indicates that the Bridge is trying to connect to the Hive Hub.
Tip! If you are installing a Hive Hub at the same time, installation instructions for the Hive Hub can be found at hivehome.com/guides
Getting Started
6
Connect the Hive Hub to power and ethernet/WiFi then wait for the LEDS to stop flashing.
7
Press the black button on the back of the Hive Hub for 2 seconds to put it into pairing mode (indicated by flashing amber).
8
The Bridge should now connect to the Hub. The LED on the Bridge will change to steady green (or steady red if Hive Bridge has not been connected, or if the inverter is still powered down).
Note! Flashing lights on a Hive Hub may indicate a firmware update is happening. Allow this to complete before connecting the Hive Bridge.
Tip! You can also connect the Bridge to the Hub via the device onboarding journey in the Hive app. Ask the customer to download the Hive app, and this will guide you through the set-up.
Using the Wall Mount
natural_image
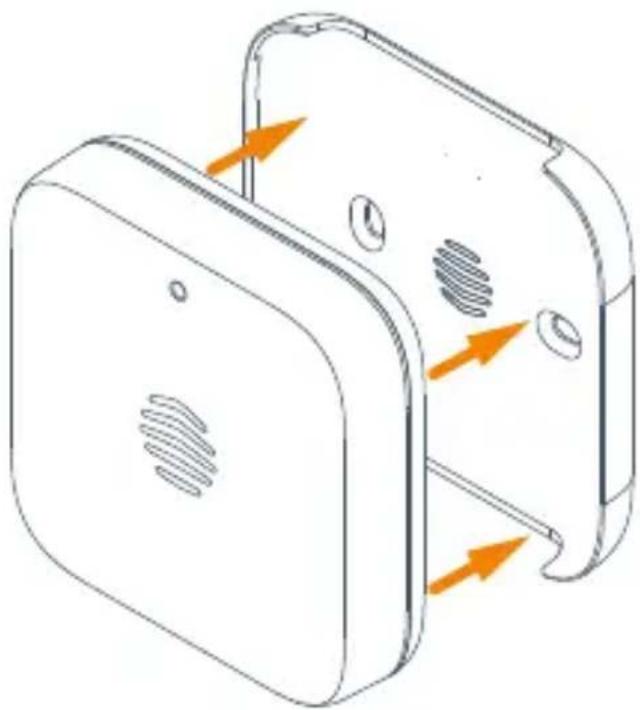
Diagram of a device with internal components and orange arrows indicating flow or movement (no text or symbols)If using the included Hive Wall Mount, make sure appropriate wall fixings are used (The Wall Mount is designed for 3.5mm/size 6 or size 8 screws) and that the location is within suitable distance for the Bridge's power and data cables. Be careful to avoid any cables and pipes that may be buried in the wall.
Button Guide
| Button Press (seconds) | Out of Box device (or a device that is in pairing mode) | Device in pairing timeout state | Device paired to a network |
| 2 Enter pairing effect | mode for 60mins | Wake up device and communicate with Hub | |
| 6 LED steady purple for 2s | LED steady purple for 2s | LED steady purple for 2s | |
| 10 Factory reset the device | Factory reset the device | Factory reset the device | |
Triggering a factory reset will clear all the settings on the Hive Bridge. The Hive Bridge will go back into pairing mode and behave as an out of box device.
LED Reference Guide
| Colour Device state LED behaviour | ||
| Off | SteadyNo power | |
| Green SteadyWill appear for 3s on power up and also in normal operation. | ||
| Amber SteadyHive Bridge is not paired to a Hive Hub or connecting to the Sunsynk Inverter. | ||
| Red SteadyHive Bridge is paired to a Hive Hub but not to the Sunsynk Inverter. | ||
| Single flashing green | Sunsynk Inverter connected, but not paired to a Hive Hub (timed out). | 1 short flash in 1s cycle |
| Double flashing green | Hive Hub pairing being attempted, Sunsynk Inverter is connected. | 2 short flashes in 1s cycle |
| Double flashing amber | Hive Hub pairing being attempted, Sunsynk Inverter is not connected. | 2 short flashes in 1s cycle |
| Fast flashing amber | Bridge is connected to the Sunsynk Inverter. | 0.5s on, Contact 0.5s off |
| Purple SteadyUsed for LED testing only. | ||
to the (
with Hi
Troubleshooting:
If the connection fails and the two devices are some distance apart (or separated by an external wall), plug in a Hive Booster or Hive Smart Plug between them – and then make sure all devices are paired and online. This should improve the connection reliability.
Usage
Your Hive Bridge is designed for UK household wiring, and for indoor use only.
Maintenance
Disconnect your Hive Bridge before cleaning and keep it away from water and other liquids at all times. The Bridge does not contain any serviceable parts so do not attempt to open it.
Can we help?
You can view our handy how-to-use videos along with hints and tips at hivehome.com/support
© 2024 Centrica Hive Limited (tradin as Hive). Registered in England (No. 5782908) SL4 5GD, UK. Bord Gáis Energy. Registered in Ireland (No. 463078) D02 HH27, Ireland All rights, reserved.
Centrica Hive Limited (trading as Hive) declares that the radio equipment type MBR1 complies with Directive 2014/53/EU. Full declaration text available at: hivehome.com/compliance Max. radiated power: <10 dBm. Frequency: 2402 - 2480 MHz
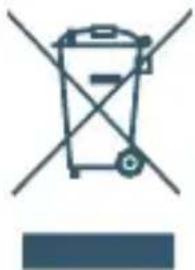
To avoid environmental and health problems due to hazardous substances in electrical and electronic goods, appliances marked with a crossed out wheeled bin should
not be placed into your household rubbish bin. Instead, when they are unable to be re-used, they should be recycled. Your local authority will be able to advise you on the location of the nearest recycling centre that is authorised to accept this type of waste. Please recycle responsibly.
natural_image
Simple line drawing of a trash bin with crossed lines indicating no waste or restriction (no text or symbols)
natural_image
Orange background with white abstract wave-like pattern and the word 'HIVE' below (no additional text or symbols)
natural_image
Hive logo with white wave-like pattern on dark blue background (no text or symbols)Brand : Hive
Model : Bridge
Category : Battery charger