
EP-MAJ7 - Massage device PANASONIC - Free user manual and instructions
Find the device manual for free EP-MAJ7 PANASONIC in PDF.


| Product Type | Massage Chair |
| Brand | Panasonic |
| Model | EP-MAJ7 |
| Dimensions (Approx) | 1200 x 750 x 1050 mm (H x W x D) |
| Weight | Approx 85 kg |
| Power Supply | AC 100-240V, 50/60Hz |
| Power Consumption | 150 W |
| Massage Techniques | Shiatsu, Kneading, Tapping, Rolling, Swedish |
| Zero Gravity | Yes, multiple recline angles |
| Heat Function | Back and seat heating |
| Air Massage | Airbags for shoulders, arms, hips, legs |
| Foot Roller | Yes |
| Body Scan | Automatic body scanning for customized massage |
| Control | Remote control with LCD display |
| Material | Premium synthetic leather |
| Care and Cleaning | Wipe with damp cloth, avoid solvents |
| Safety Features | Auto shut-off, child lock |
| Spare Parts | Available through Panasonic service centers |
| Repairability | Modular design; professional service required |
| Warranty | 2 years |
Frequently Asked Questions - EP-MAJ7 PANASONIC
User questions about EP-MAJ7 PANASONIC
0 question about this device. Answer the ones you know or ask your own.
Ask a new question about this device
Download the instructions for your Massage device in PDF format for free! Find your manual EP-MAJ7 - PANASONIC and take your electronic device back in hand. On this page are published all the documents necessary for the use of your device. EP-MAJ7 by PANASONIC.
USER MANUAL EP-MAJ7 PANASONIC
Operating Instructions
Operating Instructions
Operating Instructions
(Household) Massage Lounger
Thank you for purchasing this Panasonic product.
Before operating this unit, please read these instructions completely and save them for future use.
Searching for FAQs has been made easier.
Page EN12
Transport, installation and assembly
● Dimensions of main unit! (Page EN55)
Page EN22
What kind of courses are there?
The back massage intensity controller display differs according to the course and action!
Back massage intensity control of auto course Page EN38 Back massage intensity control of manual action
Page EN41
About heat massage
● "HEAT" operating method
The sound is irritating!
● Operating sound, perception, etc.
Contents
Page
Before Use
IMPORTANT SAFETY INSTRUCTIONS ... EN4
Part names and functions of main unit...EN10
Setting up the massage lounger ..... EN12
Assembly....EN14
Before sitting down ....EN18
How to Use
Part names and functions of the
Controller....EN20
Simple use ...... EN22
Massages
When you want a complete massage .. EN25
- When you want a concentrated massage of a particular body part with your favorite action....EN26
Air stretching and Sole massage ..... EN28
Memory Course...... EN31
Adjusting the intensity ..... EN36
After completing the massage....EN43
Moving/Maintenance
Moving the unit ..... EN44
Cleaning and maintenance.....EN45
Important Notes
Q&A......EN46
Troubleshooting ..... EN51
Error display ...... EN52
Sounds and sensations of the unit ..... EN53
Specifications ...... EN54
| ⚠️DANGER | Denotes a potential hazard that will result in serious injury or death. |
| ⚠️WARNING | Denotes a potential hazard that could result in serious injury or death. |
| ⚠️CAUTION | Denotes a hazard that could result in minor injury or property damage. |
IMPORTANT SAFETY INSTRUCTIONS
Basic precautions should always be followed when using an electrical unit, including the following. Please ensure that you read all instructions before using the Household Massage Lounger.
! DANGER
To reduce the risk of electric shock:
- Always unplug this appliance from the electrical outlet immediately after using and before cleaning.
WARNING
To reduce the risk of burns, fire, electric shock, or injury to persons:
- The unit should never be left unattended when plugged in. Always unplug the unit when not in use.
- Close supervision is necessary when this appliance is used by, on, or near children, invalids, or disabled persons. Keep children away from the legrest.
- Only use the unit for the purpose described in these instructions.
- Do not use any accessories other than those recommended by the manufacturer.
- Always return the seat to the upright position and make sure the legrest is completely retracted. Be careful that nothing is obstructing the legrest while retracting.
- Never operate the unit if it has a damaged power cord or plug. Return the unit to the nearest authorized service center if it is not working properly, if it has been dropped or damaged, or if it has been immersed in water.
- Keep power cords away from heated surfaces. Do not carry the unit by the power cord.
- Never block the air openings during operation and make sure that all air openings are kept free of lint and hair, etc. Do not drop or insert anything into any of the openings of the unit.
- Do not use the unit on top of heating appliances, such as electric carpets, etc. Do not operate the unit under blanket or pillow. Excessive heating can occur and cause fire, electric shock, or injury to persons.
- Do not use the unit outdoors.
- Do not use or operate where aerosol spray products are being used or where oxygen is being administered.
- Connect this unit to a properly grounded outlet only. See Grounding instructions.
- Use heated surfaces carefully. May cause serious burns. Do not use over insensitive skin areas or in the presence of poor circulation. The unattended use of heat by children or incapacitated persons may be dangerous.
- Do not use the unit in close proximity to loose clothing or jewelry.
- Keep long hair away from the unit while in use.
- After each massage, slide the power switch on the backside of unit body to the "off" position, turn the lock switch to the "lock" position and then remove the lock switch key and power plug.
SAVE THESE INSTRUCTIONS
GROUNDING INSTRUCTIONS
This unit must be grounded. If it should malfunction or breakdown, grounding provides a path of least resistance for electric current to reduce the risk of electric shock. This unit is equipped with a cord having an equipment-grounding conductor and a grounding plug. The plug must be plugged into an appropriate outlet that is properly installed and grounded in accordance with all local codes and ordinances.
! DANGER
Improper connection of the equipment-grounding conductor can result in a risk of electric shock. Check with a qualified electrician or serviceman if you are in doubt as to whether the product is properly grounded. Do not modify the plug provided with the product – if it will not fit the outlet, have a proper outlet installed by a qualified electrician. This product is for use on a nominal 120-volt circuit and has a grounding plug that looks like the plug illustrated in Figure A. Make sure that the product is connected to an outlet having the same configuration as the plug. No adapter should be used with this product.
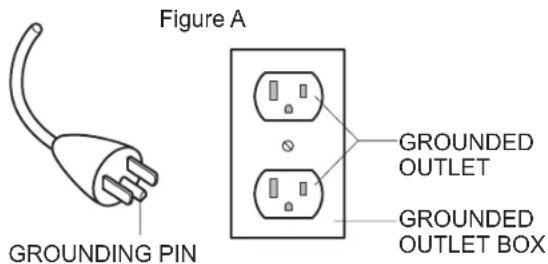
- This unit is not intended for use by persons (including children) with reduced physical sensory or mental capabilities, or lack of experience and knowledge, unless they have been given supervision or instruction concerning use of the unit by a person responsible for their safety. ● Children should be supervised to ensure that they do not play with the unit.
IMPORTANT SAFETY INSTRUCTIONS (Continued)

Denotes a specific operating procedure that must not be performed.

Denotes a specific operating procedure that must be performed.

WARNING
Symptoms

● The following persons should not use this unit:
(1) Persons who are prohibited from receiving massages by a physician (e.g.: due to thrombosis, severe aneurism, acute varicose veins, any type of dermatitis and skin infections (including inflammation of the hypodermis), etc.) (2) Persons suffering from osteoporosis, spine fracture, sprain or acute pain such as a pulled or torn muscle (3) Persons who have a pacemaker, defibrillator, or other personal medical devices prone to electronic interference (4) Pregnant women and women who have just given birth (5) Persons with symptoms of acute low back pain, herniated disk, spondylolisthesis, spinal stenosis, degenerative lumbar spondylosis (6) Persons who have abnormalities or curvature of the spine
● The following persons should not use the lower back/hip massage or pelvis stretch.
(1) Those with symptoms of acute inflammation around the hip area, acute hip pain, piriformis muscle syndrome or sciatic neuralgia
(2) Those suffering from osteoarthritis of the hip and bad hip joint
(3) Those who feel pain, numbness, lethargy in the hip and legs during use (Doing so may worsen the symptoms.)
● The unit is not to be used by people who cannot move or communicate on their own.
● Persons with any of the conditions listed below or who are undergoing medical treatment should consult with their physicians before using the unit.
(1) Persons who have a malignant tumor (2) Persons suffering from heart disease (3) Persons who have a loss of heat sensation (4) Persons who have sensory abnormalities due to a severe peripheral circulatory disturbance such as diabetes mellitus (5) Persons who have a wound where the massager operates (6) Persons whose body temperature is over 38 °C (100.4 °F) (who have a fever) (E.g.: When a person has acute inflammation symptoms (fatigued, chills, blood pressure fluctuations, etc.) or when debilitated) (7) Persons who require bed rest or who are in poor physical shape (8) Persons other than those listed above who feel unwell
- If you begin to feel unwell during use or if you do not feel effects of the massage lounger, stop use immediately and consult a physician.
(Failure to do so may cause an accident, injury or become unwell.)
If a malfunction or breakdown occurs

- If a malfunction or breakdown occurs, stop using the chair immediately and unplug the power plug from the wall socket.
(Failure to do so may result in smoke/fire or electric shock.)
- Does not start when pressing
- The power supply goes on and off when the power cord is moved.
- Burning smells or abnormal sounds occurring during operation.
- The unit becomes deformed or unusually hot.

→ Contact an authorized service center immediately for inspection/repairs.
Take note of the following points as well

- Absolutely do not modify. Furthermore, do not attempt to disassemble or repair the unit yourself. (Doing so may cause fire, or may cause the unit to function abnormally resulting in injury.)
When in use

- When massaging the neck area, be careful of the movement of the massage heads and avoid massaging the throat area and excessively strong massage action.
- Do not sit on the backrest or armrests. This unit should not be used by children. Also, do not allow children to play on the unit, or to climb on the seat, backrest or armrests.
- Do not use the massage lounger while holding children.
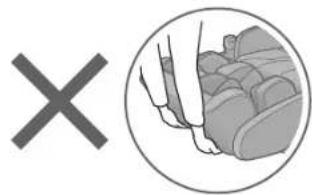
- Do not push your hands, elbows, arms or feet against the fabric covering the moving parts of the backrest during use. (Doing so may cause an accident or injury.)
- When "HEAT" is used, do not let the massage heads touch the same place for a long time. (Low temperature burns* may occur.) * Burns may occur at relatively low temperatures (40 °C (104 °F) to 60 °C (140 °F)) when in contact with the same area of skin for long periods of time, even if you do not feel heat or pain. Always check the fabric covering the backrest or legrest movable parts has not been ripped before using the unit. Please also check other areas to ensure the fabric has not been ripped.

No matter how small the rip, if you find one then immediately stop using the unit, unplug the power plug and have the unit repaired at an authorized service center.
(Failure to do so may result in injuries or electric shocks.)
- Start using a gentle Swedish massage.
- Do not massage for more than 30 minutes a day.
- Do not massage any one part of your body for more than 5 minutes at a time. (Doing so may result in adverse effect or injury.)
Confirm that the shoulder position is correct when body scanning (Page EN24) is performed. If it is not properly aligned, use the POSITION button to adjust the shoulder height, or stop the massage and perform the body scanning again (when using auto course, manual operation).
Make sure there are no persons or pets around the unit (front, back, underneath or sides of the unit) before using it for massaging or moving the backrest or legrest. (Failure to do so may cause an accident or injury.)

Power plug, power cord etc.

Do not do anything that may damage the power cord or power plug.
Do not scratch, modify, use near a heater, excessively bend, twist, pull, place heavy objects on top of, or bundle the cord or plug.
(Doing so may cause electric shock, burning, or fire due to a short circuit.)
Contact the nearest authorized service center for repairs to the power cord or power plug.
Do not insert or unplug the power plug with wet hands.
(Doing so may cause electric shock.)

Always use sockets and wiring devices at the correct rated value. Use AC 120 V. (Cannot be used overseas, nor with a transformer.) Always insert the power plug fully into the socket.
(Failure to do so may result in electric shock or fire due to overheating.)
Dust the power plug on a regular basis.
Remove dust using a dry cloth. (Failure to do so may result in fire, due to damp shorting the insulation.)
When unplugging the power plug, hold the plug itself and do not pull on the power cord. (Failure to do so may cause electric shock, burning, or fire due to a short circuit.)
IMPORTANT SAFETY INSTRUCTIONS (Continued)
CAUTION
To avoid risk of injury.
Symptoms

Persons who are otherwise healthy but have any of the conditions listed below should consult with their physicians before using the unit.
(1) Persons whose muscles have deteriorated due to age or weight loss (2) Persons with symptoms of lower back and hip pain caused by the bones and muscles, organs and nerves (3) Persons who suffer bruises or sprains easily (4) Persons who suffer from severe motion sickness (5) Persons who have undergone heart or internal surgery in the past (Failure to do so may adversely affect health.)
The unit has a heated surface. Persons insensitive to heat must be careful when using the unit. If symptoms such as rashes, reddening, itching, etc. occur as a result of using this unit, stop using the unit and consult a physician. (Failure to do so may cause an accident or adversely affect health.)
Installation and movement

- Do not drag or push the unit in an installed state.
- Do not move the unit using the castors on the flooring. (Doing so may damage the flooring.)
- Do not move with a person on it. (Doing so may result in falls, causing an accident or injury.)
- Do not hold the sole massage section when moving the unit. (It may slide in movement, causing injury.)
- Do not use in damp or humid places such as a bathroom. (Doing so may cause electric shock.)

- Use only on a horizontal surface. (Failure to do so may result in a falling accident.)
- Place a mat or other such covering on the floor when moving the unit using the castors. (Unit may damage the flooring.)
- When moving the unit on its castors, remove any obstacles from around the unit, move the backrest to the fully upright position, lift the legrest to a position below the waist (less than 80 cm (31.5 in.) from the floor) and move the unit slowly. (Page EN44) (Otherwise the unit may fall and cause injury.)
Power supply

- To ensure safety, connect the unit to a properly grounded outlet. (Page EN13)
- Failure to do so may cause an accident or discharge. (Failure to do so may cause electric shock.) Always unplug the power plug from the wall socket when cleaning the unit or removing the cover. (Failure to do so may cause an electric shock or injury.) Always unplug the power plug from the wall socket when not using. (Since dust and humidity deteriorates insulation, which may result in fire due to electrical fault.)
Before and during use

- Do not use the massage heads on your head, stomach or bare skin. Also, do not place your hands or feet between the massage heads.
- Do not place your knees between the leg and sole massage section.
- Do not fall asleep while using the unit. Do not use the unit after drinking alcohol.
- Do not stand, jump on, or place objects on the seat until the air is completely extracted after the air action. (Doing so may cause an accident or injury.)
- Do not insert your hands, fingers, feet, or head into the following spaces:
(1) Between the backrest and seat or armrest (2) Between the legrest and seat or armrest (3) Between the seat and armrest (4) Between the back cover and leg cover (5) Back of the legrest
- Do not unplug the power plug or turn the power switch "off" during massage.
- Do not use the sole massage in a standing position. (Doing so may cause injury.)
- Do not sit on, stand on, or place objects on the legrest when the legrest is not completely lowered.
(Doing so may cause the edge of the legrest to rotate or the unit to tip over, resulting in an accident or injury.)
- Do not use at the same time as another medical device.
(Doing so may cause an accident or deteriorated health.)

- Check that the massage heads are in the retracted position.
- Be sure that all operations have stopped before getting off the unit during a massage. (Failure to do so may cause an accident or injury.)
- Check that there is no foreign matter between the parts of the unit before sitting down.
- Check that there are no foreign objects stuck in the backrest, legrest, or hand and arm massage section.
(Hands, feet or small objects may become trapped, resulting in an accident or injury.)
● Avoid wearing anything hard on your head like a hair accessory, etc. when using the unit. - Do not massage with any hard objects in your trouser pockets. - Remove hard objects such as false fingernails, wristwatches or rings when massaging hands or arms.
(Doing so may cause injury.)
- Do not drop anything from your pockets, etc. into the gaps of the device. (You could lose them.)
Take note of the following points as well

- Do not allow children to use the controller holder fixing screw. (Doing so may cause an accident such as a child swallowing the screw.)
- Do not spill water on the unit or controller. (Doing so may cause electric shock, ignition or fire due to a short circuit.)
- Store the lock switch key out of the reach of children. (Failure to do so may cause an accident such as the child swallowing the key.)
- In the event of a power outage, unplug the power plug immediately. (Failure to do so may cause an accident or injury when the power supply returns.)
- If you have not used the unit for a while, carefully read the operating instructions again and check that the unit is operating normally before use. (Failure to do so may result in breakage or injury.)
Part names and functions of main unit
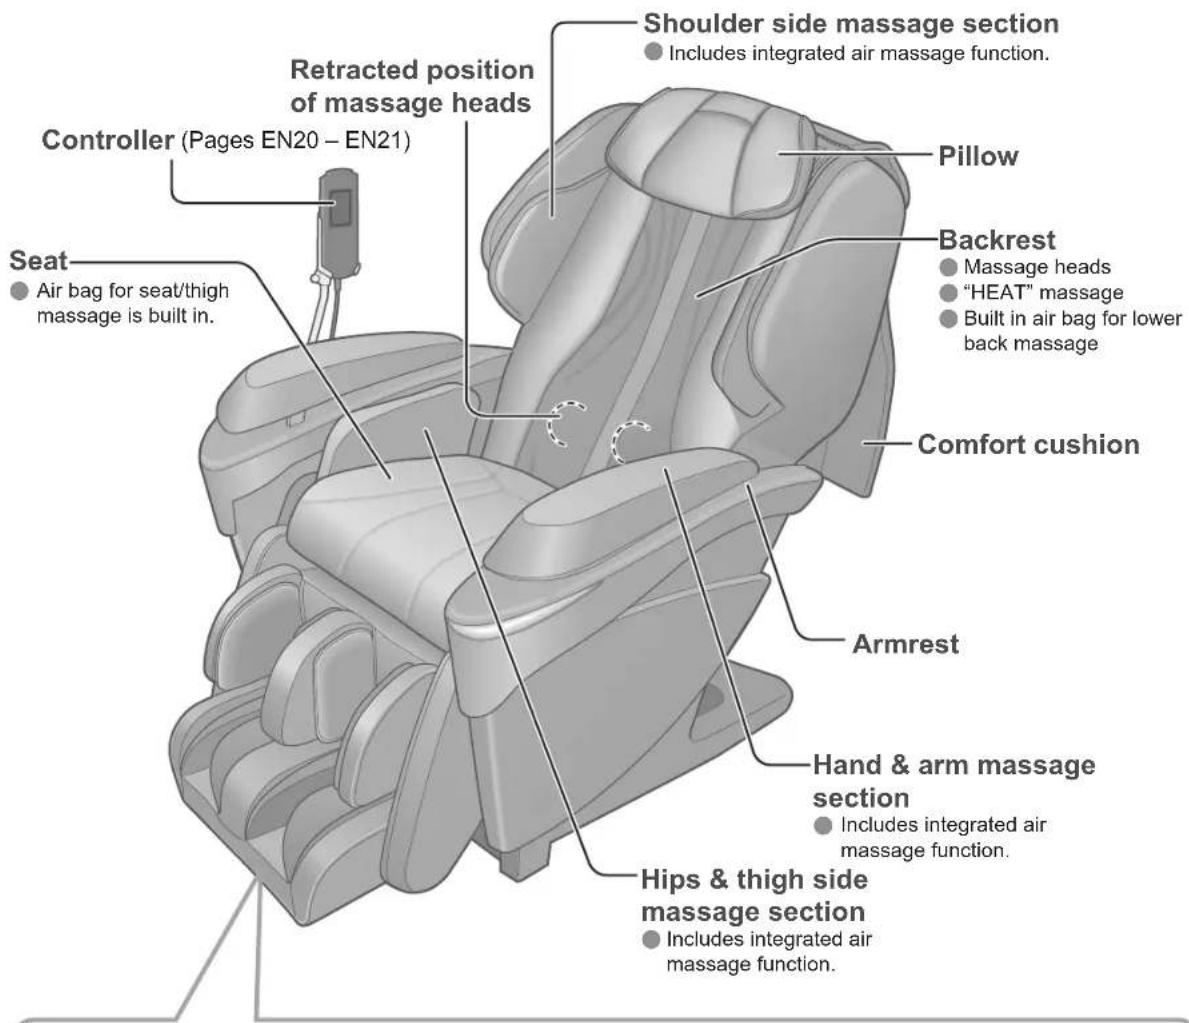
Legrest - Leg & Sole Massage Section
● Massage by sole roller. - Includes air massage function. - Position can be adjusted by sliding sole massage section.
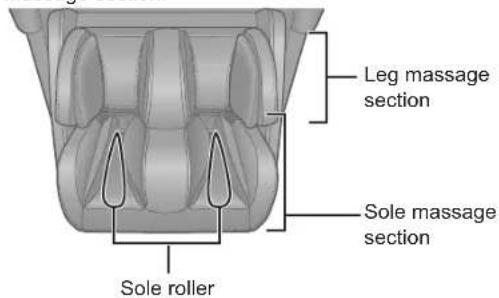
■ Sole roller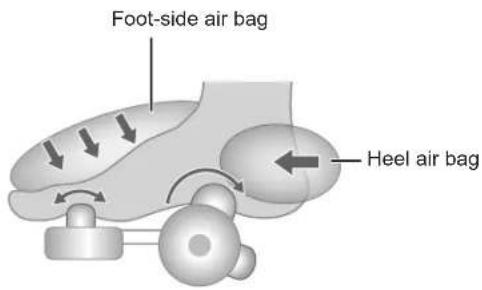

Power switch section
- Lock switch is set to "open" and power switch is set to "on" prior to leaving the factory.
Setting up the massage lounger
1) Checking the accessories
Armrests (Right/Left)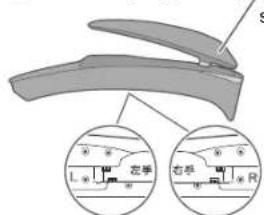
Right/Left indication (armrest back)
The holes in the fabric at the back of the hand & arm massage section are due to the manufacturing process and are not a fault.
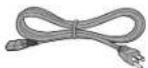
Pillow Power cord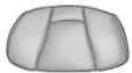
Comfort cushion
2) Where to use the unit
Ensure there is adequate space to recline.
- Dimensions required for installation (see page EN55 for the detailed dimensions of the main unit)
Approximate Dimension: Height 115 cm (45.3 in.) × Width 90 cm (35.4 in.) × Depth* 220 cm (86.6 in.)
* The actual depth of the main unit is 200 cm (78.7 in.) but the required depth is stated as 220 cm (86.6 in.) so as to install it at least 10 cm (3.9 in.) away from the wall etc. at the front and back.
Do not expose the massage lounger to direct sunlight or high temperatures, such as in front of heating sources. This can cause discoloration or hardening of the synthetic leather.
3) Installing

The unit must be carried by two or more persons.
Since the unit is heavy, be careful to avoid back injuries.
| Unit weight | Approx. 87 kg(191.8 lbs) |
Watch your step carefully and put down the unit slowly.
Lay out a mat, etc.
Since the unit may damage the flooring, it is recommended to place the unit on a mat. When placing a mat under the unit, the size of the mat should be sufficient (at least 120 cm × 70 cm (47.2 in. × 27.6 in.)) to cover the areas where the unit touches and where the legrest could touch the floor.
Hold the legrest by the sides.
Hold the legrest with your hands until it has been set on the floor completely. If you release the legrest too soon, it will spring back to the initial position.
Do not hold the foot part!
The sole massage section might slide, and injuries may occur.
Controller stand

Lock switch key (1 pc.)
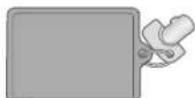
This is initially inserted in the lock switch of the power switch section prior to leaving the factory.
Allen key (1 pc.)

Attachment screws (M6 × 13) Black

(M6 × 29) Silver

4) Connect the power cord to the unit
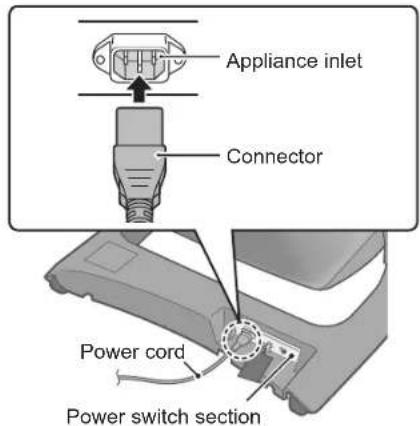
① Check for dirt and damage on the appliance inlet of the power switch section and the connector of the power cord. ② Insert the connector into the appliance inlet. ③ Be sure to push the connector in all the way.
GROUNDING INSTRUCTIONS
This unit must be grounded. If it should malfunction or breakdown, grounding provides a path of least resistance for electric current to reduce the risk of electric shock. This unit is equipped with a cord having an equipment-grounding conductor and a grounding plug. The plug must be plugged into an appropriate outlet that is properly installed and grounded in accordance with all local codes and ordinances.
5) Turn on the power and raise the backrest to the upright position.
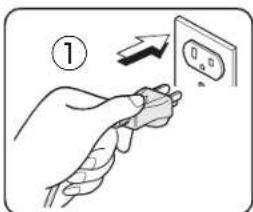
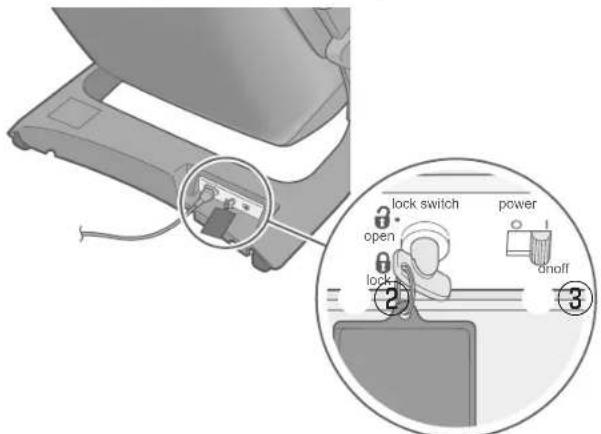
① Insert the power plug into the power outlet. • Always be sure to insert into an AC 120 V plug. ② Confirm the lock switch key is set to the “open” position. ③ Confirm the power switch is set to the "on" position. ④ Press the controller twice.
- Press once, and then press again approx. 1 second later. Backrest will rise automatically.
Assembly
1 Attaching the controller stand
The controller stand can be attached on either the left or right side.
① Align the 2 prongs of the side panel with the holes of the controller stand.

② Fasten the controller stand with the attachment screws (4 positions)
- Use this screw Attachment screws (M6 × 13) × 4 pcs. (Black)
■ How to tighten the screws
Attachment screw
● Tighten the 4 screws lightly using your fingers. (Make the screws level with the holes.)
● Tighten firmly with the allen key.
- Screw may be damaged if you tighten the screw inserted into the hole crookedly using an allen key.
If the controller stand is attached on the left hand side, pass the controller cord through the left hand side. (Page EN17)
2 Fasten the armrest
① Insert the armrest into the unit.
- “R” (right side) and “L” (left side) are indicated at the back of the armrest.
- Insert the armrest from the top aligning the ▲ marks on the side of the armrest.
- Be careful to avoid pinching your fingers and air plugs.
② Slide the armrest toward the back while pushing it downward.
③ Fasten the armrest with the attachment screws. (One for each side)
- Use this screw Attachment screws (M6 × 29) × 2 pcs. (Silver)
■ How to tighten the screws

- Put an attachment screw on the edge of the allen key and tighten the screw horizontally to the hole.
- Screw may be damaged if you tighten the screw inserted into the hole crookedly using an allen key.
④ Attach the left hand side in the same way.


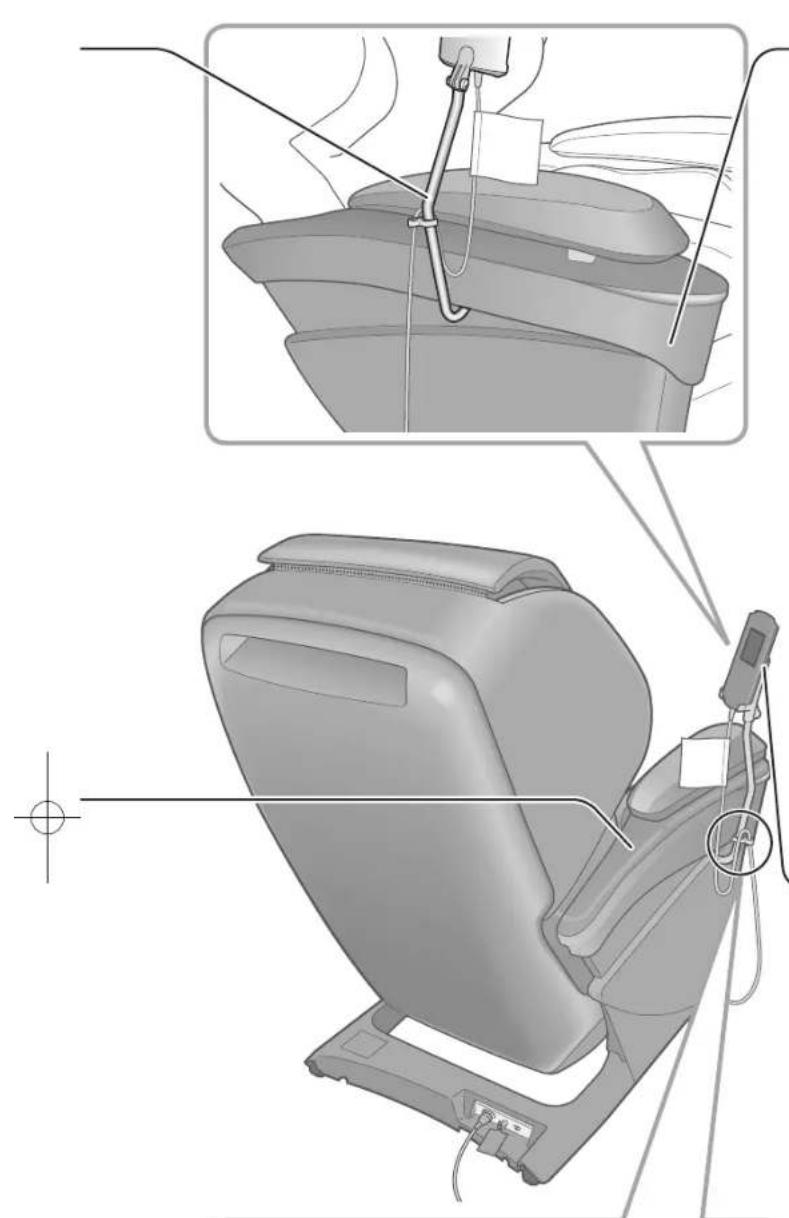
- Fasten the controller cord using the cord clip.
- Fasten so the cable under the cord clip will not sag too much (because of the risk of tripping over the cord).

3 Inserting the air plug
① Insert the air plug into the air plug jack on the armrest with your fingers until it clicks into position.

- Arm massage will not operate unless the air plugs are inserted securely.
② Insert the left side in the same way.
4 Attaching the controller to the controller holder
① Insert the controller at an angle to the bottom of the controller holder.

② Insert the controller until the two protrusions on the controller holder click into the cavities on both sides of the controller.

Lift up the controller to remove.

▶ Continued on the next page
Assembly (Continued)
5 Attaching the pillow
Attach the pillow using the Velcro fastener.
Velcro fastener

Recommended position of the pillow when using the massage lounger (Page EN19)
6 Attaching the comfort cushion
Attach the cushion with zipper.

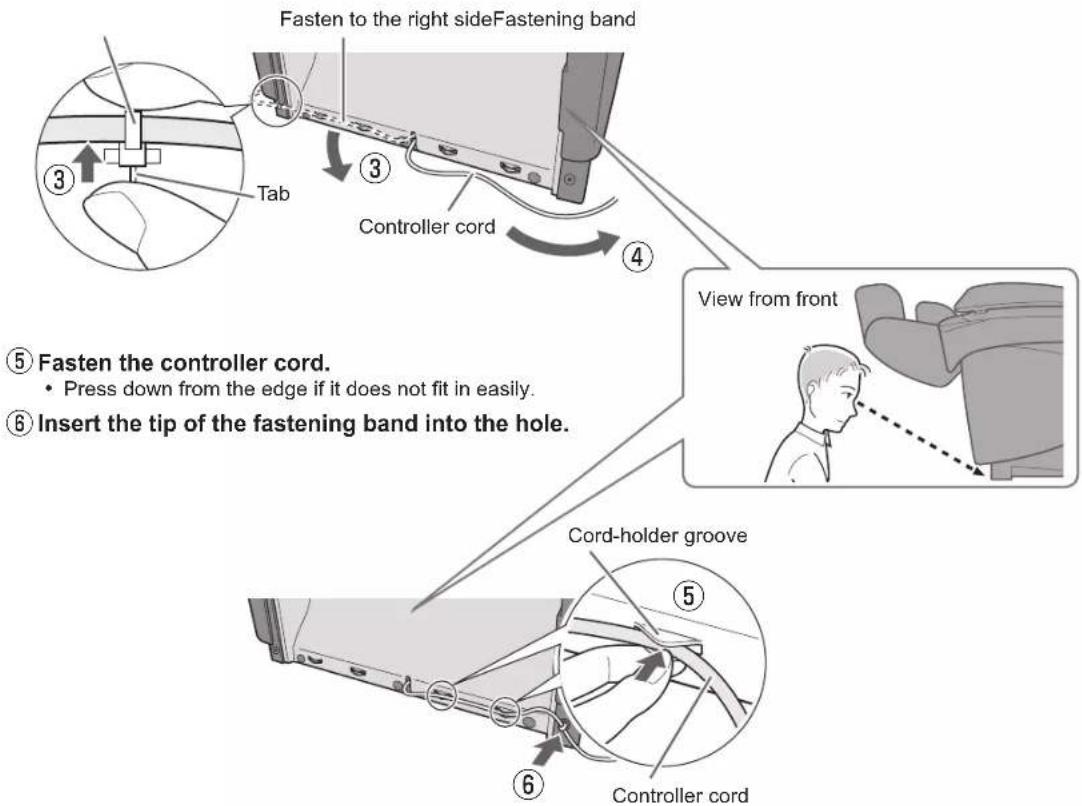
■ When the controller stand is attached on the left side
- Run the controller cord to the left as follows. The product is shipped with the controller cord fastened to the right side.
① Press on the controller.
② Press and hold the controller until a beep-beep-beep sound is heard.
- The legrest will rise until it reaches the uppermost position.

③ Disconnect the controller cord. - Hook is released by pressing on the tab on the fastening band with your fingers. ④ Move the controller cord under the legrest to the left side.
Before sitting down
Check the surrounding area
Make sure there are no objects, persons, or pets in the vicinity of the unit.
The massage lounger may not work when pets such as dogs and cats chew on or trip over the controller cord. (This may result in a breakdown.)

Adjust the Controller holder
Horizontal orientation can be adjusted.
Left and right

Check the legrest position
● Make sure the legrest is in the fully lowered position.
- When the legrest is not fully lowered
The legrest will lower by pressing on ⏻ twice.

Retracted position of massage heads
Slide the sole massage section to your preferred position
- Adjust to your preferred position after raising the legrest. (Page EN42) It will slide up to about 18 cm (7.1 in.).

Lift your feet slightly and the sole massage section returns
Check the power cord and power plug before turning on the unit.
(Page EN13)
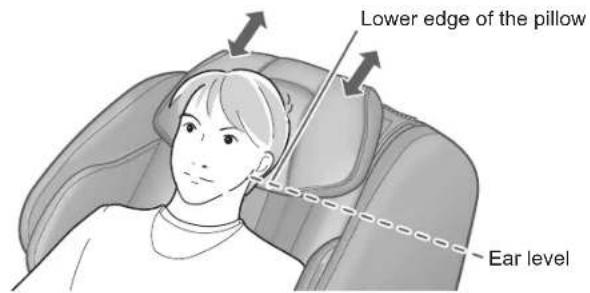
Adjust the pillow position
Remove the pillow and adjust the height of the pillow so that the bottom edge is at ear level.
- If positioned too low, the pillow may interfere with a massage of the area around the neck.
- When the reclining angle changes, the position of the pillow may shift. In that case, adjust the position again.

Flip up the comfort cushion to check the main unit.
Check the following points:
Is the fabric torn? Are there foreign objects sandwiched in the main unit? Are the massage heads in their stowed positions?
- When the massage heads are not in the retracted position:
Press ☐ twice to return the massage heads to the retracted position.
Do not massage with the comfort cushion still on the backrest.
WARNING
● Always check the fabric covering the backrest or legrest movable parts has not been ripped before using the unit. Please also check other areas to ensure the fabric has not been ripped. No matter how small the rip, if you find one then immediately stop using the unit, unplug the power plug and have the unit repaired at an authorized service center. (Failure to do so may result in injuries or electric shocks.)
Check your sitting position.
In order to deliver an effective massage, there is a bulging area in the center of the seat to make sure you sit all the way back.

Sit down all the way to the back with your bottom in contact with the backrest.
Part names and functions of the Controller.
Controller

Display
This illustration shows all lamps illuminated.
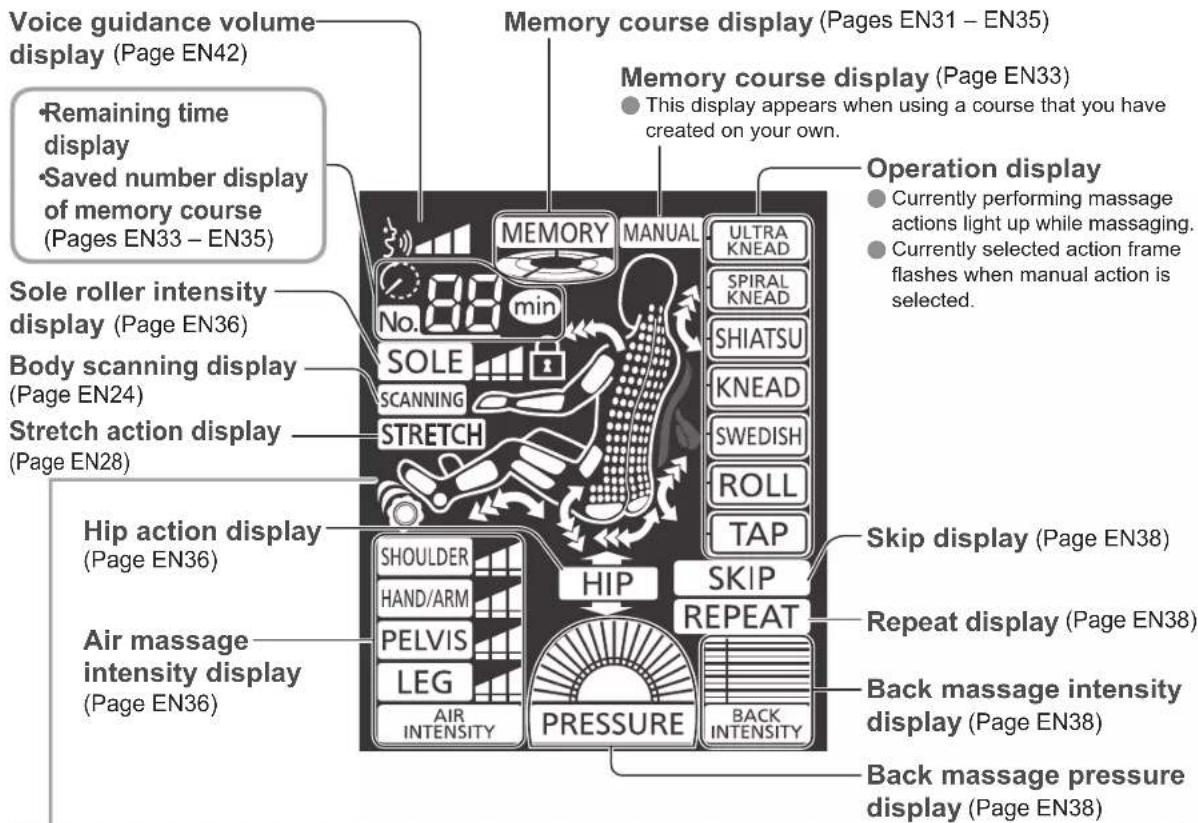

Child lock display (Page EN23)
Stretch display (Page EN36)
● Currently selected stretch parts light up. - Current stretch position flashes. ● Lights up and displays the air intensity of the stretch.
"Sole roller" display (Page EN36) "HEAT" display (Page EN36) Massage area display Air massage display
● Current approximate massage position flashes.

● Currently selected air massage parts light up. ● Current air massage position flashes.
Simple use
| Course Operation | ||
| Auto courseFor those who want a full body automatic massage (Page EN25) | 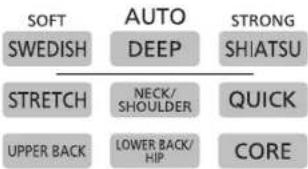 | Select one |
| Manual actionFor those who want an intensive massage using their favorite action on a favorite area(Pages EN26 – EN27) | MANUALNECK | Select your favorite action and press OK |
| Air actionFor those who want to have a “SHOULDER”, “HAND/ARM”, “PELVIS” or “LEG/FOOT” air massage(Pages EN28 – EN30) | [Air action/Stretch action]> | Select● Air massage and stretch action will not be carried out at the same time. |
| Stretch actionFor those who want to stretch their “NECK”, “CHEST”, “LOWER BACK”, “PELVIS”, “LEG”, or “CORE”(Pages EN28 – EN30) | ||
| Sole roller actionTo those who want to loosen the sole(Pages EN28 – EN30) | [Sole roller action]> | |
| Memory courseOnce saved, you can recall your own favorite auto course or a course that you have created on your own.How to save a course and use a saved course(Pages EN31 – EN35) | A maximum of three courses can be saved. MEMORY (HOLD FOR 2 SEC.) MEMORY (HOLD FOR 2 SEC.) | Select one |
Body scanning (page EN24)


Start massage


Start massage


Start air massage
- If air massage is selected, body scanning will not be carried out.


Start stretch


Start sole roller massage
- If sole roller massage is selected, body scanning will not be carried out.


Start massage
Adjustable functions during a massage Pages EN36 – EN39
Setting and canceling the child lock
How to set
With the screen of the controller blank, press and

for about 5 seconds.
- When set, will light up for about 5 seconds before the power is cut off automatically.
How to cancel
With the child lock set, when the screen of the
controller is blank or when is lit, press and
hold for about 5 seconds.
The child lock is canceled, goes off and the course selection screen appears.
If you want to stop the massage midway/ If you experience any problems
Press

All actions will stop immediately. - Dismount the unit carefully to avoid a fall.
Simple use (Continued)
Body scanning
Body scanning is where the massage heads move along the back and the shoulder position is detected, the body shape including height is estimated, and a massage is made to suit the body shape.
During body scanning, SCANNING will flash. Body scanning height range is about 140 cm – 185 cm (55.1 in. – 72.8 in.).
Automatically To massage position

Body scanning
Sit back and lean gently back so that your head touches the pillow.
For adjustment of the position of the pillow. (Page EN19)

Reclined approx. 20°
- If you have reclined deeper than the massage position, it does not automatically recline.
About 30 seconds after the body scanning starts, the massage head will lower slowly to the shoulder position and start the tapping.
With the body scanning sound "beep-beep ...", the massage head will rise up the spine to the vicinity of the neck. - Manual action (for example, "MIDDLE BACK", or "LOWER BACK") performs a simple sensing, but the massage head doesn't rise up to the shoulder. - The massage head protrudes. (It will rise again if it does not match the shoulder position and repeat the action to adjust the shoulder position.) - Seat surface air operates to prevent the body from moving during scanning.

Do not move your head from the pillow until tapping action begins!
It will not be able to accurately detect the shoulder position
■ To adjust the shoulder position
During tapping action (about 12 seconds), to adjust the height of the shoulder using the POSITION button, push OK.
Moves approximately 1.2 cm (0.5 in.) up or down for each press.

Moves approximately 1.2 cm (0.5 in.) up or down for each press.

Correct position of the massage head (The point where the tapping action should be felt.)
Correct position of the massage head (the point where the tapping action should be felt).
Even during the tapping action, when you press OK, body scanning will end and massage will start. To estimate the approximate height based on the shoulder position, the legrest may automatically adjust its angle so that the sole of the foot touches. - If the shoulder position is greatly shifted, one press of ⏻ will stop the action. Rest your shoulders back against the backrest firmly and press the button to start again.
Even during the tapping action, when you press OK, body scanning will end and massage will start. To estimate the approximate height based on the shoulder position, the legrest may automatically adjust its angle so that the sole of the foot touches. - If the shoulder position is greatly shifted, one press of ⏻ will stop the action. Rest your shoulders back against the backrest firmly and press the button to start again.
When you want a complete massage
1 Press turn on the power.

( When the unit has not been operated for more than 3 minutes, the display automatically disappears.)
(When the unit has not been operated for more than 3 minutes, the display automatically disappears.)
● Body scanning will commence when the program is selected. (See page EN24 for details)
● Body scanning will commence when the program is selected. (See page EN24 for details)
3 After Body scanning ends, massage starts.
During the massage, you can create favorite settings. (See pages EN36 – EN39 for details) - You can save your favorite settings in the memory course even in the middle of a course. (See page EN31 for details)
4 After the massage is started, it will automatically end in a maximum of approximately 19 minutes.
After the massage ends, you can save your favorite settings in the memory course. (See page EN31 for details)
■ Features of the auto course (upper body)
SWEDISH ● 19 minutes
When you want to gently loosen your body
Mainly use swedish and roll actions while moving at a slow speed to give your body a relaxing massage.

DEEP 19 minutes
When you want to firmly loosen your body
The standard massage course which mainly uses knead and ultra knead actions will give
you a thorough massage.

SHIATSU ● 19 minutes
When you want to strongly loosen your body
Mainly use shiatsu and ultra knead actions to strongly massage stiffness points.

STRETCH ● 16 minutes
When you want to stretch the whole body
Use the 6 stretch actions to slowly stretch your entire body.

NECK/SHOULDER 16 minutes
When you have painful neck or shoulders
Mainly use knead and ultra knead actions to focus on the muscles around the neck and shoulder.

QUICK ● 10 minutes
When you want to quickly loosen your body
All techniques such as knead, ultra knead, swedish, roll, etc condensed into a 10-minute course.
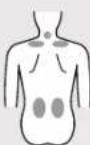
UPPER BACK ● 16 minutes
Dullness around the shoulder blade
Relax the areas around the shoulder blades with actions which transfer heat with kneading action.

LOWER BACK/HIP 16 minutes
For painful lower back and hip
Mainly use knead and ultra knead actions to focus on the areas from your lower back to the hip.
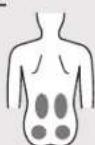
CORE 16 minutes
In order not to accumulate fatigue of the hip
Loosens around the waist, pelvic area, and hip areas with actions that transfer heat such as ultra knead, roll, and stretch actions.

When you want a concentrated massage of a particular body part with your favorite action

WARNING
- Do not massage any one part of your body for more than 5 minutes at a time. (Doing so may result in adverse effect or injury.)

1
Press 📊 to turn on the power.
(When the unit has not been operated for more than 3 minutes, the display automatically disappears.)
2
Select the part you want to massage.
A list of massage actions is displayed.
3
Select the action you prefer.
The currently selected action flashes.
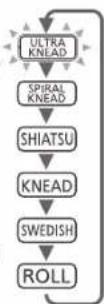
● Actions can also be selected by repeatedly pressing the area selected in step 2.
- When is selected, "ROLL" or a combination of "ROLL" and another action can be selected. When combining other actions,
press

- to select the action and then press
OK.
The contents of the action (Illustration is an image diagram of the action)
ULTRA KNEAD
Small kneading action at points.
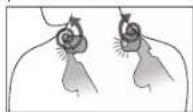
SPIRAL KNEAD
Kneading action while moving up and down.

SHIATSU
Action compressing muscle knots vertically.

KNEAD
Deep kneading action.

SWEDISH
Action of rubbing gently across a wide area.

ROLL
Action to stretch an area.

TAP
Tapping action for right and left alternately.

FULL BACK ROLL
Action stretching the body along the backbone.

The respective actions are suitable for specific body parts. (Actions of Shiatsu for the "NECK" are different from of the actions for the "SHOULDER".)

4 Press CK start the action.
The massage heads will move to selected position automatically to start the massage after the body scanning is completed. (See page EN24 about body scanning) - See pages EN36 – EN39 for setting the massage in accordance with your preferences. - When massaging the hip, air massage will not be carried out at the same time. - When a massage to the same location has continued for 5 minutes, massage heads will automatically move up approximately 3 cm (1.2 in.). (Depending on the location, the massage may move up.)
Press add tapping. The tapping can be turned OFF/ON by pressing this button. OFF/ON cannot be selected when massaging with the tapping action.
5 The massage will automatically end approx. after 16 minutes.
To change an action in the middle of a massage
Select again in steps 2 - 4.
- Press OK hln approximately 40 seconds of reselecting an action in step 2, otherwise the reselection will be canceled automatically.
To save manual action in the memory course
Press the MEMORY button for 2 seconds during the action.
- You can save your favorite manual action, stretch action and air action to create your own course. (Pages EN33 – EN35)
If you want to massage with tapping action only
1 Press & turn on the power.
2 Press TAP
3 Start the tapping action by pressing OK
- Tapping action will be performed at the current massage head positions without performing body scanning. • To change the action, select with steps 2 - 4.
Air stretching and Sole massage
Air massage .... "SHOULDER", "HAND/ARM", "PELVIS", "LEG/FOOT" ■ Stretch.....“NECK”, “CHEST”, “LOWER BACK”, “PELVIS”, “LEG”, “CORE”

1 Press turn on the power.
( When the unit has not been operated for more than 3 minutes, the display automatically disappears.)
2 Select the part you want to massage.
The legrest will rise by pressing The action contents of the air massage (below). See page EN30 for stretch specifics. For the stretch action, the massage heads will automatically move to the area to stretch after the body scanning, and perform stretch preparation action.
- Pressing SOLE enables sole roller massage.
Air massage and stretch action will not be carried out at the same time. If the Stretch button is pressed during an air massage, the air action will be canceled.
3 Air massage/Stretch starts.
4 The massage will automatically end approx. after 16 minutes.
The site of the air massage stretch position
Air massage Stretch
Detailed action contents of the stretch (Page EN30)

You can check the air OFF/ON in the display. Shoulders Hand/Arm
You can check the stretch OFF/ON in the display.
EN28
To save in the memory course
Press the MEMORY button for 2 seconds during the action.
- You can save the stretch action that you like, to create your own course. (Pages EN33 – EN34) ● Air actions can be saved at the same time when saving manual action in the memory course.
How to use the hand & arm massage
1 Lift up the hand & arm massage section.
2 Insert with fingers extended.

Effective method for using the hand & arm massage
Position the forearm and hand at the center of the hand & arm massage section.
Place hand/forearm at center of the armrest.

- Raise the backrest if there is any difficulty when positioning the hand and forearm.
Please adjust the position according to the length of the hand.

Effective method for using "LEG/FOOT" air/stretch/sole massage
1 Raise the legrest.
2 Place the heel firmly.
3 Place the back of the calf firmly.

Place the heel firmly. Place the back of the calf firmly.
For taller persons who cannot place their calf
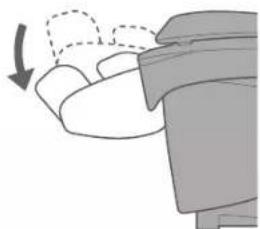
- Adjust the slide and stretch the foot. (Page EN18) ● Lower the legrest.
Upon pressing the OTTOMAN/CHAIR controllers button,

▶ Continued on the next page
Air stretching and Sole massage (Continued)
Description of stretch action
The NECK stretch
Stretches the muscles of the neck.

① The massage head holds the base of the neck.
② Air is discharged from the seat air bag.
The CHEST stretch
Extends the muscles around the shoulder blades and chest.
① Hold the shoulders with the shoulder-side air bags.
② Press the back forward with the massage head.

The LOWER BACK stretch
Extends muscles around the lower back.

① The massage head holds the lower back.
② Air is discharged from the seat air bag.
The PELVIS stretch
Stretches and twists the muscles around the pelvis to the left and right alternately.
Seat air bag inflates alternately left and right

In order to effectively stretch, the legrest will lower.
The LEG stretch
Extends the muscles from the knee area to the thighs.
① Hold the body with the thigh-side air bags.
② With the calf and foot sandwiched, the legrest is lowered.

- If you do LEG stretching with the sole massage section slid out, it may hit the floor.
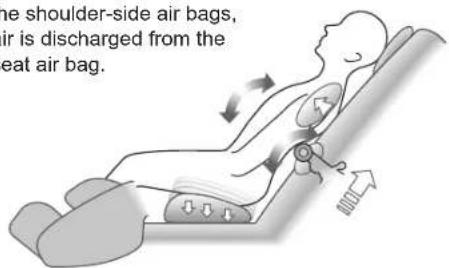
The CORE stretch
1) Extends from thighs to the lower abdomen. 2) Extends around the spine.
① Your hips are raised by the seat air bag.

② With the shoulder sides and calf/foot sandwiched, the legrest is lowered.
③ With the shoulders held by the shoulder-side air bags, air is discharged from the seat air bag.
Memory Course
Up to 3 memory courses can be saved.
Refer to "Saving a Auto Course with My Own Favorite Settings" (Page EN31) and "Creating Your Own Course" (Page EN33) to see how to save a memory course.
Saving an Auto Course with My Own Favorite Settings
Memory settings that can be saved (Pages EN36 - EN39)

Caution
The setting will not be saved if you turn OFF the power switch of the main unit or pull out the power cord during a massage.
To save during an auto course
Press the MEMORY buttons for 2 seconds during an operation to save a favorite setting.
The saved MEMORY button will light up then.
To save at the end of an auto course
① At the end of the auto course, favorite settings (Pages EN36 – EN39) are displayed and the MEMORY button flashes.
![graph TD A["1"] --> B["2"] B --> C["3"]](/content/2026/05/956697/images/2ad5147683ad6ca994d3a16586cd3ae8211cf7d7f1a221c03d32d639f1140e12.jpg)
Saving is also possible when you press 📍 to end the massage mid-way through a course. Saving is also possible during a stowing action.
② Select and press the button of the course in which you want to save your favorite setting for 2 seconds while the buttons are flashing (flashing lasts for about 25 seconds).

- If another setting has already been saved, the message "Another course has been saved" appears and the button starts to flash rapidly.
- To update the contents of a new setting, press the same button again.

- If you do not want to delete the setting already saved, press another MEMORY button.

③ At the end of the stowage operation, the power will be turned off approx. after 5 seconds.
Continued on the next page
Memory Course (Continued)
To start the saved program
![graph TD A["1 Press turn on the power.<br>(When the unit has not been operated for more than 3 minutes, the display automatically disappears.)<br>● The saved MEMORY button will flash."] --> B["2 Select one of the MEMORY buttons with a saved course.<br>● Saved MEMORY button will light. (Example: ) 1"…](/content/2026/05/956697/images/81e4f437549f321c4770400b674bc8c372ad9e0f6fcbd49bd57c0997cf93d750.jpg)
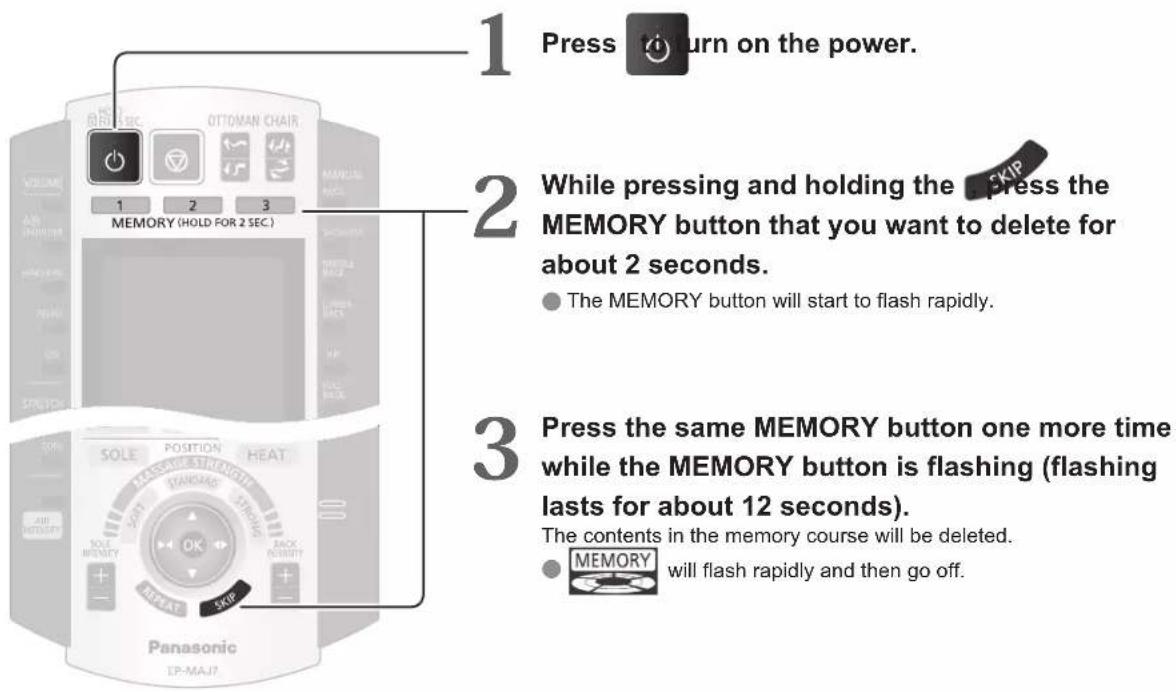
To delete the saved settings
EN32
Creating Your Own Course
You can create your own course by saving manual action and stretch action in sequence in one of the memory courses. Air action can also be saved simultaneously together with manual action.
Favorite settings that can be saved (Pages EN36 - EN39)
How to save a manual action

1 Select and activate manual action.
- Adjust the setting to suit your preference.
2 Select the MEMORY button you want to save and press it for about 2 seconds.
The action currently in operation and the settings will be saved.
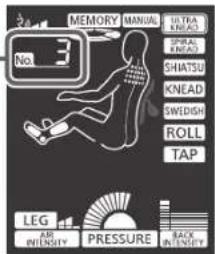
● The MEMORY will flash, the will light up and the selected button will light up. The saved sequence will be displayed in No.
3 Select and activate the manual action that you want to save next.
The saved action will be interrupted and the selected action will start.
● The flashing of MEMORY will change and the button will flash. - Adjust the setting to suit your preference.
You can freely combine a manual action with a stretch action!!
4 Press the same MEMORY button for about 2 seconds.
The action currently in operation and the settings will be saved.
- The saved sequence will be displayed in No.
- The newly saved action will be inserted after the interrupted action. The saved actions will start in sequence at intervals of about 1 minute. (The FULL BACK ROLL time is different).
5 Repeat steps 3-4.
● Maximum 16 types can be saved.
Memory Course (Continued)
How to save a stretch action

1 Select and activate the stretch action.
If you want to save several actions at the same time, select and activate all the stretch actions that you want to save.
- Adjust the setting to suit your preference.
- When several actions are saved at the same time, the actions are saved in sequence starting from the one on top. "NECK" → "CHEST" → "LOWER BACK" → "PELVIS" → "LEG" → "CORE"
2 Select the MEMORY button you want to save and press it for about 2 seconds.
The action currently in operation and the settings will be saved.
● The MEMORY will flash, the WillLight up and the selected button will light up. The saved sequence will be displayed in No.
You can freely combine a manual action with a stretch action!!
3 Select and activate the next stretch action that you want to save.
The saved action will be interrupted and the selected action will start.
● The flashing of MEMORY will change and the button will flash. - Adjust the setting to suit your preference.
4 Press the same MEMORY button for about 2 seconds.
The action currently in operation and the settings will be saved.
The saved sequence will be displayed in No. The newly saved action will be inserted after the interrupted action. ● The saved actions will activate in sequence one at a time.
5 Repeat steps 3 - 4.
● Maximum 16 types can be saved.
How to save an air action setting
An air action setting can be saved in combination with a manual action.
If you want to save the setting with an air action, perform the following steps after saving the air action in the memory course.

Select and activate the air action.
Adjust the setting to suit your preference.
Press the same MEMORY button for about 2 seconds.
Saving is not possible when only air action is in operation. Please save the air action in combination with a manual action. The saved air action will be activated together with the manual action.
To start the saved program (Page EN32)
■ Display example among the memory courses
Displays the saved order
- Adding another action.
- Press to extend the massage action currently in operation.
- Press SKIP to delete the massage action currently in operation.
- Adjusting the intensity of each action and hardness of the massage strength etc.
If you want to incorporate the above-mentioned settings into the next massage ...
① Press the button to activate the manual action that you want to add or adjust. ② Press the MEMORY button for 2 seconds during selection. (The newly saved action will be inserted after the interrupted action.)
If you want to erase the contents saved in a memory course (Page EN32)
Adjusting the intensity
Depending on the setting, a course may terminate mid-way due to the timer function.
| Adjustment function | Buttons used | Must be adjustable |
| AIR MASSAGE selection OFF/ON |  | The selected air massage and stretch action can be adjusted individually in 3 levels and turned OFF/ON.You can check the intensity level and OFF/ON status in the display.(Lit: ON, Unlit: OFF) |
| STRETCH selection OFF/ON | PELVISLEGCORE | |
| Air massage intensity |  | The intensity of all selected air massages and stretch actions can be adjusted in 3 levels.You can check the intensity level in the display. |
| “Sole roller” intensity adjustment |  | The intensity of the sole roller massage can be adjusted in 3 levels.You can check the intensity level in the display. |
| “Sole roller” OFF/ON |  | The “Sole roller” action can be turned OFF/ON.You can check the OFF/ON status in the display. |
| “HEAT” OFF/ON |  | The “HEAT” can be turned OFF/ON.The temperature cannot be adjusted.You can check the OFF/ON status in the display. |
| HIP OFF/ON | HIPOFF/ON | The “HIP” action can be turned OFF/ON.You can check the OFF/ON status in the display. |
| HIP height adjustment | HEIGHT | The “HEIGHT” during a “HIP” action can be adjusted.You can check the adjustment in the display. |

Items that have this mark can be saved and used with your favorite settings. (Page EN31)
| Auto course | Manual action | Air action* | Stretch action | ||||
| Example) Every time you press the air chest stretch are setting can be adjusted and turned OFF/ON in the following order. | ○ MEMORY | ○ MEMORY | ○ MEMORY | — | |||
| Air massage display | Stretch display | Intensity | |||||
| No display | No display | Medium↓Off↓Gentle↓Medium↓Strong | ○ MEMORY | — | — | ○ | |
| ○ MEMORY | — | ○ MEMORY | ○ MEMORY | ||||
| Intensity Gentle Medium Strong | ○ MEMORY | — | ○ MEMORY | — | |||
| Sole roller intensity display | SOLE | SOLE | SOLE | ||||
| Lit: “Sole roller” action ON Unlit: “Sole roller” action OFF● Button also turns off. | ○ MEMORY | ○ MEMORY | ○ MEMORY | — | |||
| Lit: “HEAT” ON Unlit: “HEAT” OFF● Button also turns off. | ○ MEMORY | ○ MEMORY | — | ○ MEMORY | |||
| HIP Lit: “HIP” action ON Unlit: “HIP” action OFF | ○ MEMORY | — | — | ||||
| Display...Lit: Adjustable Flashing: Air is being supplied or dischargedUnlit: Non-adjustable | ○ MEMORY | MEMORY | — | ||||
* Air action includes "Sole roller" action. When saving a manual action in a memory course, the air action setting can also be saved in the memory course.
Adjusting the intensity (Continued)
Depending on the setting, a course may terminate mid-way due to the timer function.
| Adjustment function | Buttons used Must be adjustable | |
| Back massage intensity adjustment | [IMAGE] | The back massage intensity can be adjusted.You can check the area that is currently being massaged in the display.The intensity adjustment differs according to the course and action.Auto course 5 levels (back massage intensity scale 2, Stretch action) up to 10 levels(the level depends on the action).Manual action up to 10 levels(the level depends on the action).See page EN49 if the intensity is still insufficient even when set to the highest level, or if the intensity is too strong even when set to the lowest level.The “BACK INTENSITY” cannot be adjusted when the action is being switched. |
| Massage head position adjustment |  | The position of the massage head can be adjusted vertically and horizontally.If you want to adjust the position of the massage heads that are currently performing a massage, please adjust by pushing the POSITION button.In the case of a auto course, each adjustment can be made up to 3 times.In the case of a manual action, when you press and hold the up or down button, the position will continue moving until you release your finger. |
| Massage strength select | 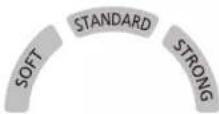 | You can detect the back massage pressure, and intensify or soften the massage strength.The massage strength of each auto course has been set to the recommended intensity.Swedish: SoftDeep, Shiatsu, Quick: StrongStretch, Neck/Shoulder, Upper back, Lower Back/Hip, Core: StandardAdjust the setting to suit your preference. |
Back massage pressuredisplay ...... Displays the back pressure acting on the upper massage heads.  | ||
| Tap | [T4c4] | Tapping can be added to an action.Tapping cannot be turned OFF/ON when massaging with only a tapping action. |
| Repeat |  | The massage action that is currently in operation can be repeated.“REPEAT” may not be valid when the action is being switched.REPEATwill flash when an action is being repeated. |
| Skip |  | Skips the massage action that is currently in operation and goes to the next action.“SKIP” may not be valid when the action is being switched. |

Items that have this mark can be saved and used with your favorite settings. (Page EN31)
| Manual action | Air action | Stretch action | ||
| 5 levels of intensity adjustment | Maximum 5 levels of intensity adjustment (the level differs according to the action) | — | 5 levels of back massage intensity adjustment in stretch action | |
| ● Depending on the location, adjustment may not be possible. | — | |||
| ● There is no difference between massage strength for treatments on the “NECK” and “HIP” using a single “TAP” action. | Adjusting the overall massage strength of a course | Adjusting the massage strength during an action | — | Adjusting the massage strength on the back currently in action |
| ● Depending on the action, the indication in the display may not match the actual sensation. ● Treatments using a single “TAP” action on the “NECK” and “HIP” areas are not displayed. | ||||
| — | ||||
| ○ | ○(Only for Auto course) | |||
| ● Upon pressing the “SKIP” button, SKIP will flash for about 5 seconds and then the next action will be displayed. | ○ | — | ○(Only for Auto course) |
Adjusting the intensity (Continued)
Hip massage
During a hip massage, the seat air bag will lift up your hip and the massage heads will go round your hip to massage. In addition, by supporting your lower back with the lower back air bag to raise your hip, the massage heads will be able to reach the muscles of your hip more effectively.
● The legrest will go up until the top. - When your hip are lifted up, your hands and legs may go out of position. - Adjust the bulge of the seat air bag with the "HIP height control button" to adjust the contact positions of the massage heads with the hip.


■ How to use the "Hip massage" skillfully
There is a bulging area in the center of the seat to make sure you sit all the way back.
Sit back all the way with your hip in contact with the backrest.
● The massage heads will not reach the hip adequately if you do not sit all the way back. - If you retract the slide of the sole massage section and bend your knees, the contact of the massage heads will feel stronger. - When massaging the hip, an air massage will not be carried out at the same time. ● Lower the backrest a little if your arms feel tight when your hips are lifted up.


"HEAT"
The warm section in the "Heat" massage heads will warm up the fabric of the massage areas.
● Heat function cannot be used alone. ● Sense of warmth differs depending on the room temperature, clothing, body shape, action, position, and course; this is not a malfunction.
■ To turn OFF each time
Register "HEAT" as OFF in the memory. (Page EN31)

Timer function
Automatically stops at maximum 19 minutes* from the start of the massage.
* Timer function time setting differs depending on the course.
• Auto courses "SWEDISH", "DEEP", "SHIATSU" ... about 19 minutes • Auto courses "STRETCH", "NECK/SHOULDER", "UPPER BACK", "LOWER BACK/HIP", "CORE" ... about 16 minutes • Auto course "QUICK" ... about 10 minutes - Manual action, air action, stretch action... about 16 minutes
After the timer has finished,
The legrest will lower so you can stand up safely.
If you have extended the sole massage section slide, it may hit the floor and not stow completely. Raise your legs to retract all the way.
- Backrest does not rise automatically. ● The massage heads move to their retracted positions.
Press ☐ twice and the backrest will rise.

Adjusting the intensity (Continued)
Voice guidance function
This is a function which briefly explains the operation procedures and contents of the action.
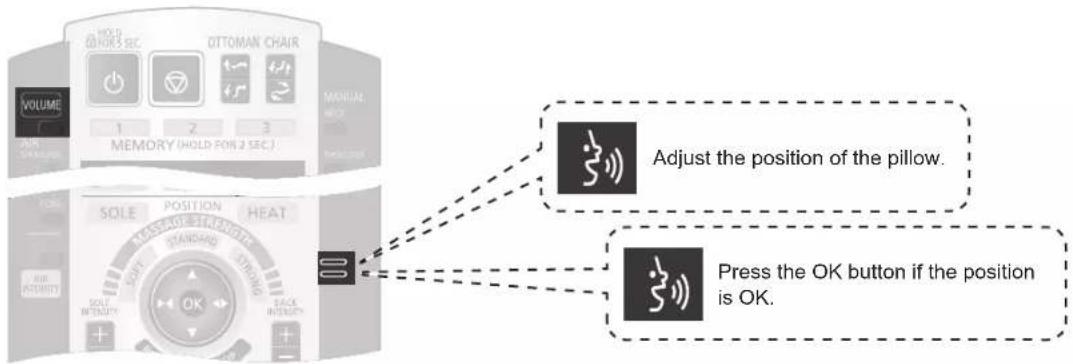
■ Adjusting the volume
![graph LR A["Press to adjust (volume raises/lowers with each press)"] --> B["Display Volume"] B --> C[""Off" "Soft" "Medium" "Loud" (Default setting)"] C --> D[""Use to register the current volume to the memory course. (Page EN31)"] D --> E["MEMORY"] style…](/content/2026/05/956697/images/c27da4920534bc3f5e1b4dd48bc0d7a03792b8392bc044406adc924ad73904ce.jpg)
For adjusting the reclining angle and legrest

- When holding down the adjustment buttons, chair adjustment will continue until you hear the limit sound (beep-beep-beep). There may be a slight delay before the legrest starts moving. Armrests will move in conjunction with the reclining of the backrest.
EN42
After completing the massage
Return your chair to normal status
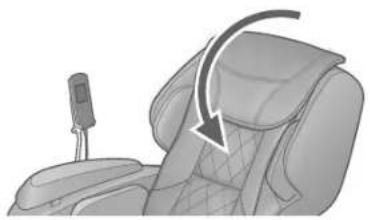
Attach the comfort cushion to the backrest.
To exit in the middle of a massage
Fully return the sole massage section to the
original position and then press

The massage head will return to stowed position even with the legrest down and the backrest up.

Lift your soles slightly and the sole massage section returns.
After completing the massage
Adjusting the intensity
Turn the power off
1 Slide the power switch to the "off" position. 2 Turn the lock switch key to the "lock" position and remove it.
3 Remove the power plug from the electrical outlet.

4 The lock switch key must be stored out of the reach of children.


WARNING
- After each massage, slide the power switch on the backside of unit body to the "off" position, turn the lock switch to the "lock" position and then remove the lock switch key and power plug.
Moving the unit
Requires at least 2 persons to lift and move
Lift and move with one person holding the sides of the legrest and one person holding the backrest cover groove. (Page EN12)
Moving the unit on its castors
Hold the legrest at the sides and move the unit on its castors.


Do not hold by the foot part.
The massage section may slide, and injuries may occur.
Hold the legrest at the sides.
Lift lower than the hip.
There is a risk of scratching the floor. Lay out a mat, etc.
Hold at the sides.

Since the unit is heavy, be careful to avoid back injuries.
Lifting weight when moving on castors.
Approx. 35 kg (77.2 lbs)
Move slowly.

Put the controller and power cord on the seat.
Castor.
■ When you lower the unit
- Put the unit down slowly and watch your step carefully. Hold the legrest with your hands until it has been set on the floor completely. If you release the legrest too soon, it will spring back to the initial position.
Detaching the armrest
Detaching the armrest makes it easier to move.
① Remove the air plug (Page EN15 Step 3). ② Remove the attachment screws (Page EN14 Step 2-③). ③ Slide armrests to the front and raise with both hands.

Cleaning and maintenance
Synthetic leather part
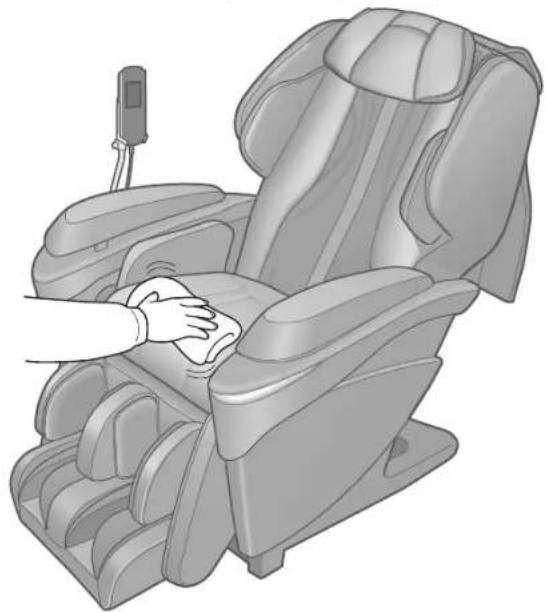
Wipe with a soft and dry cloth
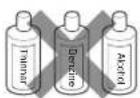
● Never use chemicals such as thinner, benzine, alcohol, etc. - When using commercially available leather-care products (chemical cloth), please follow their instructions. - If dirty, please wipe using the following procedure.
① Soak a soft cloth in water or a 3% - 5% solution of neutral kitchen detergent with warm water and squeeze well. ② Briskly rub the surfaces. ③ Finally, rinse the cloth in water and wring it out, then wipe off all the detergent. ④ Wipe with a soft, dry cloth. ⑤ Allow the unit to dry naturally.

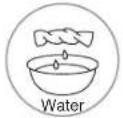
For hard-to-clean soiling, wipe with the same neutral kitchen detergent solution, etc. but using a commercially available "sponge of melamine foam material". - Do not rapidly dry off with a dryer, etc. - Since color may transfer from clothing to the synthetic leather part, be careful when using the unit with clothing such as jeans or colored clothes. - Please avoid long time contact with plastic products, etc., as they could cause discoloration. If you use hair dressing, please spread a towel on the parts they may touch.
Fabric part
① Soak a soft cloth in water or a 3% - 5% solution of neutral kitchen detergent with warm water and squeeze well. - Never use chemicals such as thinner, benzine, alcohol, etc. ② Use water or a neutral kitchen detergent and brush on areas where the seat fabric is particularly soiled. - Be careful not to brush the fabric too much to avoid damage. ③ Finally, rinse the cloth in water and wring it out, then wipe off all the detergent. ④ Allow the unit to dry naturally. - Since color may transfer from clothing to the seat fabric, be careful when using the unit with clothing such as jeans or colored clothes.


Plastic area
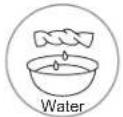
① Soak a soft cloth in water or a 3% - 5% solution of neutral kitchen detergent with warm water and squeeze well.
- Never use chemicals such as thinner, benzine, alcohol, etc.
② Finally, rinse the cloth in water and wring it out, then wipe off all the detergent.
- Make sure to wring tightly before wiping the controller.
③ Allow the unit to dry naturally.

Q&A
Question Answer
Before Use
| Doctor Consultation | Can I use the unit if I have an illness that requires regular medical attention? | Consult your doctor before using this unit.Massage is a form of stimulation by tactile pressure in which pressure is applied to the muscles to relax them and improve blood circulation. This may exacerbate some illnesses. Be sure to consult a doctor if you have an illness.(Page EN6) | |
| How to use | Is it possible to massage only the upper body or legs? | Yes.For taller and shorter persons it is recommended to separate massage of the upper body from that of the legs.Massaging only the upper bodyRaise the comfort cushion to expose the backrest and pillow for use.For taller persons, please use by reclining the backrest.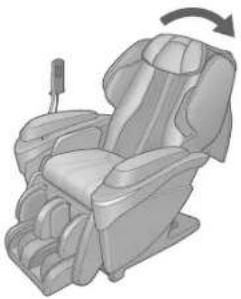 Massaging only the legsUse the leg & sole massage section with the comfort cushion on the backrest.For shorter persons, please use by raising the backrest and lifting the legrest. Massaging only the legsUse the leg & sole massage section with the comfort cushion on the backrest.For shorter persons, please use by raising the backrest and lifting the legrest. | |
| Body scanning | Can people shorter than 140 cm (55.1 in.) or taller than 185 (72.8 in.) cm still use it? | Yes.The following methods are recommended, as the correct shoulder position may not be found during body scanning.<If shorter than 140 cm (55.1 in.)><If taller than 185 cm (72.8 in.)>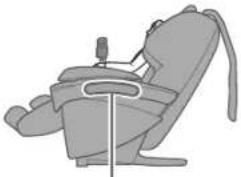 Place a cushion on the seat and sit firmly. Place a cushion on the seat and sit firmly. Recline the backrest and slide your body down. Recline the backrest and slide your body down. | |
EN46
Question Answer
During Operation
| Body scanning ® | During body scanning or a massage, the buttons flashed, 5 short beeps sounded (U, ID was displayed) and the action stopped. What happened? | Massages stop for safety if the body cannot be detected for one of the following reasons.The user is not sitting.The head and/or back is not touching the backrest.A cushion is placed against the backrest or the user is wearing thick clothing.Sit firmly, lean gently back so that your head touches the pillow, press and then press to start again.The comfort cushion is not raised. |
| Upper body | Back massage intensity controller may not work sometimes. | Back massage intensity controller may not work in the following cases.Changing massage operation (ie changing from "KNEAD" to "SWEDISH")Body scanningThis is intended to prevent the massage suddenly intensifying, it is not a malfunction. |
| There is a delay in movement when adjusting the position. | The massage heads may not move immediately depending on when the POSITION button is pushed. (There may be a small time lag. This is not an abnormality.)If you hear the limit sound (beep-beep-beep) when the button is pushed, this means that it is at the furthest position and cannot move any further. | |
| The height (intensity) on the left feels different to that on the right. Is this OK? | It is designed to differ in some cases.An alternating tapping mechanism is used to create a more natural sensation. The massage heads therefore do not move in unison in some massages. The massage head height (intensity) on the left differs from that on the right in these massages. This is not a malfunction. | |
| The massage heads sometimes move bit by bit in a twitching manner. Is this alright? | The chair is detecting the pressure acting on the massage heads and changing the massage strength. The massage heads may move bit by bit depending on the pressure but this is not an abnormality. | |
| Sole | The sole roller sometimes moves before the action begins ... | Before the action begins, the sole roller moves into place.This is not an abnormality. |
| Air massage | During auto course (including memory course), air action and sole roller action may suddenly stop and transit to the next operation... | During auto course, when hip massage or stretch action starts, air action and sole roller action stops.This is to increase the efficacy of the hip massage and stretch action, by prioritizing those air actions connected to the movement of the massage heads.Therefore, when getting arm massage alternately left and right, the number of massages on each arm may not be equal. |
| Hand & arm | Arm air pressure is applied more times on one side than on the other during the auto course. |
* Body scanning = action of measuring the body.
Q&A (Continued)
Question Answer
During Operation (Continued)
Reclining
The angle of the backrest, legrest or armrest automatically changes at times.
The angle automatically changes in the following cases.
- When auto course, stretch action or manual action are started.
The chair automatically reclines to the massage position.
The angle does not change if the chair is already reclined to the massage position or further.

When is pressed to end the massage.
The chair automatically returns to the upright position.
- Only the legrest returns to the original position if the massage is completed according to the timer.
- If it is pressed to end the massage, all operations immediately stop and the angle does not automatically change.
After Use
Hand & arm
Red marks are left on the under side of my hands/arms after a hand & arm massage.
Marks may remain on the hands and arms after use. These eventually fade and are not a problem.
How to adjust the
Body scanning
The correct shoulder position cannot be found during body scanning. (The shoulder position slips each time.)
Correct body scanning may not be possible for some sitting positions (such as leaning forward).
Adjust the shoulder position using the POSITION button. (Page EN24) For more correct scanning, sit firmly in the unit and lean back gently so that your head is touching the pillow (backrest).
Question Answer
How to adjust the
| Upper body | The auto course is “not strong enough even at the strongest setting...” or is “too strong even at the weakest setting...”. | Try the following methods.● When the auto course is not strong enough even at the strongest setting, recline the backrest. The extra body weight adds intensity to the massage.● When the auto course is too strong even at the weakest setting, place a piece of fabric or blanket between you and the backrest to decrease the sensation of the massage heads. |
| Hip | The hip massage is weak ... Please sit further in.When you sit further in, the gap between the backrest and the hip becomes smaller, making it easier for the massage heads to contact your body. (Page EN40) | |
| Hand & arm | The intensity in the left hand & arm differs from that in the right. | Only one hand at a time is strongly massaged so that the massage can be immediately stopped using the other hand in the event of an abnormality or danger. |
| Sole | I hardly feel any difference in intensity in the sole roller even after adjustment ... | The sole roller intensity is adjusted by the strength of the foot side air pressure holding the soles. Therefore, depending on the operating pattern, intensity difference may not be felt. |
| Sole roller is too intense even at the gentlest setting ... | Try the following method.Slightly lower the sole massage section so that the heel is raised above it, which will weaken the effect of the roller. | |
Other
| Controller | The controller holder is unsteady. | Tighten the controller holder fixing screw.If the controller holder comes off, loosen the controller holder fixing screw, place the holder in and tighten the fixing screw again.- Controller holder - Controller holder fixing screw - Controller holder fixing screw |
| Noise | The noise grows louder after using the chair for a long time. | This may be a malfunction. Contact the nearest authorized service center for an inspection and repair. |
Q&A (Continued)
Question Answer
Other (Continued)
| Timer function | Is there a timer function? Yes. | To prevent overuse, the massage automatically ends at a maximum of 19 minutes after starting. (Page EN41)When the timer ends, the legrest automatically lowers and the massage heads are stowed.Press ⏻ to use again.● Take a break of around 10 minutes after using for 16 minutes.● Do not use more than 30 minutes per day. |
| Moving | What precautions should I take to transport the unit when moving? | Take the following precautions:● Recline the backrest and raise the massage heads to around the center of the backrest. This moves the center of gravity to the center of the unit and makes it easier to move.● Do not move the chair while a person is sitting in it.1Press ⏻ to turn on the power.2Press OTTOMAN CHAIR to recline the backrest.Hold down the two buttons until the limit beeps sound.3Select one of the “auto course” with the power “on”.● The massage heads move. An error occurs and the movement stops when they reach the center of the backrest.4Press ⏻ to turn off the power.● Pressing automatically raises the backrest, so be sure to press .5Turn the power switch “off” and remove the power plug. (Page EN43)If you need to move the chair with the backrest upright, follow the steps below.1. Follow steps 1→3→4 above and raise the massage heads to the center.2. Press ⏻ the controller again, raise the backrest, then press .● Handle the chair with care. If you do not have the original box, use packing materials to prevent damage or vibration.● When packing, check that the power cord and controller cord are not wrapped around the main unit and take measures such as placing them on the seat with the controller to ensure that they do not scrape against the ground while moving. |
Troubleshooting
Investigate the "Problem" and apply the "Remedy" below.
If the problem still exists after following the remedy, contact an authorized service center.
| Problem Cause and Remedy | |
| The action stops mid-way. | If excessive force is applied to the massage heads during operation, in the interests of safety the action may stop.→Turn off the power switch, wait for approximately 10 seconds and then turn the power switch on again. |
| The seat cannot be reclined and the legrest cannot be lowered. (All the displays and buttons on the controller flash and then turn off.) | If the unit encounters an obstacle or if excessive force is exerted on it during operation, in the interests of safety the unit will come to a stop.→When all displays and buttons are flashing and the backrest or the legrest has stopped, turn off the power of the unit once, turn “on” the power again after approximately 10 seconds, and then operate the unit. |
| The massage heads do not come up to the shoulder or neck. | If your head does not contact the pillow or your back does not contact the backrest, the shoulder position may be detected as lower than the actual position during the body scanning.→Sit on the seat in the deepest position and put your head on the pillow, and then repeat the operations again from the start.(Page EN24) |
| The height of the left and right massage heads is different. | An alternating tapping method is employed, which means that this phenomenon will naturally occur. There is nothing wrong with the unit.(Page EN47) |
| “Heat” massage heads do not get warm. | HEAT is set to Off.Sense of warmth from the massage heads differs depending on your body shape, the massage body part, massage action, clothing, and room temperature. |
| The “HEAT” massage heads do not cool down even after being turned off. | Because of the structure of the heater, the “HEAT” massage heads will feel warm for a while after heating due to the residual heat.Continuing to massage the same area even after turning off the “HEAT” switch may increase the temperature felt. |
| Reclining does not take place even though a massage is started in automatic course. (The seat does not automatically recline.) | Automatic reclining will not activate when the backrest is reclined to flat position more than massage position and legrest is in upper position.(Page EN48) |
| The backrest does not return to the upright position. | If the unit is stopped by automatic shut-off or by pressing it will not return automatically.→To return from the reclined position to the original position, press twice. |
Troubleshooting 08A
Troubleshooting (Continued)
| Problem Cause and Remedy | |
| The unit will not operate at all. | The power plug has been disconnected. (Page EN13) |
| Power switch on the rear panel is set to “off”. | |
| The child lock has been applied. (Page EN23) | |
| An auto selection button or manual selection button hasn’t been pressed after pressing ⏻ . | |
| It is not possible to massage hands and arms. | The air plug on the armrest is disconnected. (Page EN15) |
| Sometimes the power won’t turn on when ⏻ is pressed again when a massage has finished. | Due to shutdown (Approximately 5 seconds) ⏻ may not be accepted.→ Wait at least 5 seconds once all movement has stopped before pressing ⏻ . |
| The child lock has been applied. (Page EN23) | |
| The unit has been damaged. | → To prevent accidents, be sure to contact an authorized service center. |
| The power cord or power plug is abnormally hot. | |
Error display
Remaining time display


For the error "U10"

Error display Contents
 | For safety reasons, action will terminate automatically when it cannot detect if someone is seated. If this error occurs even if you are seated, press [IMAGE], sit back all the way to the backrest, and operate from the start again. |
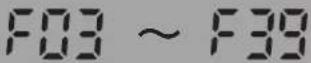 | There is a malfunction inside the massage device.Stop using and ask your dealer to inspect and repair the chair.( Service and maintenance will be carried out smoother if the error number is communicated when contacting.) |
Please contact an authorized service center. (See the warranty card for the contact number.) Service and maintenance will be carried out smoother if the error number is communicated when contacting.
EN52
Sounds and sensations of the unit
The following sounds and sensations occur while using the unit. However, they occur due to the construction of the unit and are perfectly normal.
From each air massage unit (see page EN10 for the position of each air massage unit)
"Snapping" sound
Sound of air bag during air action
"Popping", "Clunking" sounds
Sounds and feels like the massage heads are straining to get over wrinkles in the cloth
"Rattle", "Squeak", "Rustle" sounds
Operating sounds of the kneading or tapping actions
"Creaking" sound
Creaking sound when the massage heads are in operation
"Rattle", "Jerk" sounds
Operating sounds when the massage heads move up or down
"Rumble" sound
Sound of the belt rotating
Motor sounds
Motor sounds when air pressure is applied
"Clunking", "Jerking" sounds
Sounds when the massage heads change from "push" to "pull"
"Rubbing" sound
Rubbing sound of the massage heads on the seat fabric
"Grating" sound
Sound when sitting down

"Grating" sound
Sound of the comfort cushion moving over the armrest when the seat is reclining
"Grating" sound
Grating sound in the backrest and armrest
"Clunking" sound
Clunking sound during leg stretch operation
"Popping", "Clunking" sounds
Sounds and feels like the sole roller is straining to get over wrinkles in the cloth
"Creaking" sound
Creaking sound when the sole roller is in operation
Motor sounds
Motor sounds when air pressure is applied
"Clunking", "Jerking" sounds
Sound when the sole roller changes between "forward" and "reverse"
"Grating", "Grinding" sounds
Rubbing sound of the sole roller on fabric
Motor sounds
Motor sound
"Whoosh", "Hiss" sounds
Sound of discharging air
Pump sounds
Sounds of the pump beneath the seat
"Thudding", "Jerking" sounds
Sounds of the valve beneath the seat
If these sounds have grown louder, there may be a malfunction.
Contact the nearest authorized service center for inspection and repair.
Sounds and sensations of the unit
Troubleshooting/Error display
Specifications
| Power supply AC 120 V 60 Hz | ||
| Rated Current 3.0 A | ||
| Upper body massage | Massage area (Up-Down) | Approx. 79 cm (31.1 in.) (The massage heads move a total of approx. 63 cm (24.8 in.)) |
| Massage area (Left-Right) | Distance between massage heads during operation (including width of massage heads)Neck, shoulder, back: Approx. 7 cm – 21 cm (2.8 in. – 8.3 in.)Lower back/hip: Approx. 7 cm – 25 cm (2.8 in. – 9.8 in.)Distance between massage heads (including width of massage heads) during back roll and up-and-down movement: Approx. 7 cm – 18 cm (2.8 in. – 7.1 in.) | |
| Massage area (Forward-Back) | Projected range of massage head travel (intensity adjustment): Approx. 10 cm (3.9 in.). | |
| Massage speed | Knead: From approx. 4 times/min – approx. 73 times/minTap: From approx. 190 times/min – approx. 520 times/min (one side)Moving speed: From approx. 1 cm/sec – approx. 5 cm/sec | |
| Air massage | Air pressure (Calf) | 3: Approx. 35 kPa2: Approx. 32 kPa1: Approx. 17 kPa(May vary with the area slightly.) |
| Sole massage section | Massage speed From approx. 8 times/min – approx. 21 times/min | |
| Reclining angle | Backrest: Approx. 120° – 170°Legrest (Leg & sole massage section): Approx. 5° – 85° | |
| Automatic shut - off Around 19 minutes (automatically ends) | ||
| Dimensions | When not reclined (H × W × D) | Approx. 115 cm × 90 cm × 130 cm (45.3 in. × 35.4 in. × 51.2 in.) |
| When reclined (H × W × D) | Approx. 72 cm × 90 cm × 200 cm (28.3 in. × 35.4 in. × 78.7 in.) | |
| Weight of unit Approx. 87 k | g (191.8 lbs) | |
| Dimensions of box (H × W × D) | Approx. 77 cm × 75 cm × 170 cm (30.3 in. × 29.5 in. × 66.9 in.) | |
| Weight in box Approx. 108 k | g (238.1 lbs) | |
| Maximum user weight 120 k | g (264.3 lbs) | |
For persons weighing 100 kg (220.3 lbs) or more, the product operations may make more noise and the fabric cover may wear faster.


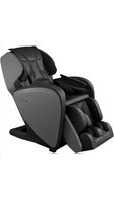
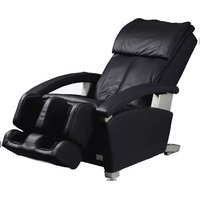
- OPERATING INSTRUCTIONS
- (HOUSEHOLD) MASSAGE LOUNGER
- SEARCHING FOR FAQS HAS BEEN MADE EASIER
- TRANSPORT, INSTALLATION AND ASSEMBLY
- WHAT KIND OF COURSES ARE THERE
- ABOUT HEAT MASSAGE
- THE SOUND IS IRRITATING
- CONTENTS
- BEFORE USE
- HOW TO USE
- MOVING/MAINTENANCE
- IMPORTANT NOTES
- IMPORTANT SAFETY INSTRUCTIONS
- DANGER
- TO REDUCE THE RISK OF ELECTRIC SHOCK
- WARNING
- TO REDUCE THE RISK OF BURNS, FIRE, ELECTRIC SHOCK, OR INJURY TO PERSONS
- SAVE THESE INSTRUCTIONS
- GROUNDING INSTRUCTIONS
- IMPORTANT SAFETY INSTRUCTIONS (CONTINUED)
- SYMPTOMS
- IF A MALFUNCTION OR BREAKDOWN OCCURS
- TAKE NOTE OF THE FOLLOWING POINTS AS WELL
- WHEN IN USE
- POWER PLUG, POWER CORD ETC
- CAUTION
- TO AVOID RISK OF INJURY
- INSTALLATION AND MOVEMENT
- POWER SUPPLY
- BEFORE AND DURING USE
- PART NAMES AND FUNCTIONS OF MAIN UNIT
- LEGREST - LEG & SOLE MASSAGE SECTION
- SETTING UP THE MASSAGE LOUNGER
- CHECKING THE ACCESSORIES
- WHERE TO USE THE UNIT
- INSTALLING
- CONTROLLER STAND
- LOCK SWITCH KEY (1 PC.)
- ALLEN KEY (1 PC.)
- ATTACHMENT SCREWS (M6 × 13) BLACK
- CONNECT THE POWER CORD TO THE UNIT
- TURN ON THE POWER AND RAISE THE BACKREST TO THE UPRIGHT POSITION
- ASSEMBLY
- ATTACHING THE CONTROLLER STAND
- HOW TO TIGHTEN THE SCREWS
- FASTEN THE ARMREST
- INSERTING THE AIR PLUG
- ATTACHING THE CONTROLLER TO THE CONTROLLER HOLDER
- ASSEMBLY (CONTINUED)
- ATTACHING THE PILLOW
- ATTACHING THE COMFORT CUSHION
- WHEN THE CONTROLLER STAND IS ATTACHED ON THE LEFT SIDE
- BEFORE SITTING DOWN
- CHECK THE SURROUNDING AREA
- ADJUST THE CONTROLLER HOLDER
- LEFT AND RIGHT
- CHECK THE LEGREST POSITION
- SLIDE THE SOLE MASSAGE SECTION TO YOUR PREFERRED POSITION
- CHECK THE POWER CORD AND POWER PLUG BEFORE TURNING ON THE UNIT
- ADJUST THE PILLOW POSITION
- FLIP UP THE COMFORT CUSHION TO CHECK THE MAIN UNIT
- CHECK THE FOLLOWING POINTS
- CHECK YOUR SITTING POSITION
- PART NAMES AND FUNCTIONS OF THE CONTROLLER
- CONTROLLER
- DISPLAY
- SIMPLE USE
- BODY SCANNING (PAGE EN24)
- ADJUSTABLE FUNCTIONS DURING A MASSAGE PAGES EN36 – EN
- SETTING AND CANCELING THE CHILD LOCK
- HOW TO SET
- HOW TO CANCEL
- IF YOU WANT TO STOP THE MASSAGE MIDWAY/ IF YOU EXPERIENCE ANY PROBLEMS
- PRESS
- SIMPLE USE (CONTINUED)
- BODY SCANNING
- AUTOMATICALLY TO MASSAGE POSITION
- SIT BACK AND LEAN GENTLY BACK SO THAT YOUR HEAD TOUCHES THE PILLOW
- ABOUT 30 SECONDS AFTER THE BODY SCANNING STARTS, THE MASSAGE HEAD WILL LOWER SLOWLY TO THE SHOULDER POSITION AND START THE TAPPING
- TO ADJUST THE SHOULDER POSITION
- WHEN YOU WANT A COMPLETE MASSAGE
- PRESS TURN ON THE POWER
- ( WHEN THE UNIT HAS NOT BEEN OPERATED FOR MORE THAN 3 MINUTES, THE DISPLAY AUTOMATICALLY DISAPPEARS.)
- ● BODY SCANNING WILL COMMENCE WHEN THE PROGRAM IS SELECTED. (SEE PAGE EN24 FOR DETAILS)
- AFTER BODY SCANNING ENDS, MASSAGE STARTS
- AFTER THE MASSAGE IS STARTED, IT WILL AUTOMATICALLY END IN A MAXIMUM OF APPROXIMATELY 19 MINUTES
- FEATURES OF THE AUTO COURSE (UPPER BODY)
- WHEN YOU WANT TO GENTLY LOOSEN YOUR BODY
- WHEN YOU WANT TO FIRMLY LOOSEN YOUR BODY
- WHEN YOU WANT TO STRONGLY LOOSEN YOUR BODY
- WHEN YOU WANT TO STRETCH THE WHOLE BODY
- WHEN YOU HAVE PAINFUL NECK OR SHOULDERS
- WHEN YOU WANT TO QUICKLY LOOSEN YOUR BODY
- DULLNESS AROUND THE SHOULDER BLADE
- FOR PAINFUL LOWER BACK AND HIP
- IN ORDER NOT TO ACCUMULATE FATIGUE OF THE HIP
- WHEN YOU WANT A CONCENTRATED MASSAGE OF A PARTICULAR BODY PART WITH YOUR FAVORITE ACTION
- PRESS 📊 TO TURN ON THE POWER
- SELECT THE PART YOU WANT TO MASSAGE
- SELECT THE ACTION YOU PREFER
- THE CONTENTS OF THE ACTION (ILLUSTRATION IS AN IMAGE DIAGRAM OF THE ACTION)
- ULTRA KNEAD
- SPIRAL KNEAD
- SHIATSU
- KNEAD
- SWEDISH
- ROLL
- TAP
- FULL BACK ROLL
- PRESS CK START THE ACTION
- THE MASSAGE WILL AUTOMATICALLY END APPROX. AFTER 16 MINUTES
- TO CHANGE AN ACTION IN THE MIDDLE OF A MASSAGE
- SELECT AGAIN IN STEPS
- TO SAVE MANUAL ACTION IN THE MEMORY COURSE
- PRESS THE MEMORY BUTTON FOR 2 SECONDS DURING THE ACTION
- IF YOU WANT TO MASSAGE WITH TAPPING ACTION ONLY
- AIR STRETCHING AND SOLE MASSAGE
- AIR MASSAGE/STRETCH STARTS
- THE SITE OF THE AIR MASSAGE STRETCH POSITION
- TO SAVE IN THE MEMORY COURSE
- HOW TO USE THE HAND & ARM MASSAGE
- EFFECTIVE METHOD FOR USING THE HAND & ARM MASSAGE
- EFFECTIVE METHOD FOR USING "LEG/FOOT" AIR/STRETCH/SOLE MASSAGE
- FOR TALLER PERSONS WHO CANNOT PLACE THEIR CALF
- AIR STRETCHING AND SOLE MASSAGE (CONTINUED)
- DESCRIPTION OF STRETCH ACTION
- THE NECK STRETCH
- THE CHEST STRETCH
- THE LOWER BACK STRETCH
- THE PELVIS STRETCH
- THE LEG STRETCH
- THE CORE STRETCH
- MEMORY COURSE
- SAVING AN AUTO COURSE WITH MY OWN FAVORITE SETTINGS
- TO SAVE DURING AN AUTO COURSE
- TO SAVE AT THE END OF AN AUTO COURSE
- MEMORY COURSE (CONTINUED)
- TO START THE SAVED PROGRAM
- TO DELETE THE SAVED SETTINGS
- CREATING YOUR OWN COURSE
- HOW TO SAVE A MANUAL ACTION
- SELECT AND ACTIVATE MANUAL ACTION
- SELECT THE MEMORY BUTTON YOU WANT TO SAVE AND PRESS IT FOR ABOUT 2 SECONDS
- SELECT AND ACTIVATE THE MANUAL ACTION THAT YOU WANT TO SAVE NEXT
- PRESS THE SAME MEMORY BUTTON FOR ABOUT 2 SECONDS
- REPEAT STEPS
- HOW TO SAVE A STRETCH ACTION
- SELECT AND ACTIVATE THE STRETCH ACTION
- SELECT AND ACTIVATE THE NEXT STRETCH ACTION THAT YOU WANT TO SAVE
- HOW TO SAVE AN AIR ACTION SETTING
- SELECT AND ACTIVATE THE AIR ACTION
- TO START THE SAVED PROGRAM (PAGE EN32)
- IF YOU WANT TO INCORPORATE THE ABOVE-MENTIONED SETTINGS INTO THE NEXT MASSAGE
- ADJUSTING THE INTENSITY
- ADJUSTING THE INTENSITY (CONTINUED)
- HIP MASSAGE
- HOW TO USE THE "HIP MASSAGE" SKILLFULLY
- HEAT
- TO TURN OFF EACH TIME
- TIMER FUNCTION
- AFTER THE TIMER HAS FINISHED
- VOICE GUIDANCE FUNCTION
- ADJUSTING THE VOLUME
- FOR ADJUSTING THE RECLINING ANGLE AND LEGREST
- AFTER COMPLETING THE MASSAGE
- RETURN YOUR CHAIR TO NORMAL STATUS
- TO EXIT IN THE MIDDLE OF A MASSAGE
- FULLY RETURN THE SOLE MASSAGE SECTION TO THE
- ORIGINAL POSITION AND THEN PRESS
- TURN THE POWER OFF
- MOVING THE UNIT
- REQUIRES AT LEAST 2 PERSONS TO LIFT AND MOVE
- MOVING THE UNIT ON ITS CASTORS
- WHEN YOU LOWER THE UNIT
- DETACHING THE ARMREST
- CLEANING AND MAINTENANCE
- SYNTHETIC LEATHER PART
- WIPE WITH A SOFT AND DRY CLOTH
- FABRIC PART
- PLASTIC AREA
- Q&A
- QUESTION ANSWER
- Q&A (CONTINUED)
- DURING OPERATION (CONTINUED)
- RECLINING
- AFTER USE
- HAND & ARM
- HOW TO ADJUST THE
- OTHER (CONTINUED)
- TROUBLESHOOTING
- TROUBLESHOOTING (CONTINUED)
- ERROR DISPLAY
- EN
- SOUNDS AND SENSATIONS OF THE UNIT
Brand : PANASONIC
Model : EP-MAJ7
Category : Massage device