
RC43P - Battery charger RYOBI - Free user manual and instructions
Find the device manual for free RC43P RYOBI in PDF.


| Product Type | Battery Charger |
| Brand | RYOBI |
| Model | RC43P |
| Input Voltage | 120V AC, 60Hz |
| Output Voltage | 43V DC |
| Output Current | 4A |
| Compatible Battery Types | RYOBI 40V/43V Lithium-ion batteries |
| Charge Time | Approximately 60-90 minutes for a 4Ah battery |
| LED Indicators | Red (charging), Green (charged), Flashing (error) |
| Dimensions (L x W x H) | 6.5 x 5.0 x 3.0 inches (16.5 x 12.7 x 7.6 cm) |
| Weight | 1.2 lbs (0.54 kg) |
| Protection Features | Overcharge protection, short circuit protection, over-temperature protection |
| Mounting Type | Wall-mountable (keyhole slots) |
| Operating Temperature | 32°F to 104°F (0°C to 40°C) |
| Storage Temperature | -4°F to 140°F (-20°C to 60°C) |
| Cord Length | 6 ft (1.8 m) |
Frequently Asked Questions - RC43P RYOBI
User questions about RC43P RYOBI
0 question about this device. Answer the ones you know or ask your own.
Ask a new question about this device
Download the instructions for your Battery charger in PDF format for free! Find your manual RC43P - RYOBI and take your electronic device back in hand. On this page are published all the documents necessary for the use of your device. RC43P by RYOBI.
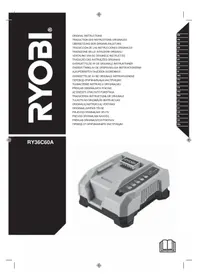
USER MANUAL RC43P RYOBI
natural_image
Close-up of a textured surface with diagonal striped patterns and a small 3D object partially visible (no text or symbols)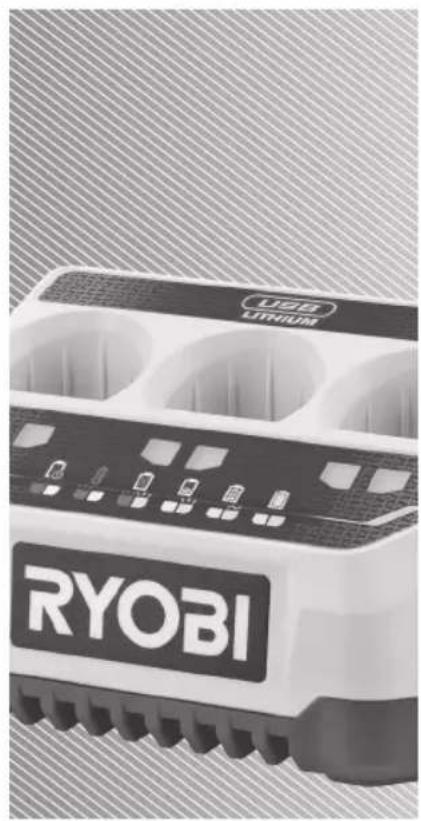
natural_image
Close-up of a RYOB1 lithium battery pack with visible branding (no text beyond brand name)
natural_image
Close-up of a white and black 3D object with textured surface, no visible text or symbolsRC43P

IMPORTANT!
The product is not intended to be used or cleaned by persons with reduced physical, sensory, or mental capabilities, or lack of experience or knowledge, unless they have been given instructions concerning the safe use of the product by a person legally responsible for their safety. They should be supervised while using the product. Children shall not use, clean, or play with the product, which when not in use, should be secured out of their reach.
It is essential that you read the instructions in this manual before assembling, operating, and maintaining the product.
Subject to technical modifications.
Safety, performance, and dependability have been given top priority in the design of your battery charger.
INTENDED USE
The charger is intended only to charge the compatible battery packs listed in this manual.
The product is only for indoor use, in dry conditions.
Do not use the product for any other purpose.
CHARGER SAFETY WARNINGS
- Read all safety warnings and all instructions. Failure to follow the warnings and instructions may result in electric shock, fire and/or serious injury.
■ Do not recharge primary cells (non-rechargeable).
■ The product must not be damp and should never be used in a damp environment.
■ Do not cover any ventilation slots, and provide adequate ventilation during operation.
■ Mains voltage must correspond with the voltage specifications on the product.
■ Before using the product, check that the charger enclosure, cable, and plug are not damaged. If damage is found, do not use the product and bring it to an authorised service centre for repair.
■ Do not use the product if it has suffered any heavy shock or jolting, or if it is damaged in any other way.
■ When charging, do not expose the product to sunlight or other heat source. The recommended temperature range at charging vicinity is 10^ to 25^ C.
■ Due to the heat generated during charging, do not use the product on a combustible surface.
- Do not use the product near flammable materials, such as cloth, packaging materials, paint, spray paint or aerosols, lubricants, thinners, petrol containers, gas containers, or gas appliances.
■ Never modify, disassemble, or attempt to repair the product yourself.
- Do not allow the charger or battery packs to become contaminated with any material that could be conductive, such as metallic particles from grinding, cutting, or machining processes.
■ Protect the battery contact terminals from metallic objects to avoid a short circuit, which can cause fire or explosion.
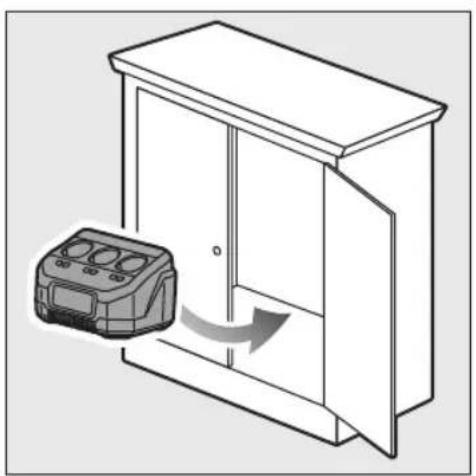
■ Unplug the product from the power socket when it is not in use or when cleaning it.
■ Use only an extension cable that is approved and in good condition.
■ Do not charge battery packs that show signs of leaks. Dispose of them properly.
■ Never charge a damaged battery pack. Replace damaged battery packs immediately.
■ Before every use, examine the supply cord for damage. If the cord is damaged, the product should be scrapped.
ADDITIONAL BATTERY SAFETY WARNINGS
To reduce the risk of fire, personal injury, and product damage due to a short circuit, never immerse your tool, battery pack or charger in fluid or allow a fluid to flow inside them. Corrosive or conductive fluids, such as seawater, certain industrial chemicals, and bleach or bleach-containing products, etc., can cause a short circuit.
WALL MOUNTING
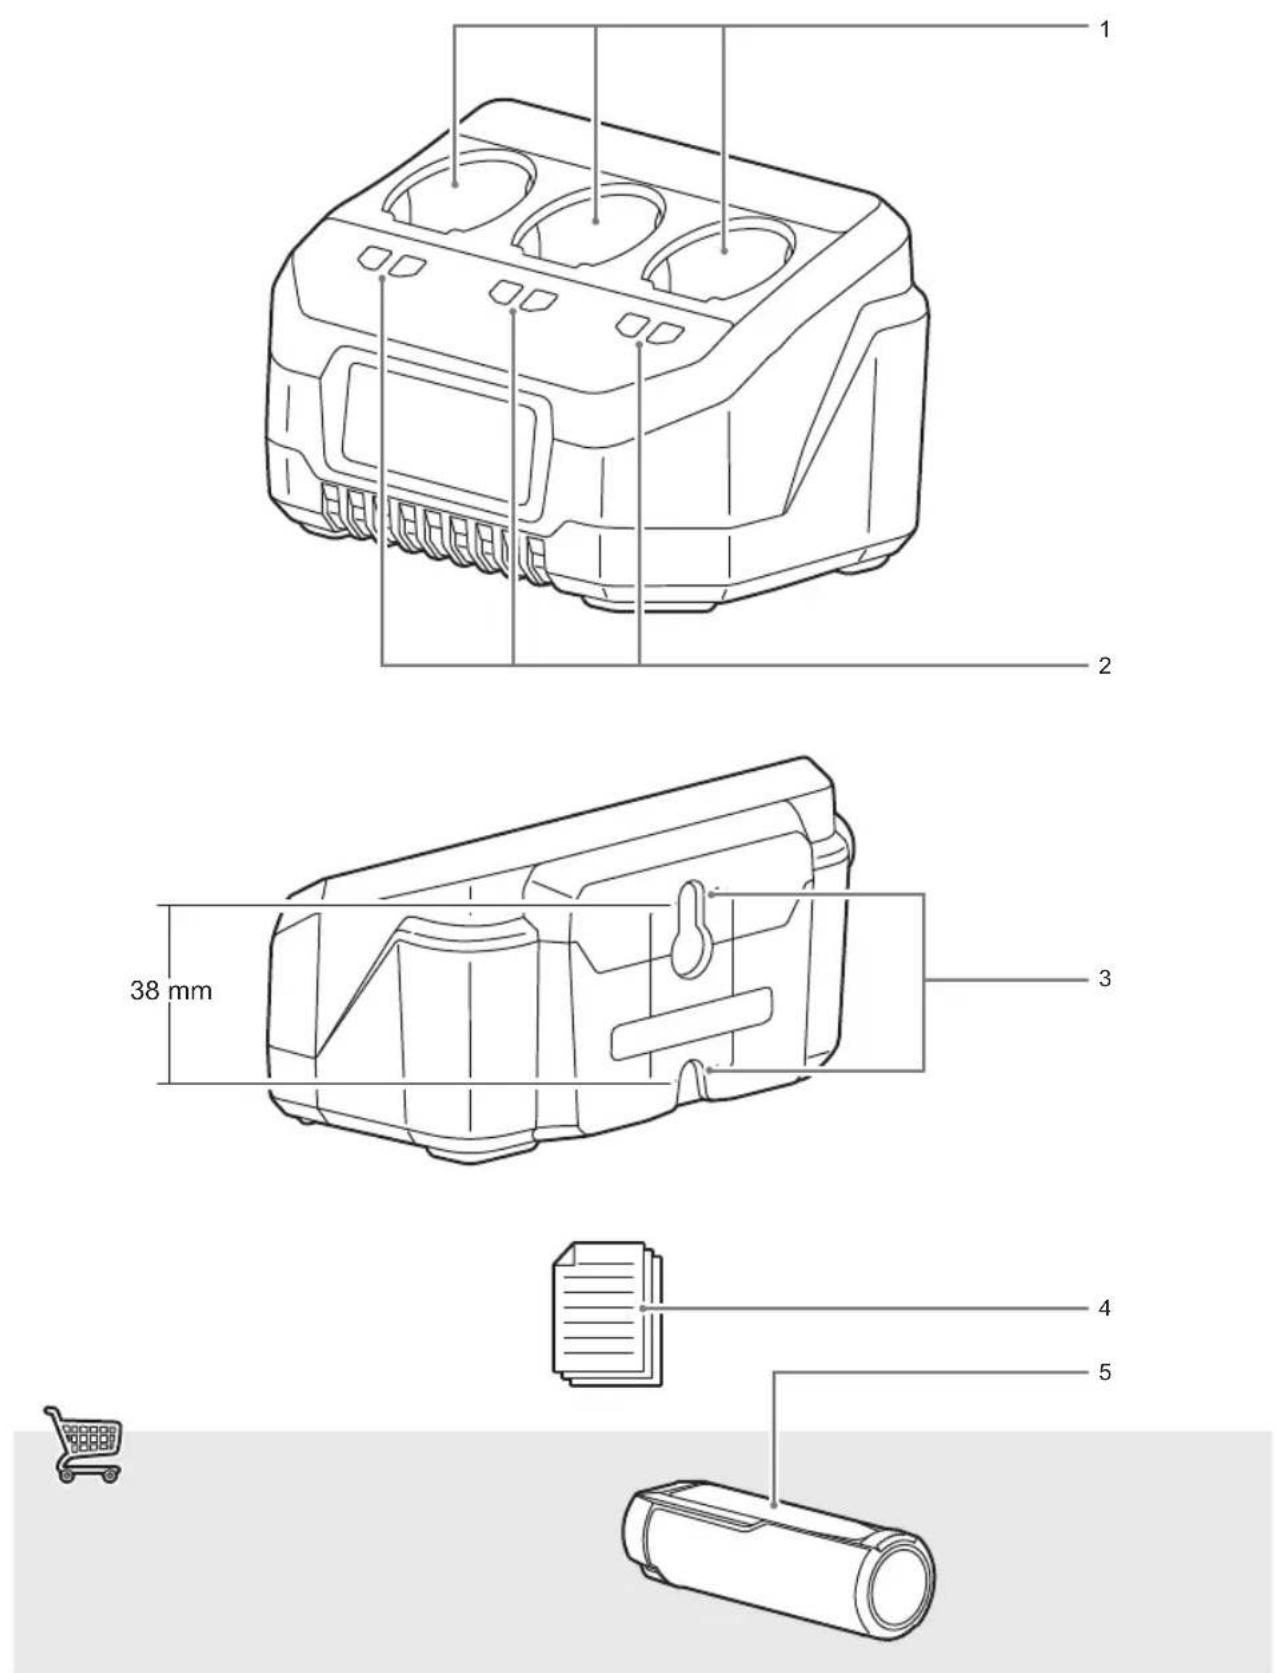
- Carefully select a stable wall for mounting the charger. Make sure that there is no hindrance to mounting work or operation. The maximum gross weight of the charger is approximately 0.475 kg, provide sufficient reinforcement for the wall if necessary.
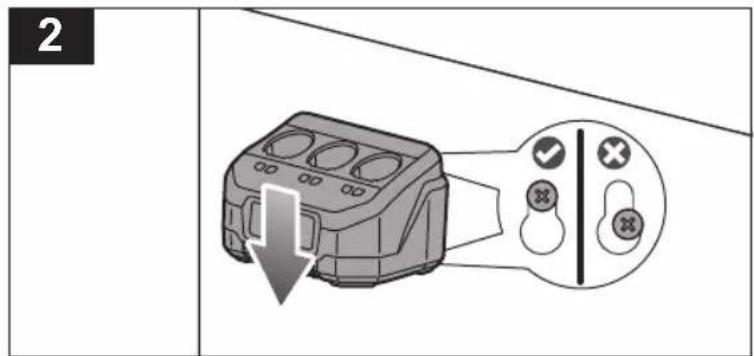
■ Mount the charger in a horizontal orientation only. Install two screws on the wall to mount the charger. Otherwise, the charger may fall and cause serious injury.
- Check the tightness of the screws on a regular basis. Make sure that the head of the screws fit properly in the wall mounting holes to hold the charger firmly in place. Otherwise, the charger may fall because of loose screws.
OPERATION
CHARGING THE BATTERY PACK
■ Battery packs are shipped in a low charge condition. Therefore, you should charge them before first use. If the charger does not charge the battery pack under normal circumstances, bring both the battery pack and charger to an authorised service centre.
■ Make sure that the power supply is normal household voltage, 220–240V, 50/60Hz, AC only.
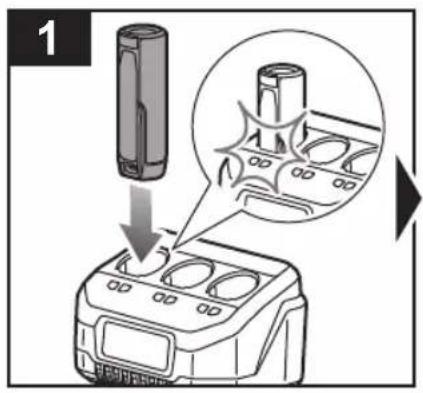
■ Insert the battery pack into the charging port.
■ Press down on the battery pack to be sure contacts on the battery pack engage properly with contacts in the charger.
NOTE: Batteries are charged in sequence. When a second or third battery is added, their light will glow solid red. Once the first battery is finished charging, the next battery will flash green and its charging cycle will begin.
NOTE: When the battery becomes fully charged, the green LED remains on. It is normal for the battery pack to become slightly warm to touch while charging.
NOTE: When charging, the charger and battery pack should be placed in a location where the temperature is more than 10^ C but less than 25^ C.
- Insert the battery pack into the charging port. Press down on the battery pack to be sure contacts on the battery pack engage properly with contacts in the charger.
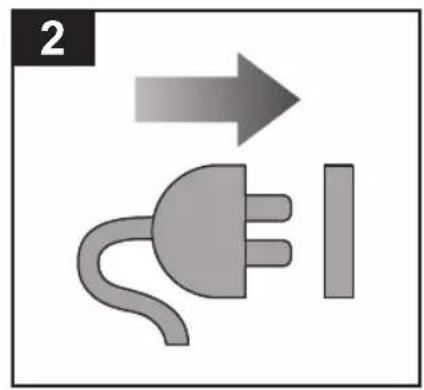
- Connect the product to a power supply.
- Disconnect the product from the power supply when the battery pack becomes fully charged.
- Remove the battery pack from the product.
CHARGING A HOT BATTERY PACK
When using a tool continuously, the battery pack may become hot. A hot battery pack should be allowed to cool down for approximately 30 minutes before recharging.
MAINTENANCE
- When not using or when cleaning the product, disconnect it from the power supply and remove the battery pack.
- Avoid using solvents when cleaning plastic parts. Most plastics are susceptible to various types of commercial solvents. Use clean cloth or soft brush to remove dirt and dust.
- Do not, at any time, let brake fluids, gasoline, petroleum-based products, and penetrating oils come in contact with plastic parts. These products contain chemicals that can damage, weaken, or destroy plastic.
- Hazardous voltages are present within the product; do not disassemble.
■ The supply cord cannot be replaced. If the cord is damaged, the product should be scrapped.
CLEANING THE CHARGER
■ Unplug the charger power cord from the power supply before cleaning to prevent serious personal injury.
■ Clean the charger surface (except labels) using a damp cloth with a mild detergent.
- Do not use any strong detergents on the plastic housing. They can be damaged by certain aromatic oils, such as pine and lemon, and by solvents such as kerosene.
■ Moisture can cause a shock hazard. Wipe off any moisture with a soft dry cloth.
STORAGE
■ Store the product in a cool dry place between 10^ C and 38^ C.
KNOW YOUR PRODUCT
See page 5.
- Battery port
- LED indicators
- Wall mounting holes
- Operator's manual
- Battery pack
SYMBOLS

\~
Direct current
Alternating current

Class II equipment

Please read the instructions carefully before starting the product.

For indoor use only.
T3.15A
Time-lag fuse 3.15A

Do not dispose of waste electrical and electronic equipment as unsorted municipal waste. Waste electrical and electronic equipment must be collected separately. Waste light sources have to be removed from the equipment. Check with your local authority or retailer for recycling advice and collection point. According to local regulations, retailers may have an obligation to take back waste electrical and electronic equipment free of charge. Your contribution to the reuse and recycling of waste electrical and electronic equipment helps to reduce the demand of raw materials. Waste electrical and electronic equipment contain valuable and recyclable materials, which can adversely impact the environment and the human health if not disposed of in an environmentally compatible manner. Delete personal data from waste equipment, if any.
COMPATIBLE BATTERY PACKS
| Battery pack Voltage | Charger input | Battery type | Battery capacity | Number of cell for battery | Approximate charging time with 1 battery (minutes) | |
| RB420 | 4 V = 90 | 220 - 240V ~ 50 / 60 Hz | Lithium-Ion | 2.0 Ah 1 60 | ||
| RB4L30 3.0 Ah |
CHARGER LED FUNCTIONS
| LED indicator | Battery pack status | Red LED Green LED Action | ||
 | Standby | Multiple battery packs installed | ON OFF | |
 | Evaluate Hot battery pack Flashing OFF | When battery pack reaches cooled temperature, charger begins fast charge mode. | ||
| Evaluate Cold battery pack | Flashing OFF | When battery pack reaches warmed temperature, charger begins fast charge mode. | ||
 | Defective | Defective | Flashing | Battery pack or charger is defective. |
| • If defective, try to repeat the conditions a second time by removing and reinstalling the battery pack. If the LED status repeats a second time, try charging a different battery.• If a different battery charges normally, dispose of the defective pack (see Maintenance section).• If a different battery also indicates “Defective,” the charger may be defective. | ||||
 | Charging | Fast charging | OFF | Battery pack is being charged. |
 | Charging | Taper charging | OFF | Fading |
 | Full | Fully charged | OFF | ON |
natural_image
Pure electrical circuit symbol diagram without any text or labels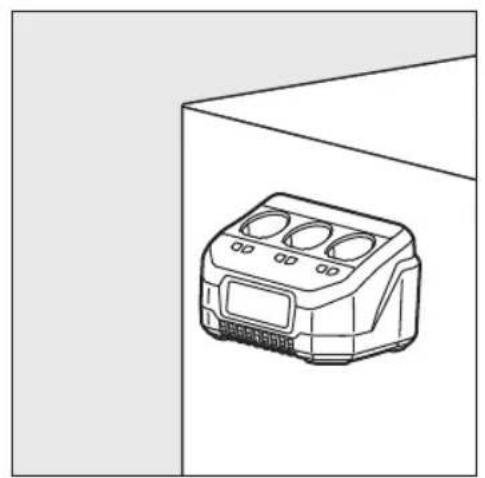
natural_image
Line drawing of a three-tiered electric stove or air purifier unit mounted on a wall (no text or symbols)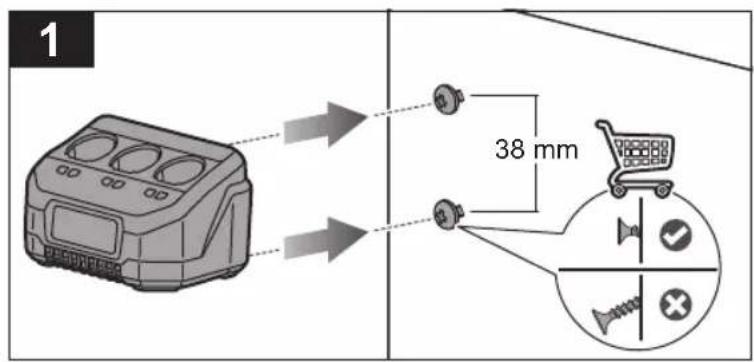
natural_image
Line drawing of a cabinet with an open door and a device inside, showing a directional arrow (no text or symbols)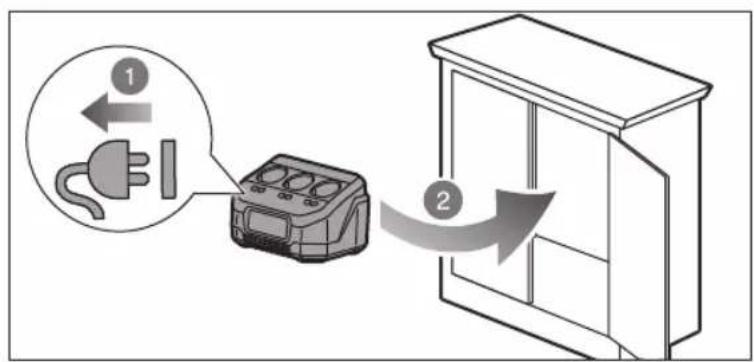
PRODUCT SPECIFICATIONS
Charger
Model RC43P
Weight 0.30 kg
Weight with the heaviest battery packs 0.48 kg
Voltage 4 V

Charger input 220 - 240 V 50/60 Hz

Input power 15 W
Charger output current 2 A
RYOBI WARRANTY APPLICATION CONDITIONS
In addition to any statutory rights resulting from the purchase, this product is covered by a warranty as stated below.
- The warranty period is 24 months for consumers and commences on the date the product was purchased. This date has to be documented by an invoice or other proof of purchase. The product is designed and dedicated to consumer and private use only. So there is no warranty provided in case of professional or commercial use. This warranty applies only on new products.
- There is a possibility to extend for a part of the range of power tools (AC/DC) the warranty period over the period described above using the registration on the www.ryobitools.eu website. The eligibility of products for extended warranty is clearly displayed in stores and / or on packaging and is contained within the product documentation. The end user is required to register his/her newly-acquired products online within 30 days from the date of purchase. The end user may register for the extended warranty in his/her country of residence if listed on the online registration form where this option is valid. Furthermore, end users must give their consent to the storage of their personal data that is required to be entered online. They must also accept the terms and conditions. The registration confirmation receipt, which is sent out by e-mail, and the original invoice showing the date of purchase will serve as proof of the extended warranty.
- The warranty covers all defects of the product during the warranty period due to faults in workmanship or material at the purchase date. The warranty is limited to repair and/or replacement and does not include any other obligations including but not limited to incidental or consequential damages. The warranty is not valid if the product has been misused, used contrary to the instruction manual, or has been incorrectly connected to a power supply. This warranty does not apply to:
– any damage to the product that is the result of improper or lack of maintenance
– any product that has been altered or modified
– any product where original identification (trade mark, serial number) markings have been defaced, altered or removed
– any damage caused by non-observance of the instruction manual
– any product not displaying the CE approval mark on the rating plate
– any product that has been attempted to be repaired by a non-authorised warranty service centre or without prior authorisation by Techtronic Industries
– any product connected to improper power supply (amps, voltage, frequency)
– any damage caused by external influences (water, chemical, physical, shocks) or foreign substances
– normal wear and tear spare parts
– inappropriate use, overloading of the tool
– use of non-approved accessories or parts
– Power tool accessories provided with the tool or purchased separately, including but not limited to screw driver bits, drill bits, abrasive discs, sand paper and blades, lateral guide, etc.
- Components (parts and accessories) subject to natural wear and tear, including but not limited to service & maintenance kits, carbon brushes, bearings, chuck, SDS drill bit attachment or reception, power cord, auxiliary handle, transport carry case, sanding plate, dust bag, dust exhaust tube, felt washers, impact wrench pins & springs, etc.
- For servicing, the product must be sent or presented to a RYOBI authorised service station listed for each country in the following list of service station addresses. In some countries your local RYOBI dealer undertakes to send the product to the RYOBI service organisation. When sending a product to a RYOBI service station, the product should be safely packed without any dangerous contents such as petrol, marked with sender's address and accompanied by a short description of the fault.
- A repair / replacement under this warranty is free of charge. It does not constitute an extension or a new start of the warranty period. Exchanged parts or products become our property. In some countries delivery charges or postage will have to be paid by the sender. Your statutory rights arising from the purchase of the product remain unaffected
- This warranty is valid in the European Community, Switzerland, Iceland, Norway, Liechtenstein, Turkey, Russia, and the United Kingdom. Outside these areas, please contact your authorised RYOBI dealer to determine if another warranty applies.
AUTHORISED SERVICE CENTRES
Any request or issue with the product can be addressed to your local authorised service centres (visit www.ryobitools.eu) or directly to: Techtronic Industries GmbH, Max Eyth Straße 10, 71364 Winnenden, Germany. Please state the serial number and product type printed on the label.
RYOBI is a trade mark of Ryobi Limited,
and is used under license.



natural_image
Three vertical panels with diagonal striped patterns, no text or symbols presentTechtronic Industries GmbH
Max-Eyth-Straße 10,
71364 Winnenden, Germany
Techtronic Industries (UK) Ltd
Parkway
Marlow Bucks SL7 1YL
UK
961075793-01B
- IMPORTANT!
- INTENDED USE
- CHARGER SAFETY WARNINGS
- ADDITIONAL BATTERY SAFETY WARNINGS
- WALL MOUNTING
- OPERATION
- CHARGING THE BATTERY PACK
- CHARGING A HOT BATTERY PACK
- MAINTENANCE
- CLEANING THE CHARGER
- STORAGE
- KNOW YOUR PRODUCT
- See page 5.
- SYMBOLS
- PRODUCT SPECIFICATIONS
- RYOBI WARRANTY APPLICATION CONDITIONS
- AUTHORISED SERVICE CENTRES
Brand : RYOBI
Model : RC43P
Category : Battery charger