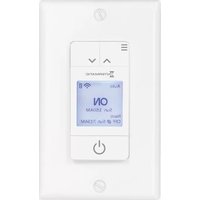
Ascend STW700W - Wall electric timer INTERMATIC - Free user manual and instructions
Find the device manual for free Ascend STW700W INTERMATIC in PDF.


| Product Type | Wi-Fi 7-Day Timer |
| Model | Ascend STW700W |
| Brand | Intermatic |
| Operating Voltage | 120 VAC, 50/60 Hz |
| General Purpose Rating | 15 A |
| Inductive Ballast | 15 A |
| Tungsten/Incandescent | 8 A |
| Electronic Ballast/LED | 5 A |
| LED Load | 600 W |
| Motor Load | 1 HP |
| Dimensions (W x H x D) | 1 3/4" x 2 3/4" x 1 2/3" |
| Wiring Compatibility | Single-pole or Three-way with remote switch |
| Display Type | LCD with backlight |
| Control Interface | Menu, Scroll Up/Down, ON/OFF/Enter buttons |
| Operating Modes | Auto, Random, Manual |
| Schedule Capacity | Up to 28 events (7-day) |
| Astronomic Features | Dawn/Dusk with offset (-120 to +120 min) |
| Wi-Fi Standards | 2.4 GHz 802.11 b/g/n |
| Mobile App | Intermatic Ascend (iOS/Android) |
| Voice Control | Works with Amazon Alexa |
| Battery Type | Lithium (non-user replaceable) |
| Certifications | FCC Part 15, ICES-005 |
| Warranty | Limited 3-year |
| Mounting | Single- or double-gang box (2-1/2" min depth) |
| Additional Features | Lock Timer, Auto-Sleep, System Restart |
Frequently Asked Questions - Ascend STW700W INTERMATIC
User questions about Ascend STW700W INTERMATIC
0 question about this device. Answer the ones you know or ask your own.
Ask a new question about this device
Download the instructions for your Wall electric timer in PDF format for free! Find your manual Ascend STW700W - INTERMATIC and take your electronic device back in hand. On this page are published all the documents necessary for the use of your device. Ascend STW700W by INTERMATIC.
USER MANUAL Ascend STW700W INTERMATIC
Timer Installation & Operation Manual
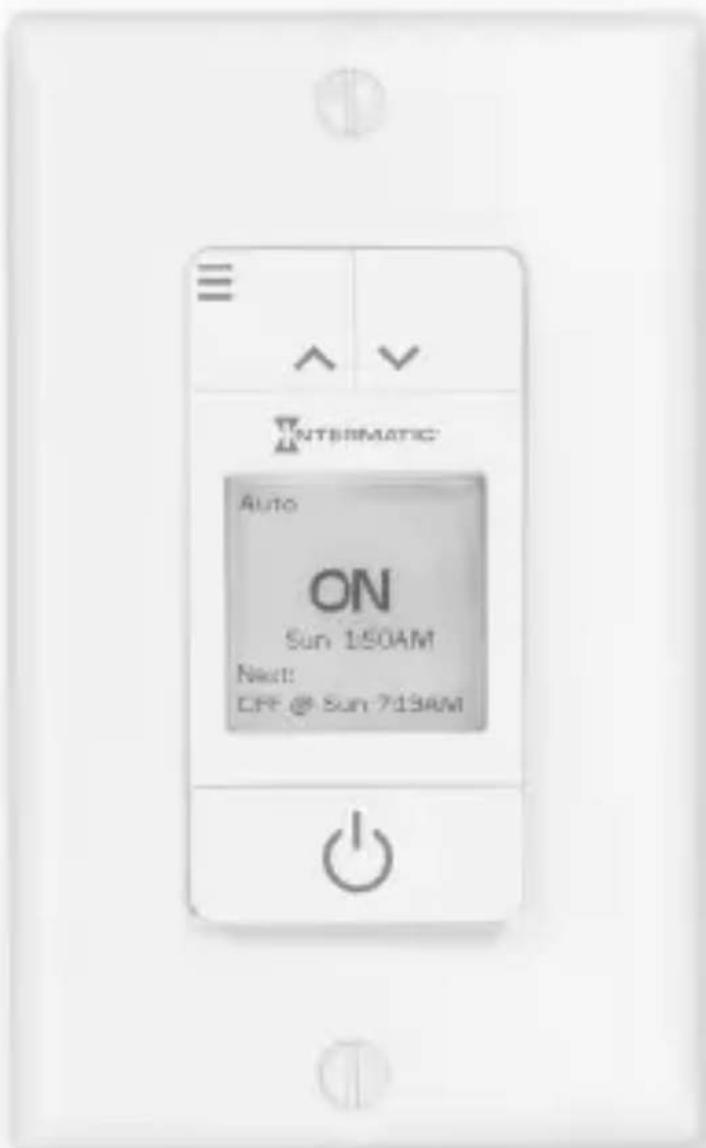
This device complies with part 15 of the FCC. Operation is subject to the following two conditions: (1) this device may not cause harmful interference, and (2) this device must accept any interference received, including interference that may cause undesired operation.
FCC NOTE: The manufacturer is not responsible for any radio or TV interference caused by unauthorized modifications to this equipment. Such modifications could void the user's authority to operate the equipment.
NOTE: This equipment has been tested and found to comply with the limits for a Class B digital device, pursuant to Part 15 of the FCC Rules. These limits are designed to provide reasonable protection against harmful interference in a residential installation. This equipment generates, uses and can radiate radio frequency energy and, if not installed and used in accordance with the instructions may cause harmful interference to radio communications. However, there is no guarantee that interference will not occur in a particular installation. If this equipment does cause harmful interference to radio or television reception, which can be determined by turning the equipment off and on, the user is encouraged to try to correct the interference by one or more of the following measures:
- Reorient or relocate the receiving antenna.
- Increase the separation between the equipment and receiver.
- Connect the equipment into an outlet on a circuit different from that to which the receiver is connected.
- Consult the dealer or an experienced radio/TV technician for help.
Important note: To comply with the FCC RF exposure compliance requirements, no change to the antenna or the device is permitted. Any change to the antenna or the device could result in the device exceeding the RF exposure requirements and void user's authority to operate the device.
This Class B digital apparatus complies with ICES-005 of Canada.

WARNING
Risk of Fire or Electric Shock
- Disconnect power at the circuit breaker(s) or disconnect switch(es) before installing or servicing.
- Installation and/or wiring must be in accordance with national and local electrical code requirements.
- Only use copper conductors rated 105°C minimum
- Battery is not user replaceable.
- Do NOT use timer to control devices that could have dangerous consequences due to inaccurate timing, such as sun lamps, saunas, heaters, and crock pots.
NOTICE
Dispose of product per local regulations on the disposal of lithium batteries.
Ratings ^1
| Operating Voltage 120 VAC, 50/60 Hz | |
| General Purpose 15 A | |
| Inductive Ballast 15 A | |
| Tungsten/Incandescent 8 A | |
| Electronic Ballast/LED 5 A | |
| LED Load 600 W | |
| Motor Load 1 HP | |
| Dimensions 2 3/4" H x 1 3/4" W x 1 2/3" D | |
SINGLE-POLE WIRING

| Wire Description | |
| Blue Connects to black wire from Load | |
| White Connects to white (neutral) wire from Load and Power Source | |
| Black Connects to black (hot) wire from Power Source | |
| Green Connects to ground | |
| Red Not used in single-pole installations |
Note: To be installed in single- and double-gang with 2-1/2" minimum depth. Please consult a qualified electrician for specific wiring details.
TYPICAL THREE-WAY WIRING

flowchart
graph TD
    A["Line"] --> B["Common Terminal"]
    B --> C["Existing Remote Switch"]
    C --> D["100 ft. MAX"]
    D --> E["Timer"]
    E --> F["Blue"]
    F --> G["Green"]
    G --> H["Neutral"]
    I["120 V Power Source"] --> A
    J["No Longer Used"] --> C
    K["Black"] --> E
    L["White"] --> E
    M["Blue"] --> F
    N["Load"] --> O["Downward arrow"]
| Wire Description | |
| Blue Connects to black wire from Load | |
| White Connects to white (neutral) wire from Load and Power Source | |
| Black Connects to black (hot) wire from Power Source | |
| Green Connects to ground | |
| Red Connects through remote switch to black (hot) wire from Power Source |
Note: For other three-way wiring scenarios,
go to www.Intermatic.com/Ascend.
The Ascend 7-Day Timer portfolio consists of two timer models: ST700W Standard and STW700W Wi-Fi enabled. In addition to the intuitive control interface common to both models, the Wi-Fi enabled Timer offers a mobile app for access to a quick setup feature, the ability to save schedules for easy transfer to other Ascend Wi-Fi enabled timers, and convenient monitoring from compatible Apple or Android mobile devices.
Access Point Mode
- Creates a peer to peer communication network between the Timer and your mobile device to offer a direct connection for initial setup, scheduling, and control of your Timer.
Wi-Fi Mode (Local)
- Connects the Timer to your local wireless network.
- Provides the benefit of constant connection with every Timer on your network, when using the app.
Remote Access (Cloud)
- Establishing an Intermatic Connect Account and registering a Timer(s) with your account, enables access from anywhere you have an active Wi-Fi or cellular connection.
Voice Integration
- Works with Alexa compatibility. Through the Alexa app, enable Intermatic - Home Skills and Intermatic - Custom Skills.
- Works with Alexa, for ON/OFF, mode changes, and status updates.
Setup Instructions
ST700W:
- Go to page 8 for Initial Setup at Timer instructions.
STW700W:
- Go to page 8 for Initial Setup at Timer instructions.
- Go to App Store or Google Play and download the Intermatic Ascend app for initial setup.
SWITCH INTERFACE

| Icon Description | |
| Timer locked | |
| Wi-Fi active | |
| Access Point Mode Timer Connected | |
| Access Point Mode Timer waiting for connection | |
| Wi-Fi Mode Timer connected to network | |
| Wi-Fi Mode Timer not connected to network | |
LCD Display

Note: Display icons change based on timer model and programmed settings.
INITIAL SETUP AT TIMER

flowchart
graph LR
    A["INTERMATIC® Press MENU for one-time Setup.<br>OFF<br>SSID: 7DT-F8F005F1CD36"] --> B["Press [ENTER"] to Setup Here.
Or
Use APP to Setup
For APP, visit:
Intermatic.com
Search for: STW700W]
    B --> C["SET TIME & DATE<br>Settings<br>Time Format: AM / PM<br>Settings<br>Time: 12:00 AM<br>Settings<br>Date: 01/01/17<br>Settings<br>Daylight Saving Time: ON"]
- Press ENTER to confirm and move to the next menu
Note:
- The app setup option is only applicable to the STW700W Wi-Fi enabled model. Press ENTER to begin setup for the ST700W standard model.
- You must complete all screens before returning to the Timer interface screen.
• Refer to page 11 for descriptions of Schedule Templates.
• Refer to the Latitude/Longitude estimation chart on page 20 or perform an app or Internet search for location specific values. - The SSID and the and icons are not available for the ST700W.

flowchart
graph TD
    A["ENTER LOCATION SETTINGS"] --> B["SELECT COUNTRY"]
    B --> C["SET TIME ZONE"]
    C --> D["Settings Saved"]
    D --> E["DO you want to setup a schedule? YES"]
    E --> F["SETUP COMPLETE"]
    F --> G["AUTO OFF Fri 11:00 AM"]
    G --> H["9"]

    subgraph Settings
        I["Latitude: 42.0°"]
        J["Longitude: -82.5°"]
    end

    subgraph Select SCHEDULE
        K["Schedule: 1 O N a ll night\n2 O N evenings\n3 O N m orning/evening\n4 C custom S schedule\n5 Cancel"]
    end

    subgraph SETUP Complete
        L["SETUP COMPLETE"]
        M["MANUAL OFF Fri 11:00 AM"]
    end

    I --> J
    J --> K
    K --> L
    L --> M
    style A fill:#f9f,stroke:#333
    style B fill:#ccf,stroke:#333
    style C fill:#cfc,stroke:#333
    style D fill:#fcc,stroke:#333
    style E fill:#ffc,stroke:#333
    style F fill:#fcc,stroke:#333
    style G fill:#fff,stroke:#333
    style H fill:#fff,stroke:#333
    style I fill:#fff,stroke:#333
    style J fill:#fff,stroke:#333
    style K fill:#fff,stroke:#333
    style L fill:#fff,stroke:#333
    style M fill:#fff,stroke:#333

flowchart
graph TD
    A["Main Menu"] --> B["Mode Schedule Settings Info"]
    C["Select Mode"] --> D["Auto Random Manual"]
    style A fill:#f9f,stroke:#333
    style B fill:#ccf,stroke:#333
    style C fill:#cfc,stroke:#333
    style D fill:#fcc,stroke:#333
| Auto Timer | operates using your programmed schedule of weekly ON/OFF events. |
| Random Similar to Auto mode except that your programmed schedule occurs randomly at +/- 15 minutes from the programmed time. | |
| Manual Operates like a manual toggle switch to turn devices ON and OFF, regardless of any schedules programmed in the timer. | |
Note: To enter Auto or Random mode, a programmed schedule must be loaded into memory.

flowchart
graph TD
    A["Main Menu\nMode Schedule\nSettings Info"] --> B["SELECT TEMPLATES"]
    B --> C["Schedule\nEdit Schedule Templates\nClear"]
    C --> D["Template 1 of 3\n1. On @ D usk\nOff @ D awn\nAll Days"]
    D --> E["Template 2 of 3\n2. On @ Dusk\nOff @ 10:00 P M\nAll Days"]
    E --> F["Template 3 of 3\n3. On @ 5:00 AM\nOff @ Dawn\nOn @ D usk\nOff @ 10:00 P M\nAll Days"]
    F --> G["CONFIRM\nOverwrite a ctive schedule with Template 1?\( YES \)"]
    style A fill:#f9f,stroke:#333
    style G fill:#bbf,stroke:#333
Note:
- A Template is a pre-set schedule of events that overrides your current schedule when chosen.
- Once a Template becomes your current schedule, you can edit the events.
- Template events in this menu cannot be altered.
• Reference page 14 to Edit Schedule events.
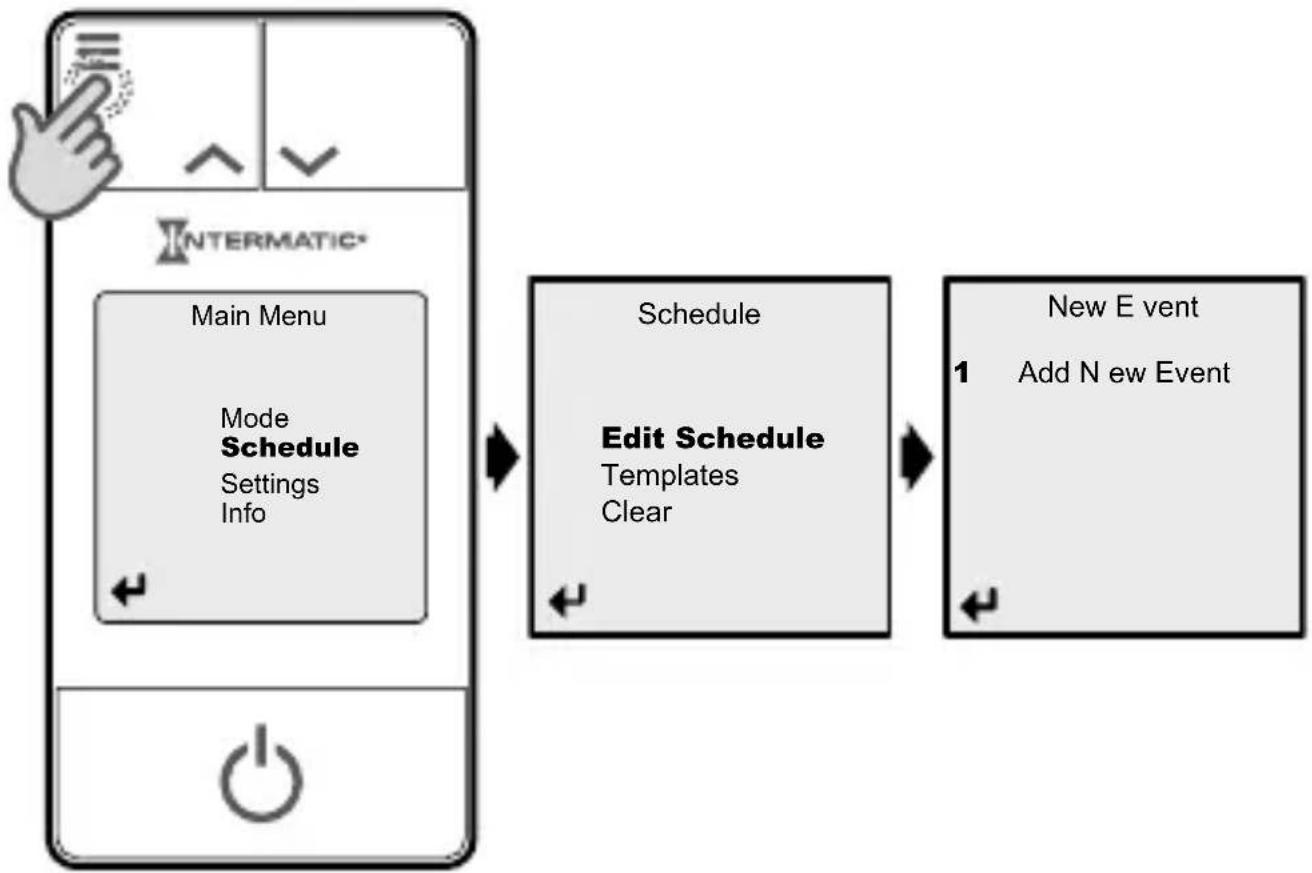
flowchart
graph LR
    A["Main Menu"] --> B["Schedule"]
    B --> C["Edit Schedule"]
    C --> D["New E vent"]
    D --> E["Add N ew Event"]
    style A fill:#f9f,stroke:#333
    style B fill:#ccf,stroke:#333
    style C fill:#cfc,stroke:#333
    style D fill:#fcc,stroke:#333
Menu Options
Action
- Enter to modify Action
- Turn OFF blinks
-
Scroll UP/DOWN to select:
-
Turn On
-
Turn Off
-
ENTER to confirm
Note: At any time, scroll to ← and press ENTER to go back to the Main Menu or choose Cancel to cancel input.

Days
- Enter to modify Days
- No Days blinks
-
Scroll UP/DOWN to select:
-
All Days
- Weekdays
- Weekends
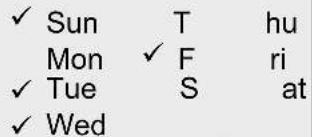
- Define Days
a. UP/DOWN to select/deselect days
b. ENTER to confirm day
c. Select ◀ to confirm
- ENTER to confirm
Time
- Enter to modify Time
- No Time blinks
-
Scroll UP/DOWN to select:
-
Define Time
- Dusk
-
Dawn
-
ENTER to confirm selection
- UP/DOWN to increase/decrease time
- ENTER to confirm
Event 1 (new):
Action: Turn On
Days: No Days
Time: No Time

Cancel
Event 1 (new):
Days of Week:

Event 1 (new):
Action: Turn On
Days: No Days
Time: Dawn
0 mins Offset

Cancel
Event 1 (new):
Action: Turn On
Days: No Days
Time: Define Time
12:00 AM

Cancel
Note: The Offset function allows Dusk/Dawn events to activate before or after the actual Dusk/Dawn time for your location. You can set an offset of +/- 0 to 120 minutes.
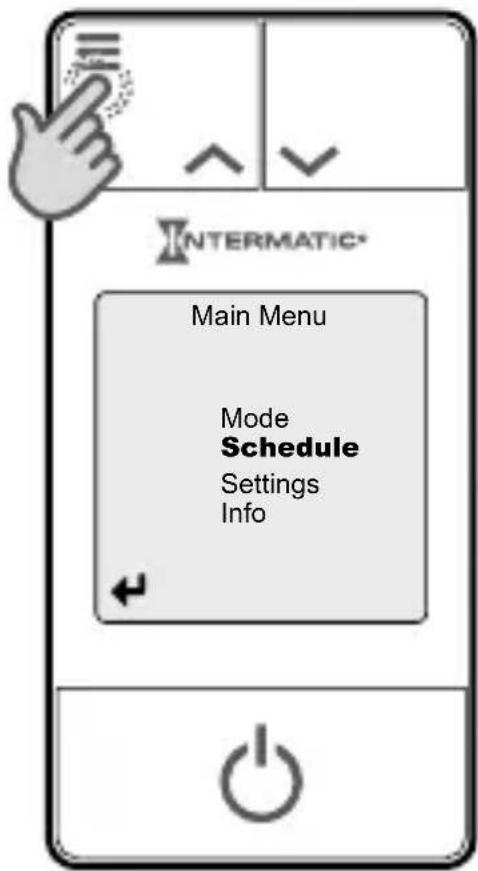
SELECT
EDIT SCHEDULE

Note: Clear will delete the current schedule.
SCROLL UP/DOWN
TO SELECT EVENT
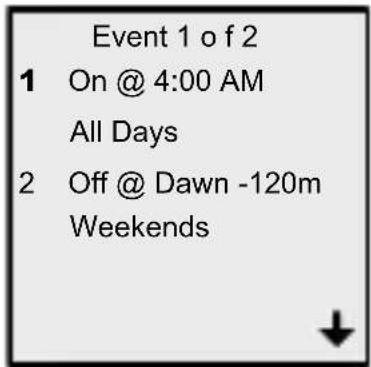


Edit Event
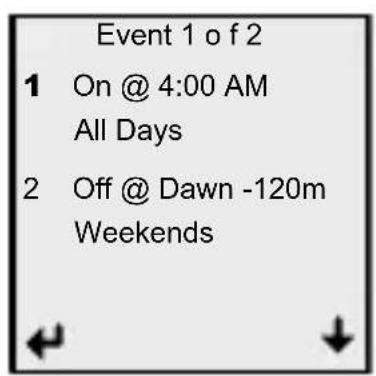


- ENTER to select event
- EDIT to change the event (Refer to page 12 for options) - CLEAR to remove event from schedule
| Error Resolution | |
| ⚠ No Days | Add a day to your event. Options include:All DaysWeekdaysWeekendsDefine Days |
| ⚠ Duplicates | A duplicate event exists. Modify or cancel your event. |
| ⚠ No Time | Add a time to your event. Options include:Define TimeDuskDawn |
| ⚠ No Memory | Remove an event before adding a new one. |

flowchart
graph TD
    A["Main Menu"] --> B["Mode"]
    B --> C["Schedule"]
    C --> D["Settings"]
    D --> E["Info"]
    F["SELECT OPTION"] --> G["Settings"]
    G --> H["Time & Date"]
    G --> I["Location"]
    G --> J["System"]
    G --> K["WiFi"]
Menu Options
Time & Date
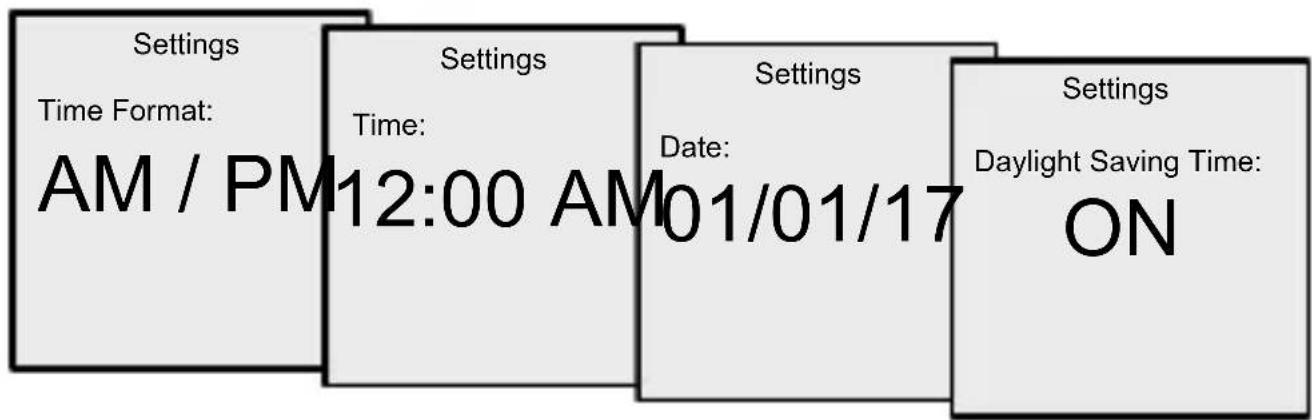
Select a 12-hour am/pm or 24-hour time format. Choose the time and date then choose to turn Daylight Saving Time ON or OFF.
Location
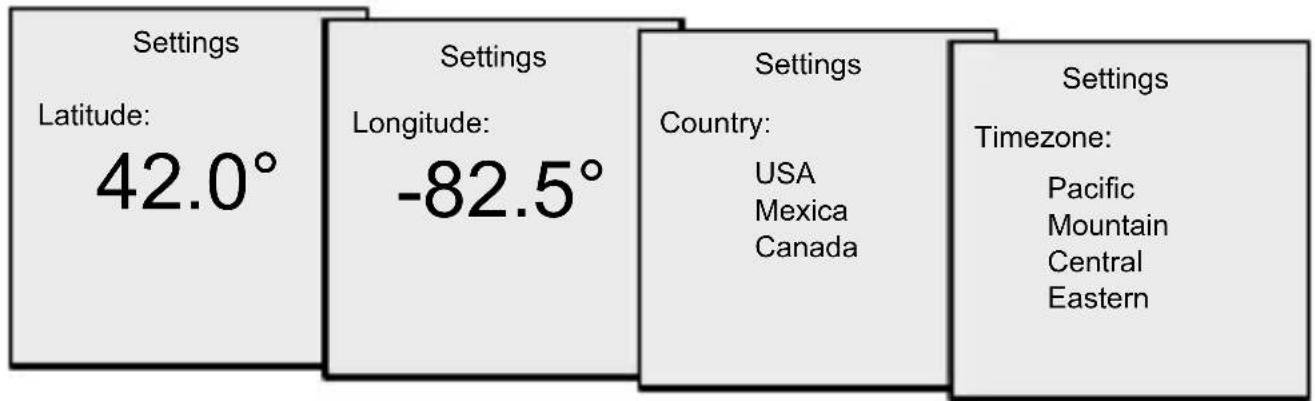
Program your latitude, longitude, country and timezone.
System

flowchart
graph LR
    A["Settings\nLock Timer:\nOFF\nTo Unlock, h old\n[Up"]/[Dn] b uttons.] --> B["Settings\nAuto-Sleep:\nON\nDisplay i s d immed\nafter i nactivity."]
    B --> C["Settings\nSystem Restart:\nYES\nKeeps all settings\nand schedule."]
    C --> D["Settings\nSet F actory Defaults:\nYES\nErases all settings\nand s schedule."]
| Lock Timer | Prevents access to Timer schedules and functionsTo unlock: press and hold the UP and DOWN buttons for three seconds |
| Auto-Sleep | Dims display after one minute of inactivity |
| System Restart | Resets timer but maintains all settings and schedulesRestores communication between the timer and routerApplies to STW700W only |
| Set Factory Defaults | Restores timer to out-of-box conditionClears programming, time settings, schedules, error log and wi-fi settings |
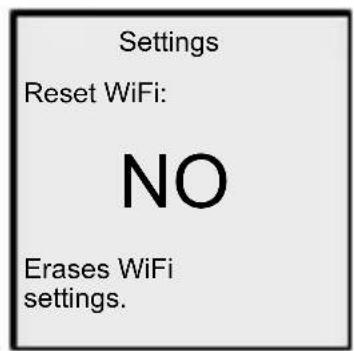
Wi-Fi
Clears and resets your Wi-Fi to Acess Point Mode. To re-establish a Wi-Fi connection refer to the app.

flowchart
graph TD
    A["Main Menu"] --> B["Mode"]
    B --> C["Schedule"]
    C --> D["Settings"]
    D --> E["Info"]
    E --> F["SELECT OPTION"]
    F --> G["Info"]
    G --> H["Wireless"]
    H --> I["Dawn/Dusk"]
    I --> J["Error L og"]
    J --> K["About"]
Menu Options
Wireless Settings (STW700W model only)
This option lets you view your IP Address, identify your Timer SSID number, and view your security PIN information.
Note: Your security PIN is a unique code that allows the app to connect to your Timer.
Wireless Settings IP: 1 92.168.255.42 Security: W PA RSSI: S trong SSID: 7DT-F8F005F1CD36 PIN: 46090
Dawn/Dusk
This option shows you the current time, the date, and the time associated with Dawn or Dusk in your set location.
Dawn/Dusk
Time: 4:53 A M
Date: 0 8/04/16
Loc: 27.1, -169.2
Dawn: 7:15 AM
Dusk: 1 0:02 PM
Error Log
Scroll UP/DOWN through the error log to view any issues logged in your system.
Error Log
Error 1 of 10:
Date: 06/23/2016
Time: 1 1:42 PM
Error: E-7
About
View the information associated with your timer, including model, version, and manufacturing date. You can also find contact details for Intermatic, Inc.
About
Model: STW700W
v01.00.04
Mfg: 01L
Intermatic, Inc.
1.815.675.7000
Intermatic.com
Major United States Cities
| City Lat. n° Long. w° | ||
| Albany, NY 43 -74 | ||
| Albuquerque, NM 35 -107 | ||
| Amarillo, TX 35 -102 | ||
| Anchorage, AK 61 -150 | ||
| Atlanta, GA 34 -84 | ||
| Austin, TX 30 -98 | ||
| Baker, OR 45 -118 | ||
| Baltimore, MD 39 -77 | ||
| Bangor, ME 45 -69 | ||
| Birmingham, AL 34 -87 | ||
| Bismarck, ND | 47 -101 | |
| Boise, ID | 44 -116 | |
| Boston, MA 42 -71 | ||
| Buffalo, NY 43 -79 | ||
| Carlsbad, NM | 32 -104 | |
| Charleston, WV | 38 -82 | |
| Charlotte, NC | 35 -81 | |
| Cheyenne, WY 41 -105 | ||
| Chicago, IL 42 -88 | ||
| Cincinnati, OH | 39 -85 | |
| Cleveland, OH | 41 -82 | |
| Columbia, SC | 34 -81 | |
| Columbus, OH 40 -83 | ||
| Dallas, TX 33 -97 | ||
| Denver, CO 40 -105 | ||
| Des Moines, IA | 42 -94 | |
| Detroit, MI 42 -83 | ||
| Dubuque, IA | 43 -91 | |
| Duluth, MN 47 -92 | ||
| El Paso, TX | 32 -106 | |
| Eugene, OR | 44 -123 | |
| Fargo, ND 47 -97 | ||
| Flagstaff, AZ | 35 -112 |
| City Lat. n° Long. w° | ||
| Fresno, CA 37 -120 | ||
| Grand Rapids, MI | 43 -86 | |
| Helena, MT 47 -112 | ||
| Honolulu, HI 21 -158 | ||
| Hot Springs, AR | 35 -93 | |
| Houston, TX 30 -95 | ||
| ID Falls, ID 44 -112 | ||
| Indianapolis, IN | 40 -86 | |
| Jackson, MS | 32 -90 | |
| Jacksonville, FL 30 -82 | ||
| Juneau, AK 58 -134 | ||
| Kansas City, MO | 39 -95 | |
| Key West, FL | 25 -82 | |
| Klamath Falls, OR | 42 -122 | |
| Knoxville, TN | 36 -84 | |
| Las Vegas, NV | 36 -115 | |
| Los Angeles, CA 34 -118 | ||
| Louisville, KY | 38 -86 | |
| Manchester, NH 43 -72 | ||
| Memphis, TN | 35 -90 | |
| Miami, FL 26 -80 | ||
| Milwaukee, WI 43 -88 | ||
| Minneapolis, MN | 45 -93 | |
| Mobile, AL 31 -88 | ||
| Montgomery, AL | 32 -86 | |
| Montpelier, VT | 44 -73 | |
| Nashville, TN | 36 -87 | |
| New Haven, CT | 41 -73 | |
| New Orleans, LA | 30 -90 | |
| New York, NY | 41 -74 | |
| Nome, AK 64 -166 | ||
| Oklahoma City, OK | 35 -97 | |
| Philadelphia, PA 40 -75 | ||
| Phoenix, AZ 33 -112 | ||
| Pierre, SD 44 -100 | ||
| Pittsburgh, PA 40 -80 | ||
| Portland, ME 44 -70 | ||
| Portland, OR 46 -123 | ||
| Providence, RI 42 -71 | ||
| Raleigh, NC 36 -79 | ||
| Reno, NV 40 -120 | ||
| Richfield, UT 39 -112 | ||
| Richmond, VA 38 -77 | ||
| Roanoke, VA 37 -80 | ||
| Sacramento, CA 39 -122 | ||
| Salt Lake City, UT 41 -112 | ||
| San Antonio, TX 29 -99 | ||
| San Diego, CA 33 -117 | ||
| San Francisco, CA | 38 -122 | |
| San Juan, PR | 19 -66 | |
| Savannah, GA 32 -81 | ||
| Seattle, WA | 48 -122 | |
| Shreveport, LA | 32 -94 | |
| Sioux Falls, SD | 44 -97 | |
| Spokane, WA | 48 -117 | |
| Springfield, IL | 40 -90 | |
| Springfield, MO | 37 -93 | |
| St. Louis, MO | 39 -90 | |
| Syracuse, NY | 43 -76 | |
| Tampa, FL | 28 -82 | |
| Virginia Beach, VA | 37 -76 | |
| Washington, D.C. | 39 -77 | |
| Wichita, KS | 38 -97 | |
| Wilmington, NC | 34 -78 | |
Note: These charts provide approximate information on your Latitude and Longitude. Perform an app or Internet search for location specific values.
Major Canadian Cities
| City Lat. n° Long. w° | ||
| Calgary, AL | 51 -114 | |
| Edmonton, AL 54 -113 | ||
| Fredericton, NB | 46 -67 | |
| Halifax, NS | 45 -64 | |
| London, ON 43 -82 | ||
| Montreal, QC | 46 -74 | |
| Nelson, BC | 50 -117 | |
| Ottawa, ON | 45 -76 | |
| Quebec, QC 53 -74 | ||
| Regina, SK | 50 -105 | |
| Toronto, ON 44 -79 | ||
| Vancouver, BC | 49 -123 | |
| Whitehorse, YT | 61 -135 | |
| Winnipeg, MB 50 -97 |
Major Mexican Cities
| City Lat. n° Long. w° | ||
| Acapulco 17 -100 | ||
| Cancún | 21 -87 | |
| Colima | 19 -104 | |
| Culiacán | 25 -107 | |
| Durango | 24 -105 | |
| Guadalajara | 21 -103 | |
| La Paz | 24 -110 | |
| León | 21 -102 | |
| Mérida | 21 -90 | |
| Mexico City | 19 -99 | |
| Monterrey | 26 -100 | |
| Morelia | 20 -101 | |
| Oaxaca | 17 -97 | |
| Querétaro | 21 -100 | |
| Tepic | 22 -105 | |
| Tuxtla Gutierrez 17 -93 | ||
| Veracruz | 19 -96 | |
| Villahermosa | 18 -93 | |
| Zacatecas | 23 -103 |
| Problem Possible Cause What To Do | ||
| Timer won't enter Auto or Random mode when you press Mode. | A schedule is not saved. Choose a template or define a schedule of events. | |
| Timer switches at incorrect times or skips some of the programmed times. | The active schedule has an invalid setting. | Review the settings and revise them as necessary. |
| Timer is in Random mode, which varies switching times up to +/- 15 minutes. | Select the Auto Mode. | |
| The Astronomic and Defined switching times are in conflict, your DST may or may not be turned on, or your timezone and location are not configured properly.Note:Your switch timer automatically skips any conflicting ON event as summer approaches to prevent unwanted operation of lights or other controlled devices. | Review your program settings and revise them as necessary. | |
| Load only operates when the remote (3-way) switch is in one position or the Timer ignores the remote switch. | The remote switch is wired incorrectly. | Recheck the wiring, especially for the jumper. |
| The Timer ignores a 3-way remote switch even though it is wired correctly or the load turns off immediately after being turned ON. | The remote switch or switch timer is wired wrong.There is an excessive length of wire (greater than 100 feet).There is buried wire to the remote switch.The remote switch is not functioning properly or worn out. | Contact a qualified electrician. |
| Timer shows ON but the light or other controlled device is OFF. | The light or controlled device itself may be switched OFF. | Make sure the light or controlled device is switched ON and plugged in. |
| Screen is OFF. Timer is set up in Sleep Mode to turn the screen OFF after one minute of inactivity. | Hit any key to wake up Timer.To keep screen ON all the time, change the Sleep Mode setting to OFF. | |
| Timer is not connecting to my local Wi-Fi network.(applies to STW700W only) | Timer display shows:or icon.Timer is in Access Point Mode or the Access Point Mode is not connected. | Follow app instructions to connect the Timer to your local Wi-Fi network |
| Timer shows:Icon.Timer is waiting for a connection.The router password for the local router may be incorrect. | Check Wi-Fi router to make sure it is ON.Use app to revise Wi-Fi settings and reconnect to your router. | |
| Can't connect my mobile device to my Timer.(applies to STW700W only) | No icon is showing.Model does not have a Wi-Fi radio, or the radio is not turning ON. | Make sure you have the STW700W Wi-Fi enabled Timer model.Try resetting the W-Fi and Timer. If problem persists, contact Intermatic. |
| icon is showing. Timer is connected to a Wi-Fi network. The mobile device may not be connected to the same network. | Make sure your mobile device is connected to the same local Wi-Fi network.To disconnect Timer from current Wi-Fi network, perform a Wi-Fi reset at the Timer. | |
| icon is showing. Timer is in Access Point Mode, waiting for mobile device connection. | Follow app instructions to connect to Timer. Make sure you are not in a wireless “dead zone” when attempting to connect. | |
| icon is showing. Timer is already connected to a mobile device. | Check your mobile device Wi-Fi settings. If connected to the 7DT-xxx network, go to the app and choose Search.If your mobile device is not connected, there is another mobile device already connected. Disconnect the other device. | |
Note: For more troubleshooting tips, contact Intermatic Tech Support at: 815-675-7000.
LIMITED THREE-YEAR WARRANTY
If within the warranty period specified, this product fails due to a defect in material or workmanship, Intermatic Incorporated will repair or replace it, at its sole option, free of charge. This warranty is extended to the original household purchaser only and is not transferable. This warranty does not apply to: (a) damage to units caused by accident, dropping or abuse in handling, acts of God or any negligent use; (b) units which have been subject to unauthorized repair, opened, taken apart or otherwise modified; (c) units not used in accordance with instructions; (d) damages exceeding the cost of the product; (e) sealed lamps and/or lamp bulbs, LED's and batteries; (f) the finish on any portion of the product, such as surface and/or weathering, as this is considered normal wear and tear; (g) transit damage, initial installation costs, removal costs or reinstallation costs.
INTERMATIC INCORPORATED WILL NOT BE LIABLE FOR INCIDENTAL OR CONSEQUENTIAL DAMAGES. SOME STATES DO NOT ALLOW THE EXCLUSION OR LIMITATION OF INCIDENTAL OR CONSEQUENTIAL DAMAGES, SO THE ABOVE LIMITATION OR EXCLUSION MAY NOT APPLY TO YOU. THIS WARRANTY IS IN LIEU OF ALL OTHER EXPRESS OR IMPLIED WARRANTIES. ALL IMPLIED WARRANTIES, INCLUDING THE WARRANTY OF MERCHANTABILITY AND THE WARRANTY OF FITNESS FOR A PARTICULAR PURPOSE, ARE HEREBY MODIFIED TO EXIST ONLY AS CONTAINED IN THIS LIMITED WARRANTY, AND SHALL BE OF THE SAME DURATION AS THE WARRANTY PERIOD STATED ABOVE. SOME STATES DO NOT ALLOW LIMITATIONS ON THE DURATION OF AN IMPLIED WARRANTY, SO THE ABOVE LIMITATION MAY NOT APPLY TO YOU.
This warranty service is available by either (a) returning the product to the dealer from whom the unit was purchased or (b) completing a warranty claim online at www.Intermatic.com. This warranty is made by: Intermatic Incorporated, Customer Service 7777 Winn Rd., Spring Grove, Illinois 60081-9698. For warranty service go to: www.Intermatic.com or call 815-675-7000.
For complete information on Intermatic products, literature and Contractors Guides visit: www.Intermatic.com/Ascend or www.Intermatic.com/AscendSupport.
- WARNING
- Risk of Fire or Electric Shock
- NOTICE
- SINGLE-POLE WIRING
- TYPICAL THREE-WAY WIRING
- Access Point Mode
- Wi-Fi Mode (Local)
- Remote Access (Cloud)
- Voice Integration
- Setup Instructions
- ST700W:
- STW700W:
- SWITCH INTERFACE
- LCD Display
- INITIAL SETUP AT TIMER
- Note:
- Menu Options
- Action
- Days
- Time
- Edit Event
- Location
- System
- Wi-Fi
- Dawn/Dusk
- Error Log
- About
- LIMITED THREE-YEAR WARRANTY
Brand : INTERMATIC
Model : Ascend STW700W
Category : Wall electric timer