
H-1AS - Paint gun Paasche - Free user manual and instructions
Find the device manual for free H-1AS Paasche in PDF.


| Product Type | Airbrush (Paint Gun) |
| Brand | Paasche |
| Model | H-1AS |
| Action | Single action, external mix, siphon feed |
| Body Material | Machined brass |
| Color Part Material | Nickel silver |
| Head Size | 0.45 mm (H-1 head for light fluids) |
| Recommended Fluids | Light fluids: inks, dyes, water colors |
| Working Pressure Range | 20-30 PSI for medium fluids, 30+ PSI for heavy fluids |
| Maximum Air Pressure | 75 PSI |
| Color Feed | Siphon feed via metal color cup or glass/plastic bottle |
| Color Flow Adjustment | Rotate tip (HT-1) clockwise to increase flow, counter-clockwise to decrease |
| Stipple Effect | Achieved by reducing air pressure (needle valve or regulator) |
| Cleaning Method | Flush with solvent; wipe cup; apply Vaseline to threads every 2-3 months |
| Safety Precautions | Use in well-ventilated area; avoid inhalation; max pressure 75 PSI |
| Spare Parts Availability | Full range of replacement parts available (see manual) |
| Included Accessories | Color cup or bottle, hanger, wrench |
| Hose Connection | Braided air hose with couplings (sold separately) |
| Needle Size | HN-1 needle (for H-1 head) |
Frequently Asked Questions - H-1AS Paasche
User questions about H-1AS Paasche
0 question about this device. Answer the ones you know or ask your own.
Ask a new question about this device
Download the instructions for your Paint gun in PDF format for free! Find your manual H-1AS - Paasche and take your electronic device back in hand. On this page are published all the documents necessary for the use of your device. H-1AS by Paasche.
USER MANUAL H-1AS Paasche
natural_image
Red and silver jet engine component with attached spray nozzle (no visible text or symbols)H Model Airbrush
Single Action-External Mix-Siphon Feed
Instruction Manual & Replacement Parts
INTRODUCTION:
Paasche® model H Airbrush features machined Brass Body and Nickel Silver Color Part, simplicity of design and ease in operation. The air and color feeds are independent and adjustable to give a fixed line, shade or stipple effect.
OPERATING INSTRUCTIONS:
Approximate Working Pressures:
• 20 lbs. or Less: Stipple and granulated effects, pressure will vary with viscosity of fluid.
• 20 to 30 lbs.: Medium consistency water colors, inks & dyes.
- 30 lbs. or More: Heavy fluids, acrylics, reduced lacquers, varnishes, paints or ceramic glaze.
Sizes:
• H-1 (.45mm)Head and HC-1-3 Aircap for light fluids.
• H-3 (.64mm)Head and HC-1-3 Aircap for medium fluids.
• H-5 (1.06mm)Head and HC-5 Aircap for heavier fluids.
- Attach hose to air supply and allow air to blow a few seconds. Shut off before attaching to Airbrush. This procedure will remove dirt from airline and hose.
Caution: Hold firmly and point away from face.
- Attach hose coupling to the airbrush.
- Attach Color Cup or Bottle to HN-1-3, or 5 Needle by exerting a firm twisting motion to fit tapered tube securely into tapered Needle inlet.
- Fill Color Cup or Bottle 1/2 to 3/4 full. Use eyedropper or brush for adding small amounts of color to metal color cup. When using Color Bottle, vent hole must be kept open.
- To Spray, hold Airbrush like a pencil comfortably between thumb and forefinger using middle finger as a guide and support. Like writing, hold forefinger easily on H-155 Finger Button and Press to open air valve.
- Regulate volume of color and size of spray by rotating HT-1, 3 or 5 Tip clockwise to increase and counter clockwise to decrease flow of color.
- Stipple Adjustment: Reducing the airline pressure is the easiest method used when creating a stippled effect with the airbrush. Pressure can be reduced by using any of the following items: 3A Needle Valve installed on the H-128A Valve Casing of the Airbrush or by using the R-75 Air Regulator and reducing the pressure.
- To adjust for heavier fluids, turn tip wide open, loosen set screw, slide needle back to obtain better flow.
CARE AND CLEANING:
- Pour any remaining color back into its original container.
- Wipe Color Cup or Bottle clean, using cloth moistened with proper solvent.
- Hold Airbrush at a downward angle and put a few drops of solvent through Color Adjusting Part Assembly. To flush out the remaining color in the H Color Adjusting Part Assembly, apply pressure to the H-155 Finger Button.
- Apply a tiny dab of Vaseline to the H Color Adjusting Part and HC-Aircap threads every two or three months to prevent color build up and consequent freezing of the Color Adjusting Part Assembly and Aircap.
HOW TO OPEN CLOGGED FLUID PASSAGES:
- Agitate color in Bottle Assembly by placing finger momentarily over HC- Aircap while air is passing through the Airbrush. This will blow color back into bottle thus opening clogged fluid passages. Do not do this with open cup as color may blow out of cup.
- Should H-1, 3 or 5 Color Adjusting Part Assembly become clogged, loosen H-153 Set Screw, unscrew HT-1, 3 or 5 Tip from HN Needle, gently pull back through ball-shaped support and remove Tip.
- Clean Parts carefully, using nothing harder than a wooden toothpick.
- To reassemble, reverse this procedure, making sure the shoulder of the Needle seats up against ball-shaped support.
- If the needle and tip are completely clogged, soak in a closed bottle of proper solvent until clean.


H - AIRBRUSH MODEL REPLACEMENT PARTS
# Part No. Description
- HC-1-3,5 Aircap w/ O-ring (Select Size)
- 3A-4 "O" Ring (Pack of 6)
- H-1,3,5 Color Adjusting Part (Select Size)
- HT-1,3,5 Tip (Select Size)
- H-185 Packing
- H-184 Packing Nut
- HN-1-3,5 Needle (Select Size)
- H-153 Set Screw
- H-150N Shell (Includes H-128A)
- H-155 Finger Button
- H-143 Handle (Nylon)
- HVL-200 Metal Handle (Aluminum - optional)
- H-128A Valve Casing
- H-192A Valve Plunger w/ A-53
- A-53 Valve Washer (Pack of 6)
- A-22 Valve Spring
- A-23R Air Valve Nut
- F-186 Wrench
- A-34 Hanger

H-1/4-OZ (1/4oz Metal)

H-1-OZ
(1oz Glass)

H-3-OZ
(3oz Glass)
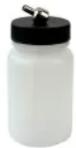
HP-3-OZ (3oz Plastic)
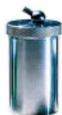
H-2-OZ
(2oz Metal)
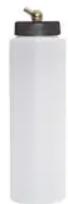
HP-8-OZ (8oz Plastic)
H - Old Style Replacement Parts
-
H-175A Air Valve Assembly
-
A-23R Air Valve Nut
-
A-22 Valve Spring
-
H-21A Valve Plunger
-
A-52 Valve Washer (Pack of 6)
-
H-128A Valve Casing
-
A-143 Needle Guide Spring
-
H-156 Stipple Adjuster
-
H-157 Finger Lever Assembly
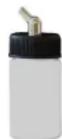
BA-30-1P (1oz Plastic)
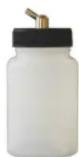
BA-30-3P (3oz Plastic)
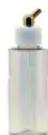
BA-30-2P (1oz Plastic)
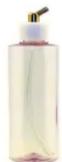
BA-30-4P (3oz Plastic)
The BA bottle assemblies are a new cover configuration and all use plastic bottle. The 2P and 4P are narrow neck and work with most airbrush paint bottles like Createx and Paasche

A-1/8-4, 6, 8. 10, 15, 20, 25 or 50 Braided Air Hose with couplings (Select Length) (3A-4 -- O-ring for airbrush coupling)
WARNING: Spray materials may be harmful if inhaled or allowed to come into contact with the skin or eyes. Consult the product label and Material Safety Data Sheet supplied for the spray material. Follow all safety precautions CAUTION: Well Ventilated Area Required to remove fumes, dust or overspray. Maximum Air Pressure 75 P.S.I.
For Multi-Language Manuals Go To: www.paascheairbrush.com
- H Model Airbrush
- Single Action-External Mix-Siphon Feed
- Instruction Manual & Replacement Parts
- INTRODUCTION:
- OPERATING INSTRUCTIONS:
- Approximate Working Pressures:
- Sizes:
- CARE AND CLEANING:
- HOW TO OPEN CLOGGED FLUID PASSAGES:
- H - AIRBRUSH MODEL REPLACEMENT PARTS
- # Part No. Description
- H - Old Style Replacement Parts
Brand : Paasche
Model : H-1AS
Category : Paint gun