
ReadyClean 47B2 - Vacuum Cleaner BISSELL - Free user manual and instructions
Find the device manual for free ReadyClean 47B2 BISSELL in PDF.


| Product Type | Upright Vacuum Cleaner |
| Brand | Bissell |
| Model | ReadyClean 47B2 |
| Dimensions (L x W x H) | 42.5 x 12.5 x 11 inches |
| Weight | 12.5 lbs |
| Power Cord Length | 25 ft |
| Power Source | Corded Electric, 120V 60Hz 10A |
| Dirt Capacity | 1.5 Liters (Dust Cup) |
| Filtration Type | Washable Foam Filter |
| Cleaning Path Width | 12 inches |
| Suction Control | Adjustable via Handle Slide Switch |
| Brushroll On/Off | Yes, Brushroll Switch |
| Headlight | Yes, Bright LED Headlights |
| Accessories Included | Crevice Tool, Dusting Brush, Stretch Hose |
| Warranty | 2 Years Limited Warranty |
| Maintenance | Wash foam filter every 3 months; replace belt if worn |
| Safety Certification | ETL Listed |
| Replacement Parts | Belt (part #203-6340), Foam Filter (part #203-6341) |
Frequently Asked Questions - ReadyClean 47B2 BISSELL
User questions about ReadyClean 47B2 BISSELL
0 question about this device. Answer the ones you know or ask your own.
Ask a new question about this device
Download the instructions for your Vacuum Cleaner in PDF format for free! Find your manual ReadyClean 47B2 - BISSELL and take your electronic device back in hand. On this page are published all the documents necessary for the use of your device. ReadyClean 47B2 by BISSELL.
USER MANUAL ReadyClean 47B2 BISSELL
READYCLEAN® USER GUIDE

natural_image
Exterior view of a Bissell cleaning vacuum cleaner (no signage or text visible on body)47B2, 20R7, 40H5, 40N7 SERIES
ImpoRtant SafEty InStRUctlonS
REaD all InStRUctlonS bEfoRE USInG yoUR DEEp cIEanER.
When using an electrical appliance, basic precautions should be observed, including the following:
⚠️ WaRnInG
TO REDUCE THE RISK OF FIRE, ELECTRIC SHOCK, OR INJURY:
» Connect to a properly grounded outlet only. See grounding instructions. Do not modify the 3-prong grounded plug.
» Do not leave appliance when it is plugged in. Unplug from outlet when not in use and before servicing.
» Use indoors only.
» Do not allow to be used as a toy. Close attention is necessary when used by or near children.
» Do not use for any purpose other than described in this User's Guide. Use only manufacturer's recommended attachments.
» Do not use with damaged cord or plug. If appliance is not working as it should, or has been dropped, damaged, left outdoors, or dropped into water, have it repaired at an authorized service center.
» Do not pull or carry by cord, use cord as a handle, close a door on cord, or pull cord around sharp edges or corners. Do not run appliance over cord. Keep cord away from heated surfaces.
» Do not unplug by pulling on cord. To unplug, grasp the plug, not the cord.
» Do not handle plug or appliance with wet hands.
» Do not put any object into openings. Do not use with any opening blocked; keep openings free of dust, lint, hair, and anything that may reduce air flow.
» Keep hair, loose clothing, fingers, and all parts of body away from openings and moving parts.
» Turn off all controls before plugging or unplugging appliance.
» Use extra care when cleaning on stairs.
» Do not use to pick up flammable or combustible materials (lighter fluid, gasoline, kerosene, etc.) or use in areas where they may be present.
» Do not use appliance in an enclosed space filled with vapors given off by oil base paint, paint thinner, some moth proofing substances, flammable dust, or other explosive or toxic vapors.
» Do not use to pick up toxic material (chlorine bleach, ammonia, drain cleaner, etc.).
» Do not pick up anything that is burning or smoking, such as cigarettes, matches, or hot ashes.
» Use only BISSELL cleaning products intended for use with this appliance to prevent internal component damage. See the Cleaning Fluid section of this guide.
» Do not immerse. Use only on surfaces moistened by the cleaning process.
» Keep appliance on a level surface.
» Do not carry the appliance while in use.
SaVE tHESE InSTRUctlonS foR fUtURE USE
This model is for household use only. Commercial use of this unit voids the manufacturer's warranty.
⚠️ WaRnInG
Improper connection of the equipment-grounding conductor can result in a risk of electrical shock. Check with a qualified electrician or service person if you aren't sure if the outlet is properly grounded. DO NOT MODIFY THE PLUG. If it will not fit the outlet, have a proper outlet installed by a qualified electrician. This appliance is designed for use on a nominal 120-volt circuit, and has a grounding attachment plug that looks like the plug in the illustration. Make certain that the appliance is connected to an outlet having the same configuration as the plug. No plug adapter should be used with this appliance.
GRoUnDInG InStRUctlonS
This appliance must be connected to a grounded wiring system. If it should malfunction or break down, grounding provides a safe path of least resistance for electrical current, reducing the risk of electrical shock. The cord for this appliance has an equipment-grounding conductor and a grounding plug. It must only be plugged into an outlet that is properly installed and grounded in accordance with all local codes and ordinances.

Thanks for buying a BISSELL deep cleaner
We're glad you purchased a BISSELL deep cleaner. Everything we know about floor care went into the design and construction of this complete, high-tech home cleaning system.
Your BISSELL deep cleaner is well made, and we back it with a limited one-year warranty. We also stand behind it with a knowledgeable, dedicated Consumer Care department, so, should you ever have a problem, you'll receive fast, considerate assistance.
My great-grandfather invented the floor sweeper in 1876. Today, BISSELL is a global leader in the design, manufacture, and service of high quality homecare products like your BISSELL deep cleaner.
Thanks again, from all of us at BISSELL.
man 1.7 mmol
Mark J. Bissell
Chairman & CEO
Safety Instructions.....2
Product View....4
Assembly 5
Operations 6-7
Maintenance & Care ..... 8
Troubleshooting ..... 9
Replacement Parts ..... 10
Accessories .... 10
Warranty 11
Consumer Care....11
Product Registration.....12
Tips
» Deep cleaning stairs and high-traffic areas on a regular basis helps prolong carpet life.
» Check upholstery stuffing before cleaning. Colored stuffing may bleed through the fabric when it becomes wet.
» Before turning off the machine, suction up clean water to thoroughly rinse out the interior of the flex hose. Then, lift the cleaning tool and point it upwards to drain any remaining water into the dirty water/collection tank.
Product View
1 Spray Trigger
2 Upper Handle
3 Retractable Handle Lock
4 Power Cord
5 Upper Body
6 Solution Tank
7 Vent Cover ( Foam Filter)
8 Collection Tank Latch
9 Removable Nozzle

Cleaning fluid
Keep plenty of genuine BISSELL 2X formula on hand so you can clean and protect whenever it fits your schedule. Always use genuine BISSELL deep cleaning formulas. Non-BISSELL cleaning solutions may harm the machine and will void the warranty.
WARNING
To reduce the risk of fire and electric shock due to internal component damage, use only BISSELL cleaning fluids intended for use with the deep cleaner.
 |  |  |  |  |  |  |  | |
| Professional Deep Cleaning | Pet Stain & Odor | Deep Clean & Protect | Allergen Cleansing | Deep Clean - Oxy Pet Stain | PreTreat Stain PreTreat | Hard Floor SolutionsTM formula | ||
| Best for | Out cleans all other formulas | Removes tough pet stains and contains patented odor removal technology | Deep deans carpets and protects from future stains with ScotchgardTMProtector | Helps remove pet & pollen allergens | Permanently removes tough stains | Pretreat to help remove tough pet stains and odors | Pretreat to penetrate and loosen tough stains | For use with the Bare Floor Tool (select models) |
| ZX Concentrated X X X | X X X | |||||||
| ScotchgardTM Protection | X X X |
*ONLY BISSELL Protects from future stains with Scotchgard™ Protector
Scotchgard ™ is a trademark of 3M ® .
Assembly
Your deep cleaner assembles quickly and easily. The only tool you will need for assembly is a Phillips head screwdriver.
- Slide upper body onto lower body.
- Secure with screws.
- Slide upper handle into upper body by aligning the pin and sliding into place.
NOTE: Be sure to secure upper handle before lifting. Rotate handle lock clockwise to secure.
- Place solution tank on back of unit.
- Wrap power cord.
Assembly is now complete.
Operations
Before you clean
- Move furniture to another area if cleaning an entire room. (Optional)
- Vacuum carpet thoroughly.
- Plan your cleaning route to leave an exit path. It is best to begin cleaning in the corner farthest from your exit.
- Pre-Treating (optional) Pre-treat stubborn stains and highly soiled carpet in hallways and other high-traffic areas.
a. Generously spray BISSELL Pretreat evenly over soiled area.
Caution: DO NOT OVER WET CARPET
b. Wait 3-5 minutes before deep cleaning.
WARNING
Do not plug in your deep cleaner until you are familiar with all instructions and operating procedures.

natural_image
Close-up of a hand holding a cylindrical object with an arrow pointing to it, no visible text or symbols
natural_image
Close-up of a hand using a power tool to adjust or install a mechanical component (no visible text or symbols)

natural_image
Close-up of a hand pressing down on a mechanical device with a downward arrow indicating motion (no visible text or symbols)Tip
» Deep cleaning carpeting regularly can reduce dust and allergens in your home.
Operations
Fill the tank
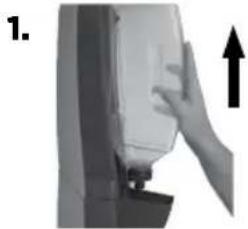
- Remove the solution tank by lifting it straight up, then away from the lower body.
- Unscrew the black cap at the bottom of the solution tank.
- Fill with hot (not boiling) tap water (140°F/60°C MAX) to the WATER line. Fill the rest of the tank with BISSELL 2X Formula to the FORMULA line. Replace and tighten the black cap.
Caution: Do not microwave or boil water before filling.
- Place solution tank on lower body.
Carpet cleaning
- Plug into proper outlet.
- Adjust the retractable handle by turning counterclockwise and lifting the handle up. Turn clockwise to secure.
- With foot, press the red power button, located on the back of the machine.
NOTE: Handle must be in the full upright position before cleaning.
-
With foot, press the grey recline lever. located next to power button.
-
Cleaning Strokes. While pressing the trigger, make one slow forward wet pass and another one back. Caution: Do not overwet.
-
Release the trigger and make one slow forward and backward pass over the same area.
-
Repeat steps 5 and 6 until solution being pulled up appears clean.
-
Empty the collection tank when dirty water reaches the full line, or when the solution tank is empty.
natural_image
Close-up of a hand pressing down on a white electronic device component (no visible text or symbols)
natural_image
Close-up of a plastic bottle with an arrow pointing to its side (no visible text or symbols)


natural_image
Two hands operating a cylindrical gas pump device, one with a pointed tip and the other with a handle (no visible text or symbols)Recline


natural_image
Close-up of a white plastic component with a black arrow pointing upward (no text or symbols visible)Empty the collection tank
-
With foot, press the red power button, to turn off and unplug power cord from outlet.
-
Remove the collection tank from base of unit.
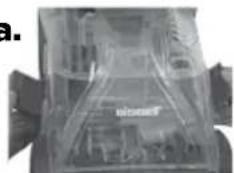
a. Release collection tank latches (on each side) by pulling up from the bottom of latch and then out.
b. Carefully remove tank by lifting up on the tank handle.
- Carry collection tank to a toilet or sink. To empty, pour out contents using opening at back of tank.
- Rinse collection tank thoroughly and replace on unit.
- Refill solution tank and continue cleaning.
2a.
natural_image
Close-up of a transparent mechanical component with internal structure (no visible text or symbols)2b.

natural_image
Close-up of a mechanical device with a black arrow pointing to a component (no visible text or symbols)
natural_image
3D rendered mechanical part with a hand adjusting its top surface (no text or symbols visible)Operations
Hard floor cleaning (select models only)
- Remove the collection tank (refer to steps 2a and 2b on page 6).
- Attach the hard floor tool by hooking it into the front of the removable nozzle and rotate until it snaps firmly in place.
- Replace the collection tank. Be sure to attach the two latches.
- Fill the solution tank with hot (not boiling) tap water (140°F/60°C MAX) to the WATER fill line. Fill the rest with BISSELL 2X Hard Floor Solutions™ to FORMULA fill line.
- Follow steps 1-8 under "Carpet Cleaning" on page 6 to continue cleaning.
WARNING
To reduce the risk of fire and electric shock- when cleaning a hard floor, the BISSELL hard floor tool (203-5683) must be used and it must only be used with BISSELL 2X Hard Floor Solutions cleaning fluid intended for use with this appliance.

natural_image
Two grayscale images showing a mechanical device with a curved arrow indicating rotation, and a separate close-up of a plastic bottle (no text or symbols visible)Cleaning after use
- Unplug the unit.
- Remove and rinse collection tank thoroughly.
- Remove tank vent & foam filter (located on top of the collection tank) and rinse.
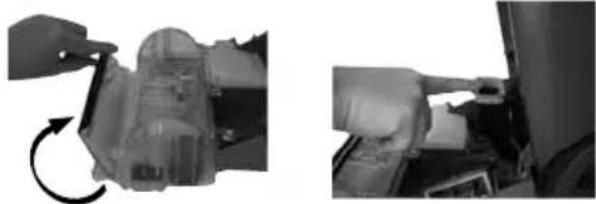
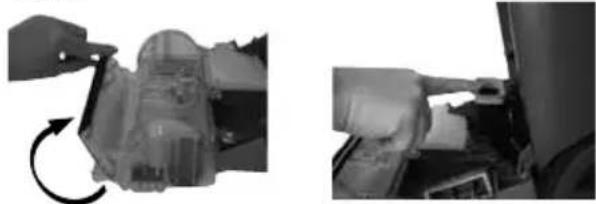
- Clean nozzle window by lifting latch and removing nozzle from machine. Rinse under running water.
- 40N7 and 40H5 series models, pop out CrossAction brush by pushing the tabs away from each other and pushing down. Once the brush pops out, rinse and replace by snapping the tabs back into place.
- When finished replace nozzle and secure with latch.
NOTE: For best results, it is recommended that the nozzle is cleaned after each use.
- Remove lint and hair from red gasket in base of unit. (Do not remove gasket)
- Replace the collection tank on the base of the machine and secure with latches.

natural_image
Two-step black-and-white photo showing a hand using a tool to clean or store plastic, with no visible text or symbols.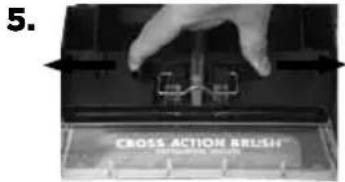
6.7.
natural_image
Mechanical assembly diagram showing a component being adjusted with rotation arrow (no text or symbols)Maintenance & Care
Machine storage
For best results, a few simple steps can assure your machine is well maintained after your cleaning is complete.
- Wrap power cord around Quick Release Cord Wrap™ on side of the machine.
- Wipe all surfaces with a soft cloth. Store cleaner upright in a protected, dry area.
NOTE: You may have cleaning solution remaining in the solution tank. You may store your machine this way for the next cleaning task, but never keep dirty water in the collection tank.
WARNING
To reduce the risk of electric shock, turn power switch off and disconnect plug from electrical outlet before performing maintenance or troubleshooting checks.
CAUTION
Do not store unit where freezing may occur. Damage to internal components may result.
Install the replacement brush belt - (For Model 47B2 and 20R7 Series only)
- Turn the machine off and unplug from wall outlet.
- Remove solution and collection tanks.
- Lay machine down to access the bottom of the machine.
- With a Phillips head screwdriver, unscrew the belt cover and remove.
- Remove the brush end cap and remove belt from brush.
- Brush can now be removed.
- Belt can be removed by sliding off the motor pulley.
- Clean or replace belt. Attach belt to motor pulley and brush, insert brush into right side end cap.
- Reattach the left end cap and slide brush back into place.
- Replace the belt cover and screw into place.
- Manually rotate brush to make sure it rotates freely and that the belt is aligned properly.

natural_image
Close-up of a mechanical device with gears and a handle, no visible text or symbols
natural_image
Close-up of a hand using a tool to adjust or install a mechanical component, no visible text or symbols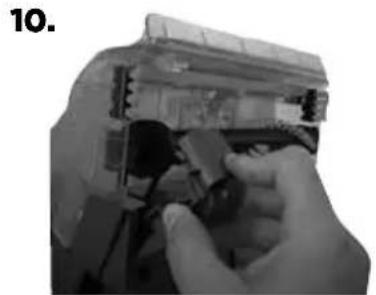
natural_image
Close-up of hands installing or adjusting a mechanical component (no visible text or symbols)Troubleshooting
WARNING
To reduce the risk of electric shock, turn power switch off and disconnect plug from electrical outlet before performing maintenance or troubleshooting checks.
| Problem Possible causes Remedies | ||
| Reduced spray OR no spray | Solution tank empty Refill tank with clogged | water and formula |
| Lint screen on solution tank cap | Soak solution tank cap in warm water and then rinse under running water | |
| Spray Nozzle Clogged Clean Spray | nozzle by rinsing under water | |
| Upper handle is not in the upright and locked position | Rotate the retractable handle lock, pull handle up and return the handle lock to the locked position. | |
| Deep cleaner not picking up cleaning solution | Collection tank not aligned/secured | Check tank alignment and secure with side latches |
| Collection tank full Empty tank | ||
| Removable nozzle installed improperly | Unplug unit. Align two "hooks" into bottom first, then snap into place on top | |
| Removable nozzle full of debris Unplug unit. Remove nozzle and rinse under running water | ||
| Red lint screen under collection tank clogged | Remove debris from lint screen | |
Please do not return this product to the store.
Other maintenance or service not included in the manual should be performed by an authorized service representative.
Thank you for selecting a BISSELL product.
For any questions or concerns, BISSELL is happy to be of service. Contact us directly at 1-800-237-7691.
Replacement Parts
These items are available for your BISSELL deep cleaner. Call 1-800-237-7691 or visit www.BISSELL.com
| PART # PART NAME PART # PART NAME | |||||
| 203-5661 | Solution Tank (Includes Cap and Insert Assembly) |  | 203-5695 | Collection Tank |  |
| 203-5546 | DirtLifter® PowerBrush (47B2 & 20R7 series) |  | 203-5545 | Cross Action Brush (40N7 & 40H5 series) |  |
| 203-5679 Nozzle | 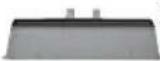 | 203-5549 Belt |  | ||
| 203-5541 | Solution tank cap & insert |  | |||
*Not all parts are included with every model.
Accessories
These items are available for your BISSELL deep cleaner. Call 1-800-237-7691 or visit www.BISSELL.com
| PART # | PART NAME | PART # | PART NAME | ||||
| 203-5683 | Hard | Floor Tool, provided with trial size Hard Floor SolutionsTM formula |  | 62E5-2 2X Deep Clean & Protect Formula with ScotchgardTM Protection 60 oz. | 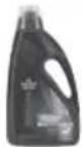 | ||
| 99K5-2 2X Pet | Stain and Odor Formula with ScotchgardTM Protection 60 oz. | 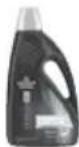 | 89Q5-2 2X Allergen Cleansing Formula 60 oz. |  | |||
| 78H6-3 2X Professional | Deep Cleaning Formula with ScotchgardTM Protection 48 oz. | [57wz] | 3156 BISSELL Deep Clean + Oxy |  | |||
| 0790 | Pet Stain PreTreat 22 oz. | 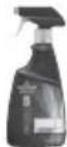 | 4001 | Stain PreTreat 22 oz. |  | ||
*Not all parts are included with every model.
Warranty Service
This warranty gives you specific legal rights, and you may also have other rights which may vary from state to state. If you need additional instruction regarding this warranty or have questions regarding what it may cover, please contact BISSELL Consumer Care by E-mail, telephone, or regular mail as described below.
Limited One-Year Warranty
Subject to the *EXCEPTIONS AND EXCLUSIONS identified below, upon receipt of the product BISSELL will repair or replace (with new or remanufactured components or products), at BISSELL's option, free of charge from the date of purchase by the original purchaser, for one year any defective or malfunctioning part.
See information below on "If your BISSELL product should require service".
This warranty applies to product used for personal, and not commercial or rental service. This warranty does not apply to fans or routine maintenance components such as filters, belts, or brushes. Damage or malfunction caused by negligence, abuse, neglect, unauthorized repair, or any other use not in accordance with the User's Guide is not covered.
BISSELL IS NOT LIABLE FOR INCIDENTAL OR CONSEQUENTIAL DAMAGES OF ANY NATURE ASSOCIATED WITH THE USE OF THIS PRODUCT. BISSELL'S LIABILITY WILL NOT EXCEED THE PURCHASE PRICE OF THE PRODUCT.
Some states do not allow the exclusion or limitation of incidental or consequential damages, so the above limitation or exclusion may not apply to you.
\*EXCEPTIONS AND EXCLUSIONS FROM THE TERMS OF THE LIMITED WARRANTY
THIS WARRANTY IS EXCLUSIVE AND IN LIEU OF ANY OTHER WARRANTIES EITHER ORAL OR WRITTEN. ANY IMPLIED WARRANTIES WHICH MAY ARISE BY OPERATION OF LAW, INCLUDING THE IMPLIED WARRANTIES OF MERCHANTABILITY AND FITNESS FOR A PARTICULAR PURPOSE, ARE LIMITED TO THE ONE YEAR DURATION FROM THE DATE OF PURCHASE AS DESCRIBED ABOVE.
Some states do not allow limitations on how long an implied warranty last so the above limitation may not apply to you.
NOTE: Please keep your original sales receipt. It provides proof of date of purchase in the event of a warranty claim.
If your BISSELL product should require service:
Contact BISSELL Consumer Care to locate a BISSELL Authorized Service Center in your area.
If you need information about repairs or replacement parts, or if you have questions about your warranty, contact BISSELL Consumer Care.
Website or E-mail:
www.BISSELL.com
Or Call:
BISSELL Consumer Care
1-800-237-7691
Monday - Friday 8am - 10pm ET
Saturday 9am - 8pm ET
Sunday 10am - 7pm ET
Or Write:
BISSELL Homecare, Inc.
PO Box 3606
Grand Rapids, MI 49501
ATTN: Consumer Care
Register your product today!
Registering is quick, easy and offers you benefits over the lifetime of your product.
You'll receive:
BISSELL Rewards Points
Automatically earn points for discounts and free shipping on future purchases.
Faster Service
Supplying your information now saves you time should you need to contact us with questions regarding your product.
Product Support Reminders and Alerts
We'll contact you with any important product maintenance reminders and alerts.
Special Promotions
Optional: Register your email to receive notice of offers, contests, cleaning tips and more!
Visit www.BISSELL.com/registration now!
BISSELL Consumer Care
For information about repairs or replacement parts, or questions about your warranty:
Call:
BISSELL Consumer Care 1-800-237-7691
Monday - Friday 8 am - 10 pm ET Saturday 9 am - 8 pm ET Sunday 10am - 7pm ET
Write:
BISSELL Homecare, Inc. PO Box 3606 Grand Rapids MI 49501 ATTN: Consumer Care
Visit the BISSELL website: www.BISSELL.com
When contacting BISSELL, have model number of cleaner available.
Please record your Model Number: ____
Please record your Purchase Date: ____
NOTE: Please keep your original sales receipt. It provides proof of purchase date in the event of a warranty claim. See Warranty on page 11 for details.
We can't wait to hear from you!
Rate this product and let us (and millions of your closest friends) know what you think!
www.BISSELL.com

©2014 BISSELL Homecare, Inc
Grand Rapids, Michigan
All rights reserved. Printed in China
Part Number 160-3744 Rev 03/14
Visit our website at: www.BISSELL.com
Scotchgard is a trademark of 3M
Bissell®
Guía Del Usario READYCLLEAN®

natural_image
Exterior view of a Bissell cleaning vacuum cleaner (no signage or text visible on body)SERIE 47B2, 20R7, 40H5, 40N7
InStRUcclonES ImpoRtantES DE SEGURIDaD
Thanks for buying a BISSELL deep cleaner
natural_image
Close-up of a hand holding a cylindrical object with an arrow pointing to it, no visible text or symbols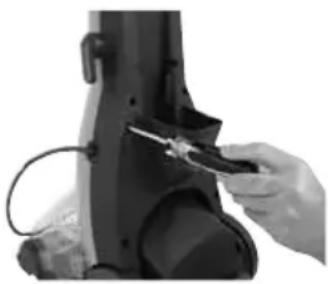
natural_image
Close-up of a hand using a power tool to adjust or install a mechanical component (no visible text or symbols)

natural_image
Close-up of a hand pressing down on a mechanical device component (no visible text or symbols)Antes de limpiar
» Deep cleaning carpeting regularly can reduce dust and allergens in your home.
Operaciones
Llene el tanque
natural_image
Close-up of a hand pressing down on a mechanical component with an upward arrow (no text or symbols visible)
natural_image
Close-up of a plastic bottle with an arrow pointing to it, no visible text or symbols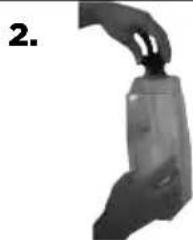
natural_image
Hand holding a plastic bag with a handle, no visible text or symbols
natural_image
Close-up of a hand pressing down on a mechanical component (no visible text or symbols)natural_image
Two hands operating a fire extinguisher, showing the lever and handle (no text or symbols visible)
natural_image
Close-up of a transparent mechanical assembly with internal components (no visible text or symbols)2b.

natural_image
Close-up of a mechanical device with a transparent cover and a black arrow pointing to it, labeled '2b.' (no readable text or symbols on the device itself)Operaciones
natural_image
Two-step black-and-white photo showing a hand holding a tool near a metallic object, with no visible text or symbols.
6.7.
natural_image
Mechanical assembly diagram showing a component being rotated and then tilted (no text or symbols visible)natural_image
Close-up of a hand using a tool to adjust or install electronic components (no visible text or symbols)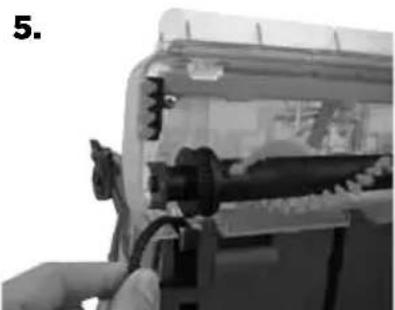
natural_image
Close-up of a hand inserting a cable into a device casing (no visible text or symbols)
natural_image
Close-up of hands assembling electronic components (no visible text or symbols)*Not all parts are included with every model.
Accesorios
Grand Rapids, MI 49501
Grand Rapids, Michigan
- READYCLEAN® USER GUIDE
- ImpoRtant SafEty InStRUctlonS
- REaD all InStRUctlonS bEfoRE USInG yoUR DEEp cIEanER.
- ⚠️ WaRnInG
- TO REDUCE THE RISK OF FIRE, ELECTRIC SHOCK, OR INJURY:
- SaVE tHESE InSTRUctlonS foR fUtURE USE
- GRoUnDInG InStRUctlonS
- Thanks for buying a BISSELL deep cleaner
- Product View
- Cleaning fluid
- WARNING
- Assembly
- Operations
- Before you clean
- Tip
- Fill the tank
- Caution: Do not microwave or boil water before filling.
- Carpet cleaning
- NOTE: Handle must be in the full upright position before cleaning.
- Empty the collection tank
- Hard floor cleaning (select models only)
- Cleaning after use
- NOTE: For best results, it is recommended that the nozzle is cleaned after each use.
- Maintenance & Care
- Machine storage
- CAUTION
- Install the replacement brush belt - (For Model 47B2 and 20R7 Series only)
- Troubleshooting
- Replacement Parts
- Accessories
- Warranty Service
- Limited One-Year Warranty
- \*EXCEPTIONS AND EXCLUSIONS FROM THE TERMS OF THE LIMITED WARRANTY
- If your BISSELL product should require service:
- Website or E-mail:
- Or Call:
- Or Write:
- Register your product today!
- BISSELL Rewards Points
- Faster Service
- Product Support Reminders and Alerts
- Special Promotions
- Visit www.BISSELL.com/registration now!
- BISSELL Consumer Care
- Call:
- Write:
- Visit the BISSELL website: www.BISSELL.com
- Bissell®
- Guía Del Usario READYCLLEAN®
- InStRUcclonES ImpoRtantES DE SEGURIDaD
- Antes de limpiar
- Operaciones
- Llene el tanque
- Accesorios
Brand : BISSELL
Model : ReadyClean 47B2
Category : Vacuum Cleaner