
SWRTY-61C - Car audio accessory CRUX - Free user manual and instructions
Find the device manual for free SWRTY-61C CRUX in PDF.


| Product Type | Car Electronics Accessory |
| Model | SWRTY-61C |
| Brand | CRUX |
| Dimensions (L x W x H) | 4.7 x 2.8 x 1.2 inches (120 x 72 x 30 mm) |
| Weight | 0.35 lbs (160 g) |
| Power Supply | 12V DC (vehicle battery) |
| Power Consumption | 0.5W (standby) / 2W (active) |
| Operating Temperature | -20°C to 60°C (-4°F to 140°F) |
| Connectivity | RCA composite video output, 4-pin power/trigger harness |
| Video Format | NTSC / PAL (auto-switching) |
| Resolution | 720 x 480 (NTSC) / 720 x 576 (PAL) |
| Field of View | 120° diagonal |
| Night Vision | Built-in IR LEDs for low-light operation |
| IP Rating | IP67 (dust and water resistant) |
| Mounting Type | Flush mount or bracket mount (included) |
| Warranty | 1-year limited warranty |
| Certifications | FCC, CE, RoHS |
| Package Contents | Camera unit, 6m RCA cable, power harness, mounting hardware, manual |
| Maintenance | Clean lens with soft, dry cloth; avoid abrasive cleaners |
| Safety | Do not install where it obstructs driver visibility; follow local laws |
Frequently Asked Questions - SWRTY-61C CRUX
User questions about SWRTY-61C CRUX
0 question about this device. Answer the ones you know or ask your own.
Ask a new question about this device
Download the instructions for your Car audio accessory in PDF format for free! Find your manual SWRTY-61C - CRUX and take your electronic device back in hand. On this page are published all the documents necessary for the use of your device. SWRTY-61C by CRUX.
USER MANUAL SWRTY-61C CRUX
- Retains factory features in select Toyota vehicles while functioning with an aftermarket radio.
- Pre-programmed to retain factory Steering Wheel Controls.
- Retains the factory amplifier (non JBL). For vehicles with factory JBL amplifier use part# SWRTY-61P.
- Retains factory back-up camera.
- Retains factory Auxiliary Audio Input.
- Includes factory USB retention adapter cable.
- Includes antenna adapter.
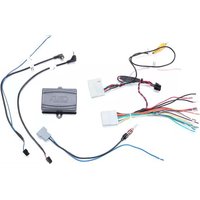
PARTS INCLUDED:


natural_image
Coiled black and white electrical connector with wires (no visible text or symbols)
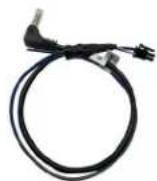

SWRTY-61C Module TY-61C Harness Speaker Harness SWC Cable USB Adapter
INSTALLATION DIAGRAM:

flowchart
graph TD
    A["USB Retention Adaptor (included in kit)"] --> B["Aftermarket Radio"]
    C["TO FACTORY HARNESS"] --> D["28 PIN"]
    C --> E["30 PIN"]
    D --> F["Antenna Adaptor Induced in Kit"]
    E --> G["Blue / Antenna Turn On"]
    F --> H["To aftermarket radio Remote Turn On wire (Blue or Blue/White wire)"]
    G --> I["12-Pin Black Connector"]
    H --> J["Yellow RCA Returns Of Camera Rear View Camera Signal Output"]
    I --> K["4-Pin Connector"]
    J --> L["3.5MM SWC Cable Plug in the 3.5MM SWC cable to the 4-pin port on the module. See below for DIP switch settings. Cap or insulate if not being used"]
    K --> M["4-Pin Connector"]
    L --> N["To aftermarket radio SWC wire or 3.5mm port Insulate with tape if not being used"]
    M --> O["TO FACTORY HARNESS"]
    N --> P["TO aftermarket radio SECS (See Chart)"]
    O --> Q["TOYOTA SWC SETTING (OFF ON OFF ON)"]
    P --> R["ON RADIO VEHICLE"]
    Q --> S["ON RADIO VEHICLE"]
INSTALLATION INSTRUCTIONS:
- Connect the SWRTY-61C T-harness to the aftermarket radio harness. Refer to the diagram on page 1 for wire color codes.
natural_image
Interior view of a car dashboard and infotainment system (no visible text or symbols)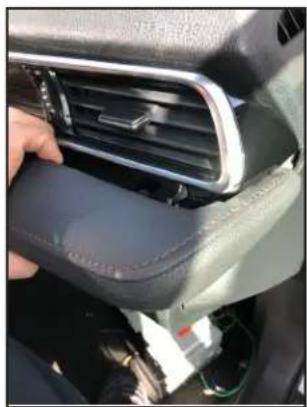
natural_image
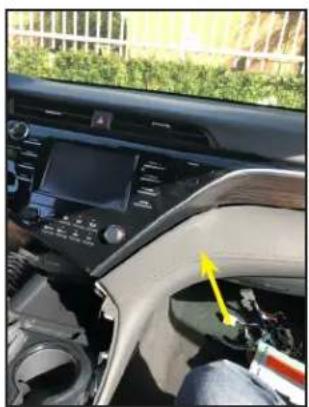
Close-up of a car interior showing the backrest door and seat area, with no visible text or symbols.- Remove the padded trim above the glove compartment.

natural_image
Interior view of a car dashboard and infotainment system (no visible text or symbols)- Carefully pull out the trim under the radio.
natural_image
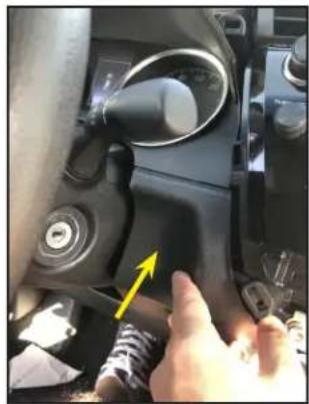
Close-up of a hand adjusting a mechanical component with a yellow arrow pointing to a component (no visible text or symbols)- Remove the small trim next to the shifter.

natural_image
Person adjusting a car dashboard with a touchscreen display (no visible text or symbols)- Remove the AC control panel below the radio.

natural_image
Close-up of a mechanical assembly with visible wiring and components (no text or symbols)- Unplug the connector behind the AC control panel.

natural_image
Close-up of a hand inserting wires into a device component (no visible text or symbols)- Pull out the radio and unplug the connectors.

natural_image
Close-up of a hand inserting wires to an automotive electrical panel (no visible text or symbols)- Mate the factory radio connectors to the SWRTY-61C T-harness. Test for functionality then install the aftermarket radio.
DIP SWITCH SETTINGS:
AFTERMARKET RADIO DIP SWITCH SETTINGS:
| RADIO BRAND: | DIP: | 1 | 2 | 3 | 4 | |||
| Atoto, Dual, Farenheit, Jensen, Pioneer Power Acoustik, Soundstream Blaupunkt, Most off-brand Radios Alpine Clarion Kenwood JVC Boss, Old Sony New Sony | OFF OFF OFF OFF OFF OFF OFF OFF OFF OFF OFF OFF | OFF OFF OFF OFF OFF OFF OFF ON OFF ON ON OFF ON OFF ON OFF | OFF OFF OFF OFF OFF ON ON ON ON ON ON ON ON OFF ON ON OFF | ON ON ON ON ON ON ON ON ON ON ON ON ON ON ON ON ON ON ON ON ON ON ON ON ON ON ON ON ON ON ON ON ON ON ON ON ON ON ON ON ON ON ON ON ON ON ON ON ON ON ON ON ON ON ON ON ON ON ON ON ON ON ON ON ON ON ON ON ON ON ON ON ON ON ON ON ON ON ON ON ON ON ON ON ON ON ON ON ON ON ON ON ON ON ON ON ON ON ON ON ON On On On On On On On On On On On On On On On On On On On On On On On On On On On On On On On On On On On On On On On On On On On On On On On On On On On On On On On On On On On On On On On On On On On On On On On On On On On On On On On On On On On On On On On On On On On On On On On On On On On On on on on on on on on on on on on on on on on on on on on on on on on on on on on on on on on on on on on on on on on on on on on on on on on on on on on on on on on on on on on on on on on on on on on on on on on on on on on on on on on on on on on on on on on on on on on on on on on on on on on on one or more. | ||||
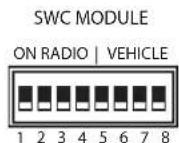
NOTE: For Atoto, Blaupunkt, Dual, Farenheit, Power Acoustik, Soundstream, and most off-brand radios, check the aftermarket radio's manual to see if the SWC buttons need to be programmed.
TOYOTA STEERING WHEEL CONTROL DIP SWITCH SETTING:
| DIP: 5 | 6 | 7 | 8 | |
| Toyota | OFF ON | OFF | ON |

3.5MM SWC CABLE
Plug in the 3.5MM to 4-Pin SWC cable to the SWC module.
NOTE: Insulate the Blue/Yellow wire or 3.5mm plug if not being used.
For aftermarket radios that have wires for SWC connections, cut off the 3.5mm plug on the Crux SWC Cable and connect the SWC wires as follows:

natural_image
Pure electrical circuit lines without any symbolsRED to SWC Key 1 WHITE to SWC Key 2 SHIELD to SWC Ground
Note that there are some radios that only have SWC1 and SWC2, in this case "shield" does not need to be connected.
VEHICLE APPLICATIONS:
Toyota
NOTE: For non amplified and amplified (non JBL) vehicles.
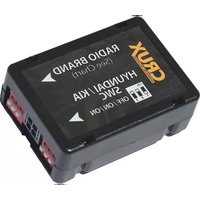


Brand : CRUX
Model : SWRTY-61C
Category : Car audio accessory