
SWRTY-61N - Car audio accessory CRUX - Free user manual and instructions
Find the device manual for free SWRTY-61N CRUX in PDF.


| Product Type | Car Stereo Receiver |
| Dimensions (W x H x D) | 7.0 x 4.0 x 4.0 inches (178 x 102 x 102 mm) |
| Weight | 2.2 lbs (1.0 kg) |
| Power Supply | 12V DC (negative ground) |
| Maximum Power Output | 4 x 50 Watts |
| Bluetooth | Built-in for hands-free calling and audio streaming |
| USB Port | Front USB for MP3/WMA playback and device charging |
| Radio Bands | FM/AM with 30 presets |
| Display | LCD with white backlight |
| Audio Inputs | AUX input (3.5mm) on front panel |
| Steering Wheel Control Compatible | Yes (requires adapter) |
| Installation Size | DIN (single) |
| Operating Temperature | 14°F to 140°F (-10°C to 60°C) |
| Cleaning | Wipe with soft, dry cloth. Avoid solvents. |
| Safety Features | Removable faceplate for theft prevention |
| Spare Parts | Contact manufacturer or authorized dealers |
| Repairability | Limited user-serviceable parts; refer to service center |
| Warranty | 1 year limited warranty |
Frequently Asked Questions - SWRTY-61N CRUX
User questions about SWRTY-61N CRUX
0 question about this device. Answer the ones you know or ask your own.
Ask a new question about this device
Download the instructions for your Car audio accessory in PDF format for free! Find your manual SWRTY-61N - CRUX and take your electronic device back in hand. On this page are published all the documents necessary for the use of your device. SWRTY-61N by CRUX.
USER MANUAL SWRTY-61N CRUX
- Retains factory features in select Toyota vehicles while functioning with an aftermarket radio.
- Pre-programmed to retain factory Steering Wheel Controls.
- iPhone Voice Recognition (VR) feature from SWC on select radios.
- Retains OEM Rear View Camera.
- Retains factory USB and auxiliary audio input (aftermarket radio must have these features).
- Includes factory USB retention adapter cable.
- Supports BT-HF/A2DP/AVRCP profile on select aftermarket radio models.
- Supports Pick Up/End Call, Pick up and Toggle between 1st and 2nd incoming call, AVRCP Track, Seek.
- EIA color coded wiring for easy installation.
PARTS INCLUDED:

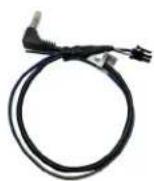
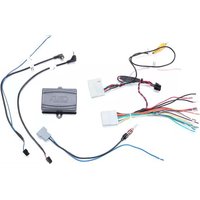
SWRTY-61N MODULE SWRTY-61N HARNESS SWC CABLE

natural_image
Two electronic components: a black cable with wires and connectors, and a black-and-white electrical plug with wires (no visible text or symbols)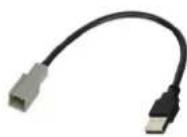
USB Retention Cable
INSTALLATION DIAGRAM:
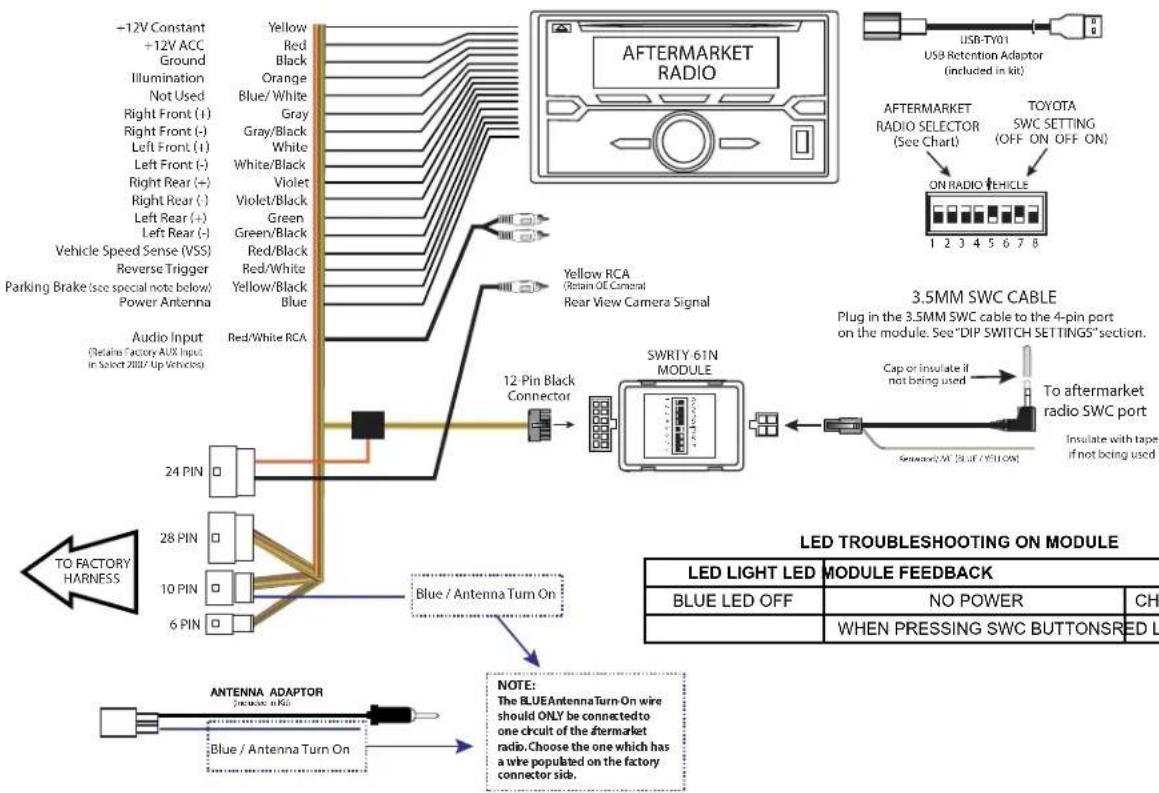
flowchart
graph TD
    A["LED LIGHT LED MODULE FEEDBACK"] --> B["BLUE LED OFF"]
    B --> C["WHEN PRESSING SWC BUTTONSRED L"]
    D["LED TROUBLESHOOTING ON MODULE"] --> E["To aftermarket radio SWC port"]
    E --> F["Insulate with tape if not being used"]
    G["3.5MM SWC CABLE Plug in the 3.5MM SWC cable to the 4-pin port on the module. See "DIP SWITCH SETTINGS" section."] --> H["Cap or insulate if not being used"]
    I["12 Pin Black Connector"] --> J["SWRTY-61N MODULE"]
    J --> K["Blue / Antenna Turn On"]
    L["Yellow RCA (Return Off Camera) Rear View Camera Signal"] --> M["Red/White RCA"]
    N["Audio Input (Retain Factory AUX Input in Select 2007 Up Vehicles)"] --> O["24 PIN"]
    P["TO FACTORY HARNESS"] --> Q["28 PIN"]
    R["Antenna Adaptor (includes in KG)"] --> S["Blue / Antenna Turn On"]
    T["-12V Constant"] --> U["Yellow"]
    T --> V["Red"]
    T --> W["Black"]
    T --> X["Orange"]
    T --> Y["Blue/White"]
    T --> Z["Gray"]
    T --> AA["Gray/Black"]
    T --> AB["White"]
    T --> AC["White/Black"]
    T --> AD["Violet"]
    T --> AE["Violet/Black"]
    T --> AF["Green"]
    T --> AG["Green/Black"]
    T --> AH["Red/White"]
    T --> AI["Red/White"]
    T --> AJ["Yellow/Black"]
    T --> AK["Blue"]
    style A fill:#f9f,stroke:#333
    style B fill:#ccf,stroke:#333
    style C fill:#cfc,stroke:#333
    style D fill:#fcc,stroke:#333
    style E fill:#ffc,stroke:#333
    style F fill:#fcc,stroke:#333
    style G fill:#fcc,stroke:#333
    style H fill:#fcc,stroke:#333
    style I fill:#fcc,stroke:#333
    style J fill:#cff,stroke:#333
    style K fill:#fcc,stroke:#333
    style L fill:#fcc,stroke:#333
    style M fill:#fcc,stroke:#333
    style N fill:#fcc,stroke:#333
    style O fill:#fcc,stroke:#333
    style P fill:#fcc,stroke:#333
    style Q fill:#fcc,stroke:#333
    style R fill:#fcc,stroke:#333
    style S fill:#fcc,stroke:#333
    style T fill:#fcc,stroke:#333
    style U fill:#ccf,stroke:#333
    style V fill:#ccf,stroke:#333
    style W fill:#ccf,stroke:#333
    style X fill:#ccf,stroke:#333
    style Y fill:#ccf,stroke:#333
    style Z fill:#ccf,stroke:#333
    style AA fill:#ccf,stroke:#333
    style AB fill:#ccf,stroke:#333
    style AC fill:#ccf,stroke:#333
    style AD fill:#ccf,stroke:#333
    style AE fill:#ccf,stroke:#333
    style AF fill:#ccf,stroke:#333
    style AG fill:#ccf,stroke:#333
    style AH fill:#ccf,stroke:#333
    style AI fill:#ccf,stroke:#333
LED TROUBLESHOOTING ON MODULE
| LED LIGHT LED | MODULE FEEDBACK | |
| BLUE LED OFF | NO POWER | CHECK VOLTAGE |
| WHEN PRESSING SWC BUTTONSRED LED FLASHES | ||
\*\* SPECIAL NOTE:
On 2013 Toyota Sequoia and Tundra, the parking brake wire (RED wire) is in position#1 on the OEM 28-pin connector. Please insert the YELLOW/BLACK wire on the SWRTY-61N harness into position#1. For all other models, please insert into position# 15. Please check that you are inserting the pin into the correct location as it is difficult to remove it again. The locking tab of the pin should be facing UP when it is inserted into the connector.

DIP SWITCH SETTINGS:
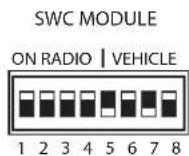
AFTERMARKET RADIO DIP SWITCH SETTINGS:
| RADIO BRAND: | DIP: | 1 | 2 | 3 | 4 | |||
| Atoto, Dual, Farenheit, Jensen, Pioneer Power Acoustik, Soundstream Blaupunkt, Most off-brand Radios Alpine Clarion Kenwood JVC Boss, Old Sony New Sony | OFF OFF OFF OFF OFF OFF OFF OFF OFF OFF OFF | OFF OFF OFF OFF OFF OFF ON OFF ON ON ON OFF ON OFF ON OFF | OFF OFF OFF OFF OFF ON ON ON ON ON ON ON ON OFF ON ON OFF | ON ON ON ON ON ON ON ON ON ON ON ON ON ON ON ON ON ON ON ON ON ON ON ON ON ON ON ON ON ON ON ON ON ON ON ON ON ON ON ON ON ON ON ON ON ON ON ON ON ON ON ON ON ON ON ON ON ON ON ON ON ON ON ON ON ON ON ON ON ON ON ON ON ON ON ON ON ON ON ON ON ON ON ON ON ON ON ON ON ON ON ON ON ON ON ON ON ON ON ON ON On On On On On On On On On On On On On On On On On On On On On On On On On On On On On On On On On On On On On On On On On On On On On On On On On On On On On On On On On On On On On On On On On On On On On On On On On On On On On On On On On On On On On On On On On On On On On On On On On On On On on on on on on on on on on on on on on on on on on on on on on on on on on on on on on on on on on on on on on on on on on on on on on on on on on on on on on on on on on on on on on on on on on on on on on on on on on on on on on on on on on on on on on on on on on on on on on on on on on on on on one or more. | ||||

NOTE: For Atoto, Blaupunkt, Dual, Farenheit, Power Acoustik, Soundstream, and most off-brand radios, check the aftermarket radio's manual to see if the SWC buttons need to be programmed.
SWC Troubleshoot option
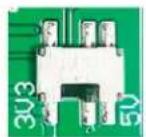
Located internally Need to take plastic Casing off module
- If Steering Wheel Controls don't work or work properly please switch internal dip switch from 3v3 to 5v as shown in picture above.
TOYOTA STEERING WHEEL CONTROL DIP SWITCH SETTING:
| DIP: | 5 | 6 | 7 | 8 | |
| Toyota | OFF | ON | OFF | ON | |
3.5MM SWC CABLE
Plug in the 3.5MM to 4-Pin SWC cable to the SWC module and to the SWC port of the aftermarket radio. Use the Blue/Yellow wire for Kenwood/JVC radios.
NOTE: Insulate the Blue/Yellow wire or the 3.5mm plug if not being used.
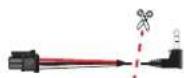
For aftermarket radios that have wires for SWC connections, cut off the 3.5mm plug on the Crux SWC Cable and connect the SWC wires as follows:

natural_image
Pure electrical circuit lines without any symbolsRED to SWC Key 1 WHITE to SWC Key 2 SHIELD to SWC Ground
Note that there are some radios that only have SWC1 and SWC2, in this case "shield" does not need to be connected.
24 TO 16 PIN ADAPTER:
Some vehicles do not have the 24-Pin Video Input connector. Instead, they have a 16-Pin connector that controls the video input for the camera. Use the optional adaptor and connect to the T-harness to convert the harness to work with the 16-Pin connector style.
TO SWC HARNESS

(Use instead of Yellow/Black Wire on Main Harness)
VEHICLE APPLICATIONS:
Note: Identify Alpine SWC learning radios by checking for three SWC cables and a SWC learn menu, instead of a 3.5mm SWC input.
If Interface has one SWR-100 Cable included If Interface has two SWR Cables included
1 - Find the included SWC adapter cable.
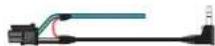
1 - Identify appropriate SWC adapter cable. Do not use cable with Blue / Yellow wire.

2 - Prepare the SWC Cable: Cut the SWC cable. You will find a red wire, a white wire, and a ground (shield) wire inside.

3 - Adjust the Module Settings: Set the module to the Pioneer dip switch setting. This configures the module to communicate correctly with the Alpine radio.
4 - Configure the Alpine Radio: On your Alpine radio, select the setting that includes an adapter for SWC. This ensures the radio will recognize the steering wheel controls.
5 - Connect the Wires: Connect both the SWC1 and SWC2 wires from aftermarket radio to the red wire from our SWC cable. Connect the SWC ground wire to the shield (ground) wire of our SWC cable. These steps should enable the steering wheel controls on your Alpine iLX series radio.


- Program the SWC: Navigate to the SWC settings on your Alpine radio to assign and test each control function.
VEHICLE APPLICATIONS:
SCION
| 2012 - 2016 | FRS |
| 2016 | iM |
| 2012 - 2013 | iQ |
| 2012 - 2016 | tC |
| 2012 - 2015 | xB |
| 2012 | xD |
TOYOTA
| 2012 - 2019 | 4Runner |
| 2012 - 2018 | Avalon |
| 2012 - 2017 | Camry |
| 2013 - 2019 | Corolla |
| 2013 - 2019 | Highlander* |
| 2012 | Matrix |
| 2012 - 2017 | Prius |
| 2012 - 2018 | RAV4 |
| 2012 - 2019 | Sequoia** |
| 2015 - 2017 | Sienna |
| 2013 - 2019 | Tacoma** |
| 2013 - 2019 | Tundra** |
| 2012 - 2016 | Venza |
* 2013-2017 Highlander vehicles without OEM Navigation radio will NOT retain the factory backup camera.
** See Special Note on page 2.
NOTES
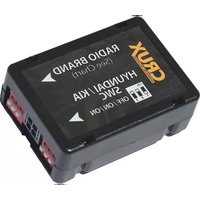


Brand : CRUX
Model : SWRTY-61N
Category : Car audio accessory