
TV-65UHD121T2S2 - Television Vivax - Free user manual and instructions
Find the device manual for free TV-65UHD121T2S2 Vivax in PDF.


| Product Type | Television |
| Brand | Vivax |
| Model | TV-65UHD121T2S2 |
| Screen Size | 65 inches |
| Resolution | 3840 x 2160 (4K UHD) |
| Refresh Rate | 60 Hz |
| Smart TV Platform | Yes (proprietary or Android TV, not specified) |
| HDR Support | HDR10, HLG |
| Connectivity | 3x HDMI, 2x USB, 1x LAN, Wi-Fi, Bluetooth |
| Audio Output Power | 20W (2x10W) |
| Power Supply | AC 100-240V, 50/60Hz |
| Power Consumption (Typical) | 150W |
| Standby Power Consumption | <0.5W |
| Dimensions with Stand (W x H x D) | 144.5 x 89.0 x 28.0 cm |
| Weight with Stand | 18.5 kg |
| VESA Mount Pattern | 400 x 200 mm |
| TV Tuner | DVB-T2/C/S2 |
| Energy Class | G (EU 2023) |
| Cleaning Instructions | Wipe with a soft, dry cloth. Do not use liquid cleaners. |
| Spare Parts Availability | Contact Vivax support or authorized service centers. |
| Repairability Index | 5.5/10 (estimated for similar models) |
Frequently Asked Questions - TV-65UHD121T2S2 Vivax
User questions about TV-65UHD121T2S2 Vivax
0 question about this device. Answer the ones you know or ask your own.
Ask a new question about this device
Download the instructions for your Television in PDF format for free! Find your manual TV-65UHD121T2S2 - Vivax and take your electronic device back in hand. On this page are published all the documents necessary for the use of your device. TV-65UHD121T2S2 by Vivax.
USER MANUAL TV-65UHD121T2S2 Vivax
Media player — Pristupite svojim muzičkim zapisima, slikama i video materijalima putem vašeg USB medija te ih pokrenite direktno na TV prijamniku.

Kontrolirajte sve funkcije pomoću jednog daljinskog upravljača. Priključite vaš televizor direktno na zemaljsku, ili kabelsku mrežu te uživajte u sadržajima u najvišoj kvaliteti.
Popis pribora uz uređaj
Prilikom otvaranja kutije i instalacije uređaja, provjerite da li ste uz vaš uređaj dobili sav potreban pribor:
- Korisnički priručnik s jamstvenom izjavom
- Daljinski upravljač
- Baterije x2
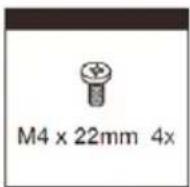
- Stalak i Vijci za stalak



Slike služe samo kao referenca i mogu se neznatno razlikovati od stvarnog proizvoda. Pri tome funkcionalnost ostaje ista.

Munja sa simbolom strelice unutar trokuta upozorava korisnika na prisutnosti opasnog neizoliranog napona unutar proizvoda, te koji može biti dovoljno jak da bi predstavljao rizik od strujnog udara ili ozljeda.

Uskličnik unutar trokuta upozorava korisnika o prisutnosti važnih uputa o rukovanju i održavanju u dokumentu priloženom u pakiranju.

OPREZ

RIZIK OD STRUJNOG UDARA NE OTVARAJTE UREĐAJ

Napomena: Zidni nosač nije dio pribora uz TV prijamnik. Ako vam je potreban zidni nosač, kontaktirajte svog prodavača za VESA standardni zidni nosač.
Prednja strana TV prijamnika

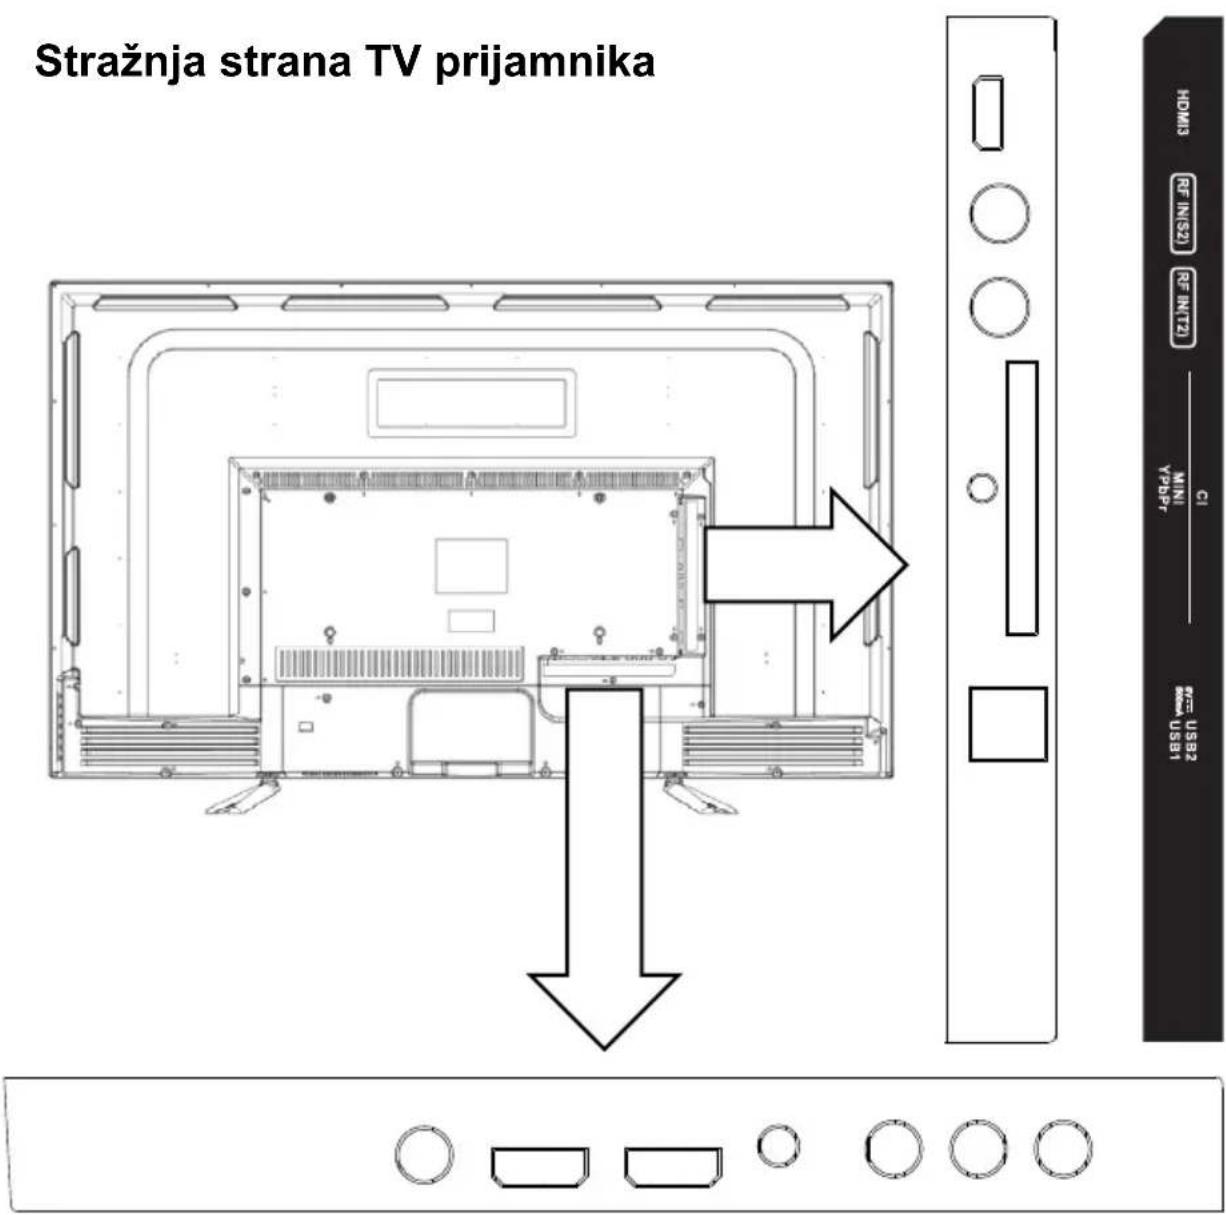

NAPOMENE
Slika je samo za informaciju. Vaš uređaj može se neznatno razlikovati od gornje slike.
Priključite USB uređaj kao što je USB memorija ili USB tvrdi disk ili digitalnu kameru za pregledavanje fotografija, slušanje glazbe ili gledanje video materijala. Ovaj ulaz koristi se i za nadogradnju software-a. Nadogradnja će se izvršiti automatski čim USB sa datotekama za nadogradnju bude umetnut u USB sučelje.
NAPOMENE
▶ DIGITAL COAX AUDIO OUT
Kablovi nisu uključeni u kompletu
▶ MINI AV
Kablovi nisu uključeni u kompletu
DALJINSKI UPRAVLJAČ

- POWER tipka: Pritisnite za uključenje/isključenje TV-a.
- MUTE tipka Prekriženog zvučnika: Kako biste ponovno uklj./isiklj. zvuk pritisnite tipku
- SLEEP tipka: Ugađanje vremena automatskog isključenja
- AUDIO tipka: Promjena načina emitiranja zvuka: desno, lijevo, mono, stereo.
- ASPECT tipka: Odabir veličine prikaza slike
- FREEZE tipka: Zamrzavanje trenutnog prikaza; Pritisnite tipku ponovno za povratak u normalni TV prikaz
- BROJEVNE (0-9) tipke: Pritiskom ovih tipki unose se brojevne znamenke. Direktno se biraju programi u ATV i DTV modu, te unose lozinke za roditeljsko zaključavanje
- -/-- tipka: Promjena unosa kanala kao jedna znamenka ili 2 znamenke
- tipka: Direktno vraćanje na prijašnji odabrani program
- FAV+ / FAV- tipka: Promjena programa prema gore ili dolje u FAV listi (listi omiljenih programa)
- FAV tipka: Dodavanje trenutnoh programa u FAV listu, ili brisanje programa iz FAV liste.
- CRVENA/ZELENA/ŽUTA/PLAVA/ tipka: Koristi se za Teletekst funkcije u TV modu rada za odabir funkcije u korespodentnoj boji prikazane unutar teleteksta.
- INFO tipka: Prikaz informacija o trenutnom statusu programa
- INPUT tipka: Odabir izvora
- ◀▶ tipke: Ugađanje vrijednosti u izborniku ili pomak selekcije lijevo/desno
- ▲ ▼ tipke: Pomak selekcije unutar izbornika ili prikaza dolje/gore
- OK tipka: Potvrda unosa
- MENU tipka: Ulaz u glavni izbornik ili povratak iz izbornika.
- EXIT tipka: Izlaz iz izbornika ili otkaz funkcije
- VOL ▲▼ tipke: Ugađanje zvuka
- CH ▲▼ tipke: Listanje programa
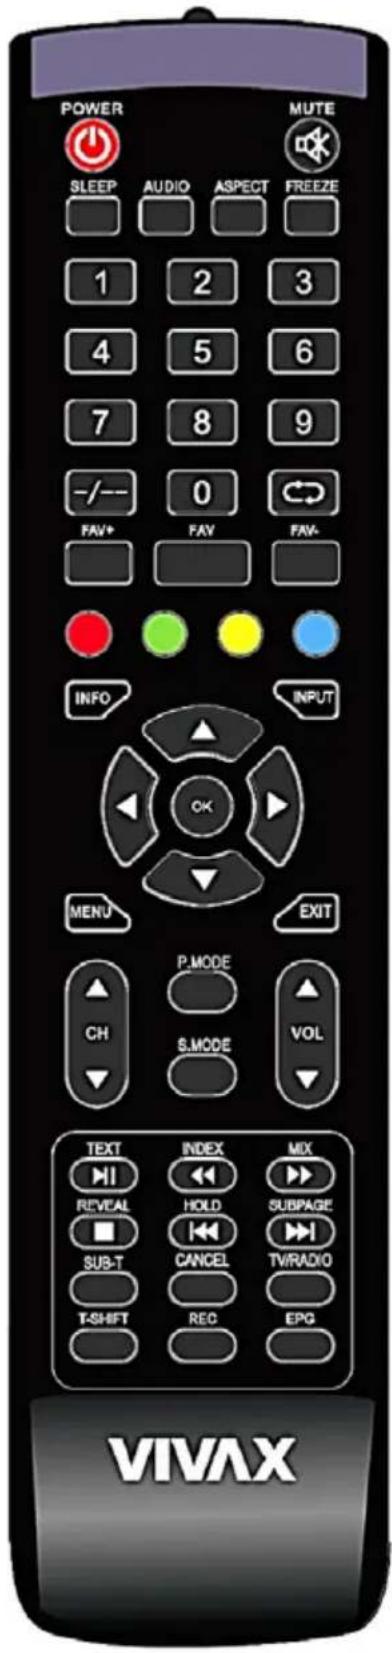
- PMODE tipka: Direktno biranje moda prikaza slike
- SMODE tipka: Direktno biranje moda reprodukcije zvuka
- TEXT tipka: Prikaz teleteksta na zaslonu (TV mod)
▶|| tipka: Reprodukcija / Pauza (USB mod)
- INDEX tipka: Prikaz početne stranice teleteksta (TXT mod)
◀◀ tipka: Pretraga zapisa unazad (USB mod) - MIX tipka: Miješanje TV i Teletekst slike (TXT mod)
▶▶ tipka: Pretraga zapisa unaprijed (USB mod) - REVEAL tipka: Prikaz skrivenih znakova (TXT mod)
■ tipka: zaustavljanje reprodukcije (USB mod)

NAPOMENE
Environment (Okolina)
Tuning Mode (Mod Prijama):
Možete postaviti: DTV (Digital Ch.), ATV (Analog Ch.) ili ATV+DTV.
Digital Type (Digital. tip): Vrsta Pretrage kanala.
Možete postaviti: DVB-T, DVB-C ili Satellite (Satelit DVB-S).

Scan Mode, Network ID, Frequency, Symbol (Mod pretrage, Mrežni ID, Frekv., Simboli:
Ovdje možete odabrati Modove pretrage i dodatne parametre vezane uz pretragu frekventnog pojasa.
Kadapokrenete automatsku pretragu, TV će pretražiti sve dostupne frekvencije, ovisno o vašim postavkama i prilagodbama u prethodnim izbornicima i pohraniti sve pronađene TV programe u memoriju.
Čestitamo, vaš TV je sada spreman za gledanje TV programa!
Ako ne želite pretragu kanala, možete odabrati opciju "Click here to conect a Game, Blue-Ray, DVD or other players (Pritisnite ovdje za povezivanje igre, Blu-ray, DVD ili drugih playera)" i tipku OK za ulaz u izbornik INPUT (SOURCE) za prikaz dostupnih vanjskih Audio/Video izvora.
Odabir ulaza (Input Source)
Standard mod slike, gdje onda ručno možete ugađati pojedine parametre slike kao što su kontrast, svjetlina, boja, oštrina i ton.
| Audio | |
| Sound Mode | Standard |
| Bass | 50 |
| Treble | 50 |
| Balance | 0 |
| SPDIF Mode | PCM |
| Surround Sound | Off |
| Auto Volume | Off |
| AD Switch | Off |
| AD Volume | 30 |
| Speaker Delay | 0 |
| SPDIF Delay | 0 |
| Adjust | Menu Return |
| Move | OK Select Exit Exit |
Surround Sound (Surround Zvuk)
Pritisnite tipku za ▼ / ▲ za odabir opcije Surround Audio effect (Surround Zvučnog efekta), tada pritisnite ◀ / ▶ za On (Uključenje) ili Off (Isključenje) efekta.
Auto Volume (Auto nivo zvuka)
Ova se funkcija automatski koristi za smanjenje razlike u jačini zvuka između različitih programa.
Pritisnite tipku▼ / ▲ za odabir Auto Volume Level (Auto nivo zvuka), tada pritisnite ◀ / ▶ za odabir On (Uklj.) ili Off (Isklj.).
AD Switch/AD Volume (AD Uključenje/AD Jačina)
Auto Scan (Auto Pretraga)
DVB-T Auto Scan (DVB-T Auto Pretraga)
Kako bi pokrenuli Automatsku pretragu kanala pritisnite tipku ▼ / ▲ za odabir Auto Scan (Auto Pretraga), tada pritisnite OK tipku za ulaz u Podizbornik.
Tuning Mode (Mod pretrage):
Možete odabrati: DTV (Digitalni kanali), ATV (Analogni kanali) ili ATV+DTV.
Country (Država):
Ovom opcijom odabirete zemlju ili regiju instalacije vašeg TV prijamnika.
Prema vašim ugođenim postavkama, TV će automatski prilagoditi parametre i standard za pretragu mreže.

LCN:
Scan Mode (Mod Pretrage):
Možete odabrati opcije: Network (preuzimaju se frekvencije pretrage iz mreže), BlindScan (pretražuju se sve frekvencije) i Default (uzimaju se frekvencije iz TV prijamnika.

Modulation / Symbol /
Network ID / Frequency (Modulacija / Simboli / Mrežni ID / Frekvencija): Ugađanje parametara pretrage DVB-C kanala. Ukoliko niste sigurni u postavke, ugodite vrijednosti na "Auto". Sistem će sam prilagoditi postavke potrebama vaše kablovske mreže.
DVB-S Auto Scan (DVB-S Auto pretraga)
U slučaju da ste odabrali DVB-S (Satelitsku) Auto Pretragu, slijedeće opcije biti će dostupne za ugađanje:
Satellite (Satelit):
Odabir Satelita za Auto pretragu.
Channel Type (Tip Kanala)
Možete odabrati: Free (FTA) (Slobodni), Scramble (Kodirani) ili Free + Scramble pretragu kanala.
Service Type (Vrsta Usluge)
Možete odabrati: DTV (Digitalni TV Prog.), Radio ili DTV + Radio pretragu kanala.

Scan Mode (Mod Pretrage)
Subtitle languages (Jezik Podnaslova)
Pritisnite tipku ◀ I ▶ za odabir opcije Subtitle Language (Jezik Podnaslova), tada pritisnite OK za ulazak u Podizbornik.
Pritisnite tipku ◀ / ▶ za odabir Subtitle Language (Jezik Podnaslova).
Audio Languages (Audio Jezik)
Pritisnite tipku ▼ / ▲ za odabir Audio Languages (Audio Jezik), tada pritisnite OK za ulazak u Podizbornik.
DLC (Dynamic Luminance Control)
Pritisnite tipku ▼ / ▲ za odabir opcije DLC, tada pritisnite ◀ / ▶ za ugađanje: Dark (Tamno) / Normal / Bright (Svjetlo) / Off (Isklj.).
PVR Option (PVR Opcije)
Pritisnite tipku ▼ / ▲ za odabir opcije PVR File System, tada pritisnite OK za ulazak u Podizbornik.
Pritisnite tipku ▼ / ▲ za odabir Check PVR File System, zatim pritisnite tipku OK z aulazak u Podizbornik. Sistem će sada provjeriti brzinu učitavanja podataka sa vašeg USB uređaja.
Home Mode (Kućni Mod)
Pritisnite tipku ◀ I ▶ i OK za izbor Home (Kućni Mod) ili Store mode (Mod Trgovine). Za standardnu kućnu uporabu postavite opciju na Home Mode (Kućni Mod).
Za prikaz i prezentaciju TV-a u trgovini odaberite Store Mode (Mod Trgovine),
Uređaj će prikazivati informativnu traku sa karakteristikama uređaja.
Restore Factory Default (Vraćanje na Tvornički Postav)
Pritisnite tipku ▼ / ▲ za odabir opcije Restore

Factory Default (Vraćanje na Tvornički postav), tada pritisnite OK za potvrdu Reseta postavki TV-a.
Time Zone (Vremenska Zona)
Pritisnite tipku ▼ / ▲ kako bi odabrali Time
Zone opciju, tada pritisnite tipku ◀ / ▶ za ugađanje vremenske zone gdje je vaš TV instaliran.
DST (Daylight Saving Time) (Ljetno Vrijeme)
Pritisnite tipku ▼ / ▲ za odabir opcije DST (Ljetno vrijeme), tada pritisnite ◀ / ▶ za Uključenje (On) ili Isključenje (Off) Ljetnog računanja vremena.
OSD Active Time (Vrijeme prikaza OSD-a)
Pritisnite tipku ▼ / ▲ za odabir opcije OSD Timer (Vremena prikaza OSD-a na zaslonu), tada pritisnite ◀ / ▶ za ugađanje.
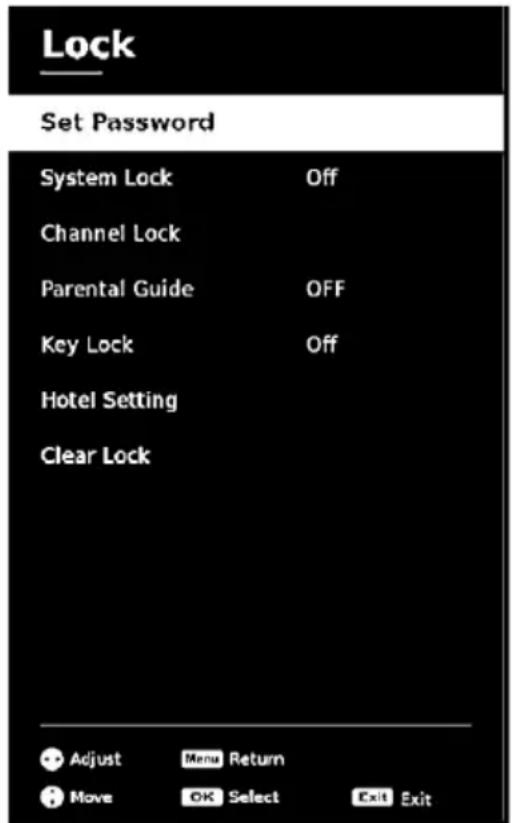
IZBORNIK LOCK (ZAKLJUČAVANJE)
Set Password (Promjena Lozinke)
Pritisnite tipku ▼ / ▲ za odabir Set Password (Promjena Lozinke), tada pritisnite OK ili ▶ za promjenu lozinke. Prvo unesite staru lozinku, nakon toga unesite novu lozinku dva puta za redom.
Molimo vas da zapamtite lozinku!
Ako zaboravite lozinku, obratite se servisnom centru.
System Lock (Sistemsko Zaključavanje)
Pritisnite Zelenu tipku za Zaključ. Ili Otključ. Programa.
Parentall Guide (Roditeljsko Zaključavanje)
Hotel Mode (Hotelski Mod)
Max Volume (Max Jačina)
Pritisnite ▼ / ▲ za odabir maksimalne jačine zvuka, tada pritisnite tipku ◀ / ▶ za ugađanje jačine.
CH Table Import/Export (Izvoz/Uvoz Liste Programa)
Pritisnite tipku ▼ / ▲ za odabir opcije CH Table Export/Import, kojom kopirate ili učitavate listu programa iz/u TV prijamnik.
Clear Lock (Očisti Zaključavanje)
Pritisnite tipku ▼ / ▲ za odabir opcije Clear Lock, tada pritisnite OK za reset svih Hotelskih postavki.
USB MEDIA OPERACIJE
Medija plejer - pristupite svojoj muzici, slikama I filmovima preko mreže ili USB medija I pokrenite ih na televizoru.
Sve radi pomoću jednog daljinskog upravljača. Spojite televizor na antenu, satelitsku antenu ili kablovsku mrežu I uživajte u sadržajima, u visokom kvalitetu.
Popis pribora uz uređaj
Prilikom otvaranja pakovanja I instalacije uređaja, proverite da li ste uz vaš uređaj dobili sav potreban pribor:

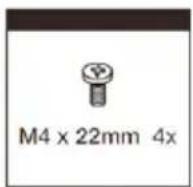
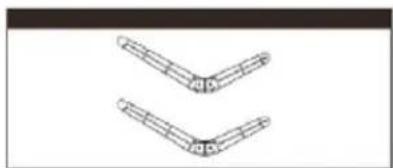
Slike služe samo kao referenca I mogu neznatno da se razlikuju od stvarnog proizvoda. Pri tom, funkcionalnost ostaje ista.

Munja u okviru trougla upozorava korisnika na prisustvo opasnog, neizolovanog napona unutar proizvoda, koji može da bude dovoljno jak da bi predstavljao rizik od strujnog udara I povreda.

Obratite pažnju na usmerenje nogica
Napomena: Zidni nosač nije deo pribora uz TV prijemnik.
Ako vam je potreban zidni nosač, kontaktirajte sa svojim prodavcem u vezi sa VESA standardnim zidnim nosačem.
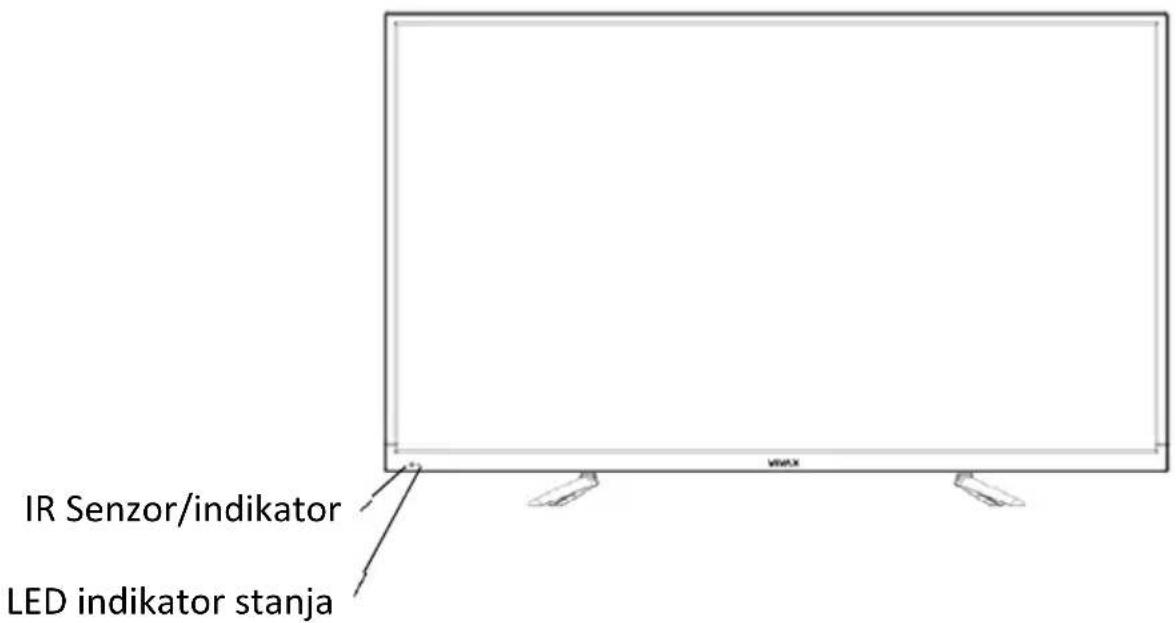
Prednja strana TV prijemnika
| Opis | ||
| 1 | IR senzor daljinskog upravljača | Prima signal iz daljinskog upravljača. Ne postavljajte nikakve prepreke između senzoraldaljinskog upravljača pošto to može da utiče na ispravan radlkontrolu uređaja daljinskim upravljačem. |
| 2 | Indikator stanja | Crveno svetlo svetli u modu čekanja. Plavo svetlo svetli kada je televizor uključen. |
NAPOMENE
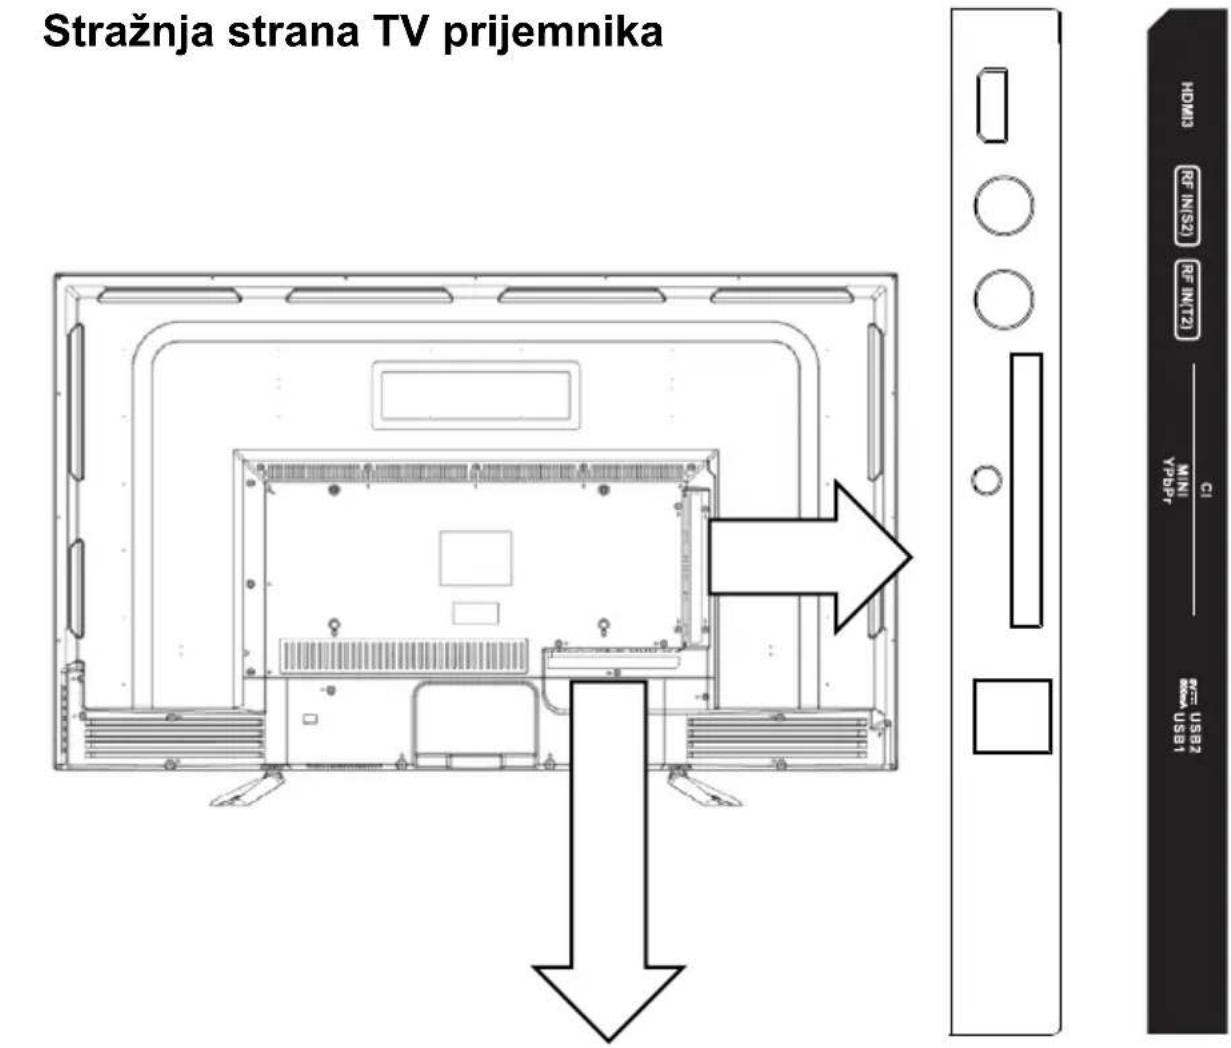


NAPOMENE
Spojite USB uređaj kao što je USB memorija ili USB tvrdi disk ilidigitalnu kameru za pregledavanje fotografija, slušanje muzike ili gledanje video materijala. Ovaj ulaz upotrebljava selza nadogradnju softvera. Nadogradnja će da se izvrši automatski čim USB sa datotekama za nadogradnju bude umetnut u USB ulaz.
NAPOMENE
- Pr ilikom spajanja hard diska ili USB memorije, uvek priključite adapter napajanja priključenog uređaja u izvor napajanja. Preopterećenje USB priključka može da dovede do oštećenja. Najveća dozvoljena potrošnja struje iznosi 500mA.
- TV prije mnik ne podržava samostalne, nestandardne hard diskove koji nemaju eksterno napajanje, ako je zahtevana struja jača ili jednaka 500mA. To može da dovede do oštećenja TV uređaja ili hard diska.
- USB ula z podržava napon od 5V.
- M aksimalna podržana veličina prostora za memorisanje je 1TB.
Ako želite da reprodukujete DTV video, brzina prenosa USB uređaja za memorisanje ne sme da bude manja od 5 MB/s.
▶ VGA - PC AUDIO IN
▶ DIGITAL COAX AUDIO OUT
Za reprodukciju TV audio sadržaja na spoljašnjem uređaju, priključite spoljašnji digitalni audio uređaj na digitalni optički izlaz TV uređaja. Pre spajanja digitalnog audio sistema na optički priključak trebali biste da smanjite jačinu zvuka TV uređajalaudio sistema da bi izbegli nenadano pojačanje zvuka.
TV DIGITAL AUDIO Audio pojačalo

▶ EARPHONE (SLUŠALICE)
Kablovi nisu uključeni u kompletu
DALJINSKI UPRAVLJAČ

- POWER taster: pritisnite za uključenje/isključenje TV-a.
- MUTE taster: kako biste ponovo uklj./isiklj. zvuk, pritisnite taster
- SLEEP taster: podešavanje vremena automatskog isključenja
-
AUDIO taster: promena načina emitovanja zvuka: desno, levo, mono, stereo.
-
ASPECT taster: izbor veličine prikaza slike
-
FREEZE taster: zamrzavanje trenutnog prikaza; Pritisnite taster ponovo za povratak u normalni TV prikaz
-
BROJČANI (0-9) tasteri: pritiskom ovih tastera unose se brojevi. Direktno se biraju programi u ATVIDTV modulunose lozinke za roditeljsko zaključavanje
-
-/-- taster: Promena unosa kanala kao jedna cifra ili 2 cifre
-
taster: direktno vraćanje na pređašnji izabrani program
-
FAV+/FAV- taster: promena programa prema gore ili dole u FAV listi (listi omiljenih programa)
-
FAV taster: dodavanje trenutnog programa u FAV listu ili brisanje programa iz FAV liste.
-
CRVENI/ZELENI/ŽUTI/PLAVI taster: upotrebljava se za teletekst funkcije u TV modu, za izbor funkcije u korespodentnoj boji prikazane unutar teleteksta.
-
INFO taster: prikaz informacija o trenutnom statusu programa
-
INPUT taster: izbor izvora
-
◀▶ tasteri: podešavanje vrednosti u meniju ili pomak selekcije levo/desno
-
▲▼ tasteri: pomak selekcije unutar menija ili prikaza dole/gore
-
OK taster: potvrda unosa
-
MENU taster: ulaz u glavni meni ili povratak iz menija.
-
EXIT taster: izlaz iz menija ili otkaz funkcije
-
VOL ▲▼ tasteri: podešavanje zvuka
-
CH ▲▼ tasteri: listanje programa
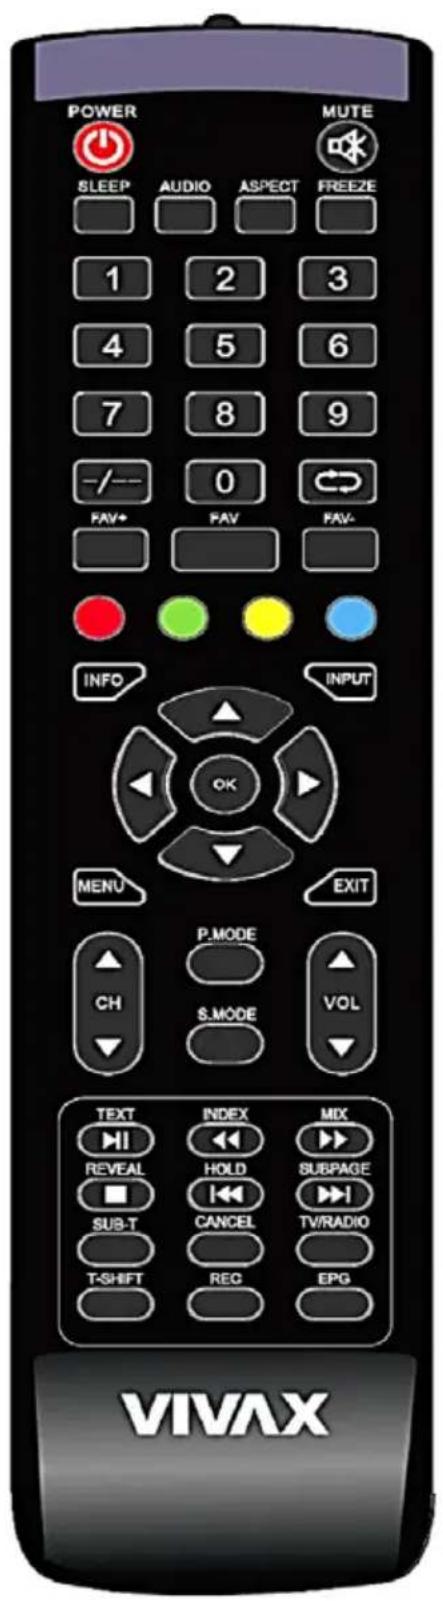
-
PMODE taster: direktno biranje načina prikaza slike
-
SMODE taster: direktno biranje načina reprodukcije zvuka
-
TEXT taster: prikaz teleteksta na ekranu (TV mod)
▶|| taster: reprodukcija/pauza (USB mod)
- INDEX taster: prikaz početne stranice teleteksta (TXT mod)
◀◀ taster: pretraga zapisa unazad (USB mod)
- MIX taster: mešanje TVIteletekst slike (TXT mod)
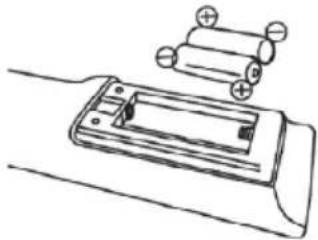
(2) Stavite baterije

NAPOMENE
- Slika proizvoda služi samo za informaciju, stvarni proizvod može da se razlikuje u izgledu.
- Stare baterije odložite na označeno mesto za odlaganje. Nemojte da bacate baterije u vatru.
- Ne mešajte tipove baterijalne kombinujte upotrebljene sa novim baterijama.
- Odmah zamenite prazne baterije da biste sprečili curenje kiseline u odeljak za baterije daljinskog upravljača.
- Ako ne planirate da koristite daljinski upravljač duže vreme uklonite baterije.
- Baterije ne smeju da se izložu preteranoj toploti poput sunčeve svetlosti, grejalica ili vatre.
- Hemikalije iz baterija mogu da izazovu osiplopekotine na koži. Ako baterije cure očistite odeljak krpom. Ako hemikalije dođu u dodir sa kožom, odmah operite kožu.
- Source: Izbor ulaza
Izaberite izvor ulaza u zavisnosti od toga koji je video uređaj spojen na televizor. Kako biste izabrali izvor ulaza: Pritisnite taster [INPUT]. Kada se pojavi lista izvora ulaza, pritisnite [▲/▼] kako biste izabrali izvor a zatim pritisnite OK za povezivanje.
- Pode šavanje volumena
Environment (Okolina)
Pritisnite ◀▶IOK za izbor Home (Kućni mod) ili Store (Mod za prodavnicu). Za standardnu kućnu upotrebu postavite opciju "Home Mode (Kućni Mod)". Za prikaz slike u prodavnici, izaberite "Store Mode (Mod za prodavnicu)", gde će TV prijemnik na ekranu prikazivati karakteristike uređaja.
Tuning Setup (Podešavanja)
Kada pokrenete automatsku pretragu, TV će pretražiti sve dostupne frekvencije i, u zavisnosti od podešavanja u prethodnim menijima, sačuvati sve pronađene TV programe u memoriji.
Vaš TV spreman je za gledanje TV programa!
Ako ne želite pretragu kanala, možete da izaberete opciju "Click here to conect a Game, Blue-Ray, DVD or other players (Pritisnite ovde za povezivanje igre, Blu-ray, DVD ili drugih playera)" i taster OK za ulaz u meni INPUT (SOURCE) za prikaz dostupnih spoljašnjih Audio/Video izvora.
Izbor ulaza (Input Source)
Za direktan izbor spoljašnjeg audio/video izvora možete pritisnuti taster INPUT na daljinskom upravljaču ili tastaturi za prikaz liste dostupnih ulaznih signala.
Pritisnite ▼/▲ tasteri za izbor izvora.
Pritisnite taster OK za potvrdu izbora.
Pritisnite taster EXIT za izlaz iz menija.

Glavni meni
OSD (On Screen Display) prikaz menija omogućava vam priastup svim podešavanjimalfunkcijama putem prikaza komandi na TV prijemniku.
Za upotrebu OSD sistema menija, pritisnite taster MENU na daljinskom upravljaču, čime se prikazuje Glavni meni.
Pritisnite tastere ◀/▶ za izbor jednog od pod-menija: PICTURE (SLIKA), AUDIO (ZVUK), CHANNEL (KANAL), SETUP (PODEŠAVANJE), TIME (VREME), LOCK (ZAKLJUČAVANJE)ISOURCE (IZVOR).
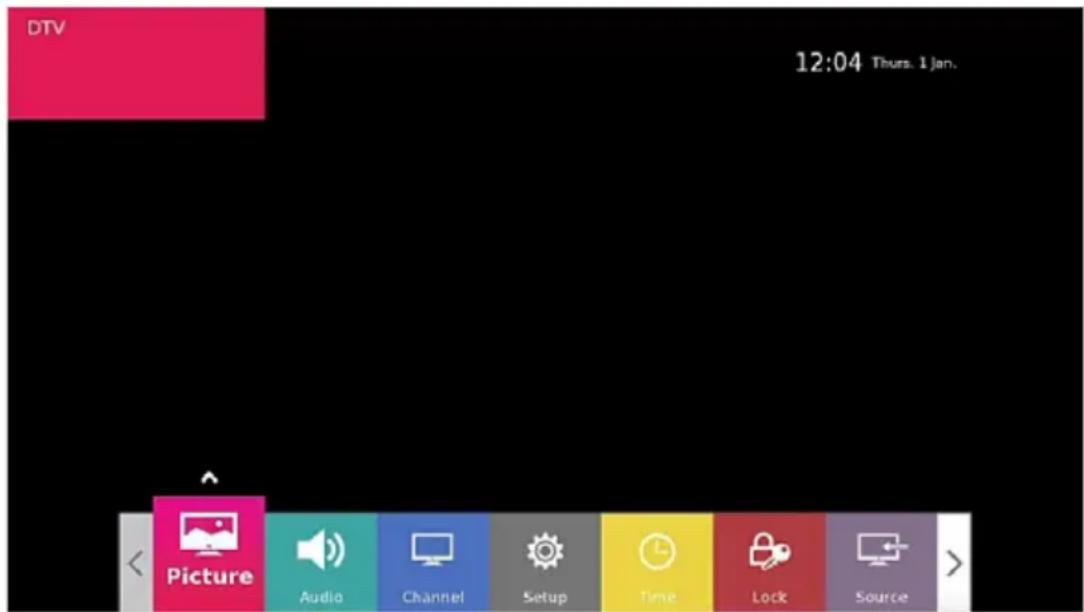
Za ulazak u pod-meni pritisnite OK taster.
Unutar pod-menija pritisnite tastere ▼/▲ za pomeranjeloznačavanje određene opcije u pod-meniju.
Contrast/Brightness/Colour/Sharpness/Tint (Kontrast / Svetlina / Boja / Oštrina / Ton)
Pritisnite taster ▼/▲ za izbor željene opcije a zatim pritisnite taster ◀/▶ za podešavanje.
Kontrast Podesite kontrast.
Svetlina Podesite svetlinu slike, ovo utječe na tamne dijelove slike.
Boja Podesite zasićenost boje.
| Audio | |
| Sound Mode | Standard |
| Bass | 50 |
| Treble | 50 |
| Balance | 0 |
| SPDIF Mode | PCM |
| Surround Sound | Off |
| Auto Volume | Off |
| AD Switch | Off |
| AD Volume | 30 |
| Speaker Delay | 0 |
| SPDIF Delay | 0 |
| Adjust | Menu Return |
| Move | OK Select Exit Exit |
Film Pojačava visokelduboke tonove.
Sport Pojačava srednje tonove - prikladno za sportske kanale
Lično Izaberite kako biste sami prilagodili podešavanja.
Napomena: Podešavanje visokihldubokih tonova dostupno je samo u Standard modu.
Balance (Balans)
Pritisnite taster ▼/▲ za izbor opcije, pritisnite taster ◀/▶ za podešavanje balansa zvuka.
SPDIF Mode
Pritisnite ▼/▲ taster kako biste izabrali SPDIF Digital Audio output a zatim pritisnite ◀/▶ tasteri izaberite Off/PCM/Auto.
Surround Sound (Surround Zvuk)
Pritisnite taster za ▼/▲ za izbor opcije Surround Audio effect (Surround zvučnog efekta), pritisnite ◀/▶ za On (Uključenje) ili Off (Isključenje) efekta.
Auto Volume (Auto nivo zvuka)
Ova funkcija se automatski koristi za smanjenje razlike u jačini zvuka između različitih programa.
Pritisnite taster ▼/▲ za izbor Auto Volume Level (Auto nivo zvuka), pritisnite ◀/▶ za izbor On (Uklj.) ili Off (Isklj.).
AD Switch/AD Volume (AD Uključenje/AD Jačina)
Amblyopia: funkcija za slabovidne osobe koja dodaje dodatni audio zapis koji se meša kako bi se dodatno opisalo događanje ne ekranu.
Kako bi ova funcija bila dostupna,distributer programa mora da pruža ovu uslugu.
Pritisnite taster ▼/▲ za izbor AD Switch (AD Uključenje) funkcije, pritisnite taster ◀/▶ za izbor On (Uklj.) ili Off (Isklj.).
Kada je funkcija “AD Switch” uključena, možete da podesite jačinu dodatnog opisa podešavanjem opcije AD Volume (AD Jačina).
Speaker Delay/SPDIF Delay (Kašnjenje zvučnika/SPDIF kašnjenje)
Ova funkcija se koristi za podešavanje sinhronizaciju zvukalslike.
Pritisnite taster ▼/▲ za izbor opcija Speaker Delay/SPDIF Delay (Kašnjenje zvučnika/SPDIF kašnjenje), pritisnite ◀/▶ za podešavanje sinhronizacije.
MENI CHANNEL (KANALI)
- Pritisnite MENU taster za prikaz glavnog menija.
- Pritisnite ◀/▶ taster za izbor podmenija CHANNEL (KANAL).
-
Pritisnite ▼/▲ taster za izbor opcije koju želite da podešavate unutar podmenija CHANNEL (KANAL).
-
Pritisnite OK taster za podešavanje izabrane opcije.
- Pošto ste završili podešavanje, pritisnite MENU taster za memorisanjelpovratak na prethodni meni ili pritisnite taster EXIT za ulazak u normalni TV mod.
Za prvi korak podešavanjalpretrage kanala (Programa), morate izabrati tip DVB pretrage.
Možete izabrati:
Auto Scan (Auto pretraga)
DVB-T Auto Scan (DVB-T Auto Pretraga)
Kako biste pokrenuli automatsku pretragu kanala pritisnite taster
▼/▲ za izbor Auto Scan (Auto pretraga) pa pritisnite OK taster za ulaz u Podmeni.
Tuning Mode (Mod pretrage): Možete izabrati: DTV (Digitalni kanali), ATV (Analogni kanali) ili ATV+DTV.
Country (Država):
Ovom opcijom birate zemlju ili regiju instalacije vašeg TV prijemnika.
Prema vašim podešavanjima, TV će automatski da prilagodi parametrelstandard za pretragu mreže.
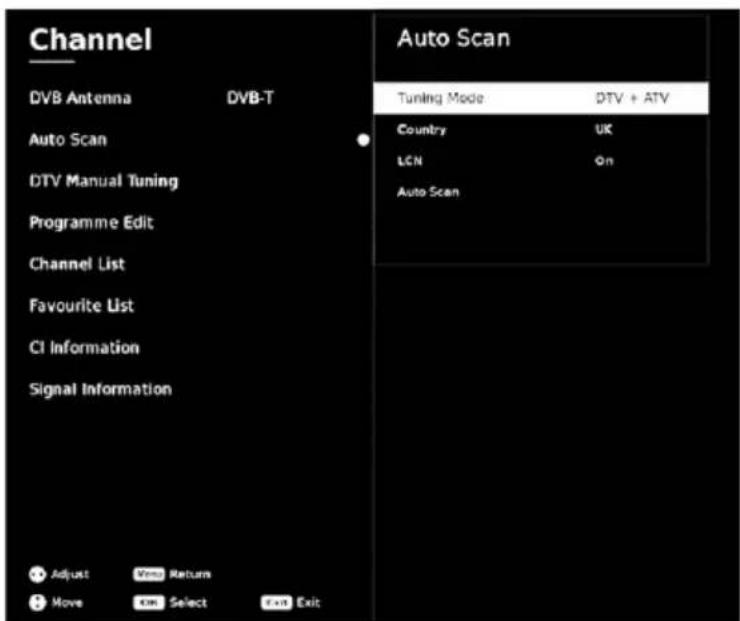
LCN:
Opcijom LCN (Logical Channel Numbering) podešavate da li želite prikaz programa u listi prema redosledu, kako je to odredio operater (opcija "On") ili da se programi poređaju prema redosledu kako su pronađeni prilikom pretrage programa (opcija LCN postavljena na "Off").
Pošto ste završili sa svim podešavanjima, izaberite opciju Auto Scan (Auto pretraga) i pritisnite OK taster.
Za vreme pretrage ATV (analognih TV programa) možete pritisnuti taster MENU i taster ◀ / ▶ kako biste preskočili ATV podešavanje (ukoliko u vašoj regiji nema ATV programa).
TV prijemnik će sada da pretražilsačuva u memoriji sve raspložive programe.
Scan Mode (Mod pretrage):
Možete izabrati opcije: Network (preuzimaju se frekvencije pretrage iz mreže), BlindScan (pretražuju se sve frekvencije) Default (uzimaju se frekvencije iz TV prijemnika.
| Channel | Auto Scan | ||||
| DVB Antenna | DVB-C¶ | Tuning Mode | DTV + ATV | ||
| Auto Scan | Country | UK | |||
| LCN | On | ||||
| DTV Manual Tuning | Auto Scan | ||||
| Programme Edit | Scan-Mode¶ | Network¶ | |||
| Channel List | Modulation¶ | Auto¶ | |||
| Favourite List | Symbol¶ | Auto¶ | |||
| CI Information | Network ID¶ | Auto¶ | |||
| Signal Information | Frequency¶ | Auto¶ | |||
| Adjust | View Return | ||||
| Move | OK Select | Exit Exit | |||
Modulation/Symbol/Network ID/Frequency (Modulacija/Simboli/Mrežni ID/Frekvencija):
Subtitle languages (jezik podnaslova)
Pritisnite taster ◀▶ za izbor opcije Subtitle Language (jezik podnaslova) a zatim pritisnite OK za ulazak u podmeni.
Pritisnite taster ◀/▶ za izbor Subtitle Language (jezik podnaslova).
Audio Languages (audio jezik)
Pritisnite taster ▼/▲ za izbor Audio Languages (audio jezik) a zatim pritisnite OK za ulazak u podmeni.
DLC (Dynamic Luminance Control)
Pritisnite taster ▼/▲ za izbor opcije DLC a zatim pritisnite ◀/▶ za podešavanje: Dark (Tamno)/Normal/Bright (Svetlo)/Off (Isklj.).
PVR Option (PVR opcije)
Pritisnite taster ▼/▲ za izbor opcije PVR File System a zatim pritisnite OK za ulazak u podmeni.
Pritisnite taster ▼/▲ za izbor Check PVR File System, zatim pritisnite taster OK za ulazak u podmeni. Sistem će sada da proveri brzinu učitavanja podataka sa vašeg USB uređaja.
Home Mode (kućni mod)
Time Zone (vremenska zona)
Pritisnite taster ▼/▲ kako biste izabrali Time Zone opciju a zatim pritisnite taster ◀/▶ za podešavanje vremenske zone gde je vaš TV instaliran.
DST (Daylight Saving Time) (letnje vreme)
Pritisnite taster ▼/▲ za izbor opcije DST (letnje vreme) a zatim pritisnite ◀/▶ za uključenje (On) ili isključenje (Off) letnjeg računanja vremena.
OSD Active Time (Vreme prikaza OSD-a)
Pritisnite taster ▼/▲ za izbor opcije OSD Timer (Vremena prikaza OSD-a na ekranu) a zatim pritisnite ◀/▶ za podešavanje.
ZAKLJUČAVANJE
Pritisnite taster MENU za prikaz glavnog menija.
Pritisnite taster ◀/▶ za izbor podmenija LOCK (ZAKLJUČAVANJE).
Set Password (promena lozinke)
Pritisnite taster ▼/▲ za izbor Set Password (promena lozinke) a zati pritisnite OK ili ▶ za promenu lozinke. Prvo unesite staru lozinku, posle toga unesite novu lozinku dva puta za redom.
Zapamtite lozinku!
Ako zaboravite lozinku, obratite se servisnom centru.
System Lock (sistemsko zaključavanje)
Pritisnite zeleni taster za zaključ. Ili otključ. programa.
Parentall Guide (roditeljsko zaključavanje)
CH Table Import/Export (Izvoz/uvoz liste programa)
Pritisnite taster ▼/▲ za izbor opcije CH Table Export/Import, kojom kopirate ili učitavate listu programa iz/u TV prijemnik.



Напомена: Sudniot nosac ne e del od priborot co TB приемникot. Ако ви е потребен сиден nosac, контакрајте го вашот продавач за VESA стандардни сидни nosачи..


НАПОМЕНА
▶ DIGITAL COAX AUDIO OUT

НАПОМЕНА
Environment (Околина)
| Audio | |
| Sound Mode | Standard |
| Bass | 50 |
| Treble | 50 |
| Balance | 0 |
| SPDIF Mode | PCM |
| Surround Sound | Off |
| Auto Volume | Off |
| AD Switch | Off |
| AD Volume | 30 |
| Speaker Delay | 0 |
| SPDIF Delay | 0 |
| Adjust Menu Return Move OK Select Exit Exit | |
Surround Sound (Surround 3вук)
Country (Држава):
DLC (Dynamic Luminance Control)
Max Volume (Максимална Јачина)


SHËNIME
▶ DIGITAL COAX AUDIO OUT
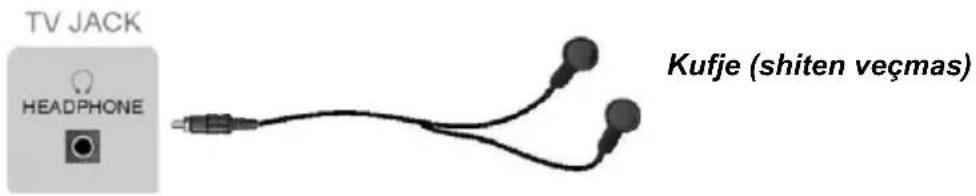
▶ HEADPHONE (KUFJE)
Lidhni Kufje për audio dalje nga TV-ja.
▶ MINI YPbPr IN

SHËNIME
Udhëzime të Lidhjes
. Lidhje Ajrore
Environment (Mjedisi)
Tuning Mode (Mod i Marrjes):
Mund të vendosni: DTV (Digital Ch.), ATV (Analog Ch.) ose ATV+DTV.
Digital Type (Lloj Digjital):
MENYJA PICTURE (PAMJA)
| Audio | |
| Sound Mode | Standard |
| Bass | 50 |
| Treble | 50 |
| Balance | 0 |
| SPDIF Mode | PCM |
| Surround Sound | Off |
| Auto Volume | Off |
| AD Switch | Off |
| AD Volume | 30 |
| Speaker Delay | 0 |
| SPDIF Delay | 0 |
| Adjust | Menu Return |
| Move | OK Select Exit Exit |
Surround Sound (Surround Zëri)
AD Switch/AD Volume (AD Kyçje/AD Fuqia)
Auto Scan (Auto Kërkim)
DVB-T Auto Scan (DVB-T Auto Kërkim)
Country (Shteti):
Modulation / Symbol / Network ID / Frequency (Modulimi / Simbolet / ID e Rrjetit / Frekuenca):
Power (LNB Furnizim), LNB Type (LNB Lloji), 22kHz sinjal, DiSEqC switch settings (DiSEqC rregullime), Motor adjust (Rregullim i Motorit), Unicable option (Unicable opsione)).
Program Edit (Rregullim i programit)
Device Auto Power Off (Shkyçje e Pajisjes së Jashtme)
DLC (Dynamic Luminance Control)
Time Zone (Zona Kohore)
DST (Daylight Saving Time) (Koha Verore)
Set Password (Ndërrim i Fjalëkalimit)
Channel Lock (Mbyllje e Kanalit)
Source Lock (Mbyllje e Burimit)
Max Volume (Fuqia maksimale)
Important Safety Instructions 5
Installation 11
Stand Installation 11
Wall mount installation 12
TV Front 13
Control Panel 14
Antenna and Power Connection 14
TV Rear 15
Connections 16
Remote Controller 20
Installing batteries in the Controller 22
Connection Instructions 23
Using the Remote Control 24
Basic Features
First time installation 26
Select Input Source 27
Main Menu
Picture Menu 29
Audio Menu 30
Channel Menu 31
Setup menu 36
Time Menu 39
Lock Menu 40
Hotel Mode 41
USB Media operations
Other Information
Trouble Shooting 43
Technical Specifications 46
Disposal of Waste Electrical & Electronic Equipment 47
EU Declaration of Conformity 47
Product Fiche (at the end of the Manual)
Warranty Declaration (at the end of the Manual)
WELCOME
This device lives up to the highest standards, innovative technology and high user comfort.

With this TV you can do it fast and simple, whilst in the comfort of your living room.

Media player — access your music, pictures and videos from your network or USB storage media and play them directly on your TV.

Everything works with one remote control now. Connect your TV directly to your terrestrial, satellite antenna or cable and enjoy contents in high quality without loss
The Accessories
When opening the box and installing the machine, make sure you have get all the necessary accessories:
- User manual with warranty statement
- Remote Control
- Batteries x2
- Stand and Screws for stand

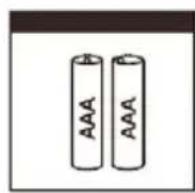
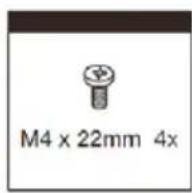
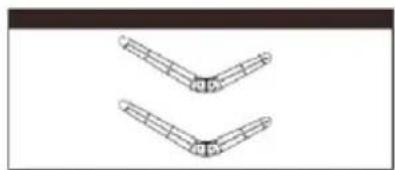
Images are for reference only

The flash with the symbol of arrowhead, inside an equilateral triangle alerts the user about the presence of a dangerous tension not isolated inside the product which can be sufficiently powerful to constitute a risk of electrocution.

The point of exclamation inside an equilateral triangle alerts the user about the presence of important operating instructions and maintenance in the document enclosed in the package.

CAUTION

RISK OF ELECTRIC SHOCK DO NOT OPEN
Do not open the back cover. In no case the user is allowed to operate inside the TV set. Only a qualified technician from the manufacture is entitled to operate.

Main plug is used as the disconnect device, the disconnect device shall remain ready for operating.

Incorrect replacement of the battery may lead to the risk, including the replacement of another similar or the same type. Do not expose batteries to heat such as sun or fire or something like that.

The device should not be exposed to dripping and spraying and it can not be placed under objects filled with liquids.
Please read the following safeguards for your TV and retain for future reference. Always follow all warnings and instructions marked on the television.
IMPORTANT SAFETY INSTRUCTIONS
1. Read, Retain, Follow All Instructions
Read all safeties and operations about the TV. Retain them safely for future reference. Follow all operations and instructions accordingly.
WARNING: People (including children) with reduced physical, nervous or mental disabilities or who lack experience and / or knowledge of safe use of the device do not allow the use of electrical devices unattended!
2. Heed Warnings
Adhere to all warnings on the appliance and in the operating instructions.
3. Cleaning
Unplug the TV from the wall outlet before cleaning. Do not use liquid, abrasive, or aerosol cleaners. Cleaners can permanently damage the cabinet and screen. Use a soft dampened cloth for cleaning.
4. Attachments and Equipment
Never add any attachment and/or equipment without approval of the manufacturer as such additions may result in the risk of fire, electric shock or other personal injury.
5. Water and Moisture
The apparatus shall not be exposed to dripping of splashing and that no objects filled with liquids, such as vases, shall be placed on the apparatus.
6. Setting
Do not place this TV on an unstable cart, stand or table. Placing the TV on an unstable base can cause the TV to fall, result in serious personal injuries as well as damage to the TV. Use only a cart, stand, bracket or table recommended by the manufacturer or salesperson.
7. Ventilation
Slots and openings in the cabinet are provided for ventilation and to ensure reliable operation for the TV and to protect it from overheating. Do not cover the ventilation openings in the cabinet and never place the set in a confined space such as built-in cabinet unless proper ventilation is provided. Leave a minimum 10 cm gap all around the unit.
8. Power Source
This TV should be operated only from the type of power source indicated on the marking label. If you are not sure of the type of power supplied to your home, consult your appliance dealer or local power company.
9. Grounding or Polarization

TV equipped with this sign have a polarized alternating current line plug. The unit has a double insulation (Class II Protection), and no need additional grounding. Do not defeat the safety purpose of the polarized plug. To check do you need Grounding socket, check rating plate on the unit back side. If you did not find this sign, than you need grounding socket!
10. Lightning
For added protection for this TV during a lightning storm, or when it is left unattended and unused for long periods of time, unplug it from the wall outlet and disconnect the antenna or cable system. This will protect the TV from damage due to lightning and power-line surge.
11. Power Lines and Antenna cables
An outside antenna system should not be located in the vicinity of overhead power lines or other electric light or power circuits, or where it can fall into such power lines or circuits. Where installing an outside antenna system,
extreme care should be taken to keep from touching such power lines or circuits as contact with them might be fatal.
12. Overloading
Do not overload wall outlets and extension cords as this can result in a risk of fire or electric shock.
13. Object and Liquid Entry
Never push any kinds of object into this TV through openings as they may come up against dangerous voltage points or short-out parts that could result in fire or electric shock. Never spill any kinds of liquid on or into the TV.
14. Outdoor Antenna Grounding
If an outside antenna or cable system is connected with the TV, be sure the antenna or cable system is grounded so as to provide protection against voltage surges and built-up static charges. Section 810 of the National Electric Code, ANSI/NFPA No. 70-1984, provides information with respect to proper grounding of the mast and supporting structure, grounding of the lead in wire to an antenna discharge unit, connection to grounding electrodes, and requirements for the grounding electrode.
15. Servicing
Do not attempt to service this TV yourself as opening or removing covers may expose you to dangerous voltage or other hazards. Refer all servicing to qualified service personnel.
16. Damage Requiring Service
Unplug the TV from the wall outlet and refer servicing to qualified service personnel under the following conditions:
- When the power-supply cord or plug is damaged.
- If liquid has been spilled, or objects have fallen into
the TV.
- If the TV has been exposed to rain or water.
- If the TV operates abnormally by following the operating instructions. Adjust only those controls that are covered by the operating instructions as an improper adjustment of other controls may result in damage and will often require extensive work by a qualified technician to restore the TV to its normal operation.
- If the TV has been dropped or the cabinet has been damaged.
17. Replacement Parts
When replacement parts are required, be sure the service technician has used replacement parts specified by the manufacturer or have the same characteristics as the original part. Unauthorized substitutions may result in fire, electric shock or other hazards.
18. Safety Check
Upon completion of any service or repair to the TV, ask the service technician to perform safety checks to determine that the TV is in safe operating condition.
19. Heat

The product should be situated away from heat sources such as radiators, heat registers, stoves, or other products (including amplifiers) that product heat.
The TV should not be placed near open flames and sources of intense heat.
20. Earphones use - Attention

Excessive sound pressure from earphones and headphones can cause hearing loss. If you notice any disturbance or hum noise in your ears, stop using the headset or earphones.
-
Power cord and Plug should be easily accessible. Do not put a TV or furniture on the power cord. A damaged power cord or plug can cause fire or electric shock. Do not bend or squeeze the power cord. Unplug your TV from main supply to hold the plug and pull it from the power outlet. Never pull the power cord. Never touch a power cord / plug with wet hands, it could cause a short circuit or electric shock. Never make a knot in the cord or tie it with other cables
-
The instructions for installation or use provided with non-floor standing televisions likely to be used in the home and weighing over 7 kg shall contain the following information or equivalent:
WARNING
Never place a television set in an unstable location. A television set may fall, causing serious personal injury or death. Many injuries, particularly to children, can be avoided by taking simple precautions such as:
- Using cabinets or stands recommended by the manufacturer of the television set.
- Only using furniture that can safely support the television set.
- Ensuring the television set is not overhanging the edge of the supporting furniture.
- Not placing the television set on tall furniture (for example, cupboards or bookcases) without anchoring both the furniture and the television set to a suitable support. -Not placing the television set on cloth or other materials that may be located between the television set and supporting furniture.
- Educating children about the dangers of climbing on furniture to reach the television set or its controls.
If your existing television set is being retained and relocated, the same considerations as above should be applied.
- This appliance is not intended for use by persons (including children) with reduced physical, sensory or mental capabilities, or lack of knowledge and experience to use the appliance, unless they are supervised by a person who is responsible for their safety or you're not received training on the use of appliances
Children do not always correctly recognize possible danger situations.
Swallowing batteries can be fatal. Keep batteries out of the reach of small children. If the battery is swallowed, immediate contact medical help.
Packaging equipment and protective bags keep away from children. There is a risk of suffocation.
LED Panel
Materials used when generating this product are made up of fragile elements. Therefore, product can be broken when in cases of falling over or bumps. LED panel is a high tech product and offers you high detailed images. From time to time, a few inactive pixels on screen can appear in blue, green or red steadily. This hes no effect over the product performance.
Positioning the TV set
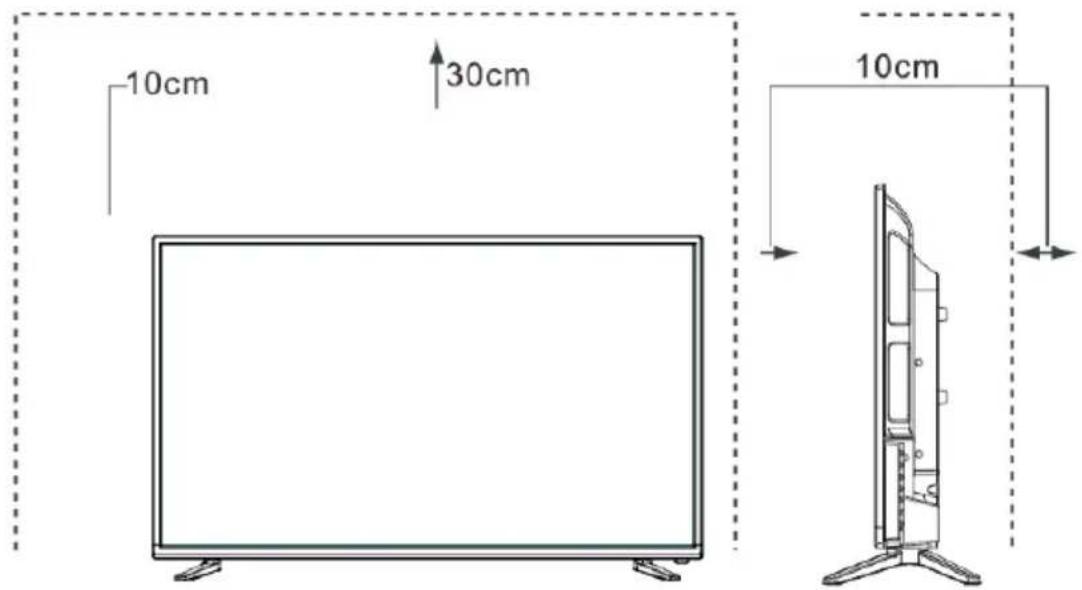
Place the TV set on a firm and flat surface, leaving a space of at least 10cm around the set and 30cm from the top of the set to the wall.
STAND INSTALLATION
Notes
- The TV screen is very fragile, and must be protected at all times when removing the base stand. Be sure that no hard or sharp object, or anything that could scratch or damage the screen, come into contact with it. DO NOT exert pressure on the front of the TV at any time because the screen could crack.
- For tabletop use, the TV must be attached to the provided stand as shown on this page.
- Product images are only for reference, actual product may vary in appearance
WARNING! Be sure to disconnect the AC power cord before installing a stand or wall-mount brackets.
CAUTION!
Carefully place your TV facedown on a soft, cushioned surface to prevent damage to the TV or scratching to the screen.
Follow the illustrations and textual instructions below to complete the installation steps:
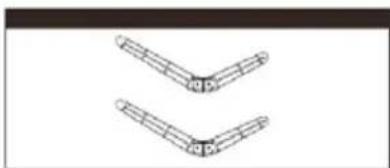
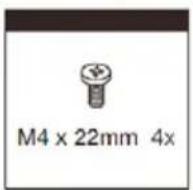
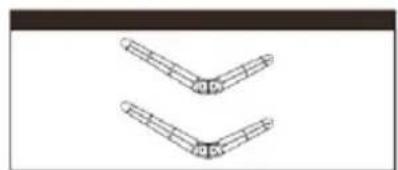
- Attach the stand to the TV set as shown in the picture.
- Use the screws to fix the stand tightly.
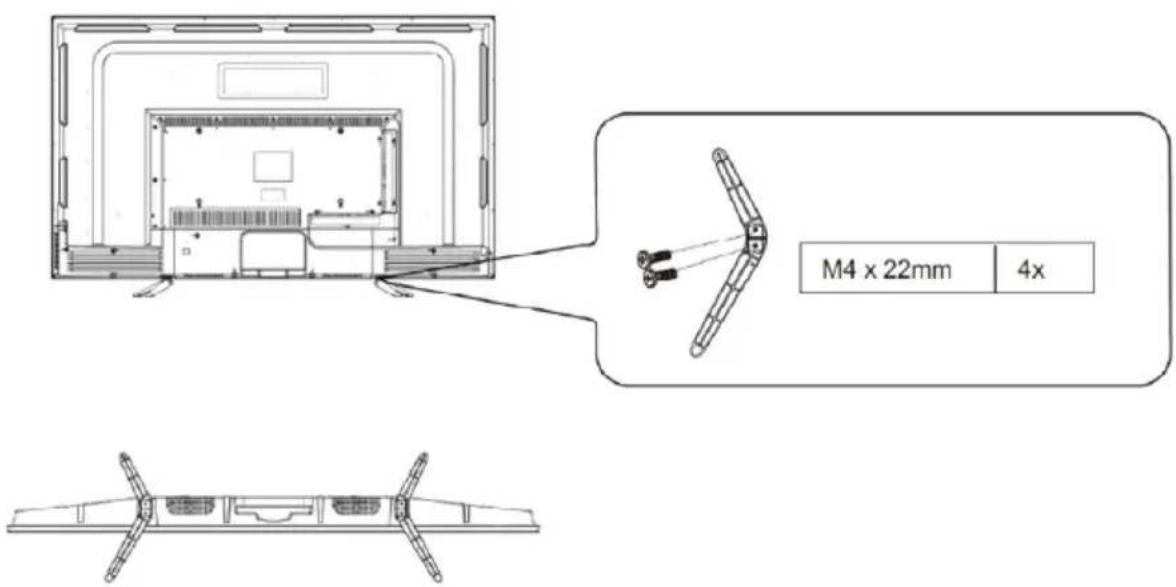
Plase take note on the base direction
Wall mount installation
- Remove the stand before installing the TV on the wall mount.
- If you install the TV on a ceiling or slanted wall, it may fall and result in severe injury. Use an authorized wall mount and contact the local dealer or qualified personnel.
- To prevent injury, TV must be securely attached to the floor/wall in accordance with the installation instructions.
- Use the screws and wall mounts that meat the following specs.
| VESA STANDARD SCREW | DIMENSION |
| VESA 400x200 | M6, length 8mm, 4pcs |

Note: T he wall mount is not contained in the accessories. If you need a wall mount, please contact your dealer for VESA standard wall mount.
TV Front

| Description | ||
| 1 IR Remote Sensor | Receive remote signals from the remote control.Do not put anything near the sensor, as its function may be affected. | |
| 2 Remote Indicator | Red light up in standby mode. Blue LED will light up when unit is work on. | |
NOTES
The Picture is Only for Reference.
Powering on the TV requires several seconds to load program.
Do not rapidly turn the TV off as it may cause the TV to work abnormally.
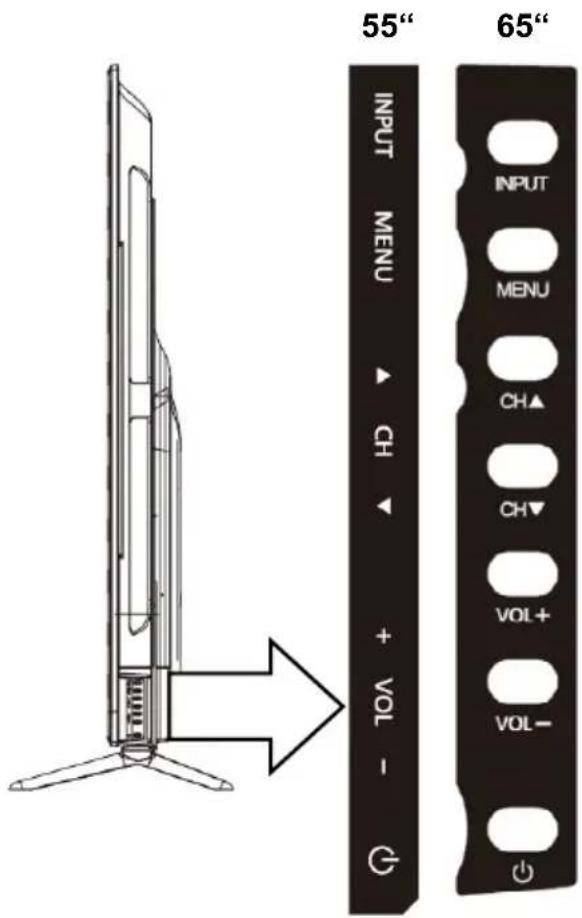
Control Panel

/ Power Turn the TV on or enter into standby mode.
INPUT Signal source selection button.
MENU Enter / Exit the main menu.
CH ▼ Channel decreasing short cut key; decrease the channel No. and select the last option in the menu.
CH ▲ Channel increasing short cut key; increase the channel No. and select the next option in the menu.
VOL- Volume decreasing short cut key; enter into the next menu and adjust OSD options (decreasing).
VOL + Volume increasing short cut key; enter into the next menu and adjust OSD options(increasing).
Antenna and Power Connection
- Connect the antenna cable into the TV antenna input terminal at the rear panel and wall antenna socket.
- Connect the Power plug into the wall outlet.

![TV Rear HDMI3 [6] [INS2] [6] [INS2] [6] [INS2] MIPI USB1 USB2 USB1 COAX HDMI1 HDMI2/ARC CVBS L R Earphone](/content/2026/05/953694/images/2df1bca0c83e0db00051a9deba7792d34fcf288bb993f901498e9a6426e9b179.jpg)
NOTES
The Picture is Only for Reference.
Check the jacks for position and type before making any connections. Loose connections can result in image or color problems. Make sure that all connections are tight and secure.
Not all A/V devices have the ability to connect to a TV, please refer to the user's manual of your A/V device for compatibility and connections procedure.
Before connecting external equipment, remove the mains plug from the wall socket. This may cause electric shock.
▶ CONNECTIONS
▶ RF IN (T2): Connect (DVB-T2) an outdoor VHF/UHF antenna or cable
![graph LR A["RF IN (T2)"] --> B["+"] B --> C["(not included)"] C --> D["Antenna Cable (75Ω)"] D --> E["Cable ANT OUT"] E --> F["VHFIUHF Antenna"] D --> G["or"] G --> H["Antenna Cable (75Ω)"]](/content/2026/05/953694/images/8775991bcc1991ffbfb1f169589507820679014bb6cb79b213e04f385b87d9c0.jpg)
▶ RF IN (S2): Connect (DVB-S2) an outdoor Satellite dish or Sat. Cable convection. (option, only models with Satellite Tuner)
![graph LR A["TV JACK"] --> B["RF IN (S2)"] B --> C["(not included)"] C --> D["Antenna Cable (75Ω)"] D --> E["SAT cable socket"] F["Cable ANT OUT"] --> E G["Sat Antenna"] --> D H["or"] --> D](/content/2026/05/953694/images/20f607448cb7328c99f819c0ae4ff5d1196f376c77b9c4ea7858ea588c985595.jpg)
▶ HDMI1, HDMI2, HDMI3 Digital connection

Connect an HDMI cable from an external A/V equipment.
Some devices such as DVD player require HDMI signal to be set to output in the device's settings.
Please consult your device user manual for instructions. Please note that the HDMI connector provides both video and audio signals, it's not necessary to connect an audio cable.
- Press [INPUT] button, when the list of Input Source appears, press [▲/▼] to select the source [HDMI], then press [OK] to connect.
Note: HDMI3 supports ARC (Audio Return Channel) function. With this function, you don't need to connect RCA Audio cables to your Audio
▶ USB

Connect the USB devices such as hard drives, USB sticks and digital cameras for browsing photos, listening music and watching recorded movies. At the same time update is also an easy thing and will be done just by plugging the USB with the updating files into the same interface
NOTES
When connecting a hard disk or a USB hub, always connect the mains adapter of the connected device to the power supply. Exceeding a total current consumption may result in damage. The maximum current consumption is 500mA.
For individual non-standard high-capacity mobile hard disk, if it's impulse current is greater than or equal 500mA, it may cause TV-rebooting or self-locking. So the TV does not support it.
The USB port supports a voltage of 5V.
The maximum supported storage space of the hard disk is 1T.
If you want to play the video streaming of a DTV program, the transfer rate of the USB storage device must not be less than 5MB/s.
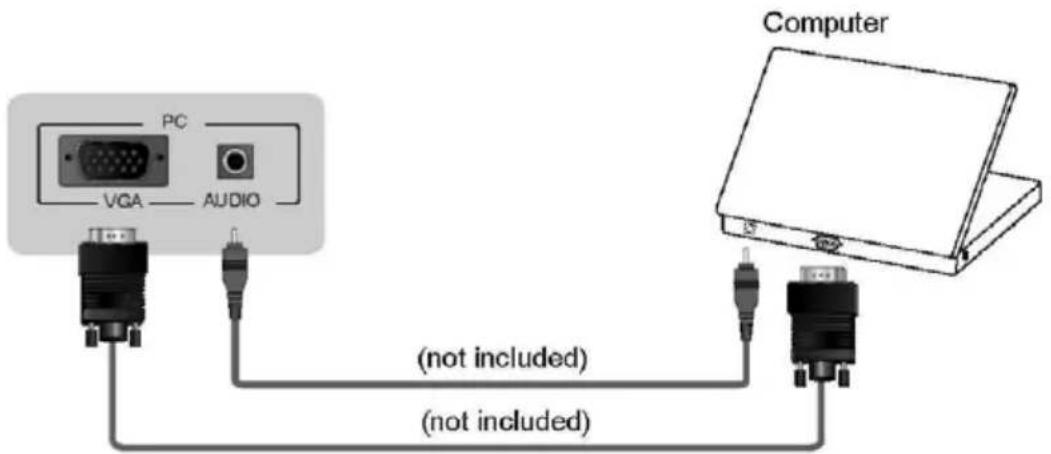
▶ VGA - PC AUDIO IN
Connect a VGA cable and an audio cable from the PC.
- Press [INPUT] button, when the list of Input Source appears, press [▲/▼] to select the source [PC] and press [OK] to connect.
▶ CI: COMMON INTERFACE
![graph LR A["TV JACK"] --> B["COMMON INTERFACE(CARD FACE FRONT)"] B --> C["CAM CARD"] C --> D["SMART CARD"] C -->|①| D C -->|②| B](/content/2026/05/953694/images/1d50d7fdc714acc8e265db9706e72a736122e89da53bd9f6e68111d930a6a649.jpg)
Insert the CI or CI+ module for watching scrambled services like pay-tv channels or some HD channels
NOTES
- Before you insert/remove the CI module, ensure that the TV is switched off. Then insert the CI card into the CI module in accordance with the Service Provider's instructions.
- Do not rep eatedly insert or remove the Common Access Module as this may damage the interface and cause a malfunction.
- You must obtain a CI module and card from the service provider of the channels you want to watch.
- Insert the CI module with the SmartCard in the direction marked on the module and SmartCard.
- CI is not support ed in some countries and regions; check with your authorized dealer.
▶ COAX: DIGITAL AUDIO OUT
Connect to an external digital audio device.
Before connecting a digital audio system to the SPDIF DIGITAL AUDIO jack, you should decrease the volume of both the TV and the system to avoid that the volume suddenly become bigger.
TV SOCKET DIGITAL AUDIO Audio Amplifier

▶ EARPHONE
Connect Headphone for audio out of the TV.

▶ MINI YPbPr
Connect a component cable and an audio cable from an external A/V Device.
The component output ports Y, PB and PR on the VCD or DVD can sometimes be identified as Y, CB and CR.
Press [INPUT] button, when the list of Input Source appears, press [▲/▼] to select the source [YPbPr] and press [OK] to connect.
![graph TD A["MINI YPbPr"] --> B["Yellow(Video)"] C["MINI AV"] --> B D["Component L R P_R P_E Y"] --> E["Red(R) (not included) Red(R)"] D --> F["Red(P_R) (not included) Red(P_R/C_R)"] D --> G["Blue(P_B) (not included) Blue(P_B/C_B)"] D --> H["Green(Y) (not included) Green(Y)"] B --> I["White(L)"] B --…](/content/2026/05/953694/images/1b3e9acfd18f71743cb7b5874d1a3c41023c5b44ab762a37f9e35ac51a1ac2d8.jpg)
Connection Cables are not included
▶ MINI AV
Connect the Composite cable from an external A/V Device.
Use the audio and video cables to connect the external A/V device's composite video/audio jacks to the TV's jacks. (Video = yellow, Audio Left = White, and Audio Right = Red)
Press [INPUT] button, when the list of Input Source appears, press [▲/▼] to select the source [AV] and press [OK] to connect
![graph TD A["MINI AV"] --> B["Yellow(Video)"] A --> C["White(L)"] A --> D["Red(R)"] B --> E["(not included) Yellow(Video)"] C --> F["(not included) White(L)"] D --> G["(not included) Red(R)"] H["VCR/DVD Player/Recorder/<br>Set-top box/Satellite Receiver"] --> I["Video"] H --> J["L"] H --> K["R"]](/content/2026/05/953694/images/041a265905c58679d58131bb827deabdfa73894fab219af065851f2f0097f057.jpg)
Connection Cables are not included
REMOTE CONTROLLER

-
POWER button: press for turning the TV On / Off
-
MUTE button with crossed-speakers: press the button to restore volume
-
SLEEP button: setting the TV to turn off automatically
-
AUDIO button: to change the ways of broadcasting sound: right, left, mono, stereo
-
ASPECT button: choose the size of the display image
-
FREEZE button: Freeze the current screen frame; Press again to return to normal wieving mode
-
NUMBER (0-9) button: pressing these buttons digits are entered. Programs on ATV and DTV are directly elected, and are entering passwords for parental lock
-
-/-- : To switch the Channel digit
-
button: Directly back to the previous program
-
FAV+/FAV- button: Switch Up or Down through the current Favorite Channel list (FAV list)
-
FAV button: Adds the current channel to your FAV (favorite) list, or erase the current channel from FAV list.
-
RED/GREEN/YELLOW/BLUE/ button: Used for TXT in DTV mode: Teletext direct access corresponded with color of the button with teletext function color presented on the TV screen.
-
INFO button: To display information about current entry
-
INPUT button: Source settings
-
◀▶ buttons: to increase / decrease the value in the menu
-
▲ ▼ buttons: select previous / next option or function
-
OK button: To confirm the entry on display when highlighted or bold
-
MENU button: Enter to the main Menu or return to the upper level of a sub-menu.
-
EXIT button: Exit from menu or function

-
VOL ▲▼ buttons: Increase / decrease volume
-
CH ▲▼ buttons: Scrolling programs
-
PMODE button: Directly choose the picture mode
-
SMODE button: Directly choose ways of broadcasting sound
-
TEXT button: Show teletext on the screen (TV mode)
▶|| button: Play / Pause (USB mode)
- INDEX button: Shows the main teletext page (TXT mode)
◀◀ button: Rewind back (USB mode)
- MIX button: Mix TV and Teletext picture with transparent background (TXT mode)
▶▶ button: Forward search (USB mode)
- REVEAL button: Show hidden signs or text (TXT mode)
■ button: Stop button (USB mode)
- HOLD button: Keep the current TXT page and prevent loading new content (TXT mode)
|◀◀ button: Switching to the previous page / display (USB mode)
- SUBPAGE button: display of the current TXT sub page (TXT mode)
▶▶| button: Move to the next page / display (USB mode)
-
SUB-T button: Display Subtitle and Caption
-
CANCEL button: To cancel the display
-
TV/RADIO button: Switch between TV and RADI mode (in DVB reception only)
-
T-SHIFT button: Press to activateTimeShift function in DTV mode, to delay viewing DTV Channel (USB device should be connected into USB slot)
-
REC button: Press to start recording current DVB channel (USB device should be connected into USB slot)
-
EPG button: to display the electronic program guide while the browser / menu is not running
Note: All picture in this manual are examples, only for reference, actual product may differ from the pictures.
The buttons not mentioned here are not used.
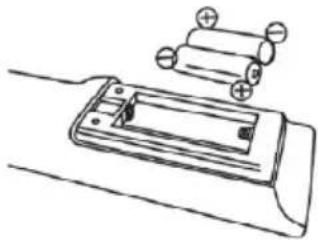
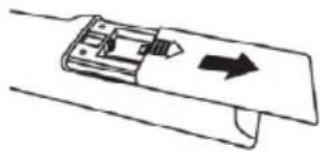
▶ Installing Batteries in the Remote Control
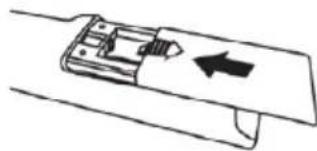
Slide the back cover to open the battery compartment of the remote control. Insert two AAA size batteries. Make sure to match the (+) and (-) ends of the batteries with the (+) and (-) ends indicated in the battery compartment.
Close the battery compartment cover.
(1) Gently open battery cover
(2) Insert the batteries
(3) Gently push cover back
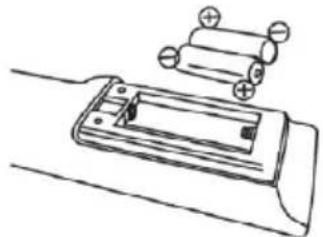

NOTES
Product image is only for reference, actual product may vary in appearance.
Dispose of your batteries in a designated disposal area. Do not throw the batteries into a fire.
Do not mix battery types or combine used batteries with new ones.
Remove depleted batteries immediately to prevent battery acid from leaking into the battery compartment.
If you do not intend to use the remote control for a long time, remove the batteries.
Batteries should not be exposed to excessive heat, such as sunshine, heat registers, or fire.
Battery chemicals can cause a rash. If the batteries leak, clean the battery compartment with a cloth. If chemicals touch your skin, wash immediately.
Remote Control Operation Range
Point the remote control at the TV within no more than 5 metres from the remote control sensor on the TV and within 60° in front of the TV.
The operating distance may vary depending on the brightness of the room.

Connection Instructions
- Connecting an Aerial
To view television channels correctly, a signal must be received by the set from the following source:
- An outdoor VHF/UHF antenna or Satellite Dish (option).
- Connecting HDMI
Supports digital connections between HDMI -enabled A/V devices such as (PVRs, DVD, Blu-Ray, HD-DVD, AV receivers and digital devices). No sound connection is needed for HDMI to HDMI connection.
▶ NOTE
Some devices such as a PVR or DVD players require a HDMI signal to be set to output in the device's settings. (Please consult your device user manual for instructions.)
What is HDMI?
- HDMI, or high-definition multimedia interface, is a high resolution interface that enables the transmission of digital audio and video signals using a single cable without compression.
- "Multimedia interface" is a more accurate name for it especially because it allows multiple channels of digital audio (5.1 channels). The difference between HDMI and DVI is that the HDMI device is smaller in size, has the HDCP (High Bandwidth Digital Copy Protection) coding feature installed, and supports multi-channel digital audio.
- Use the HDMI terminal for HDMI connection to a compatible device. If your external device has DVI only, you should use a DVI-to-HDMI cable (or adapter) for the connection, and the "R - AUDIO - L" terminal on DVI for sound output.
- Connecting Component Devices (DVD/PVR) Connect Component video and audio cables to Component inputs ("Y"(Green), "PB"(Blue), "PR"(Red)) on the rear of your set and the other ends to corresponding component video out connectors on the source (PVR, DVD, etc)
The Y, PB and PR connectors on your component devices (PVR or DVD) are sometimes labeled Y, B-Y and R-Y or Y, CB and CR. (Colours for inputs and cables must correspond on both devices.)
▶NOTE
Some devices such as a PVR or DVD player require a "Component/YPBPR" signal to be set to output in the devices settings. (Please consult your device user manual for instructions.)
- Connecting External A/V Devices
Connect a Video RCA cable to an appropriate external A/V device such as a VCR, DVD or Camcorder.
Connect RCA audio cables to "R (Right/Red) - AUDIO - L (left/White)" and Video cable with yellow connector to the "AV"(Yellow) input on the rear of your set and the other ends to corresponding audio and Video out connectors on the A/V device.
- Connecting a Computer
Connect the D-Sub cable to "VGA" on the rear of your set and the other end to the Video Card of your computer.
Connect the stereo audio cable to "AUDIO" on the rear of your set and the other end to "Audio Out" of the sound card on your computer. Primarily this unit is intended for use as an LCD TV. If using as a monitor, and compatibility is a problem; please contact the manufacturer of the PC Video/Graphic's card for further support. Perfect compatibility is not warranted.
Connecting USB data Devices
Connect a USB device for browsing photos, listening music, watching movies.
This USB port also can be used for servicing and updating software on your TV.
- Connecting Digital Audio
Connect an Coax RCA audio device to this jack.
- Connecting Headphones
Headphones can be connected to the headphone output on the side of your set.
USING THE REMOTE CONTROL
- Turning your TV on and off
Turning off to standby mode: Press [ ( | ) Power Standby] on the back RHS panel or on the remote control to switch to standby mode. You can activate the unit again by pressing [ ( | ) Power Standby].
Power indicator: Light indicates standby mode. There will be no light when the power switch is in the off position.
▶ NOTE
Remove the connection from the wall power outlet if you do not intend to use the unit for long periods, for example if you plan to be away a few days. Wait at least 5 seconds after turning off if you want to re-start the TV.
- Selecting the Input Source
Select the Input Source depending on the video device you have connected to your TV.
To select the Input Source: Press [Source] button. When the list of Input Source appears, press [▲/▼] to select the source, then Press [OK] to connect.
- Adjusting the volume
Press [VOL▲/VOL▼] to increase or decrease the volume.
Press [MUTE] to turn the sound off. Press [MUTE] again to turn the sound back on.
- Changing channels
Press the [CH ▲/CH ▼] buttons to go to the next higher or lower channel. Or, Press the number buttons to select a channel. For example, to select channel 12, press [1], then press [2].
- Selecting the sound mode
Press the [Sound Mode] button to select between 5 different pre-adjusted sound modes: Standard, Music, Movie, Sports and Personal.
- Selecting the picture mode
Press the [Picture Mode] button to select between 6 different pre-adjusted picture modes: Standard, Cinema Day, Cinema Night, PC Game, Dynamic and Personal.
- Selecting the aspect ratio
Press the [ASPECT] button to change the screen aspect ratio among Normal, 4:3, Wide, Zoom and Cinema
NOTE
The option of aspect is vary with different source.
- Setting the Sleep Timer
You can specify how long you want your TV to wait for before it automatically turns off.
Pressing [SLEEP] button repeatedly will allow you to change the sleep timer mode: Off, 15Min, 30Min, 45Min, 60Min, 90Min, 120Min and 240Min.
- Audio function
Pressing [ AUDIO ] button the TV screen will display the Audio options such as Stereo, Dual I, Dual II, Mixed.
- Displaying Channel List
Press [ENTER] to display the full list of digital and analogue channels available.
• Electronic Programming Guide (EPG)

Provides convenient access to the television programs that will be available in the next 7 days. The info
displayed by the EPG is made available by the commercial television networks for digital channels only. The EPG also provides a simple way to program the recording of your favorite programs. There is no need to setup complicated timers.
BASIC FEATURES
First time installation
Connect an RF cable from the Tv's input called "RF-In" and to your TV Aerial socket. Than, connect power cord plug to the electric socket and switch on (Power on) TV.
The „First Time installation“ screen will appear on the screen:
Select OSD Language
Press ◀ / ▶ and OK button to select the language to be used for menus and message.
Select Country
Press ▼ / ▲ and OK button to highlight country menu and region in which TV receiver is installed.

Environment
Press ◀ I ▶ and OK to
choose Home or Store mode. For a standard home use set the option to "Home Mode".
To display image in the shop, select "Store Mode", unit will present the main fetures on the screen.
Tuning Setup
Press ▼ / ▲ and OK button to highlight and adjust a following options:
Tuning Mode:
You can choose: DTV (Digital Ch.), ATV (Analog Ch.) or ATV+DTV.
Digital Type:
Type of the Scan channels. You can choose DVB-T, DVB-C or Satellite
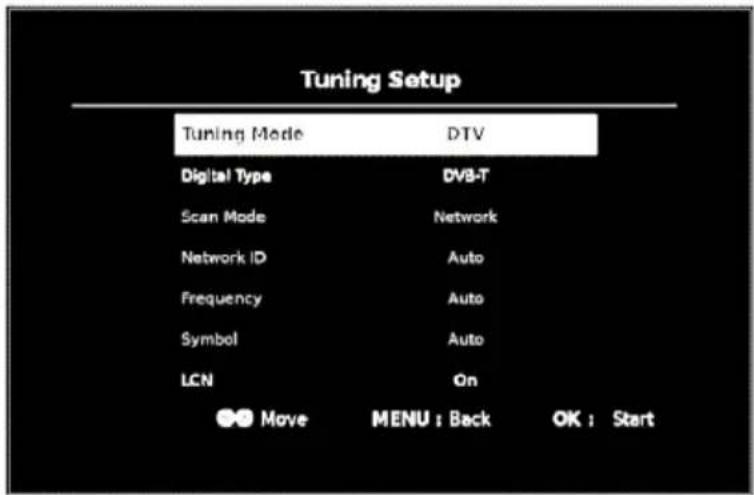
Scan Mode, Network ID, Frequency, Symbol:
Select Network and scan options.
If you are not sure about exact settings, keep items on „Auto“. Thy system will automatically adjust all paramteres according to your broadcast signal.
LCN:
With LCN (Logical Channel Numbering) option you can adjust whether you want to see the programs on the list in the order specified by the service provider ("On") or arranged in the order that they were found (LCN option "Off")
After you finsih all settings press OK button. The „First Time Installation“ Screen will appear on the screen.
Press OK button to start Auto Scan (Item „Click here to scan TV channels“)
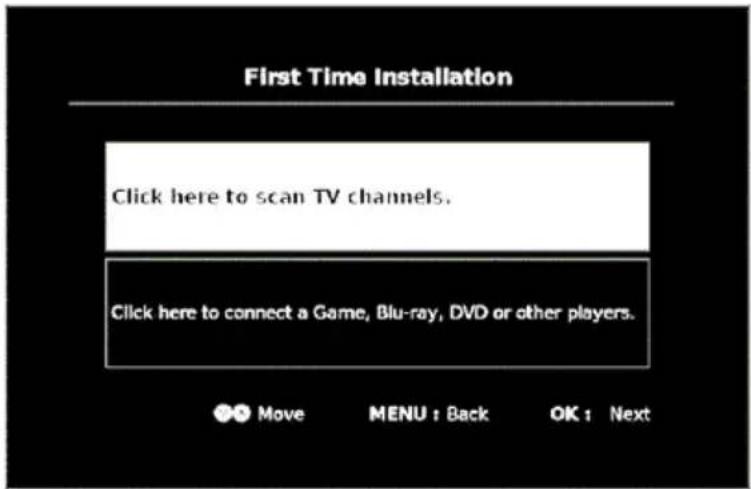
After Auto Channel scan, TV will scan through all available frequencies, according to your settings and adjustments in previous menus and store all available channels into memory.
Congratulations, your TV is now ready to watch Channels!
If you don't want to make Channel scan, you can choose option „Click here to conect a Game, Blue-Ray, DVD or other players“ and press OK button to enter into INPUT (SOURCE) menu to show picture of external Audio/Video sources.
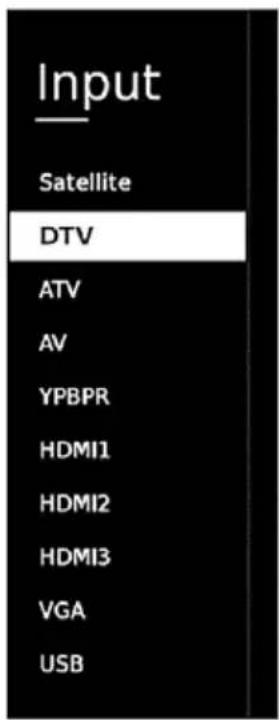
Select Input Source
To choose external Audio/Video source directly, you can press INPUT button on the Remote or Keypad to display the input source list.
Press ▼ / ▲ button to select the input source.
Press OK button to enter the input source,
Press EXIT button to quit.
Main Menu Operation
The OSD (On Screen Display) menu enables you to approach to the TV functions.
To use OSD menu system, press MENU button on remote control, than press ◀ / ▶ to select SUB-MENU: PICTURE, AUDIO, CHANNEL, SETUP, TIME, LOCK, SOURCE.
To enter into SUB-MENU, press OK button.
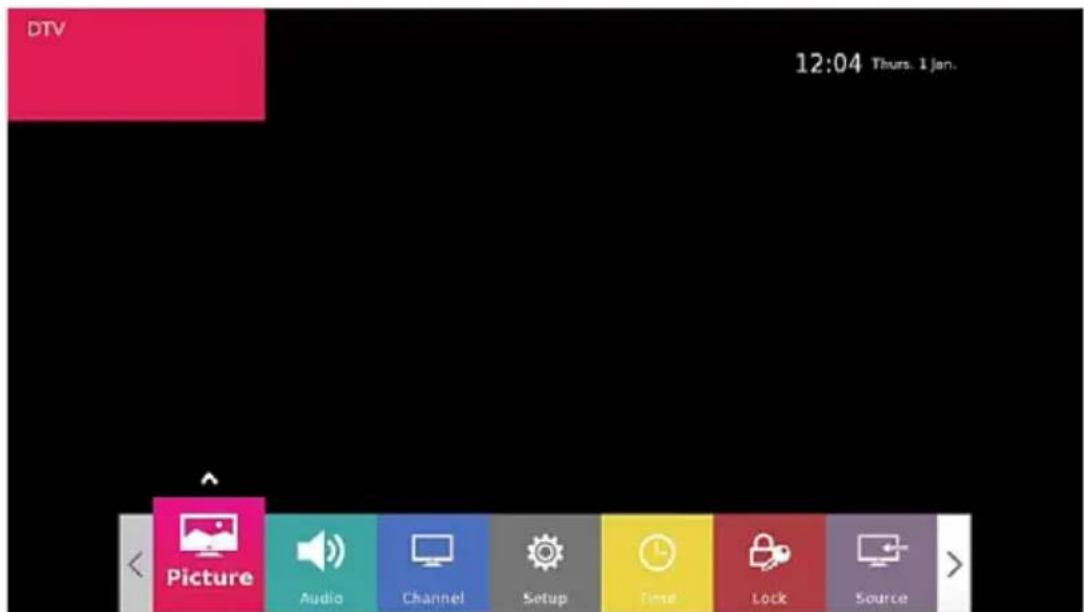
Press ▼ / ▲ button to move selection within each option in the SUB-MENU.
To adjust item, press ▶ or OK button.
If available, use the text help messages at the bottom of each screen for easier navigation and help.
To return in previous Menu, press MENU button.
To exit from OSD Menu, press EXIT button or repeatedly press MENU button.
PICTURE MENU
- Press MENU button to display the main menu.
- Press ◀ / ▶ button to select PICTURE in the main menu.
- Press ▼ / ▲ button to select the option that you want to adjust in the PICTURE menu.
- Press OK button to adjust.
- After finishing your adjustment, Press MENU button to save and return back to the previous menu or press EXIT button to enter into normal TV mode.
Picture Mode
Press ▼ / ▲ button to select Picture Mode, then press OK button to enter Sub-menu.
You can change the value of contrast, brightness, color, sharpness and tint when the picture is in Standard mode only.

TIPS: You can press Picture Mode button on the Remote Controller to change the Picture Mode directly.
Contrast/ Brightness/ Colour/ Sharpness / Tint
Press ▼ / ▲ button to select option, then press ◀ / ▶ button to adjust.
Brightness: Adjust the optical fiber output of the entire picture, it will effect the dark region of the picture.
Contrast: Adjust contrast.
Colour: Adjust the saturation of the color.
Sharpness: Adjust the sharpness of the picture
Tint: Use in compensating color changed with the transmission in the NTSC code.
Colour Temp
Change the overall color cast of the picture.
Press ▼ / ▲ button to select Color Temperature, then press OK button to enter sub-menu.
Press ◀ / ▶ button to adjust optimal color temperature (Picture looks more brighter when Color temperature is higher).
Noise Reduction
To filter out and reduces the image noise and improve picture quality.
Press ▼ / ▲ button to select Noise Reduction, then press ▶ or OK button to enter sub-menu.
You can choose:
Off Select to turn off video noise detection.
Low Detect and reduce low video noise.
Middle Detect and reduce moderate video noise.
High Detect and reduce enhanced video noise.
Default Restore to default settings
AUDIO MENU
- Press MENU button to display the main menu.
- Press ◀ / ▶ button to select AUDIO in the main menu.
- Press ▼ / ▲ button to select the option that you want to adjust in the AUDIO menu.
- Press OK button to adjust.
- After finishing your adjustment, Press MENU button to save and return back to the previous menu or press EXIT button to enter into normal TV mode.
Sound Mode
Press ▼ / ▲ button to select Sound Mode, then press OK button to enter sub-menu.
Press ▼ / ▲ button to select.
You can change the value of Treble and Bass when the sound is in Standard mode.
| Audio | |
| Sound Mode | Standard |
| Bass | 50 |
| Treble | 50 |
| Balance | 0 |
| SPDIF Mode | PCM |
| Surround Sound | Off |
| Auto Volume | Off |
| AD Switch | Off |
| AD Volume | 30 |
| Speaker Delay | 0 |
| SPDIF Delay | 0 |
| Adjust Menu Return Move OK Select Exit Exit | |
TIPS: You can press Sound button on the remote control to change the Sound Mode directly.
Standard Produces a balanced sound in all environments.
Music Preserves the original sound. Good for musical programs.
Movie Enhances treble and bass for a rich sound experience.
Sports Enhances vocals for sports.
Personal Select to customize picture settings.
Note: The treble and bass are only available in Standard mode, you can adjust them as you like.
Balance
Press ▼ / ▲ button to select option, Press ◀ / ▶ button to adjust.
SPDIF Mode
Press ▼ / ▲ button to select type of SPDIF Digital Audio output, then press ◀ / ▶ button to select Off / PCM / Auto.
Surround Sound
Press ▼ / ▲ button to switch On or Off Surround Audio effect, then press ◀ / ▶ button to select On or Off.
Auto Volume
This item is used for reducing the difference between channel and program's volume automatically.
Press ▼ / ▲ button to select Auto Volume Level, then press ◀ / ▶ button to select On or Off.
AD Switch/AD Volume
This is Amblyopia function for the blind persons. The additional Audio track will be mixed with original Audio and additionally describe the current scene.
It need code stream given from broadcaster to support this function.
Press ▼ / ▲ button to select AD Switch, then press ◀ / ▶ button to select On or Off.
When AD Switch is active, you can adjust Description Volume by AD Volume option.
Speaker Delay / SPDIF Delay
This function you can use to adjust Audio delay between Sound and Picture.
Press ▼ / ▲ button to select Speaker Delay / SPDIF Delay, then press ◀ / ▶ button to adjust Delay.
CHANNEL MENU
- Press MENU button to display the main menu.
- Press ◀ / ▶ button to select CHANNEL in the main menu.
- Press ▼ / ▲ button to select the option that you want to adjust in the CHANNEL menu.
-
Press OK button to adjust.
-
After finishing your adjustment, Press MENU button to save and return back to the previous menu or press EXIT button to enter into normal TV mode.
For the first step, you should select type of DVB Antenna.
You can select:
- DVB-T: Areal DVB channels
- DVB-C: Cable channels
- DVB-S: Satellite channels
According to this settings, some items and options will be available or hidden.

Auto Scan
DVB-T Auto Scan
To make Auto Search Channels, press ▼ / ▲ button to select Auto Scan, then press OK button to enter.
Tuning Mode:
You can choose: DTV (Digital Ch.), ATV (Analog Ch.) or ATV+DTV.
Country:
Choose Country or Area of your TV installation.
According to your selection, TV will automatically setup

parameters for scan network and standard.
LCN:
With LCN (Logical Channel Numbering) option you can adjust whether you want to see the programs on the list in the order specified by the service provider ("On") or arranged in the order that they were found (LCN option "Off")
After you finsih all settings select option Auto Scan and press OK button.
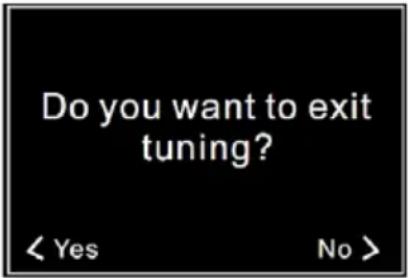
If you want to skip ATV search and directly scan DTV, Press the MENU button to enter the selection menu. Press ◀ / ▶ button to select Yes or No and press OK button to continue.
TV set will scan and search all available channels.
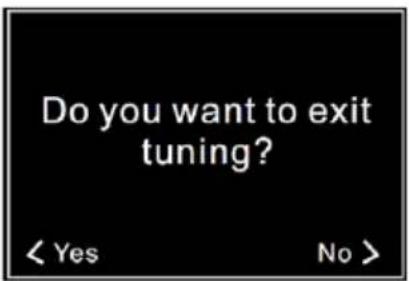
All found channels will be visible in program list.
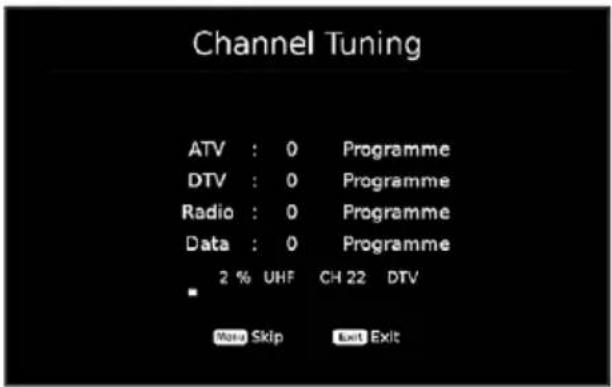
DVB-C Auto Scan
In case that you provide DVB-C (Cable) Auto Scan search, additional following options will be abvailable:
Scan Mode:
You can select the options: Network (download search frequencies from the network), BlindScan (searching all frequencies) and Default (receive frequencies from the TV receiver.

Modulation/Symbol/Network ID/Frequency:
You can adjust the DVB-C channel scan parameters.
If you are not sure of the settings, adjust the values to "Auto".
The system will automatically adjust the settings according to your cable network requirements.
DVB-S Auto Scan
In case that you provide DVB-S (Satellite) Auto Scan search, the following options will be abvailable:
Satellite:
Choose Satellite for Auto scan search.
Channel Type
You can choose: Free (FTA), Scramble or Free + Scramble channel search.
Service Type
You can choose: DTV, Radio or DTV + Radio channel search.
Scan Mode
You can choose type of Scan mode.
Auto Scan
To start Auto Scan, please choose option Auto Scan and press OK button.
All found channels will be visible in program list.


Dish Setup
Press ▼ / ▲ button to select Dish Setup, then press OK button to enter sub-menu to adjust all Dish settings, according to specific Satellite.
Use ◀ / ▶ / ▼ / ▲ buttons and OK button to adjust Dish Setting options (LNB Power, LNB Type, 22kHz signal, DiSEqC switch settings, Motor adjust Unid

Use colored buttons to:
Blue button: Start Scan Satellite
Yellow button: Add new Satellite
Red button: Delete Satellite
Green button: Edit Satellite
DTV Manual Tuning
Press ▼ / ▲ button to select DTV Manual Tuning, the n press OK button to enter sub-menu.
Press ◀ / ▶ button to select channel, then press OK button to search program.

Program Edit
Press ▼ / ▲ button to select Program Edit, then press OK button to enter sub-menu.
Via color buttons, you can edit the programme, such as delete, rename, skip channel, etc. You can also add or erase the channel from the favorite channel list via FAV button on the remote control.


- Press Red button to delete the selected program in the list.
- Press Yellow button to move programs in the list.
- PressBlue button to skip the selected channel.

When CH+/CH- is executed, this program is skipped and the program can be selected by pressing the number keys only.
- Press FAV button to add or remove the channel to your favorite list.
Channel List
Show the Channel list.
Press ▼ / ▲ button to select Channel List, then press OK button to enter sub-menu.
Favourite List
Show the Favourite List.
Press ▼ / ▲ button to select FavouriteList, then press OK or ▶ button to enter sub-menu.
Tips: You can also press FAV button on the remote control to enter the menu.
CI Information
Press ▼ / ▲ button to select CI Information, press the OK button to see the detail information about CI or CI+ card inserted into CI slot.
Signal Information
Press ▼ / ▲ button to select Signal Information, press the OK button to see the detail information about the signal.
Only available when there is signal in DTV.
SETUP MENU
- Press MENU button to display the main menu.
- Press ◀ / ▶ button to select SETUP in the main menu.
- Press ▼ / ▲ button to select the option that you want to adjust in the SETUP menu.
- Press OK button to adjust.
- After finishing your adjustment, Press MENU button to save and return back to the previous menu or press EXIT button to enter into normal TV mode.
OSD Language
Select an OSD menu language. Default English is selected as menu language.
Press ◀ / ▶ button to select Menu Language
Subtitle languages
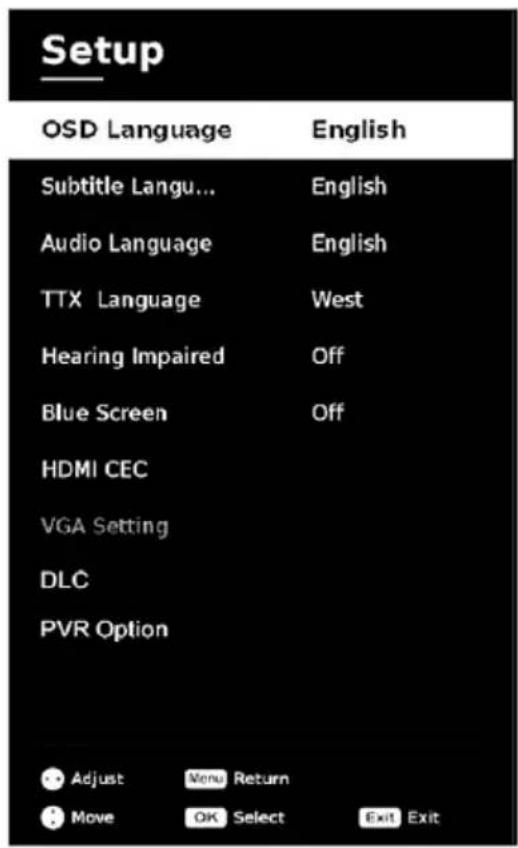
Press ▼ / ▲ button to select Subtitle
Language, then press OK button to enter sub-menu.
Press ◀ / ▶ button to select Subtitle Language.
Audio Languages
Press ▼ / ▲ button to select Audio Languages, then press OK button to enter sub-menu.
Press ◀ / ▶ button to select the primary of Audio Languages.
Press ▼ / ▲ / ◀ / ▶ button to select the Audio Languages.
TTX Language
Press ▼ / ▲ button to select Teletext Language, then press ENTER button to enter sub-menu.
Press ▼ / ▲ button to select Teletext language code page.
Hearing impaired
Press ▼ / ▲ to select Hearing Impaired (additional titles for deaf or hard-of-hearing persons), then press OK to select On or Off.
Note: It need code stream given from broadcaster to support this function
Blue Screen
If there is no input signal, the TV screen will be blue.
Press ▼ / ▲ button to select Blue Screen, then press OK button to select On or Off.
HDMI CEC
CEC (Consumer
Electronics Control) is an HDMI feature that allows you to command and control other CEC enabled devices that are connected through HDMI, without user intervention.
Press ▼ / ▲ button to select HDMI CEC, then press OK button to enter the sub-menu.
HDMI CEC
Press ◀ / ▶ to turn On/Off HDMI CEC control.
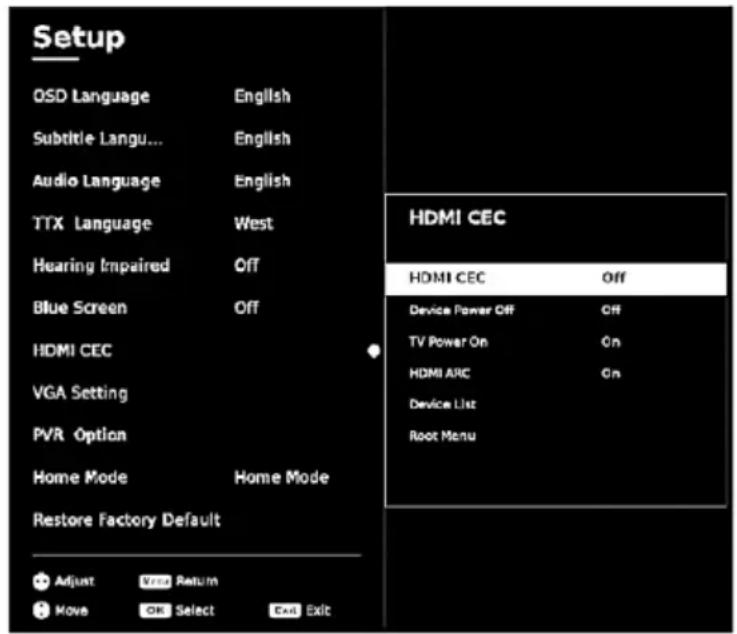
Device Auto Power Off
Press ◀ / ▶ to turn On/Off Auto power Off TV when external HDMI unit is turn Off.
TV Auto Power On
Press ◀ / ▶ to turn On/Off Auto power On TV when external HDMI unit is turn On.
HDMI ARC (Audio Return Channel)
This function returns Audio through the same HDMI channel that is used to send Video to the TV. In that case, you don't need separate Audio cable to return Audio from the TV.
Press ◀ / ▶ to turn On/Off ARC HDMI function (Audio connection external Audio units via HDMI cable).
Note: ARC function is available on HDMI3 input only.
Device List
Press OK button to open the main List of available device.
Root menu
Press OK button to open the main menu of device.
VGA Settings (PCin)
Press ▼ / ▲ button to select VGA Setting, then press OK button to enter the sub-menu
Horizontal Pos.
Adjust the horizontal position of the picture.
Press ▼ / ▲ button to select Horizontal Pos., then press ◀ / ▶ to adjust position.
Vertical Pos.
Adjust the horizontal position of the picture.
Press ▼ / ▲ button to select Vertical Pos., then press ◀ / ▶ button to adjust position
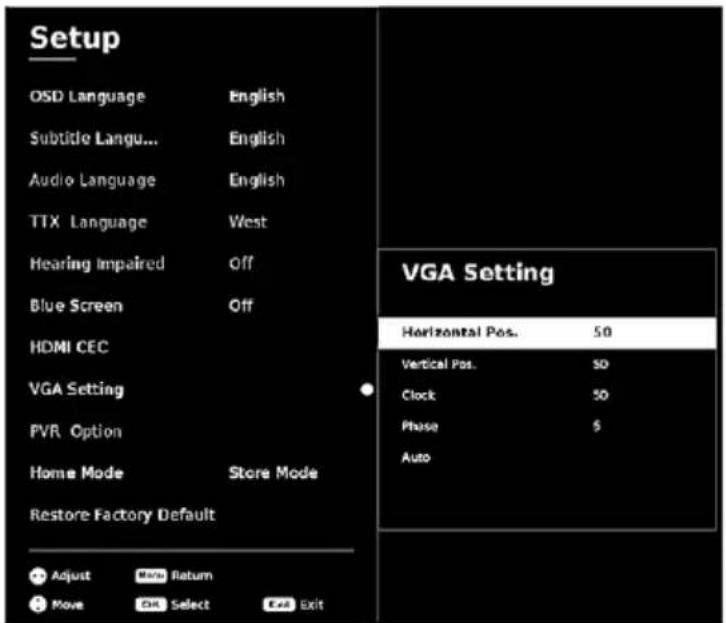
Clock
Adjust the frequency (Clock) rate.
Press ▼ / ▲ button to select Clock., then press ◀ / ▶ button to adjust.
Phase
Adjust the horizontal interfering lines.
Press ▼ / ▲ button to select Phase, then press ◀ / ▶ button to adjust.
Auto
Press ▼ / ▲ button to select Auto adjust, then press OK button.
DLC (Dynamic Luminance Control)
Press ▼ / ▲ to select DLC, then press ◀ / ▶ button to adjust: Dark / Normal / Bright / Off.
PVR Option
Press ▼ / ▲ to select PVR File System, then OK to go to the submenu.
Press ▼ / ▲ to select Check PVR File System, then OK to enter the menu. Afterwards, the speed of loading dana from USB is checked.
Home Mode
Press ◀ I ▶ and OK to choose Home or Store mode. For a standard home use set the option to "Home Mode".

To display image in the shop, select "Store Mode", unit will present the main fetures on the screen.
Press ▼ / ▲ to select Restore Factory Default option, then OK to confirm TV Reset.
All TV settings will be erased and TV state will be as Factory default.
Software Update(USB)
Press ▼ / ▲ button to select Software Update (USB), plug your USB device in the USB slot, then press OK button to update the software from USB.
TIME MENU
Press MENU button to display main menu. Press ◀ / ▶ button to select TIME in the main menu.
- Press ▼ / ▲ button to select the option that you want to adjust in the TIME menu.
- Press OK button to adjust.
- After finishing your adjustment, press MENU button to save and return to the previous menu.
Sleep Timer
Press ▼ / ▲ button to select Sleep Timer, then press ◀ / ▶ button to adjust auto turn off TV.
Available options are: Off, 15Min, 30Min, 45Min, 60Min, 90Min, 120Min, 240Min).
Auto Standby
Press ▼ / ▲ button to select Auto Standby, then press ◀ / ▶ button to adjust auto turn off TV.

Tip: The remote control does not make any
operation in the hypothesis time, it will close down automatically. If you do any operation, it will reset the time.
Time Zone
Press ▼ / ▲ button to select Time Zone, then press ◀ / ▶ button to adjust Time zone where TV is located.
DST (Daylight Saving Time)
Press ▼ / ▲ button to select DST, then press ◀ / ▶ button to adjust DST On or Off.
OSD Active Time
Press ▼ / ▲ button to select OSD Timer (showing OSD time on the screen), then press ◀ / ▶ button to adjust.
LOCK MENU
Press MENU button to display the main menu.
Press ◀ / ▶ button to select LOCK in the main menu.
To enter into LOCK menu, you should enter correct password.
Default Password is 0 0 0 0 .
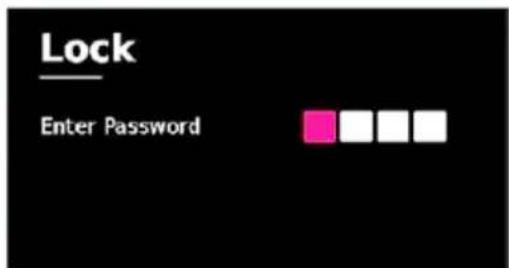
Set Password
Press ▼ / ▲ button to select Set
Password, then press OK or ▶ button to change password. First, enter old password, than enter new password twice.
Please remember password!
In case that you forgot password, contact your service centre.
System Lock
Press ▼ / ▲ button to select System Lock, then press OK button to make Lock options valid.
Default password is 0000, and if forget what you set, please call the service center.
Channel Lock
Press ▼ / ▲ button to select Channel Lock, then press OK button to enter sub-menu to select.
Press Green button to lock or unlock the channel.

Parentall Guide
You can set the parental control function to suit viewing for children of all ages.
Press ▼ / ▲ button to select Parental Guidance, then press ◀ / ▶ button to adjust level Rate (From 4-18 or Off).
Key Lock
Press ▼ / ▲ button to select option, then press ◀ / ▶ button to adjust lock of the cabinet buttons.
HOTEL MODE
Press ▼ / ▲ button on the remote control to select Hotel menu, than press OK to enter.
Hotel Mode
Press ▼ / ▲ button to select Hotel Mode, then press OK button to make Hotel options valid.
Source Lock
Press ▼ / ▲ button to select which source is going to be available or unavailable when Hotel Mode is active.
Press OK to enter into list of available Input (Source) items.
Default Prog
Press ▼ / ▲ button to select Default Prog (On which TV channel TV will turn on), then press ◀ / ▶ button to adjust It is available when the default source is TV.
Max Volume
Press ▼ / ▲ button to select Max Volume, then press ◀ / ▶ button to adjust.

CH Table Import/Export
Press ▼ / ▲ for CH Table Export/Import of database (programs) for copying from TV to TV.
Clear Lock
Press ▼ / ▲ button to select Clear Lock, then press OK button to clear the setting you have done before in Hotel Mode.
USB MEDIA OPERATION
Note: Before operating Media menu, Plug In USB device, then press INPUT button to set the Input Source to Media.
Press ▼ / ▲ button to select USB in the INPUT menu, then press OK button to enter.
You can select PHOTOS, MUSIC, MOVIE or TEXT by using ▼ / ▲ button.

Press OK button to select the right "C" disk USB icon.
Continue to press the OK button to enter the corresponding FileSelector menu.

Select the file you want to play, press the button on remote to start playing file.
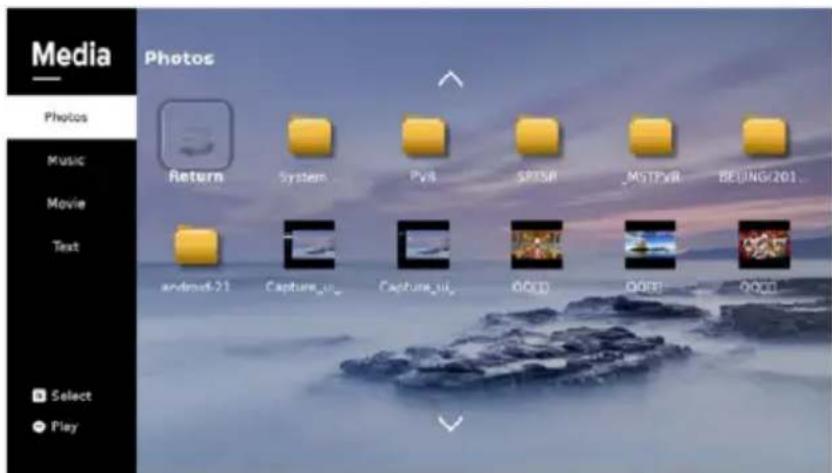
Other Information
Troubleshooting
If the TV does not operate as usual or appears to be faulty please read carefully this section. Many operational issues can be resolved by users.
It is also advisable to unplug the TV from the AC socket on the wall for 60 seconds or more, then reconnect and start again. This simple procedure helps in restoring stable conditions for electric circuits and firmware of the unit.
Please contact Manufacturer Customer Care if the problem is unresolved or you have other concerns.
| SYMPTOMS | POSSIBLE SOLUTIONS |
| No sound or picture. | Check if the power cord is plugged into a powered AC outlet.A power switch on the right side bottom edge of the front panel must be turned on. Press the [POWER] button in the remote control to activate the unit from Standby.Check to see if LED light is either red or blue. If illuminated, power to TV is OK. |
| I have connected an external source to my TV and I get no picture and/or sound. | Check for the correct output connection on the external source and for the correct input connection on the TV.Make sure you have made the correct selection for the input mode for the incoming signal. |
| When I turn On my television, there is a few second delay before the picture appears. Is this normal? | Yes, this is normal. That is the TV searching for previous setting information and initializing the TV. |
| Picture is normal, but no sound. | Check the volume settings.Check if Mute mode is set "on". |
| Sound but no picture or black and white picture. | If black and white picture first unplug TV from AC outlet and re-plug after 60 seconds.Check that the Colour is set to 50 or higher.Try different TV channels. |
| Sound and picture distorted or appear wavy. | ·An electrical appliance may be affecting TV set. Turn off any appliances, if interference goes away, move appliance farther away from TV.·Insert the power plug of the TV set into another power outlet. |
| Sound and picture is blurry or cuts out momentarily. | ·If using an external antenna, check the direction, position and connection of the antenna.·Adjust the direction of your antenna or reset or fine tune the channel. |
| Horizontal/vertical stripe on picture or picture is shaking. | ·Check if there is interfering source nearby, such as appliance or electric tool. |
| The plastic cabinet makes a "clicking" type of sound. | ·"Click" sound can be caused when the temperature of the television changes. This change causes the television cabinet to expand or contract, which makes the sound. This is normal and the TV is OK.. |
| Remote control does not work. | ·Confirm that TV still has power and is operational.·Change the batteries in the remote control.·Check if the batteries are correctly installed. |
playable format list
| Media File Ext. Codec | Remark | |||
| Video Audio | ||||
| .mpg MPEG-1, MPEG-2 | Max Resolution: 3840x2160 | |||
| MJPEG | Max Data Rate: 40 Mbps | |||
| MOVIE | .avi | |||
| MPEG-4 SP/ASP, H.263/H.264 | ||||
| MPEG-2,.ts H.264,AVS*,AVS+HEVC | MP3, WMA | Max Resolution: 3840x2160 Max Data Rate: 20 Mbps | ||
| MOVIE.dat MPEG-MPEG-4 S.mp4MPEG-1, M | .mov.mkv | MPEG-4 SP/ASP,H.263/H.264,HEVC | AAC,AC3*,PCM | |
| 1 | ||||
| P/ASP,MPEG-2 | H.263/H.264, H.265HEVC | |||
| Max Resolution:720x576 | ||||
| .vob | MPEG-2 | Max Data Rate: 40Mbps | ||
| .rm*/.rmvb* | RV30/RV40 COOK, MP2 | Max Resolution:3840x2160 | ||
| MUSIC | .mp3 | -- | MP3 | Sample Rate:8K~48KHz Bit Rate:32K~320Kbps |
| .m4a/.aac | -- | AAC | Sample Rate:16K~48KHzBit Rate:32K~442KbpsChannel: Mono/Stereo | |
| PHOTO.bmpInterlaced | .jpg/ | Progressive JPEG | Max Resolution:1024x768 | |
| .jpeg | Baseline JPEG | Max Resolution:15360x8640 | ||
| BMP | Max Resolution:9600x6400 | |||
| .png | Non-interlaced | Max Resolution:9600x6400 | ||
| Max Resolution:1280x800 | ||||
| .srt.ssa/.ass.smiSUBTITLE.txt | SubRip | |||
| SubStation Alpha | ||||
| SAMI | ||||
| .sub | SubViewer MicroDVDDVDSubtitleSystemSubldx(VobSub) | SubViewer 1.0 & 2.0Only | ||
| TMPlayer | ||||
If the media codec is not supported by the player, a warning will be given.
REMARK:
It may happen that due to different versions of the 'Codec' version and file format, the device may not support some of above formats. If this happens, convert your record to another compatible format. The manufacturer is not responsible for the incompatibility of the device and your records and the possible loss of the contents of your files.
Technical Specifications
| Model TV-55UHD121T2S2 TV-65UHD121T2S2 | ||
| Size with stand (mm) | 1254 x 790 x 305 | 1465 x 896 x 305 |
| Size without stand (mm) | 1254 x 738 x 83 | 1465 x 842 x 87 |
| Weight with stand (kg) | 12,08 18,22 | |
| Weight without stand (kg) | 11,78 17,92 | |
| Display Size | 55 inches 65 inches | |
| Display resolution | 3840x2160 3840x2160 | |
| Audio power (RMS) | 10 W + 10 W 10 W + 10 W | |
| Rating Power | 150 W 185 W | |
| Power supply | 100-240V ~ 50/60Hz | |
| AV Color System | PAL NTSC | |
| Television System | PAL/SECAM-B/G, D/K,DVB-T+C DVB-T2 H.264/H.265, DVB-S2 | |
| Working conditions | Temperature: 5°C - 45°C Humidity: 20% -80% RH Atmosfere pressure: 86 kPa - 106kPa | |
| Component mode | 480I / 60Hz, 480P / 60Hz, 576I / 50Hz, 576P/ 50Hz, 720P / 50Hz, 720P / 60Hz, 1080I /50Hz, 1080I / 60Hz, 1080P / 50Hz, 1080P /60Hz, 3840P / 60Hz | |
| VGA mode | 640 x 480, 800 x 600, 1024 x 768, 1280 x1024 60Hz, 1920 x 1080, 3840 x2160 | |
| HDMI mode | 480I / 60Hz, 480P / 60Hz, 576I / 50Hz, 576P/ 50Hz, 720P / 50Hz, 720P / 60Hz, 1080I /50Hz, 1080I / 60Hz, 1080P / 5OHz, 1080P /60Hz, 3840I / 60Hz, 3840P / 60Hz640 x 480, 800 x 600, 1024 x 768 60Hz | |
Manufactured under license from Dolby Laboratories. Dolby and the double-D symbol are trademarks of Dolby Laboratories

HDMI, the HDMI logo and High-Definition Multimedia Interface are trademarks or registered trademarks of HDMI Licensing LLC..

"CI Plus" logo is a trademark and a trademark of CI Plus LLP company.

Information on Disposal for Users of Waste Electrical & Electronic Equipment (private households)

This symbol on the product(s) and / or accompanying documents means that used electrical and electronic products should not be mixed with general household waste. For proper treatment, recovery and recycling, please take this product(s) to designated collection points where it will be accepted free of charge. Alternatively, in some countries you may be able to return your products to your local retailer upon purchase of an equivalent new product. Disposing of this product correctly will help save valuable resources and prevent any potential negative effects on human health and the environment, which could otherwise arise from inappropriate waste handling. Please contact your local authority for further details of your nearest designated collection point. Penalties may be applicable for incorrect disposal of this waste, in accordance with your national legislation.
Disposal of waste batteries

Check local regulations for disposal of waste batteries or call your local customer service in order to get instructions on the disposal of old and used batteries. The batteries in this product should not be disposed of with household waste. Be sure to dispose of old batteries in special places for disposal of used batteries that are found in all retail shops
where you can buy batteries.
EU Declaration of Conformity
Hereby, M SAN Grupa d.d. declares that the radio equipment type TV set is in compliance with Directive 2014/53/EU (RED Directive).

The full text of the EU declaration of conformity is available at the following internet address: www.msan.hr/dokumentacijaartikala
POŠTOVANI!
Zahvaljujemo na kupnji Vivax uređaja i nadamo se da ćete biti zadovoljni odabirom. Ako u jamstvenom roku bude potreban popravak proizvoda, molimo savjetujte se sa ovlaštenim prodavačem koji Vam je proizvod prodao ili nas kontaktirajte na dolje navedene brojeve i adrese. MOLIMO VAS DA PRIJE UPORABE PROIZVODA PAŽLJIVO PROČITATE UPUTE PRILOŽENE UZ PROIZVOD!
JAMSTVENI LIST
VIVAX
HR
MODEL UREĐAJA
SERIJSKI BROJ
DATUM PRODAJE
BROJ RAČUNA PRODAVATELJA
POTPIS I PEČAT PRODAVATELJA
- Ovim jamstvom M SAN Grupa kao davatelj jamstva u Republici Hrvatskoj jamči besplatan popravak istog u skladu s važećim propisima i u skladu s uvjetima opisanim u ovom jamstvenom listu. Ovim jamstvom jamčimo da će predmet ovog jamstva raditi bez pogreške uzrokovane eventualnom lošom izradom ili lošim materijalom izrade. Svi, eventualno nastali, kvarovi biti će besplatno otklonjeni u ovlaštenom servisu u jamstvenom roku.
- UVJETI JAMSTVA Jamstveni rok počinje od dana kupnje proizvoda i traje 12 mjeseci, osim za Vivax Imago televizore (CRT, LCD, PDP) za koje jamstvo traje 24 mjeseca.
- U slučaju kvara na proizvodu koji je predmet ovog jamstva, obvezujemo se da ćemo isti popraviti u najkraćem mogućem roku, a najkasnije u roku od 45 dana. Ako se proizvod ne može popraviti ili se ne popravi u roku od 45 dana, biti će zamijenjen novim. Jamstvo će biti produženo za vrijeme trajanja popravka.
- Jamstvo se priznaje samo uz račun o kupnji, te uz ovaj jamstveni list koji mora biti ispravno popunjen odnosno mora sadržavati datum prodaje, pečat i potpis prodavatelja.
5. JAMSTVO NE OBUHVAĆA
POTPIS I PEČAT PRODAVATELJA
GARANCIJSKA IZJAVA
- Ovom garancijom garantira proizvođač proizvoda, preko KIM TEC d.o.o., kao uvoznika i davatelja garancije u Republici Bosni i Hercegovini besplatan popravak istog u skladu s važećim propisima i u skladu s uvjetima opisanim u ovom garantnom listu. Ovom garancijom garantiramo da će predmet ove garancije raditi bez greške uzrokovane eventualnom lošom izradom i lošim materijalom izrade. Svi eventualno nastali kvarovi biti će besplatno otklonjeni u ovlaštenom servisu u garantnom roku.
UVJETI GARANCIJE:
Garantni rok počinje teći od dana kupnje proizvoda i traje 12 mjeseci, osim za Vivax Imago televizore (CRT, LCD, PDP) za koje jamstvo traje 24 mjeseca
- U slučaju kvara na proizvodu koji je predmet ove garancije, obavezujemo se da ćemo isti popraviti u najkraćem mogućem roku, a najkasnije u roku od 45 dana. Ako se proizvod ne može popraviti ili se ne popravi u roku od 45 dana, biti će zamijenjen novim. Ako popravak proizvoda traje duže od 10 dana, garancija se produljužuje za vrijeme trajanja popravka.
- Garancija se priznaje samo uz račun o kupnji, te uz ovaj garantni list koji mora biti ispravno popunjen odnosno mora sadržavati datum prodaje, pečat i potpis prodavatelja.
- Davalac garancije osigurava servis i rezervne dijelove 7 godina od datuma kupnje.
GARANCIJA NE OBUHVAĆA:
POTPIS I PEČAT PRODAVCA
- Ovom izjavom o saobraznosti proizvođač proizvoda, preko KIM TEC CG d.o.o., kao uvoznika i davaoca prava u Crnoj Gori besplatan popravak istog u skladu s vazećim propisima i u skladu s uslovima opisanim u ovoj izjavi o saobraznosti. Ovom izjavom o saobraznosti istićemo da će predmet ovog prava raditi bez greške uzrokovane eventualnom lošom izradom i lošim materijalom izrade. Svi eventualno nastali kvarovi biće besplatno otklonjeni u ovlašćenom servisu u predviđenom roku za reklamaciju.
- USLOVI REKLAMACIJE: Rok za reklamaciju počinje teći od dana kupovine proizvoda i traje 24 mjeseca.
- U slučaju kvara na proizvodu koji je predmet reklamacije, obavezujemo se da ćemo isti popraviti u najkraćem mogućem roku, a najkasnije u roku od 15 dana. Ako se proizvod ne može popraviti ili se ne popravi u roku od 15 dana, biće zamijenjen novim.
- Pravo na reklamaciju se priznaje uz fiskalni račun o kupovini, ili uz ovu izjavu o saobraznosti koji mora biti ispravno popunjen odnosno mora sadržati datum prodaje, pečat i potpis prodavca.
- Davalac izjave o saobraznosti osigurava servis i rezervne djelove 7 godina od datuma kupovine.
- PRAVO NA REKLAMACIJU NE OBUHVATA
Kosova Electronic Service Center
Kosova Electronic Service Center
VIVAX Air Conditioners; White Goods and Small Home appliances
- POPIS PRIBORA UZ UREĐAJ
- OPREZ
- RIZIK OD STRUJNOG UDARA NE OTVARAJTE UREĐAJ
- PREDNJA STRANA TV PRIJAMNIKA
- NAPOMENE
- DIGITAL COAX AUDIO OUT
- MINI AV
- DALJINSKI UPRAVLJAČ
- ENVIRONMENT (OKOLINA)
- TUNING MODE (MOD PRIJAMA)
- ČESTITAMO, VAŠ TV JE SADA SPREMAN ZA GLEDANJE TV PROGRAMA
- ODABIR ULAZA (INPUT SOURCE)
- SURROUND SOUND (SURROUND ZVUK)
- AUTO VOLUME (AUTO NIVO ZVUKA)
- AD SWITCH/AD VOLUME (AD UKLJUČENJE/AD JAČINA)
- AUTO SCAN (AUTO PRETRAGA)
- DVB-T AUTO SCAN (DVB-T AUTO PRETRAGA)
- TUNING MODE (MOD PRETRAGE)
- COUNTRY (DRŽAVA)
- LCN
- SCAN MODE (MOD PRETRAGE)
- MODULATION / SYMBOL
- DVB-S AUTO SCAN (DVB-S AUTO PRETRAGA)
- SATELLITE (SATELIT)
- CHANNEL TYPE (TIP KANALA)
- SERVICE TYPE (VRSTA USLUGE)
- SUBTITLE LANGUAGES (JEZIK PODNASLOVA)
- AUDIO LANGUAGES (AUDIO JEZIK)
- DLC (DYNAMIC LUMINANCE CONTROL)
- PVR OPTION (PVR OPCIJE)
- HOME MODE (KUĆNI MOD)
- RESTORE FACTORY DEFAULT (VRAĆANJE NA TVORNIČKI POSTAV)
- TIME ZONE (VREMENSKA ZONA)
- DST (DAYLIGHT SAVING TIME) (LJETNO VRIJEME)
- OSD ACTIVE TIME (VRIJEME PRIKAZA OSD-A)
- IZBORNIK LOCK (ZAKLJUČAVANJE)
- SET PASSWORD (PROMJENA LOZINKE)
- MOLIMO VAS DA ZAPAMTITE LOZINKU
- SYSTEM LOCK (SISTEMSKO ZAKLJUČAVANJE)
- PARENTALL GUIDE (RODITELJSKO ZAKLJUČAVANJE)
- HOTEL MODE (HOTELSKI MOD)
- MAX VOLUME (MAX JAČINA)
- CH TABLE IMPORT/EXPORT (IZVOZ/UVOZ LISTE PROGRAMA)
- CLEAR LOCK (OČISTI ZAKLJUČAVANJE)
- USB MEDIA OPERACIJE
- PREDNJA STRANA TV PRIJEMNIKA
- VGA - PC AUDIO IN
- EARPHONE (SLUŠALICE)
- SOURCE: IZBOR ULAZA
- PODE ŠAVANJE VOLUMENA
- TUNING SETUP (PODEŠAVANJA)
- VAŠ TV SPREMAN JE ZA GLEDANJE TV PROGRAMA
- IZBOR ULAZA (INPUT SOURCE)
- GLAVNI MENI
- CONTRAST/BRIGHTNESS/COLOUR/SHARPNESS/TINT (KONTRAST / SVETLINA / BOJA / OŠTRINA / TON)
- BALANCE (BALANS)
- SPDIF MODE
- SPEAKER DELAY/SPDIF DELAY (KAŠNJENJE ZVUČNIKA/SPDIF KAŠNJENJE)
- MENI CHANNEL (KANALI)
- MODULATION/SYMBOL/NETWORK ID/FREQUENCY (MODULACIJA/SIMBOLI/MREŽNI ID/FREKVENCIJA)
- DST (DAYLIGHT SAVING TIME) (LETNJE VREME)
- OSD ACTIVE TIME (VREME PRIKAZA OSD-A)
- ZAKLJUČAVANJE
- SET PASSWORD (PROMENA LOZINKE)
- ZAPAMTITE LOZINKU
- НАПОМЕНА
- ENVIRONMENT (ОКОЛИНА)
- SURROUND SOUND (SURROUND 3ВУК)
- COUNTRY (ДРЖАВА)
- MAX VOLUME (МАКСИМАЛНА ЈАЧИНА)
- SHËNIME
- HEADPHONE (KUFJE)
- MINI YPBPR IN
- UDHËZIME TË LIDHJES
- LIDHJE AJRORE
- ENVIRONMENT (MJEDISI)
- TUNING MODE (MOD I MARRJES)
- DIGITAL TYPE (LLOJ DIGJITAL)
- MENYJA PICTURE (PAMJA)
- SURROUND SOUND (SURROUND ZËRI)
- AD SWITCH/AD VOLUME (AD KYÇJE/AD FUQIA)
- AUTO SCAN (AUTO KËRKIM)
- DVB-T AUTO SCAN (DVB-T AUTO KËRKIM)
- COUNTRY (SHTETI)
- MODULATION / SYMBOL / NETWORK ID / FREQUENCY (MODULIMI / SIMBOLET / ID E RRJETIT / FREKUENCA)
- PROGRAM EDIT (RREGULLIM I PROGRAMIT)
- DEVICE AUTO POWER OFF (SHKYÇJE E PAJISJES SË JASHTME)
- TIME ZONE (ZONA KOHORE)
- DST (DAYLIGHT SAVING TIME) (KOHA VERORE)
- SET PASSWORD (NDËRRIM I FJALËKALIMIT)
- CHANNEL LOCK (MBYLLJE E KANALIT)
- SOURCE LOCK (MBYLLJE E BURIMIT)
- MAX VOLUME (FUQIA MAKSIMALE)
- IMPORTANT SAFETY INSTRUCTIONS 5
- INSTALLATION 11
- BASIC FEATURES
- MAIN MENU
- USB MEDIA OPERATIONS
- OTHER INFORMATION
- PRODUCT FICHE (AT THE END OF THE MANUAL)
- WARRANTY DECLARATION (AT THE END OF THE MANUAL)
- WELCOME
- THE ACCESSORIES
- CAUTION
- RISK OF ELECTRIC SHOCK DO NOT OPEN
- IMPORTANT SAFETY INSTRUCTIONS
- READ, RETAIN, FOLLOW ALL INSTRUCTIONS
- HEED WARNINGS
- CLEANING
- ATTACHMENTS AND EQUIPMENT
- WATER AND MOISTURE
- SETTING
- VENTILATION
- POWER SOURCE
- GROUNDING OR POLARIZATION
- LIGHTNING
- POWER LINES AND ANTENNA CABLES
- OVERLOADING
- OBJECT AND LIQUID ENTRY
- OUTDOOR ANTENNA GROUNDING
- SERVICING
- DAMAGE REQUIRING SERVICE
- REPLACEMENT PARTS
- SAFETY CHECK
- HEAT
- EARPHONES USE - ATTENTION
- WARNING
- LED PANEL
- POSITIONING THE TV SET
- STAND INSTALLATION
- NOTES
- WALL MOUNT INSTALLATION
- TV FRONT
- CONTROL PANEL
- ANTENNA AND POWER CONNECTION
- CONNECTIONS
- USB
- CI: COMMON INTERFACE
- COAX: DIGITAL AUDIO OUT
- EARPHONE
- MINI YPBPR
- REMOTE CONTROLLER
- INSTALLING BATTERIES IN THE REMOTE CONTROL
- REMOTE CONTROL OPERATION RANGE
- CONNECTION INSTRUCTIONS
- CONNECTING AN AERIAL
- CONNECTING HDMI
- NOTE
- WHAT IS HDMI
- CONNECTING EXTERNAL A/V DEVICES
- CONNECTING A COMPUTER
- CONNECTING DIGITAL AUDIO
- CONNECTING HEADPHONES
- USING THE REMOTE CONTROL
- TURNING YOUR TV ON AND OFF
- SELECTING THE INPUT SOURCE
- ADJUSTING THE VOLUME
- CHANGING CHANNELS
- SELECTING THE SOUND MODE
- SELECTING THE PICTURE MODE
- SELECTING THE ASPECT RATIO
- SETTING THE SLEEP TIMER
- AUDIO FUNCTION
- DISPLAYING CHANNEL LIST
- ELECTRONIC PROGRAMMING GUIDE (EPG)
- FIRST TIME INSTALLATION
- SELECT OSD LANGUAGE
- SELECT COUNTRY
- ENVIRONMENT
- TUNING SETUP
- TUNING MODE
- DIGITAL TYPE
- SCAN MODE, NETWORK ID, FREQUENCY, SYMBOL
- CONGRATULATIONS, YOUR TV IS NOW READY TO WATCH CHANNELS
- SELECT INPUT SOURCE
- MAIN MENU OPERATION
- PICTURE MENU
- PICTURE MODE
- CONTRAST/ BRIGHTNESS/ COLOUR/ SHARPNESS / TINT
- COLOUR TEMP
- NOISE REDUCTION
- AUDIO MENU
- SOUND MODE
- SURROUND SOUND
- AUTO VOLUME
- AD SWITCH/AD VOLUME
- SPEAKER DELAY / SPDIF DELAY
- CHANNEL MENU
- AUTO SCAN
- DVB-T AUTO SCAN
- COUNTRY
- DVB-C AUTO SCAN
- SCAN MODE
- MODULATION/SYMBOL/NETWORK ID/FREQUENCY
- DVB-S AUTO SCAN
- SATELLITE
- CHANNEL TYPE
- SERVICE TYPE
- DISH SETUP
- DTV MANUAL TUNING
- PROGRAM EDIT
- CHANNEL LIST
- FAVOURITE LIST
- CI INFORMATION
- SIGNAL INFORMATION
- SETUP MENU
- OSD LANGUAGE
- AUDIO LANGUAGES
- TTX LANGUAGE
- HEARING IMPAIRED
- BLUE SCREEN
- HDMI CEC
- DEVICE AUTO POWER OFF
- TV AUTO POWER ON
- HDMI ARC (AUDIO RETURN CHANNEL)
- DEVICE LIST
- ROOT MENU
- VGA SETTINGS (PCIN)
- HORIZONTAL POS
- VERTICAL POS
- CLOCK
- PHASE
- AUTO
- PVR OPTION
- HOME MODE
- SOFTWARE UPDATE(USB)
- TIME MENU
- SLEEP TIMER
- AUTO STANDBY
- TIME ZONE
- DST (DAYLIGHT SAVING TIME)
- OSD ACTIVE TIME
- LOCK MENU
- SET PASSWORD
- PLEASE REMEMBER PASSWORD
- SYSTEM LOCK
- CHANNEL LOCK
- PARENTALL GUIDE
- KEY LOCK
- HOTEL MODE
- SOURCE LOCK
- DEFAULT PROG
- MAX VOLUME
- CH TABLE IMPORT/EXPORT
- CLEAR LOCK
- USB MEDIA OPERATION
- TROUBLESHOOTING
- REMARK
- INFORMATION ON DISPOSAL FOR USERS OF WASTE ELECTRICAL & ELECTRONIC EQUIPMENT (PRIVATE HOUSEHOLDS)
- DISPOSAL OF WASTE BATTERIES
- EU DECLARATION OF CONFORMITY
- POŠTOVANI
- JAMSTVENI LIST
- VIVAX
- HR
- MODEL UREĐAJA
- SERIJSKI BROJ
- DATUM PRODAJE
- BROJ RAČUNA PRODAVATELJA
- POTPIS I PEČAT PRODAVATELJA
- JAMSTVO NE OBUHVAĆA
- GARANCIJSKA IZJAVA
- UVJETI GARANCIJE
- GARANCIJA NE OBUHVAĆA
- POTPIS I PEČAT PRODAVCA
Brand : Vivax
Model : TV-65UHD121T2S2
Category : Television