
DXZ855MP - Hi-Fi System CLARION - Free user manual and instructions
Find the device manual for free DXZ855MP CLARION in PDF.


| Product Type | CD/MP3 Receiver |
| Brand | Clarion |
| Model | DXZ855MP |
| Dimensions (W x H x D) | 178 mm x 50 mm x 158 mm |
| Weight | 1.2 kg |
| Power Supply | 12 V DC (negative ground) |
| Maximum Power Output | 4 x 50 W |
| RMS Power Output | 4 x 22 W (at 4 ohms, 1% THD) |
| Tuner Frequency Range (FM) | 87.5 - 108 MHz |
| Tuner Frequency Range (AM) | 530 - 1710 kHz |
| Playable Discs | CD, CD-R, CD-RW, MP3 |
| Audio Formats | MP3, WMA |
| Equalizer | 3-band (Bass, Mid, Treble) |
| Inputs | Auxiliary (3.5 mm), CD changer control (optional) |
| Outputs | 4-channel speaker outputs, 2-channel preamp outputs |
| Display | Multi-color dot matrix LCD |
| Remote Control | IR remote included |
| Maintenance | Clean with dry, soft cloth. Avoid solvents. |
| Safety | Use only specified fuse (10 A). Disconnect battery before installation. |
| Spare Parts & Repairability | Contact authorized Clarion service center for parts and repairs. |
| General Information | High-power car stereo with CD/MP3 playback, designed for 12V systems. |
Frequently Asked Questions - DXZ855MP CLARION
User questions about DXZ855MP CLARION
0 question about this device. Answer the ones you know or ask your own.
Ask a new question about this device
Download the instructions for your Hi-Fi System in PDF format for free! Find your manual DXZ855MP - CLARION and take your electronic device back in hand. On this page are published all the documents necessary for the use of your device. DXZ855MP by CLARION.
USER MANUAL DXZ855MP CLARION
CD/MP3/WMA Receiver /
CeNET & Touch Panel Control
•
Thank you for purchasing this Clarion product.
*Please read this owner's manual in its entirety before operating this unit.
*After reading this manual, be sure to keep it in a handy place (e.g., glove compartment).
*Check the contents of the enclosed warranty card and keep it carefully with this manual.
* This manual includes the operating procedures of the CD changer and TV tuner connected via the CeNET cable. The CD changer and TV tuner have their own manuals, but no explanations for operating them are described.
Contents
- FEATURES.... 2
- PRECAUTIONS .... 3
Sloping Console 4
Handling Compact Discs 4
- CONTROLS 5
- NOMENCLATURE 6
Names of the Buttons and their Functions 6
Operations when External Equipment is Connected to this Unit 7
Touch Panel Buttons 8
Touch Panel Operations 9
- DCP 10
- REMOTE CONTROL 11
Inserting the Battery 11
Functions of Remote Control Unit Buttons 12
- OPERATIONS ...... 13
Basic Operations 13
Radio Operations 16
CD/MP3/WMA Operations 19
Sound Adjustment 24
Common Operations 27
- OPERATIONS OF ACCESSORIES 35
CD Changer Operations 35
TV Operations 38
- IN CASE OF DIFFICULTY 41
- ERROR DISPLAYS 43
- SPECIFICATIONS 44
1. FEATURES
• 4.2-Inch Full Color TFT Display
- Optimedia Technology for Superior Graphics and Touch-Screen Control
- MP3 and WMA Playback With ID3-TAG and WMA-TAG Display Capability
• High-Powered Internal MOSFET Amplifier (53 Watts x 4 Channels)
- Superb Music Reproduction With 24-Bit D/A Conversion and 4-Volt/6-Channel RCA Outputs
- Auxiliary Input for External Device Connection
• 2-Band Parametric EQ and ADF Compressed Audio Enhancer
• High Quality Stainless Steel Faceplate
2. PRECAUTIONS
-
When the inside of the car is very cold and the player is used soon after switching on the heater, moisture may form on the disc or the optical parts of the player and proper playback may not be possible. If moisture forms on the disc, wipe it off with a soft cloth. If moisture forms on the optical parts of the player, do not use the player for about 1 hour. The condensation will disappear naturally allowing normal operation.
-
Driving on extremely bumpy roads may cause severe vibration and cause the sound to skip.
- This unit uses a precision mechanism. Even in the event that trouble arises, never open the case, disassemble the unit, or lubricate the rotating parts.
WARNING
For your safety, do not watch or operate the touch panel while driving.
This unit has been tested and found to comply with the limits for a Class B digital device, pursuant to Part 15 of the FCC Rules.
These limits are designed to provide reasonable protection against harmful interference in a residential installation.
This unit generates, uses, and can radiate radio frequency energy, and, if not installed and used in accordance with the instructions, may cause harmful interference to radio communications. However, there is no guarantee that interference will not occur in a particular installation.
If this unit does cause harmful interference to radio or television reception, which can be determined by turning the equipment off and on, the user is encouraged to consult the dealer or an experienced radio/TV technician for help.
CAUTION
USE OF CONTROLS, ADJUSTMENTS, OR PERFORMANCE OF PROCEDURES OTHER THAN THOSE SPECIFIED HEREIN, MAY RESULT IN HAZARDOUS RADIATION EXPOSURE.
THE COMPACT DISC PLAYER AND MINI DISC PLAYER SHOULD NOT BE ADJUSTED OR REPAIRED BY ANYONE EXCEPT PROPERLY QUALIFIED SERVICE PERSONNEL.
CHANGES OR MODIFICATIONS NOT EXPRESSLY APPROVED BY THE MANUFACTURER FOR COMPLIANCE COULD VOID THE USER'S AUTHORITY TO OPERATE THE EQUIPMENT.
INFORMATION FOR USERS:.
CHANGES OR MODIFICATIONS TO THIS PRODUCT NOT APPROVED BY THE MANUFACTURER WILL VOID THE WARRANTY AND WILL VIOLATE FCC APPROVAL.
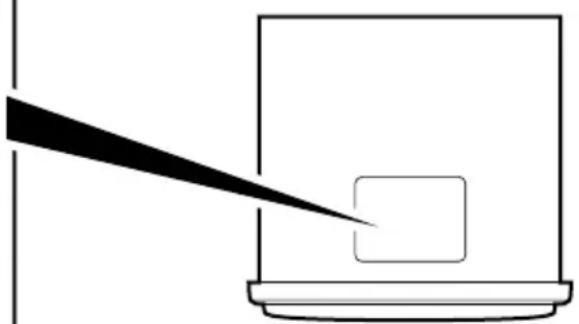
natural_image
Simple line drawing of a laptop with a screen and a diagonal line extending from it (no text or symbols)Bottom View of Source Unit
This unit uses a SLOPING CONSOLE to make large screen displays possible.
When you use the SLOPING CONSOLE, be sure to close it.
CAUTION
BE CAREFUL NOT TO GET YOUR FINGERS CAUGHT WHEN OPENING AND CLOSING THE SLOPING CONSOLE.
- For safety's sake, always close the SLOPING CONSOLE before leaving this unit unused for a prolonged period or switching OFF the ignition key.
If you switch OFF the ignition key with the SLOPING CONSOLE tilted, the SLOPING CONSOLE does not close.
Handling Compact Discs
Use only compact discs bearing the


mark.
Do not play heart-shaped, octagonal, or other specially shaped compact discs.
Some CDs recorded in the CD-R/CD-RW mode may not be usable.
Handling
- Compared to ordinary music CDs, CD-R and CD-RW discs are both easily affected by high temperature and humidity and some CD-R and CD-RW discs may not be playable. Therefore, do not leave them for a long time in the car.
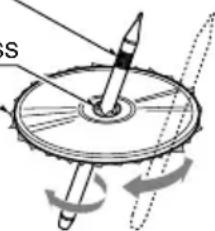
- New discs may
have some roughness around the
edges. If such discs are used, the player
may not work or the sound may skip. Use a ball-point pen or the like to remove any roughness from the edge of the
- Never stick labels on the surface of the compact disc or mark the surface with a pencil or pen.
- Never play a compact disc with any cellophane tape or other glue on it or with peeling off marks. If you try to play such a compact disc, you may not be able to remove it from the CD player or it may damage the CD player.
Ball-point pen
Roughness
- Before the SLOPING CONSOLE closes, there may be a braking sound from the safety mechanism. This is normal.
- If you move the SLOPING CONSOLE by hand, this may start play. To correct this play, with the power for the unit ON, press the [▲] button to close the SLOPING CONSOLE.
- After a disc is ejected, the SLOPING CONSOLE automatically returns to the tilted or closed state. If there is any obstruction when the SLOPING CONSOLE tries to close, the safety mechanism is triggered and the SLOPING CONSOLE returns to the open state. If this happens, remove the obstruction, then press the [▲] button.
-
To avoid scratching the compact disc, keep the 12 or 8 cm CD level when loading or removing it.
-
Do not use compact discs that have large scratches, are misshapen, cracked, etc. Use of such discs may cause misoperation or damage.
- To remove a compact disc from its storage case, press down on the center of the case and lift the disc out, holding it carefully by the edges.
- Do not use commercially available CD protection sheets or discs equipped with stabilizers, etc. These may damage the disc or break the internal mechanism.
Storage
- Do not expose compact discs to direct sunlight or any heat source.
- Do not expose compact discs to excess humidity or dust.
- Do not expose compact discs to direct heat from heaters.
Cleaning
- To remove fingermarks and dust, use a soft cloth and wipe in a straight line from the center of the compact disc to the circumference.
- Do not use any solvents, such as commercially available cleaners, anti-static spray, or thinner to clean compact discs.
• After using special compact disc cleaner, let the compact disc dry off well before playing it.
3. CONTROLS
Source unit
![[ADJ] IR-Receiver [ROTARY] S SRC Display [SIR] [SRC] [MODE] [ ] (SOUND) Photo Sensor [▲] (OPEN/EJECT) DIZZASSMP Clarion ProAudio ONL /ELECT MODE SOUND M [SIR] [SOUND] [SIRIUS] EADT](/content/2026/05/953564/images/0577c759ca4585ec8b05502b3361fb5456c0b7c53d1c2a4c49c6a783eddd3f08.jpg)
With the SLOPING CONSOLE opened
![[CD SLOT] PUSH LOCK→←RELEASE DCP Detaching Slider](/content/2026/05/953564/images/94c6ff94313a51a8587dbea9115197f4600d38aba852842e5c951e158e707e9d.jpg)
4. NOMENCLATURE
Names of the Buttons and their Functions
IR-Receiver
- Receiver for remote control unit. (Operating range: 30^ in all directions)
[ADJ] button
- Use this button to set or adjust the various settings in the adjust mode.
[▲] (OPEN/EJECT) button
- Open/closes the control panel. To eject a disc, open the control panel first, and then press this button once again.
Photo Sensor
- This sensor detects the brightness inside your car. When the auto-dimmer function is set to "AUTO", the brightness of the display is dimmed according to the brightness detected by this sensor.
[MODE] button
- Use this button to play in scan, repeat, or random mode.
- Press and hold this button for 2 seconds or longer to switch between standard and simple operation displays.
[♪] (SOUND) button
- Use this button for setting or adjusting various settings such as ADF.
[ISR] (Instant Station Recall) button
- Immediately calls up a favorite radio station regardless of the current mode. (This is the ISR function.) You can store radio stations to the [ISR] button by holding this button down for 2 seconds or longer in the radio mode.
[ SRC] button
- Switches among sound sources as shown below. Radio → (SIRIUS) → CD/MP3 → (CD changer) → (DVD changer) → (TV) → AUX → Radio...
Note:
External equipment not connected with CeNET is not displayed.
[ROTARY] knob
- Press the knob to turn the power ON.
- Press the knob to turn the power OFF.
- T urn the knob to adjust the volume.
[CD SLOT]
- CD insertion slot.
DCP Detaching Slider
- Removes the DCP.
Display
- Displays the various information that indicates the operating state of this unit such as tuning/play state and indicators.
- You can operate the display by touching or touching the surface. (cf. page 9)
Operations when External Equipment is Connected to this Unit
●When the CD/DVD changer is connected
* For details, see the section "CD changer operations" (cf. page 35). For the DVD changer, refer to the Owner's Manual provided with the DVD changer.
●When the TV is connected
* For details, see the section "TV operations" (cf. page 38).
●When the Sirius Satellite Radio is connected
* For details, refer to the Owner's Manual provided with the Sirius Satellite Radio.
What is Sirius Satellite Radio?

Sirius is radio the way it was meant to be: Up to 100 new channels of digital quality programming delivered to listeners coast to coast via satellite. That means 50 channels of completely commercial-free music. Plus up to 50 more channels of news, sports, and entertainment from names like CNBC, Discovery, SCI-FI Channel, A&E, House of Blues, E!, NPR, Speedvision and ESPN.
Sirius is live, dynamic entertainment, completely focused on listeners. Every minute of every day of every week will be different. All 50 commercial-free music channels are created in-house and hosted by DJs who know and love the music. Do you like Reggae? How about Classic Rock or New Rock? Sirius has an array of choices spanning a vast range of musical tastes including the hits of the 50's, 60's, 70's, & 80's as well as Jazz, Country, Blues, Pop, Rap, R&B, Bluegrass, Alternative, Classical, Heavy Metal, Dance and many others...
From its state-of-the-art, digital broadcasting facility in Rockefeller Center, New York City, Sirius will deliver the broadest, deepest mix of radio entertainment from coast to coast. Sirius will bring you music and entertainment programming that is simply not available on traditional radio in any market across the country. It's radio like you've never heard before.
So Get Sirius and Listen Up! For more information, visit siriusradio.com.
●Standard operation display
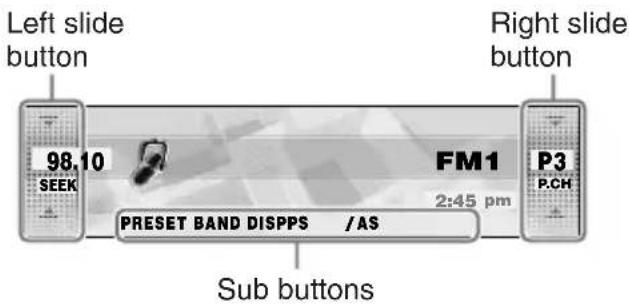
Left slide button
- Touch this button for seek up/down or track up/down operations.
- Touch and hold this button for fast-forward/fast-rewind operations.
Right slide button
- Touch this button for preset channel up/down, folder up/down, and disc up/down operations.
Sub buttons
• Shows functions available in a certain context.
●Simple operation display
(To switch to the simple operation display, press and hold the [MODE] button for 2 seconds or longer.)
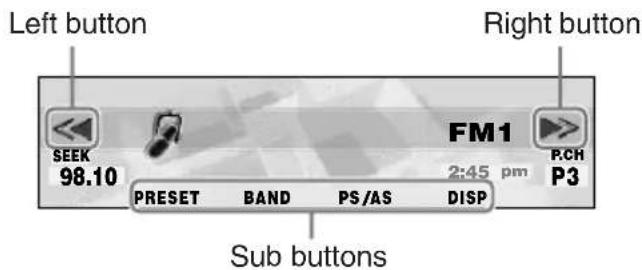
Left button
- Touch this button for seek down or track down operations.
- Touch and hold this button for fast-rewind operation.
Right button
- Touch this button for seek up or track up operations.
- Touch and hold this button for fast-forward operation.
Sub buttons
• Shows functions available in a certain context.
A touch panel display is used as the display on this unit. You can operate this display just by touching it with your fingertip. There are four main display operations as follows:
Touch
Touch the display with your fingertip and take it away within 1 second. This is the most basic operation when operating the display.
Touch and hold
Touch the display with your fingertip and hold it on the display for 1 or 2 seconds or longer. Do not move your finger while you are touching the display.
Touch

Touch the display with your fingertip, and move your finger to the up (↑) or down (↓) with your fingertip still touching the display, and take your fingertip away within 1 second. This operation is used, for example, selecting tracks or discs.
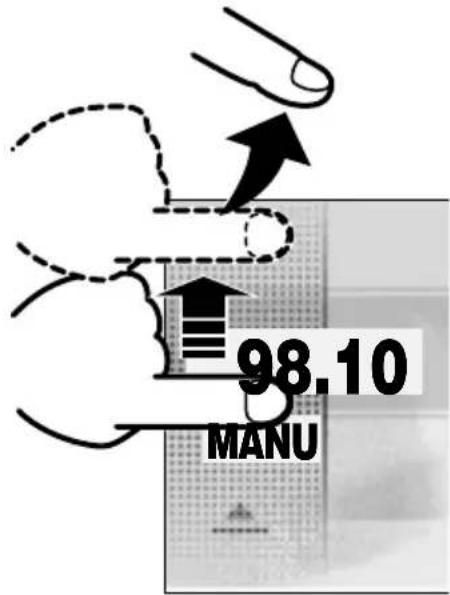
Touch

Touch the display with your fingertip, and move your finger to the up (↑) or down (↓) with your fingertip still touching the display, and keep your fingertip on the display. The current operation continues for the time your fingertip is held on the display. This operation is used, for example, for fast-forwarding/fast-rewinding tracks.
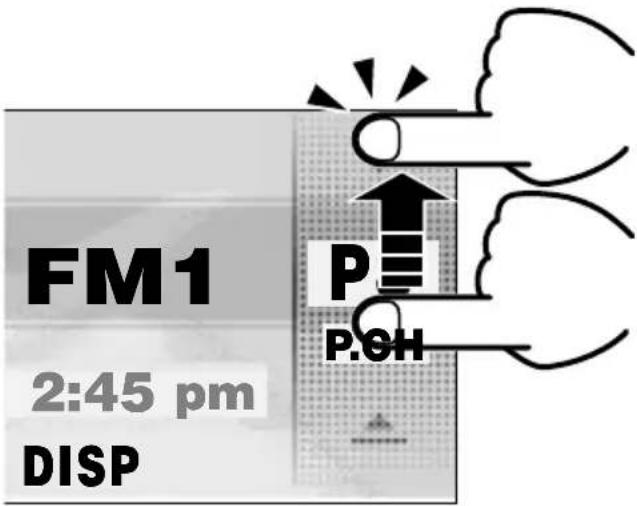
5. DCP
The control panel can be detached to prevent theft. When detaching the control panel, store it in the DCP (DETACHABLE CONTROL PANEL) case to prevent scratches.
We recommend taking the DCP with you when leaving the car.
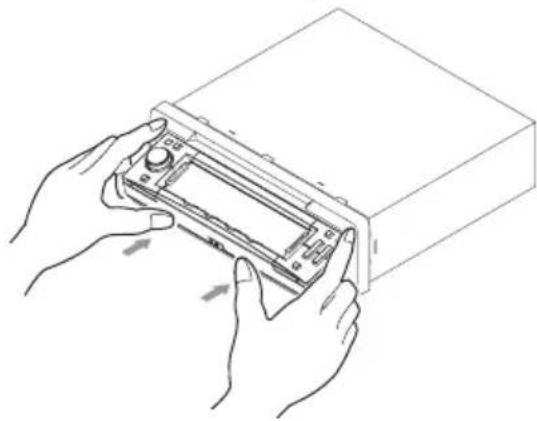
Removing the DCP
- Press the [▲] button to open the DCP.
- Move the DCP detaching slider to the "RELEASE" side.
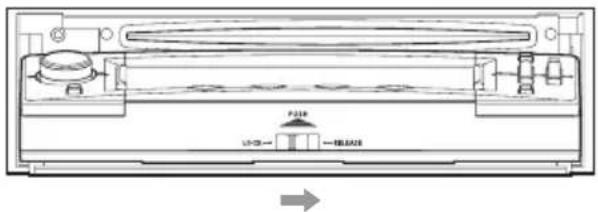
- Push and slide the DCP upward to remove.
natural_image
Line drawing of hands installing or adjusting a device into a rectangular box (no text or symbols visible)* The SLOPING CONSOLE without DCP closes automatically in a few seconds.
CAUTION
- Do not try to remove or attach while driving.
- The DCP can easily be damaged by shocks. After removing it, be careful not to drop it or subject it to strong shocks.
- If you purchased a replacement DCP, an electrical adjustment is necessary. This adjustment requires technical knowledge. Please consult Clarion service or a Clarion service station.
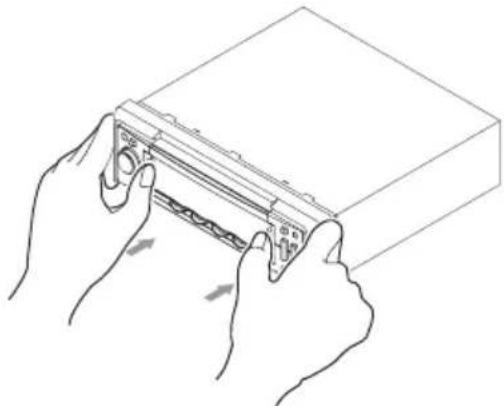
Attaching the DCP
- Place the DCP to the SLOPING CONSOLE, adjusting the metal connectors on DCP and the SLOPING CONSOLE.
- Press the DCP until it clicks into the SLOPING CONSOLE.
natural_image
Line drawing of hands installing or adjusting a device component (no text or symbols visible)* The DCP display lights and is ready to use.
3. Move the DCP detaching slider to the "LOCK" side.
CAUTION
- If the slider is on the [RELEASE] side and the DCP is not locked into place, it may fall out from vibration of the car. This can break the DCP, so after removing it, either firmly reattach it on the unit or put it in its DCP case.
- The connector connecting the unit and the DCP is an extremely important part. Be careful not to damage it by pressing on it with fingernails, screwdrivers, etc.
Note:
- If the DCP is dirty, wipe off the dirt with a soft, dry cloth only.
6. REMOTE CONTROL
Remote control unit
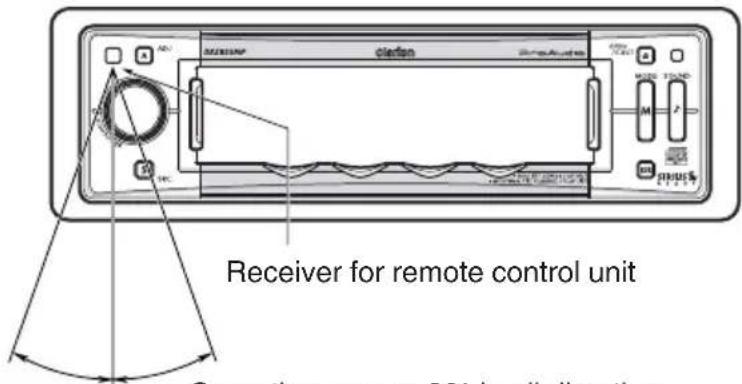
Operating range : 30° in all directions
Signal transmitter
![Signal transmittent [SRC] BND [▼II] [▲], [▼] [<<], [▶] [MUTE] ISP [DSP] [ISR] RDM [SCN] CLARION + PINES BASE CONTROLLER + SCN PENS RPT RDM RPTR](/content/2026/05/953564/images/97795cc6674f418441c7593c540edb4a9acc85a56ff2bd954f0e8ace299cbbe7.jpg)
Inserting the Battery
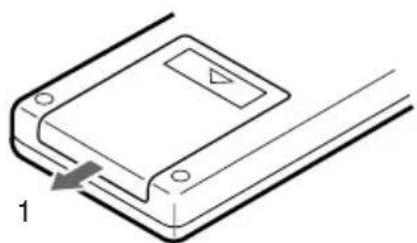
- Turn over the remote control unit and slide the cover in the direction indicated by the arrow in the illustration.
- Insert the battery (CR2025) into the insertion guides, with the printed side (+) facing upwards.
- Press the battery in the direction indicated by the arrow so that it slides into the compartment.
- Replace the cover and slide in until it clicks into place.
Notes:
Misuse may result in rupture of the battery, producing leakage of fluid and resulting in personal injury or damage to surrounding materials. Always follow these safety precautions:
- Use only the designated battery.
- When replacing the battery, insert properly, with +/- polarities oriented correctly.
- Do not subject battery to heat, or dispose of in fire or water. Do not attempt to disassemble the battery.
- Dispose of used batteries properly.
natural_image
Technical line drawing of a mechanical component with a labeled arrow and triangle symbol (no text or symbols present)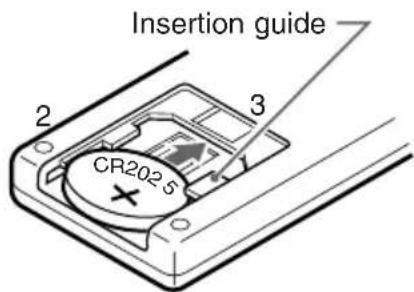
Functions of the Remote Control Unit Buttons
| ModeButton | Radio/SIRIUS | CD/MP3/WMA | CD changer DVD changer | TV |
| [ SRC ] | Switches among radio, SIRIUS tuner, CD/MP3/WMA, CD changer, DVD changer, TV and AUX. | |||
| [BND] | Switches reception band. | Returns to the first track. | Moves the next disc in increasing order. | Switches reception band. |
| [▲], [▼] | Increases and decreases volume (in all modes). | |||
| [◀], [▶] | Moves preset channels up and down. | Moves tracks up and down.When pressed and held for 1 second or longer:Fast-forward/fast-rewind. | Moves preset channels up and down. | |
| [▶II] | No function. | Switches between playback and pause. | No function. | |
| [MUTE] | Turns mute on and off. | |||
| [ISR] | Recalls ISR radio station in memory.When pressed and held for 2 seconds or longer: Stores current station into ISR memory (radio mode only). | |||
| [DISP] | Switches between the title display and the spectrum analyzer display. | |||
| [SCN] | Preset scan.When pressed and held for 2 seconds or longer:Auto store. | Scan play.When pressed and held for 1 second or longer:Folder scan play (MP3/WMA disc). | Scan play.When pressed and held for 1 second or longer:Disc scan play. | Preset scan.When pressed and held for 2 seconds or longer:Auto store. |
| [RPT] | No function. | Repeat play.When pressed and held for 1 second or longer:Folder repeat play (MP3/WMA disc). | Repeat play.When pressed and held for 1 second or longer:Disc repeat play. | No function. |
| [RDM] | No function. | Random play.When pressed and held for 1 second or longer:Folder random play (MP3/WMA disc). | Random play.When pressed and held for 1 second or longer:Disc random play. | Switches between TV and VTR. |
* Some of the corresponding buttons on the source unit and remote control unit have different functions.
CAUTION
Be sure to lower the volume before switching the unit off or the ignition key. The unit remembers its last volume setting. If you switch the power OFF with the volume up, when you switch the power back ON, the sudden loud volume may hurt your hearing and damage the unit.
Turning ON/OFF the power
Turning on
Note:
- Be careful when using this unit for a long time without running the engine. If you drain the car's battery too far, you may not be able to start the engine and this can reduce the service life of the battery.
- Press the [ROTARY] knob.
The mode that was previously active is displayed.
Turning off
- Press the [ROTARY] knob.
*The clock will stay displayed after the power is turned OFF.
■ To turn off the clock display
Touch the clock to turn off the clock display while the power is off.
CODEMATIC function
When “CODEMATIC” is set to “ON”, and the power is turned ON with the DCP attached, the Touch Code display appears. Touch the display in the order that was set in the adjust mode.
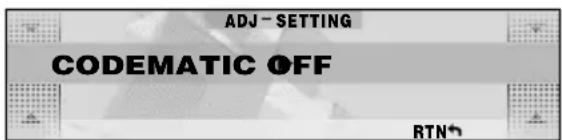
For details on the CODEMATIC function, see "Using the security function" (cf. page 34).
Selecting a mode
- Press the [SRC] button to change the operation mode.
- Each time you press the [SRC] button, the operation mode changes in the following order:
$$ \begin{array}{l} \text { Radio } \rightarrow (\text { SIRIUS }) \rightarrow \text { CD / MP3 } \rightarrow \ (C D \text { changer }) \rightarrow (D V D \text { changer }) \rightarrow (T V) \ \rightarrow \text { AUX } \rightarrow \text { Radio... } \ \end{array} $$
*External equipment not connected with CeNET is not displayed.
Adjusting the volume
- Turning the [ROTARY] knob clockwise increases the volume; turning it counterclockwise decreases the volume.
*The volume level is from 0 (minimum) to 33 (maximum).
Switching the operation display mode
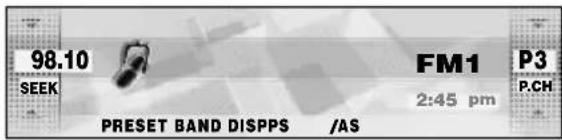
There are 2 basic operation displays: standard operation display and simple operation display.
- Press and hold the [MODE] button for 2 seconds or longer to switch the operation display.
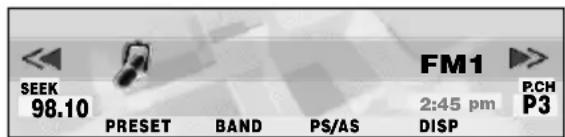
In the simple operation display, the operations of touching in the radio or CD mode display screen are not required.
Descriptions given in this manual are mainly for the standard operation display. For descriptions for operations in the simple operation display, refer to the descriptions for the screen displays in the radio mode or the CD mode.
Switching the background
1. Touch [DISP].
*DISPLAY EDIT screen displays.
- Touch ↑↓ ↓ on the left of the display to choose the background.
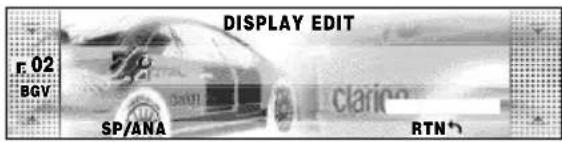
*The background includes 12 wallpaper images and 2 motion pictures.
* Choose [SCAN] to automatically display all the wallpaper.
● Background
M01: WRC
M02: Landscape
P01: Car and Checker Flag
P02: 307WRC from Two View Points
P03: Rally Driver
P04: Driving Scene
P05: Cube
P06: Bubble
P07: Speaker
P08: Digital Image1 (Disc media)
P09: Digital Image2 (Broadcast media such as satellite)
P10: Mixer
P11: Record Player
P12: Meter
3. Touch [RTN].
■ To change wallpaper color
You can change the colors of the wallpaper (from P05 to P12).
- It can be set to both "DAY" mode and "NIGHT" mode.
-
Touch [DISP].
-
Touch [COLOR].
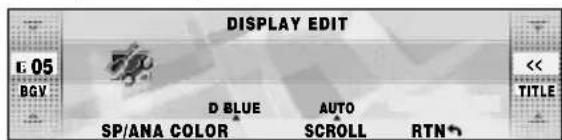
* The [COLOR] is displayed only when you choose wallpaper from P05 to P12.
- Touch ↑↓ on the left of the display to select [DAY] or [NIGHT].
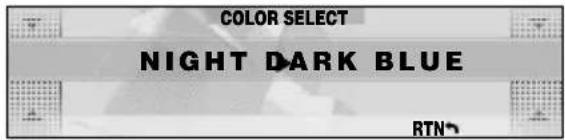
- Touch ↑↓ on the right of the display to select the color to set.
COLOR
Adjusting the spectrum analyzer
1. Touch [DISP].
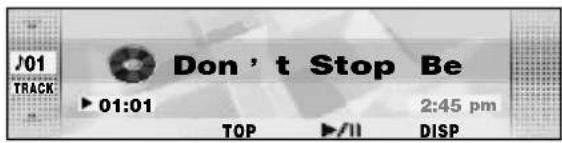
*Display edit mode appears.
2. Touch [SP/ANA].
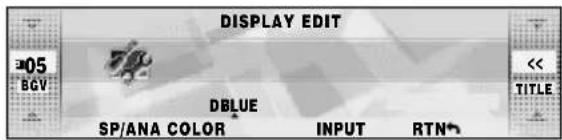
*The display shows the spectrum analyzer mode.
3. Touch ↑↓ on the right of the display to select the spectrum analyzer to set.
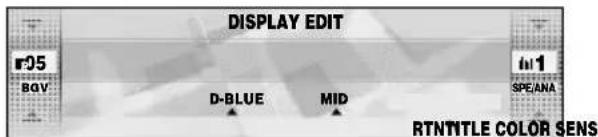
- Y ou can choose from four types.
- When [SCAN] is selected, each of them is displayed for about 10 seconds.
4. Touch [SENS] to select the sensitivity.
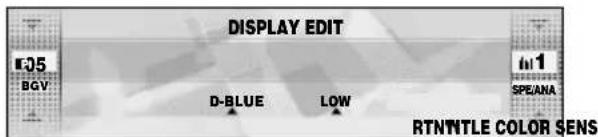
- You can choose from [HIGH], [MID], or [LOW].
5. Touch [RTN].
Switching the title display
You can display stored information such as disc titles or track titles when playing back music in CD or CD changer mode.
- Touch [DISP] while a title is shown.
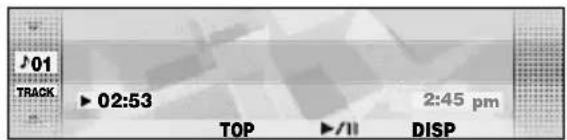
*Display edit mode appears.
- Touch [TITLE].
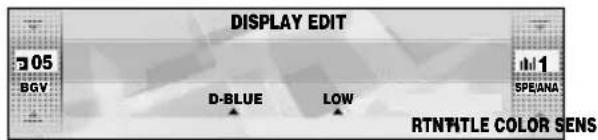
*Title edit mode appears.
- Touch ↑ ≡ ↓ on the right of the display to choose the kind of title to show.
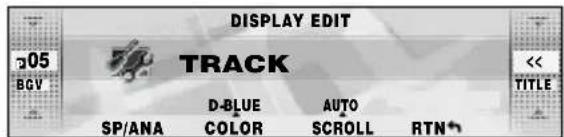
* The title you have chosen is displayed. If it is too long to fit into the display, it automatically scrolls.
- Touch [SCROLL].
- Select [AUTO] to scroll the title repeatedly.
- Select [ONCE] to scroll the title only once.
Notes:
- Y ou cannot set the scroll options in User title mode.
- Touch [RTN].
●CD mode (MP3/WMA)
Folder title (when using a folder) → Play list (when using a play list) → Track title → Album TAG → Artist TAG → Title TAG → Folder title (when using a folder)...
Notes:
• MP3 supports ID3 Tags V2.3 / 2.2 / 1.1 / 1.0.
- T ag displays give priority to V2.3 / 2.2.
- In the case of album Tags for WMA, the information written into the extension header is displayed.
- Only ASCII characters can be displayed in Tags.
FM reception
For enhanced FM performance, the
MAGI-TUNE® tuner includes signal actuated stereo control, Enhanced Multi AGC, Impulse noise reduction circuits and Multipath noise reduction circuits.
Screen displays in the radio mode
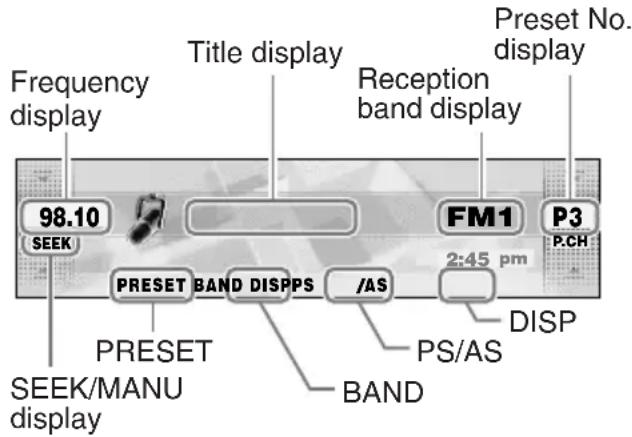
● Standard operation display
The standard operation display appears by pressing the [SRC] button and selecting the radio mode.
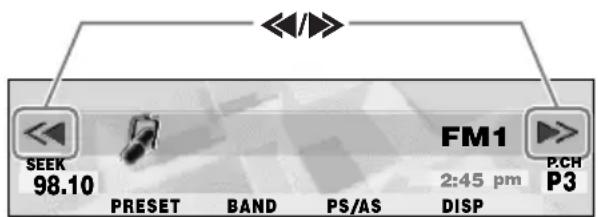
● Simple operation display
Pressing and holding the [MODE] button for 2 seconds or longer switches the simple operation display.
Frequency display
The frequency currently being received is displayed.
Touching 🔍 on the left slide button in the standard operation display allows you to perform seek tuning or manual tuning.
Preset No. display
Touching ↑ of the right slide button in the standard operation display selects a preset memory.
Title display
Displays the name of the broadcast channel currently being received.
Reception band display
AM: AM band name
FM1: FM band name
PRESET
Touching this displays a preset memory No. list.
BAND
Touching this switches the reception band. Touching and holding this for 1 second or longer switches between the manual tuning mode and the seek tuning mode.
PS/AS
Touching this starts a preset scan.
Touching and holding this for 2 seconds or longer starts an auto store.
Touching this during the preset scan/auto scan ends the operation.
DISP
The display contents can be changed.

(only in the simple operation display)
Touching these enables seek tuning or step tuning (in the manual tuning mode).
Touching and holding these enables quick tuning (in the manual tuning mode).
Listening to the radio
- Press the [SRC] button to select the radio mode.
Each press of the [SRC] button switches the mode as follows:
$$ \begin{array}{l}\text {Radio} \rightarrow (\text {SIRIUS}) \rightarrow \text {CD / MP3} \rightarrow\(\text {CD Changer}) \rightarrow (\text {DVD Changer}) \rightarrow (\text {TV})\\rightarrow \text {AUX} \rightarrow \text {Radio...}\end{array} $$
*The mode of equipment that is not connected is not displayed.
- Touch [BAND] to switch the reception band.
Each touch of [BAND] switches the reception band as follows:
$$ \mathrm{FM1} \rightarrow \mathrm{FM2} \rightarrow \mathrm{FM3} \rightarrow \mathrm{AM} \rightarrow \mathrm{FM1} \dots $$
Tuning
There are 3 types of tuning mode available, seek tuning, manual tuning and preset tuning.
Seek tuning
Seek tuning is a function for automatically tuning stations with good reception.
- Touch and hold [BAND] for 1 second or longer if "MANU" is displayed.
Automatic tuning is possible when "SEEK" is displayed. - Touch on the frequency display.
"SEEK UP"/"SEEK DOWN" is displayed, and tuning starts.
Tuning automatically stops at stations with good reception.
■ To cancel tuning
- Touch an the frequency display again.
Manual tuning
There are 2 ways available: quick tuning and step tuning.
In the step tuning mode, the frequency changes 1 step at a time. In the quick tuning mode, you can quickly tune the desired frequency.
-
Touch and hold [BAND] for 1 second or longer if "SEEK" is displayed.
Manual tuning is possible when "MANU" is displayed. -
Operate the frequency display to tune to a frequency on which there is a broadcast.
- Step tuning
Touch on the frequency display.
- Quick tuning
Touch on the frequency display. Tuning stops when you take your finger away from the panel.
Recalling a preset station
Recalling a preset station is a function for tuning pre-stored stations.
- Touch [PRESET].
The preset memory No. list is displayed. - Touch the preset memory No.
*In the standard operation display, preset
No. can also be tuned by touching ↗ ≈ ↘
■ To cancel tuning
- Touch [RTN].
Preset memory
A total of 24 preset positions (6-FM1, 6-FM2, 6-FM3, 6-AM) exists to store individual radio stations in memory.
- Touch [BAND] to switch the reception band.
- Operate the frequency display to tune to a frequency to store.
- Touch [PRESET].
The preset memory No. list is displayed. - Touch and hold the preset No. to store the station to for 2 seconds or longer.
You will hear a long beep, and the station is stored in memory.
Auto store
Auto store is a function for storing up to 6 stations that are automatically tuned in sequentially.
- Touch and hold [PS/AS] for 2 seconds or longer.
"A-STORE" is displayed.
*Stations with good reception are automatically searched, and are stored to preset memory (No.1 to No.6) in order from the station having the lowest frequency.
Notes:
- When auto store is performed, stations stored to memory so far are cleared.
- When there are fewer than 6 stations with good reception, low frequencies are automatically returned to, and auto store is performed again. If there are fewer than 6 stations even after auto store is performed twice, stations stored so far remain in memory.
Preset scan
Preset scan is a function for receiving stations in the order that they are currently stored to preset No. so that broadcasts can be checked.
- Touch [PS/AS].
"P-SCAN" is displayed.
*The currently stored stations are received in order for 7 seconds or longer each. Stations with poor reception are skipped, and the next station is received.
■ To cancel preset scan
1. Touch [PS/AS].
"P-SCAN" display disappears and the stations that were being received when [PS/AS] was touched are received next.
Instant station recall (ISR)
Instant station recall is a special radio preset that instantly accesses a favorite radio station at a touch of a button. The ISR function even operates with the unit in other modes.
- The factory default setting is "FM87.9MHz".
- Press the [ISR] button.
"ISR" appears on the display.
■ To return to the previous mode
Press the [ISR] button again or press the [SRC] button.
■ To store the station to "ISR"
In the radio mode, tune the station to store, and press and hold the [ISR] button for 2 seconds or longer.
You will hear a long beep, and the station currently being received is stored to ISR.
Screen displays in the CD/MP3 mode
● Standard operation display
The standard operation display appears by pressing the [SRC] button to select the CD/MP3 mode.
Track No.
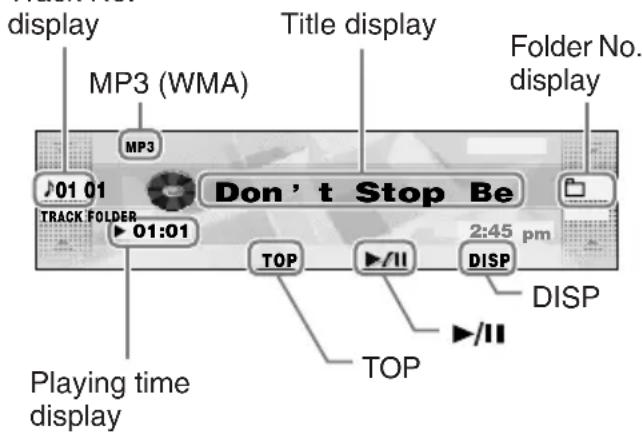
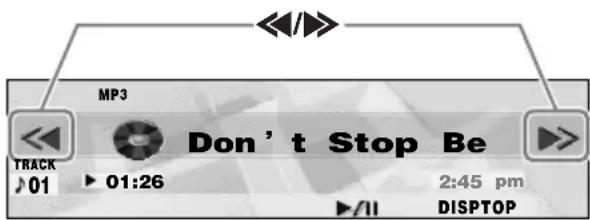
● Simple operation display
Pressing and holding the [MODE] button for 2 seconds or longer switches the simple operation display.
Playing time display
▶00: 01: The playing time is displayed.
Track No. display
If ↑↓ or ↑↓ is touched, you can select the track to play, or fast-forward or fast-rewind tracks.
Title display
The selected title is displayed.
Folder No. display (in the case of MP3/WMA)
Touching ↑ ↓ selects folders.
TOP
Touching this starts play from the track at the top of the disc or folder being played.

Touching this pauses or resumes play.
DISP
The display contents can be changed.
◀/▶ (only in the simple operation display)
Touching these buttons selects the track to play. Touching and holding these buttons fast-forwards or fast-rewinds tracks.
/ (Appears only in MP3/WMA discs and the simple operation display)
Touching these buttons selects the folder to play.
MP3/WMA
What is MP3?
MP3 is an audio compression method and classified into audio layer 3 of MPEG standards. This audio compression method has penetrated into PC users and become a standard format.
This MP3 features the original audio data compression to about 10 percent of its initial size with a high sound quality. This means about 10 music CDs can be recorded on a CD-R disc or CD-RW disc to allow a long listening time without having to change CDs.
What is WMA?
WMA is the abbreviation of Windows Media Audio, an audio file format developed by Microsoft Corporation.
Notes:
- If you play a file with DRM (Digital Rights Management) for WMA remaining ON, no audio is output. (The DRM indicator blinks.)
- Windows Media™, and the Windows® logo are trademarks, or registered trademarks of Microsoft Corporation in the United States and/or other countries.
● To disable DRM (Digital Rights Management):
-
When using Windows Media Player 8, click on TOOLS → OPTIONS → COPY MUSIC tab, then under COPY SETTINGS, unclick the check box for PROTECT CONTENT. Then, reconstruct files.
-
When using Windows Media Player 9, click on TOOL → OPTIONS → MUSIC RECORD tab, then under Recording settings, unclick the Check box for RECORD PROTECTED MUSIC. Then, reconstruct files.
Personally constructed WMA files are used at your own responsibility.
Precautions when creating MP3/WMA disc
● Usable sampling rates and bit rates:
- MP3: Sampling rate 11.025 kHz-48 kHz, Bit rate: 8 kbps-320 kbps / VBR
- WMA: Bit rate 48 kbps-192 kbps
● File extensions
- Always add a file extension ".MP3" or ".WMA" to MP3 or WMA file by using single byte letters. If you add a file extension other than specified or forget to add the file extension, the file cannot be played.
- Files without MP3/WMA data will not play. The indication “—:—” appears in the play time display if you attempt to play files without MP3/WMA data.
● Logical format (File system)
- When writing MP3/WMA file on a CD-R disc or CD-RW disc, please select "ISO9660 level 1, 2 or JOLIET or Romeo" as the writing software format. Normal play may not be possible if the disc is recorded on another format.
- The folder name and file name can be displayed as the title during MP3/WMA play but the title must be within 128 single byte alphabetical letters and numerals (including an extension).
- Do not affix a name to a file inside a folder having the same name.
- Folder structure
- A disc with a folder having more than 8 hierarchical levels will be impossible.
● Number of files or folders
- Up to 255 files can be recognized per folder. Up to 500 files can be played.
- Tracks are played in the order that they were recorded onto a disc. (Tracks might not always be played in the order displayed on the PC.)
- Some noise may occur depending on the type of encoder software used while recording.
Multisession function
When a disc contains both CD-DA and MP3/WMA type tracks mixedly, you can select which type of the recorded tracks to play.
● Default value is "CD".
- Press the [MODE] button.
-
Touch [◀]/[▶] to go to the next page.
-
Touch [MULTI SESS]. Each touch of [MULTI SESS] toggles the MULTI SESS display between "CD" (play CD-DA) or "MP3/WMA" (play MP3/WMA).
| SettingDisc | Set to CD | Set to MP3/WMA |
| Mixed with CD and MP3/WMA type tracks | Play CD | Play MP3/WMA |
| CD-DA | Play CD Play | CD |
| MP3/WMA disc | Play MP3/WMA | Play MP3/WMA |
*The multi-session selection setting is reflected the next time you load a CD.
Note:
- When playing a CCCD (Copy Control CD), set the setting to CD type. When this is set to MP3/WMA type, the CD cannot be played normally in some cases.
Disc-In-Play function
As long as the ignition key is turned to the ON or ACC position, this function allows you to turn the power to the unit and start playing the disc automatically when the disc is inserted even if the power is not turned on.
Loading a CD
-
Press the [▲] button.
The control panel opens. -
Insert the disc into the CD SLOT.
When the disc is loaded, the control panel automatically closes after several seconds, and play starts.
Notes:
- Never insert foreign objects into the CD SLOT.
- If the CD does not insert easily, there may be another CD in the mechanism or the unit may require service.
- Discs not bearing the QISC DIGITAL AUDIO TEXT mark and CD-ROMs cannot be played by this unit.
- Some CDs recorded in the CD-R/CD-RW mode may not be usable.
Loading 8 cm compact discs
*No adapter is required to play an 8 cm CD.
*Insert the 8 cm CD into the center of the CD SLOT.
Backup eject function
You can eject a disc by pressing the [▲] button even if the engine key or ACC is at the OFF position.
CAUTION
When the disc is ejected, press the [▲] button to close the control panel. If the control panel is left open, you will hear a double beep, and the control panel automatically closes.
- Press the [▲] button.
The control panel opens. - Press the [▲] button.
The disc is ejected.
Note:
- Always close the SLOPING CONSOLE after opening it or ejecting the CD.
CAUTION
- Be careful not to catch your hand or fingers while closing the SLOPING CONSOLE.
- Do not try to put your hand or fingers in the disc insertion slot. Also never insert foreign objects into the slot.
- Do not insert discs where adhesive comes out from cellophane tape or a rental CD label, or discs with marks where cellophane tape or rental CD labels were removed. It may be impossible to extract these discs from the unit and they may cause the unit to break down.
Listening to a disc already loaded in the unit
- Press the [SRC] button to select the CD/MP3 mode.
*Play automatically starts when the mode changes to the CD/MP3 mode.
Pausing play
- Touch [ ]▶/II
■ To resume play
- Touch [] again.
Selecting a track
When a CD-R/CD-RW recorded with an MP3 file or a WMA file is loaded, you can select only tracks recorded to the same folder by touching ↑↓ on the track display.
- To listen to the next track, touch ↑ on the track display.
- To listen to the previous track, touch twice on the track display.
Touching ↑ play the next track. If you touch ↑ more times, the track advances ahead to the track for the number of times you touched ↑ and that track is played. Touching ↓ plays the previous track. If you touch ↓ more times, the track moves back to the track for the number of times you touched ↓ and that track is played.
*If you touch ↓ twice on the track display while the start of the track is being played, the track 2 tracks back is sometimes played.
■ To select a folder
To select a different folder, touch ↗ ≡ ↓ on the folder display on the right.
Play list mode
This function allows you to play tracks, up to latest 5 time stamps, by reading the play list information written on the disc.
- Press the [MODE] button.
- Touch [◀]/[▶] to go to the next page.
- Touch [PLAY LIST].
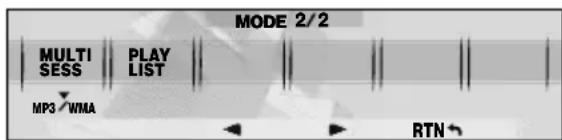
The operation of selecting the play list or tracks in the play list is the same as that of selecting a folder or tracks in a folder.
*Play list play is possible only when there is a file whose extension is ".M3U" on the CD-R/RW.
*Up to 5 play lists can be recognized, and up to 255 files can be recognized per play list.
■ Stopping play of play list
-
Press the [MODE] button.
-
Touch [◀]/[▶] to go to the next page.
- Touch [PLAY LIST].
Notes:
- The SCN/RPT/RDM functions cannot be used while in the play list mode.
- The title changes from folder name to play list name.
Making a play list
- Write desired tracks to a CD-R/RW, etc. Be sure to use alphanumeric/ASCII characters for all file names.
- Make a play list by using a multimedia player, etc. and save the data. The file format must be M3U.
- Again, write this play list to the CD-R/RW, etc.
Notes:
- When writing to a CD-R/RW, etc., be sure to use alphanumeric/ASCII characters.
- Up to 5 layers can be recognized as a list. For written play lists, latest 5 lists are recognized in the order in which they are written.
- When writing to a CD-R/RW, etc., turn off the Disc At Once function.
- When adding a play list, it is recommended to write it in the "Root" folder.
Fast-forward/fast-rewind
- To fast-forward, touch 📋 on the track display.
- To fast-rewind, touch 🏠 on the track display.
Top function
The top function resets the CD player to the first track of the disc.
- Touch [TOP].
Play starts from the first track (track No.1).
Scan play
This function allows you to locate and play the first 10 seconds of all the tracks recorded on a disc.
- Press the [MODE] button.
- Touch [TRACK SCAN].
*Scan play starts from the next track after the track currently being played.
■ To cancel scan play
- Press the [MODE] button.
Folder scan play
This function allows you to locate and play the first 10 seconds of the first track of all the folders recorders on a disc.
- Press the [MODE] button.
- Touch [FOLDER SCAN].
*Folder scan play starts from the folder following the folder that is playing.
■ To cancel folder scan play
- Press the [MODE] button.
Repeat play
This function allows you to play the current track repeatedly.
- Press the [MODE] button.
- Touch [TRACK RPT].
■ To cancel repeat play
- Press the [MODE] button.
Folder repeat play
This function allows you to play the current folder repeatedly.
- Press the [MODE] button.
- Touch [FOLDER RPT].
■ To cancel folder repeat play
- Press the [MODE] button.
Random play
This function allows you to play all tracks on the disc at random.
When the disc contains 2 or more folders, all of the tracks in the folder are played at random, followed by all of the tracks in the next folder. This is repeated for all folders.
- Press the [MODE] button.
- Touch [TRACK RDM].
■ To cancel random play
- Press the [MODE] button.
Folder random play
This function allows you to play all folders on the disc at random.
-
Press the [MODE] button.
-
Touch [FOLDER RDM].
■ To cancel folder random play
- Press the [MODE] button.
Adjustment items
You can adjust a sound effect or tone quality to your preference.
Anti Distortion Filter (ADF) ...... Page 24
MAGNA BASS EXTEND ...... Page 24
Sub-woofer speaker volume (SW VOLUME)...... Page 25
Bass setting (BASS) Page 25
Treble setting (TREBLE) ...... Page 25
Balance (BALANCE) Page 25
Fader (FADER) Page 25
Filter (FILTER) Page 26
Setting the ADF
- ADF is the abbreviation of Anti Distortion Filter.
The adopted "Liveliness Enhancement Filter" and "Sound Tone Compensation" functions allow well-modulated realistic playback without affecting the characteristics of the original sound tone.
This unit is provided with 4 types of sound tone effects stored in memory. Select the one you prefer.
ADF-1 : Suitable for genuine speakers
ADF-2: Suitable for separate speakers
ADF-3: Suitable for co-axial speakers
USER : This setting can be adjusted by the user to his or her individual preference.
OFF: No sound effect
- The factory default setting is "OFF".
Notes:
- As the volume changes when ADF is switched, switch ADF with the volume and "SW VOLUME" (sub-woofer) turned down as far as possible.
-
Press the [SOUND] button.
-
Touch [ADF].
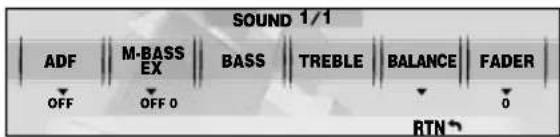
- Touch ↑↓ on the right of the display to select the ADF mode.
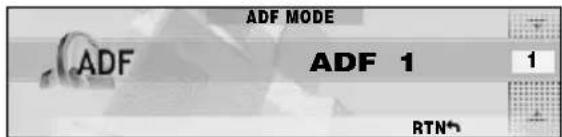
* Select one of "USER", "1", "2", "3", or "OFF".
-
To change the details of the ADF setting, press the [ADJ] button.
-
Touch ↑ ≡ ↓ on the left of the display to select the desired item.
Each touch of ↑↓↓ switches the adjustment item display as follows:
- Adjustment item (when USER is selected in step 3) BASS → TREBLE → COMP → BASS...
● Adjustment item (when 1 to 3 is selected in step 3) LEVEL → COMP → LEVEL...
- Touch ↑ ≡ ↓ on the right of the display to adjust the item.
* "BASS" and "TREBLE" can be adjusted within the range 1 to 13.
*“LEVEL” can be adjusted within the range - 3 to +3.
* Select either "ON" or "OFF" for "COMP".
- Press the [SOUND] button to return to the original mode.
Setting MAGNA BASS EXTEND
The MAGNA BASS EXTEND does not adjust the low frequencies like the normal sound adjustment function, but emphasizes the deep bass frequencies to provide you with a dynamic sound.
- The factory default setting is "OFF".
- Press the [SOUND] button.
- Touch [M-BASS EX] to select "ON" or "OFF".
*Each time you touch [M-BASS EX], the adjustment item changes as following order:
$$ O F F \rightarrow O N \rightarrow O F F... $$
- Press the [SOUND] button to return to the original mode.
Note:
When "1", "2", "3", or "USER" is selected for ADF (Anti Distortion Filter), setting of MAGNA BASS EX cannot be performed.
Adjusting the sub-woofer
- "SW VOLUME" (sub-woofer) can be adjusted only when the "SUB-WOOFER" is set to "ON" (cf. page 32).
-
The factory default setting for SW VOLUME is "0".
-
Press the [SOUND] button.
-
Touch [SW VOLUME].
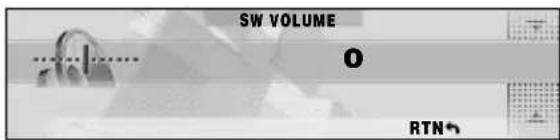
- Touch ↑↓ on the right of the display and adjust the item as desired.
*This item can be adjusted within the range -5 to +5.
- Press the [SOUND] button to return to the original mode.
Adjusting the bass (Gain, Frequency, Q-curve)
This adjustment can only be performed when the ADF (Anti Distortion Filter) is set to "OFF".
- Press the [SOUND] button.
- Touch [BASS].
- Touch ↑ ≡ ↓ on the left of the display to select the item.
Each touch of ↑ ≡ ↓ switches the adjustment items as follows:
GAIN → FREQUENCY → Q → GAIN...
- Touch ↑ ≡ ↓ on the right of the display to adjust the setting.
* The factory default setting for "GAIN" is "0". (Adjustment range: -6 to +8)
* The factory default setting for "FREQUENCY" is "50". (Adjustment 50/80/120Hz)
* The factory default setting for "Q" is "1". (Adjustment 1/1.25/1.5/2)
- When the adjustment is complete, press the [SOUND] button to return to the original mode.
Adjusting the treble (Gain, Frequency)
This adjustment can only be performed when the ADF (Anti Distortion Filter) is set to "OFF".
- Press the [SOUND] button.
- Touch [TREBLE].
- Touch ↑ ≡ ↓ on the left of the display to select the item.
Each touch of ↑↓↓ switches the adjustment items as follows:
GAIN → FREQUENCY → GAIN...
- Touch ↑↓ on the right of the display to adjust the setting.
* The factory default setting for "GAIN" is "0". (Adjustment range: -6 to +6)
*The factory default setting for "FREQUENCY" is "12k". (Adjustment 8kHz/12kHz)
- When the adjustment is complete, press the [SOUND] button to return to the original mode.
Adjusting balance/fader
BALANCE:
Adjusts the volume balance between the left and right speakers.
FADER:
Adjusts the volume balance between the front and rear speakers.
- The factory default setting for BALANCE is "0" and for FADER is "0".
- Press the [SOUND] button.
- Touch [BALANCE] or [FADER].
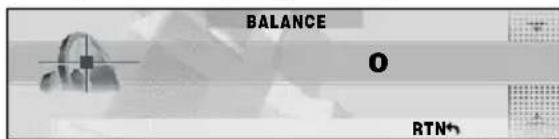
- Touch ↑↓ on the right of the display and adjust the item as desired.
*“BALANCE” can be adjusted within the range L13 (left side emphasized) and R13 (right side emphasized).
* "FADER" can be adjusted within the range R12 (rear side emphasized) and F12 (front side emphasized).
- Press the [SOUND] button to return to the original mode.
Adjusting the filter frequency
Filter frequency
You can set a filter frequency value best suited for your speakers.
* This item can be adjusted only when "SUB-WOOFER" is set to "ON".
- The factory default setting for FILTER is "THROUGH".
Filter adjustment
●SUB-W LPF (Subwoofer Low-Pass Filter) adjustment
This filter cuts the signals above the selected frequency value.
Each touch switches the frequency value as follows:
THROUGH → 50Hz → 80Hz → 120Hz → THROUGH...
Select the frequency that suits your subwoofer. Set to "THROUGH" if you use powered subwoofers with built-in low-pass filters.
- Press the [SOUND] button.
- Touch [FILTER].
- Touch ↑↓ on the right of the display to select the frequency value.
- Select from THROUGH, 50Hz, 80Hz, or 120Hz.
- Press the [SOUND] button to return to the original mode.
Screen display in the TITLE INPUT
The "TITLE INPUT" screen appears when you enter a title.
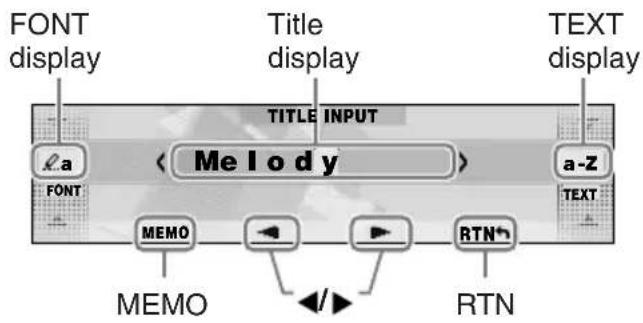
FONT display
A : Capital alphabet letters
a : Small alphabet letters
1: Numbers
♪: Symbols
A : Umlaut
Title display
The currently entered title is displayed.
TEXT display
Touch↑↓ to select the character to enter.

Touching these buttons moves the cursor indicating input position.
RTN
Touching this cancels entry of titles, and returns the display to the original screen.
MEMO
Touching this stores the title that was input, and returns the display to the original screen.
Entering titles
You can give radio/TV stations and CDs a title up to 10 characters long. These titles can be displayed when broadcasts are received or when playing CDs.
The number of titles that can be entered is as follows:
| Mode | Number of titles |
| CD mode | 50 titles |
| TV mode | 20 titles |
| Radio mode | 30 titles |
| CD changer mode Number of titles | |
| DCZ625 connected | 100 titles |
| CDC655Tz connected | 100 titles |
| CDC1255z connected | 50 titles |
-
Either receive the radio or TV station, or play a CD for which you want to enter the title.
-
Touch [DISP].
-
Touch [INPUT].
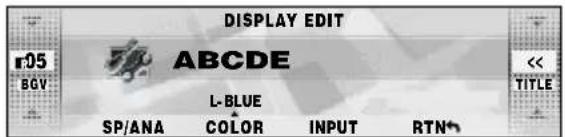
The TITLE INPUT screen appears.
- Touch [◀]/[▶] to move the cursor to indicate the input position.
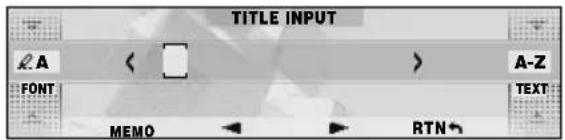
*Up to ten characters can be input.
CAUTION
Pressing the reset button clears all user memories such as titles stored on this unit.
- Touch ↑ ≡ ↓ on [FONT] to select the type of text.
Each touch of ↗ ≡↓ switches the type of text as follows:
Capital alphabet letters
(space) A B C D E F G H I J K L M N O P Q R S T U V W X Y Z
Small alphabet letters
abcdefghijklmnopqrstuvwxyz
Numbers
0123456789
Symbols

Umlaut
ÄÄËÉEÊÏÆ∅åäëéeêïöüæø
-
Touch ↑ ≡ ↓ on [TEXT] to determine the characters to enter.
-
Repeat steps 4 to 6 to enter the title.
-
Touch [MEMO].
You will hear a long beep, and the title is stored in memory.
■ When a new title is stored beyond the maximum number of titles
In the case of a radio or TV station
Titles not stored to preset channels and ISR (radio stations only) are automatically cleared, and the new title is stored in memory.
In the case of a CD
Titles of CDs that have been played the least are cleared, and the new title is stored in memory.
Clearing titles
- Either receive the radio or TV station, or play a CD whose title you want to clear.
- Touch [DISP].
- Touch [INPUT].
- Touch and hold [RTN] for 2 seconds or longer to erase the title.
- Touch [MEMO].
*Erasing is performed by overwriting with a blank title.
Triggered audio mute for cellular telephones
This unit requires special wiring to mute the audio signal automatically when a cellular telephone rings in the car.
*This function is not compatible with all cellular telephones. Contact your local authorized Clarion dealer for information on proper installation and compatibility.
Changing settings
Selecting setting items
- Press the [ADJ] button.
The mode changes to the adjust mode.
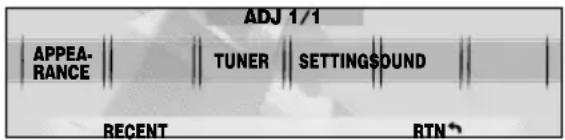
- Touch [APPEARANCE], [SOUND], [TUNER], or [SETTING].
-
Touch ↑↓ ↓ on the left of the display to select the item to set.
-
When "ENT" is displayed at the right of the display, touch [ENT] to switch to the adjustment details display.
- Touch ↑↓ on the right of the display to set the details.
■ To return to the original mode
- Press the [ADJ] button again.
■ To call up the last operated item
-
Touch [RECENT].
-
Setting items
| Main item Sub item | |
| APPEARANCE CLOCK EDIT | |
Setting the clock (CLOCK)
When the power is OFF, the clock is displayed. The clock is displayed in 12-hour format.
-
Press the [ADJ] button.
-
Touch [APPEARANCE].
-
Touch ↑↓ on the left slide button to select "CLOCK EDIT" and touch [ENT].
![ADJ-APPEARANCE CLOCK EDIT ▶ [ENT] RTN↑](/content/2026/05/953564/images/c1fe0e8606769d8c9f0f3828b8c6af6d57020d2fb15a03297ef586585bbc1425.jpg)
The time (e.g. "2pm:45") currently set on this unit is displayed, and the mode changes to the time setting mode.
- Touch ↑ ≡ ↓ on the left slide button to set hours.
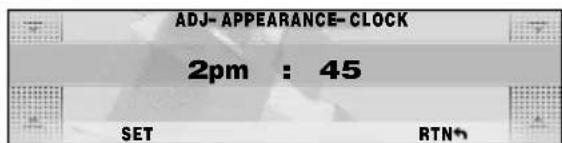
*If you operate another button while you are setting the time, the time is not adjusted.
-
Touch ↑↓ on the right slide button to set minutes.
-
Touch [SET].
* You will hear a long beep, and the time is set.
Notes:
- The clock cannot be adjusted when the power is OFF.
- When the battery has been removed for maintenance or for repair, set the time again.
- Press the [ADJ] button to return to the original mode.
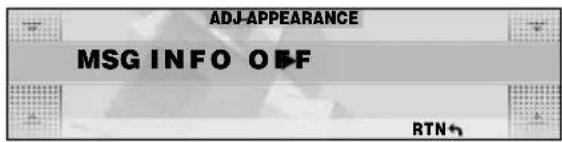
Displaying messages (MSG INFO)
This function allows you to display a message on the display when no operation is performed for more than 30 seconds.
- The factory default setting is "OFF".
-
Press the [ADJ] button to set to the adjust mode.
-
Touch [APPEARANCE].
-
Touch ↑ ≡ ↓ on the left of the display to select "MSG INFO".
-
Touch ↑ ≡ ↓ on the right of the display to select "ON" or "OFF".
-
Press the [ADJ] button to return to the original mode.
Entering messages to display in message information (MSG INPUT)
- Up to 30 characters can be entered.
- The factory default setting is "Welcome to Optimedia".
-
Press the [ADJ] button to set to the adjust mode.
-
Touch [APPEARANCE].
-
Touch ↑↓ on the left of the display to select "MSG INPUT".
![ADJ-APPEARANCE MSG INPUT ▶ [ENT] RTN↑](/content/2026/05/953564/images/70217232d2b3bdc67b277a8100dc18477e57146d23450487e224deae61c834b7.jpg)
- Touch [ENT].
The mode changes to the message entry mode.
- Touch [ ]/[] t▶ determine the entry position.
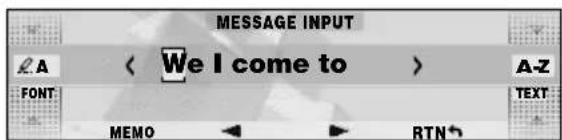
- Touch ↑ ≡ on [FONT] to select the type of text.
Each touch of ↑↓↓ switches the type of text. For details, see page 27.
-
Touch ↑↓ on [TEXT] to determine the character to enter.
-
Repeat steps 5 to 7 to enter the message.
-
Touch [MEMO].
You will hear a long beep, and the message is stored in memory.
- Press the [ADJ] button to return to the original mode.
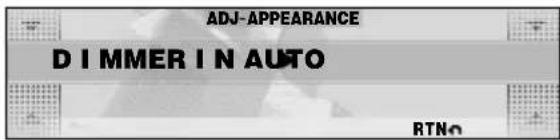
Setting the auto-dimmer (DIMMER IN)
This function allows you to dim the lighting of the display matched to the illumination or the brightness inside your car.
Select either "AUTO" (interlocked to the brightness inside your car) or "ILLUMI" (interlocked to the illumination inside your car) as the auto-dimmer setting.
- When the auto-dimmer function is set to "AUTO", the brightness of the display is dimmed according to the brightness detected by this sensor.
- Set the dimmer setting at DMR LEVEL.
-
The factory default setting is "AUTO".
-
Press the [ADJ] button to set to the adjust mode.
-
Touch [APPEARANCE].
-
Touch on the left of the display to select "DIMMER IN".
-
Touch on the right of the display to select "AUTO" or "ILLUMI".
-
Press the [ADJ] button to return to the original mode.
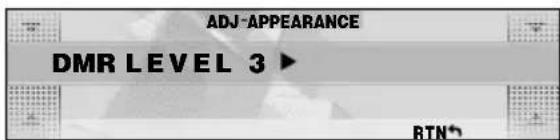
Setting the dimmer level (DMR LEVEL)
This function allows you to set how much the displayed is to be dimmed.
• The factory default setting is "3".
-
Press the [ADJ] button to set to the adjust mode.
-
Touch [APPEARANCE].
-
Touch on the left of the display to select "DMR LEVEL".
-
Touch the right of the display to set the dimmer level. *Select one of OFF (dimming OFF, bright), 1 (slightly dimmed) to 5 (dark).
-
Press the [ADJ] button to return to the original mode.
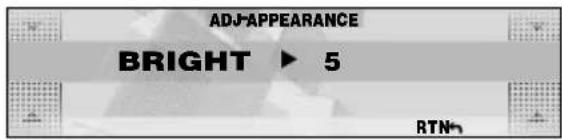
Adjusting the brightness of the display (BRIGHT)
You can adjust the brightness of the display to match the mounting angle of the unit.
• The factory default setting is "5".
-
Press the [ADJ] button to set to the adjust mode.
-
Touch [APPEARANCE].
-
Touch on the left of the display to select "BRIGHT".
-
Touch on the right of the display to adjust the brightness.
*This setting item can be adjusted within the range 1 to 12. Adjust this setting item while viewing how the appearance of the display changes. -
Press the [ADJ] button to return to the original mode.
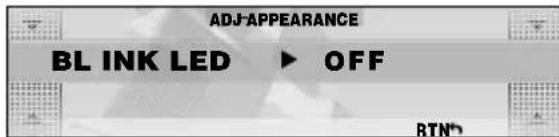
Making the LED blink when DCP is removed (BLINK LED)
You can make the LED on this unit blink when the DCP is removed.
- The factory default setting is "OFF".
-
Press the [ADJ] button to set to the adjust mode.
-
Touch [APPEARANCE].
-
Touch on the left of the display to select "BLINK LED".
-
Touch on the right of the display to select "ON" or "OFF".
-
Press the [ADJ] button to return to the original mode.
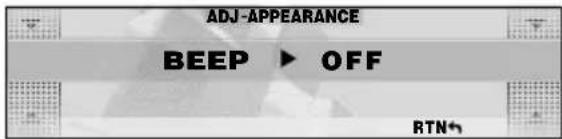
Setting the beep for when buttons are operated (BEEP)
The short or long high-pitched tone you hear when a button is operated is called a "BEEP".
- The factory default setting is "ON".
-
Press the [ADJ] button to set to the adjust mode.
-
Touch [APPEARANCE].
-
Touch ↑ ≡ on the left of the display to select "BEEP".
-
Touch ↑↓ on the right of the display to select "ON" or "OFF".
-
Press the [ADJ] button to return to the original mode.
Adjusting the title scroll speed (SCROLL SPD)
This feature allows you to slow down the scroll speed when the scroll speed is too fast, making it difficult to view the screen.
- The factory default setting is "SPEED 1".
-
Press the [ADJ] button to set to the adjust mode.
-
Touch [APPEARANCE].
-
Touch ↑↓ on the left of the display to select "SCROLL SPD".
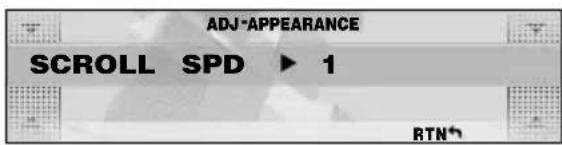
- Touch ↑↓ ↓ on the right of the display to adjust the sensitivity.
* This setting item can be adjusted within the range SPEED 1 to SPEED 4.
- Press the [ADJ] button to return to the original mode.
Setting the source icon (SRC ICON)
You can change the source icon on the display.
- The factory default setting is "ICON".
-
Press the [ADJ] button to set to the adjust mode.
-
Touch [APPEARANCE].
-
Touch ↑ ≡ ↓ on the left of the display to select "SRC ICON".
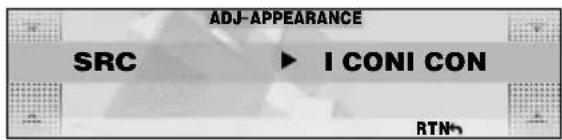
-
Touch ↑ ≡ on the right of the display to select "ICON" or "SPE/ANA".
-
Press the [ADJ] button to return to the original mode.
Setting speaker ON/OFF (SUB-WOOFER)
Set the sub-woofer (SUB-WOOFER) ON/OFF. Be sure to set this setting to "OFF" when there is no sub-woofer.
- The factory default setting is "ON".
-
Press the [ADJ] button to set to the adjust mode.
-
Touch [SOUND].
-
Touch ↑↓ on the right of the display to select "ON" or "OFF".
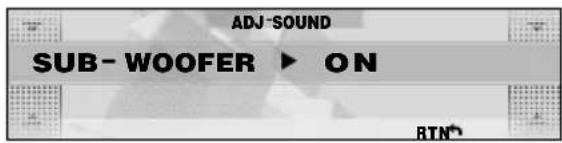
- Press the [ADJ] button to return to the original mode.
Setting internal amplifier use ON/OFF (AMP CANCEL)
Set internal amplifier use ON/OFF matched to whether or not an external amplifier is used.
Set AMP CANCEL to "ON" (internal amplifier use OFF) when an external amplifier is connected and the internal amplifier is not used.
- The factory default setting is "OFF" (internal amplifier used).
-
Press the [ADJ] button to set to the adjust mode.
-
Touch [SOUND].
-
Touch on the left of the display to select "AMP CANCEL".
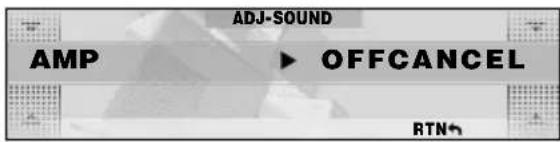
- Touch on the right of the display to select "ON" or "OFF".
- Press the [ADJ] button to return to the original mode.
Displaying the Sirius ID No. (SID DISP)
- This item can be set only when Sirius is connected.
- Press the [ADJ] button to set to the adjust mode.
- Touch [TUNER].
- Touch on the left of the display to select "SID DISP".
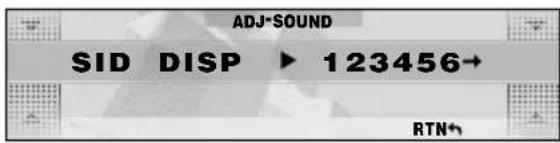
- Touch on the right of the display to switch between the display for the upper 6 digits and the lower 6 digits.
- Press the [ADJ] button to return to the original mode.
AUX function
This system has an external RCA input so you can listen to sounds and music from external devices connected to this unit.
Setting the input level (AUX SENS) of portable audio (AUX mode)
This function allows you to set the input level of optional external devices connected to this unit.
- The factory default setting is "MID".
- Press the [ADJ] button to set to the adjust mode.
-
Touch [SETTING].
-
Touch on the left of the display to select "AUX SENS".
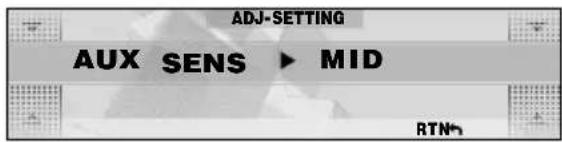
- Touch on the right of the display to set the input level.
*Select LOW, MID or HIGH.
Notes:
- When the input level is overloaded, "OVERLOAD" appears. Adjust AUX SENS or the input level so that "OVERLOAD" disappears.
- Press the [ADJ] button to return to the original mode.
Performing a system check (SYSTEM CHECK)
This function allows you to perform a system check when an external equipment is connected to this unit.
- Press the [ADJ] button to set to the adjust mode.
- Touch [SETTING].
- Touch on the left of the display to select "SYSTEM CHECK".
![ADJ-SETTING SYSTEM CHECK ▶ [START] RTN](/content/2026/05/953564/images/9ccc4a7507d54229e3764bb7aa99da8c4f58de0e7a0648b765842bd4f2bca48e.jpg)
- Touch [START].
The confirmation display appears.
- Touch [OK].
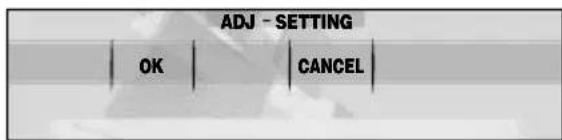
After this operation, the display returns to the original mode.
Using the security function (CODEMATIC)
This function prevents persons who do not know the touch sequence from easily operating this unit. The Touch Code display appears when DCP is attached and the power is turned ON with "CODEMATIC" set to "ON".
If you touch the display in this screen in the preset order, "SUCCESSFUL" is displayed and the power is turned OFF.
When the power is next turned ON, the Touch Code display does not appear, and the main display in the radio mode or CD mode is displayed.
- The factory default setting is "OFF".
-
Press the [ADJ] button to set to the adjust mode.
-
Touch [SETTING].
-
Touch on the left of the display to select "CODEMATIC".
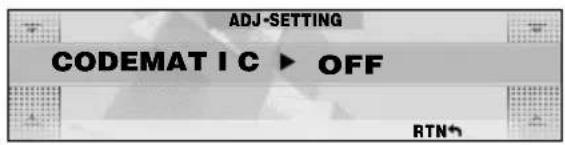
2 types of items are displayed for "CODEMATIC", items for which "ON" or "OFF" is displayed at the right of the screen, and items for which "INPUT" is displayed at the right of the screen. Here, select the item for which "ON" or "OFF" is displayed at the right of the display.
-
Touch on the right of the display to select "ON" or "OFF".
-
Touch on the left of the display to select "CODEMATIC".
![ADJ-SETTING CODEMATIC ▶ [INPUT] RTN *](/content/2026/05/953564/images/f0fb08f680684f6b5bcb39389a6a86e569023d988f5b1da80066e0e5568589f2.jpg)
Here, select the item for which "INPUT" is displayed at the right of the display.
- Touch [INPUT].
The Touch Code display appears.
- Enter the touch code.
* Touch [1] to [4] at the bottom of the display at random. You can also repeatedly touch the same number.
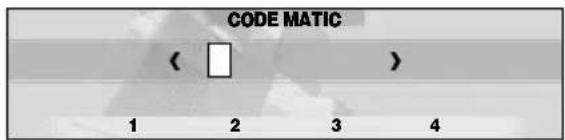
When you touch 4 times, and 4 indicators light, you will hear a long beep, and the original mode is returned to.
■ To cancel CODEMATIC
If you have forgotten the touch order, either touch [4], [1], [3] and then [2] in that order, or press [SCN] on the remote control unit.
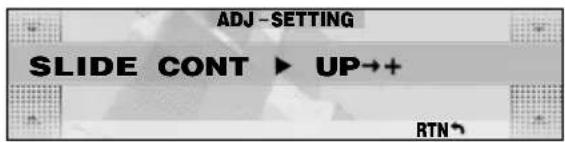
Setting the slide direction of the slide buttons (SLIDE CONT)
This function allows you to set the direction of the left and right slide buttons.
- The factory default setting is "UP → +".
-
Press the [ADJ] button to set to the adjust mode.
-
Touch [SETTING].
-
Touch on the left of the display to select "SLIDE CONT".
-
Touch on the right of the display to select "UP → +" or "DOWN → +".
-
Press the [ADJ] button to return to the original mode.
8. OPERATIONS OF ACCESSORIES
CD Changer Operations
CD changer
When an optional CD changer is connected through the CeNET cable, this unit can control CD changer operations. This unit can be connected to a total of 2 CeNET-wired CD changers.
■ When 2 CD changers are connected
Press the [SRC] button to select the changer connected to this unit. (Each press of the [SRC] button switches the changer.)
- If the CD changer does not contain a magazine, "NO MAG" is displayed, and if the magazine does not contain a CD, "NO DISC" is displayed.
- For details on the title display, see "Switching the title display" (cf. page 15).
Screen displays in the changer mode
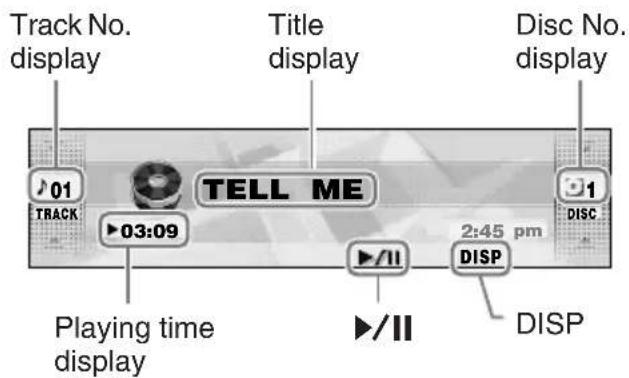
● Standard operation display
The standard operation display appears by pressing the [SRC] button to select changer modes.
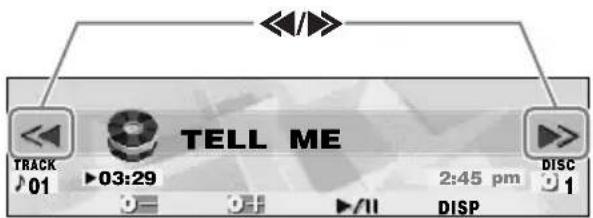
● Simple operation display
Pressing and holding [MODE] button for 2 seconds or longer switches the simple operation display.
Playing time display
▶00:01: The playing time is displayed.
Track No. display
Touching ↑↓ or ↑↓ allows you to select the track to play, or fast-forward/fast-rewind tracks.
Title display
The selected title is displayed.
Disc No. display
Touching ↑ 🔊 ↓ selects discs.
▶/II
Touching this pauses or resumes play.
DISP
The display contents can be changed.
◀/▶ (only in the simple operation display)
Touching these selects the track to play. Touching and holding these fast-forwards/fast-rewinds tracks.
D — / (Only in the simple operation display)
Touching these buttons selects the disc to play.
CAUTION
CD-ROM discs cannot be played from every CD changer. This depends on the model.
Note:
- Some CDs recorded in the CD-R/CD-RW mode may not be usable.
Selecting the changer mode
- Press the [SRC] button to select the changer mode.
* Each time you press the [SRC] button, the display switches as follows:
$$ \begin{array}{l}\text {Radio} \rightarrow (\text {SIRIUS}) \rightarrow \text {CD / MP3} \rightarrow\(\text {CD changer}) \rightarrow (\text {DVD changer}) \rightarrow (\text {TV}) \rightarrow\\text {AUX} \rightarrow \text {Radio...}\end{array} $$
* The mode of equipment that is not connected is not displayed. Play starts automatically when the mode changes to the changer mode.
Pausing play
- Touch [▶/Ⅲ].
■ To resume play
- Touch [▶/Ⅱ] again.
Selecting a CD
- Touch on the disc No. display to select a disc. Play starts.
* If magazine does not contain the disc you selected, the No. for that disc is not displayed.
Selecting a track
-
To listen to the next track, touch on the track display.
-
To listen to the previous track, touch twice on the track display. Touching plays the next track. If you touch more times, the track advances ahead to the track for the number of times you touched and that track is played. Touching plays the previous track. If you touch more times, the track moves back to the track for the number of times you touched and that track is played.
* If you touch twice on the track display while the start of the track is being played, the track 2 tracks back is sometimes played.
Fast-forward/fast-rewind
- To fast-forward, touch on the track display.
- To fast-rewind, touch on the track display.
Scan play
Scan play locates and plays the first 10 seconds of each track on a disc automatically. This function continues on the disc until it is canceled.
The scan play function is useful when you want to select a desired track.
- Press the [MODE] button.
- Touch [TRACK-SCAN].
* Scan play starts from the next track after the track currently being played.
■ To cancel scan play
- Press the [MODE] button.
Disc scan play
Disc scan play locates and plays the first 10 seconds of the first track on each disc in the currently selected changer. This function continues automatically until it is canceled.
Disc scan play is useful when you want to select a desired disc.
- Press the [MODE] button.
- Touch [DISC SCAN].
* Disc scan play starts from the next disc after the disc currently being played.
■ To cancel disc scan play
- Press the [MODE] button.
Repeat play
Repeat play continuously plays the current track. This function continues automatically until it is canceled.
- Press the [MODE] button.
- Touch [TRACK RPT].
■ To cancel repeat play
- Press the [MODE] button.
Disc repeat play
After all the tracks on the current disc have been played, disc repeat play automatically replays the current disc over from the first track. This function continues automatically until it is canceled.
- Press the [MODE] button.
- Touch [DISC RPT].
■ To cancel disc repeat play
- Press the [MODE] button.
Random play
Random play selects and plays individual tracks on the disc in no particular order. This function continues automatically until it is canceled.
- Press the [MODE] button.
- Touch [TRACK RDM].
■ To cancel random play
- Press the [MODE] button.
Disc random play
The disc random play selects and plays individual tracks or discs automatically in no particular order. This function continues automatically until it is canceled.
- Press the [MODE] button.
- Touch [DISC RDM].
■ To cancel disc random play
- Press the [MODE] button.
TV tuner function
When an optional TV tuner is connected through the CeNET cable, this unit controls all TV tuner functions. To watch TV, you need a TV tuner and a monitor.
Screen displays in the TV mode
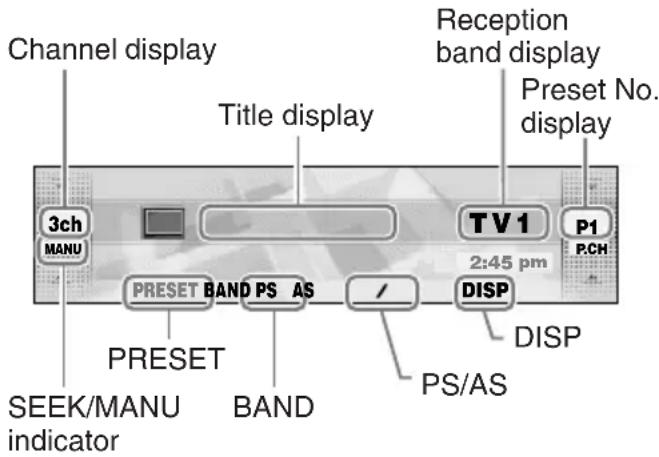
● Standard operation display
The standard operation display appears by pressing the [SRC] button to select the TV mode.
● Simple operation display
Pressing and holding the [MODE] button for 2 seconds or longer switches the simple operation display.
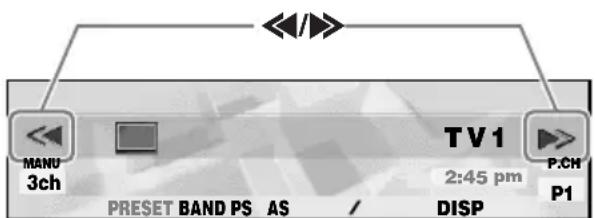
Channel display
3ch: The channel currently being received is displayed.
Touching ↑ of ↓ in the standard operation display allows you to perform seek tuning or manual tuning.
Title display
The name of the station currently being received is displayed.
VTR : In video mode
Touching these switches the display.
Reception band display
TV1 : Band name
Preset No. display
Touching on the right slide button in the standard operation display selects a preset memory.
Touching [PRESET] displays the preset memory number list.
PS/AS
Touching this starts a preset scan.
Touching and holding this for 2 seconds or longer starts an auto store.
Touching this during the preset scan/auto scan ends the operation.
BAND
Touching this switches the reception band.
Touching and holding this for 1 second or longer toggles between the manual tuning mode and the seek tuning mode.
◀/▶ (only in the simple operation display)
Touching these buttons enables seek tuning or step tuning (in the manual tuning mode).
Touch and holding these buttons enables quick tuning (in manual tuning mode).
DISP
The display contents can be changed.
Selecting the TV mode
- Press the [SRC] button to select the TV mode.
Each press of the [SRC] button switches the mode as follows:
$$ \begin{array}{l} \text { Radio } \rightarrow (\text { SIRIUS }) \rightarrow \text { CD / MP3 } \rightarrow \ \begin{array}{l}(\text {CD changer}) \rightarrow (\text {DVD changer}) \rightarrow (\text {TV}) \rightarrow\\text {AUX} \rightarrow \text {Radio...}\end{array} \ \end{array} $$
* The mode of equipment that is not connected is not displayed.
Switching the reception band
- Touch [BAND] to switch the reception band.
Each touch of [BAND] switches the reception band.
$$ \mathrm{TV1} \rightarrow \mathrm{TV2} \rightarrow \mathrm{TV1} \dots $$
Seek tuning
Seek tuning is a function for automatically tuning stations with good reception.
- Touch and hold [BAND] for 1 second or longer while "MANU" is displayed. Automatic tuning is possible when "SEEK" is displayed.
- Touch ↑↓ on the channel display. "SEEK UP/SEEK DOWN" is displayed, and tuning starts. Tuning automatically stops at stations with good reception.
■ To cancel tuning
- Touch ↑↓ on the channel display again.
Manual tuning
There are 2 ways available: quick tuning and step tuning.
In the step tuning mode, the frequency changes 1 step at a time. In the quick tuning mode, you can quickly tune the desired frequency.
-
Touch and hold [BAND] for 1 second or longer if "SEEK" is displayed. Manual tuning is possible when "MANU" is displayed.
-
Operate the channel display to tune to a channel on which there is a broadcast.
- Step tuning
Touch ↑ ↓ on the channel display.
- Quick tuning
Touch 📋 on the channel display. Tuning stops when you take your finger away from the panel.
Recalling a preset station
This function allows the user to select a preset station.
- Touch [PRESET]. The preset memory No. list is displayed.
- Touch the preset memory No. * The station can also be tuned by touching ↑ ≡ ↓ in the standard operation display.
■ To cancel tuning
- Touch [RTN].
Preset memory
A total of 12 TV stations can be stored (6-TV1 and 6-TV2). This allows you to select your favorite TV stations and store them in memory for later recall.
- Touch [BAND] to switch the reception band.
- Operate the channel display to select the station to store to.
- Touch [PRESET]. The preset memory No. list is displayed.
- Touch and hold the preset No. to store for 2 seconds or longer.
You will hear a long beep, and the station is stored in memory.
Auto store
Auto store selects 6 TV stations automatically and stores each one into preset memory.
- Touch and hold [PS/AS] for 2 seconds or longer. "A-STORE" appears on the display. * Stations with good reception are automatically searched, and are stored to preset memory (No.1 to No.6) in order from the station having the lowest frequency.
Notes:
- When auto store is performed, stations stored to memory so far are cleared.
- When there are fewer than 6 stations with good reception, low frequencies are automatically returned to, and auto store is performed again. If there are fewer than 6 stations even after auto store is performed twice, stations stored so far remain in memory.
Preset scan
Preset scan is a function for receiving stations in the order that they are currently stored to preset No. so that broadcasts can be checked.
1. Touch [PS/AS].
"P-SCAN" appears on the display.
* The currently stored stations are received in order for 7 seconds or longer each. Stations with poor reception are skipped, and the next station is received.
■ To cancel the preset scan
1. Touch [PS/AS].
"P-SCAN" disappears, and the stations that were being received when [PS/AS] was touched are received next.
Watching a video
The TV tuner has a VTR input terminal to which 1 external device can be connected. Connect a 12 V video cassette player (VCP) or video cassette recorder (VCR) to the TV tuner input terminal.
- Press the [MODE] button.
- Touch [TV/VTR].
* Every time you touch this, the function switches between TV and VTR.
Setting the TV Diver
You can change the reception setting for the TV antenna connected to the TV tuner.
- Set this item to "OFF" when a TV diversity antenna is not in use.
-
The factory default setting is "ON".
-
Press the [ADJ] button to set to the adjust mode.
- Touch [TUNER].
- Touch on the left of the display to select [TV DIVER].
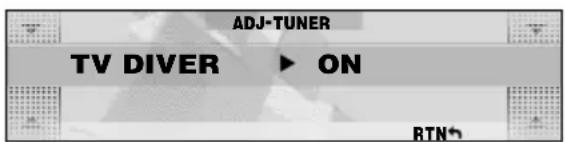
- Touch on the right of the display to select [ON] or [OFF].
- Press the [ADJ] button to return to the original mode.
9. IN CASE OF DIFFICULTY
| Problem | Cause | Measure | |
| General | Power does not turn on.(No sound is produced.) | Fuse is blown. | Replace with a fuse of the same amperage. If the fuse blows again, consult your store of purchase. |
| Incorrect wiring. | Consult your store of purchase. | ||
| No audio when operating the unit with amplifiers. | Amplifier turn-on lead is shorted to ground or excessive current is required. | Turn the unit off and check each wire for a possible short. If the amplifier turn-on lead shorts out, cover it with insulation such as tape. | |
| Nothing happens when buttons are pressed. | The microprocessor has malfunctioned due to noise, etc. | Turn off the power, then remove the DCP by referencing "Removing the DCP" (cf. page 10). 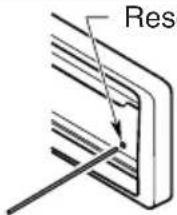 Press the reset button for about 2 seconds with a thin rod. Press the reset button for about 2 seconds with a thin rod. | |
| Display is not accurate. | DCP or main unit connectors are dirty. | Wipe the dirt off with a soft cloth moistened with cleaning alcohol. | |
| No sound heard. | The speaker protection circuit is operating. | 1. Check the speaker connection.2. Turn down sound volume. Function can also be restored by turning the power off and on again.3. If the sound is muted again, consult your store of purchase. | |
| CD/MP3/WMA | No sound heard. | There is a disc other than a compact disc or foreign matter already in place. | With the SLOPING CONSOLE open, press and hold the [▲] button for 3 seconds or longer.The foreign matter is forcibly ejected. |
| MP3/WMA files are absent in a disc. | Write MP3/WMA files onto the disc properly. | ||
| Files are not recognized as an MP3/WMA file. | Use MP3/WMA files encoded properly. | ||
| File system is not correct. | Use ISO9660 level 1, 2 or JOLIET or Romeo file system. | ||
| Sound skips or is noisy. | Disc is dirty. | Clean the disc with a soft cloth. | |
| Disc is heavily scratched or warped. | Replace with a disc with no scratches. | ||
| Sound is cut or skipped. Noise is generated or noise is mixed with sound. | MP3/WMA files are not encoded properly. | Use MP3/WMA files encoded properly. | |
| Problem | Cause Measure | ||
| CD/MP3/WMA | Sound is bad directly after power is turned on. | Water droplets may form on the internal lens when the car is parked in a humid place. | Let dry for about 1 hour with the power on. |
| Wrong filename | File system is not correct. | Use ISO9660 level 1, 2 or JOLIET or Romeo file system. | |
| Play list play is not performed. | File name or extension is not correct. | Use alphanumeric/ASCII characters for MP3/WMA file name.Use “.M3U” for the file extension of a play list. |
10. ERROR DISPLAYS
If an error occurs, one of the following displays is displayed.
Take the measures described below to eliminate the problem.
| Error Display | Measure Cause | ||
| CD/MP3/WMA | ERROR 2 | A DISC is caught inside the CD deck and is not ejected. | This is a failure of CD deck's mechanism and consult your store of purchase. |
| ERROR 3 | A DISC cannot be played due to scratches, etc. | Replace with a non-scratched, non-warped-disc. | |
| ERROR 6 | A DISC is loaded upside-down inside the CD deck and does not play. | Eject the disc then reload it properly. | |
| CD changer | ERROR 2 | A DISC inside the CD changer is not loaded. | This is a failure of CD changer's mechanism and consult your store of purchase. |
| ERROR 3 | A DISC inside the CD changer cannot be played due to scratches, etc. | Replace with a non-scratched, non-warped disc. | |
| ERROR 6 | A DISC inside the CD changer cannot be played because it is loaded upside-down. | Eject the disc then reload it properly. | |
| DVD changer | ERROR 2 | A DISC inside the DVD changer cannot be played. | This is a failure of DVD mechanism and consult your store of purchase. |
| ERROR 3 | A DISC cannot be played due to scratches, etc. | Retry or replace with a non-scratched, non-warped-disc. | |
| ERROR 6 | A DISC inside the DVD changer cannot be played because it is loaded upside-down. | Eject the disc then reload it properly | |
| ERROR P | Parental level error | Set the correct Parental level. | |
| ERROR R | Region code error | Eject the disc and replace correct region code disc. | |
| General | AMP GUARD | The speaker protection circuit is operating. During this operation, if any volume operation is performed, the display shows “AMP GUARD”. “AMP GUARD” sometimes functions when special test signals are used. | 1. Turn down sound volume. Function can also be restored by turning the power off and on again.(Speaker volume is reduced automatically when the speaker protection circuit operates).2. If the sound is muted again, consult our service department. |
If an error display other than the ones described above appears, press the reset button. If the problem persists, turn off the power and consult your store of purchase.
11. SPECIFICATIONS
FM Tuner
Frequency Range: 87.9 MHz to 107.9 MHz
Usable Sensitivity: 9 dBf
50dB Quieting Sensitivity: 15 dBf
Alternate Channel Selectivity: 70 dB
Stereo Separation (1 kHz): 32 dB
Frequency Response ( ±3 dB): 30 Hz to 15 kHz
AM Tuner
Frequency Range: 530 kHz to 1710 kHz
Usable Sensitivity: 25 μV
CD Player
System: Compact disc digital audio system
Usable Discs: Compact disc
Frequency Response ( ± 1 dB): 5 Hz to 20 kHz
Signal to Noise Ratio (1 kHz): 100 dB
Dynamic Range (1 kHz): 96 dB
Harmonic Distortion: 0.01%
Audio
Maximum Power Output: 212 W (53 W × 4 ch)
Continuous Average Power Output: 18 W × 4, into 4 Ω, 20 Hz to 20 kHz, 1%THD
Bass Control Action (50 Hz): ±12 dB
Treble Control Action (12.5 kHz): ±12 dB
Line Output Level (CD 1 kHz): 4 V/F 2ch + 4V/R 2ch 4 V/SUB WOOFER 2ch
General
Power Supply Voltage: 14.4 V DC (10.8 to 15.6 V allowable), negative ground
Current Consumption: Less than 15 A, 3A
Speaker Impedance: 4 Ω (4 Ω to 8 Ω allowable)
Weight / Source unit: 3.74 lb. (1.7 kg)
Weight / Remote control unit: 1.41 oz. (40 g) (including battery)
Dimensions / Source unit: 7" (Width) × 2" (Height) × 6-5/16" (Depth) [178 (W) × 50 (H) × 160 (D) mm]
Dimensions / Remote control unit: 1-3/4" (Width) × 4-7/16" (Height) × 1/2" (Depth) [44 (W) × 113 (H) × 13 (D) mm]
Note:
- Specifications and design are subject to change without notice for further improvement.
Clarion Co., Ltd.
2005/1 (Abe·Abe)
All Rights Reserved. Copyright © 2005: Clarion Co., Ltd. Printed in China / Imprimé en Chine / Impreso en China
PE-2749B 280-8189-00
- Contents
- FEATURES
- PRECAUTIONS
- WARNING
- CAUTION
- INFORMATION FOR USERS:.
- BE CAREFUL NOT TO GET YOUR FINGERS CAUGHT WHEN OPENING AND CLOSING THE SLOPING CONSOLE.
- Handling Compact Discs
- Handling
- Storage
- Cleaning
- CONTROLS
- NOMENCLATURE
- Names of the Buttons and their Functions
- IR-Receiver
- [ADJ] button
- [▲] (OPEN/EJECT) button
- Photo Sensor
- [MODE] button
- [♪] (SOUND) button
- [ISR] (Instant Station Recall) button
- [ SRC] button
- Note:
- [ROTARY] knob
- [CD SLOT]
- DCP Detaching Slider
- Display
- Operations when External Equipment is Connected to this Unit
- ●When the CD/DVD changer is connected
- ●When the TV is connected
- ●When the Sirius Satellite Radio is connected
- What is Sirius Satellite Radio?
- ●Standard operation display
- Left slide button
- Right slide button
- Sub buttons
- ●Simple operation display
- Left button
- Right button
- Touch
- Touch and hold
- DCP
- Removing the DCP
- Attaching the DCP
- REMOTE CONTROL
- Remote control unit
- Inserting the Battery
- Notes:
- Functions of the Remote Control Unit Buttons
- Turning ON/OFF the power
- Turning on
- Turning off
- ■ To turn off the clock display
- CODEMATIC function
- Selecting a mode
- Adjusting the volume
- Switching the operation display mode
- Switching the background
- Touch [DISP].
- ● Background
- Touch [RTN].
- ■ To change wallpaper color
- COLOR
- Adjusting the spectrum analyzer
- Touch [SP/ANA].
- Touch ↑↓ on the right of the display to select the spectrum analyzer to set.
- Touch [SENS] to select the sensitivity.
- Touch [RTN].
- Switching the title display
- FM reception
- Screen displays in the radio mode
- ● Standard operation display
- ● Simple operation display
- Frequency display
- Preset No. display
- Title display
- Reception band display
- PRESET
- BAND
- PS/AS
- DISP
- Listening to the radio
- Tuning
- Seek tuning
- ■ To cancel tuning
- Manual tuning
- Recalling a preset station
- Preset memory
- Auto store
- Preset scan
- ■ To cancel preset scan
- Touch [PS/AS].
- Instant station recall (ISR)
- ■ To return to the previous mode
- ■ To store the station to "ISR"
- Screen displays in the CD/MP3 mode
- Playing time display
- Track No. display
- Folder No. display (in the case of MP3/WMA)
- TOP
- ◀/▶ (only in the simple operation display)
- / (Appears only in MP3/WMA discs and the simple operation display)
- MP3/WMA
- What is MP3?
- What is WMA?
- ● To disable DRM (Digital Rights Management):
- Precautions when creating MP3/WMA disc
- ● Usable sampling rates and bit rates:
- ● File extensions
- ● Logical format (File system)
- - Folder structure
- ● Number of files or folders
- Multisession function
- ● Default value is "CD".
- Disc-In-Play function
- Loading a CD
- Loading 8 cm compact discs
- Backup eject function
- Listening to a disc already loaded in the unit
- Pausing play
- ■ To resume play
- Selecting a track
- ■ To select a folder
- Play list mode
- ■ Stopping play of play list
- Making a play list
- Fast-forward/fast-rewind
- Top function
- Scan play
- ■ To cancel scan play
- Folder scan play
- ■ To cancel folder scan play
- Repeat play
- ■ To cancel repeat play
- Folder repeat play
- ■ To cancel folder repeat play
- Random play
- ■ To cancel random play
- Folder random play
- ■ To cancel folder random play
- Adjustment items
- Setting the ADF
- Setting MAGNA BASS EXTEND
- Adjusting the sub-woofer
- Adjusting the bass (Gain, Frequency, Q-curve)
- Adjusting the treble (Gain, Frequency)
- Adjusting balance/fader
- BALANCE:
- FADER:
- Adjusting the filter frequency
- Filter frequency
- Filter adjustment
- ●SUB-W LPF (Subwoofer Low-Pass Filter) adjustment
- Screen display in the TITLE INPUT
- FONT display
- TEXT display
- RTN
- MEMO
- Entering titles
- Pressing the reset button clears all user memories such as titles stored on this unit.
- Capital alphabet letters
- Small alphabet letters
- Numbers
- Symbols
- Umlaut
- ■ When a new title is stored beyond the maximum number of titles
- In the case of a radio or TV station
- In the case of a CD
- Clearing titles
- Triggered audio mute for cellular telephones
- Changing settings
- Selecting setting items
- ■ To return to the original mode
- ■ To call up the last operated item
- Setting the clock (CLOCK)
- Displaying messages (MSG INFO)
- Entering messages to display in message information (MSG INPUT)
- Setting the auto-dimmer (DIMMER IN)
- Setting the dimmer level (DMR LEVEL)
- Adjusting the brightness of the display (BRIGHT)
- Making the LED blink when DCP is removed (BLINK LED)
- Setting the beep for when buttons are operated (BEEP)
- Adjusting the title scroll speed (SCROLL SPD)
- Setting the source icon (SRC ICON)
- Setting speaker ON/OFF (SUB-WOOFER)
- Setting internal amplifier use ON/OFF (AMP CANCEL)
- Displaying the Sirius ID No. (SID DISP)
- AUX function
- Setting the input level (AUX SENS) of portable audio (AUX mode)
- Performing a system check (SYSTEM CHECK)
- Using the security function (CODEMATIC)
- ■ To cancel CODEMATIC
- Setting the slide direction of the slide buttons (SLIDE CONT)
- OPERATIONS OF ACCESSORIES
- CD Changer Operations
- CD changer
- ■ When 2 CD changers are connected
- Screen displays in the changer mode
- Disc No. display
- ▶/II
- D — / (Only in the simple operation display)
- CD-ROM discs cannot be played from every CD changer. This depends on the model.
- Selecting the changer mode
- Selecting a CD
- Disc scan play
- ■ To cancel disc scan play
- Disc repeat play
- ■ To cancel disc repeat play
- Disc random play
- ■ To cancel disc random play
- TV tuner function
- Screen displays in the TV mode
- Channel display
- Selecting the TV mode
- Switching the reception band
- - Step tuning
- - Quick tuning
- ■ To cancel the preset scan
- Watching a video
- Setting the TV Diver
- IN CASE OF DIFFICULTY
- ERROR DISPLAYS
- SPECIFICATIONS
- FM Tuner
- AM Tuner
- CD Player
- Audio
- General
- Clarion Co., Ltd.
Brand : CLARION
Model : DXZ855MP
Category : Hi-Fi System