
WRS100SBR - Barcode scanners Wasp - Free user manual and instructions
Find the device manual for free WRS100SBR Wasp in PDF.


| Product Type | 1D Ring Barcode Scanner |
| Brand | Wasp |
| Model | WRS100SBR |
| Category | Barcode Scanners |
| Connectivity | Bluetooth HID, USB HID, USB VCP |
| Bluetooth Profile | HID (Keyboard Emulation) |
| Symbologies Supported | Code 39, Code 128, EAN/UPC, Codabar, Interleaved 2 of 5, GS1 DataBar, and many more 1D codes |
| Reading Mode | Trigger Mode, Continuous Auto-off Mode |
| Illumination | Laser (always on or on trigger), LED illuminator |
| Indicators | Blue, Green, Red LEDs; Beeper (tone adjustable) |
| Data Output | Preamble, Postamble, Code ID, Barcode Length, Barcode Data, Terminator (configurable) |
| Memory Mode | Off-line data collection; stores barcodes with date/time; retrieve via USB mass storage |
| Cloning Mode | Duplicate scanner settings via Code 39 barcodes |
| Keyboard Layout | Multiple international layouts (e.g., English USA) |
| Power Source | Rechargeable internal battery (via USB charging) |
| Battery Life | Typical 8+ hours (estimated based on power-off timeout settings) |
| Charging Time | Approximately 2-3 hours (estimated) |
| Dimensions (W x D x H) | Approximately 50 x 30 x 70 mm (ring form factor) |
| Weight | Approximately 100 g (including strap) |
| Included Accessories | Wrist strap, USB cable |
| Configuration Method | Scanning setup barcodes from manual |
Frequently Asked Questions - WRS100SBR Wasp
User questions about WRS100SBR Wasp
0 question about this device. Answer the ones you know or ask your own.
Ask a new question about this device
Download the instructions for your Barcode scanners in PDF format for free! Find your manual WRS100SBR - Wasp and take your electronic device back in hand. On this page are published all the documents necessary for the use of your device. WRS100SBR by Wasp.
USER MANUAL WRS100SBR Wasp
natural_image
Black handheld device with black strap and display screen (no visible text or symbols)User's Manual

CHECK VERSION
PREFACE
Table of Contents....2
LED & Beeper Indication....3
Cloning Mode....4-5
How to set up the parameter....6
GENERAL SETTINGS (GROUP 1 - 12)
1 Default, Abort, Check Version, Setup Code Read.....7
2 Reading Mode, Button/Illumination Preference...... 8
3Beep tone, Terminator....9
4 Send Data Length, Preamble, Postamble....10
5Accuracy Adjustment....11
6 Code ID, Inverse Barcode....12
7 Symbologies Code Identifier....13
8\~9 Set Code ID....14-15
10 Inter-block and Inter-character Delay....16
11 Keyboard Layout....17
12 Caplock Mode, Numeric Key, HT/CR/ESC Conversion..18
WIRELESS SCANNER SETTINGS (GROUP 13-20)
13 Interface.... 19
14 BT HID - Getting Connected.... 20
15 BT HID - Smartphone/Tablet Touch Keyboard.....21
16 Power Off Timeout 22
17 Memory Mode - Memory Mode, Delete Record..... 23
18 Memory Mode - Data Format, Date & Time Setup. 24
19 Memory Mode - Date Format, Time Format...... 25
SYMBOLOGIES (GROUP 21 - 38)
20\~22 Enable/Disable Barcode Symbology......26-28
China Postal Code (Toshiba Code)....28
23 MSI, UK Plessey Code.... 30
Code 93, Telepen, IATA....32
25 Interleaved 2 of 5, Code 11....34
26 Industrial 2 of 5, Matrix 2 of 5.... 36
27 Codabar....38
28 ABC-Codabar, CX-Codabar....40
29 Codabar Coupling, Codabar Adjacent Required.....41
30 Standard & Full ASCII Code 39, Code 32.....42
31 UPC-E 44
32UPC-E System Number 45
33UPC-A 46
34 EAN-8 47
35 EAN-13, ISBN, ISSN 48
36 EAN/UCC-128, Code 128.... 49
37 GS1 Databar.... 50
FULL ASCII(CODE39)TABLE, FUNCTION KEY TABLE(GROUP 39 - 50)
38\~46 Full ASCII table(Code 39)....51-59
47\~49 Function Key table(Code 39)....60-62
APPENDIX
Appendix 1 Default table....63-65
Appendix 2 Barcode test chart....66-67
LED & BEEPER INDICATION
| Scanner | Status | Blue LED Green LRed LED | Beeper | |
| Successful Barcode Scan | 1 Flash | 1 beep | ||
| Successful Connection | 2 Flashes | 2 beeps | ||
| Reads Configuration Barcode | 1 Flash | 2 beeps | ||
| Barcode Scan in Memory Mode | 1 Flash | 1 beep | ||
| Wireless Disconnection | 3 Flashes | 3 beeps | ||
| Unexpected Barcode Scan during Configuration | 1 Flash | 3 short beeps | ||
| Memory Full | 1 Flash | 3 short beeps | ||
| Barcode Scan while Disconnected | 1 Flash | 3 short beeps | ||
| Poor Connection (Out of Range) | 1 Flash | 4 beeps (Hi-Lo-Hi-Lo) | ||
| Low Power | Flashing | |||
| Bluetooth Discoverable | Flashing | |||
| Power Off or Standby |
CLONING MODE
WHAT IS CLONING MODE?
CLONING duplicates a scanners settings in other scanners. It can save time when a number of scanners must be programmed to the same settings.
HOW SHOULD CLONING WORK?
- Using this guide, make all the necessary settings for one wand.
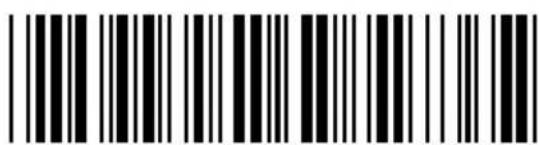
- Scan the CLONING MODE bar code shown below.
- When CLONING MODE is scanned, all setup parameters will be converted to alphanumeric characters and shown on the monitor.
- Using a bar code printer, print out all the setup parameters as Code 39 bar code labels.
- Scan the printed labels sequentially with each wand to be programmed.

Figure 1
CLONING MODE
NOTES:
- All cloning strings are upper case.
- All cloning strings printed on labels should be the same as those on the monitor sequentially from first to last.
- Cloning mode works in Word Note Pad only.
- Never edit the data on the first row (.A017\$). It is an entry command for cloning.
- The cloning string's length can be adjusted by combining multiple strings into one, or by breaking one string into multiple strings starting from the second row after “...”. Length must be in sequences of four, such as 4, 8, 12, 16, 20 (MAX).
- Be sure to print the dots exactly where they are shown on the monitor.
FORMAT OF CLONING
* Format of Cloning:
1st row >>> ".A017\$" ( never edit any data of the first row ) 2nd row >>> "....XXXX" you can adjust the String's Length starting from the dots "..." forward. The length of the string should be in 4, 8, 12, 16 or 20 ( MAX )digits.
3rd row \~ so on >>> XXXX End row - A dot “.” Is the ending of cloning.
XXXX Stands for any string
CLONING MODE
EXAMPLE :
1. PROJECT ASSIGNMENTS:
1.1. Beep tone: BEEP LOW.
1.2. Capslock Mode: CAPSLOCK ON
1.3. Reading Mode: CONTINUOUS AUTO OFF.
2. SETTING PROCEDURE:
2.1. Scan BEEP LOW (GROUP 3).
2.2. Scan CAPSLOCK'ON (GROÚP 12).
2.3. Scan CONTINUOUS MODE (GROUP2).
- Scan [.A016\$] Cloning Mode. All parameters will be output in alphanumeric characters and shown on the monitor.
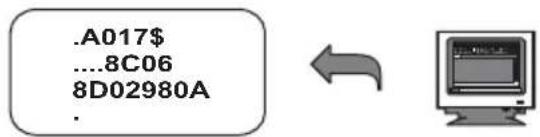
- Print the results shown on the monitor as bar codes with a bar code printer. The bar codes should be in the Code 39 symbology.

- Scan from the first row to the second and so on sequentially, top to bottom, with the scanner you wish to "clone" these settings to.
CORRECT SETTING
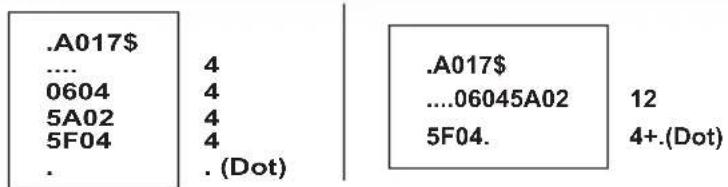
WRONG SETTING



HOW TO SET PARAMETERS
How do you program a scanner with this user's guide?
-
Use the scanner to scan at the bar code representing the function/parameter you want to set.
-
When you hear two beeps, the new settings have been defined or updated permanently to the scanner.
Default parameters are indicated in bold type and underlined characters. The character font is ARIAL BLACK.
Most settings require only a single bar code, but a few need several different bar codes to be scanned in order to completely define a setting (i.e Multi-step Configurations). They are:
Preamble / Postamble (maximum 16 digits)
Step 1: Scan CLR PRE/POSTAMBLE
Step 2: Scan PREAMBLE or POSTAMBLE.
Step 3: Scan 1 \~ 16 alphanumeric from Full ASCII table (Group 38-49).
Step 4: Scan PREAMBLE or POSTAMBLE.
Min Length / Max Length
Step 1: Scan MIN LENGTH or MAX LENGTH.
Step 2: Scan two digits from Full ASCII table - Numbers (Group 46).
Step 3: Scan MIN LENGTH or MAX LENGTH.
Set Code ID (Example: Code 39)
Step 1: Scan CODE 39 SET ID from Group 8
Step 2: Scan either one or two alphanumerics (maximum 2 digits)
from Full ASCII table (Group 40-46)
Step 3: Scan CODE 39 SET ID from Group 8
Set Data Format
Step 1: Scan DATA FORMAT
Step 2: Scan 1 \~ 3 digits from Full ASCII Table - Numbers (Group 46)
Step 3: Scan DATA FORMAT
Set Field Separator
Step 1: Scan FIELD SEPARATOR
Step 2: Scan one alphanumeric character from Full ASCII Table (Group 40-46)
Step 3: Scan FIELD SEPARATOR
Set Date/Time
Step 1: Scan SET DATE/TIME
Step 2: Scan 6 digits from Full ASCII Table - Numbers (Group 46)
Step 3: Scan SET DATE/TIME
Set Date/Time Format
Step 1: Scan SET DATE/TIME FORMAT
Step 2: Scan 2 digits from Full ASCII Table - Numbers (Group 46)
Step 3: Scan SET DATE/TIME FORMAT
NOTES:
-
The scanner will beep three times as indication that a setting is not yet complete or unexpected barcode is scanned during multi-step configuration.
-
If you make a mistake, forget a step, etc., and want to abort the multi-step configuration, scan RESET/ABORT and start over again.
RESET/ ABORT

GROUP-1
GENERAL SETTINGS
DEFAULT

* Reset to factory default
CHECK VERSION

*Check firmware version
RESET/ ABORT
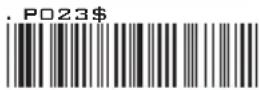
* Abort multi-step configuration

SETUP CODE READ

*Caution: Scanning SETUP CODE OFF will turn the scanner into unprogrammable state and the scanner will not react to any configuration barcode!
FUNCTION CODE CONVERSION


*Caution: Once disabled, the scanner will output the original encoded data of the barcodes in Full ASCII Table - Function/Navigation/Modifier Keys (Group 47-49).
GROUP-2
GENERAL SETTINGS -
READING MODE, BUTTON/ILLUMINATION PREFERENCE
READING MODE

- LED is always on.
* The trigger does not function in Continuous Mode.

- The LED will turn on when the trigger is pressed.
- The LED will go off when the trigger is released.
BUTTON PREFERENCE
Scan one of below configuration barcodes to determine which touch-sensing button to enable according to your habit:

* Recommended for left-handed user.

* Recommended for right-handed user.

ILLUMINATION PREFERENCE


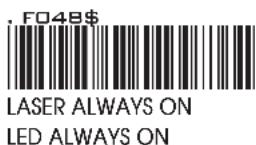

GROUP-3
GENERAL SETTINGS - BEEP TONE, TERMINATOR
BEEP TONE

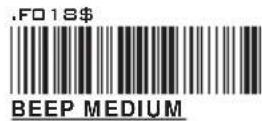


TERMINATOR


NOTES:
- For the BT HID/USB HID interface the default terminator is CR.
-
For the USB VCP interface the default terminator is CR+LF.
-
Below is the position of Terminator among output data string:
[Preamble] [Symbology ID] [Barcode Length] [Barcode Data] [Postamble] [Terminator]
- By default, with Preamble, Postamble, Barcode Length and Symbology ID disabled, the scanner data output will be:
[Barcode Data] [Terminator]
GROUP-4
SEND DATA LENGTH, PREAMBLE & POSTAMBLE.
SEND DATA LENGTH


PREAMBLE & POSTAMBLE (PREFIX AND SUFFIX)

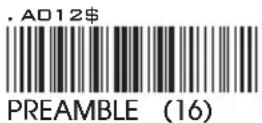
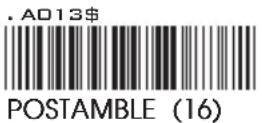
EXAMPLE:
Set PREAMBLE String as “##” POSTAMBLE String as “\\”
SETTING PROCEDURE:
STEP 1 : Scan : CLEAR PRE/ POSTAMBLE.
STEP 2 : Scan : PREAMBLE.
STEP 3 : Scan : “ # ” twice from Full ASCII Table.
STEP 4 : Scan : PREAMBLE.
STEP 5 : Scan : POSTAMBLE.
STEP 6 : Scan : “ \$ ” twice from Full ASCII Table.
STEP 7 : Scan : POSTAMBLE.
DATA FORMAT:
[Preamble] [Symbology ID] [Barcode Length] [Barcode Data] [Postamble] [Terminator]
NOTES:
- A PREAMBLE is a string of up to 16 characters added to the beginning of a scanned barcode.
- A POSTAMBLE is a string of up to 16 characters added to the end of a scanned barcode.
- Default value for both: None.
GROUP-5
GENERAL SETTINGS - ACCURACY ADJUSTMENT

ACCURACY ADJUSTMENT

Accuracy Adjustment assures a more reliable decoded output. Enabling the feature and setting a number from 1 to 9 subjects the decoded output a higher standard of accuracy. The higher the number, the greater the accuracy.
SETTING PROCEDURE:
- Scan ACCURACY ADJUSTMENT.
- Scan one digit (1\~9) from barcode menu above.
- Scan ACCURACY ADJUSTMENT.
NOTES:
RESET/ABORT
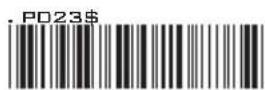
- The scanner will beep three times as indication that a setting is not yet complete or unexpected barcode is scanned during multi-step configuration.
- If you make a mistake, forget a step, etc., and want to abort the multi-step configuration, scan RESET/ABORT and start over again.
GROUP-6
GENERAL SETTINGS - CODE ID, INVERSE BARCODE
ENABLE INVERSE BARCODE
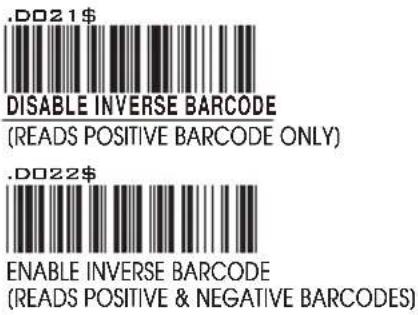
CODE ID / SYMBOLOGY ID


NOTES:
- Only ONE code ID will be sent.
- The code ID is located at the position before the barcode data and after the preamble.
DATA FORMAT:
[Preamble] [Symbology ID] [Barcode Length] [Barcode Data] [Postamble] [Terminator]
EXAMPLE :
1.Preamble 145287,
2. Code ID: enable AIM ID,
3.Bar code symbologies : EAN 13+5
145287
Preamble 145287
]E0
CODE ID AIM ID : ]E0

BARCODE / DATA EAN 13 +5
OUTPUT : 145287]E0456398712345312411
| SYMBOLOGIES CODE ID IDENTIFIER | |||||
| Symbologies | Factory ID | AIM ID (new) | Symbologies | Factory ID | AIM ID (new) |
| EAN 128 | T | ]C1 | MSIMSI(MOD 10 / CDV & not send CD) | O | ]M0 |
| Code 128 | K | ]C0 | ]M1 | ||
| EAN8(-2/-5 OFF) | S | ]E4 | Code 32 | B | ]X0 |
| EAN8(+2 ON) | ]E4 | CodabarCodabar(ABC Codabar) | N | ]F0 | |
| EAN8(-5 ON) | ]E4 | ]F1 | |||
| UPC-E(-2/-5 OFF) | E | ]E0 | Codabar(CDV & Send CD) | ]F2 | |
| UPC-E(-2 ON) | ]E3 | Codabar(CDV & not send CD) | ]F4 | ||
| UPC-E( 5 ON) | ]E3 | UK Plessey | P | ]P0 | |
| UPC-A(+2/+5 OFF) | A | ]E0 | Matrix 2 of 5 | Y | ]X0 |
| UPC-A(12 ON) | ]E3 | Full ASCII Code 39(disable CDV) | D | ]A4 | |
| UPC-A(+5 ON) | ]E3 | Full ASCII Code 39(CDV & send CD) | ]A5 | ||
| EAN-13(12/15 OFF) | F | ]E0 | Full ASCII Code 39(CDV & not send CD) | ]A7 | |
| EAN-13(+2 ON) | ]E3 | Standard Code 39(disable CDV) | M | ]A0 | |
| EAN-13(15 ON) | ]E3 | Standard Code 39(CDV & send CD) | ]A1 | ||
| Code 93 | L | ]G0 | Standard Code 39(CDV & not send CD) | ]A3 | |
| Code 11(disable CDV) | J | ]H0 | Interleaved 2 of 5(CDV & send CD) | I | ]I1 |
| Code 11(send one CD) | ]H0 | Interleaved 2 of 5(CDV & not send CD) | ]I3 | ||
| Code 11(send two CD) | ]H1 | Interleaved 2 of 5(disable CDV) | ]I0 | ||
| Code 11(not send CD) | ]H3 | DatabarDatabar StackedDatabar Stacked OmnidirectionalDatabar Truncated | G | e | |
| Telepen(ASCII) | U | ]B0 | |||
| Telepen(Numeric) | ]B1 | ||||
| IATA 2 of 5 | R | ]R0 | |||
| V | ]S0 | dctimil. rabataD5 fo 2 la | rtsud6 | ||
| China Post Code | H | ]X0 | Databar Expanded | Q | |
| PDF417 | Z | ]E0 | Databar Expanded Stacked | ||
SET ID - SETTING PROCEDURES
Steps:
- Scan the SET ID bar code for a particular symbology.
- Scan one or two alphanumeric characters from the Full ASCII Table.
- Scan the SET ID bar code again.
Example: Define the MSI Code ID = A, Code 93 = G9
MSI
Step1: Scan MSI Set ID (Group 9).
Step2: "A" from Group 42.
Step3: Scan MSI Set ID (Group 9).
Code 93:
Step1: Scan Code 93 Set ID (Group 8).
Step2: "G" from Group 56, Scan "9" from Group 46.
Step3: Scan Code 93 Set ID (Group 8).
NOTES:
- The length of a Code ID is either one or two characters. If one character is set, the Code ID output will be one character. If two characters are set, the Code ID output will be two characters.
- Only one type of Code ID will be sent.
GROUP-8
GENERAL SETTINGS - SET CODE ID

EAN 13 Set ID
EAN 8 Set ID
UPC E Set ID
UPC A Set ID
Code 39 Set ID
Code 93 Set ID
Codabar Set ID
IATA Set ID
Code 128 Set ID
EAN 128 Set ID
Telepen Set ID
Code 11 Set ID
Code 32 Set ID
China Post Code
(TOSHIBA Code) Set ID
GROUP-9
GENERAL SETTINGS - SET CODE ID
| MSI Code Set ID | P014 |
| UK Plessey Set ID | P015 |
| Matrix 2 of 5 Set ID | P017 |
| Interleaved 2 of 5 Set ID | P006 |
| Industrial 2 of 5 Set ID | P018 |
| Full ASCII Code39 Set ID | P008 |
| GS1 Databar (RSS) Limited Set ID | P019 |
| GS1 Databar (RSS) Expanded Set ID | P020 |
| GS1 Databar (RSS) Set ID | P024 |
| LABEL Code Set ID(Reserved) | P020 |
Steps:
-
Scan the SET ID bar code for a particular symbology.
-
Scan one or two alphanumeric characters from the Full ASCII Table.
-
Scan the SET ID bar code again.
-
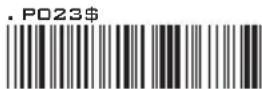
If you make a mistake, forget a step, etc., and want to abort the multi-step configuration, scan RESET/ABORT and start over from step 1 to step 3 again.
RESET/ABORT
GROUP-10
GENERAL SETTINGS
INTERBLOCK DELAY

bar
| Price ($) | Latency (mS) | | :--- | :--- | | 8001 | 0 | | 8002 | 10 | | 8003 | 50 | | 8004 | 100 | | 8005 | 200 | | 8006 | 500 |INTERCHARACTER DELAY

bar
| Sample Size | Sample Amount ($) | | :--- | :--- | | 140uS | 140 | | 500uS | 500 | | 1mS | 1m | | 4mS | 4m | | 16mS | 16 |GROUP-11
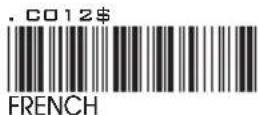
GENERAL SETTINGS - KEYBOARD LAYOUT
KEYBOARD LAYOUT


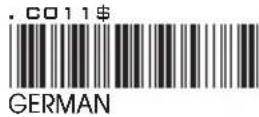

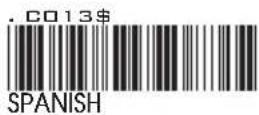





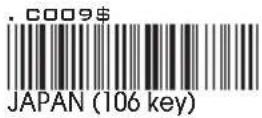



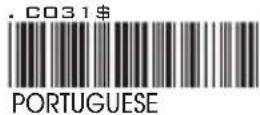

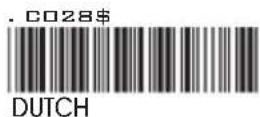




GROUP-12
GENERAL SETTINGS -
CAPLOCK MODE, NUMERIC KEY, HT/CR/ESC CONVERSION
CAPITAL LOCK MODE

CAPLOCK ON

CAPLOCK OFF

CAPLOCK FREE
NOTE:
-
When barcode scanner is set to Caplock Free mode, no matter keyboard Capslock LED indicator is ON or OFF, output will be always the same as the Original barcode. In other words, what you see is what output is.(CODABAR is the exception)
-
If ABCD/ABCD, abcd/abcd, ABCD/T*E, abcd/tn*e are on, they work independently according to their rules.
NUMERIC KEY

NUMERIC KEY

ALPHANUMERIC KEY
NOTE:
-
By default, the alphanumeric key is used for transmitting digits. Scan NUMERIC KEY if you want to use the keys on the numeric keypad.
-
If you select NUMERIC KEY, the Num Lock status of the physical keyboard should be ON.
HT/CR/ESC CONVERTS TO TAB/ENTER/ESCAPE

HT/CR/ESC CONVERTS TO
TAB/ENTER/ESCAPE ENABLE

HT/CR/ESC CONVERTS TO
TAB/ENTER/ESCAPE DISABLE
NOTE:
- By default, HT [\I], CR [\M] and ESC [%A] is transmitted as <0x09>, <0x0D> and <0x1B> respectively.
- When enabled, HT [\I], CR [\M] and ESC [%A] is transmitted as
, and on keyboard respectively.
GROUP-13
WIRELESS SCANNER SETTINGS
INTERFACE

BT HID
Emulates a Bluetooth HID keyboard that transmits each barcode data to the host after decode. Wireless scanner operates in this mode right out of box. Please see next page (Group 14) for details.
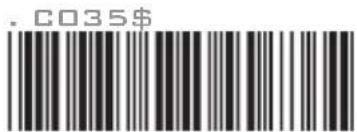
Memory Mode
Emulates a USB mass storage device that saves each barcode data during off-line data collection. See Memory Mode chapter (Group 17-19) for details.
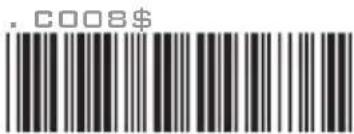
USB HID
Emulates a USB keyboard that transmits each barcode data to the host after decode. Barcode data is sent via USB cable directly.
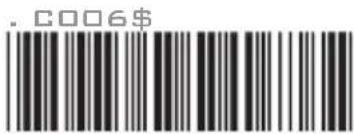
USB VCP
Emulates a USB virtual com device that transmit each barcode data to the host after decode. Barcode data is sent via USB cable directly. For VCP driver, please contact our sales representative or technical support team.
GROUP-14
WIRELESS SCANNER SETTINGS
BT - HID 📋 GETTING CONNECTED
- Scan [Disconnect] to delete previous pairing record. Alternatively, you may long-press the function button for 5 seconds until the scanner emit two beeps.
E031\$
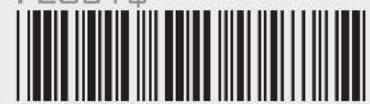
Disconnect
- Scan [BT - HID]; the scanner will emit two beeps.
E043\$

BT - HID
- Scan either one of below barcodes according to your host system.
F068\$

iOS/MAC/WINDOWS
F067\$

ANDROID
- Select "Scanner XXXXXX" on the discovered device list of your Bluetooth. ("XXXXXX" are the last 6 digits of MAC address which can also be found on the product label)
Bluetooth

DEVICES

Scanner 15B06F

Tap to
connect
- The scanner will emit two beeps to verify the connection.
Bluetooth

MY DEVICES
Scanner 15B06F
Connected

GROUP-15
WIRELESS SCANNER SETTINGS
While connected with the scanner, the Touch Keyboard on the iOS device might disappear. To resolve this issue, please simply press the function button to toggle iOS Touch Keyboard.
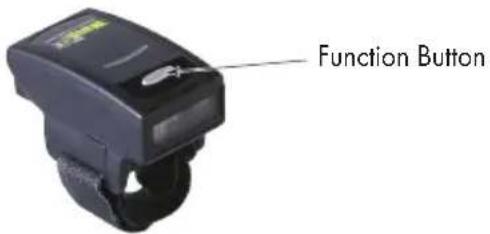
Android
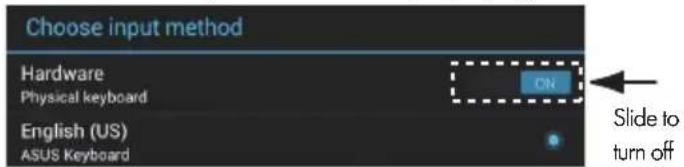
While connected with the scanner, the Touch Keyboard on the Android smartphone or tablet might disappear. To resolve this issue, please change settings on Android device with below steps:
- Enter "Settings"
- Enter "Language & input"
- Tap on "Default keyboard"
- Turn off "Physical keyboard", or Turn on "On-screen keyboard" and the Touch Keyboard will function properly again.
GROUP-16
WIRELESS SCANNER SETTINGS
POWER OFF TIMEOUT
Variable Timeout

SET MINUTE
(Range: 00 \~ 60)

SET SECOND
(Range: 00 \~ 60)
The timeout is 30 seconds by default, and is programmable to the second and minute, ranging from 10 seconds (00:10) to 60 minutes and 60 seconds (60:60)
For example, to set the timeout as 5 minutes 30 seconds:
- Scan [Set Minute]
- Scan [0] & [5] on below numeric barcode table.
- Scan [Set Minute]
- Scan [Set Second]
- Scan [3] & [0] on below numeric barcode table.
- Scan [Set Second]
No Timeout (Scanner Always On)

DISABLE TIMEOUT
Warning! This will cause the battery to drain quickly.
NUMERIC BARCODES

GROUP-17
WIRELESS SCANNER SETTINGS
MEMORY MODE

MEMORY MODE
After scanning the above barcode, the scanner will be able to collect barcode data off-line. The barcode data will be stored in the format of:
< Date >, < Time >, < Barcode Data > < CR >
To retrieve stored data, please connect the scanner to the host with cable, access removable storage device "MiniScan" from which you may open or copy the file "BARCODE.txt" to your computer.
To exit Memory Mode, simply scan any interface barcode in INTERFACE section (Group 13)
DELETE LAST RECORD

DELETE LAST RECORD
To delete ONE stored data, please scan below barcode or press function button.

CLEAR ALL RECORD
To delete ALL stored data, simply delete the file "BARCODE.txt" in the removable storage device "MiniScan" until you hear two beeps.
GROUP-18
WIRELESS SCANNER SETTINGS
MEMORY MODE □ DATA FORMAT

DATA FORMAT
The default Data Format for Memory Mode is
| Code | Item Code | Item |
| 2 | Date | 4 Barcode Data |
| 3 | Time |
Example:
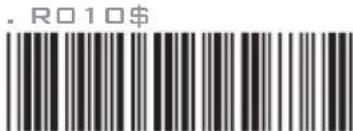
To change Data Format to
- Scan [Data Format]
-
Scan [4], [2], [3] from Group 46.
-
Scan [Data Format]
FIELD SEPARATOR
Default is comma ( , ). You may replace it with any alphanumeric characters from the full ASCII table.
Example: To change Field Separator to Semicolon ( ; )
- Scan [Field Separator]
- Scan [ ; ] from the full ASCII table (Group 40-46)
- Scan [Field Separator]
MEMORY MODE □ DATE & TIME SETUP
SET DATE

Example: To set Date to 2018-08-01 (Year-Month-Day):
- Scan [Set Date]
- Scan [1], [8], [0], [8], [0], [1] from Group 46.
- Scan [Set Date]
SET TIME

Example: To set Time to 08:10:30 am (Hr:Min:Sec)
- Scan [Set Time]
- Scan [0], [8], [1], [0], [3], [0] from Group 46.
- Scan [Set Time]
* Full drain of battery may cause the Time and Date to stop. To avoid this, please, please fully charge the scanner for at least 1 hour before use.
GROUP-19
WIRELESS SCANNER SETTINGS
MEMORY MODE □ DATE FORMAT

DATE FORMAT
The default Date Format for Memory Mode is DD/MM/YYYY (Code = 09), below is full list of available formats and their setup codes:
| Code | Format Code | Format | |
| 01 | DD-MM-YYYY | 09 | DD/MM/YYYY |
| 02 | MM-DD-YYYY | 10 | MM/DD/YYYY |
| 03 | DD-MM-YY | 11 | DD/MM/YY |
| 04 | MM-DD-YY | 12 | MM/DD/YY |
| 05 | YYYY-MM-DD | 13 | YYYY/MM/DD |
| 06 | YY-MM-DD | 14 | YY/MM/DD |
| 07 | DD-MM | 15 | DD/MM |
| 08 | MM-DD | 16 | MM/DD |
Example:
To set Date Format to MM/DD/YY (Code = 12)
- Scan [Date Format]
- Scan [1], [2] from Group 46.
- Scan [Date Format]
MEMORY MODE □ TIME FORMAT
TIME FORMAT

The default Time Format for Memory Mode is HH:MM:SS (Code = 01), below are available formats and their setup codes:
Code Format Code Format
01 HH:MM:SS
02
HH:MM
Example:
To set Time Format to HH:MM (Code = 02)
- Scan [Time Format]
- Scan [0], [2] from Group 46.
- Scan [TimeFormat]
ENABLE
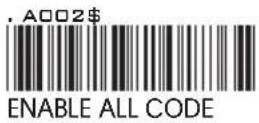
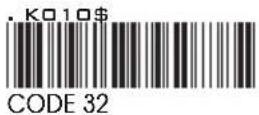


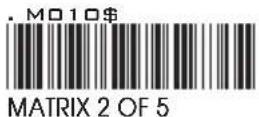


DISABLE








ENABLE


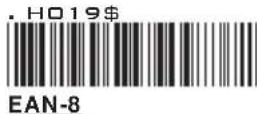


DISABLE



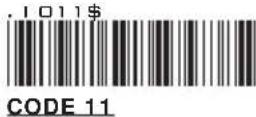

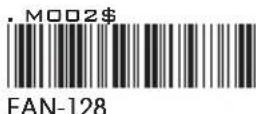
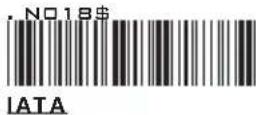
GROUP-22
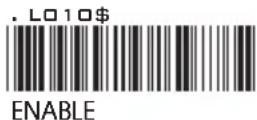
ENABLE/DISABLE SYMBOLOGIES, CHINA POSTAL CODE
ENABLE

DISABLE


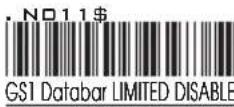
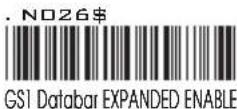


CHINA POSTAL CODE [ TOSHIBA CODE ]
![Wasp WRS100SBR - CHINA POSTAL CODE [ TOSHIBA CODE ] - 1](/content/2026/05/952899/images/27a192661856e0345f86fd53df1578d047375a20c971398de03af0e03c5187d2.jpg)
![Wasp WRS100SBR - CHINA POSTAL CODE [ TOSHIBA CODE ] - 2](/content/2026/05/952899/images/b36e33c2da8bedc2adf7e264d5ee468c222fe491d0affde10a8a8adf83f6667e.jpg)
![Wasp WRS100SBR - CHINA POSTAL CODE [ TOSHIBA CODE ] - 3](/content/2026/05/952899/images/b17d695b90a11127c9de5e3d3dea12eb0b6ea5f43db960e0f82f48c4303eda2e.jpg)
![Wasp WRS100SBR - CHINA POSTAL CODE [ TOSHIBA CODE ] - 4](/content/2026/05/952899/images/35c9fe3aaf7f0f961ab47b4849f339c7cc2c687d94435ab922ce3a6da9361c28.jpg)
![Wasp WRS100SBR - CHINA POSTAL CODE [ TOSHIBA CODE ] - 5](/content/2026/05/952899/images/fb0af71ff4ba62e276f9808395ec63c19e1945128889997786bb049a97327cd9.jpg)
![Wasp WRS100SBR - CHINA POSTAL CODE [ TOSHIBA CODE ] - 6](/content/2026/05/952899/images/4f0e70c6e5bc1279c283d9b69b6800d64071f118790dd48a76607ba5ec468f3c.jpg)
![Wasp WRS100SBR - CHINA POSTAL CODE [ TOSHIBA CODE ] - 7](/content/2026/05/952899/images/e43521268de0bd550ac5c04cf650522abbd6caab7eb88a12c88e75632f613093.jpg)
APPENDIX
FULL ASCII (Code 39) NUMERIC TABLE

SETTING PROCEDURE
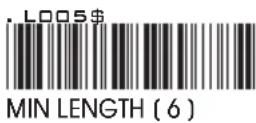
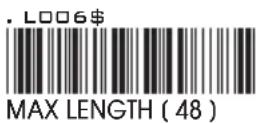
MIN / MAX LENGTH
STEP 1 - Scan: MIN LENGTH/ MAX LENGTH
STEP 2 - Scan: Two digits from Appendix.
STEP 3 - Scan: MIN LENGTH/ MAX LENGTH
Please note that when Min Length and / or Max Length are enabled, the scanner will only read bar codes that fall into those length parameters. Bar codes shorter or longer than specified will not be read. The default lengths for these are indicated in parentheses under the Min and Max bar codes for each symbology.
NOTES:
RESET/ABORT

- The scanner will beep three times as indication that a setting is not yet complete or unexpected barcode is scanned during multi-step configuration.
- If you make a mistake, forget a step, etc., and want to abort the multi-step configuration, scan RESET/ABORT and start over again.
GROUP-23
SYMBOLOGIES: MSI CODE, UK PLESSEY CODE

MSI



UK PLESSEY CODE

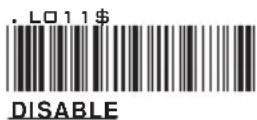

APPENDIX
FULL ASCII (Code 39) NUMERIC TABLE

SETTING PROCEDURE
MIN / MAX LENGTH
STEP 1 - Scan: MIN LENGTH/ MAX LENGTH
STEP 2 - Scan: Two digits from Appendix.
STEP 3 - Scan: MIN LENGTH/ MAX LENGTH
Please note that when Min Length and / or Max Length are enabled, the scanner will only read bar codes that fall into those length parameters. Bar codes shorter or longer than specified will not be read. The default lengths for these are indicated in parentheses under the Min and Max bar codes for each symbology.
NOTES:
RESET/ABORT

- The scanner will beep three times as indication that a setting is not yet complete or unexpected barcode is scanned during multi-step configuration.
- If you make a mistake, forget a step, etc., and want to abort the multi-step configuration, scan RESET/ABORT and start over again.
GROUP-24
SYMBOLOGIES: CODE 93, TELEPEN, IATA
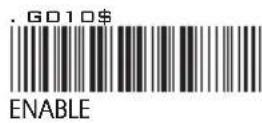
CODE 93
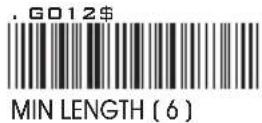

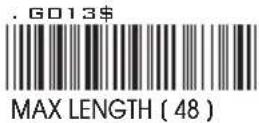

TELEPEN


IATA





APPENDIX
FULL ASCII (Code 39) NUMERIC TABLE
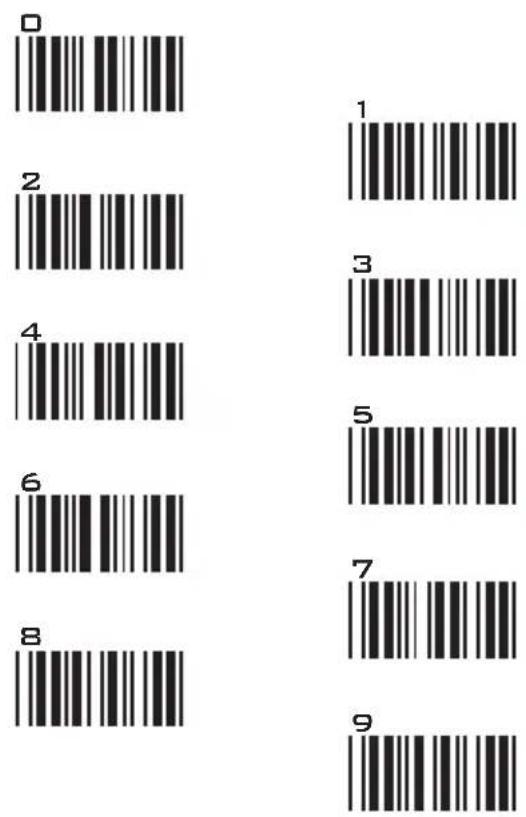
SETTING PROCEDURE
MIN / MAX LENGTH
STEP 1 - Scan: MIN LENGTH/ MAX LENGTH
STEP 2 - Scan: Two digits from Appendix.
STEP 3 - Scan: MIN LENGTH/ MAX LENGTH
Please note that when Min Length and / or Max Length are enabled, the scanner will only read bar codes that fall into those length parameters. Bar codes shorter or longer than specified will not be read. The default lengths for these are indicated in parentheses under the Min and Max bar codes for each symbology.
NOTES:
RESET/ABORT
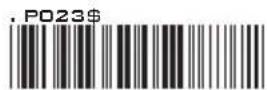
- The scanner will beep three times as indication that a setting is not yet complete or unexpected barcode is scanned during multi-step configuration.
- If you make a mistake, forget a step, etc., and want to abort the multi-step configuration, scan RESET/ABORT and start over again.
GROUP-25
SYMBOLOGIES: INTERLEAVED 2 OF 5, CODE 11
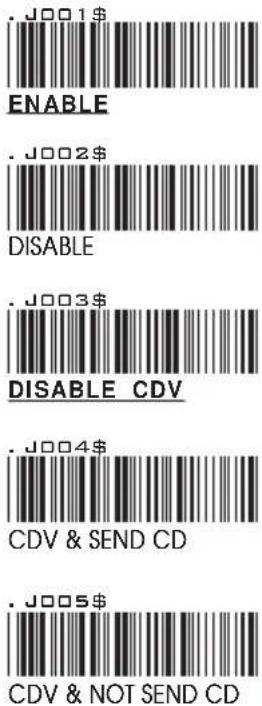
INTERLEAVED 2 OF 5
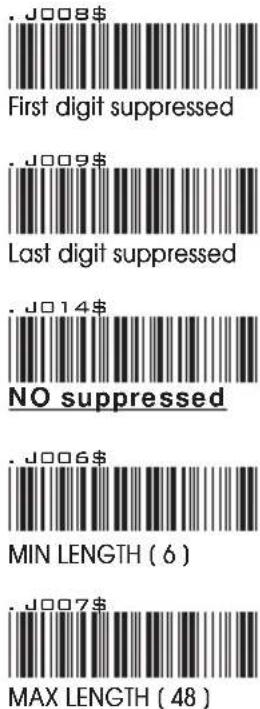
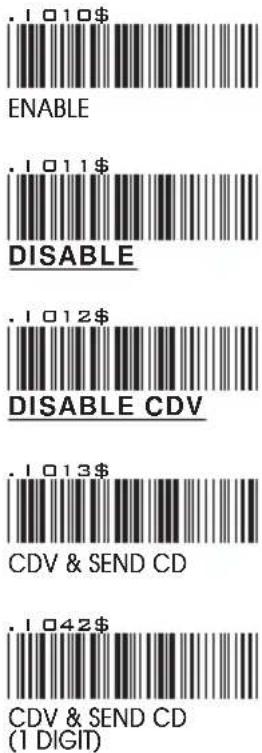
CODE 11

APPENDIX
FULL ASCII (Code 39) NUMERIC TABLE
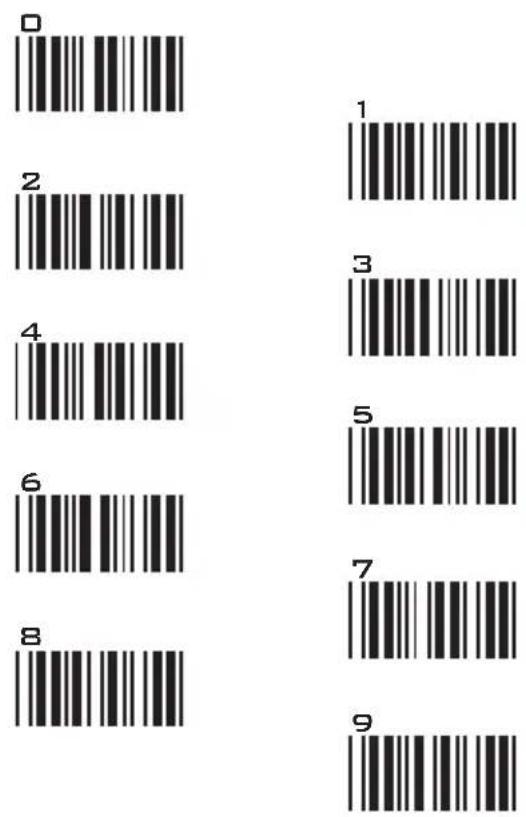
SETTING PROCEDURE
MIN / MAX LENGTH
STEP 1 - Scan: MIN LENGTH/ MAX LENGTH
STEP 2 - Scan: Two digits from Appendix.
STEP 3 - Scan: MIN LENGTH/ MAX LENGTH
Please note that when Min Length and / or Max Length are enabled, the scanner will only read bar codes that fall into those length parameters. Bar codes shorter or longer than specified will not be read. The default lengths for these are indicated in parentheses under the Min and Max bar codes for each symbology.
NOTES:
RESET/ABORT

- The scanner will beep three times as indication that a setting is not yet complete or unexpected barcode is scanned during multi-step configuration.
- If you make a mistake, forget a step, etc., and want to abort the multi-step configuration, scan RESET/ABORT and start over again.
GROUP-26
SYMBOLOGIES: INDUSTRIAL 2 OF 5, MATRIX 2 OF 5
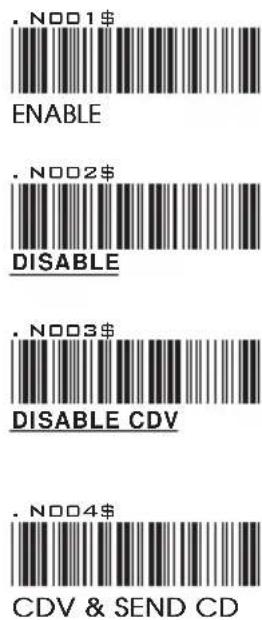
INDUSTRIAL 2 OF 5

CDV & NOT SEND CD

MIN LENGTH (6)

MAX LENGTH (48)

ENABLE

DISABLE

DISABLE CDV

CDV & SEND CD
MATRIX 2 OF 5

CDV & NOT SEND CD

MIN LENGTH (6)
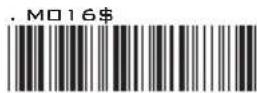
MAX LENGTH (48)
APPENDIX
FULL ASCII (Code 39) NUMERIC TABLE
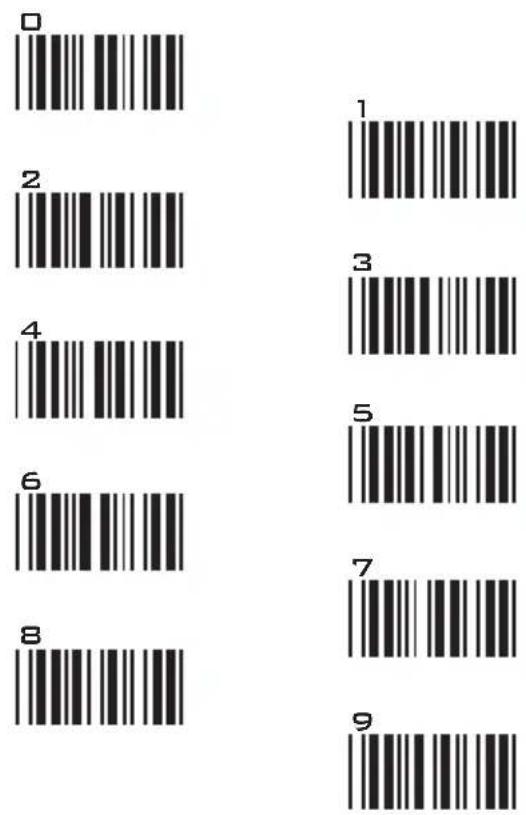
SETTING PROCEDURE
MIN / MAX LENGTH
STEP 1 - Scan: MIN LENGTH/ MAX LENGTH
STEP 2 - Scan: Two digits from Appendix.
STEP 3 - Scan: MIN LENGTH/ MAX LENGTH
Please note that when Min Length and / or Max Length are enabled, the scanner will only read bar codes that fall into those length parameters. Bar codes shorter or longer than specified will not be read. The default lengths for these are indicated in parentheses under the Min and Max bar codes for each symbology.
NOTES:
RESET/ABORT
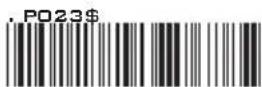
- The scanner will beep three times as indication that a setting is not yet complete or unexpected barcode is scanned during multi-step configuration.
- If you make a mistake, forget a step, etc., and want to abort the multi-step configuration, scan RESET/ABORT and start over again.
GROUP-27
SYMBOLOGIES: CODABAR
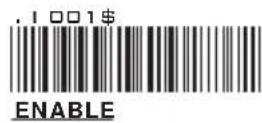



CODABAR

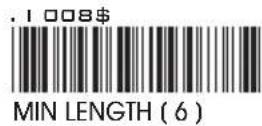
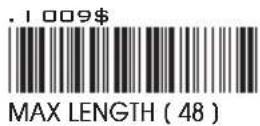

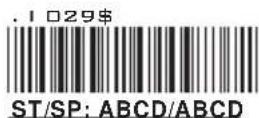


START / STOP


Example of ST (Start) / SP (Stop)
123456 Not Transmit ST/SP A123456B ST/SP: ABCD/ABCD a123456b ST/SP: abcd/abcd A123456N ST/SP: ABCD/TN*E a123456n ST/SP: abcd/tn*e


CLSI FORMAT
CLSI- Enable library space insertion. If you enable the CLSI format, this option inserts spaces in position 2, 7, 13 of the data string for use in library systems.
APPENDIX
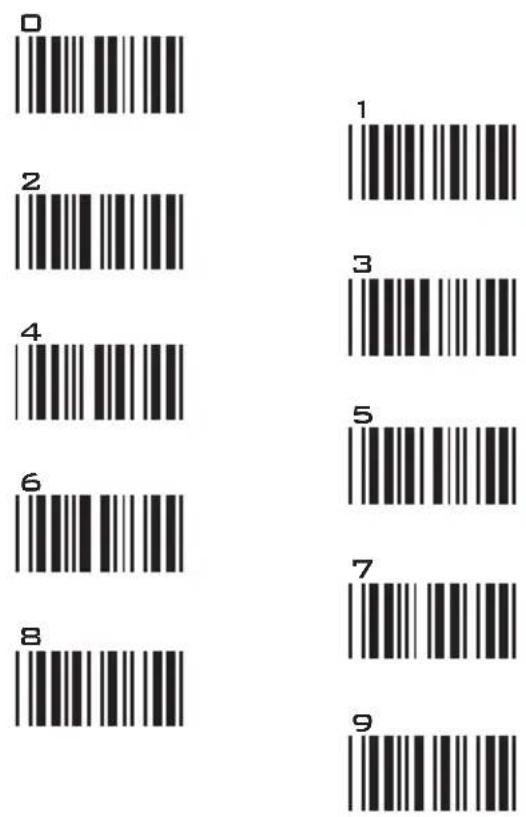
FULL ASCII (Code 39) NUMERIC TABLE
SETTING PROCEDURE
MIN / MAX LENGTH
STEP 1 - Scan: MIN LENGTH/ MAX LENGTH
STEP 2 - Scan: Two digits from Appendix.
STEP 3 - Scan: MIN LENGTH/ MAX LENGTH
Please note that when Min Length and / or Max Length are enabled, the scanner will only read bar codes that fall into those length parameters. Bar codes shorter or longer than specified will not be read. The default lengths for these are indicated in parentheses under the Min and Max bar codes for each symbology.
NOTES:
RESET/ABORT

- The scanner will beep three times as indication that a setting is not yet complete or unexpected barcode is scanned during multi-step configuration.
- If you make a mistake, forget a step, etc., and want to abort the multi-step configuration, scan RESET/ABORT and start over again.
GROUP-28
SYMBOLOGIES: ABC-CODABAR, CX-CODABAR

ABC- CODABAR


* The data can be any alphanumerics of FULL ASCII Table (GROUP 40-46)
REMARK:
ABC-CODABAR (American Blood Commission). The ABC Code is an acronym for American Blood Commission. This bar code is a variant of the CODABAR Code developed for the use in the blood bank. This Code consists of two bar codes which are decoded in one read cycle. The code is concatenated when the stop character of the first bar code and the start character of the second bar code is a “D”, these two “D” are not transmitted.
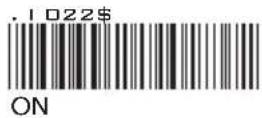
CX CODE- CODABAR


* The data can be any alphanumerics of FULL ASCII Table (GROUP 40-46)
REMARK:
The CX-Code consists of two bar codes which are decoded in one read cycle, the code is concatenated when the stop character of the first bar code is a C, and the start character of the second bar code is a B. The B and C characters are not transmitted.
GROUP-29
SYMBOLOGIES: CODABAR COUPLING, ADJACENT REQUIRED


CODABAR COUPLING


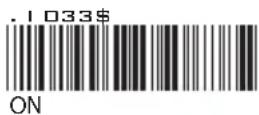
ABC-Codabar and CX-Codabar have certain rules regarding the Stop Character of first bar code and the stop character of second bar code while in conjunction, while Codabar-Coupling is enabled, the data from any two Codabar bar codes can be coupled into one set of data without any limitations between the Stop character of first bar code and the Start character of second bar code. The Start and Stop characters associated with each bar code will be sent.
* The data can be any alphanumerics of FULL ASCII Table (GROUP 40-46)
ADJACENT REQUIRED
If CODABAR ADJACENT is enabled, the scanner will only read two adjacent Codabar bar codes; a single bar code will not be read.

NOTES:
- Both ABC-Codabar and CX-Codabar can be enabled together, except when Codabar-Coupling is also enabled.
- If ABC-Codabar, CX-Codabar, and Codabar-Coupling are all enabled at the same time, the scanner will read only Codabar-Coupling, that is, ABC-Codabar, CX-Codabar will be considered coupling formats.
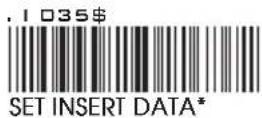
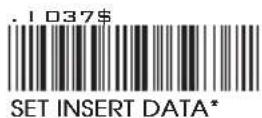
SETTING PROCEDURE - SET INSERT DATA
Step 1- Scan SET INSERT DATA.
Step 2- Scan any combination of alphanumeric characters from FULL ASCII Table.
Step 3- Scan SET INSERT DATA.
RESET

NOTES:
- The scanner will beep three times as a reminder that a setting is not yet complete.
- If you make a mistake, forget a step, etc., Scan RESET to start again.
GROUP-30
SYMBOLOGIES: STANDARD & FULL ASCII CODE 39, CODE 32
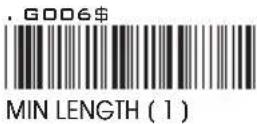
STANDARD CODE 39 & FULL ASCII 39






NOTE:
The default for Code 39 is Standard Code 39. If Full ASCII Code 39 is enabled, Standard Code 39 will be automatically disabled.

CODE 32




APPENDIX
FULL ASCII (Code 39) NUMERIC TABLE

SETTING PROCEDURE
MIN / MAX LENGTH
STEP 1 - Scan: MIN LENGTH/ MAX LENGTH
STEP 2 - Scan: Two digits from Appendix.
STEP 3 - Scan: MIN LENGTH/ MAX LENGTH
Please note that when Min Length and / or Max Length are enabled, the scanner will only read bar codes that fall into those length parameters. Bar codes shorter or longer than specified will not be read. The default lengths for these are indicated in parentheses under the Min and Max bar codes for each symbology.
NOTES:
RESET/ABORT

- The scanner will beep three times as indication that a setting is not yet complete or unexpected barcode is scanned during multi-step configuration.
- If you make a mistake, forget a step, etc., and want to abort the multi-step configuration, scan RESET/ABORT and start over again.
GROUP-31
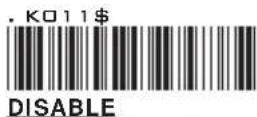
SYMBOLOGIES FORMATTING: UPC-E



UPC-E


ADD ON SUPPLEMENT




NOTE:
If ADDENDA REQUIRED is set to ON, the scanner will only read an UPC-E bar code that has an addenda. At the same time please also scan +5 ON or +2 ON so the scanner will output a 5-digit or 2-digit addendum.
GROUP-32
SYMBOLOGIES: UPC-E SYSTEM NUMBER
UPC-EO


UPC-E1


NOTE:
Most UPC bar codes lead with 0 number systems, for these bar codes use UPC E(0) selection. For the bar codes that lead with the 1 number, use UPC E(1) selection.
- If UPC-E EXPAND TO UPC A FORMAT is enabled, the output of UPC-A will be 12 digits.
- The default output of UPC-A is 12 digits, if UPC-A EXPAND TO EAN13 is enabled, a zero will be added to in front of the bar code.
GROUP-33
SYMBOLOGIES FORMATTING: UPC-A

UPC-A
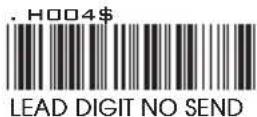




UPC-A EXPAND
TO EAN-13


ADD ON SUPPLEMENT

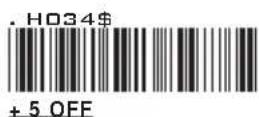




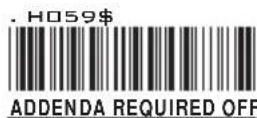
NOTE:
If ADDENDA REQUIRED is set to ON, the scanner will only read an UPC-E bar code that has an addenda. At the same time please also scan +5 ON or +2 ON so the scanner will output a 5-digit or 2-digit addendum.
GROUP-34
SYMBOLOGIES FORMATTING: EAN 8

EAN-8


ADD ON SUPPLEMENT




NOTE:
If ADDENDA REQUIRED is set to ON, the scanner will only read an UPC-E bar code that has an addenda. At the same time please also scan +5 ON or +2 ON so the scanner will output a 5-digit or 2-digit addendum.
GROUP-35
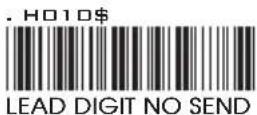
SYMBOLOGIES FORMATTING: EAN13, ISBN, ISSN, ISMN

ENABLE

DISABLE

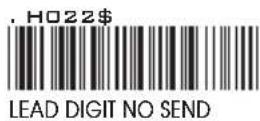
LEAD DIGIT SEND
EAN-13

LEAD DIGIT NO SEND

CHECK DIGIT SEND

CHECK DIGIT NO SEND
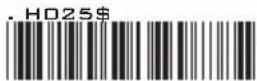
+5 ON

+ 5 OFF

+2 ON

+ 2 OFF
ADD ON SUPPLEMENT

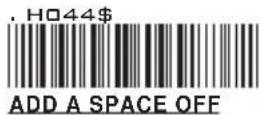
ADD A SPACE ON

ADD A SPACE OFF

ADDENDA REQUIRED ON
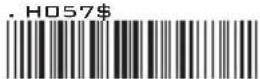
ADDENDA REQUIRED OFF

ISBN OFF
NOTES:
- If ADDENDA REQUIRED is set to ON, the scanner will only read an EAN-13 bar code that has an addenda.
- Either ISSN or ISBN will be considered as an extension of EAN-13. If ISSN or ISBN needs to be read, EAN-13 must be enabled. If ISSN and ISBN need to be read with addenda, EAN-13 must be enabled with ADDENDA REQUIRED set to ON, and +2 ON or +5 ON must be enabled as well.

ISSN OFF
ISBN

ISBN ON

ISSN ON
NOTE:
Both ISSN and ISBN are the extension codes of EAN-13. If scanner is required to read either ISSN or ISBN, EAN-13 must be enabled. Otherwise the scanner will not be able to read ISSN or ISBN.
GROUP-36
SYMBOLOGIES: EAN/UCC-128, CODE 128
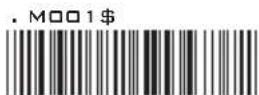
ENABLE
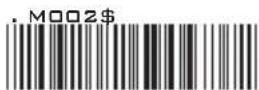
DISABLE

CODE ID ENABLE
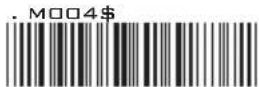
CODE ID DISABLE
EAN/ UCC-128

FUNC 1 CHAR SEND

FUNC 1 CHAR NOT SEND
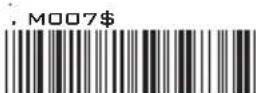
DEFINE EAN 128
NOTES: DEFINE EAN 128
The first FNC1 character is translated to ]c1, and the second FNC1 character is translated to an ASCII
String format:
| JC1 | DATA CHARACTERS | DATA CHARACTERS |
Setting Procedure:
1: Scan DEFINE EAN128.
2: Scan ASCII Code (Group 40-46)
3: Scan DEFINE EAN128.
CODE 128

ENABLE

DISABLE
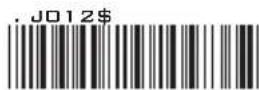
MIN LENGTH (5)

MAX LENGTH (48)
GROUP-37
GS1 DataBar, LIMITED, EXPANDED
GS1 DataBar (RSS) - OMNI & STACKED

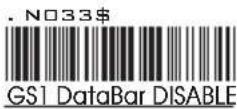


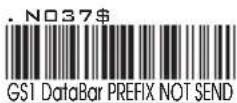


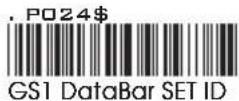
GS1 DataBar (RSS) - LIMITED


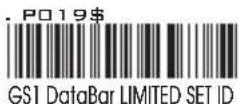
GS1 DataBar (RSS) - EXPANDED


GROUP-38
FULL ASCII TABLE ( CODE 39 ) CONTROL CODES

bar
| Label | Value | |-------|-------| | %U | 10 | | $A | 15 | | $B | 18 | | $C | 20 | | $D | 22 | | $E | 25 | | $F | 28 | | $G | 30 | | $H | 32 | | $I | 35 | | $J | 38 | | $K | 40 | | $L | 42 | | $M | 45 | | $N | 48 | | $O | 50 | | NUL | 52 | | SOH | 55 | | STX | 58 | | ETX | 60 | | EOT | 62 | | ENQ | 65 | | ACK | 68 | | BEL | 70 | | BS | 72 | | HT | 75 | | LF | 78 | | VT | 80 | | FF | 82 | | CR | 85 | | SO | 88 | | SI | 90 |GROUP-39
FULL ASCII TABLE ( CODE 39 )
CONTROL CODES
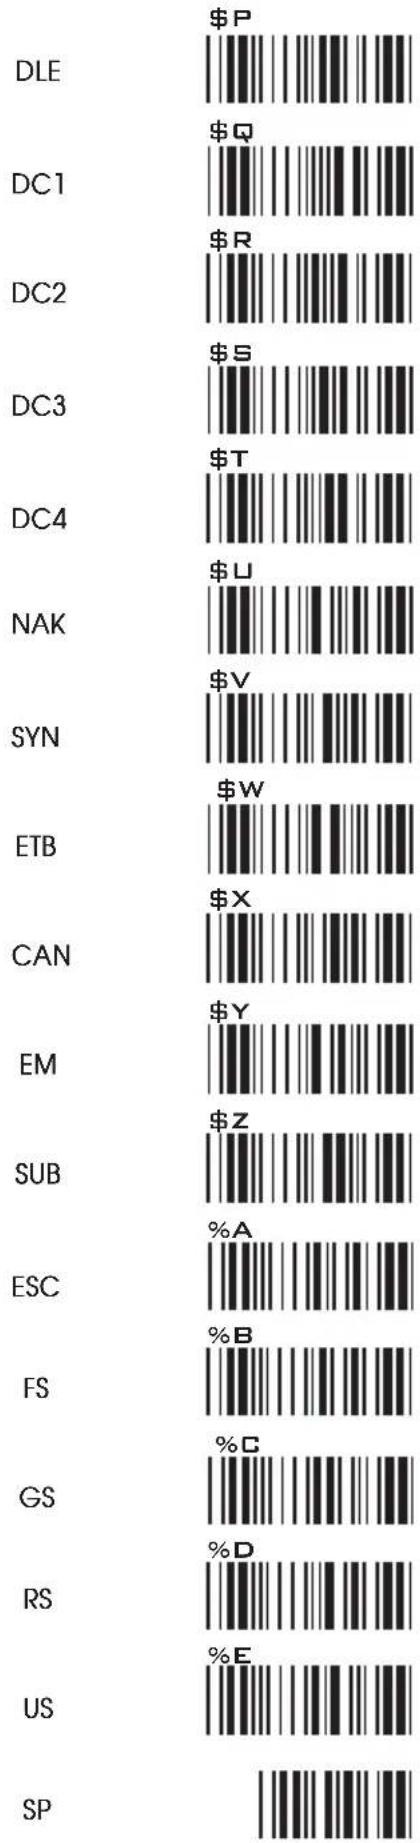
bar
| Category | Value | | -------- | ----- | | DLE | $P | | DC1 | $Q | | DC2 | $R | | DC3 | $S | | DC4 | $T | | NAK | $U | | SYN | $V | | ETB | $W | | CAN | $X | | EM | $Y | | SUB | $Z | | ESC | %A | | FS | %B | | GS | %C | | RS | %D | | US | %E | | SP | 0 |GROUP-40
FULL ASCII TABLE ( CODE 39 ) SYMBOLS

GROUP-41
FULL ASCII TABLE ( CODE 39 ) SYMBOLS
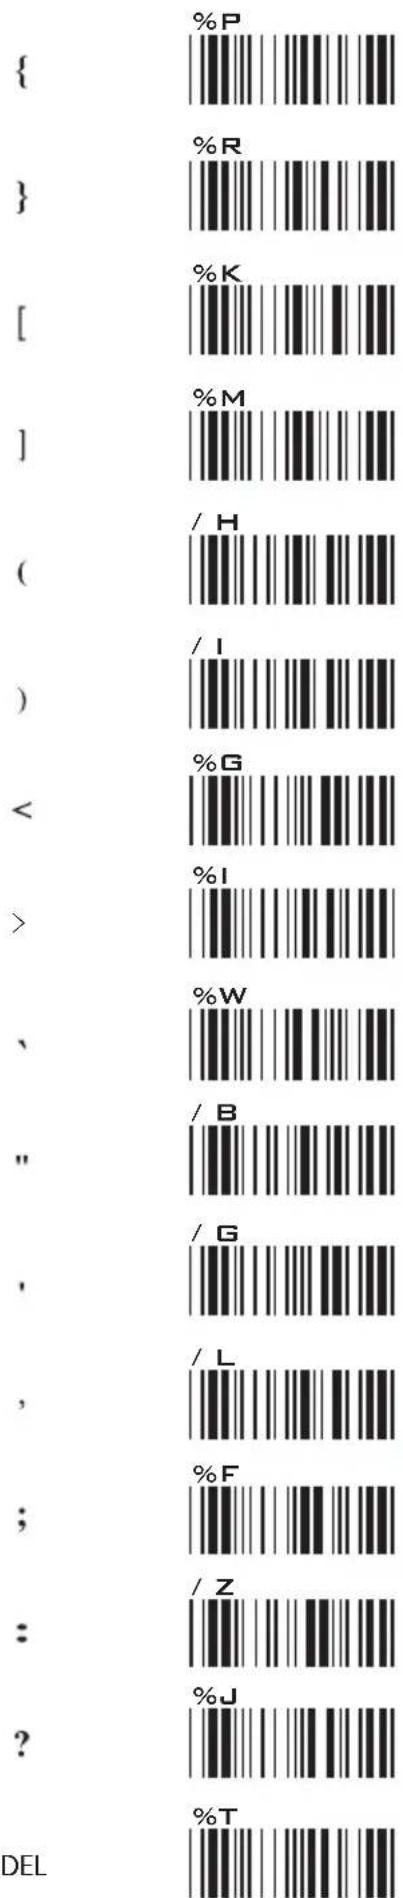
GROUP-43
FULL ASCII TABLE ( CODE 39 ) UPPER CASE ALPHABETS

GROUP-44
FULL ASCII TABLE ( CODE 39 ) LOWER CASE ALPHABETS

GROUP-45
FULL ASCII TABLE ( CODE 39 ) LOWER CASE ALPHABETS

GROUP-46
FULL ASCII TABLE ( CODE 39 ) NUMBERS
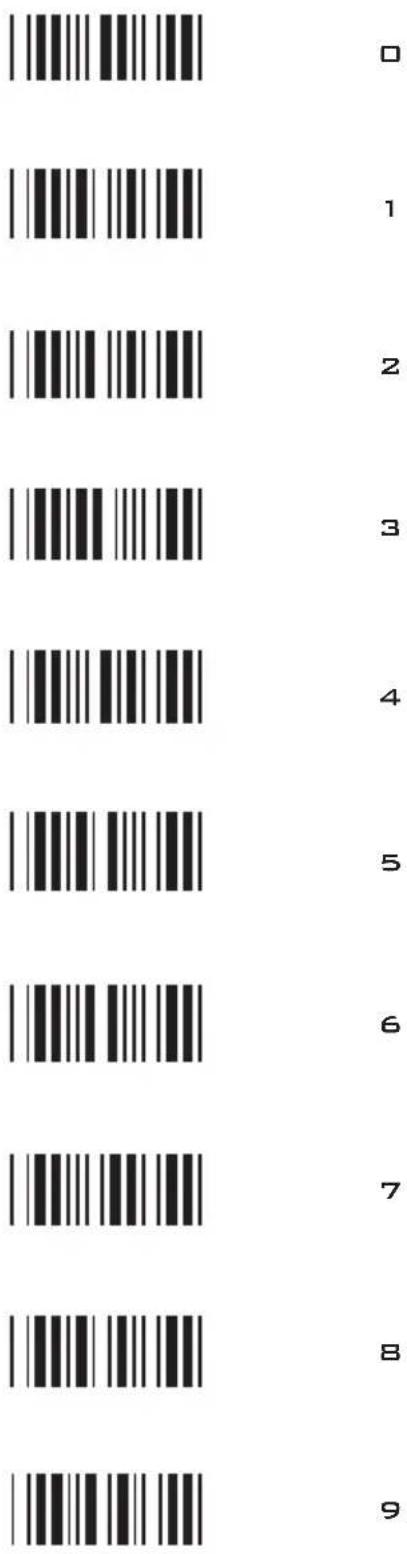
GROUP-47
FULL ASCII TABLE ( CODE 39 ) FUNCTION KEYS
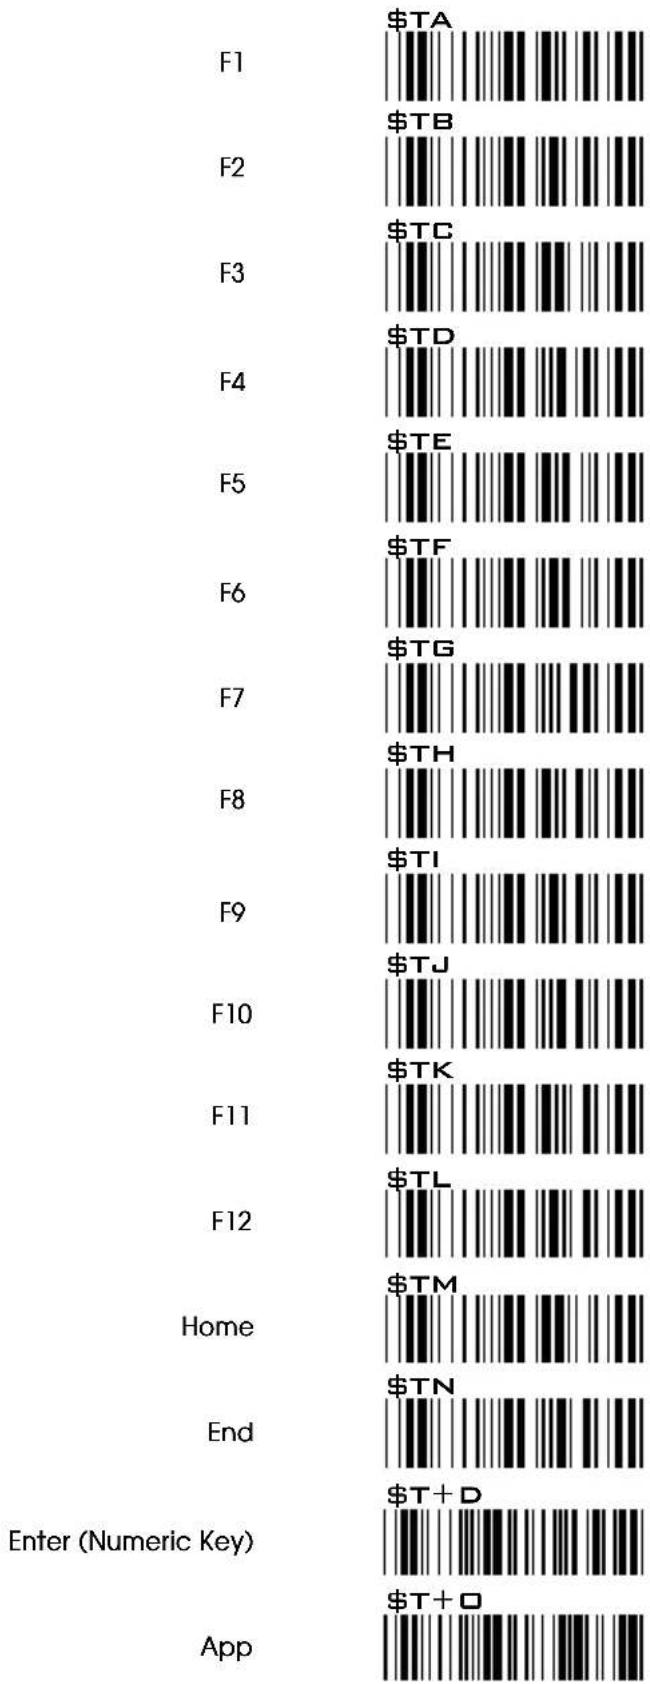
bar
| Category | Value ($) | |---|---| | F1 | $TA | | F2 | $TB | | F3 | $TC | | F4 | $TD | | F5 | $TE | | F6 | $TF | | F7 | $TG | | F8 | $TH | | F9 | $TI | | F10 | $TJ | | F11 | $TK | | F12 | $TL | | Home | $TM | | End | $TN | | Enter (Numeric Key) | $T+D | | App | $T+O |GROUP-48
FULL ASCII TABLE ( CODE 39 ) NAVIGATION KEYS

Cursor Right
Cursor Left
Cursor Up
Cursor Down
Page Up
Page Down
Tab
Back Tab
Esc
Enter
BS
Ins
Del
GROUP-49
FULL ASCII TABLE ( CODE 39 ) MODIFIER KEYS
\$T%L

Alt (Left) make*1
\$T+E

Alt (Right) make
\$T%N

Shift (Left) make *2
\$T+1

Shift (Right) make
\$T+K

Win (Left) make
\$T+M

Win (Right) make
\$T%W

Ctrl (Left) make *3
\$T+G

Ctrl (Right) make
\$T%M
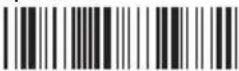
Alt (Left) break
\$T+F

Alt (Right) break
\$T%□

Shift (Left) break
\$T+J

Shift (Right) break
\$T+L

Win (Left) break
\$T+N

Win (Right) break
\$T+A

Ctrl (Left) break
\$T+H

Ctrl (Right) break
For UK Keyboard Special Character
\$T+B
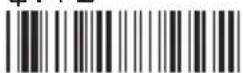

\$T+C

£
Note:
*1: When "Alt(Left)Make" is programmed, please scan "Alt(Left)Break" to resume barcode setting.
*2: When "Shift(Left)Make" is programmed, please scan "Shift(Left)Break" to resume barcode setting.
*3: When "Ctrl(Left)Make" is programmed, please scan "Ctrl(Left)Break" to resume barcode setting.
APPENDIX 1
DEFAULT TABLE 1
| GROUP | PARAMETER DEFAULT | |
| 1 | Setup Code ON | |
| Function Code Conversion ON | ||
| 2 | Reading Mode Trigger Mode | |
| Button Preference Both Buttons | ||
| Illumination Preference | Laser always ON, LED ON after 1 sec | |
| 3 | Beep Tone Medium | |
| Terminator | CR (BT HID, USB HID) | |
| CR+LF (USB VCP) | ||
| 4 | Send Data Length OFF | |
| enoNelbmaerP | ||
| Postamble | None | |
| 5 | Inverse Barcode | Disable |
| Code ID (Symbology ID) | Disable Code ID | |
| 7~9 | Set ID | None |
| 10 | Interblock Delay | 0mS |
| Intercharacter Delay | 140uS | |
| 11 | Keyboard Layout | English (USA) |
| 12 | Capital Lock Mode | Caplock OFF |
| Numeric Key | Alphanumeric Key | |
| HT/CR/ESC Conversion | Disable | |
| 13 | Interface | N/A |
| 14 | iOS/MAC/Windows or Android | iOS/MAC/Windows |
| 16 | Power Off Timeout | 30 seconds |
| 18 | Data Format<Date><Time><Barcode Data> | |
| Field Separator | , | |
| Set Date | N/A | |
| Set Time | N/A | |
| 20 | Date Format DD/MM/YYYY | |
| Time Format | HH:MM:SS | |
| 20~22 | Enable/Disable Symbologies | |
| Code 32 | Disable | |
| China Postal Code | Disable | |
| UK Plessey Code | Disable | |
| Industrial 2 of 5 | Disable | |
| Matrix 2 of 5 | Disable | |
| Interleaved 2 of 5 | Enable | |
| Code 128 | Enable | |
| Codabar | Enable | |
| Telepen | Disable | |
| GPU | elbān | |
| CPU | elbān | |
| BA | elbān | |
| 3KA | elbān | |
| MSI | D elba | |
| Code 39 | Enable | |
| Code 11 | Disable | |
| Code 93 | Disable | |
| EAN-128 | Enable | |
| ATAI | Elba | |
| GS1 Databar | Disable | |
| GS1 Databar Stacked | Enable | |
| GS1 Databar Limited | Disable | |
| GS1 Databar Expanded | Disable | |
| GS1 Databar Stacked | Enable | |
| 22 | China Postal Code (Toshiba Code) | |
| Enable/Disable | Enable | |
| Min Length | 11 | |
| Max Length | 48 | |
| Check Digit Verification | Disable CDV | |
| 23 | MSI | |
| Enable/Disable | Disable | |
| Check Digit Verification | CDV & Send CD | |
| Check Digit Mod | Check Digit Single Mod 1 | |
| Min Length | 6 | |
| Max Length | 48 | |
| UK Plessey Code | ||
| Enable/Disable | Disable | |
| Check Digit Verification | CDV & Not Send CD | |
APPENDIX 1
DEFAULT TABLE 2
| GROUP | PARAMETER DEFAULT | |
| 24 | Code 93 | |
| Enable/Disable Disable | ||
| Min Length 6 | ||
| Max Length 48 | ||
| Telepen | ||
| Enable/Disable Disable | ||
| Number/ASCII ASCII | ||
| IATA | ||
| Enable/Disable Disable | ||
| Check Digit Verification Disable CDV | ||
| Min Length 6 | ||
| Max Length 48 | ||
| 25 | Interleaved 2 of 5 | |
| Enable/Disable Enable | ||
| Check Digit Verification Disable CDV | ||
| Suppressed No Suppressed | ||
| Min Length 6 | ||
| Max Length 48 | ||
| Code 11 | ||
| Enable/Disable Disable | ||
| Check Digit Verification Disable CDV | ||
| Min Length 6 | ||
| Max Length 32 | ||
| 26 | Industrial 2 of 5 | |
| Enable/Disable Disable | ||
| Check Digit Verification Disable CDV | ||
| Min Length 6 | ||
| Max Length 48 | ||
| Matrix 2 of 5 | ||
| Enable/Disable Disable | ||
| Check Digit Verification Disable CDV | ||
| Min Length 6 | ||
| Max Length 48 | ||
| 27 | Codabar | |
| Enable/Disable Enable | ||
| Check Digit Verification Disable CDV | ||
| Min Length 6 | ||
| Max Length 48 | ||
| dneSpotSRS | ||
| Start/Stop Type | ST/SP: ABCD/ABCD | |
| CLSI Format | CLSI Format OFF | |
| 28 | ABC-Codabar | |
| ON/OFF | OFF | |
| Insert Data | Insert Data OFF | |
| CX-Codabar | ||
| ON/OFF | OFF | |
| Insert Data | Insert Data OFF | |
| 29 | Codabar Coupling | |
| ON/OFF | OFF | |
| Insert Data | Insert Data OFF | |
| Adjacent Required | OFF | |
| 30 | Code 39 | |
| Enable/Disable Enable | ||
| Check Digit Verification Disable CDV | ||
| Min Length 1 | ||
| Max Length 48 | ||
| Full ASCII Code 39 | Enable | |
| Start/Stop | Not Send | |
| Code 32 | ||
| Enable/Disable Disable | ||
| dneL | dneS | |
| Tailing | Send | |
| 31 | UPC-E | |
| Enable/Disable Enable | ||
| Check Digit Verification Send CD | ||
| Lead Digit | Send | |
| $ | ∅F | |
| 2 | ∅F | |
| Add a Space | OFF | |
| Addenda Required | OFF | |
APPENDIX 1
DEFAULT TABLE 3
| GROUP | PARAMETER DEFAULT | |
| 32 | NO0E-CPU | |
| FFO1E-CPU | ||
| UPC-E Expand to UPC-A Disable | ||
| 33 | UPC-A | |
| Enable/Disable Enable | ||
| Check Digit Verification Send CD | ||
| Lead Digit | Send | |
| UPC-A Expand to EAN-13 | Disable | |
| +5 | FFO | |
| +2 | FFO | |
| Add a Space | OFF | |
| Addenda Required | OFF | |
| 34 | EAN-8 | |
| Enable/Disable Enable | ||
| Check Digit Verification Send CD | ||
| Lead Digit | Send | |
| +5 | FFO | |
| +2 | FFO | |
| Add a Space | OFF | |
| Addenda Required | OFF | |
| 35 | EAN-13 | |
| Enable/Disable Enable | ||
| Check Digit Verification Send CD | ||
| Le | dn#ti | |
| +5 | FFO | |
| +2 | FFO | |
| Add a Space | OFF | |
| Addenda Required | OFF | |
| INB | FFO | |
| INS | FFO | |
| MN | FFO | |
| 36 | EAN/UCC-128 | |
| Enable/Disable Enable | ||
| Func 1 Char | Not Send | |
| Code 128 | ||
| Enable/Disable Enable | ||
| Min Length | 5 | |
| Max Length | 48 | |
| 37 | GS1 Databar | |
| Enable/Disable Disable | ||
| Check Digit Verification Not Send CD | ||
| Prefix | Not Send | |
| GS1 Databar Stacked/Omnidirectional | ||
| Enable/Disable Enable | ||
| GS1 Databar Limited | ||
| Enable/Disable Disable | ||
| Check Digit Verification Not Send CD | ||
| Prefix | Not Send | |
| GS1 Databar Expanded | ||
| Enable/Disable Disable | ||
| GS1 Databar Expanded Stacked | ||
| Enable/Disable Enable | ||
| Min Length | 1 | |
| Max Length | 74 | |
APPENDIX 2
BAR CODE TEST CHART
| DENSITY | NARROW mm(mil) | WIDE mm(mil) | CHAR.GAP mm(mil) | N/W RATIO |
| MEDIUM DENSITY | 0.25(10) 0 | 625(25) 0.25 | (10) 1/2.5 |
MEDIUM DENSITY
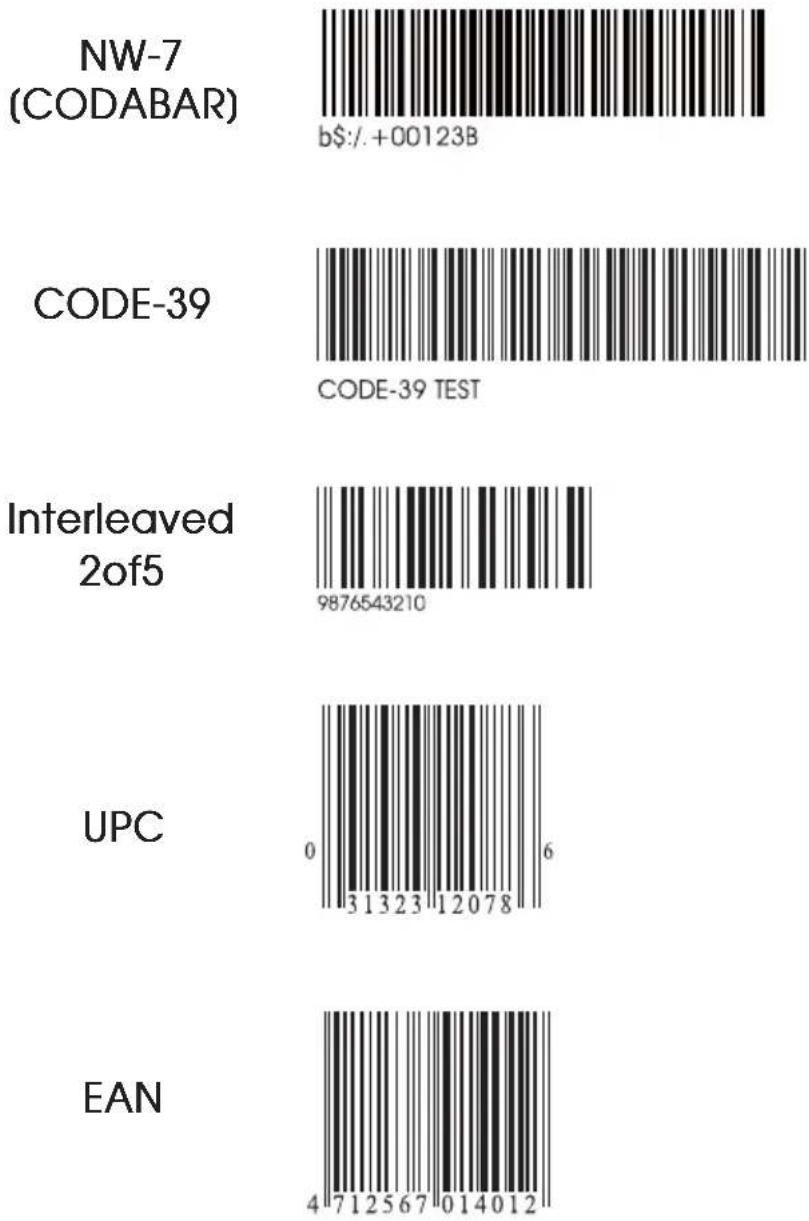
bar
| Sequence | Value | | --------------- | --------- | | NW-7 (CODABAR) | b$:/.+00123B | | CODE-39 | CODE-39 TEST | | Interleaved 2of5 | 9876543210 | | UPC | 0 | | EAN | 4 |APPENDIX 2
BAR CODE TEST CHART
| DENSITY | NARROW mm(mil) | WIDE mm(mil) | CHAR.GAP mm(mil) | N/W RATIO |
| LOW DENSITY | 0.33(13) 0.825(32.5) 0.33(13) 1/2.5 | |||
LOW DENSITY

C9876543210D

CODE-39 TEST
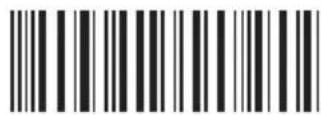
0012345690
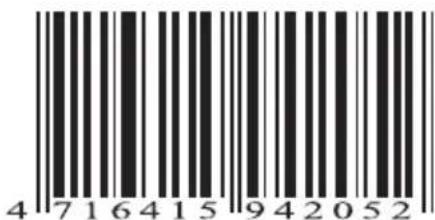


BARCODE TECHNOLOGIES
Wasp Barcode Technologies
1400 10th Street
Plano, Texas USA 75074
(214) 547-4100 | www.waspbarcode.com
©2013-2018 Wasp Barcode Technologies
Wasp WRS100SBR 1D Ring Barcode Scanner User's Manual (Rev 1)


- PREFACE
- GENERAL SETTINGS (GROUP 1 - 12)
- WIRELESS SCANNER SETTINGS (GROUP 13-20)
- SYMBOLOGIES (GROUP 21 - 38)
- FULL ASCII(CODE39)TABLE, FUNCTION KEY TABLE(GROUP 39 - 50)
- APPENDIX
- LED & BEEPER INDICATION
- CLONING MODE
- WHAT IS CLONING MODE?
- HOW SHOULD CLONING WORK?
- NOTES:
- FORMAT OF CLONING
- EXAMPLE :
- PROJECT ASSIGNMENTS:
- SETTING PROCEDURE:
- CORRECT SETTING
- WRONG SETTING
- HOW TO SET PARAMETERS
- How do you program a scanner with this user's guide?
- Preamble / Postamble (maximum 16 digits)
- Min Length / Max Length
- Set Code ID (Example: Code 39)
- Set Data Format
- Set Field Separator
- Set Date/Time
- Set Date/Time Format
- GROUP-1
- GENERAL SETTINGS
- DEFAULT
- CHECK VERSION
- RESET/ ABORT
- SETUP CODE READ
- FUNCTION CODE CONVERSION
- GROUP-2
- GENERAL SETTINGS -
- READING MODE, BUTTON/ILLUMINATION PREFERENCE
- READING MODE
- BUTTON PREFERENCE
- ILLUMINATION PREFERENCE
- GROUP-3
- GENERAL SETTINGS - BEEP TONE, TERMINATOR
- GROUP-4
- EXAMPLE:
- SETTING PROCEDURE:
- DATA FORMAT:
- GROUP-5
- GENERAL SETTINGS - ACCURACY ADJUSTMENT
- GROUP-6
- SET ID - SETTING PROCEDURES
- Steps:
- GROUP-8
- GENERAL SETTINGS - SET CODE ID
- GROUP-9
- GROUP-10
- GROUP-11
- GENERAL SETTINGS - KEYBOARD LAYOUT
- GROUP-12
- NOTE:
- HT/CR/ESC CONVERTS TO TAB/ENTER/ESCAPE
- GROUP-13
- WIRELESS SCANNER SETTINGS
- INTERFACE
- GROUP-14
- BT - HID 📋 GETTING CONNECTED
- GROUP-15
- Android
- GROUP-16
- POWER OFF TIMEOUT
- GROUP-17
- MEMORY MODE
- DELETE LAST RECORD
- CLEAR ALL RECORD
- GROUP-18
- MEMORY MODE □ DATA FORMAT
- MEMORY MODE □ DATE & TIME SETUP
- GROUP-19
- MEMORY MODE □ DATE FORMAT
- MEMORY MODE □ TIME FORMAT
- ENABLE
- DISABLE
- GROUP-22
- CHINA POSTAL CODE [ TOSHIBA CODE ]
- SETTING PROCEDURE
- MIN / MAX LENGTH
- RESET/ABORT
- GROUP-23
- GROUP-24
- GROUP-25
- GROUP-26
- GROUP-27
- CLSI FORMAT
- GROUP-28
- REMARK:
- GROUP-29
- ADJACENT REQUIRED
- SETTING PROCEDURE - SET INSERT DATA
- GROUP-30
- GROUP-31
- GROUP-32
- GROUP-33
- GROUP-34
- GROUP-35
- GROUP-36
- NOTES: DEFINE EAN 128
- GROUP-37
- GROUP-38
- GROUP-39
- GROUP-40
- GROUP-41
- GROUP-43
- GROUP-44
- GROUP-45
- GROUP-46
- GROUP-47
- GROUP-48
- GROUP-49
- FULL ASCII TABLE ( CODE 39 ) MODIFIER KEYS
- APPENDIX 1
- DEFAULT TABLE 1
- DEFAULT TABLE 2
- DEFAULT TABLE 3
- APPENDIX 2
- BAR CODE TEST CHART
- Wasp Barcode Technologies
Brand : Wasp
Model : WRS100SBR
Category : Barcode scanners