
CR8S-XBT - Loudspeaker MACKIE - Free user manual and instructions
Find the device manual for free CR8S-XBT MACKIE in PDF.


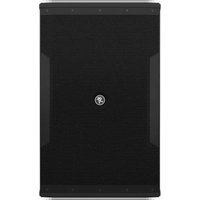
| Product Type | Active Multimedia Subwoofer with Bluetooth |
| Model | CR8S-XBT |
| Woofer Size | 8 in / 203 mm, polypropylene-coated |
| Amplifier Power | 200 W peak, Class D |
| Frequency Response (-10 dB) | 30 Hz – 250 Hz |
| Frequency Response (-3 dB) | 40 Hz – 180 Hz |
| Maximum SPL | 112 dB peak |
| Crossover Type | Adjustable, -12 dB/octave |
| Crossover Frequency Range | 40 Hz – 180 Hz |
| Inputs | 1/4" TRS (balanced/unbalanced), RCA (unbalanced) |
| Outputs | 1/4" TRS (to monitors), RCA (to monitors) |
| Bluetooth Version | 4.2, for audio streaming |
| Polarity Switch | 0° / 180° selectable |
| Controls | Input level, Sub output level, Crossover knob, Polarity switch |
| Included Remote | CRDV Desktop Volume Controller (1/4" TRS connection) |
| Cabinet Material | MDF with black vinyl wrap |
| Dimensions (H x W x D) | 14.0 x 12.6 x 16.2 in / 356 x 320 x 411 mm |
| Weight | 24.5 lb / 11.1 kg |
| Power Requirements | 100–240 VAC, 50–60 Hz, 150 W |
| Fuse | T2AL 250V |
| Safety Certification | Class II, double insulated, FCC Class B, ICES-003 |
| Care Instructions | Clean with dry cloth; avoid moisture and freezing temperatures |
Frequently Asked Questions - CR8S-XBT MACKIE
User questions about CR8S-XBT MACKIE
0 question about this device. Answer the ones you know or ask your own.
Ask a new question about this device
Download the instructions for your Loudspeaker in PDF format for free! Find your manual CR8S-XBT - MACKIE and take your electronic device back in hand. On this page are published all the documents necessary for the use of your device. CR8S-XBT by MACKIE.
USER MANUAL CR8S-XBT MACKIE
MULTIMEDIA SUBWOOFER w/ BLUETOOTH
CRDV
DESKTOP VOLUME CONTROL FOR CR8S-XBT
OWNER'S MANUAL

natural_image
Black and white photo of a black square audio device with a green accent stripe, emitting sound waves (no visible text or symbols)Important Safety Instructions
- Read these instructions.
- Keep these instructions.
- Heed all warnings.
-
Follow all instructions.
-
Do not use this apparatus near water.
-
Clean only with a dry cloth.
-
Do not block any ventilation openings. Install in accordance with the manufacturer's instructions.
-
Minimum distance (5 cm) around the apparatus for sufficient ventilation.
-
Do not install near any heat sources such as radiators, heat registers, stoves, or other apparatus (including amplifiers) that produce heat.
-
No naked flame sources, such as lighted candles, should be placed on the apparatus.
-
Do not defeat the safety purpose of the polarized or grounding-type plug. A polarized plug has two blades with one wider than the other. A grounding-type plug has two blades and a third grounding prong. The wide blade or the third prong are provided for your safety. If the provided plug does not fit into your outlet, consult an electrician for replacement of the obsolete outlet.
-
Protect the power cord from being walked on or pinched particularly at plugs, convenience receptacles, and the point where they exit from the apparatus.
-
Only use attachments/accessories specified by the manufacturer.
-
Use only with a cart, stand, tripod, bracket, or table specified by the manufacturer, or sold with the apparatus. When a cart is used, use caution when moving the cart/apparatus combination to avoid injury from tip-over.
-
Unplug this apparatus during lightning storms or when unused for long periods of time.

-
Refer all servicing to qualified service personnel. Servicing is required when the apparatus has been damaged in any way, such as power-supply cord or plug is damaged, liquid has been spilled or objects have fallen into the apparatus, the apparatus has been exposed to rain or moisture, does not operate normally, or has been dropped.
-
This apparatus shall not be exposed to dripping or splashing, and no object filled with liquids, such as vases or beer glasses, shall be placed on the apparatus.
-
Do not overload wall outlets and extension cords as this can result in a risk of fire or electric shock.

CAUTION
RISK OF ELECTRIC SHOCK! DO NOT OPEN!

CAUTION: TO REDUCE THE RISK OF ELECTRIC SHOCK DO NOT REMOVE COVER (OR BACK). NO USER-SERVICEABLE PARTS INSIDE. REFER SERVICING TO QUALIFIED PERSONNEL.

The lightning flash with arrowhead symbol within an equilateral triangle is intended to alert the user to the presence of uninsulated "dangerous voltage" within the product's enclosure, that may be of significant magnitude to constitute a risk of electric shock to persons.

The exclamation point within an equilateral triangle is intended to alert the user of the presence of important operating and maintaining (servicing) instructions in the literature accompanying the appliance.
WARNING — To reduce the risk of fire or electric shock, do not expose this apparatus to rain or moisture.
CAUTION — To prevent electric shock hazard, do not connect to mains power supply while grille is removed.
CAUTION - These servicing instructions are for use by qualified service personnel only. To reduce the risk of electric shock, do not perform any servicing other than that contained in the operating instructions unless you are qualified to do so.
- This apparatus has been equipped with a rocker-style AC mains power switch. This switch is located on the rear panel and should remain readily accessible to the user.
-
The MAINS plug or an appliance coupler is used as the disconnect device, so the disconnect device shall remain readily operable.
-
Explanation of symbol, marking, signal lamp or similar means indicates that the apparatus is completely disconnected from the mains.
-
WARNING: Please refer to the information on exterior bottom enclosure for electrical and safety information before installing or operating the apparatus.
-
The use of apparatus is in tropical climates.
-
NOTE: This equipment has been tested and found to comply with the limits for a Class B digital device, pursuant to part 15 of the FCC Rules. These limits are designed to provide reasonable protection against harmful interference in a residential installation. This equipment generates, uses, and can radiate radio frequency energy and, if not installed and used in accordance with the instructions, may cause harmful interference to radio communications. However, there is no guarantee that interference will not occur in a particular installation. If this equipment does cause harmful interference to radio or television reception, which can be determined by turning the equipment off and on, the user is encouraged to try to correct the interference by one or more of the following measures:
- Reorient or relocate the receiving antenna.
- Increase the separation between the equipment and the receiver.
- Connect the equipment into an outlet on a circuit different from that to which the receiver is connected.
- Consult the dealer or an experienced radio/TV technician for help.
CAUTION: Changes or modifications to this device not expressly approved by LOUD Audio, LLC. could void the user's authority to operate the equipment under FCC rules.
- This apparatus does not exceed the Class B limits for radio noise emissions from digital apparatus as set out in the radio interference regulations of the Canadian Department of Communications.
Canada ICES-003(B)/NMB-003(B)
-
This equipment is a Class II or double insulated electrical appliance. It has been designed in such a way that it does not require a safety connection to electrical earth.
-
This device complies with Part 15 of the FCC rules and Industry Canada's license-exempt RSS standard(s). Operation is subjected to the following two conditions: (1) this device may not cause harmful interference, and (2) this device must accept any interference received, including interference that may cause undesired operation.
-
Exposure to extremely high noise levels may cause permanent hearing loss. Individuals vary considerably in susceptibility to noise-induced hearing loss, but nearly everyone will lose some hearing if exposed to sufficiently intense noise for a period of time. The U.S. Government's Occupational Safety and Health Administration (DSHA) has specified the permissible noise level exposures shown in the following chart.
According to OSHA, any exposure in excess of these permissible limits could result in some hearing loss. To ensure against potentially dangerous exposure to high sound pressure levels, it is recommended that all persons exposed to equipment capable of producing high sound pressure levels use hearing protectors while the equipment is in operation. Ear plugs or protectors in the ear canals or over the ears must be worn when operating the equipment in order to prevent permanent hearing loss if exposure is in excess of the limits set forth here:
| Duration, per day in hours | Sound Level dBA, Slow Response | Typical Example |
| 8 | 90 | Duo in small club |
| 6 | 92 | |
| 4 | 95 | Subway Train |
| 3 | 97 | |
| 2 | 100 | Very loud classical music |
| 1.5 | 102 | |
| 1 | 105 | Craig screaming at Troy about deadlines |
| 0.5 | 110 | |
| 0.25 or less | 115 | Loudest parts at a rock concert |

Correct disposal of this product: This symbol indicates that this product should not be disposed of with your household waste, according to the WEEE directive (2012/19/EU) and your national law. This product should be handed over to an authorized collection site for recycling waste electrical and electronic equipment (EEE). Improper handling of this type of waste could have a possible negative impact on the environment and human health due to potentially hazardous substances that are generally associated with EEE. At the same time, your cooperation in the correct disposal of this product will contribute to the effective usage of natural resources. For more information about where you can drop off your waste equipment for recycling, please contact your local city office, waste authority, or your household waste disposal service.
Contents Features
Important Safety Instructions....2
Contents 3
Features......3
Introduction 4
Getting Started 4
Hookup Diagrams ....5
CR8S-XBT: Rear Panel Features......7
-
Power Connection and Fuse ....7
-
Power Switch ....7
-
Signal Inputs......7
-
Signal Outputs ....8
-
Input Level Knob 8
-
Sub Output Level Knob......8
-
Crossover Knob 8
-
Polarity Switch......8
-
CRDV Jack 8
CRDV: Features 8
CR8S-XBT: Front Panel Features......9
- Running Man Bluetooth Button / LED ..9
Custom-Tuned Bottom Shelf Port......9
Input Signal Wiring......9
Care and Cleaning......9
The Ins and Outs of Polarity......10
Appendix A: Service Information......11
Appendix B: Technical Information .....13
CR8S-XBT Dimensions....14
CR8S-XBT Block Diagram 15
Limited Warranty 16

Like us

Follow us

Watch our dang videos
Part No. SW1291 Rev. A 12/19
©2019 LOUD Audio, LLC. All Rights Reserved.
Signature CR Series Sound
• Professional studio-quality sound
- Perfect upgrade for your desktop speakers
- Great for home studios, content creators, gaming, listening to your favorite tunes, and more
Fresh Look
- Brushed metal front panel and color matches CR-X multimedia monitors
Plug and Play
- Adjustable Input and Output Level
• Variable Crossover control - Polarity switch
- Inputs - 1/4" TRS, RCA, and Bluetooth
- Outputs - 1/4" TRS and RCA
Bluetooth® Streaming
- Effortlessly pair any Bluetooth enabled device for easy music streaming directly to your system
- Adds Bluetooth streaming to any studio monitors
Professional-grade components and design for optimized sonic performance
• 200 watts of clean, accurate sound
- 8" polypropylene-coated woofer
- All-wood cabinet provides a natural sonic character
Included Desktop Remote
- Control your whole system with the included CRDV Desktop Volume remote with separate levels for the monitors and subwoofer
Please write the serial numbers here for future reference (i.e., insurance claims, tech support, return authorization, make dad proud, etc.)
Purchased at:
Date of purchase:
Introduction
The CR8S-XBT 8" Creative Reference Multimedia Subwoofer with Bluetooth® offers 200W of powerful dedicated bass reinforcement for your studio or home.
The sleek design looks great in any room and is the perfect match for any CR Series monitors. Flexible rear panel inputs and outputs include 1/4" TRS and RCA plus easy Bluetooth pairing for effortless streaming.
Dial your sound in just right with input and output level controls plus a variable crossover and polarity switch.
The included CRDV Desktop Volume Control makes controlling your system a breeze. Upgrade your listening experience with Mackie CR8S-XBT 8" subwoofer with Bluetooth®.
How to Use This Manual:
After this introduction, a getting started guide will help you get things set up fast. The hookup diagrams show some typical setups, while the remaining sections provide details of the CR8S-XBT subwoofer and CRDV desktop volume controller.

This icon marks information that is critically important or unique. For your own good (and our peace of mind), please read and remember them. You will be quizzed later.
An Extremely Important Note on CRBS-XBT Bass Response and Your Control Room
The CR8S-XBT subwoofer achieve the best bass response in a room that's optimized for bass reproduction. A lot of factors can conspire to thwart the extended low frequency, including room shape, room volume and acoustical treatment.
This is not a cop-out or an apology. It's plain old physics in action. Luckily we've armed you with some compensating controls that you can use to optimize the frequency response of the speakers in your particular room. Consider the following:
When you put your CR8S-XBT in a corner or up against walls, their bass characteristics change. The apparent loudness of the low frequencies increases when the subwoofers are placed close to a wall, and even more so when they are placed in a corner.
Getting Started
We realize that you can't wait to hook up your CR8S-XBT subwoofer and try it out. Nevertheless, please take the time to read this page NOW, and the rest can wait until you're good and ready.
- Turn the input level and sub output level controls on the back of the cabinet down (fully counterclockwise) before turning on the subwoofer for the first time.
- Set the power switch on the back panel off. This will prevent you from accidentally connecting a hot signal source to the subwoofer and getting a rude surprise.
- Connect the supplied AC power cord to the IEC socket on the back of the subwoofer. Plug the other end into an AC outlet properly configured with the voltage corresponding to the markings next to the IEC socket.
- Turn on the power switch on the rear panel of the CR8S-XBT subwoofer.
- Connect your device via Bluetooth [instructions on page 9]...
...OR...
Connect the line-level monitor signal from your computer, mixer, or other signal source to the input jacks on the rear panel of the subwoofer (1/4" or RCA).
Connect the line-level signal from the output jacks on the CR8S-XBT subwoofer to the studio monitors' input jacks (1/4" or RCA).
- Start your signal source (mp3 player, CD player, DAW, 8-track player, turntable, other), but leave the master volume control down.
- Turn on the power switch on the monitors. Turn on the power switch on the CR8S-XBT.
- Slowly turn up the input and sub output level controls on the back of the subwoofer to center position (12 o'clock).
- Adjust the master volume on the computer, mixer, preamp or other signal source to a comfortably loud listening level.
- Balance the subwoofer to your desired input and sub output levels and adjust the crossover to your desired setting.
Enjoy the authoritative, commanding lows of the CR8S-XBT. Then read the rest of this manual.
Additional Tidbits of Wisdom
- Never listen to loud music for prolonged periods. Please see the Safety Instructions on page 2 for information on hearing protection.
- When you shut down your equipment, turn off the CR8S-XBT subwoofer first to prevent thumps and other noises generated by any upstream equipment from coming out the speaker. When powering up, turn on the subwoofer last.
- Save the sales receipt and original packaging in case you ever need warranty service. See page 16 for details.

flowchart
graph TD
    A["Input Device"] --> B["POWER Speaker"]
    B --> C["CR-X"]
    C --> D["Wireless Device"]
    D --> E["MultiMedia Subwoofer w/ Bluetooth"]
    E --> F["PC Computer"]
    F --> G["Computer Interface"]
    G --> H["INPUTS"]
    H --> I["Power Speaker"]
    I --> J["CR-X"]
    J --> K["Wireless Device"]
    K --> L["MultiMedia Subwoofer w/ Bluetooth"]
    L --> M["PC Computer Interface"]
Connecting a CR8S-XBT to the signal chain is quite easy, so let's take a quick look at a fairly typical setup. In this example, a computer is connected directly to the subwoofer's RCA inputs. [Note: you could also plug a source – such as a mixer, smartphone, mp3 player or other signal source – directly into the subwoofer's input(s)].
From here, the L/R outputs from the CR8S-XBT are connected to the inputs of a pair of CR-XBT monitors using balanced 1/4" TRS connectors.
Now position the subwoofer and monitors where you would like them. Play audio through the computer, making sure that the volume of the computer, subwoofer and monitors are above "0".
Last step: move the subwoofer and monitors around until the optimal sound has been achieved and adjust volume to taste.

flowchart
graph TD
    A["Passive Speaker Input"] --> B["Mobile Device"]
    C["POWERED Speaker"] --> D["MultiMedia Subwoofer"]
    B --> E["INPUTS"]
    D --> F["OUTPUTS"]
    E --> G["R/ L TRG SWITCH"]
    F --> H["R/ L TRG SWITCH"]
    G --> I["R/ L N/A SWITCH"]
    H --> J["R/ L N/A SWITCH"]
    I --> K["CROV"]
    J --> L["CROV"]
    style A fill:#f9f,stroke:#333
    style C fill:#f9f,stroke:#333
    style B fill:#ccf,stroke:#333
    style D fill:#ccf,stroke:#333
    style E fill:#cfc,stroke:#333
    style F fill:#cfc,stroke:#333
    style G fill:#ffc,stroke:#333
    style H fill:#ffc,stroke:#333
    style I fill:#ffc,stroke:#333
    style J fill:#ffc,stroke:#333
    style K fill:#ffc,stroke:#333
The illustration above shows a common use for the CR8S-XBT subwoofer and CR-XBT monitors. Perhaps a friend created a playlist on their smartphone and wants to share it. With great hesitation, you finally oblige. Everyone has that one friend with terrible taste in music. We know, it happens.
In this example, a smartphone is connected to the CR8S-XBT subwoofer via Bluetooth.
From here, the L/R outputs from the CR8S-XBT are connected to the inputs of a pair of CR-XBT monitors using RCA connectors.
Now position the subwoofer and monitors where you would like them. Play audio through the computer, making sure that the volume of the smartphone, subwoofer and monitors are above "0".
Last step: move the subwoofer and monitors around until the optimal sound has been achieved and adjust volume to taste.
CR8S-XBT: Rear Panel Features
1. Power Connection and Fuse
Connect the power cord to this IEC socket securely, and plug the other end into a live AC outlet. Make sure the AC outlet has the correct voltage indicated below the IEC socket.

Disconnecting the plug's ground pin is dangerous. Don't do it!
The fuse is located behind the fuse cover, at the bottom of the IEC socket. See the "Troubleshooting" section on page 11 for information about replacing the fuse.
2. Power Switch
Press this switch up to turn the CR8S-XBT subwoofer on. Make sure the input and output level knobs are off [fully counterclockwise] before turning it on.
The ring surrounding the Running Man logo on the front panel illuminates white when the CR8S-XBT is plugged into an AC outlet and the power switch is turned on.
Press this switch down to turn the CR8S-XBT subwoofer off.

3. Signal Inputs
Connect the line-level signal from a computer, mixer, or other signal source to one pair of these input jacks. There are two types of input connectors to choose from: 1/4" line-level signals driven by balanced or unbalanced sources or RCA line-level signals driven by unbalanced sources. Since these are connected together electrically, do not connect more than one signal at a time to the input jacks.
A balanced signal provides better noise rejection and is the preferred method, especially if using a cable longer than 20 feet (6 meters).
They are wired as follows, according to standards specified by the AES (Audio Engineering Society):
1/4" TRS Balanced Mono Wiring:
Sleeve = Shield (Ground)
Tip = Hot (+)
Ring = Cold (-)

To connect unbalanced lines to these inputs, use a 1/4" mono (TS) phone plug, wired as follows:
1/4" TS Unbalanced Mono Wiring:
Sleeve = Shield (Ground)
Tip = Hot (+)

The unbalanced RCA plugs are wired as follows:
Unbalanced RCA
Sleeve = Shield (Ground)
Tip = Hot (+)

4. Signal Outputs
Connect these output jacks to the input jacks of studio monitors. Like the inputs, there are two types of output connectors to choose from for the left and right outputs: 1/4" balanced or unbalanced or unbalanced RCA. Since these are connected together electrically, do not connect more than one pair of cables at a time to the output jacks.
The frequency range depends on where the crossover level is set.
These output jacks are wired the same as the input jacks as seen on the previous page.

5. Input Level Knob
The CR8S-XBT subwoofer expects a line-level signal at its input. Use this control to adjust the sensitivity of the input section (from Off to Max) according to the signal strength at its input.
6. Sub Output Level Knob
This knob adjusts the subwoofer's overall output level (from Off to Max). Balance the subwoofer to your desired low-frequency output level and adjust the crossover to your desired setting.
7. Crossover Knob
The CR8S-XBT crossover allows you to choose a crossover frequency for studio monitors ranging from 40 Hz to 180 Hz for optimal sound. Adjust to what sounds best to your ears.
8. Polarity Switch
This switch - when left - sends a normal (0°) polarity of the signal into the subwoofer amplifier. It has no effect on the signal at the outputs.
This switch – when right – reverses the polarity of the signal going into the subwoofer amplifier by 180irc . It has no effect on the signal at the outputs.
There is no right or wrong setting for this switch. Listen to the overall blend of the subwoofer with the rest of the system and select the switch position that gives you the best sound. In fact, your system may vary when positioned differently. Don't be afraid to experiment with the position of the polarity switch. See page 10 for more information.
9. CRDV Jack
Plug the 1/4" connector of the included CRDV volume controller to this jack for remote control of the overall and subwoofer levels.
CRDV: Features
Included with your CR8S-XBT subwoofer is a CRDV volume controller. With it, you are able to control the overall volume level, as well as the subwoofer level... all without having dig around behind the subwoofer!

natural_image
Technical line drawing of a three-tier electronic component with no text or symbolsThere are three control knobs:
- The top control knob adjusts the overall volume of the system. Rotate clockwise to turn it up and counter-clockwise to turn it down... although we don't know why you would want to turn it down!
- The middle control knob adjusts the subwoofer volume. Rotate clockwise to turn it up and counterclockwise to turn it down.
- The bottom control knob adjusts the settings of the sun. Rotate clockwise to turn the heat up and counter-clockwise to turn it down.
Hey sports fans, in a pinch, the CRDV can also double as a hockey puck.
CR8S-XBT: Front Panel Features
10. Running Man Bluetooth Button / LED

The ring surrounding the Running Man logo on the front panel illuminates white when the CR8S-XBT subwoofer is plugged into an AC outlet and the power switch is turned on.

The logo isn't just for pretty looks and LED illumination... it's also
how to connect your device to the subwoofer via Bluetooth! Read on...
Upon powering up the CR8S-XBT, the Bluetooth function is either:
(1) In sleep mode. See 'Pairing and connecting for the first time' (see below) or...
(2) ...Paired and connected. See 'Previously paired and connected devices' (info to the right).
Pairing and connecting for the first time:
To enter pairing mode, press and release the Running Man logo – it doubles as the Bluetooth button! The ring surrounding the button will illuminate and flash green for approximately 30 seconds while in pairing mode. [The LED will continue to flash until it has successfully paired and connected].
While the CR8S-XBT subwoofer is in pairing mode, simultaneously scan for Bluetooth devices on your smartphone. You should see CR8S-XBT appear in the list of "available devices". Select it by tapping it. From there, your Bluetooth device should indicate that it is successfully connected. Additionally, the Bluetooth button will stop flashing and remain solid white. If it does not, start the pairing process again, and make sure that CR8S-XBT and your device are both in pairing mode at the same time.
Previously paired and connected devices:
The Bluetooth connection will disconnect if it's out of range. Previously paired and connected devices will automatically reconnect and the Running Man logo / Bluetooth button will illuminate.

While your Bluetooth device is connected to a CR8S-XBT, you can quickly press the Bluetooth button on the front of the unit to pause/play your audio (the same as if you'd pressed pause/play on your device).

The Bluetooth may disconnect when affected by Electrostatic Discharge [ESD]. Manually reconnect the Bluetooth connection.
Custom-Tuned Bottom Shelf Port
Located on the bottom of the CR8S-XBT is a port. This custom-tuned shelf port uses the radiation from the rear of the woofer cone to extend the low-frequency response of the speaker. The size of the port is carefully designed with respect to the volume of the cabinet and the characteristics of the woofer to produce low-frequency extension.
Input Signal Wiring
We recommend using high-quality, shielded cables to connect the signal source to the signal input jacks on CR8S-XBT subwoofer.
Two types of input connectors are provided to interface with virtually any application you may have:
- Balanced TRS / Unbalanced TS cables work well with the 1/4" inputs.
- Unbalanced phono cables work well with the RCA inputs.
NOTE: Route the cable away from AC power cords and outlets. These are common sources for hum in an audio signal. Wall warts and line lumps are especially insidious hum inducers!
NOTE: In certain home theater applications, it may be necessary to connect the speaker outputs from a stereo receiver to the inputs of the CR8S-XBT subwoofer if the receiver doesn't have preamp outputs or other line-level output connections.

CAUTION: Do not attempt to connect speaker outputs directly to the inputs of the CR8S-XBT subwoofer! Speaker levels are much higher than line levels and
can damage the input circuitry in the CR8S-XBT.
However, it is possible to insert a speaker-level to line-level signal attenuator between the receiver's speaker output and the CR8S-XBT subwoofer's input. Any local authorized dealer should be able to assist, or you can build your own.
Care and Cleaning
The CR8S-XBT subwoofer will provide many years of reliable service if you follow these guidelines.
- Avoid exposing the monitors to moisture.
- Avoid exposure to extreme cold (below freezing temperatures).
- Use a dry cloth to clean the cabinets. Only do this when the power is turned off.
The Ins and Outs of Polarity
The CR8S-XBT subwoofer includes a switch that allows you to quickly invert the polarity of the subwoofer's output relative to the input signal it is receiving from the mixer or other sound source. But what exactly does that mean? A subwoofer works by literally pumping air as the woofer cone moves in and out with respect to the cabinet in which it is housed. It does so according to the low-frequency portion of the signal it receives from the sound source.
The woofer cone is simply following the waveform as seen in the sine wave in Figure 1. As the sine wave rises, the woofer cone pushes out. Likewise, as the sine wave falls, the woofer cone pulls into the cabinet. A musical signal is much more complex, of course, but the same principle applies. Movement of the woofer cone causes air pressure changes that we perceive as sound.
When the polarity switch is to the right, the original waveform is simply reversed 180irc [see Figure 2]. Again, the subwoofer cone follows the waveform. However, this time the woofer cone starts by pulling into the cabinet followed by the woofer cone pushing out. If you have ever experimented with a subwoofer polarity switch, you may not have noticed any changes to the sound regardless of its position, especially if you are listening to just the subwoofer. This is normal, as our ears perceive them both at the same time.
The polarity switch comes into play when the CR8S-XBT subwoofer is paired with studio monitors. Ideally, the woofer cones of the subwoofer and monitors would work together by pushing and pulling in unison. CR8S-XBT subwoofers are designed to be used in a broad range of applications. The flexibility provided by the polarity switch is necessary to ensure that you are receiving the best possible sound from your system, regardless of your setup.
Polarity Waveforms
Figure 1: 0°

line
| Time Point | Amplitude | | ---------- | --------- | | 0 | 0 | | Peak | High | | Low | Low | | End | 0 |Figure 2: 180°

line
| Time | Amplitude | |------|---------| | 0 | 0 | | Peak | High | | Low | Low | | End | 0 |Appendix A: Service Information
If you think your CR8S-XBT subwoofer has a problem, please check out the following troubleshooting tips and do your best to confirm the problem. Visit the Support section of our website (www.mackie.com/support) where you will find lots of useful information such as FAQs and other documentation. You may find the answer to the problem without having to part with your subwoofer.
Troubleshooting
No power
- Our favorite question: Is it plugged in? Make sure the AC outlet is live [check with a tester or lamp].
- Our next favorite question: Is the power switch on? If not, try turning it on.
- Make sure the power cord is plugged all the way into the AC outlet.
- Is the power LED on the front panel illuminated? If not, make sure the AC outlet is live. If so, refer to "No sound" below.
- If the power indicator is not illuminated, and you are certain that the AC outlet is live, it is possible the fuse has blown.
To remove and replace the fuse:
- Disconnect the power cord from the IEC socket.
- Remove the fuse drawer by prying it open with a small screwdriver. It will slide all the way out.

- Remove the fuse and replace it with an equivalent-type fuse: T2AL 250V
- Replace the fuse drawer by pushing it all the way back into the IEC socket.
If two fuses blow in a row, then something is very wrong. See the "Repair" section on the next page to find out how to proceed.
No sound
- Is the level knob for the input source turned all the way down? Verify that all the volume controls in the system are properly adjusted.
- Is the signal source turned up? Make sure the signal level from the computer, mixer, MP3 player, phone (or whatever device immediately precedes the subwoofer) is high enough to produce sound.
- If it's a stereo pair, try switching them around. For example, if a left output is presumed dead, switch the left and right cords at the subwoofer end. If the problem switches sides, it's not the subwoofer. It could be a bad cable, or no signal from the source.
Poor sound
- Is it loud and distorted? Make sure that you're not overdriving a stage in the signal chain. Verify that all level controls are set properly.
- Are the input connectors plugged completely into the jacks? Be sure all connections are secure.
- If possible, listen to the signal source with headphones plugged into the preamp stage. If it sounds bad there, it's not the subwoofer.
- Too much bass or not enough bass? Move around the room and see if the bass response changes. It's possible your listening position coincides with a room mode where the low frequencies either become exaggerated or nulled. If so, try moving the subwoofer to a different position, or moving your listening position.
Noise / Hum / Buzz
- Check the signal cable between the computer/mixer/MP3 player/phone and the subwoofer. Make sure all connections are secure. These problems usually produce crackling noises, hum, or buzz.
-
If connecting an unbalanced output to the CR8S-XBT subwoofer's balanced input, make sure the shield is connected to the unbalanced ground of the source.
-
Make sure the signal cable is not routed near AC cables, power transformers, or other EMI sources (including wall warts and line lumps!). These sources usually produce hum.
- Is there a light dimmer or other triac-based device on the same AC circuit as the subwoofer? Dimmers cause buzzing noises. Use an AC line filter or plug the monitor into a different AC circuit.
- Excessive hiss is an indication of an incorrect gain setting somewhere before the speaker.
- If possible, listen to the signal source with headphones plugged in. If it sounds noisy there, it's not the subwoofer.
- Try disconnecting the cable connected to the input jack. If the noise disappears, it could be a “ground loop,” rather than a problem with the CR8S-XBT subwoofer. Try some of the following troubleshooting ideas:
- Use balanced connections throughout your system for the best noise rejection.
- Whenever possible, plug all the audio equipment's line cords into outlets which share a common ground. The distance between the outlets and the common ground should be as short as possible.
Bluetooth or Other Issues
- Please email or call Technical Support if you are having Bluetooth or any other issue not listed here: o mackie.com/support-contact o 1-800-898-3211
Repair
For warranty service, refer to the warranty information on page 16.
Non-warranty service is available at a factory-authorized service center. To locate the nearest service center, visit www.mackie.com/support/service-locator. Service for CR8S-XBT subwoofers living outside the United States may be obtained through local dealers or distributors.
If you do not have access to our website, please call our Tech Support department at 1-800-898-3211 (normal business hours, Pacific Time), to explain the problem. They will tell you where the nearest factory-authorized service center is located in your area.
Appendix B: Technical Information
CR8S-XBT Series Specifications
Acoustic Performance
| Frequency Response (-10 dB) | 30 Hz – 250 Hz |
| Frequency Response (-3 dB) | 40 Hz – 180 Hz |
| Maximum SPL Peak | 112 dB |
Transducers
| Low Frequency | 8.0 in / 203 mmPolypropylene-coated woofer |
Amplifiers
| Rated Power | 200 watts peak |
| Design | Class D |
Electronic Crossover
| Crossover Type | -12 dB / octave |
| Crossover Frequency | 40 Hz – 180 Hz [Adjustable] |
| Sensitivity | -3 dBu at 100 Hz input to rated power |
Input / Output
| Input Type | 1/4" TRS Balanced / UnbalancedRCA Unbalanced |
| Input Impedance | 100 kΩ balanced bridging;18 kΩ unbalanced |
| Output Type | 1/4" TRS Balanced / UnbalancedRCA Unbalanced |
| Output Impedance | 4 Ω |
Power Requirements
| Line Input Power | ~100V – 240 VAC, 50 – 60 Hz, 150W |
| Fuse | T2AL 250V |
Bluetooth Information
| Bluetooth Protocol | 4.2 |
| Bluetooth Function | Audio Streaming |
Construction Features
| Basic Design Rectangular | |
| Enclosure Construction Solid MDF | |
| Finish Black Vinyl Wrap | |
| Damping | Adiabatic batting |
| Display LED | Power ring(surrounding the Running Man logo) |
| Operating Temperature | 0 - 40 °C32 - 104 °F |
Physical Properties
| CR8S-XBT: | |
| Height: | 14.0 in / 356 mm |
| Width: | 12.6 in / 320 mm |
| Depth: | 16.2 in / 411 mm |
| Weight: | 24.5 lb / 11.1 kg |
CRDV:
| Height: | 2.0 in / 51 mm |
| Width: | 4.3 in / 110 mm |
| Depth: | 3.2 in / 81 mm |
| Weight: | 0.31 lb / 0.14 kg |
Disclaimer
Since we are always striving to make our products better by incorporating new and improved materials, components, and manufacturing methods, we reserve the right to change these specifications at any time without notice.
The "Running Man" figure is a registered trademark of LOUD Audio, LLC.
All other brand names mentioned are trademarks or registered trademarks of their respective holders, and are hereby acknowledged.
©2019 LOUD Audio, LLC.
All Rights Reserved.


flowchart
graph TD
    subgraph Input
        A["Input"] --> B["PT2258"]
        C["TRS-L"] --> D["PT2258"]
        E["TRS-R"] --> F["MCU STC15W408AS"]
        G["CRDV"] --> H["MCU STC15W408AS"]
    end

    subgraph Crossover
        I["PT2258"] --> J["D2761"]
        K["MCU STC15W408AS"] --> L["D2761"]
        M["80HzHPF"] --> N["Output"]
        O["Crossover"] --> P["Switching Power"]
    end

    subgraph Polarity
        Q["Polarity"] --> R["EQ"]
        S["AMP"] --> T["TPA3221"]
    end

    subgraph Output
        U["RCA-L"] --> V["TRS-L"]
        W["RCA-R"] --> X["TRS-R"]
    end

    style Input fill:#f9f,stroke:#333
    style C fill:#f9f,stroke:#333
    style E fill:#f9f,stroke:#333
    style G fill:#f9f,stroke:#333
    style H fill:#f9f,stroke:#333
    style I fill:#ccf,stroke:#333
    style K fill:#ccf,stroke:#333
    style M fill:#ccf,stroke:#333
    style O fill:#ccf,stroke:#333
    style U fill:#ccf,stroke:#333
    style V fill:#ccf,stroke:#333
    style W fill:#ccf,stroke:#333
    style X fill:#ccf,stroke:#333
    style Y fill:#ccf,stroke:#333
    style Z fill:#ccf,stroke:#333
    style AA fill:#ccf,stroke:#333
    style AB fill:#ccf,stroke:#333
    style AC fill:#ccf,stroke:#333
    style AD fill:#ccf,stroke:#333
    style AE fill:#ccf,stroke:#333
    style AF fill:#ccf,stroke:#333
    style AG fill:#ccf,stroke:#333
    style AH fill:#ccf,stroke:#333
    style AI fill:#ccf,stroke:#333
    style AJ fill:#ccf,stroke:#333
    style AK fill:#ccf,stroke:#333
    style AL fill:#ccf,stroke:#333
    style AM fill:#ccf,stroke:#333
    style AN fill:#ccf,stroke:#333
    style AO fill:#ccf,stroke:#333
    style AP fill:#ccf,stroke:#333
    style AQ fill:#ccf,stroke:#333
    style AR fill:#ccf,stroke:#333
    subgraph Power Conversion
        AS["ATS2819"] --> AT["L"]
        AU["POWER"] --> AV["BLUE-PAIR"]
        AW["WII"] --> AX["Blue-PAIR"]
        AY["INPUT"] --> AZ["L"]
        BA["TRS-L"] --> BB["TRS-R"]
        BC["TRS-R"] --> BD["TRS-R"]
        BE["CPU"] --> BF["L"]
        BG["CPU"] --> BH["CPU"]
        BI["CPU"] --> BJ["L"]
        BK["CPU"] --> BL["L"]
        BM["CPU"] --> BN["L"]
        BO["CPU"] --> BP["L"]
        BQ["CPU"] --> BR["L"]
        BS["CPU"] --> BT["L"]
        BU["CPU"] --> BV["L"]
        BW["CPU"] --> BX["L"]
        BY["CPU"] --> BZ["L"]
        CA["CPU"] --> CB["L"]
        CC["CPU"] --> CD["L"]
        DD["CPU"] --> DE["L"]
        DF["CPU"] --> DG["L"]
        DH["CPU"] --> DI["L"]
        DJ["CPU"] --> DK["L"]
        DL["CPU"] --> DV["L"]
        DW["CPU"] --> DX["L"]
        DX --> DY["L"]
        DXM["INPUT LEVEL"] --> DY
        DXV["SUB LEVEL"] --> DY
        DXR["SWITCHING POWER"] --> DY
    end

    subgraph Switch Power
        DY1["+29V 15V -15V +5V"] --> DY2["+29V 15V -15V +5V"]
    end

    note right of DT: PT2258 (input), DT: MCU STC15W408AS (output), SWITCHING POWER (switch power)
Owner's Manual
Please keep your sales receipt in a safe place.
This Limited Product Warranty (“Product Warranty”) is provided by LOUD Audio, LLC (“LOUD”) and is applicable to products purchased in the United States or Canada through a LOUD-authorized reseller or dealer. The Product Warranty will not extend to anyone other than the original purchaser of the product (hereinafter, “Customer,” “you” or “your”).
For products purchased outside the U.S. or Canada, please visit www.mackie.com to find contact information for your local distributor, and information on any warranty coverage provided by the distributor in your local market.
LOUD warrants to Customer that the product will be free from defects in materials and workmanship under normal use during the Warranty Period. If the product fails to conform to the warranty then LOUD or its authorized service representative will at its option, either repair or replace any such nonconforming product, provided that Customer gives notice of the noncompliance within the Warranty Period to the Company at: www.mackie.com or by calling LOUD technical support at 1.800.898.3211 (toll-free in the U.S. and Canada) during normal business hours Pacific Time, excluding weekends or LOUD holidays. Please retain the original dated sales receipt as evidence of the date of purchase. You will need it to obtain any warranty service.
For full terms and conditions, as well as the specific duration of the Warranty for this product, please visit www.mackie.com.
The Product Warranty, together with your invoice or receipt, and the terms and conditions located at www.mackie.com constitutes the entire agreement, and supersedes any and all prior agreements between LOUD and Customer related to the subject matter hereof. No amendment, modification or waiver of any of the provisions of this Product Warranty will be valid unless set forth in a written instrument signed by the party to be bound thereby.
Need help with the CR8S-XBT and/or CRDV?
- Visit www.mackie.com/support to find: FAQs, manuals, addendums, and other documents.
- Email us at: www.mackie.com/support-contact
- Telephone 1-800-898-3211 to speak with one of our splendid technical support chaps (Monday through Friday, normal business hours, Pacific Time).

MACKIE.
19820 North Creek Parkway #201
Bothell, WA 98011 • USA
Phone: 425.487.4333
Toll-free: 800.898.3211
Fax: 425.487.4337
www.mackie.com


- CRDV
- Important Safety Instructions
- CAUTION
- Contents Features
- Signature CR Series Sound
- Fresh Look
- Plug and Play
- Bluetooth® Streaming
- Professional-grade components and design for optimized sonic performance
- Included Desktop Remote
- Purchased at:
- Date of purchase:
- Introduction
- How to Use This Manual:
- An Extremely Important Note on CRBS-XBT Bass Response and Your Control Room
- Getting Started
- Additional Tidbits of Wisdom
- CR8S-XBT: Rear Panel Features
- Power Connection and Fuse
- Power Switch
- Signal Inputs
- 1/4" TRS Balanced Mono Wiring:
- 1/4" TS Unbalanced Mono Wiring:
- Unbalanced RCA
- Signal Outputs
- Input Level Knob
- Sub Output Level Knob
- Crossover Knob
- Polarity Switch
- CRDV Jack
- CRDV: Features
- CR8S-XBT: Front Panel Features
- Running Man Bluetooth Button / LED
- Pairing and connecting for the first time:
- Previously paired and connected devices:
- Custom-Tuned Bottom Shelf Port
- Input Signal Wiring
- Care and Cleaning
- The Ins and Outs of Polarity
- Polarity Waveforms
- Appendix A: Service Information
- Troubleshooting
- No power
- No sound
- Poor sound
- Noise / Hum / Buzz
- Bluetooth or Other Issues
- Repair
- Appendix B: Technical Information
- CR8S-XBT Series Specifications
- Disclaimer
- Please keep your sales receipt in a safe place.
- Need help with the CR8S-XBT and/or CRDV?
- MACKIE.
Brand : MACKIE
Model : CR8S-XBT
Category : Loudspeaker