
DV3050-SB - Radio Furrion - Free user manual and instructions
Find the device manual for free DV3050-SB Furrion in PDF.


| Product Type | 2-Zone Entertainment System / Radio |
| Model | DV3050-SB |
| Brand | Furrion |
| Dimensions (W x H x D) | 7.5 x 4.3 x 4.1 inches (200 x 110.5 x 190 mm) |
| Net Weight | 10.6 lbs (4.8 kg) |
| Gross Weight | 13.9 lbs (6.3 kg) |
| Power Supply | DC 12V |
| Current Consumption | Max 10A |
| Power Output | 4 x 24W RMS (4 x 40W Max) |
| Channels | 2 Stereo Channels (4 speakers) |
| Display Type | LCD, 4 inches |
| Radio Bands | FM: 87.5-108 MHz (Europe/USA/Australia); AM: 522-1710 kHz |
| Preset Stations | 30 (18 FM + 12 AM) |
| RDS | Yes (AF, TA, PTY) |
| Bluetooth | Version 4.0, with A2DP/AVRCP, Hands-free |
| NFC | Yes, for quick pairing |
| USB Playback | MP3, WMA via USB socket |
| AUX Input | Yes (Front and Rear AUX) |
| AV Input/Output | 1 AV input, 1 AV output (RCA) |
| Subwoofer Output | Yes (RCA) |
| Headphone Jack | Yes (3.5mm front) |
| Microphone Input | Yes (front) |
| IR Control Jack | Yes |
| Zones | 2 independent audio zones |
| Key Illumination | White |
| Rotary Volume Control | Yes |
| Equalizer Modes | Flat, Classic, Rock, Cinema, EQ Off |
| Accessories Included | Remote control with batteries, wiring harness, manual, warranty card |
Frequently Asked Questions - DV3050-SB Furrion
User questions about DV3050-SB Furrion
0 question about this device. Answer the ones you know or ask your own.
Ask a new question about this device
Download the instructions for your Radio in PDF format for free! Find your manual DV3050-SB - Furrion and take your electronic device back in hand. On this page are published all the documents necessary for the use of your device. DV3050-SB by Furrion.
USER MANUAL DV3050-SB Furrion
Before operating your new appliance, please read these instructions carefully.
This instruction manual contains information for safe use, installation and maintenance of the appliance.
Please keep this instruction manual in a safe place for future reference.
This will ensure safe use and reduce the risk of injury. Be sure to pass on this manual to new owners of this appliance.
The manufacturer does not accept responsibility for any damages due to not observing these instructions. If you have any further questions regarding our products, please contact us at support@furrion.com
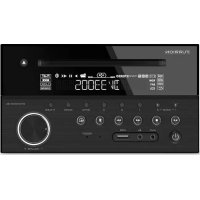
Locations and Names of the Controls

- NFC DETECTION AREA
- IR REMOTE CONTROL SENSOR
- 1/2/3 BUTTON
1 TEL /REDIAL BUTTON
2 HANG UP BUTTON
- ZONE 1/2 BUTTON
- ◀◀ / ▶️ BUTTON
- PLAY/PAUSE BUTTON RADIO REGION SELECT BUTTON
- POWER BUTTON
-
STOP BUTTON AS/PS BUTTON
-
AUX IN SOCKET
- HEADPHONE SOCKET
- USB SOCKET
- BT MODE BUTTON/EQ BUTTON
- MICROPHONE IN
- RESET BUTTON
- INPUT MODE BUTTON/BAND BUTTON
- 5/RANDOM BUTTON
- VOL KNOB/SEL BUTTON
- 6 BUTTON
- 4/REPEAT BUTTON
- LCD DISPLAY
The remote control description

- Power button
- APS button
- SCAN button
- CLOCK button
- BAND button
- MODE button
- NUMBER buttons(0\~9)
1/PAUSE/PLAY button
2/ INT button
3/RPT button
4/RDM button
- * button
- MUTE button
- T-M button
- TEL button
- HANG UP/CLEAR button
- Button
- LOUD button
- LOC button
-
- button
- ST button
- UP button
- SEL button
-
- button
- DOWN button
Common operation:
- To turn the unit on/off
When the unit is powered Off, it may be switched On by pressing POWER button. When the unit is switched On, press and hold POWER button for more than 1 second to switch the power off.
- To select function mode
Press INPUT MODE button on the front panel repeatedly to select Tuner, USB(After inserting a USB storage), BT, F AUX, AV and R AUX mode.
- To adjust the volume level
Rotate the VOL KNOB on the front panel or press the + or - button on the remote control to adjust volume level during playback.
- Volume Adjust
Rotate VOL KNOB clockwise to increase volume, rotate anticlockwise to reduce volume.
- To mute or resume sound
Press MUTE button on the remote control to eliminate or resume sound immediately during playback.
- To select and adjust the mode of the sound and menu
Press SEL button repeatedly to select the mode of AF ON/AF OFF mode, TA ON/TA OFF PTY NEWS/PTY MUSICS, NEWS/POP M, BASS,TRE(treble), LIR(balance), LOUD OFF/LOUD ON, VOL LAST/VOL DEFA, BEEP ON/BEEP OFF, DX/LOCAL (in RADIO mode), STEREO/MONO(in RADIO mode), SUBW ON/SUBW OFF, CLK XX XX, in the sequence and circulation. In each item, rotate the VOL KNOB to select your desired mode.
1) VOL LAST/VOL DEFA
VOL LAST: The volume level when switching off will be restored with power On. VOL DEFA: The volume level of the main unit after power on is a constant value. When selecting VOL DEFA item, press SEL button to display AVOL, then you can preset the constant volume level after power on with VOL control.
2) BEEP ON/BEEP OFF
BEEP ON mode: The beep is generated when any key is pressed. BEEP OFF mode: The beep sound is disabled.
3) DX/LOCAL
Radio station search mode is divided by this DX/LOCAL switch, which can be used to control an attenuator in the tuner during search. The detecting level of seek, scan, auto-memory will be reduced as much as the attenuated level of the tuner. In radio mode, press the LOC button to change local reception or distance reception. (Note: This button is only for FM reception. In AM mode, LOC is invalid.)
4) CLK XX XX
When select CLK XX XX mode, Rotate the VOL KNOB to adjust HOUR, press SEL button for confirmation. With the same means to adjust MINUTE.
- To select a preset EQ mode
Press and hold BT button on the front pane to select the preset music equalizer curves: FLAT, CLASSIC, ROCK, CINEMA, EQ OFF. The sound effect will be changed.
- ZONE 1/2 Button
Pressing ZONE 1 or 2 button will turn on or off the audio source in each of the different areas which your speakers are connected. “ZONE <1>” or “ZONE <2>” will display on the LCD once it is selected.
- To reset unit
When the display is incorrect, or the function buttons are not effective or sound is distorted, then use a sharp point to press RESET button, that will make the unit be reset to factory default and re-instate the correct functions.
Radio Operation
1. FREQUENCY SELECT
In RADIO mode. Press and hold PLAY/PAUSE▶II button for about 5 seconds to select your desired frequency EUROPE, USA1, USA2 or AUSTRALIA.
2. AM/FM BUTTON
In RADIO mode, press and hold INPUT MODE button on the front panel or briefly press BAND button on the remote control to select your desired radio band of FM1, FM2, FM3, AM1, AM2, and the selected band will be displayed on the LCD of the front panel.
3. TUNE/SEEK UP/DOWN
In RADIO mode:
1) Press and hold ◀◀ or ▶▶ button on the front panel or press and hold ◀◀◀ / ▶▶◀ button on the remote control to automatically search down/up for a available station from the current frequency.
2) Press ◀◀ or ▶▶ button on the front panel or press ◀◀ / ▶▶ button on the remote control to manually search up or down with step by step for your desired station from the current frequency.
4. APS BUTTON & SCAN BUTTON
In RADIO mode:
1) When pressing and holding APS button on the remote control or press and hold ■ button on the front panel, the radio searches from the lowest frequency and checks the signal strength level until 1 cycle search is finished. And then the 6 strongest stations are preset to the corresponding preset number memory bank. The AS operation is implemented in each bank of the selected band. When the AS operation is finished, it will resume broadcasting on the M1. (It can store 3x6 stations for FM and 2x6 stations for AM in all)
2) When briefly pressing APS button on the remote control or press ■ button on the front panel, the radio searches for each preset station from the M1. When the field strength level is more than the threshold level of the stop level, the radio holds at that preset number for a few seconds with releasing mute, and then searches again.
After finishing a circle of searching, it will stop searching on the M1.
NOTE: In FM band, FM1, FM2, FM3 are checked one at a time.
In AM band, AM1, AM2 are checked one at a time.
3) Press the SCAN button on the remote control to scan the radio frequency. If a valid signal has detected, the current frequency will be hold and blinking for 5 seconds, then press SCAN again to stop and remain the current frequency; otherwise, the radio will go on to scan the other radio frequency 5 seconds later.
5. PRESET STATION [1-6] BUTTONS
In RADIO mode:
1) To memorize the current frequency on the current band, press and hold any one of the six preset buttons (1-6).
2) To recall the preset memory on the current band, press one of the preset buttons [1-6].
6. STEREO/MONO BUTTON
Press ST button on the remote control to select the STEREO or MONO sound mode for FM band.
7. LOC BUTTON
1) In RADIO mode, when the signal of the distance radio station are very weak and the receiving effect is bad during tuning, press LOC button on the remote control to turn off the LOC function, then tune again for the distance radio station;
2) In RADIO mode, when the signals from the local radio stations are too strong, this could lead to interference. Press LOC button on the remote control to turn on the LOC function, Re-tune for the local station required.
- To search for stations with a PTY (PROGRAM TYPE) program
Press and hold button on the front panel to select one of PTY programs:SEL
When turning on a PTY program, the PTY program and PTY word is flashed on LCD. After selecting a desired PTY program and no operation for 5 seconds, it will search for the station of the PTY program. During 1 loop, if the desired station of the PTY program is not found, it returns to previous normal radio and PTY icon disappears.
- AF [ALTERNATIVE FREQUENCIES] FUNCTION
When AF switching mode is selected the state of AF switching mode is displayed by AF segment in display.
Segment off: AF switching mode off.
Segment on: AF switching mode on, and has RDS information.
Segment flashing: AF switching mode on, but RDS information is not received yet.
When AF switching mode is selected, the radio checks the signal strength of AF all the time. The interval of checking time of each AFs depends on the signal strength of the current station, from a few minutes for strong station to a few seconds for weak station. Every time that new AF is stronger than current station, it switches over to that frequency for a very short time, and the NEW FREQUENCY is displayed for 1-2 seconds.
Because the mute time of AF switching or checking time is very short, it is almost inaudible in case of normal program.
During FM mode, when AF is on, SEEK, (SCAN), AUTO-MEMORY function can only receive and save RDS program.
- TA [TRAFFIC ANNOUNCEMENT] FUNCTION
When TA mode is on(TA is displayed on LCD), it will begin to seek TA station and TA SEEK will be displayed on LCD for a while.
When traffic announcement is transmitted:
1). If the unit is in SD, USB mode, it will switch to radio mode temporarily.
2). If volume level is below 20, volume level is raised to 20, and returns to its previous mode and volume level when the traffic announcement is over.
If volume is adjusted during traffic announcement, only the traffic announcement volume is valid
USB Operation
1. Pause Playback
During playback, press PLAY/PAUSE ▶|| button on the front panel or remote control to pause the playback, press PLAY/PAUSE ▶|| button again to resume normal playback.
2. Stop Playback
During playback, press STOP button once to pause the playback, then press the PLAY/PAUSE ▶ button to resume the normal playback; press STOP button twice to stop the playback, then press PLAY/PAUSE ▶ button to start playback from the beginning of the first chapter/track.
3. Select Chapter with the
Press ◀◀ or button on the front panel or / ◀◀◀ b ▶▶▶ utton on the remote control during playback to select the previous or next chapter to playback.
Note: Press ◀◀ or ▶▶ button or press ◀◀/ ▶▶ Button multiple times to advance multiple chapters/tracks backward or forward.
4. To scan tracks
During playback, press INT button on the front panel briefly to play the first 10 seconds of each track.
Press INT button again to cancel INT function and retain playing the track currently selected.
5. To repeat track(s)
During playback, press RPT button briefly to play the current track repeatedly, and the LCD will display RPT ONE.
Pres s RPT button twice to play the tracks in the album repeatedly, and the LCD will display RPT DIR.
Press RPT button a third time to play the tracks of the albums, and the LCD will display display RPT ALL.
Press RPT button again to cancel RPT function, and the LCD will display RPT OFF.
6. To play tracks in random
During playback, press RDM button briefly to play all tracks in random. Press it again to cancel RDM function.
7. Tracks search
Press APS button on the remote control, it will activate TRK SEARCH mode. The LCD will display TRK 0/00/000 (decide on the total number of tracks in the USB stick) and flash the 0 on the biggest digit position. Then press + or - button on the remote control to select number on the flashing digit position from 0 \~ 9, Press APS button to change the position and with the same means to select numbers in the other position. After finishing selecting the numbers on all digits position, press PLAY/PAUSE ▶ button to play the track of the selected serial number.
Bluetooth Handsfree System
1. Pairing and connection
1) Turn on the Bluetooth mode of the mobile phone;
2) Select the item of Finding the Bluetooth Device and enter it. After finishing the finding, it will show the name of the Bluetooth Device FURRION DV3050-XXXX (where X can be any character A-Z or number 0-9). Select it and enter it, then it will show an interface that ask you to input a password, input the password 00 00 and enter it. Then it will tell you pair OK.
3) For some mobile phones, they can automatically connect with the BT device of the car audio system after pairing is ok; for some mobile phones, they need to select the paired BT device and press the CONNECTION button. When connection is ok, the LCD of the car audio system will show LINK OK.
2. Use the mobile phone to do connection or disconnection
In the connection status, find the paired and connected Bluetooth Device, then press the disconnection button to do disconnection.
In the disconnection status, find the paired and disconnected Bluetooth Device, then press the connection button to do connection.
3. In the connection status: Mobile phone transfers to the car audio whenever a dialing takes place; mobile phone transfers to the car audio whenever receiving a call.
4. Dialing when in connection status
4.1 Dial with the mobile phone directly.
4.2 Dial with remote control with the following procedures:
(1)Press TEL button to CALL mode, the LCD will display CALL
(2)Input telephone number with number button 0\~9.
\* Short press CLEAR button to cancel the wrongly input number if necessary
(3) Short press TEL button to execute the dialing.
4.3 To redial the last phone number dialed
Short press TEL /1 button on the front panel, it will show CALL OUT on the LCD, then it will execute the dialing.
5. Accept/Reject/End Call
5.1 Incoming call ringing, short press TEL button on the remote control or 1 button on the front panel to accept the call.
5.2 To reject incoming call ringing, short press HANG UP button on the remote control or 2 button on the front panel to REJECT the call.
5.3 During a phone call, short press HANG UP button on the remote control or 2 button on the front panel to end the call.
Note: When an incoming call is present the LCD of the DV3050 will display CALL IN.
6. In BT mode, press CALL LOG button to check the LAST DIAL, LAST IN, LAST MISS phone numbers(press + or - button to cycle).
7. To play an audio file from an external Bluetooth device(mobile phone) of the DV3050
After the device has been successfully paired and the DV3050 screen displays LINK OK
If your mobile device supports A2DP then you will be able to stream music from your Bluetooth device so it can be played by stereo speaker.
You must select on your mobile Bluetooth device to play the audio through Bluetooth. If your mobile device supports AVRCP then you will be able to control the basic phone audio output functions by the wall-mount Stereo controls. Eg.Play Pause.
Note: During other modes(except Bluetooth conversation), press BT MODE button on the front panel to switch the mode with others.
8. To setup your Stereo using NFC(only support mobile phone with NFC function)
(1) Turn on the NFC function of your mobile phone and make sure the screen is activated and unlocked.
(2) With the NFC detection area of your phone touched with the NFC detection area of the Stereo, you can connect or disconnect your mobile phone with the Stereo conveniently.
Note: For the first time pair and connect, it will ask you to input a password. The default password is "0000".
Installing the unit
\* Before finally installing the unit, connect the wiring temporarily and make sure the unit and the system work properly.
\*Fix the unit with screw according to following diagram.

PLASTIC SHELL
OF THE FRONT PANEL
1. Remove plastic shell of the front panel from the unit.
2. Fix the unit with 4 piece #8 pan head self tapping screws.
3. Put back plastic shell of the front panel to the unit.
Wiring Diagram

Wiring connecting socket view

PIN NO COLOR FUNCTION 1 GREY FRONT RIGHT SPEAKER (+) 2 GREY/BLACK FRONT RIGHT SPEAKER (-) 3 WHITE FRONT LEFT SPEAKER (+) 4 WHITE/BLACK FRONT LEFT SPEAKER (-) 5 GREEN/BLACK REAR LEFT SPEAKER (-) 6 GREEN REAR LEFT SPEAKER (+) 7 PURPLE/BLACK REAR RIGHT SPEAKER (-) 8 PURPLE REAR RIGHT SPEAKER (+) 9 BLUE AUTO ANTENNA 10 NONE 11 RED MEMORY B+ 12 BLACK GROUND
Supported Audio Format File Extension Audio Codec Bit Rate Sampling Rate Remark .mp3 MP3 16kbps - 320kbps 8k - 48kHz wma WMA 16kbps - 320kbps 8k - 48kHz WMA only support WMA7/WMA8/WMA9 (CRR/VBR)(only support 353 format)
Note: Reading the above file formats is not guaranteed.
Specification
GENERAL
Supply Voltage
Current Consumption
Power Output
Number of channels
Dimensions(w x h x d)
DC 12V
Max.10A
4x24W RMS
2 STEREO channels.
7 7 / 8 ×4 3 / 8 ×4 1 / 9 " / 200×110.5×190mm
FM SECTION
Frequency range
87.5Mhz - 108Mhz (Europe)
87.5 Mhz - 107.9Mhz(U.S.A.)
87.5 Mhz - 108Mhz(Australia)
Effective sensitivity
I.F Frequency
3uV.
10.7MHz.
AM SECTION
Frequency range
522Khz - 1620Khz(Europe)
530khz - 1710Khz(U.S.A.)
522 Khz - 1710Khz(Australia)
Effective sensitivity
I.F Frequency
40dB
450KHz
Preamp Output
2 V Output
USB PLAYBACK
System
Frequency characteristics
MP3 audio system
20Hz -100Hz <=5dB
10KHz-20KHz <=5dB
Signal to noise (USB)
50dB [1KHz]
FURRION
Furrion Innovation Center & Institute of Technology
• 52567 Independence Ct., Elkhart, IN 46514, USA • Toll free:1-888-354-5792
\- Email: support@furrion.com
©2007-2018 Furrion Ltd. Furrion® and the Furrion logo are trademarks licensed for use by Furrion Ltd. and registered in the U.S. and other countries.
FURRION.COM
160W 2-Zone Entertainment System

DV3050-SB

DV3050-SS

Bluetooth®

Main Features


VIBRATIONSMART™CLIMATESMART™ SIGNALSMARXILIARY IN
USB INTERFACE
HEADPHONE JACK
SUBWOOFER OUT


Specifications
Din Type 1-din (Main Chassis) Front Panel Type Fixed Supported Disc Format Nil Supported Media Format MP3/WMA Tuner Type AM & FM # of Preset Stations 30 RDS √ USB √ Card Reader • Memory Card Support • AUX-IN √ AUX-IN Video Support • Bluetooth 4.0 NFC √ GPS • Display Type LCD Display Size (inch) 4" Power Output (Watt) 4 x 40W (MAX) Power Connector Type 12-pin Key Illumination Color White Rotary Volume Control √ Accessories Included Remote Control with Batteries, Harness, Manual, Warranty Card
Inputs & Outputs
# of RCA (Audio LR) Inputs, Rear Panel 2 # of RCA (Audio LR) Outputs, Rear Panel 1 # of Video Inputs, Rear Panel 1 # of Video Outputs, Rear Panel 1 # of Subwoofer Outputs, Rear Panel 1 # of HDMI Outputs, Rear Panel • # of Optical Audio Inputs, Rear Panel • # of Coaxial Audio Inputs, Rear Panel • # of Camera Inputs, Rear Panel • IR Control Jack 1 # Zone Audio Outputs 2
Dimensions & Weight
Individual Packaging Dimensions(W x H x D) 9.37 x 5.59 x 6.02"(238 x 142 x 153mm) Net Weight (lbs/kg) 10.6/4.8 Gross Weight (lbs/kg) 13.9/6.3
Master Carton
Quantity Per Box (pcs) 6 Master Carton Dimensions(W x H x D) 18.78 x 11.77 x 9.84"(477 x 299 x 250mm) Master Carton Gross Weight (lbs/kg) 14.3/6.5
FURRION

DV3050-SB

Integrating residential design with recreational vehicle functionality, the new DV3050 entertainment system offers next generation two-zone audiovisual technology with bluetooth connectivity and NFC quick-touch communication. Instantly pair your device and stream music wirelessly with amazing clarity.

BLUETOOTH
CONNECTIVITY
NFC
NEAR FIELD COMMUNICATION

AUXILIARY IN

USB INTERFACE
Quick-touch Wireless Streaming
NFC communication allows the user to hold their NFC compatible device over the DV3050 entertainment system and stream music without needing to go through multiple steps setting up a connection.
Connect your device in 3 simple steps:
1. Enable NFC on your handheld device.
2. Hold your handheld device over the Furrion logo until a message appears prompting you to pair devices. (A password may be required, please enter '0000').
3. The devices are now paired, press play on your handheld device to enjoy streaming high definition audio through your bluetooth connection.

Copyright © 2017 Furrion Ltd. All rights reserved. Furrion® is a trademark licensed by Furrion Ltd, registered in the U.S., which may be pending or registered in other countries.
WARRANTY CARD
FURRION
Congratulations on purchasing your new Furrion product. All Furrion products are made to strict quality standards. If used properly for its intended purpose, your product should provide many years of use.
We are pleased to provide you with a 1 year warranty on all Furrion products. The details of this warranty are set out in the terms and conditions (see reverse) which supplement the authorised dealer's Terms and Conditions of Sale.
This warranty is given in addition to your other rights under the laws of the country where you purchase Furrion products.


Please visit www.furrion.com/productregistration to register your product
WARRANTY TERMS AND CONDITIONS.
1. The warranty guarantees that Furrion products will be free from faults or defects in workmanship and materials for a period of 1 year commencing on the date of delivery to you. If a valid claim is made under warranty then you will only be entitled to claim in accordance with paragraph 6 below.
Our goods come with guarantees that cannot be excluded under the Australian Consumer Law. You are entitled to a replacement or refund for a major failure and compensation for any other reasonably foreseeable loss or damage. You are also entitled to have the goods repaired or replaced if the goods fail to be acceptable quality and the failure does not amount to a major failure.
2. The warranty only applies:
a. to Furrion products with a valid serial number;
b. to the person who purchased the Furrion product. It is not transferrable to any other person;
c. to individuals who purchased the Furrion products as a consumer for private use, not to businesses, companies, partnerships or sole traders;
d. to Furrion products used solely within a domestic environment for personal use, not to Furrion products put into and used within business premises, place of work, rental properties, student properties or similar;
e. to Furrion products used within the environment intended by their design;
f. to Furrion products used and installed in accordance with the instructions supplied with the product;
g. where the purchaser of the Furrion product has validated the warranty in accordance with paragraph 4 below.
3. The warranty does not cover:
a. items where the serial number has been defaced and/or rendered unidentifiable;
b. damage caused or contributed to by poor, faulty or incorrect use, installation or maintenance;
c. damage caused or contributed to by events outside Furrion's control including but not limited to Acts of God, fire, explosion, contact with corrosive matter, extreme weather conditions, flood, vandalism, soiling, misuse, abrasion, improper storage following delivery, rot and/or infestation following delivery, leaks (or similar incidents), damage due to non-domestic use;
d. damage or deterioration caused or contributed to as a result of normal wear and tear;
e. damage caused or contributed to by maintenance or repairs other than those carried out by an authorised dealer;
f. damage caused or contributed to by wilful damage, abuse, mistreatment, negligence, abnormal storage or environmental conditions;
g. damage caused or contributed to by household animals and misuse by children.
4. To validate the warranty you must:
a. fill in the registration card provided with the Furrion product; and
b. register the warranty covering the Furrion product within 6 months of delivery of the Furrion product by following the instructions on the registration card;
c. have a copy of your receipt to validate warranty of the Furrion product.
5. To make a claim under your warranty please cease using the goods when a fault arises and contact the supplier or manufacturer and point to the defect. Please contact Furrion's customer service at:
\- For US customers: support@furrion.com or Furrion, 52567 Independence Court Elkhart, IN 46514
\- For Australia customers: Furrion Ltd, Unit 614-615 Level 6, Core D, Cyberport 3, 100 cyberport road, Hong Kong, at warranty.au@furrion.com or 1.(800).985.957.
6. Following the filing of a claim, Furrion will investigate the claim and if we believe there is a defect or fault covered by the warranty, we will at our option either repair the defective Furrion product (or part) or replace the defective Furrion product (or part).
7. Please note in the event that no fault can be found, it is your responsibility to pay for the re-delivery of the replacement items. If a defect is found, Furrion will pay for the re-delivery of the replacement items.
8. Installation of any repaired or replaced Furrion product will not be Furrion's responsibility.
9. If you do not allow the authorised dealers representative to view the Furrion product which is the subject of the warranty claim, you will invalidate the warranty in respect of that claim.
10. Any repaired or replaced Furrion product parts shall be guaranteed on the terms of this warranty for the unexpired portion of the warranty period only.
11. This warranty is non-transferrable and is personal to the original purchaser as shown on the invoice.
12. This warranty is subject to the jurisdiction of the courts of the country where you purchase Furrion products, and any dispute or claim arising out of, or in connection with it or its subject matter, shall be governed by, and construed in accordance with the laws of the country where you purchase Furrion products.
4. To scan tracks
During playback, press INT button on the front panel briefly to play the first 10 seconds of each track. Press INT button again to cancel INT function and retain playing the track currently selected.5. To repeat track(s)
During playback, press RPT button briefly to play the current track repeatedly, and the LCD will display RPT ONE. Pres s RPT button twice to play the tracks in the album repeatedly, and the LCD will display RPT DIR. Press RPT button a third time to play the tracks of the albums, and the LCD will display display RPT ALL. Press RPT button again to cancel RPT function, and the LCD will display RPT OFF.6. To play tracks in random
During playback, press RDM button briefly to play all tracks in random. Press it again to cancel RDM function.7. Tracks search
Press APS button on the remote control, it will activate TRK SEARCH mode. The LCD will display TRK 0/00/000 (decide on the total number of tracks in the USB stick) and flash the 0 on the biggest digit position. Then press + or - button on the remote control to select number on the flashing digit position from 0 \~ 9, Press APS button to change the position and with the same means to select numbers in the other position. After finishing selecting the numbers on all digits position, press PLAY/PAUSE ▶ button to play the track of the selected serial number.Bluetooth Handsfree System
1. Pairing and connection
1) Turn on the Bluetooth mode of the mobile phone; 2) Select the item of Finding the Bluetooth Device and enter it. After finishing the finding, it will show the name of the Bluetooth Device FURRION DV3050-XXXX (where X can be any character A-Z or number 0-9). Select it and enter it, then it will show an interface that ask you to input a password, input the password 00 00 and enter it. Then it will tell you pair OK. 3) For some mobile phones, they can automatically connect with the BT device of the car audio system after pairing is ok; for some mobile phones, they need to select the paired BT device and press the CONNECTION button. When connection is ok, the LCD of the car audio system will show LINK OK.2. Use the mobile phone to do connection or disconnection
In the connection status, find the paired and connected Bluetooth Device, then press the disconnection button to do disconnection. In the disconnection status, find the paired and disconnected Bluetooth Device, then press the connection button to do connection. 3. In the connection status: Mobile phone transfers to the car audio whenever a dialing takes place; mobile phone transfers to the car audio whenever receiving a call. 4. Dialing when in connection status 4.1 Dial with the mobile phone directly. 4.2 Dial with remote control with the following procedures: (1)Press TEL button to CALL mode, the LCD will display CALL (2)Input telephone number with number button 0\~9. \* Short press CLEAR button to cancel the wrongly input number if necessary (3) Short press TEL button to execute the dialing.4.3 To redial the last phone number dialed
Short press TEL /1 button on the front panel, it will show CALL OUT on the LCD, then it will execute the dialing.5. Accept/Reject/End Call
5.1 Incoming call ringing, short press TEL button on the remote control or 1 button on the front panel to accept the call. 5.2 To reject incoming call ringing, short press HANG UP button on the remote control or 2 button on the front panel to REJECT the call. 5.3 During a phone call, short press HANG UP button on the remote control or 2 button on the front panel to end the call. Note: When an incoming call is present the LCD of the DV3050 will display CALL IN. 6. In BT mode, press CALL LOG button to check the LAST DIAL, LAST IN, LAST MISS phone numbers(press + or - button to cycle). 7. To play an audio file from an external Bluetooth device(mobile phone) of the DV3050 After the device has been successfully paired and the DV3050 screen displays LINK OK If your mobile device supports A2DP then you will be able to stream music from your Bluetooth device so it can be played by stereo speaker. You must select on your mobile Bluetooth device to play the audio through Bluetooth. If your mobile device supports AVRCP then you will be able to control the basic phone audio output functions by the wall-mount Stereo controls. Eg.Play Pause. Note: During other modes(except Bluetooth conversation), press BT MODE button on the front panel to switch the mode with others. 8. To setup your Stereo using NFC(only support mobile phone with NFC function) (1) Turn on the NFC function of your mobile phone and make sure the screen is activated and unlocked. (2) With the NFC detection area of your phone touched with the NFC detection area of the Stereo, you can connect or disconnect your mobile phone with the Stereo conveniently. Note: For the first time pair and connect, it will ask you to input a password. The default password is "0000".Installing the unit
\* Before finally installing the unit, connect the wiring temporarily and make sure the unit and the system work properly. \*Fix the unit with screw according to following diagram.  PLASTIC SHELL OF THE FRONT PANEL 1. Remove plastic shell of the front panel from the unit. 2. Fix the unit with 4 piece #8 pan head self tapping screws. 3. Put back plastic shell of the front panel to the unit. Wiring Diagram  Wiring connecting socket view | PIN NO | COLOR FUNCTION | |
| 1 | GREY | FRONT RIGHT SPEAKER (+) |
| 2 | GREY/BLACK | FRONT RIGHT SPEAKER (-) |
| 3 | WHITE | FRONT LEFT SPEAKER (+) |
| 4 | WHITE/BLACK | FRONT LEFT SPEAKER (-) |
| 5 | GREEN/BLACK | REAR LEFT SPEAKER (-) |
| 6 | GREEN | REAR LEFT SPEAKER (+) |
| 7 | PURPLE/BLACK | REAR RIGHT SPEAKER (-) |
| 8 | PURPLE | REAR RIGHT SPEAKER (+) |
| 9 | BLUE | AUTO ANTENNA |
| 10 | NONE | |
| 11 | RED | MEMORY B+ |
| 12 | BLACK | GROUND |
| Supported Audio Format | ||||
| File Extension | Audio Codec | Bit Rate | Sampling Rate | Remark |
| .mp3 | MP3 | 16kbps - 320kbps | 8k - 48kHz | |
| wma | WMA | 16kbps - 320kbps | 8k - 48kHz | WMA only support WMA7/WMA8/WMA9 (CRR/VBR)(only support 353 format) |
Specification
GENERAL
Supply Voltage Current Consumption Power Output Number of channels Dimensions(w x h x d) DC 12V Max.10A 4x24W RMS 2 STEREO channels. 7 7 / 8 ×4 3 / 8 ×4 1 / 9 " / 200×110.5×190mmFM SECTION
Frequency range 87.5Mhz - 108Mhz (Europe) 87.5 Mhz - 107.9Mhz(U.S.A.) 87.5 Mhz - 108Mhz(Australia) Effective sensitivity I.F Frequency 3uV. 10.7MHz.AM SECTION
Frequency range 522Khz - 1620Khz(Europe) 530khz - 1710Khz(U.S.A.) 522 Khz - 1710Khz(Australia) Effective sensitivity I.F Frequency 40dB 450KHz Preamp Output 2 V OutputUSB PLAYBACK
System Frequency characteristics MP3 audio system 20Hz -100Hz <=5dB 10KHz-20KHz <=5dB Signal to noise (USB) 50dB [1KHz]FURRION
Furrion Innovation Center & Institute of Technology
• 52567 Independence Ct., Elkhart, IN 46514, USA • Toll free:1-888-354-5792 \- Email: support@furrion.com ©2007-2018 Furrion Ltd. Furrion® and the Furrion logo are trademarks licensed for use by Furrion Ltd. and registered in the U.S. and other countries. FURRION.COM160W 2-Zone Entertainment System
 DV3050-SB  DV3050-SS  Bluetooth® Main Features
       VIBRATIONSMART™CLIMATESMART™ SIGNALSMARXILIARY IN USB INTERFACE HEADPHONE JACK SUBWOOFER OUT     Specifications| Din Type | 1-din (Main Chassis) |
| Front Panel Type | Fixed |
| Supported Disc Format | Nil |
| Supported Media Format | MP3/WMA |
| Tuner Type | AM & FM |
| # of Preset Stations | 30 |
| RDS | √ |
| USB | √ |
| Card Reader | • |
| Memory Card Support | • |
| AUX-IN | √ |
| AUX-IN Video Support | • |
| Bluetooth | 4.0 |
| NFC | √ |
| GPS | • |
| Display Type | LCD |
| Display Size (inch) | 4" |
| Power Output (Watt) | 4 x 40W (MAX) |
| Power Connector Type | 12-pin |
| Key Illumination Color | White |
| Rotary Volume Control | √ |
| Accessories Included | Remote Control with Batteries, Harness, Manual, Warranty Card |
| # of RCA (Audio LR) Inputs, Rear Panel | 2 |
| # of RCA (Audio LR) Outputs, Rear Panel | 1 |
| # of Video Inputs, Rear Panel | 1 |
| # of Video Outputs, Rear Panel | 1 |
| # of Subwoofer Outputs, Rear Panel | 1 |
| # of HDMI Outputs, Rear Panel | • |
| # of Optical Audio Inputs, Rear Panel | • |
| # of Coaxial Audio Inputs, Rear Panel | • |
| # of Camera Inputs, Rear Panel | • |
| IR Control Jack | 1 |
| # Zone Audio Outputs | 2 |
| Individual Packaging Dimensions(W x H x D) | 9.37 x 5.59 x 6.02"(238 x 142 x 153mm) |
| Net Weight (lbs/kg) | 10.6/4.8 |
| Gross Weight (lbs/kg) | 13.9/6.3 |
| Quantity Per Box (pcs) | 6 |
| Master Carton Dimensions(W x H x D) | 18.78 x 11.77 x 9.84"(477 x 299 x 250mm) |
| Master Carton Gross Weight (lbs/kg) | 14.3/6.5 |
FURRION
 DV3050-SB  Integrating residential design with recreational vehicle functionality, the new DV3050 entertainment system offers next generation two-zone audiovisual technology with bluetooth connectivity and NFC quick-touch communication. Instantly pair your device and stream music wirelessly with amazing clarity.  BLUETOOTH CONNECTIVITY NFC NEAR FIELD COMMUNICATION  AUXILIARY IN  USB INTERFACEQuick-touch Wireless Streaming
NFC communication allows the user to hold their NFC compatible device over the DV3050 entertainment system and stream music without needing to go through multiple steps setting up a connection.Connect your device in 3 simple steps:
1. Enable NFC on your handheld device. 2. Hold your handheld device over the Furrion logo until a message appears prompting you to pair devices. (A password may be required, please enter '0000'). 3. The devices are now paired, press play on your handheld device to enjoy streaming high definition audio through your bluetooth connection.  Copyright © 2017 Furrion Ltd. All rights reserved. Furrion® is a trademark licensed by Furrion Ltd, registered in the U.S., which may be pending or registered in other countries. WARRANTY CARDFURRION
Congratulations on purchasing your new Furrion product. All Furrion products are made to strict quality standards. If used properly for its intended purpose, your product should provide many years of use. We are pleased to provide you with a 1 year warranty on all Furrion products. The details of this warranty are set out in the terms and conditions (see reverse) which supplement the authorised dealer's Terms and Conditions of Sale. This warranty is given in addition to your other rights under the laws of the country where you purchase Furrion products.   Please visit www.furrion.com/productregistration to register your productWARRANTY TERMS AND CONDITIONS.
1. The warranty guarantees that Furrion products will be free from faults or defects in workmanship and materials for a period of 1 year commencing on the date of delivery to you. If a valid claim is made under warranty then you will only be entitled to claim in accordance with paragraph 6 below. Our goods come with guarantees that cannot be excluded under the Australian Consumer Law. You are entitled to a replacement or refund for a major failure and compensation for any other reasonably foreseeable loss or damage. You are also entitled to have the goods repaired or replaced if the goods fail to be acceptable quality and the failure does not amount to a major failure. 2. The warranty only applies: a. to Furrion products with a valid serial number; b. to the person who purchased the Furrion product. It is not transferrable to any other person; c. to individuals who purchased the Furrion products as a consumer for private use, not to businesses, companies, partnerships or sole traders; d. to Furrion products used solely within a domestic environment for personal use, not to Furrion products put into and used within business premises, place of work, rental properties, student properties or similar; e. to Furrion products used within the environment intended by their design; f. to Furrion products used and installed in accordance with the instructions supplied with the product; g. where the purchaser of the Furrion product has validated the warranty in accordance with paragraph 4 below. 3. The warranty does not cover: a. items where the serial number has been defaced and/or rendered unidentifiable; b. damage caused or contributed to by poor, faulty or incorrect use, installation or maintenance; c. damage caused or contributed to by events outside Furrion's control including but not limited to Acts of God, fire, explosion, contact with corrosive matter, extreme weather conditions, flood, vandalism, soiling, misuse, abrasion, improper storage following delivery, rot and/or infestation following delivery, leaks (or similar incidents), damage due to non-domestic use; d. damage or deterioration caused or contributed to as a result of normal wear and tear; e. damage caused or contributed to by maintenance or repairs other than those carried out by an authorised dealer; f. damage caused or contributed to by wilful damage, abuse, mistreatment, negligence, abnormal storage or environmental conditions; g. damage caused or contributed to by household animals and misuse by children. 4. To validate the warranty you must: a. fill in the registration card provided with the Furrion product; and b. register the warranty covering the Furrion product within 6 months of delivery of the Furrion product by following the instructions on the registration card; c. have a copy of your receipt to validate warranty of the Furrion product. 5. To make a claim under your warranty please cease using the goods when a fault arises and contact the supplier or manufacturer and point to the defect. Please contact Furrion's customer service at: \- For US customers: support@furrion.com or Furrion, 52567 Independence Court Elkhart, IN 46514 \- For Australia customers: Furrion Ltd, Unit 614-615 Level 6, Core D, Cyberport 3, 100 cyberport road, Hong Kong, at warranty.au@furrion.com or 1.(800).985.957. 6. Following the filing of a claim, Furrion will investigate the claim and if we believe there is a defect or fault covered by the warranty, we will at our option either repair the defective Furrion product (or part) or replace the defective Furrion product (or part). 7. Please note in the event that no fault can be found, it is your responsibility to pay for the re-delivery of the replacement items. If a defect is found, Furrion will pay for the re-delivery of the replacement items. 8. Installation of any repaired or replaced Furrion product will not be Furrion's responsibility. 9. If you do not allow the authorised dealers representative to view the Furrion product which is the subject of the warranty claim, you will invalidate the warranty in respect of that claim. 10. Any repaired or replaced Furrion product parts shall be guaranteed on the terms of this warranty for the unexpired portion of the warranty period only. 11. This warranty is non-transferrable and is personal to the original purchaser as shown on the invoice. 12. This warranty is subject to the jurisdiction of the courts of the country where you purchase Furrion products, and any dispute or claim arising out of, or in connection with it or its subject matter, shall be governed by, and construed in accordance with the laws of the country where you purchase Furrion products.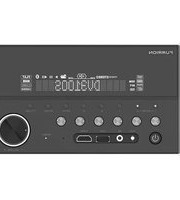


- Locations and Names of the Controls
- The remote control description
- Common operation:
- Radio Operation
- FREQUENCY SELECT
- AM/FM BUTTON
- TUNE/SEEK UP/DOWN
- APS BUTTON & SCAN BUTTON
- PRESET STATION [1-6] BUTTONS
- STEREO/MONO BUTTON
- LOC BUTTON
- USB Operation
- Pause Playback
- Stop Playback
- Select Chapter with the
- To repeat track(s)
- To play tracks in random
- Tracks search
- Bluetooth Handsfree System
- Pairing and connection
- Use the mobile phone to do connection or disconnection
- To redial the last phone number dialed
- Accept/Reject/End Call
- Installing the unit
- Specification
- GENERAL
- FM SECTION
- AM SECTION
- USB PLAYBACK
- FURRION
- Furrion Innovation Center & Institute of Technology
- 160W 2-Zone Entertainment System
- Main Features
- Quick-touch Wireless Streaming
- Connect your device in 3 simple steps:
- WARRANTY TERMS AND CONDITIONS.
Brand : Furrion
Model : DV3050-SB
Category : Radio