CDM 425 SUBT - Hi-Fi System GoGen - Free user manual and instructions
Find the device manual for free CDM 425 SUBT GoGen in PDF.


| Product Type | Portable Stereo Radio with CD/MP3 Player |
| Brand / Model | GoGen CDM 425 SUBT |
| Power Supply | AC 100–240 V, 60/50 Hz; DC 12 V (8 x UM-1/D batteries, not included) |
| Power Consumption | 22 W (operation), 0.32 W (standby) |
| Dimensions (W x D x H) | 492 x 210 x 198 mm |
| Weight | Not specified |
| Radio Bands | FM (87.5–108 MHz) |
| Disc Playback | CD, CD-R, CD-RW, MP3 CD |
| Media Playback | USB, SD Card, AUX In (3.5 mm) |
| Bluetooth | Yes (profile not specified, range up to 10 m) |
| Audio Output | 2 x 12.5 W RMS |
| Equalizer Modes | Flat, Classic, Rock, Pop, Jazz |
| Disco Light | 9 modes including off, 7 static colors, random mix |
| Headphone Jack | 3.5 mm (disables speakers) |
| Other Features | Programmable track playback (up to 20 for CD, 99 for MP3), repeat (one/all/dir), random, intro scan, auto preset memory for radio |
| Safety & Maintenance | Keep away from water, heat, dust; do not open device; use only specified batteries; clean with dry cloth |
| Accessories Included | Instruction booklet, AC power cord |
Frequently Asked Questions - CDM 425 SUBT GoGen
User questions about CDM 425 SUBT GoGen
0 question about this device. Answer the ones you know or ask your own.
Ask a new question about this device
Download the instructions for your Hi-Fi System in PDF format for free! Find your manual CDM 425 SUBT - GoGen and take your electronic device back in hand. On this page are published all the documents necessary for the use of your device. CDM 425 SUBT by GoGen.
USER MANUAL CDM 425 SUBT GoGen
natural_image
Abstract logo design with white stylized 'S' inside a circle on black background (no text or symbols)CDM 425 SUBT
GoGEN
natural_image
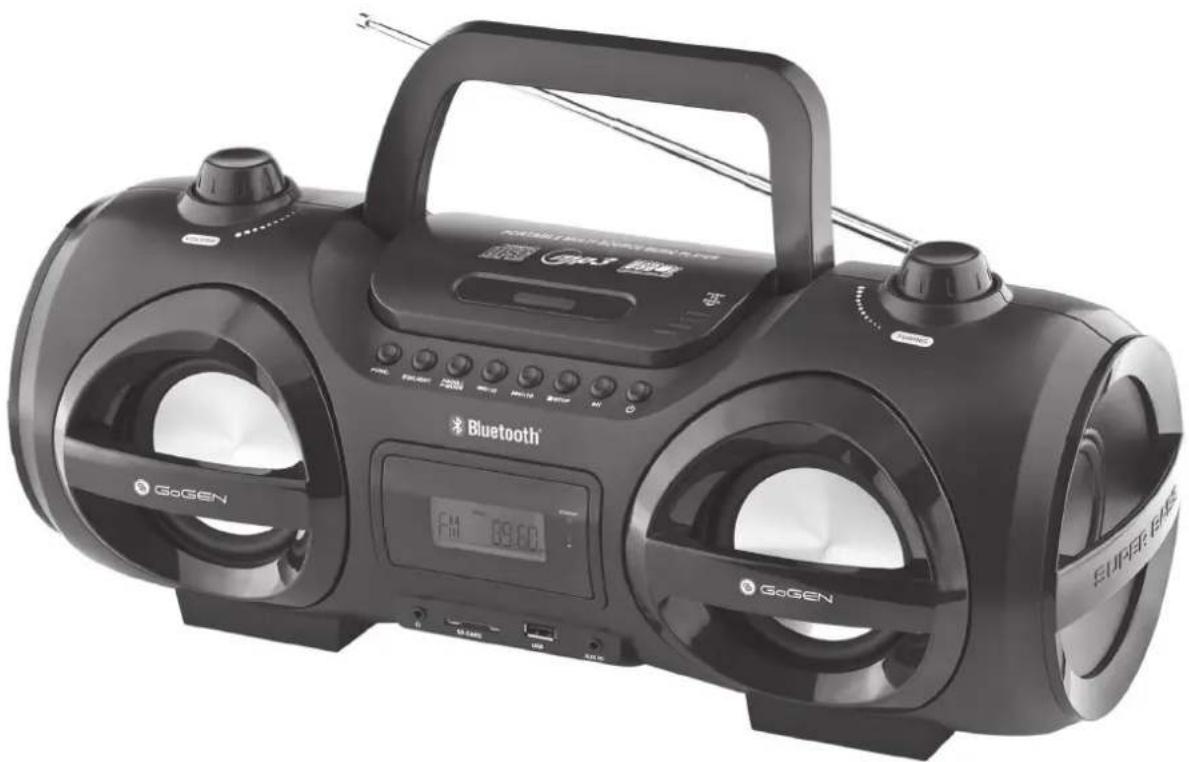
Black GoGen portable electronic device with two front panels, a digital display, and external control knobs (no visible text or symbols on the device body)
PŘENOSNÝ STEREOFONNÍ RADIOPŘIJÍMAČ PRENOSNÝ STEREOFÓNNY RÁDIOPRIJÍMAČ PRZENOŠNE RADIO I ODTWARZACZ STEREO PORTABLE STEREO RADIO HORDOZHATÓ SZTEREÓ RÁDIÓ
NÁVOD K POUŽITÍ NÁVOD NA POUŽITIE INSTRUKCJA OBSŁUGI USER MANUAL HASZNÁLATI UTASÍTÁS
natural_image
Two-step diagram showing hand positioning of a device with directional arrows indicating movement (no text or symbols)ZDROJ NAPÁJANIA
natural_image
Two-step diagram showing hand positioning of a device with directional arrows indicating movement (no text or symbols)ŹRÓDŁO ZASILANIA
IMPORTANT: Please read before using and keep for future reference.
IMPORTANT NOTES
INTRODUCTION
- Thank you for buying this product.
- Please read through these operating instructions, so you will know how to operate your equipment properly. After you finished reading the instructions manual, put it in a safe place for future reference.
CAUTION
Use of controls or adjustment or performance of procedures other than those specified herein may result in hazardous radiation exposure.
DANGER
This Compact disc player is classified as a Class 1 LASER PRODUCT. THE CLASS 1 LASER PRODUCT label is located on the rear exterior.
NOTE: The manufacturer is not responsible for any radio or TV interference caused by unauthorized modifications.
- Avoid installing the unit in locations described below:
- Places exposed to direct sunlight or close to heat radiating appliances such as electric heaters, or other equipments that radiate too much heat.
- Places subjected to constant vibration.
- Unventilated or dusty places.
-
Humid or moist places.
-
Operate buttons and switches as instructed in the manual.
- Before turning on the power for the first time, make sure that the power cord is properly installed and the voltage switch is correctly set.
- Store the unit in a cool area to avoid damage from heat.
CAUTION: TO REDUCE THE RISK OF ELECTRIC SHOCK, DO DOT REMOVE COVER (OR BACK). DO NOT OPEN THE UNIT ANY SERVICING PLEASE REFER TO QUALIFIED SERVICE PERSONNEL.
WARNING:
- Remove batteries if exhausted or if they will not be used for a long period.
-
The incorrect use of batteries can cause electrolyte leakage and will corrode the compartment or cause the batteries to burst. Therefore:
-
Do not mix battery types, e.g. alkaline with zinc carbonate.
- When inserting new batteries, replace all batteries at the same time.
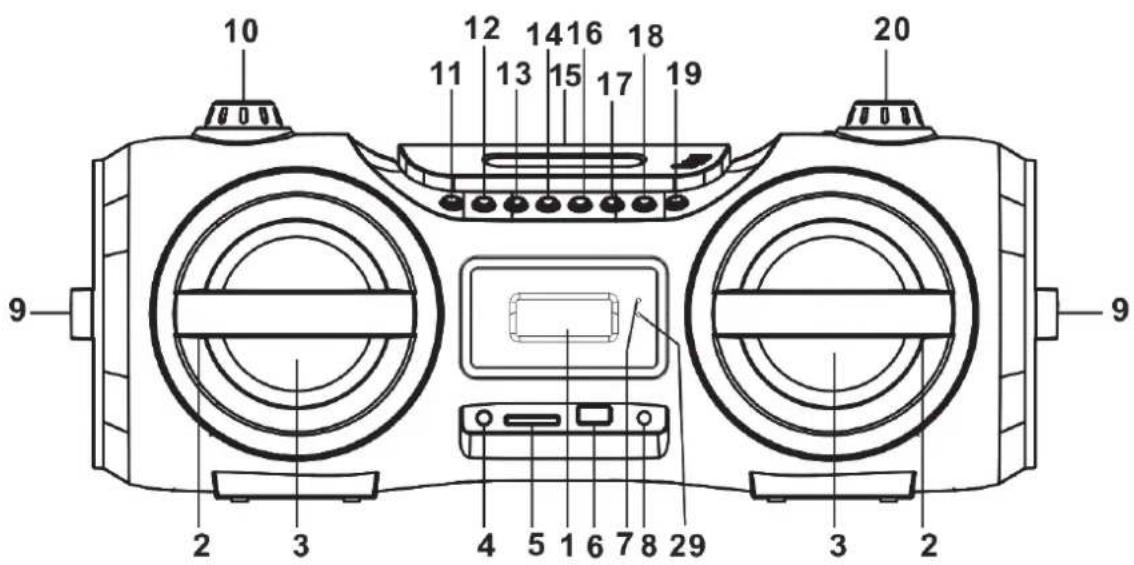
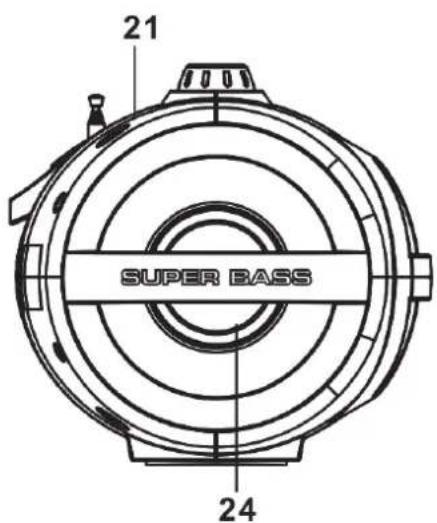
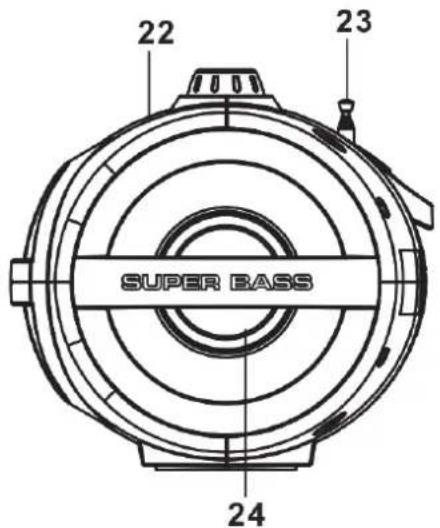
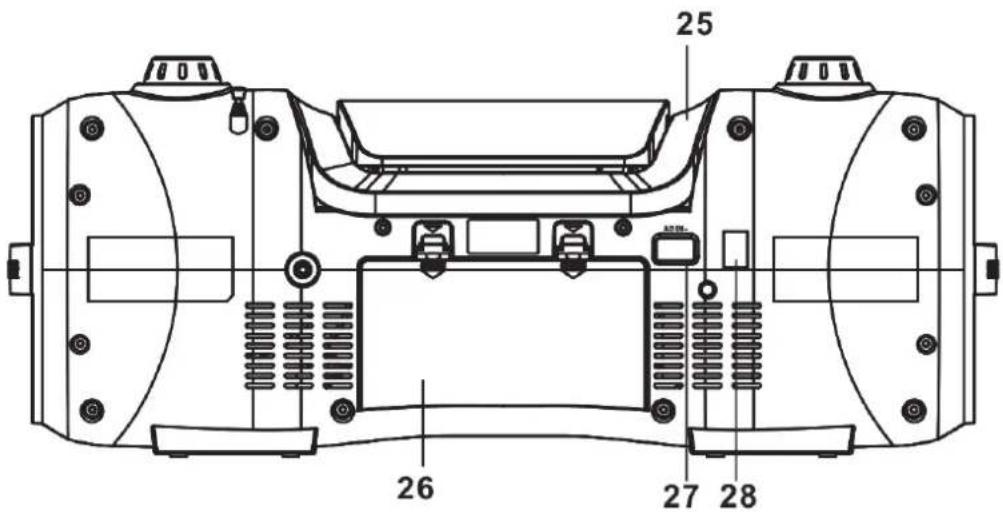
NAMES OF CONTROLS
1) Display
2) Speaker guard
3) Left / Right speakers
4) Headphone jack
5) SD Card Slot
6) USB port
7) Standby Indicator
8) 3.5 mm AUX IN JACK
9) Passive speaker guard
10) VOLUME dial
11) FUNCTION button
12) EQ / LIGHT button
13) PROG. / P-MODE button
14) PREVIOUS / REVERSE / -10 BUTTON
15) CD door
Note: Please remove the plastic protector from the battery compartment before using for the 1st time.
To operate the unit with the remote control, point the transmitter on the front of the remote control at the remote sensor on the front panel of the unit. Press a button on the remote control to activate it.
The remote works best within a range of 20 to 23 feet (6 to 7 meters) from the front panel and within 30 degrees to either side. Bright sunlight or lighting conditions in the room can interfere with the remote control. If the remote operation is unsatisfactory or stops working entirely, try using a new battery in the remote or try darkening the room.
REPLACING THE REMOTE CONTROL BATTERY
- The remote control includes one CR2025 (3 V) lithium battery. (Remove the plastic protector from the battery compartment before using the remote for the first time.)
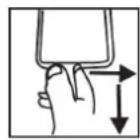
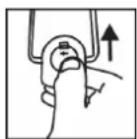
- To replace the battery, gently push the clasp to the right and then slide the battery compartment tray out. Remove the old battery and install a new lithium battery (type CR-2025) in the tray. The positive side of the battery should face up.
- Slide the tray back into the compartment until the clasp clicks into place.
POWER SOURCE
This unit is designed to operate on or AC / DC electrical systems.
AC OPERATION
Plug one end of the power cord into the AC power input on the unit; plug the other end into a household AC outlet. (The batteries will be automatically disabled).
NOTE: MAKE SURE THAT THE AC VOLTAGE SELECTOR (LOCATED ON THE BACK OF THE UNIT) IS SWITCHED TO YOUR LOCAL VOLTAGE.
DC OPERATION
Open the BATTERY DOOR [26]. Install 8pcs UM-1/D size batteries (not included) into the compartment. Please follow correct polarities as indicated.
CAUTION:
Remove batteries if they are flat or not being used for a long period of time. Batteries contain chemical substances, so they should be disposed of properly.
BASIC FUNCTION
After connecting the power, press POWER [19] button to unit or on remote control to turn on the unit. Press the FUNC. button on unit or on remote control to choose CD / MP3 / USB / AUX / SD CARD function.
NOTE: In CD / MP3 / USB / SD / AUX mode when the unit is not providing the main function for 15 minutes, the unit will automatically switch into standby mode. To turn on the unit again, press "STANDBY" button or replug the unit.
ESD hints – The product maybe reset or not reset to operation of control due to electrostatic discharge, just switch off and reconnect again.
SETTING THE FUNCTION MODE
To change the function mode, press the FUNCTION button [11] on the unit (TUNER / CD / USB / SD / AUX). By default, the unit will be in the TUNER (radio) function mode.
ADJUSTING THE VOLUME
Rotate the VOLUME dial [10] to increase or decrease volume.
This unit has a built-in equalizer system, Press the EQ button [12] during playback to select a setting that best matches the music style: FLAT, CLASSIC, ROCK, POP and JAZZ.
HEADPHONE JACK
For private listening, connect a 3.5 mm headphone (not included) to the HEADPHONE jack [4]. The SPEAKER will be automatically disabled.
CAUTION: LISTENING AT A HIGH VOLUME OVER A LONG PERIOD IS NOT GOOD FOR YOUR EARS.
DISCO LIGHT
There are nine flashing modes of the disco light, press and hold the EQ/LIGHT button on unit or press the LIGHT KEY on remote control to choose the desired mode. Default mode 1 "OFF", mode 2 – 8, press once to change color, totally 7 colours, mode 9, mix color randomly.
To turn off the disco light, press and hold the EQ/LIGHT button on unit or press the LIGHT KEY on remote control until "LIGHT OFF" shows on the display.
RADIO OPERATION
RADIO OPERATION
1) Press the FUNCTION button [11] to select the desired wave band (FM).
2) Tune to the desired station by rotating the TUNING dial [20] (the station frequency is shown on the display).
3) Rotate the VOLUME dial [10] to adjust the volume to a comfortable level.
4) To optimize reception when listening to stations on the FM band, extend the telescopic antenna to its full length.
AUTO PRESET MEMORY / SCAN
To search for and automatically save stations to preset memory, press the PLAY button [18].
Any station with a strong enough signal will be saved to preset memory. After the unit is finished scanning, the unit will automatically tune to preset station number 1 (P01).
To tune to the next preset station, press NEXT [16]. To tune to the previous station, press PREV [14].
You may choose stations ito save in preset memory so that you can tune directly to these stations quickly.
1) Press the PROG./P-MODE button [13]. "P01" will flash on the display. Turn the TUNING dial [20] to select the desired station.
2) Press the PROG./P-MODE button [13] to choose the station you want to store, then press the PROG. / P-MODE button again to enter.
3) To save another station, repeat steps (1) & (2). You may save up to 30 FM stations and 30 AM stations.
4) To tune to preset stations, press NEXT [16] or PREV [14].
CD / MP3 OPERATION
SUPPORTED DISC FORMATS
TThis unit can play all digital audio CD / MP3, finalized digital audio CD-Recordable (CD-R) discs, finalized digital audio CD-Rewritable (CD-RW) discs, and CD-DA formatted digital audio CD / CD-R / CD-RW discs.
LOADING A DISC
1) Press the FUNCTION button [11] to select "CD" mode.
2) Press PUSH TO OPEN on the CD door to open it; the display will read "OPEN".
3) Place an audio CD or MP3 disc into the tray with the label side facing up.
4) Close the CD door; the display will flash "TOC READ", and then show the total number of playable tracks on the disc. Playback will start automatically.
5) To remove the CD, press the POWER button [19] to turn off the unit, then press PUSH TO OPEN on the CD door to open it. Hold the CD by its edges, and take it out carefully.
Note:
1) Make sure the disc is completely stopped before opening the CD door.
2) To ensure good system performance, wait until the unit reads the disc completely before doing anything else.
3) If the disc is unreadable or if no disc is loaded in the tray, the display will show "NO DISC".
PLAYING A DISC
1) The playback starts from Track 1 automatically after a compatible disc has been loaded and read by the unit.
- To pause playback, press the PLAY button [18]. The current track time will flash on the display.
- To resume playback, press the PLAY [18] button again.
2) To stop playback, press the STOP button [17]. The display will show the total number of tracks.
SKIPPING TO A TRACK / TIME POINT
To select a desired track
Press the NEXT [16] or PREV [14] buttons to skip to the next or previous track, respectively. Track numbers are shown on the display.
To scan quickly to a point in a track
Press and hold the NEXT [16] or PREV [14] buttons to quickly scan forward or in reverse through a track. The track time is shown on the display.
PROGRAMING TRACKS
You can create a custom play list from your disc when playback is stopped. You can program up to 20 tracks for a CD disc and 99 tracks for an MP3 disc.
1) While play is stopped, press the PROG button [13]. The display will flash PROG and show "P01".
2) Use the NEXT [16] / PREV [14] buttons to select the first track to be saved to the program list, then press PROG [13] to save. The display will now show the next program number (e.g., "P02").
3) Repeat step 2 to save more tracks to the program list until all tracks have been programmed.
4) Press the PLAY button [18] to start playing the program list from the beginning. The display will show which track is currently playing.
5) Press the STOP button [17] on unit to stop program playback.
To clear the program, you may the STOP button [17] when the disc stopped and open the CD compartment lid. The program is now erased.
REPEAT PLAY
You can play one track or all tracks on the disc repeatedly.
- To repeat a single track, press the PROG button [13] during play until the “REPEAT ONE” indicator is shown on the display. The current track will be played over an over again until you press the STOP button [17].
- To repeat all tracks, press the PROG button [13] during play until the “REPEAT ALL” indicator is shown on the display. All tracks on the disc will be played over and over again till you press the STOP button [17] on unit.
- To repeat all MP3 tracks in a folder, press the PROG button [13] during play until the “REPEAT DIR” indicator is shown on the display. All tracks in the current folder will be played over and over again till you press the STOP button [17] on unit. (This option is only available when playing an MP3 disc that contains more than one folder.)
- To cancel repeat play, press the PROG button [13] until the display no longer shows any repeat indicators.
RANDOM PLAY
Press the PROG button [13] during play until the “RAN” indicator is shown on the display. Tracks will play in random order. To resume normal playback, press the PROG button [13] until the “RAN” indicator disappears from the display.
INTRO PLAY
Press the PROG button [13] during play until the "INTRO" indicator is shown on the display. The first 10 seconds of each track will play, and then skip to the next track. To resume normal playback, press the PROG button [13] until the "INTRO" indicator disappears from the display.
LISTENING TO USB / SD CARD
USB OPERATION
1) Press the FUNCTION button [11] to select "USB" mode.
2) Connect the USB memory stick to the USB port [6] found on the front of the unit. The display will show the total number of playable tracks on the USB device. Playback will start automatically from Track 1.
3) To pause playback, press the PLAY button [18]. The current track time will flash on the display.
4) To resume playback, press the PLAY button [18] again.
5) To stop playback, press the STOP button [17]. The display will show the total number of tracks.
6) To learn more about custom programs and repeat / random playback, please refer to the CD / MP3 OPERATION section of this manual.
CAUTION:
To prevent harmful interference, always connect USB devices directly to the unit. Do not use a USB extension cable to connect USB devices to the unit.
SD CARD OPERATION
1) Press the FUNCTION button [11] to select "CARD" mode.
2) Insert a compatible memory card into the SD CARD SLOT [5] found on the front of the unit. The display will show the total number of playable tracks on the card. Playback will start automatically from Track 1.
3) To pause playback, press the PLAY button [18]. The current track time will flash on the display.
4) To resume playback, press the PLAY button [18] again.
5) To stop playback, press the STOP button [17]. The display will show the total number of tracks.
6) To learn more about custom programs and repeat / random playback, please refer to the CD / MP3 OPERATION section of this manual.
AUX-IN OPERATION
1) Press the FUNCTION button [11] to select "AUX" mode.
2) Connect your audio device to the 3.5mm AUX IN jack [8] found on the front of the unit with a 3.5 mm AUX cable.
3) Set the volume level of the connected audio device to approximately 80 %. Make additional adjustments to the volume level by turning the VOLUME dial [10] of the unit.
4) Control playback with your audio device.
BLUETOOTH OPERATION
1) Press the FUNCTION button on unit or on remote control to switch to BLUETOOTH function, the LCD will display "bt" and the Pair/Standby indicator will flash at high speed.
2) Turn on the Bluetooth function on the device, scan the unit "GOGCDM425SUBT" and connect, then input the password 0000 if required, the Pair/Standby blue light will light up to indicate connection done, and the display will show "bt". Press ▶//PAIR button on the unit or play key on the device to start playback. If the unit can't connect the relative Bluetooth within 2 minutes, press the ▶//PAIR button on unit or PAIR key on remote control to reconnect.
3) Rotate the VOLUME knob to your desired level.
4) Press ▶/+10 button or ◀/-10 on the unit or TUN+/▶ or TUN-/◀ key on remote control to choose the desired track.
5) To stop playback, press ▶I/PAIR button on unit or ▶II key on remote control.
Note: The Bluetooth works best within 10 meters.
SPECIFICATIONS
GENERAL
| Power Requirement | AC 100–240 V 60/50 Hz |
| DC 12 V UM-1/D x 8pcs | |
| Power consumption | 22 W |
| Standby Power Consumption | 0,32 W |
| Dimensions | 210 (D) x 492 (W) x 198 (H) mm |
| Operation temperature | +5 °C – +35 °C |
BLUETOOTH
| Wireless Working Frequency | 2,402 – 2,480 GHz |
| E.i.r.p. | - 13,71 dBm |
RECEIVER SECTION
| Receiving Bands | FM.ST |
| Frequency Range | FM 87.5 – 108 MHz |
COMPACT DISC SECTION
| Optical Pickup | 3-Beam Laser |
| Frequency Response | 100 Hz – 16 kHz |
AUDIO SECTION
| Power output | 12.5 W x 2 |
ACCESSORIES
Instruction Booklet 1
AC Cord 1
WE RESERVE THE RIGHT TO CHANGE TECHNICAL SPECIFICATIONS.
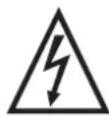
WARNING: DO NOT USE THIS PRODUCT NEAR WATER, IN WET AREAS TO AVOID
FIRE OR INJURY OF ELECTRIC CURRENT. ALWAYS TURN OFF THE PRODUCT
WHEN YOU DON'T USE IT OR BEFORE A REVISION. THERE AREN'T ANY PARTS IN
THIS APPLIANCE WHICH ARE REPARABLE BY CONSUMER. ALWAYS APPEAL TO A
QUALIFIED AUTHORIZED SERVICE. THE PRODUCT IS UNDER A DANGEROUS TENTION.
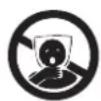
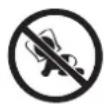
TO AVOID DANGER OF SUFFOCATION, KEEP THE PLASTIC BAG AWAY FROM BABIES AND CHILDREN. DO NOT USE THIS BAG IN CRIBS, BEDS, CARRIAGES OR PLAYPENS. THIS BAG IS NOT A TOY.
Disposal of old Electrical & Electronic Equipment (Applicable in the European Union and other European countries with separate collection systems)
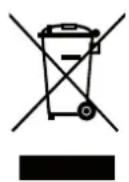
This symbol on the product or on its packaging indicates that this product shall not be treated as household waste. Instead it shall be handed over to the applicable collection point for the recycling of electrical and electronic equipment. By ensuring this product is disposed of correctly, you will help prevent potential negative consequences for the environment and human health, which could otherwise be caused by inappropriate waste handling of this product. The recycling of materials will
help to conserve natural resources. For more detailed information about recycling of this product, please contact your local Civic Office, your household waste disposal service or the shop where you purchased the product.
Hereby, ETA a.s. declares that the radio equipment type CDM425SUBT is in compliance with Directive 2014/53/EU. The full text of the EU declaration of conformity is available at the following internet address: http://www.gogen.cz/declaration_of_conformity
CSATORNÁK MANUÁLIS MENTÉSE
natural_image
Abstract logo design with white stylized 'S' inside a black circle (no text or symbols)GoGEN
- GoGEN
- ZDROJ NAPÁJANIA
- ŹRÓDŁO ZASILANIA
- IMPORTANT NOTES
- INTRODUCTION
- CAUTION
- DANGER
- WARNING:
- NAMES OF CONTROLS
- REPLACING THE REMOTE CONTROL BATTERY
- POWER SOURCE
- AC OPERATION
- DC OPERATION
- CAUTION:
- BASIC FUNCTION
- SETTING THE FUNCTION MODE
- ADJUSTING THE VOLUME
- HEADPHONE JACK
- DISCO LIGHT
- RADIO OPERATION
- AUTO PRESET MEMORY / SCAN
- CD / MP3 OPERATION
- SUPPORTED DISC FORMATS
- LOADING A DISC
- Note:
- PLAYING A DISC
- SKIPPING TO A TRACK / TIME POINT
- To select a desired track
- To scan quickly to a point in a track
- PROGRAMING TRACKS
- REPEAT PLAY
- RANDOM PLAY
- INTRO PLAY
- LISTENING TO USB / SD CARD
- USB OPERATION
- SD CARD OPERATION
- AUX-IN OPERATION
- BLUETOOTH OPERATION
- SPECIFICATIONS
- ACCESSORIES
- WE RESERVE THE RIGHT TO CHANGE TECHNICAL SPECIFICATIONS.
- Disposal of old Electrical & Electronic Equipment (Applicable in the European Union and other European countries with separate collection systems)
- CSATORNÁK MANUÁLIS MENTÉSE
Brand : GoGen
Model : CDM 425 SUBT
Category : Hi-Fi System