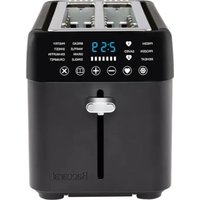
The Artisan Toasty Slice - Toaster Baccarat - Free user manual and instructions
Find the device manual for free The Artisan Toasty Slice Baccarat in PDF.


User questions about The Artisan Toasty Slice Baccarat
0 question about this device. Answer the ones you know or ask your own.
Ask a new question about this device
Download the instructions for your Toaster in PDF format for free! Find your manual The Artisan Toasty Slice - Baccarat and take your electronic device back in hand. On this page are published all the documents necessary for the use of your device. The Artisan Toasty Slice by Baccarat.
USER MANUAL The Artisan Toasty Slice Baccarat
Frozen and Reheat Function


Baccarat®
The Artisan Toasty Slice
4 SLICE LONG SLOT TOASTER
Everyone's favourite way to start the day
is with a scrumptious slice of toast
The Baccarat® Artisan Toasty Slice Toaster
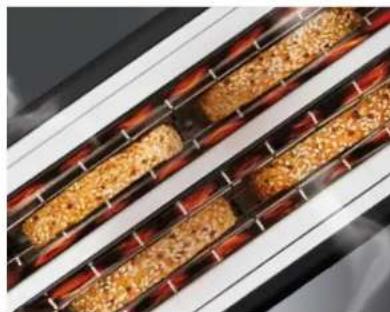
has 8 preset functions for bread, waffle,
grain, crumpet, pastry, sweet, English muffin
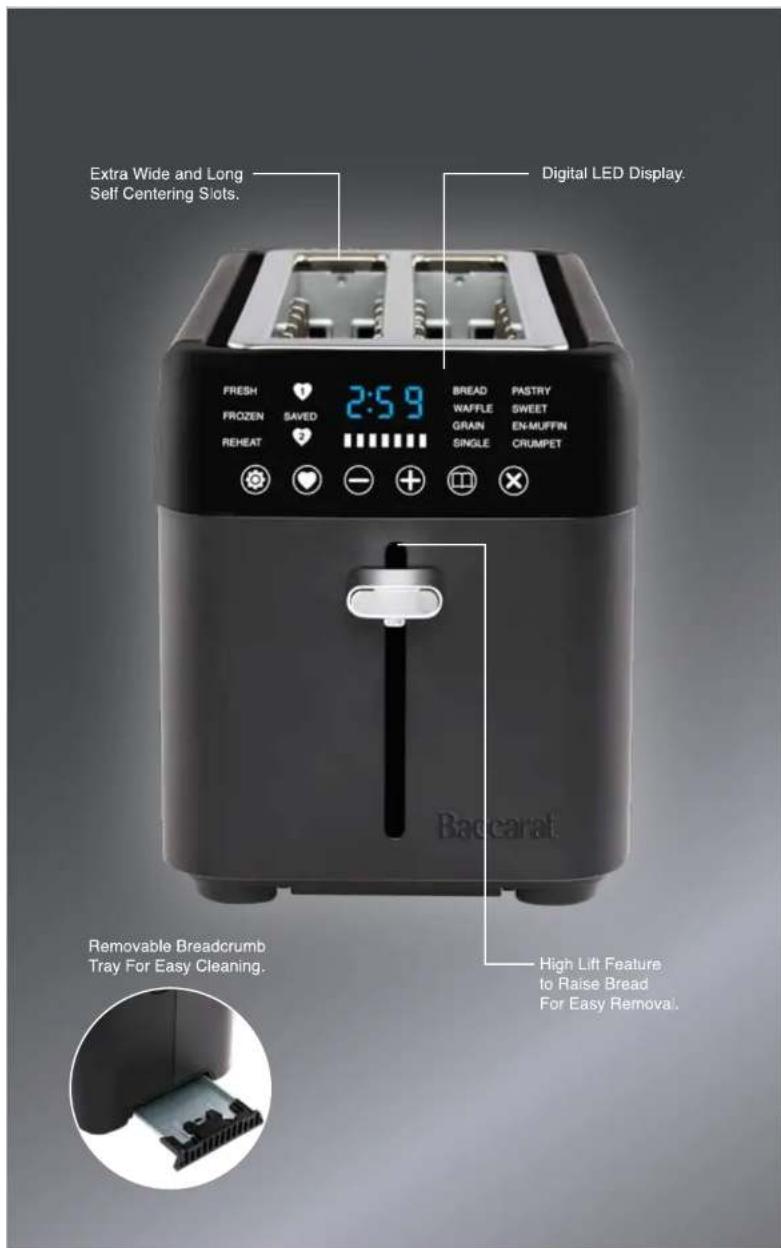
and single. The wide and long slots fits
4 regular slices or 2 large artisan slices.

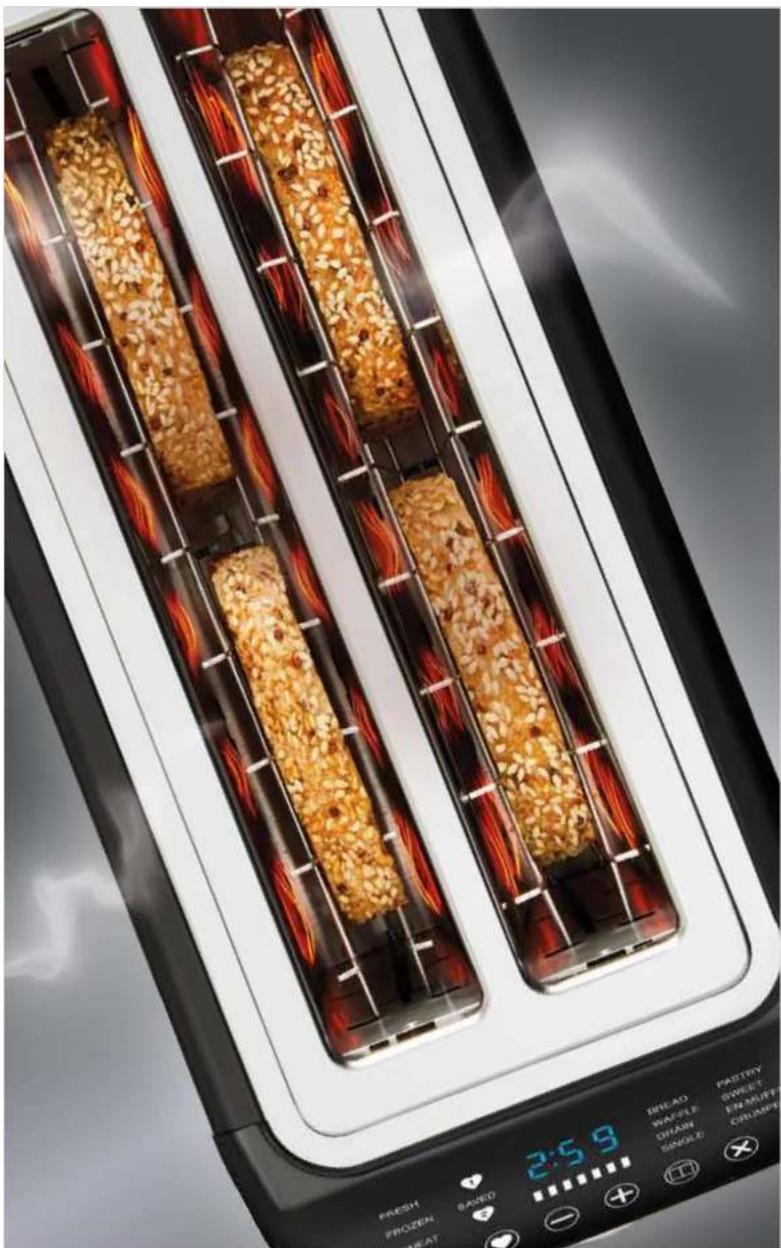
Baccarat® The Artisan Toasty Slice
BACCARAT® IMPORTANT SAFETY INSTRUCTIONS FOR ALL ELECTRICAL APPLIANCES. PLEASE READ CAREFULLY BEFORE FIRST USE & RETAIN FOR FUTURE REFERENCE.
Safety is at the forefront of design and manufacturing throughout the process of all Baccarat® products. It is essential that the product user exercise care when using a Baccarat® electrical appliance. Please adhere to the following precautions which are essential for the safe use of an electrical appliance:
Safety precautions for the Baccarat® Artisan Toasty Slice.
- Bread may burn. Do not use the appliance near or below combustible materials (e.g. curtains).
- Ensure the bread is not too thick that it will jam or wedge the bread carriage and does not protrude above the bread slot opening.
- Do not move the toaster whilst in operation or when hot.
- Never cover the toaster whilst it is plugged into the power outlet or while hot.
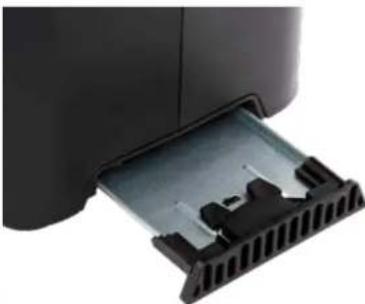
- Remove and empty the breadcrumb tray regularly after use. Wipe with a damp cloth, dry, then replace in the toaster.
- When using a single toasting slot, check that the other slot is empty.
- Do not toast or reheat "buttered", torn, or misshapen bread.
- If bread gets jammed, unplug the toaster, let it cool, and carefully remove the bread.
- Sit the toaster upright on a firm, level, dry, heat-resistant surface when in use.
Safety Precautions for all Baccarat® Electrical Appliances
- This appliance can be used by children aged from 8 years and above and persons with reduced physical, sensory, or mental capabilities or lack of experience and knowledge if they have been supervised/instructed and understand the hazards involved.
• Children should be supervised to ensure that they do not play with the appliance. - Cleaning and user maintenance shall not be done by children unless they are aged from 8 years and above or supervised.
- Keep the appliance and cable out of reach of children under 8 years.
- Always turn the power off at the power outlet before you insert or remove a plug. Remove by grasping the plug - do not pull on the cord
- To eliminate a choking hazard for young children, remove and safely discard the protective cover fitted to the power plug of this appliance.
- Turn the power off and remove the plug when the appliance is not in use and before cleaning.
- Do not use the appliance with an extension cord unless this cord has been checked and tested by a qualified electrician.
Baccarat®

- Always use the appliance from a power outlet of the voltage (A.C. only) marked on the appliance.
- Do not pull or carry the appliance by its power cord. Do not pull the cord around sharp edges or corners. Do not bend the cord and never force the plug into the power outlet.
- The temperature of accessible surfaces may be high when the appliance is operating.
- Never leave the appliance unattended while in use.
- Do not use the appliance for any purpose other than its intended use.
- Do not place the appliance on or near a hot gas flame, electric element, on or in a heated oven.
- Do not place on top of any other appliance
- Do not let the power cord of the appliance hang over the edge of a table or bench top or press any hot surface.
- Do not operate any electrical the appliance with a damaged plug, cord or after the appliance has been damaged in any manner. If damage is suspected, return to place of purchase, or see how to claim under warranty.
- Do not immerse the appliance in water or any other liquid unless recommended.
- The appliances are not intended to be operated by means of an external timer or separate remote-control system.
- Do not use unauthorised accessory attachments as they may cause injuries.
- This appliance is for household use only. Do not use this appliance for anything other than its intended use. Do not use in moving vehicles or boats. Do not use outdoors. Misuse may cause injury.
- The appliance should always be used on a hard, stable, dry, heat-resistant surface, such as a benchtop or table.
- Allow to cool before storing.
• Refer to care guide for cleaning.
Operating Instructions Before First Use
- Remove all the packaging and safely discard.
- Insert the plug into a power outlet.
- The LED display will light up and the appliance will enter its standby default setting.
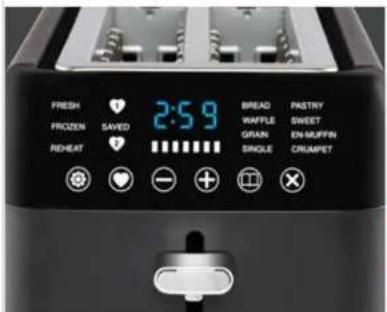
- Note: Standby default setting will illuminate a flashing light on Toast Setting 'Fresh' and Menu Setting 'Bread'.
- Operate the Artisan Toasty Slice empty in its default setting by pressing the lever down fully to cure the new elements.
- The LED display will emit a solid light on the selected Toast, Menu and Browning Time settings and begin the countdown with the timer.
- In doing so, This will burn off any lubricants from the Artisan Toasty Slice heating elements and may omit a smell, this is normal.
- The lever will pop up automatically once the timer has finished.
Cooking Use
- Insert the plug into a power outlet.
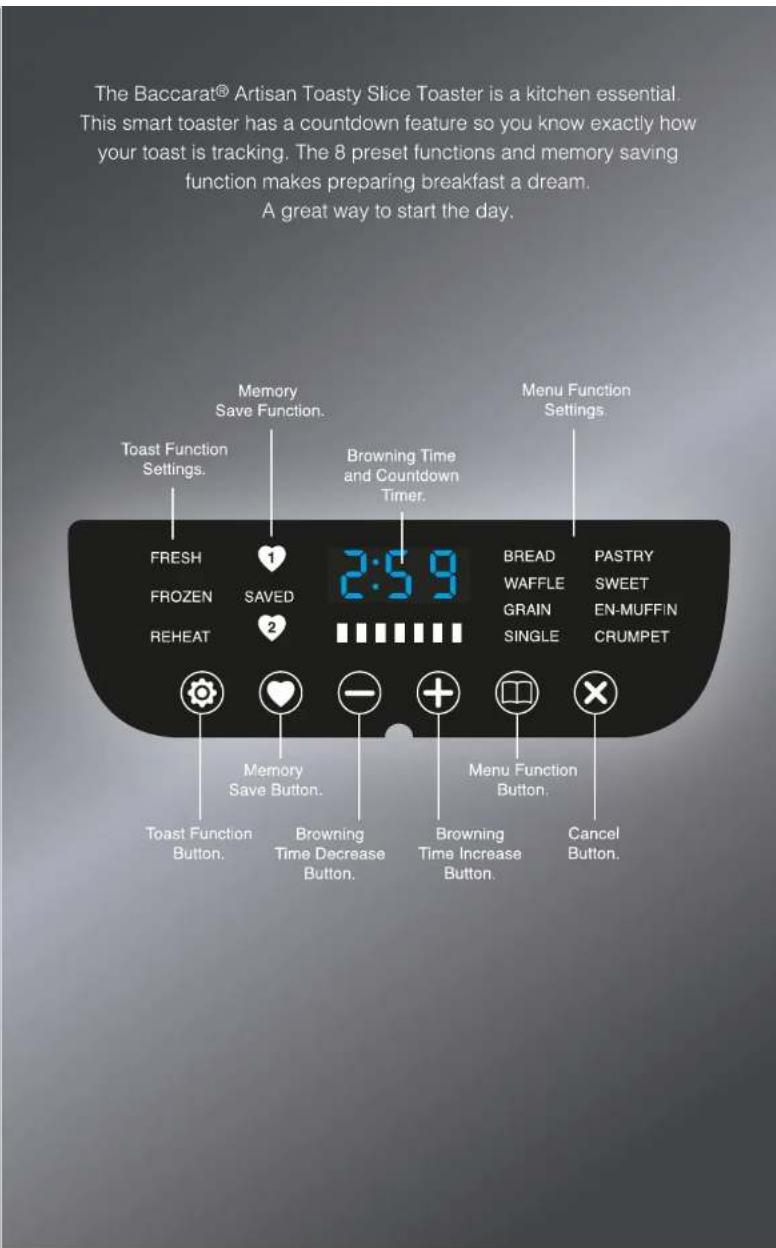
- Select the desired 'Toast Function' setting by pressing the ⏻ button repeatedly until the LED display emits a flashing light on your desired Toast function. The Toast function setting options are Fresh, Frozen and Reheat.
- Note: If you pass the Toast function setting you require, simply keep pressing the Ⓞ button repeatedly until the indicator light is flashing on your desired function again.
- Select the desired 'Menu Function' setting by pressing the ⏻ button repeatedly until the LED display emits a flashing light on your desired Menu function. The Menu function setting options are Bread, Waffle, Grain, Crumpet, Pastry, Sweet, En-Muffin (English Muffin) and Single.
- Note: If you pass the Menu function setting you require, simply keep pressing the ⏻ button repeatedly until the indicator light is flashing on your desired function again.
- The 'Browning Time' setting will automatically adjust and set recommended browning time based on your above selections of the Toast and Menu function settings. To adjust the recommended browning time, use the decrease or increase buttons to adjust to the desired browning time. Refer to Browning Level Timetable.
- Press the lever down fully.
- The LED display will emit a solid light on the selected Toast, Menu and Browning Time functions and begin the countdown with the timer.
- The toast will raise automatically once the timer has finished.
Baccarat®
Fresh Function
The Fresh function is designed for fresh bread types, that have not been frozen or do not require reheating.
- Press the ⚙ button repeatedly until the LED display emits a flashing light on 'Fresh'.
- Select the Fresh bread type in the Menu Function Ⓐ setting.
- A recommended browning time for the fresh bread type selected in the Menu setting will be suggested.
- Press the lever down fully.
- The LED display will show your selected Function, Menu and Browning Time settings and begin the countdown with the timer.
- The toast will raise automatically once the timer has finished.
Frozen Function
The Frozen function generates a longer browning time cycle perfect for toasting frozen bread types.
- Press the Ⓞ button repeatedly until the LED display emits a flashing light on 'Frozen'.
- Select the frozen bread type in the Menu Function ⏻ setting.
- A recommended browning time for the frozen bread type selected in the Menu setting will be suggested.
- Press the lever down fully.
- The LED display will show your selected Function, Menu and Browning Time settings and begin the countdown with the timer.
- The toast will raise automatically once the timer has finished.
Reheat Function
The Reheat function is designed to reheat bread types after the toasting cycle has finished. The reheat function gives 30 seconds toasting time for a burst of heat.
- Press the Ⓞ button repeatedly until the LED display emits a flashing light on 'Reheat'.
- Select the bread type in the Menu ⏻ setting.
- Press the lever down fully.
- The LED display will show your selected Function, Menu and Browning Time settings and begin the countdown with the timer.
- The toast will raise automatically once the timer has finished.
Menu Function
The Menu function is designed to toast, defrost or reheat (in conjunction with the Toast function setting selection) various bread types. Some bread types require more or less toasting time due to many factors such as sugar content and density. Select your bread type for recommended browning time for ultimate results. The Selected bread will flash during the selection process and be lit solid during toasting on the LED display.
- Press the button until the LED Display emits a flashing light on your desired bread type. Bread type settings include: Bread, Waffle, Grain, Crumpet, Pastry and En-Muffin (English Muffin) • Note: The Crumpet Function is designed to extend heating time on the outer heating elements and reduce heating time on the centre heating elements to toast crumpet tops and lightly toast the base. Please place the crumpets into the toaster with the tops facing the outer heating elements.
- Select desired Toast and Browning Time.
- Press the lever down fully.
- The LED display will show your selected Function, Menu and Browning Time settings and begin the countdown with the timer.
- The toast will raise automatically once the timer has finished.
Single Function
The Single function allows for only one single slot to be in use.
- Press the Ⓐ button until the LED Display emits a flashing light on 'Single'.
-
Note: The single function operates the toast slot on the right-hand side of the appliance front-facing
-
Select desired Toast and Browning Time.
- Press the lever down fully.
- The LED display will show your selected Function, Menu and Browning Time settings and begin the countdown with the timer.
- The toast will raise automatically once the timer has finished.
Memory Saving Function
Save up to 2 of your preferred toast settings for easy convenience
1. Select desired Toast, Menu, and Browning Time
2. Select the desired memory setting number by pressing 🤊 button until the LED display emits a flashing light on the desired first 🔒 or second 🔒 memory saving number.
3. The LED display will emit flashing lights on your chosen Toast, Menu, Browning Time and chosen memory saving number when successfully saved.
4. Repeat above steps 1-3 to select and save the second desired setting functions
5. To use your saved toasting settings, press the ♥ button until the LED display emits a flashing light on your desired first ♥ or second ♥ saved memory setting.
6. Pull the lever down fully. The LED display will emit solid lights on the selected memory saved setting.
- Note: Any memory saving setting can be revised by repeating the steps above and over riding the current memory saving settings.
- Note: Memory saving settings will remain saved even when the toaster is unplugged
- Note: To exit out of your Memory saved setting, Press the ♥ button the 3rd time until there is no flashing light on first ♥ or second ♥ memory saved settings.
Cancel Function
To stop toasting at any time during the browning process, press the Ⓧ button.
Sleeping Mode
After approx. 4 minutes of no operation, The appliance will enter sleeping mode and the LED display will only emit light on the Ⓕ button. To exit sleeping mode, press the Ⓕ button.
Care Guide
• Always switch off, unplug from the power outlet, and dismantle before cleaning.
- Never put the appliance, plug or cord in the water or let the cord or plug get wet
• Do not wash parts in the dishwasher.
- Do not clean with scouring powders, steel wool pads or other abrasive materials.
To Clean
Before cleaning, switch off the power at the power outlet and unplug the Artisan Toasty Slice and let the appliance cool down.
Wipe outer surfaces with a damp cloth and dry. Remove and empty the crump tray regularly after use. Wipe with damp cloth, dry, then replace it in the toaster.
Storage
Once clean, store the appliance in a dry cupboard.
Disposal
Dispose of the appliance in accordance with the local environmental laws and guidelines.
Baccarat®
Browning Level Timetable
| Menu Function | Toast Function | Browning Level | ||||||
| 1 | 2 | 3 | 4 | 5 | 6 | 7 | ||
| Bread | Fresh | 1m 20s | 1m 45s | 2m 10s | 2m 35s | 3m 0s | 3m 25s | 3m 50s |
| Frozen | 1m 36s | 2m 06s | 2m 36s | 3m 06s | 3m 36s | 4m 06s | 4m 36s | |
| Reheat | 0m 30s | 0m 30s | 0m 30s | 0m 30s | 0m 30s | 0m 30s | 0m 30s | |
| Waffle | Fresh | 1m 10s | 1m 30s | 1m 50s | 2m 15s | 2m 40s | 3m 05s | 3m 30s |
| Frozen | 1m 24s | 1m 48s | 2m 12s | 2m 42s | 3m 12s | 3m 42s | 4m 12s | |
| Reheat | 0m 30s | 0m 30s | 0m 30s | 0m 30s | 0m 30s | 0m 30s | 0m 30s | |
| Grain | Fresh | 1m 10s | 1m 30s | 1m 50s | 2m 10s | 2m 30s | 2m 50s | 3m 10s |
| Frozen | 1m 24s | 1m 48s | 2m 12s | 2m 36s | 3m 0s | 3m 24s | 3m 48s | |
| Reheat | 0m 30s | 0m 30s | 0m 30s | 0m 30s | 0m 30s | 0m 30s | 0m 30s | |
| Crumpet | Fresh | 1m 40s | 2m 10s | 2m 40s | 3m 10s | 3m 40s | 4m 20s | 5m 0s |
| Frozen | 2m 0s | 2m 36s | 3m 12s | 3m 48s | 4m 24s | 5m 12s | 6m 0s | |
| Reheat | 0m 30s | 0m 30s | 0m 30s | 0m 30s | 0m 30s | 0m 30s | 0m 30s | |
| Pastry | Fresh | 1m 05s | 1m 20s | 1m 35s | 1m 55s | 2m 15s | 2m 35s | 2m 50s |
| Frozen | 1m 18s | 1m 36s | 1m 54s | 2m 18s | 2m 42s | 3m 06s | 3m 24s | |
| Reheat | 0m 30s | 0m 30s | 0m 30s | 0m 30s | 0m 30s | 0m 30s | 0m 30s | |
| Sweet | Fresh | 1m 30s | 1m 50s | 2m 20s | 2m 50s | 3m 20s | 3m 55s | 4m 20s |
| Frozen | 1m 48s | 2m 12s | 2m 48s | 3m 24s | 4m 0s | 4m 42s | 5m 12s | |
| Reheat | 0m 30s | 0m 30s | 0m 30s | 0m 30s | 0m 30s | 0m 30s | 0m 30s | |
| En-Muffin | Fresh | 1m 40s | 2m 10s | 2m 40s | 3m 10s | 3m 40s | 4m 10s | 4m 40s |
| Frozen | 2m 0s | 2m 36s | 3m 12s | 3m 48s | 4m 24s | 5m 0s | 5m 36s | |
| Reheat | 0m 30s | 0m 30s | 0m 30s | 0m 30s | 0m 30s | 0m 30s | 0m 30s | |
| Single | Fresh | 1m 40s | 2m 10s | 2m 40s | 3m 10s | 3m 40s | 4m 20s | 5m 0s |
| Frozen | 2m 0s | 2m 36s | 3m 12s | 3m 48s | 4m 24s | 5m 12s | 6m.0s | |
| Reheat | 0m 30s | 0m 30s | 0m 30s | 0m 30s | 0m 30s | 0m 30s | 0m 30s | |

Baccarat®
Warranty
Baccarat® 12 Month Guarantee
Baccarat® is covered by a "12 Month Guarantee" which is provided during the Warranty Period (defined below) by the following importers in the country in which you bought this product:
Australia; Playcorp Pty Ltd. www.globalretailbrandsAU.com Level 3, 425 St Kilda Road Melbourne Victoria 3004 1300 136 936
The Terms and Conditions of the 12 Month Guarantee are as set out below.
What it covers:
The "12 Month Guarantee" constitutes a warranty that the product is free from defects in workmanship, manufacture and materials, or abnormal deterioration when used in accordance with our "Care and Use Instructions" as contained in this Manual and normal domestic use during the Warranty Period.
What it does not Cover:
To the extent permitted by applicable laws, the 12 Month Guarantee does not cover defects or faults caused to the product by:
- Misuse or a failure to use in accordance with our "Care and Use Instructions", such as improper use and cleaning, neglect, modification, fire or flood, theft or commercial use, or normal wear and tear;
- Defects or damages caused by accessories, replacement parts or repair services other than those that have been authorised by Baccarat® or the importer; or
- Cosmetic damages that do not impair the function of the product (examples include but are not limited to scratches, water marks, cracks, dents, stains or discolouration to surfaces).
Warranty Period
The "12 Month Guarantee" starts from the date of purchase by the original end user and continues for twelve (12) months from this date (Warranty Period). Replacement of the product or a part of the product does not extend or restart the Warranty Period.
How to Claim:
To make a claim under the 12 Month Guarantee for a defective product, please cease using the product and contact the importers customer service team for assessment (see contact details at the end of this warranty). You may also present the item at the place of purchase with proof of purchase for an assessment but your claim may be deferred to the importer for further assessment. In order to make a claim under this Warranty, you will need your original proof of purchase and to provide an explanation as to the nature of the defect. You will need to provide your product model number and batch code. This can be found on a sticker and is typically located underneath or on the back of the product. Once we have this information and the details of the problem with your product, we will be able to advise you of next steps required to process your Warranty claim.
You must not Dispose of any Defective Product:
We may need you to send it back to us. If so, we will give you full details of how to prepare it for shipping and how to return it to us free of charge (see under heading 'The costs of claiming' below). You must make a claim or present the item with proof of purchase (as applicable) during the Warranty Period.

What Happens if you make a Claim:
If your claim is assessed to be valid, the product will be repaired or replaced by an alternative product. Any decision as to whether to repair or replace a product is to be made by the importer in its absolute discretion.
If an identical replacement product is not available, the retailer or the importer may replace your product with a new product with equivalent features and specifications as determined by the retailer or the importer where the retail price of the replacement does not exceed the original purchase price paid for the product. Once any product or part has been replaced, the original product or part becomes our property
The Costs of Claiming:
There is no cost to you for making a claim for a defective product and receiving a replacement or repaired product.
We will be responsible for all shipping costs for the claims under this Warranty which are assessed by the importer as valid. However, we may arrange with you to pick up the replacement or repaired product directly from our business address in certain circumstances. The product will be at your risk whilst in transit between you and the relevant retailer.
Your Statutory Rights:
The purchaser who is a consumer has statutory rights in relation to this product and this Warranty does not affect those statutory rights. Nothing in this Warranty restricts or affects any of the guarantees, rights or remedies given to you under any other relevant law.
New Zealand - Our goods come with guarantees that cannot be excluded under the New Zealand consumer law. You are entitled to your available rights and remedies under the Consumer Guarantees Act 1993.
Australia - Our goods come with guarantees that cannot be excluded under the Australian Consumer Law. You are entitled to a replacement or refund for a major failure and compensation for any other reasonably foreseeable loss or damage. You are also entitled to have the goods repaired or replaced if the goods fail to be of acceptable quality and the failure does not amount to a major failure.
Further Enquiries and Contact Details for Claims:
Visit your relevant and local importer website to obtain additional options for submitting a further enquiry through customer service.
Australia; Playcorp Pty Ltd. www.globalretailbrandsAU.com 1300 136 936.


- BACCARAT®
- THE ARTISAN TOASTY SLICE
- BACCARAT® THE ARTISAN TOASTY SLICE
- BACCARAT® IMPORTANT SAFETY INSTRUCTIONS FOR ALL ELECTRICAL APPLIANCES. PLEASE READ CAREFULLY BEFORE FIRST USE & RETAIN FOR FUTURE REFERENCE
- SAFETY PRECAUTIONS FOR THE BACCARAT® ARTISAN TOASTY SLICE
- SAFETY PRECAUTIONS FOR ALL BACCARAT® ELECTRICAL APPLIANCES
- OPERATING INSTRUCTIONS BEFORE FIRST USE
- COOKING USE
- FRESH FUNCTION
- FROZEN FUNCTION
- REHEAT FUNCTION
- MENU FUNCTION
- SINGLE FUNCTION
- MEMORY SAVING FUNCTION
- CANCEL FUNCTION
- SLEEPING MODE
- CARE GUIDE
- TO CLEAN
- STORAGE
- DISPOSAL
- WARRANTY
- BACCARAT® 12 MONTH GUARANTEE
- THE TERMS AND CONDITIONS OF THE 12 MONTH GUARANTEE ARE AS SET OUT BELOW
- WHAT IT COVERS
- WHAT IT DOES NOT COVER
- WARRANTY PERIOD
- HOW TO CLAIM
- YOU MUST NOT DISPOSE OF ANY DEFECTIVE PRODUCT
- WHAT HAPPENS IF YOU MAKE A CLAIM
- THE COSTS OF CLAIMING
- YOUR STATUTORY RIGHTS
- FURTHER ENQUIRIES AND CONTACT DETAILS FOR CLAIMS
Brand : Baccarat
Model : The Artisan Toasty Slice
Category : Toaster