USER MANUAL The Smart Chef Baccarat
recipe ideas scan this code
Baccarat®
The Smart Chef XL
MULTICOOKER
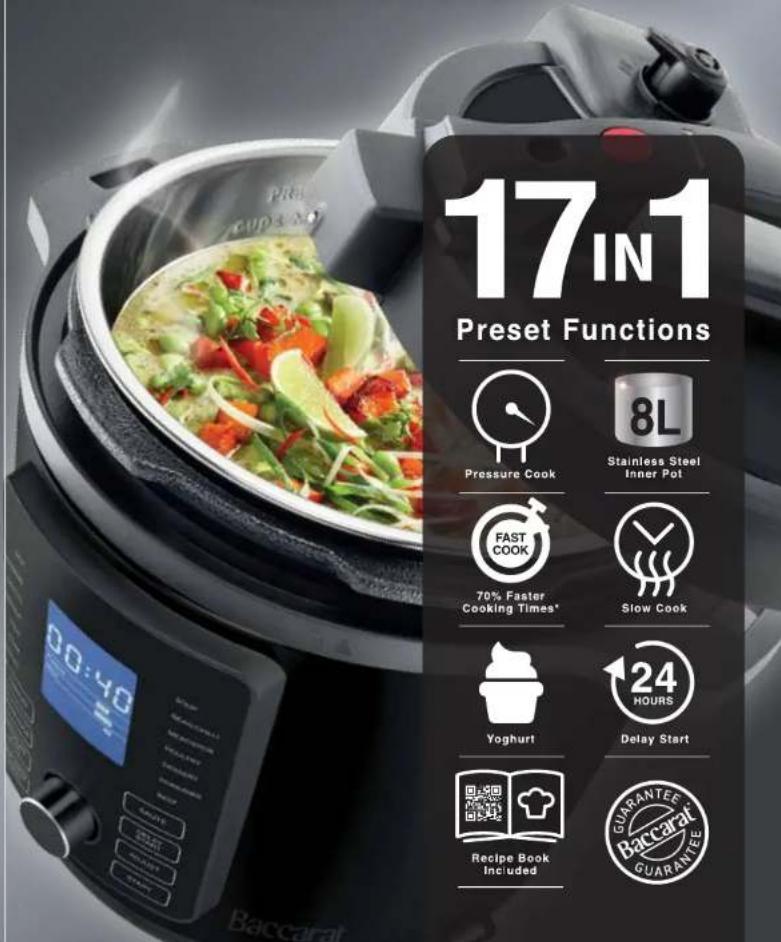
17 IN 1
Preset Functions

Pressure Cook

Stainless Steel Inner Pot

70% Faster Cooking Times*

Slow Cook

Yoghurt

Delay Start

Recipe Book Included



Baccarat®
The Smart Chef XL
MULTICOOKER
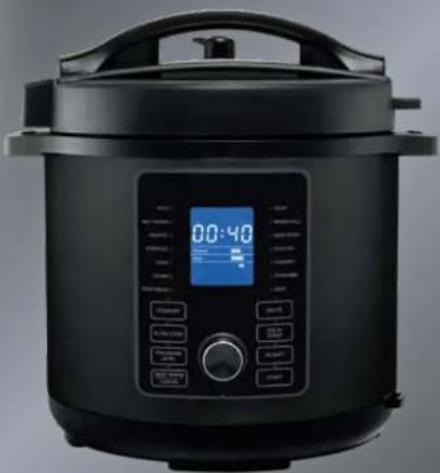
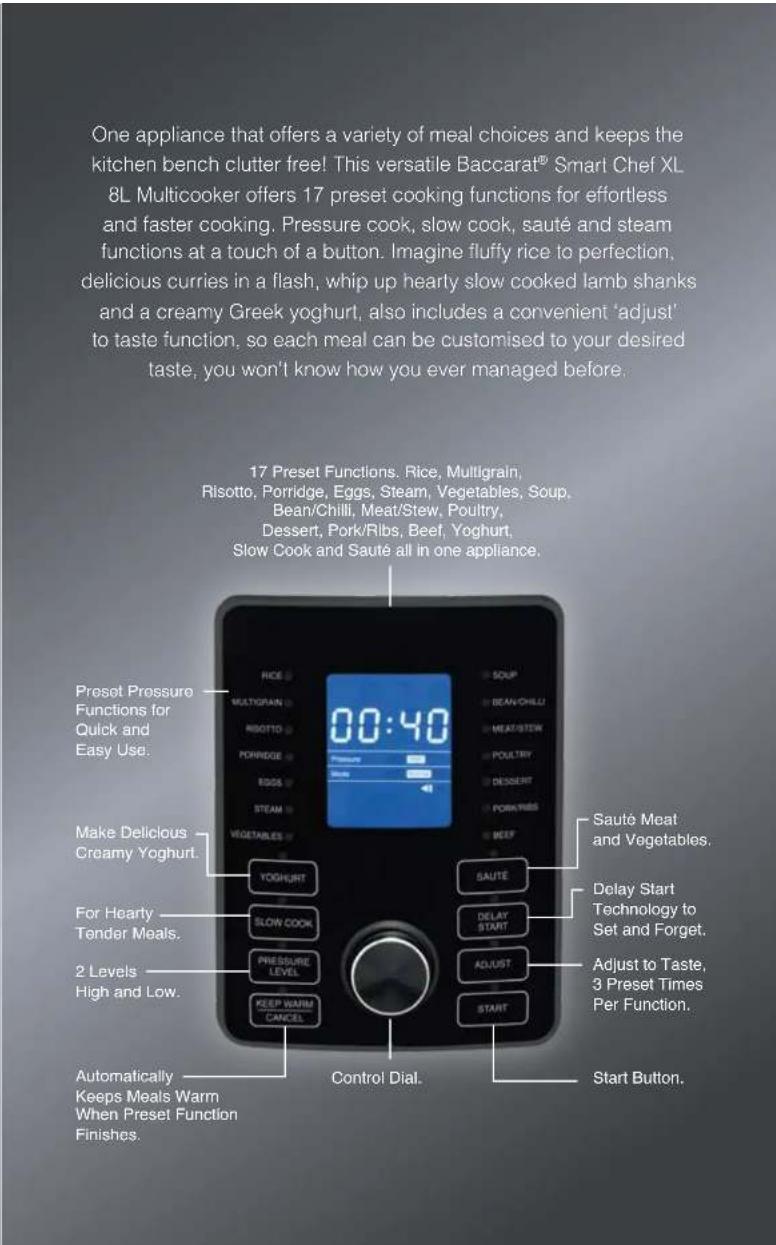
The Baccarat® Smart Chef XL has an extra large 8L capacity to serve 6-8 people or bulk cook for an organised week! The delay start technology enables you to set and forget, come home to a delicious nutritious meal after a long day. The handy keep warm function ensures dinner will always be hot, even if you are running late. 17 Preset functions in 1 appliance which includes adjustable pressure levels and 3 preset times per function.
| Contents | Pages |
| Safety Precautions 5-7 | |
| Product Features 8-10 | |
| Time and Message Display Guide 11 | |
| Before First Use 11 | |
| Initial Water Test 12 | |
| Cooking Check List | 12 |
| Operating Instructions | 12-17 |
| Natural Pressure Release Method | 14-15 |
| Quick Pressure Release Method | 15-16 |
| Cooking Guide | 18-25 |
| • Preset Pressure Cooking Programs | 18-20 |
| • Adjusting Pressure, Mode and Time | 20-21 |
| • Sauté Function | 21-22 |
| • Slow Cooking | 22 |
| • Yoghurt Function | 23-24 |
| • Dessert Function | 24 |
| • Delay Start 25 | |
| Care Guide | 25-26 |
| Recipes | 26-45 |
| Warranty | 44-45 |
Baccarat® The Smart Chef XL
BACCARAT® IMPORTANT SAFETY INSTRUCTIONS FOR ALL ELECTRICAL APPLIANCES. PLEASE READ CAREFULLY BEFORE FIRST USE & RETAIN FOR FUTURE REFERENCE.
Safety is at the forefront of design and manufacturing throughout the process of all Baccarat® products. It is essential that the product user exercise care when using a Baccarat® electrical appliance. Please adhere to the following precautions which are essential for the safe use of an electrical appliance:
Safety precautions for the Baccarat® Smart Chef XL Multicooker 8L.
- Do not move or lift the appliance while the power cord is still connected to the power outlet or still on. Always ensure it is switched off and has cooled down completely before moving.
- This appliance has no user-serviceable parts contained within. Do not attempt to repair, disassemble or modify the appliance.
- Improper installation may result in the risk of fire, electric shock or injury to person.
- Do not touch hot surfaces. The temperature of the outer body can get very hot while the appliance is in operation. Allow the appliance to cool down completely before inserting or removing parts.
- Do not clean with metal scouring pads. Pieces may break off the pad and touch the electrical parts, creating a risk of electric shock.
-
This appliance cooks under pressure. Improper use may result in scalding.
-
Never move the appliance with the pot still full of hot ingredients. All liquids and ingredients should be emptied from the pot before the appliance is moved.
- Never fill the appliance over the MAX mark on the pot (2/3 full) while pressure cooking. Follow the filling instructions precisely to ensure the safe use of the appliance. Overfilling may increase the risk of clogging the pressure limiting valve and the float valve, which can cause excessive pressure to build-up in the appliance. Failure to follow this procedure can result in injury to person(s) and/or damage to the appliance.
- Certain foods such as apple sauce, porridge, legumes or pasta, can foam, froth and clog the pressure limiting valve and float valve. These foods should be cooked carefully in the appliance, do not overfill and always clean the valves well after use.
• Always check the pressure release devices (pressure limiting valve and float valve) for clogging before use.
- DO NOT open the appliance until the appliance has cooled and all internal pressure has been released. If the lid is difficult to open or rotate, this indicates that the appliance is still holding pressure – DO NOT FORCE IT OPEN. Any pressure remaining in the appliance can be dangerous and can cause
Baccarat®
injury if forced open. See further instructions on page 14 to ensure that all pressure has been expelled from the appliance before attempting to remove the lid.
- Never use oil as the main ingredient when pressure cooking. This product is NOT a Deep Fryer
- Be careful not to damage the seal ring located inside the lid and DO NOT replace it with anything other than a replacement ring designed for this appliance. If you believe that the seal ring has been damaged, silicone rings are available as spare parts and can be purchased from most Baccarat. ® stockists or Baccarat.com.au.
- The surface of contact between the inner pot and the electric heating plate should always be clean. DO NOT use the inner pot with any other heating sources other than the appliance. DO NOT replace or substitute the inner pot with any other container other than that supplied with the appliance.
• The appliance should not be used for more than 6 hours continuously (except when using the SLOW COOK and YOGHURT presets). Serious injury and or damage may occur if any safeguards are ignored.
- If steam is released around the lid during the cooking process, unplug the cooker from the power supply immediately. Let the appliance cool completely and remove the contents. The above is a signal that the pressure discharging device has been activated. This is a safeguard to alert the user that the pressure limiting valve is malfunctioning. Discontinue using the appliance immediately.
- Surfaces of the appliance will become hot during use. Take care to only touch the handles when the appliance is hot. Wearing oven gloves is recommended when opening the lid.
Safety Precautions for all Baccarat® Electrical Appliances
Baccarat®
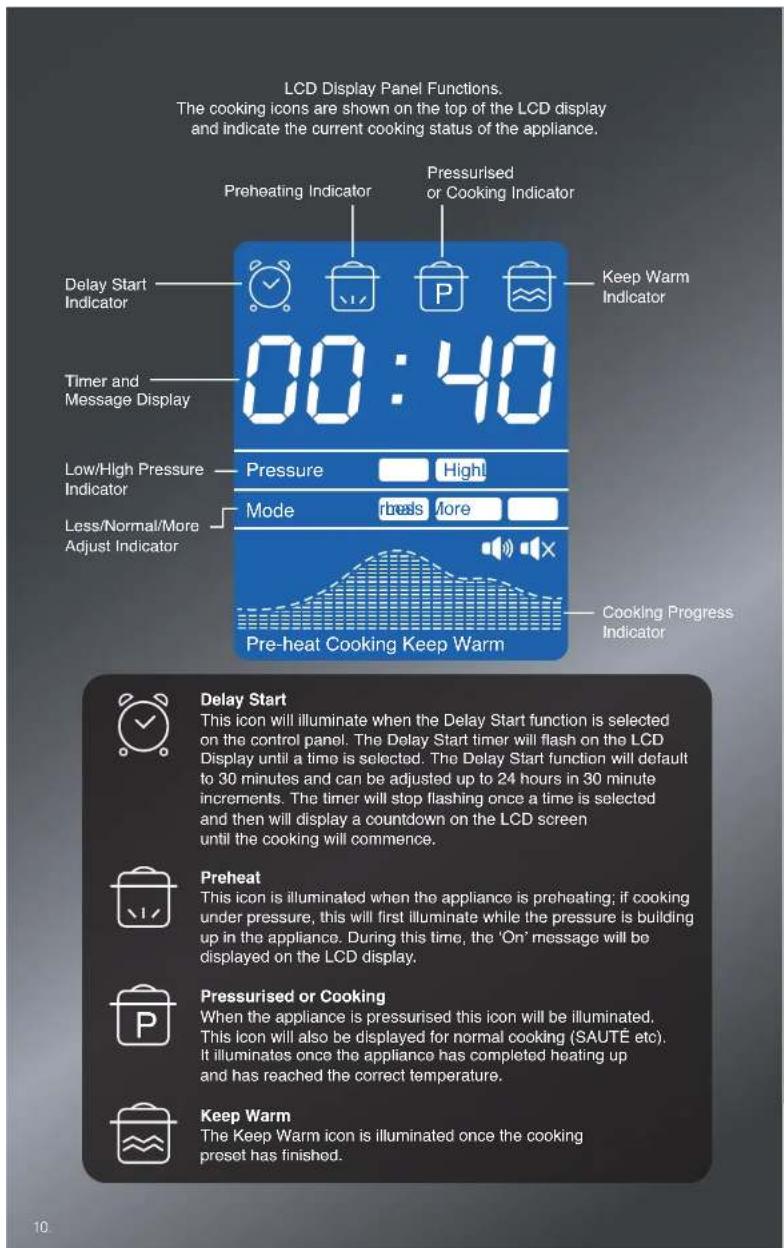
Timer and Message Display
This section of the LCD display shows timer details along with other message information
Timer Display
When selecting a preset cooking program, the cooking time in minutes will appear on the timer display. When the preset cooking program has been selected and the appliance has finished preheating, the time will be displayed once again on the LCD display and will begin counting down until the cooking cycle is completed.
Note: The amount of time shown on the timer display reflects the cooking time only and does not include the preheating time or time to build pressure within the appliance. Preheating times will vary depending on ingredients and liquid levels.
Note: When using the delay start function, the delay time selected will be displayed on the LCD display in hours and minutes and will countdown until the selected preset cooking program begins. At this point the appliance will begin the preheating stage and move through the cooking cycle automatically.
Message Display
The table below lists the messages that maybe displayed. These messages may appear during cooking, at the completion of a preset cooking program or as a warning.
LCD Display Messages
OFF The appliance is plugged in but no programs have been selected. It's ready to use and to select a program. This message will also be displayed when a preset program is cancelled.
On A program has been selected and the appliance is preheating.
88:88 Timer indicating how much time is left for cooking. Also displays delay start time or keep warm time remaining.
Yo9t This will display when pasteurising is complete and also when the yoghurt program is complete.
boiL Pasteurising.
L10 Lid is not correctly locked into place.
Hot Sauté function has completed warm up and now at maximum temperature.
Before First Use
- Read all the safety and operating instructions thoroughly. Follow the steps below before using. We recommend you keep the original packaging for storing when not in use.
- Pay close attention to the sections entitled Safety Precautions.
- Remove all packaging with exception of: safety warnings on the appliance lid or rating label on the body. Ensure you have all accessories listed in the product features.
- Wash the inner pot, steam rack, condensation cup, measuring cup and spoon in warm soapy water using a soft sponge and dry thoroughly before use.
- Wipe the exterior housing, lid, and inner surfaces of the appliance with a damp cloth and then dry thoroughly. Do not immerse it in water or other liquids.
Note: You may notice a slight odour being emitted from the appliance when using it for the first time. This is normal and odour will cease with continued use.
Baccarat®
Initial Water Test
Before using, test the seals and pressure limiting valve with the water test.
To carry out the water test follow the below steps:
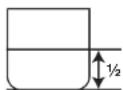
- Fill the inner pot to the 1/2 indicator line.
Follow the instruction on pages 16 to properly fill and fit the inner pot.
- Lock lid into position.
- Set the pressure limiting valve to the SEALING position.
- Plug into a wall socket and switch on. The appliance will beep once and the 'OFF' message will be displayed.
- Using the control dial, scroll to the STEAM preset.
- Press the START button. The 'ON' message will be displayed meaning that the appliance has started.
- The appliance will automatically preheat, build pressure and perform the test. If the appliance operates throughout the whole process, it is ready to use.
- If the appliance does not continue to function during this test, then turn off by pressing the KEEP WARM/CANCEL button on the control panel and follow steps 1-6 again.
-
Once the test is complete, the keep warm function will be automatically activated. The keep warm icon will illuminate on the LCD display while the red indicator light above the KEEP WARM/CANCEL button will illuminate.
-
Once the keep warm function is active, press cancel button and release the internal pressure using the natural release method (following instructions on page 14). Switch off and unplug from the wall.
- Carefully remove the lid.
- Your appliance is now ready to use.
Cooking Checklist
Below is a quick checklist to ensure that the appliance is ready for use.
- All food residue has been removed from the upper rim of the inner pot.
• Install the condensation cup to the rear of the appliance.
- Check that the seal ring inside the lid is undamaged and is correctly fitted to the lid. Push the seal ring with pressure up into the lid, ensure it is correctly fitted.
- Ensure that the lid has been securely and correctly fitted to the appliance.
- Turn the pressure limiting valve to the SEALING position on the lid if required.
- Initial Water Test to test the pressure limiting valve and the seals has been completed.
Operating Instructions
Pressure Limiting Valve
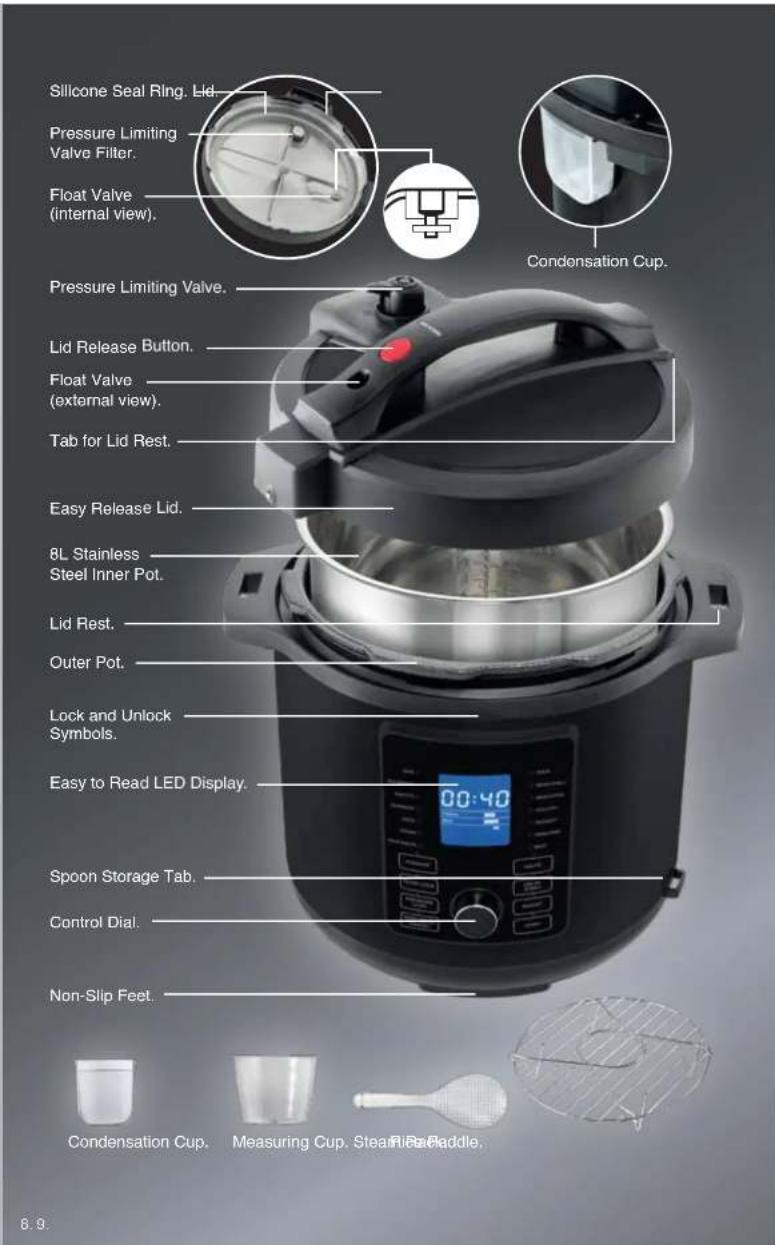
The pressure limiting valve is located top rear of the lid. This valve has two positions; SEALING and VENTING (these markings are shown on the lid). It is important that you follow the directions carefully as the pressure limiting valve can operate in both positions.
SEALING

VENTING

All the presets listed in the table found on page 19. are Pressure Cooking presets. This means that the food is being cooked under pressure and in turn, means that the pressure limiting valve needs to be set to the SEALING position BEFORE cooking is started. This is extremely important and is instrumental to your safety and cooking success.
When using the SLOW COOK, SAUTE and DESSERT presets, the pressure limiting valve needs to be set to the VENTING position. These presets do not call for cooking under pressure. Once cooking cycle is complete, before attempting to remove the lid, the pressure limiting valve MUST be turned to the VENTING position for both Quick Release and Natural Release pressure method.
WARNING: Extreme caution should be taken when venting or adjusting the pressure valve, as steam and liquid will be expelled during this process. Always use long handled longs and wear oven mitts, keeping hands and face away from steam.
WARNING: DO NOT adjust the pressure limiting valve to the VENTING position before the cooking cycle has finished. This is extremely dangerous and can cause serious injury or bums. Always press the KEEP WARM/CANCEL button first to cancel the cooking preset, before attempting to expel the pressure from the appliance.
WARNING: When the pressure limiting valve is adjusted under the quick pressure release method, hot steam and liquid will be expelled. Ensure that hands, face and all exposed body parts are kept well away during this process.
WARNING: DO NOT open the appliance until it has cooled down for a few minutes and all internal pressure has been released. If the lid is difficult to open or rotate, this indicates that the appliance is still holding pressure - DO NOT FORCE IT OPEN. Any pressure remaining in the cooker can be dangerous and can cause injury.
Pressure and Adjust Display
This section of the display shows the selected pressure and adjust settings for a preset cooking program.
The pressure and adjust settings will default to High Pressure and Normal Mode for the presel cooking programs. However, these presets can be adjusted by the user to suit their needs, recipe or ingredients by pressing the Pressure or Adjust button. This excludes the YOGHURT and SLOW COOK functions which do not require the pressure setting to function, however the mode setting can still be adjusted. The SAUTÉ functions does not require a pressure or mode setting to function.
Installing the Condensation Cup
The condensation cup is a clear plastic cup (included) that slides into the back side of the appliance. Ensure the cup is properly filled before attempting to use the appliance (the cup will CLICK into place). Check the condensation cup for liquid before and after each use and empty when required.
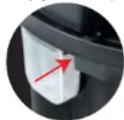
Note: When removing or installing the condensation cup, ensure the appliance has cooled completely.
Fitting the Lid
For your safety and correct functionality of the appliance, the lid MUST BE fitted correctly and only removed when it is safe to do so. Before attempting to fit the lid ensure the following:
- All food residue has been removed from the upper rim of the inner pot.
PULL UP TO REMOVE FOR CLEANING
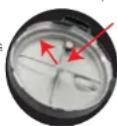
- The seal ring inside the lid is undamaged and is correctly fitted to the lid. Please note that the seal ring will already be correctly fitted to the lid on purchase of this appliance. If it is removed to be cleaned, or for some other reason, please follow these instructions to refill it and always check that it is in position before cooking. Push the seal ring with pressure up into the lid, to ensure it is correctly filled.
Note: The lid must be inspected before each use to ensure that all seals and safety mechanisms (valves) are not blocked.
Note: Always plug in and turn on the appliance at the power outlet before fitting the lid so the messages on the LCD display are visible.
- Plug in. The 'OFF' message will be displayed on the LCD screen.
- To lock the lid in place, hold the handle firmly and align the arrow with marking on the lid with the arrow and unlock icon found to the left of the control panel.
- Ensure the lid is resting on top of the appliance evenly and is making contact with all sides. When the lid is incorrectly in place, the word 'Lid' will illuminate on the LCD display and the appliance will beep intermittently.
- Turn the lid clockwise (to the left) until it locks into position (a clicking sound will be heard). The appliance will emit one longer beep signaling the lid is now locked into place and the word 'OFF' will be on the LCD display.
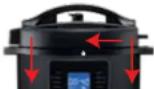
- When filled correctly, the arrow marking on the lid will align with the arrow marking (and locked icon) found on the lip of the outer body (just above the middle of the control panel).
Note: This appliance has built-in safety features that prevents all functions from activating if the lid is not properly locked into place. The appliance will beep intermittently and the message 'Lid' will be shown on the display. When the lid is locked into place, the appliance is ready for use.
Removing the Lid and Releasing the Internal Pressure after Pressure Cooking
When the cooking cycle has finished the appliance will automatically switch to the keep warm function. The keep warm icon on the LCD display will illuminate and the time display will show 00:00. Once the internal pressure has been released the lid can be removed.
There are two methods for removing internal pressure. Please select the most relevant option based on your ingredients and settings used during cooking.
Note: Please also see the included Cooking Tips to understand what pressure release method should be used on what types of food and in which instances.
Natural Pressure Release Method
The appliance can release the pressure build-up itself automatically via the pressure limiting valve over a period of time. The pressure limiting valve does not need to be turned to VENTING, it is just left in the SEALING position and the pressure will be slowly released. This is the slower method of pressure release and can take 1b-30 minutes, depending on what has been cooked.
During this time, cooking continues so it is recommended to use this method for certain cuts of meat, and other foods that contain larger quantities of liquids such as soup, broths, casseroles, rice and risstos.
This provides more time for the excess liquids to evaporate further and ensures a safer method of pressure release. If the Quick Release method is used for foods such as this, liquid will also be forced out of the pressure limiting valve along with the steam, which could cause injury.
Note: The time taken to automatically release all the internal pressure in the appliance, depends on the volume of liquid and the length of time the appliance has been holding pressure.
- Once the cooking cycle has finished and the keep warm function has activated, press the KEEP WARM/CANCEL button on the control panel. The 'OFF' message will be displayed.
Note: We recommend that the KEEP WARM/CANCEL button is not immediately pressed once the cooking cycle is finished. Instead wait a few minutes to allow to cool a little and to avoid releasing the pressure at maximum levels.
- Next, check the position of the float valve. The float valve is located inside the exterior of the handle on the lid and will still be extended outwards if pressure is still contained in the appliance. When all pressure has fully been expelled from the appliance through the pressure release valve (Natural Release method), the float valve will sink and drop back down to its previous position (before cooking started), completely inside the lid.


FLOAT VALVE
SUNKEN
- Once the float valve has sunk completely back inside the lid, turn the pressure limiting valve to the VENTING position (using tongs or oven mills) to expel any remaining pressure from the appliance. Next, press and hold the lid release button and rotate the lid anticlockwise (to the right) until the arrow on the lid lines up with the arrow (and unlock icon) on the lip of the outer body (just to the left of the control panel). Release the button and then lift the lid upwards vertically (to shield any escaping steam).
-
If the lid does not open, a further amount of time is needed for the appliance to automatically release the remaining pressure.
-
Check the float valve again and wait for it to sink back fully into the lid. Once all remaining pressure has been released, the lid will now unlock, allowing it to open easily.
Quick Pressure Release Method
This method requires caution and care when using. Hot steam and liquid will be expelled from the appliance while using this method.
- Once the cooking cycle has finished and the keep warm function has activated, press the KEEP WARM/CANCEL button. The 'OFF' message will be displayed.
- Using long-handled tongs and wearing oven mitts, SLOWLY move the pressure limiting valve from the SEALING position towards the VENTING position until it can go no further.
SEALING


- Wait until there is no more steam escaping from the pressure limiting valve and then release it from the grip of the long handled tongs.
- Press and hold the lid release button rotating the lid anticlockwise (to the right) until the arrow on the lid lines up with the arrow (and unlock icon) on the lip of the appliance (just to the right of the control panel).

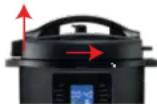
- Release the button and then lift the lid upwards vertically (to shield any escaping steam).
- If the lid does not come loose, there is still pressure inside. Follow points 2 and 4 above again to expel any remaining pressure.
- Once all remaining pressure has been released, the lid will now unlock, allowing it to open easily.
Baccarat®
Once the lid has been removed, rest on the side of the appliance using the below steps:
- Locate the lid rest tab.
- Insert the lid rest lab (located on the side of the lid) into the slot found in the side handles of the appliance. The top of the lid will need to be facing outwards.
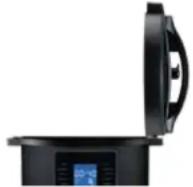
- The lid will be held in a near vertical position allowing access to the inner pot.
Cooking Use
Filling and Fitting the Inner Pot
For safe operation filling the inner pot with the correct level of ingredients and liquid is critical. The maximum volume the inner pot can accommodate will be dependent on the type of ingredients used as different ingredients respond to pressure cooking in different ways.
Inside the inner pot there are three sets of markings.
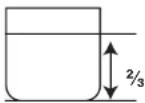
The highest marking inside the inner pot is labelled MAX PRESSURE COOK (2/3), which indicates the absolute maximum fill line when cooking most types of ingredients. These ingredients are foods that generally do not expand during cooking, bubble or loam. For example, soups, stocks, meals and vegetables.
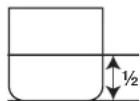
Note: If the recipe has lots of different ingredients, for example a soup with vegetables and some beans, then inner pot can be filled up to 2/3 full mark. If cooking only one primary ingredient such as a bean chilli, then the inner pot should never be filled passed the MAX 1/2 full mark.
The second marking is the 1/2 marking and represents half the total capacity of the inner pot. This marking shows the maximum volume of ingredients such as:
- Dry vegetables
- Beans
- Grains
- Other ingredients that swell and rapidly absorb water
Note: These foods either expand during cooking or generate lots of loam (or both). Beans and some grains can swell to twice their size during cooking. The foam and bubbles can block up the valves in the appliance. For these types of ingredients, the Natural Release method should be used. This will avoid liquid and starch being ejected out of the pressure limiting valve and will ensure a safer pressure release method.
The third marking is the RICE CUP marking and represents the number of cups of rice and liquid combined inside the inner pot. The maximum capacity of the inner pot when cooking rice is 8 cups of rice and 8 cups of liquid. NEVER fill the inner pot with rice and liquid past the 8 cup marking.

There should always be a minimum of 1/2 a cup of liquid added to the appliance when cooking. This ensures correct operation and that the inner pot will not boil-dry. However, it is recommended that the best method of pressure cooking is to always ensure there is a minimum of 1 litre of
combined food and liquid in the inner pot. This will give you the best cooking results possible.
To ensure that the inner pot is sitting correctly in the outer pot, gently rotate the inner pot through a full 360'. This process ensures that the inner pot is evenly and correctly seated inside the appliance. Ensure that the ingredients inside the inner pot are evenly distributed.
WARNING: Ensure that the inner pot is correctly sealed inside the appliance. Failure to do so may result in damage to the inner pot and difficulty in filling the lid.
WARNING: Overfilling the inner pot may cause burns or serious injury when cooking. Never overfill the inner pot past the MAX PRESSURE COOK indicator line.
Fitting and Using the Steamer Rack
The steamer rack should be used for the STEAM, EGG and DESSERT preset only.
- Pour a minimum of 250ml of water into the inner pot.
- Carefully place the steam rack inside the pot so that it sits evenly on the bottom of the pot. Ensure the top of the steamer rack is above the water.
- Place the food for steaming on top of the steamer rack, ensuring it is evenly distributed. If the food is too small to sit on top of the steamer rack, it is recommended to place a heat resistant tray, silicone basket or suitable steamer basket on top of the steamer rack to hold the food in place.
Note: Only oven suitable containers should be used inside the appliance
- Ensure that the inner pot is sitting correctly in the appliance.
- Follow the instructions on page 32 to use the STEAM preset.
CAUTION: The steamer rack will become very hot during use. Wait until the appliance and steamer rack have cooled down before removing from the inner pot. Always wear oven mills and use longs to remove the steamer rack.
Selecting the Correct Cooking Program
Preset Cooking Programs
There are 17 different preset cooking functions for cooking different types of food quickly and easily.
Special Cooking Programs
There are 4 special cooking programs which allow your appliance to perform additional cooking tasks. These are YOGHURT, DESSERT, SLOW COOK and SAUTÉ. Each special cooking program is explained in detail on page 19.
Delayed Start Function
The delayed start function allows programing the appliance to a time that suits you. Detailed instructions on how to program the delay timer function can be found on page 10
Keep Warm Function
The 24 hour keep warm function is automatically activated once the cooking cycle has been completed. It can also be manually activated. Recommend to use this function for a maximum of 4 hours or the food could start to dry out. To cancel keep warm, press the KEEP WARM/CANCEL button and then switch off and unplug the cord from the wall outlet.
Baccarat®
Cooking
The table shows the various functions of the appliance.
The Cooking Cycle
The appliance passes through several stages during use that are referred to as the cooking cycle:
- Prehealing
- Pressurisation
- Cooking
- Keep Warm
Each of these stages are completed automatically. At the conclusion of the cooking stage, the appliance will automatically keep the cooked food warm for up to 24 hours.
Preset Pressure Cooking Programs
The table opposite lists the 13 preset pressure programs and adjustable options.
The default cooking times and cooking pressures in the table are programmed for fast and easy cooking of portions of ingredients that are less than 1.3kg in total combined weight.
All the presets listed are where the food is being cooked under PRESSURE. When cooking under pressure, the pressure limiting valve ALWAYS needs to be in the SEALING position BEFORE cooking is started. This is extremely important and is instrumental to your safety and your cooking success.

| Preset Pressure Cooking Program | Liquid Water or Stock | Default Cooking Time | Default Cooking Pressure | Default Cooking Mode | Optional Cooking Pressure | Optional Cooking (Adjust) | User Adjustable Cooking Time (Minimum) (Maximum) |
| Rice | 1 Cup Min8 Cups Max | 12 mins | High Normal 1 min | Low or High | Less Normal More | 8 mins12 mins15 mins | 99 mins |
| Multigrain | 1 Cup Min8 Cups Max | 40 mins | High Normal 1 min | Low or High | Less Normal More | 20 mins40 mins45 mins | 99 mins |
| Risotto | 1 Cup Min6 Cups Max | 35 mins | High Normal 1 min | Low or High | Less Normal Mora | 20 mins35 mins45 mins | 98 mins |
| Porridge | 1 Cup Min6 Cups Max | 15 mins | High Normal 1 min | Low or High | Less Normal More | 12 mins15 mins20 mins | 98 mins |
| Eggs | 1 Cup Min | 5 mins | High Normal 1 min | Low or High | Less Normal Mora | 4 mins5 mins6 mins | 99 mins |
| Sleam | 1 Cup Min4 Cups Max | 15 mins | High Normal 1 min | Low or High | Less Normal Mora | 12 mins15 mins20 mins | 98 mins |
| Vegetables | 1 Cup Min | 15 mins | High Normal 1 min | Low or High | Less Normal Mora | 10 mins15 mins20 mins | 99 mins |
| Soup | 1 Cup Min8 Cups Max | 15 mins | High Normal 1 min | Low or High | Less Normal More | 12 mins15 mins20 mins | 98 mins |
| Bean/Chilli | 1 Cup Min | 30 mins | High Normal 1 min | Low or High | Less Normal More | 25 mins30 mins40 mins | 98 mins |
| Moat/Stow | 1 Cup Min | 35 mins | High Normal 1 min | Low or High | Less Normal More | 20 mins35 mins45 mins | 98 mins |
| Poultry | 1 Cup Min | 15 mins | High Normal 1 min | Low or High | Less Normal More | 10 mins15 mins25 mins | 99 mins |
| Dessert | 1 Cup Min4 Cups Max | 15 mins | N/A Normal 1 min | N/A | Less Normal Mora | 25 mins40 mins50 mins | 99 mins |
| Pork/Pibs | 1 Cup Min | 18 mins | High Normal 1 min | Low or High | Less Normal Mora | 13 mins18 mins25 mins | 99 mins |
| Beef | 1 Cup Min | 35 mins | High Normal 1 min | Low or High | Less Normal Mora | 30 mins35 mins40 mins | 99 mins |
*Recommended cooking limos are a guide only.
Baccarat®
WARNING: Do not use oil, melted butter, cream or milk as the base cooking liquid.
WARNING: Never operate the appliance when it is empty. We recommend cooking with no loss than 1 litre of combined food and liquid to achieve the best cooking results.
Using the Preset Cooking Programs
-
Prepare your ingredients and fill the inner pot.
-
Fit and lock the lid into position.
Note: When cooking there should always be a minimum of 1/2 a cup of liquid added. Anything less might cause the appliance to boil-dry and damage the inner pot.
- Set the pressure limiting valve to the SEALING position.
- Plug into a wall outlet and switch on. The "OFF" message will be displayed.
- Select a preset cooking programs by rotating the control dial.
- Once the preset is selected, the indicator light next to the preset will illuminate red.
- Press the START button. The 'ON' message will be displayed, the appliance has started.
- The appliance will automatically preheat, build pressure and then start cooking the ingredients using the pressure method. Once preheating is finished and enough pressure is built in the appliance, the LCD display will indicate the preset time and then start counting down the cooking time.
- Once the timer has reached zero, the keep warm function will be automatically activated and the red indicator light above the KEEP WARM/CANCEL button, will illuminate.
-
Release the pressure using one of the two available methods.
-
Once all the internal pressure is released, switch off and unplug from the wall outlet.
- Carefully remove the lid.
- To stop the cooking cycle at any point, press the KEEP WARM/CANCEL button.
WARNING: Do not move the appliance when it is powered on or during any point in the cooking cycle.
Adjusting Pressure
The default pressure setting for all preset cooking programs is high pressure, excluding the YOGHURT, SLOW COOK. DESSERT and SAUTE presels. This gives the latest results for cooking, to lower the pressure follow the steps below:
- Follow the steps 1 through to 5 (Preset cooking program - this page).
- Press the PRESSURE LEVEL button to select either high or low pressure. Shown on the LCD display screen (found in the middle of the display).
- After you have made your selection, continue to follow the steps beginning with step 6 and continuing through to step 11 to start the cooking process.
Note: Adjustments can be made until the 'On' message is displayed on the LCD display. Once 'On' is displayed, no more adjustments can be made. If you have not selected the right settings for your cooking, press the KEEP WARM/CANCEL button to cancel the cooking process and make your selections again.
After completing step 1 through to step 5, you can adjust the cooking time automatically, by using the Adjust button, or manually by pressing the dial in once and scrolling to increase the time, before continuing with steps 6 to step 11.
Adjusting the Mode
The default mode setting for all preset cooking programs is normal mode. This excludes the SAUTÉ function. This represents the regular or recommended cooking time for the selected preset.
Normal – is the recommended cooking time for the presel cooking program. This is the default setting.
More – results in a longer cooking time, where the ingredients will be cooked more than the normal default setting.
Less – results in a shorter cooking time, where the ingredients will be cooked less than the normal default setting.
- After following steps 1 to 5 on page 20, press the ADJUST button on the control panel and you can quickly cycle between the three available modes as per below. Either less or more time will be added to the cooking time depending upon your selection.
![graph TD A["Normal (default)"] --> B["MoreLess"] B --> C C --> A](/content/2026/05/1015918/images/2f17816cf64eeaaafeb56fff32e53c9867654fd0a3d3dc33431a1c9392656bb6.jpg)
Refer to the table on page 19 to review the adjusted cooking time for each mode.
- After you have made your selection, continue to follow the steps on pages 20 beginning with step 6 and continuing through to step 11 to start the cooking process.
Manual Cooking and Time Adjustment
The cooking time for each preset cooking program can also be manually adjusted by the user. This represents the length of time the cooking stage lasts within the cooking cycle.
It is important to note that this time does not represent the total time taken to complete the whole cooking cycle, rather the cooking stage only. The appliance will still need time to preheat and build pressure and the timer will only start to countdown after this has occurred.
The table on page 19 indicate the maximum and minimum cooking times that can be manually adjusted per preset (User Adjustable Cooking Time).
Follow the steps below to manually adjust the cooking time of any preset cooking program.
- Follow the steps 1 through to 5 (Preset cooking program page 20).
- Press the PRESSURE LEVEL button to select either high or low pressure. The LCD display screen will indicate whether you have selected high or low pressure (found in the middle of the display).
- Next, press the control dial in once and scroll to adjust the time by minute or hour increments.
- After you have made your selection, continue to follow the steps on pages 20 beginning with step 6 and continuing through to step 11 to start the cooking process.
Special Cooking Programs Sauté Program
This setting allows for cooking over high heat inside the inner pot without the lid fitted.
Note: Use the sauté function to brown meats before slow or pressure cooking. Also sauté vegetables, onions and garlic before using as ingredients in recipes.
Baccarat®
- Remove the lid and set it aside
- Add a little oil or butter to the bottom of the inner pot, then add your ingredients.
- Plug into a wall socket and switch on
- Leave the lid off and press the SAUTE button on the control panel.
- Once the SAUTÉ button has been pressed, the indicator light above the preset button will illuminate red. The default cooking time of 30 minutes will be displayed on the LCD display.
- Press the START button. The LCD display will display 'On' the appliance has started heating up.
- Once the LCD display displays the 'Hot' message this means that the appliance has healed up to the correct temperature and it will start cooking for the time that was selected.
- Stir or turn over the ingredients as needed until the desired colour and consistency has been achieved.
Note: Unlike pressure cooking, the time selected will not countdown on the LCD display. The 'Hot' message will be displayed continuously.
-
Once the time selected has expired, the keep warm function will automatically be activated.
-
To stop the cooking cycle at any point, press the KEEP WARM/CANCEL button.
-
Allow the appliance to cool for 2-3 minutes before attempting to start pressure cooking. If the appliance will not allow a preset cooking program to be selected, allow it to cool for a longer period before trying again.
Note: The Sauté function uses high heat. Carefully monitor your ingredients while cooking as they can quickly burn. The ingredients will need to be stirred or turned over multiple times.
Slow Cooking
This setting allows for your appliance to operate as a slow cooker giving you added convenience and additional cooking options.
- Sauté any meats and vegetables first, before starting slow cooking. Remember that only a small amount of oil needs to be used.
- Prepare ingredients and place them inner pot making sure liquid is added.
- Fit and lock the lid into position
Note: When using the slow cook function, it is essential that liquids such as gravy, water, stock etc., be added to the rest of the ingredients. Please use your recipe to determine the amount of liquid to be added and NEVER fill the inner pot over the MAX line.
- Set the pressure limiting valve to the VENTING position ready for slow cooking.
- Plug the appliance into a wall outlet and switch on. The LCD display screen will display the 'OFF' message.
- Press the SLOW COOK button on the control panel. Once pressed, the indicator light above the SLOW COOK button will illuminate red. The default cooking time of 6 hours will be displayed.
- Press either the SLOW COOK button to automatically select less or more cooking time (00.30/06.00/09.30 hours), or press the dial in once and scroll to adjust by 30 minute increments up to 9.5 hours.
- Press the START button. The LCD display will display the 'On' message.
-
The appliance will automatically preheat and then start cooking the ingredients using the slow cook method. Once preheating is finished, the LCD display will indicate the preset time and then start counting down the cooking time.
-
Once the timer has reached zero, the keep warm function will be automatically activated. The keep warm icon will be illuminated on the LCD display and the red indicator light above the KEEP WARM/CANCEL button will illuminate.
- To stop the cooking cycle at any point, press the KEEP WARM/CANCEL button. The 'OFF' message will be displayed on the LCD Display.
WARNING: As with any slow cooking recipe, the food should be checked regularly, stirred and more liquid added if needed. Ensure that the food is checked at regular intervals. There will not be any pressure build-up in the appliance so you are able to remove the lid.
Yoghurt Function
This appliance has the ability to make yoghurt with unpasturised milk, as well as regular milk bought in the supermarket (which is already pasturised). If pasteurisation is needed then follow process 1.
Process 1 - Pasteurisation (if needed)
- Pour milk into the inner pot.
- Fit and lock the lid into position.
- Set the pressure limiting valve to the SEALING position ready for normal cooking.
- Plug the appliance into a wall outlet and switch on. The 'OFF' message will be displayed.
- Press the YOGHURT Button. The timer display screen will display the default time of 8 hours.
- Immediately press the ADJUST button on the control panel until the word 'boiL' is displayed on the LCD display.
- Press the START button. The appliance will then automatically begin to pasteurise the milk, which is an important step in the yoghurt making process.
- Once the pasteurisation process is complete the appliance will beep and the LCD display
screen will show 'Yogt'.
- SLOWLY move the pressure limiting valve from the SEALING position towards the VENTING position until it can go no further. We recommend doing this slowly and not in one, quick movement.
- The lid should easily be removed, as pressure does not build-up while using the Yoghurl function. If for some reason the lid will not rotate, please wait a few minutes and try again.
- Remove the inner pot carefully using oven mints and place on a wire rack or heat proof surface to cool.
- Allow the milk to cool to 38°C to 40°C then move onto Process 2 immediately.
Process 2 – Making Culture Yoghurt (see recipe on page 43)
- Follow the recipe on page 43
a. If following process 1 add the Yoghurt Culture (Starter) to the inner pot referring to the recipe you are using.
- Place the inner pot into to the appliance
a. If following process 1 use oven mitts.
- Fit and lock the lid into position.
- Set the pressure limiting valve to the SEALING position ready for normal cooking
- Plug into a wall socket and switch on. The LCD display will display the 'OFF' message.
- Press the YOGHURT button on the control panel. Once pressed, the indicator light above to YOGHURT will illuminate red. The default cooking time of 8 hours will be displayed on the LCD display.
- Press either the YOGHURT button to automatically select less or more cooking time (adjustable time 06.00 to 24.00 hours),
Baccarat®
or prose the dial in once and scroll to adjust by 30 minute increments up to 24 hours. Do not select 'boil' at this stage of the cooking cycle. Only a time should be selected. Usually, 8 hours for normal yoghurt and 24 hours for thicker yoghurt. If unsure, you can check the yoghurt at any time, as the appliance does not build-up pressure while operating in the Yoghurt preset.
8. Press the START button. The 'On' message will be displayed.
9. The appliance will reach the fermentation temperature automatically and will continue functioning until the cooking time has elapsed.
10. To stop the cooking cycle at any point, press the KEEP WARM/CANCEL button.
11. Once cooking is complete, the appliance will beep and the LCD display screen will display the 'Yogt' message. Press the KEEP WARM/CANCEL button to turn the appliance off.
12. Open the lid and remove the inner pot carefully using oven mitts and place on a wire rack or heat proof surface to cool.
13. Carefully transfer the yoghurt to a container and refrigerale as directed in the recipe. Strain for a thicker yoghurt.
CAUTION: The lid may be extremely hot. Avoid contact with all hot surfaces on the appliance. Use of a heat resistant oven mitt to safely grasp the lid.
Dessert Function
This setting allows for your appliance to operate as an oven, giving you added convenience and additional cooking options. Alternatively you can add water and use the sleaming rack (as per the recipe on page 39)
-
Prepare your ingredients in a mixing bowl as per the recipe.
-
Lightly grease the inner pot with cooking spray and line with baking paper
- Pour the cake mixture directly into the lightly greased and lined inner pot.
- Refit the inner pot back into the appliance.
- Fit and lock the lid into position.
- Set the pressure limiting valve to the VENTING position ready for cooking.
- Plug into a wall socket and switch on.
The 'OFF' message will be displayed.
- Select the DESSERT preset.
- Press the START button. The 'On' message will be displayed and the cooking process started.
- The appliance will automatically preheat and then start cooking the ingredients.
Note: If using the no water method you may release the lid at any time as there will be no pressure build-up.
- Once the cooking cycle has finished and the keep warm function has activated, press the KEEP WARM/CANCEL button on the control panel. The LCD display will display the 'OFF' message.
- Carefully remove the lid and insert lid into the lid rest tab. The top of the lid will need to be facing outwards.
- Switch off and unplug from the wall outlet.
CAUTION: The lid may be extremely hot. Avoid contact with all hot surfaces on the appliance. Use a heat resistant oven mitt to safely grasp the lid.
-
Carefully remove the inner pot and place on a heat resistant, dry, flat surface.
-
Using a spatula carefully remove the cake from the inner pot and place onto a cooling rack to allow the cake to cool.
CAUTION: The inner pot will be hot. Use oven mitts to protect your hands from burns when removing.
Delayed Start Function
If you wish to program the appliance to automatically cook your ingredients and have them ready at a later time, you can delay the start of the cooking cycle for up to 24 hours.
- Prepare your ingredients and fill the inner pot.
Note: It is essential that you DO NOT use the delayed start function when using ingredients that may spoil.
- Fil and lock the lid into position.
- Set the pressure limiting valve to the SEALING position ready for regular pressure cooking.
- Plug into a wall socket and switch on. The 'OFF' message will be displayed.
- Press the DELAY START button. Both the delay start icon will illuminate and flash and timer will display the default 30 minutes on the LCD display.
- Press the DELAY START button again or press the control dial in once and scroll to increase the delay start time in 30 minute increments to a maximum of 24 hours.
- Once your preferred delay time is flashing on the LCD display, select the desired preset cooking program. Make any necessary adjustments to cooking time and pressure as per normal.
- Press the start button and the delay time will commence counting down.
Care Guide
- Switch the appliance 'OFF' and unplug from the wall socket.
- Ensure the appliance has been depressurised correctly and has completely cooled before cleaning. Remove lid, condensation cup and power cord.
- Wipe clean with a damp cloth the outer body and inside the main body. Avoid using abrasive materials to preserve the condition of the appliance. NEVER immerse the outer body in any liquids or pour liquid into it.
- Clean with warm soapy water, lid and all lid contents (silicone seal ring, vent, float valve, pressure limiting valve) and lot dry thoroughly.
- Wash the inner pot, steam rack, condensation cup, measuring cup and plastic spoon in warm soapy water and dry thoroughly.
- Make sure all parts are dried thoroughly before reassembling your appliance.
- Do not store the lid on tightly. This preserves the seal ring function from wear and tear.
Note: The accessories are not dishwasher safe except the inner pot and steam rack.
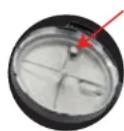
How to Remove the Filter
To remove the filter, grasp and pull it up vertically, away from the lid. To reattach, simply line up the filter and press down until the filter clicks into place.
Baccarat®
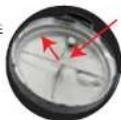
How to Remove the Silicone Seal Ring
PULL UP TO REMOVE FOR CLEANING
FUSH
DOWN
TO SEA
BEFORE
COOKING
To remove gently pull the silicone seal ring by the metal brackets until it comes away from the lid. Wash and dry thoroughly. To reallach, push the silicone seal ring with pressure up into the lid, to ensure it is correctly fitted.
Storage
Before packing away for storage, ensure it is clean and dry. We recommend storing the appliance, with all its accessories inside in a dry cupboard. Do not place heavy objects on top of the appliance during storage.
Disposal
Dispose of the appliance in accordance with local environmental laws and guidelines.
Rice Function
• Always wash the rice before cooking, this helps to remove starch preventing clumping.
- Ensure rice is spread evenly across the bottom of the inner pot before cooking.
- For fluffier rice add a little extra water, for firmer rice a little loss.

White rice including Long Grain, Jasmine and Basmati.
| Cups of uncooked rice | Cups of cold water | Makes cups of cooked rice | Est Cooking time (Mins) |
| 2 | 2 | 5 | 10-12 |
| 4 | 4 | 9 | 12-15 |
| 6 | 6 | 15 | 15-20 |
| 8 | 8 | 16 | 20-25 |
*approx. timing, adjust to lasle.
Multigrain Function
• Always wash the rice before cooking, this helps to remove starch preventing clumping.
- Ensure rice is spread evenly across the bottom of the inner pot before cooking.
- For fluffler rice add a little extra water, for firmer rice a little less.

Brown Rice Includes Sushi, Arborlo and Quinoa.
| Cups of uncooked rice | Cups of cold water | Makes cups of cooked rice | Est Cooking time (Mlns) |
| 2 | 3 | 5 | 25-30 |
| 4 | 6 | 10 | 30-40 |
| 6 | 9 | 15 | 40-45 |
*approx. timing, adjust to taste.

Baccarat®
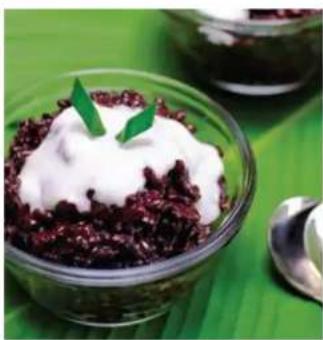
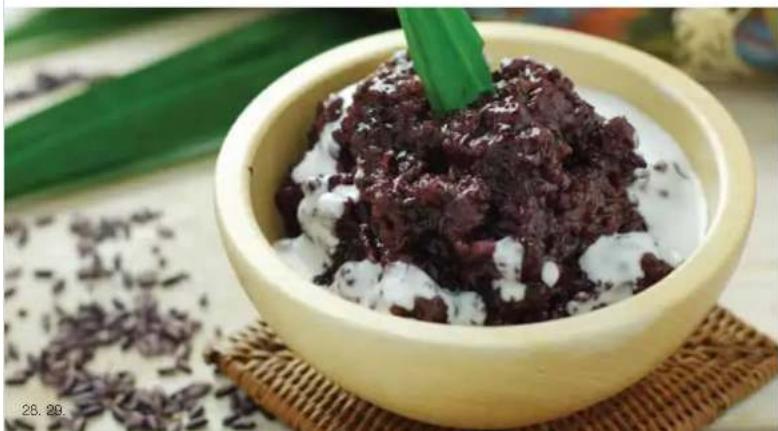
Black Rice Pudding
Multigrain Function
Serves: 6
Prep: 5 minutes
Cook: 20 minutes
Ingredients
- 250g black glutinous rice, rinsed
- 2 x 400g can coconut milk
- 400ml water
- 1 tsp vanilla extract
- ¼ cup brown sugar
- Pinch of sea salt
Toppings
Sliced mango, to serve
Toasted coconut flakes, to serve
Method
- Place the rice into the inner pot along with 1 can of coconut milk, the water and vanilla. Stir well to combine.
- Attach the lid, select the multigrain function and adjust the cooking time to 20 minutes.
- When the cooking time has completed, release the pressure slowly using the quick release method.
- Stir through the sugar and salt and then allow the mixture to sit for 5 minutes to absorb any remaining liquid.
- Divide the rice between serving bowls and garnish with sliced mango, coconut flakes and drizzle over the remaining can of coconut milk. Enjoy!
Pea and Prawn Risotto
Risotto Function
Serves: 6
Prep: 10 minutes
Cook: 20 minutes
Ingredients
- 2 tbsp olive oil
- 300g peeled green prawns
- 1 brown onion, finely diced
- 1 celery stick, finely diced
- 300g arborio rice
- 250ml white wine
- 1L chicken slock
(use fish stock lor pescalarian)
- 1 tsp sea salt
- 200g frozen peas, defrosted
- 1 long rod chilli, deseded
and finely chopped
- 1 lemon, zest and juice
- 100g baby spinach
- ¼ cup picked parsley leaves.
roughly chopped
Method
- Using the sauté function, heat the oil and add the prawns, cooking until slightly golden. Roughly chop and set aside.
- Add the onion and celery to the inner pot and saule for 5 minutes or until soft. Stir through the rice and continue to cook for 2 minutes or until the rice is slightly translucent.
- Deglaze with wine and then stir through the stock and salt.
- Attach the lid, select the risotto function and adjust the cooking time to 5 minutes.
- When the cooking time has completed, release the pressure slowly using the quick release method.
- Stir through the peas, chilli, lemon juice and zest, spinach, parsley and the chopped prawns. Stir well to combine, season again to taste, and serve with an extra drizzle of olive oil. Enjoy!

Baccarat®
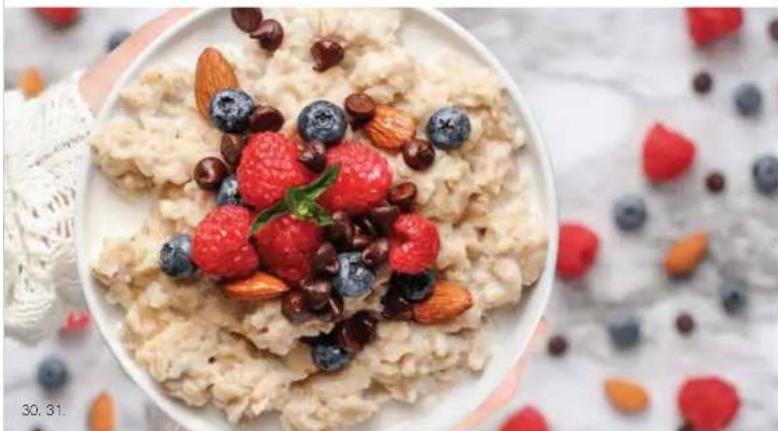
Classic Porridge
Porridge Function
Serves: 6 (4 cups)
Prep: 2 minutes
Cook: 5 minutes
Ingredients
- 1½ cups rolled oats
- 1½ cups milk
- 3 ½ cups water
- 1 tsp cinnamon
Method
- Combine the oats, milk, water and cinnamon in the inner pot. Stir well to combine.
- Attach the lid, select the porridge function and adjust the cooking time to 5 minutes.
- When the cooking time has completed, turn off and allow the pressure to release naturally for 10 minutes. Use the pressure valve to release any remaining pressure after this time.
- Divide porridge between serving bowls and garnish with your favourite toppings.
Serving suggestions:
Honeycomb Butter
Combine 200g softened butter, 1 x 50g Violet Crumble bar (crushed) with 1 tbsp honey in a food processor until combined. Dollop honeycomb butter on top of hot porridge.
Blueberry Compote
Combine 1 cup frozen blueberries in a small saucepan with 1 tbsp lemon juice and 1 tbsp brown sugar. Cook over a medium heat for 10 minutes, stirring continuously. Swirl compote through hot porridge.
Nuts and Seeds Mix
Combine 1/2 cup (1 cup total) of roughly chopped almonds, macadamias, hazelnuts and pecans on a lined baking tray. Sprinkle over 1 tsp of pepilas, 2 tsp of maple syrup and a pinch of sea salt and loss well to coal. Bake for 10 to 12 minutes at 180°C until well toasted. Sprinkle over hot porridge.
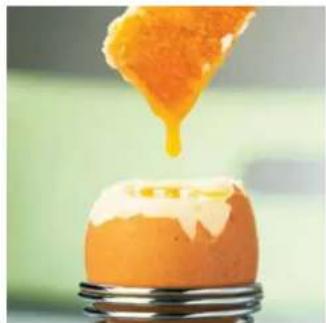
Eggs
- Simply add 2 cups of water into the bottom of the inner pot.
- Place in steaming tray and add eggs to boil.
- Attach lid and turn pressure valve to sealing, select eggs and choose your preferred timing. Once finished use the quick release method to stop your eggs from further cooking.
| Eggs Cooking Mode Est Cooking | Time (Mins) |
| Soft boiled | Less | 4 |
| Medium Boiled | Normal | 5 |
| Hard Boiled | More | 6 |
*approx. timing, adjust to taste.

Baccarat®
Steam Function
- Simply add a cup of water into the bottom of the inner pot.
- Place in steaming tray and add ingredients to steam.
- Attach lid and turn pressure valve to sealing, select steam function and choose your preferred timing.
- Once finished use the quick release method to stop your ingredients from further cooking.
Note: Cut ingredients to a similar size and don't overlap for even steaming.

| Steaming Weight Food type Est Cooking | | time (Mins) |
| Fish | | Fillet | 8-10 |
| Poultry | | Breast | 20 |
| Dumplings | | Fresh | 12-15 |
| Vegetables | 250g | Snow peas | 4-5 |
| 250g | Frozen peas | 4-5 |
| 250g | Broccoli | 8-10 |
| 500g | Cabbage | 10-12 |
| 2 bunches | Asparagus | 12-14 |
| 300g | Beefroot | 12-14 |
| 2 fresh cobs | Corn | 20-25 |
*approx. timing, adjust to taste.

Root Vegetable Curry
Vegetable Function
Serves: 6
Prep: 15 minutes
Cook: 20 minutes
Ingredients
- 2 tbsp olive oil
- 1 large brown onion, sliced
- 1 bunch silverbeet. leaves
and stems separated and
roughly chopped
- 3 cloves garlic, minced
- 2 tsp finely grated ginger
- 1 (bsp ground turmeric
- 2 tsp ground cumin
- 2 tsp ground coriander
- 500ml vegetable stock
- 400g can coconut milk
2 tsp sea salt
- 2 large carrots, peeled, 5cm dice
- 1 large parsnip, peeled, 5cm dice
- 1 large turnip, peeled, 50m dice
- 1 large swede, peeled, 5cm dice
- Coriander, to serve
- Basmali rice, to serve
Method
- Using the sauté function, heat the oil, add the onion and silverbeel stems and cook until softened. Add the garlic, ginger, turmeric, cumin and conander and sauté for a further 2 minutes.
- Add the stock, coconut milk, salt, carrots, parsnip, turnip and swode, and stir well to combine.
- Attach the lid, select the vegetable function and adjust the cooking time to 10 minutes.
- When the cooking time has completed, release the pressure slowly using the quick release method.
- Stir through the silverboot leaves and season to lasle. Divide between serving bowls, serve with freshly steamed basmati rice.
Baccarat®
Butternut Pumpkin Soup
Soup Function
Makes: 10 cups
Prep: 10 minutes
Cook: 22 minutes
Ingredients
- 2 tbsp olive oil
- 1 brown onion, diced
- 1 leek, washed and sliced
- 3 garlic cloves, sliced
- 1 lsp ground coriander
- 1 lsp ground cumin
- 1.5kg peeled and deseeded bullternul pumpkin, chopped
- 2 carrots, peeled and diced
- 1 L vegetable stock
- 1 tsp sea salt
- ½ cream, plus extra to serve
Method
- Using the saule function, heal the oil and cook in the inner pot, the onion, teek and garlic for 5 minutes or until soft. Add the coriander and cumin and cook, stirring, for a further 2 minutes until the spices are toasted and aromatic.
- Add the pumpkin, carrots, stock and salt, and stir well to combine.
- Attach the lid, select the soup function and adjust the cooking time to 15 minutes.
- When the cooking time has completed, release the pressure slowly using the quick release method.
- Stir through 1/2 cup of cream and then use the Baccarat Quick Mix blending bar to blend the soup to a smooth consistency.
- Season to taste and serve with an extra drizzle of cream.

Bean/Chilli Function
- Use this function to either cook up your favourite bean soups, curries, chilli's or simply to cook your beans.
- When cooking beans follow the instructions on the packet for the amount of water needed.

| Pulse Soaked - Quick Release Method (Mins) | Soaked - Natural Release Method (Mins) | Unsoaked - Quick Release Method (Mins) |
| Red Kidney Bean | 10-12 | 5-8 | 20-25 |
| Cannellini Bean | 10-13 | 6-8 | 30-40 |
| Soy Bean | 9-12 | 16-18 | 28-35 |
| Chickpea | 13-18 | 9-14 | 30-40 |
| French Puy Lentil | | | 10-12 |
| Green/ Brown Lentil | | | 8-10 |
| Red/yellow Lentil | | | 4-6 |
| Green/ yellow Split peas | | | 6-10 |
*approx. timing, adjust to taste. Use the recommended amount of water to cook beans.
Baccarat®
Pumpkin Thai Green Curry
Meat/Stew Function
Serves: 6
Prep: 15 minutes
Cook: 10 minutes
Ingredients
- 2 lbs olive oil
- 2 lbs soy sauce
- 1 medium butternut pumpkin cut
into small cubes
- ½ bunch fresh coriander
(save some for garnish)
- 2 cans coconut milk
- 500 mls vegetable stock
- 3 cloves of garlic
- 2 tsp grated ginger
- 4 tbs green curry paste
- ½ bunch fresh coriander
(save some for garnish)
- Sugar snap peas
- Edamame beans
- 1 bunch of asparagus spears
- Basmati rice to serve
(Cooked with the rice option
in the multicooker)
Garnish
- Lime wedges
- Spring onions sliced thinly
- Green chilli slices
- Red chili slices
- Coriander leaves
Method
-
Placed chopped cubes of pumpkin in a bowl and add soy sauce. Toss to coat and leave for 5 mins to soak in.
-
Using the sauté method, heat ½ the olive oil and add the pumpkin and sauté until golden brown. Remove from the heat and place aside.
-
In a food processor or blender place washed coriander and coconut milk and blend until combined.
-
Add the remaining olive oil and gently sauto garlic, ginger, green curry paste until heated through. Add the blended coconut milk and vegetable stock and stir well to combine.
-
Place pumpkin back into the pot, add the sugar snaps, edamame beans and asparagus spears and adjust the cooking selector to meat/stew and cook for 10 minutes. Less if you like your vegetables slightly crunchy.
-
When the cooking time has completed, release the pressure slowly using the quick release method.
-
Garnish with lime wedges, spring onions, chilli slices and coriander leaves and serve with basmat rice.

Baccarat®
Chilli Con Carne
Bean/Chilli Function
Serves: 6 - 8
Prep: 5 minutes
Cook: 60 minutes
Ingredients
- 3 tbsp olive oil
- 2 brown onions, finely diced
- 3 garlic cloves, sliced
- 1 red capsicum, diced
- 2 tsp chilli powder
- 1 tbsp smoked paprika
- 1 tbsp ground cumin
- 700g lean minced beef
- 450ml beef stock
- 2 x 400g can chopped tomatoes
- 2 tbsp tomato paste
- 2 x 400g can red kidney beens, drained
- 1 tbsp sea salt
- ½ bunch coriander, to serve
- Corn chips and guacamole, to serve
Method
-
Using the sauté function, heat 2 tbsp of the oil and cook the onion, garlic and capsicum for 5 minutes or until soft.
-
Add the chilli powder, paprika and cumin and cook, stirring, for a further 2 minutes until the spices are toasted and aromatic. Remove this mixture from the inner pot and sel aside.
- Deglaze the pot with ¼ cup of the beef stock and then pour this over the onion mixture.
- Heal the remaining 1 tbsp of oil and add the beef mince. Cook, stirring occasionally, until well browned. Add the remaining beef stock, tomatoes, tomato paste, kidney beans, sea salt and cooked onion mixture to the pot, and stir well.
- Attach the lid, select the bean/chilli function and adjust the cooking time to 30 minutes.
- When the cooking time has completed, release the pressure slowly using the quick release method
- Select the saute function and simmer for a further 12 minutes, reducing the sauce by half.
- Season the con carne to taste, garnish with coriander and serve with corn chips and guacamole.

Moroccan Fish Stew
Meat/Stew Function
Serves: 6
Prep: 10 minutes
Cook: 20 minutes
Ingredients
- 1 tosp olive oil
- 1 brown onion, thinly sliced
- 1 red capsicum, thinly sliced
- 2 tsp finely grated ginger
- 1 garlic clove, minced
- 1 tsp ground cumin
- 1 tsp ground turmeric
- 1 cinnamon slick
- Pinch cayenne pepper
- 400g can chopped tomatoes
- 1 tsp sea salt
- 400g can chickpeas, drained
- 100g mixed pitted olives
- 500g firm, skin-on fish fillets.
cut into 5cm pieces
- 100g sliced skin-on almonds, toasted
- 1 cup coriander leaves, chopped
- Couscous, to serve
Method
- Using the sauté function, heat the oil and cook the onion for 5 minutes or until soft. And the ginger, garlic, cumin, turmeric, cinnamon and cayenne pepper and cook, stirring; for a further 2 minutes until the spices are toasted and aromatic.
- Add the tomatoes, 1/2 cup water and salt and simmer for 5 minutes.
- Stir through the chickpeas and olives and then carefully fold through the fish pieces.

- Attach the lid, select the meat/stew function and adjust the cooking time to 5 minutes.
- When the cooking time has completed, release the pressure slowly using the quick release method.
- Stir through the sliced almonds and coriander and divide between serving bowls.
Serve with couscous.
Baccarat®
Butter Chicken
Poultry Function
Serves 6
Prep: 20 minutes
Cook: 30 minutes
Ingredients
- 3 tbsp olive oil
- 8 skinless chicken thighs, trimmed and halved
- 1 brown onion, sliced
- 3 garlic cloves, minced
- 2 lsp finely grated ginger
- 2 tbsp garam masala
- 2 tbsp ground turmeric
- 2 tbsp paprika
- 2 tbsp ground coriander
- 2 tbsp ground cumin
- 2 tsp sea salt
- 3/4 cup tomato paste
- 1 cup chicken stock
- 1 lemon, zest and juice
- 400g plain yoghurt
- 2 tbsp maple syrup
- ½ cup creat
- 1 cup picked coriander leaves.
chopped, lo serve
Method
- Using the saule function, heat the oil and brown the chicken on all sides. Work in batches of six pieces at a time to avoid crowding the inner pot. Remove the chicken and set aside.
- Add the onion to the pot and saute for 5 minutes until softened, followed by the garlic, ginger, spices and salt. Cook, stirring for one minute then add the tomato paste. Cook for a further 2 minutes before deglazing with the chicken stock.
- Gently stir through the reserved chicken, lemon juice and zest.
- Attach the lid, select the poultry function and adjust the cooking time to 8 minutes.

- When the cooking time has completed, turn off and allow the pressure to release naturally for 20 minutes.
- Use the pressure valve to release any remaining pressure after this time.
- Remove the cooked chicken and set aside, loosely covered, to rest.
- Add the yoghurl, maple syrup and cream to the sauce and use a stick blender to blend to a smooth consistency. Season to taste then return the chicken to the pot and stir well to coat.
- Divide between serving bowls, top with chopped coriander and serve with a side of basmati rice.
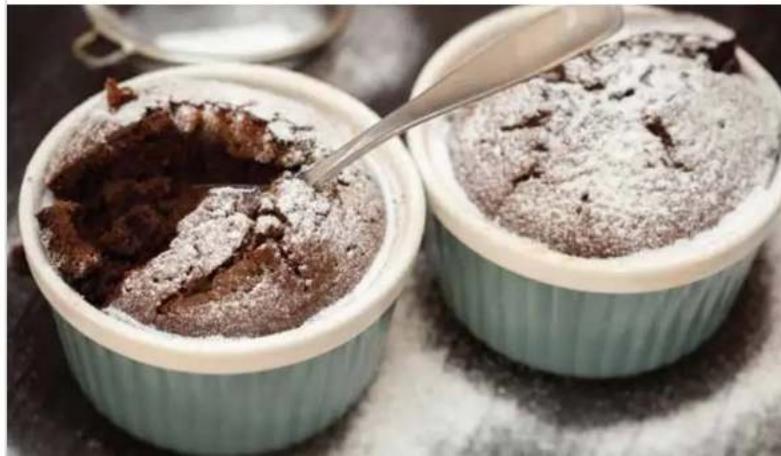
Chocolate Steam Puddings
Dessert Function
Makes: 6
Prep: 10 minutes
Cook: 24 minutes
Ingredients
- 150g butte
- 150g dark chocolate
- 150g caster sugar
- 3 large eggs, beaten
- 75g plain flour
Method
- Place the butter and chocolate in a medium saucepan over a medium-low heat and stir with a spatula until melted and smooth. Remove from the heat, add the sugar and stir until the sugar has dissolved and the mixture has cooled slightly.
- Add the beaten eggs to the warm chocolate mixture and work quickly to incorporate. Add the flour and mix until smooth.
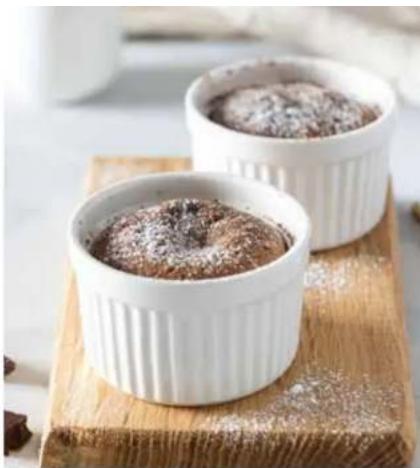
- Spray 6 ramekins (180ml capacity) with cooking spray and divide the baller evenly between each.
- Place the steam rack along with 1 cup of water into the base of the inner pot. Place three ramekins on top of the steam rack.
- Attach the lid, select the dessert function and adjust the cooking time to 12 minutes.
- Remove the ramekins and repeat with the remaining three puddings.
- Serve immediately with ice-cream or cream.
Baccarat®
Beef & Stout Stew
Beef Function
Serves: 6
Prep: 15 minutes
Cook: 60 minutes
Ingredients
- 2 tbsp olive oil
- 1.5kg chuck steak, 4cm dice
200g speck, diced
- 1 large brown onion, sliced
- 2 cloves garlic, sliced
- 2 carrots, peeled and diced
- 2 sticks celery, diced
- 3 tbsp plain flour
- 440ml can stout
- ¼ cup tomato paste
- 400ml beef stock
- 2 lsp sea salt
- 1 bay leaf
- 2 sprigs thyme
- Parsley, chopped, to serve
Method
-
Using the saule function, heat the oil, add the beef in batches and brown all over. Remove the beef and set aside. Repeat until all beef has been browned.
-
Add the speck, onion, garlic, carrots and celery and sauté for 10 minutes or until soft.
- Add the flour and continue to cook, stirring, for 2 minutes.
- Add all remaining ingredients to the pot, including the beef and stir well to combine
- Attach the lid, select the beef function (35 minutes) and press start.
- When the cooking time has completed, release the pressure slowly using the quick release method.
- Strain the mixture, separating the solids from the liquid. Return the liquid to the pot and reduce the sauce until it coats the back of a spoon. Return the solids to the pot and season to taste.
- Divide the stew between serving bowls, garnish with freshly chopped parsley and serve with a side of soft polenta.

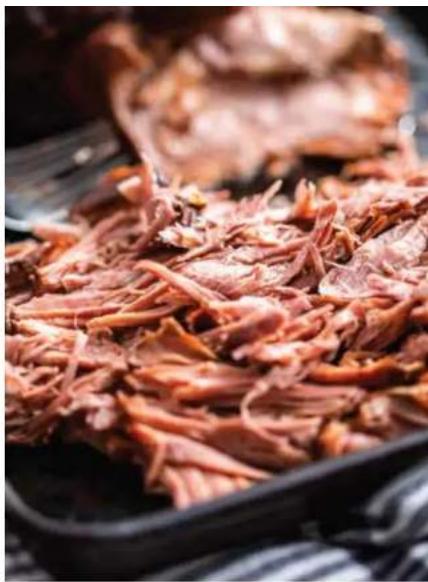
BBQ Pulled Pork
Pork/Rib Function
Serves: 8
Prep: 15 minutes
Cook: 90 minutes
Ingredients
- 1.5kg boneless pork shoulder, trimmed and quartered
2 tsp garlic powder
- 2 tsp onion powder
- 2 tsp paprika
- 2 tsp sea salt
- 1 tsp cracked black pepper
- 3 tbsp olive oil
- 500ml pineapple juice
- 1 large brown onion, sliced
- ½ cup good quality BBQ sauce
Method
- Remove the pork from the fridge and pal it dry with paper towel 1 hr before cooking. This allows the protein to come to room temperature and cook more evenly.
- Combine the garlic and onion powder, paprika, salt and pepper together in a large bowl. Add the pork and toss to coat, ensuring all sides are covered in the spice mix.
- Using the sauté function, heat the oil and brown the pork on all sides. Work in batches of two at a time to avoid crowding the pan. Remove the pork and set aside.
- Doglaze the pan with the pineapple juice, stir through the sliced onion and return the pork to the pan.
- Attach the lid, select the pork/ribs function and adjust the cooking time to 1 hour.
- When the cooking time has completed, turn off and allow the pressure to release naturally for 20 minutes. Use the pressure valve to release any remaining pressure after this time.
- Remove the pork and coarsely shred the meat. Stir through the BBQ sauce and season to taste. Serve the BBQ Pulled Pork with bricche rolls, hot mustard and a side of coleslaw or in tortillas with your favourite loppings.
Baccarat®
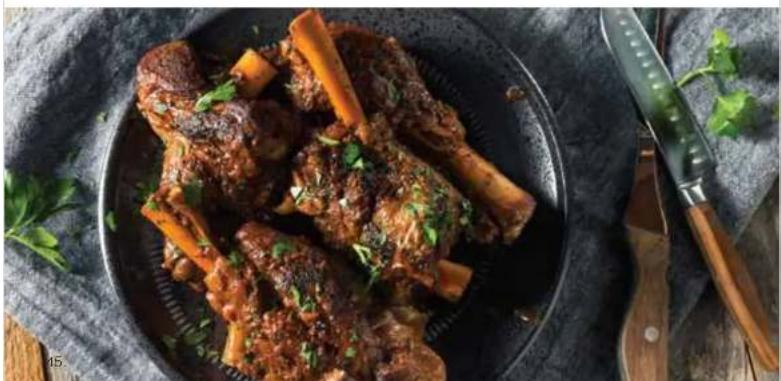
Lamb Shank Ragü
Slow Cook Function
Serves: 6 - 8
Prep: 20 minutes
Cook: 6 hours
Ingredients
- 4 large lamb shanks, trimmed
- ¼ cup plain flour
- 1 tsp sea salt
- ½ tsp cracked black pepper
- 2 tosp olive oil
- 1 large brown onion, sliced
- 3 cloves garlic, sliced
- 2 x 400g tins chopped tomatoes
- 500ml chicken stock
- 3 carrots, peeled and roughly chopped
- 2 sprigs thyme
- 2 lbsp balsamic vinegar
- 1½ tbsp maple syrup
- Sea salt and pepper, to taste
- Parsley, chopped, to serve
Method
- Combine the flour, salt, pepper and lamb in
a large bowl and toss the lamb to coat.
Dust off the excess and set aside.
- Using the sauté function, heat the oil and brown the lamb shanks on all sides. Work in batches
of one or two at a time to avoid crowding
the pan. Remove the shanks and set aside.
- Add the onion and garlic and sauté for two minutes until softened. Add all remaining ingredients and stir well to combine.
- Carefully place the shanks into the sauce ensuring the meat is covered and the bone is facing up.
- Attach the lid, select the slow cook function and adjust the cooking time to 6 hours.
- When the cooking time has completed, turn off and allow the pressure to release naturally for 20 minutes. Use the pressure valve to release any remaining pressure after this time.
- Remove the shanks and set aside.
Strain the sauce then return the liquid to the
pol to reduce until it coals the back of a spoon.
- Pick the meat from the sharks and add it to the strained solids. Place this mixture back into the pot with the reduced liquid and fold gently to combine.
- Divide the ragù between serving bowls, garnish with freshly chopped parsley and serve with a side of mashed potato.
Greek Yoghurt
Yoghurt Function
Makes: 8 cups (2L)
Prep: 5 minutes (+ overnight selling)
Cook: 8 hours
Ingredients
- 41l whole milk
- 70g plain Greek yoghurt,
with 'live cultures'
Method
- Ensure the stainless-steel inner pot is storile by running it through a hot dishwasher cycle or under some boiling water.
- Place the milk and yoghurt into the pot and whisk well to incorporate
- Allach the lid, select the yoghurt function (8 hours) and press start.
- When the cooking time has completed, remove the inner pot and carefully transfer the yoghurt to a muslin-lined sieve. Place the sieve over a large bowl in the refrigerator and allow to strain and set overnight.
- The thickness of your finished yoghurt can be adjusted by adding a few tablespoons of whey back into the strained yoghurt.
- Homemade yoghurt will last, refrigerated, for up to one week.
Note: Make sure the yoghurt label lists 'live
cultures' under the ingredients list. These cultures are necessary to the yoghurt making process.
Tip: If you don't have muslin, then line your sieve with a good quality paper towel.

Baccarat®
Warranty
Baccarat® 12 Month Guarantee
Baccarat® is covered by a "12 Month Guarantee" which is provided during the Warranty Period (defined below) by the following importers in the country in which you bought this product:
Australia: Playcorp Pty Ltd.
www.globalretailbrandsAU.com
Level 3, 425 St Kilda Road
Melbourne Victoria 3004
1300 136 936
The Terms and Conditions of the 12 Month Guarantee are as set out below.
What it covers:
The "12 Month Guarantee" constitutes a warranty that the product is free from defects in workmanship, manufacture and materials, or abnormal deterioration when used in accordance with our "Care and Use Instructions" as contained in this Manual and normal domestic use during the Warranty Period.
What it does not Cover:
To the extent permitted by applicable laws, the 12 Month Guarantee does not cover defects or faults caused to the product by:
- Misuse or a failure to use in accordance with our "Care and Use Instructions", such as improper use and cleaning, neglect, modification, fire or flood, theft or commercial use, or normal wear and tear;
- Defects or damages caused by accessories, replacement parts or repair services other than those that have been authorised by Baccarat ® or the importer; or
- Cosmetic damages that do not impair the function of the product (examples include but are not limited to scratches, water marks, cracks, dents, stains or discolouration to surfaces).
Warranty Period
The "12 Month Guarantee" starts from the date of purchase by the original end user and continues for twelve (12) months from this date (Warranty Period).
Replacement of the product or a part of the product does not extend or restart the Warranty Period.
How to Claim:
To make a claim under the 12 Month Guarantee for a defective product, please cease using the product and contact the importers customer service team for assessment (see contact details at the end of this warranty). You may also present the item at the place of purchase with proof of purchase for an assessment but your claim may be deferred to the importer for further assessment. In order to make a claim under this Warranty, you will need your original proof of purchase and to provide an explanation as to the nature of the defect. You will need to provide your product model number and batch code. This can be found on a sticker and is typically located underneath or on the back of the product. Once we have this information and the details of the problem with your product, we will be able to advise you of next steps required to process your Warranty claim.
You must not Dispose of any Defective Product:
We may need you to send it back to us. If so, we will give you full details of how to prepare it for shipping and how to return it to us free of charge (see under heading 'The costs of claiming' below). You must make a claim or present the item with proof of purchase (as applicable) during the Warranty Period.

What Happens if you make a Claim:
If your claim is assessed to be valid, the product will be repaired or replaced by an alternative product. Any decision as to whether to repair or replace a product is to be made by the importer in its absolute discretion.
If an identical replacement product is not available, the retailer or the importer may replace your product with a new product with equivalent features and specifications as determined by the retailer or the importer where the retail price of the replacement does not exceed the original purchase price paid for the product. Once any product or part has been replaced, the original product or part becomes our property.
The Costs of Claiming:
There is no cost to you for making a claim for a defective product and receiving a replacement or repaired product.
We will be responsible for all shipping costs for the claims under this Warranty which are assessed by the importer as valid. However, we may arrange with you to pick up the replacement or repaired product directly from our business address in certain circumstances. The product will be at your risk whilst in transit between you and the relevant retailer.
Your Statutory Rights:
The purchaser who is a consumer has statutory rights in relation to this product and this Warranty does not affect those statutory rights. Nothing in this Warranty restricts or affects any of the guarantees, rights or remedies given to you under any other relevant law.
New Zealand - Our goods come with guarantees that cannot be excluded under the New Zealand consumer law. You are entitled to your available rights and remedies under the Consumer Guarantees Act 1993.
Australia - Our goods come with guarantees that cannot be excluded under the Australian Consumer Law. You are entitled to a replacement or refund for a major failure and compensation for any other reasonably foreseeable loss or damage. You are also entitled to have the goods repaired or replaced if the goods fail to be of acceptable quality and the failure does not amount to a major failure.
Visit your relevant and local importer website to obtain additional options for submitting a further enquiry through customer service.
Australia; Playcorp Pty Ltd.
www.globalretailbrandsAU.com
1300 136 936.