
GFWD3WH - Bin GEMINI - Free user manual and instructions
Find the device manual for free GFWD3WH GEMINI in PDF.


| Type | Anti-bacterial eco food waste disposer |
| Model | GFWD3WH |
| Power Consumption | 500W |
| Voltage | 220-240V~ |
| Frequency | 50-60Hz |
| Dimensions (H x W x D) | 316 x 253 x 253 mm |
| Processing Modes | Quick, Standard, Ferment |
| Volume Selection | Low, Medium, Large |
| Processing Times (Quick) | Low: 2.5h, Medium: 4h, Large: 5h |
| Processing Times (Standard) | Low: 4h, Medium: 5h, Large: 6h |
| Processing Times (Ferment) | Low: 12h, Medium: 16h, Large: 20h |
| Bucket Material | Aluminum with anti-bacterial coating |
| UV Light | Yes, internal UV sterilization |
| Activated Carbon Filter | Replaceable, recommended every 6 months |
| Safety Features | Lid safety switch, overheat protection, child lock? (not specified) |
| Cleaning | Bucket dishwasher safe; wipe exterior with soft cloth |
| Noise Level | Not specified (typical for food waste disposers) |
| Warranty | Refer to warranty card or website |
Frequently Asked Questions - GFWD3WH GEMINI
User questions about GFWD3WH GEMINI
0 question about this device. Answer the ones you know or ask your own.
Ask a new question about this device
Download the instructions for your Bin in PDF format for free! Find your manual GFWD3WH - GEMINI and take your electronic device back in hand. On this page are published all the documents necessary for the use of your device. GFWD3WH by GEMINI.
USER MANUAL GFWD3WH GEMINI
ANTI-BACTERIAL ECO FOOD WASTE DISPOSER
除臭抑菌環保廚餘機
Please read and retain for future reference.
SAFETY INSTRUCTION - GENERAL
- Use this appliance solely in accordance with these instructions.
- This appliance is for household use only, not for commercial purpose.
- Remove all packaging material from the appliance before use.
- This appliance shall not be used by children of 0 to 8-year old.
- This appliance can be used by children older than 8-year old and persons with reduced physical, sensory or mental capabilities or lack of experience and knowledge, but only if they have been given supervision or instruction concerning use of the appliance in safe way and understand the hazards involved.
• Children should be supervised to ensure that they do not play with the appliance. - Cleaning and maintenance must not be done by children.
- Have any repairs carried out solely by a qualified electrician. Never try to repair the appliance yourself.
- Do not handle the plug or appliance with wet hands.
- Do not immerse the main body in water.
• Children shall not play with the appliance. - Do not leave the appliance unattended when connected to the mains supply.
- Keep hair, loose clothing, fingers and all parts of the body away from openings of the appliance.
- Only use the attachments/accessories supplied with the product.
SAFETY INSTRUCTION - ELECTRICITY AND HEAT
- Verify that the mains voltage is the same as that indicated on the rating plate on the appliance before use.
- Make sure that you always use a grounded wall socket to connect the appliance.
• Always remove the plug from the wall socket when the appliance is not in use. - Remove the plug from the wall socket by pulling the plug, not the power cord.
- Make sure that the appliance, the power cord and plug do not make contact with water.
- Make sure that the appliance, the power cord and plug do not make contact
• with hot surface, such as a hot hob or naked flame. - Check the appliance's power cord regularly to make sure it is not damaged.
-
Do not use the appliance if the power cord is damaged. If the power cord is damaged, it must be replaced by an electrical technician or a person with similar qualification, in order to avoid any hazards.
-
The appliance needs space to allow heat to escape, thereby preventing the risk of fire. Make sure that the appliance has sufficient space around it, and does not come in contact with flammable material. The appliance, the air vents must not be covered or blocked when use.
- Never use the appliance in the vicinity of flammable material.
- Certain part of the appliance may get hot during operation. Do not touch these part to prevent scalding yourself.
SAFETY INSTRUCTION - DURING OPERATION
- Before using the appliance for the first time, remove any promotional materials and packaging materials, and check that the cooking plates are clean and free of dust. If necessary, wipe over with a damp cloth.
- When operating the appliance keep at least four inches of space on all sides of the appliance to allow for adequate air circulation.
- Place the appliance on a flat, dry, stable surface.
- Ensure that the appliance is completely dry before use.
- The appliance should not be placed on untreated wooden surface. Place the appliance on a heat resistant surface.
- Oversized foods or metal utensils must not be inserted into the appliance as they may create a fire or risk of electric shock.
- Do not place any item onto the oven or cover the oven with inflammable material during operation as it may cause fire.
- Do not place any of the following materials in the oven: cardboard, plastic, paper, or anything similar.
- Be aware that the feet of the appliance can leave some marks on the table, if this happens, remove the marks with a damp cloth.
SAFETY INSTRUCTION - UV LIGHT
The product contain UV light system. In normal operation the UV light would not exposed outside.
When product with UV light system required have below warning:
WARNING!
- High intensity ultraviolet light.
- Eyes and skin hazard - avoid exposure to eyes/skin.
- Do not look directly at UV to avoid damaging eyesight.
Note: The UV lamp will only light up when on “power on mode”. Also it will not light up when the cover is opened <-- no matter the machine is during work or not working.
PRODUCT OVERVIEW
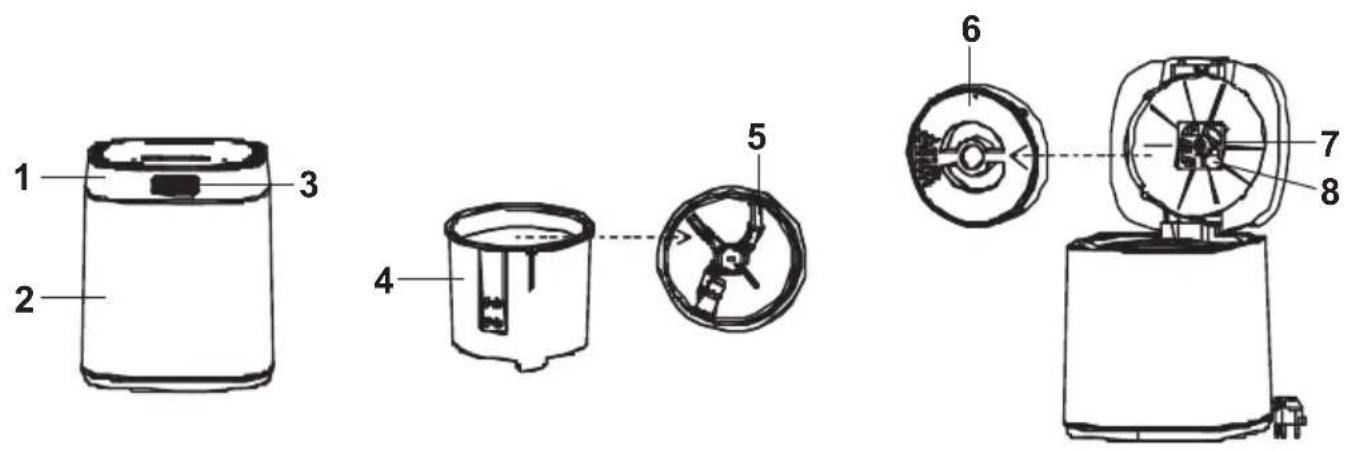
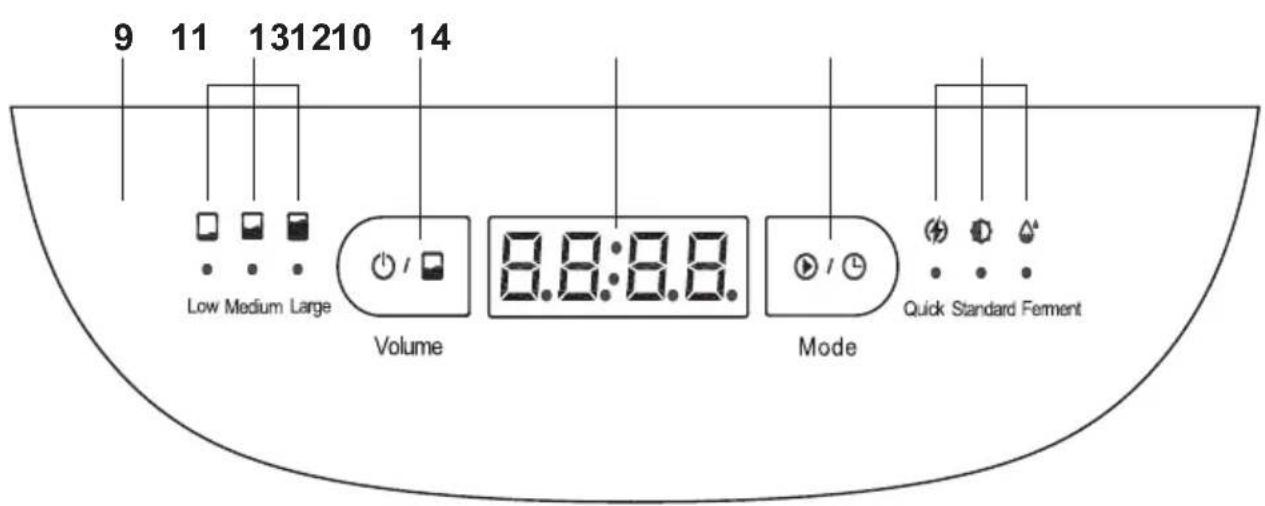
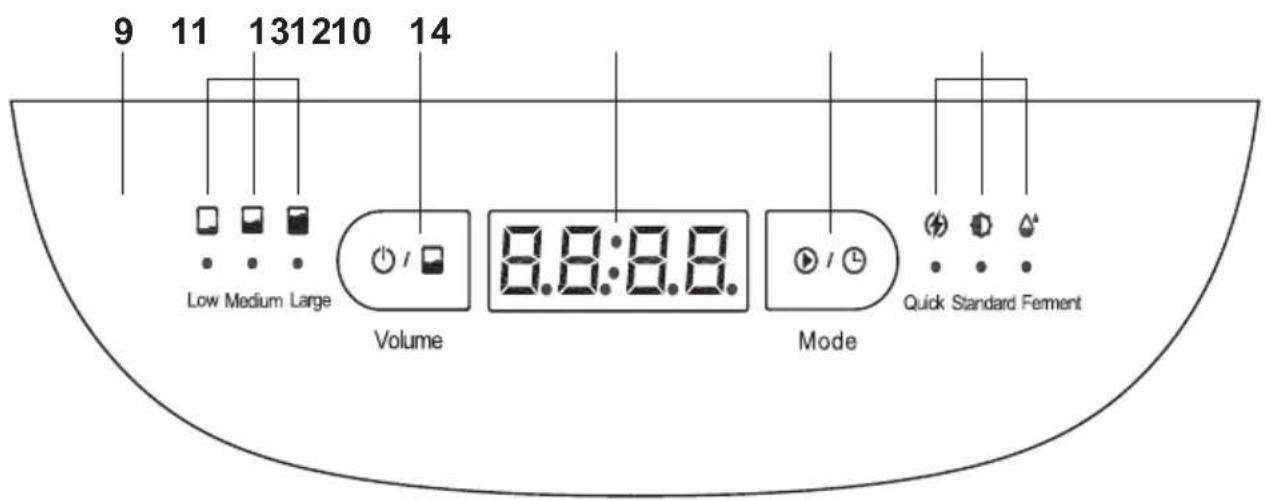
CONTROL PANEL
- Cover
- Main housing body
- Open button
- Aluminum bucket
- Agitators in the bucket
- Activated carbon box
- UV light
- Built-in fan
-
Control panel
-
Volume indicator light
- Power On/Off or Volume selection button
- Time remaining
- Start/Pause or Mode selection button
- Mode indicator light
MODES
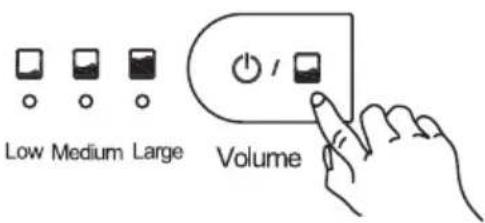
- The appliance has only two buttons - the "Volume" button and the "Mode" button, but you can choose from 9 combinations to choose the processing method that suits you best.
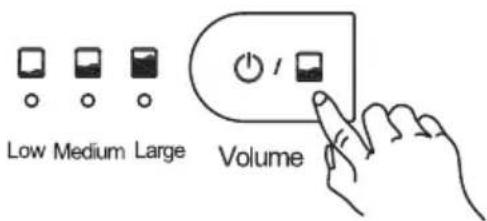
- For the "Volume" button, you could short press to choose Low, Medium and Large:
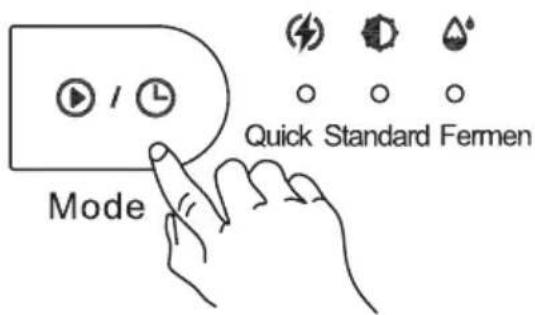
- For the "Mode" button, you could short press to choose Quick, Standard and Ferment.
Quick Mode:
- This mode is suitable for most prone to odor of kitchen food waste (do not put in degradable bioplastics).
- This is the best mode for you if you just want to get rid of most of the odors and food waste in your kitchen with low energy consumption.
- Quick Mode utilizes 120°C heat sterilization to produce the final product which is dry, shredded and pest free pre-composted material.
- You can collect it at any time and add water and EM spawn for faster composting at your spare time.
Standard Mode:
• In addition to food waste, this Mode can also put in all Bio-degradable products.
- For more items, you can refer to the List of “What can I put in this appliance”. This mode also can generate environmentally friendly pre-composted materials.
Ferment Mode:
- This mode accelerates the production of ready-to-use fertilizers through intelligent programming that simulates the proper ratio and temperature required for natural fermentation.
- You only need to put in green and brown materials with a reasonable carbon to nitrogen ratio (Perfect Ratio is 4:1 brown waste to green waste) to produce fertilizer. If you want to ferment faster, you can put in the extra purchased EM inoculum.
- This appliance helps different types of microorganisms to multiply to the greatest extent via the intelligent program of grinding-heating-keeping-cooling, thereby decomposing the organic matter in the garbage and turning it into fertilizer.
- The fertilizer state produced in fermentation mode is half wet and half dry debris, which is very conducive to the continuous decomposition of organic matter by microorganism.
- Place the machine on a level surface
-
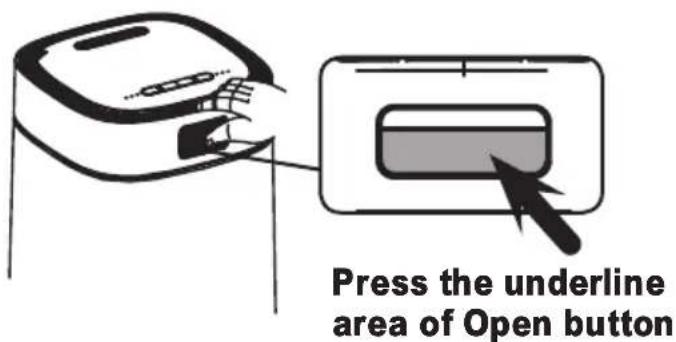
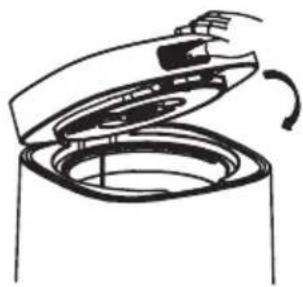
Press the cover button (Refer to pic.)
-
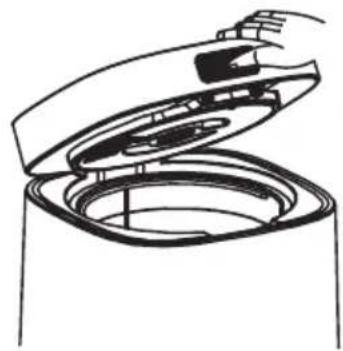
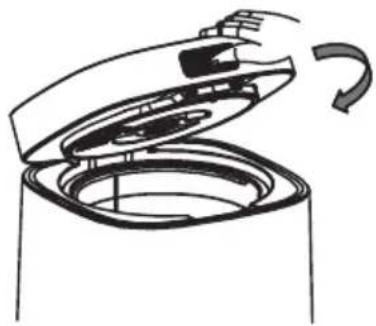
Open the lid upwards
natural_image
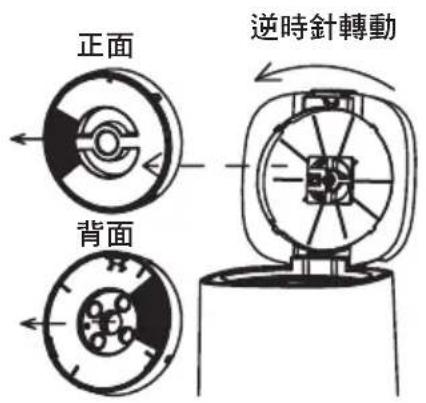
Line drawing of a hand opening a cylindrical device with internal components (no text or symbols)- Rotate counterclockwise to remove the carbon
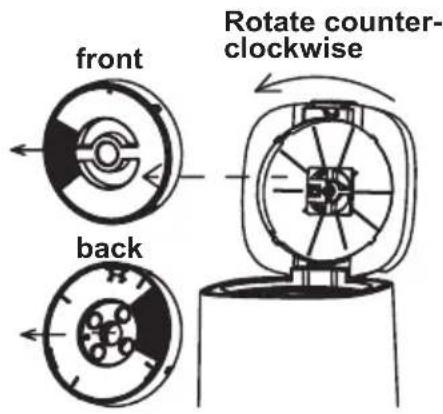
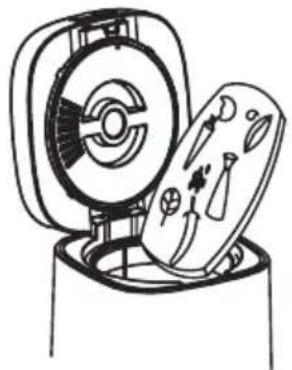
- Install the carbon box as shown in the figure and tear off the front and back sticker
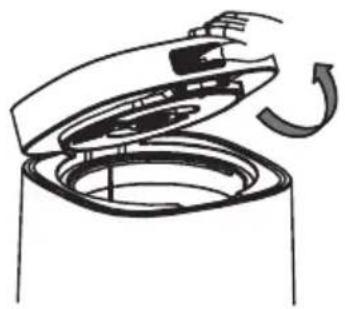
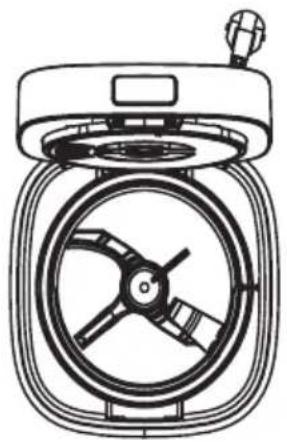
- Close the lid down
natural_image
Simple line drawing of a mechanical device with an open lid and rotating arrow (no text or symbols)Note: The two stickers on the front and back of the carbon box must be removed before it can be used.
In use
-
Press the cover button (Refer to pic.)
-
Open the lid upwards
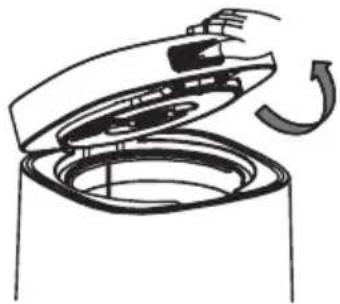
natural_image
Line drawing of a hand opening a cylindrical device with a curved arrow indicating rotation (no text or symbols)-
Pour the food waste into the bucket
-
Close the lid down
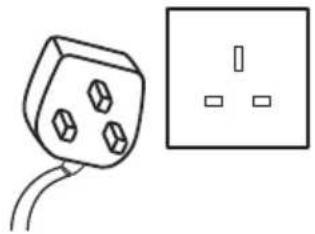
Plug ir5the power
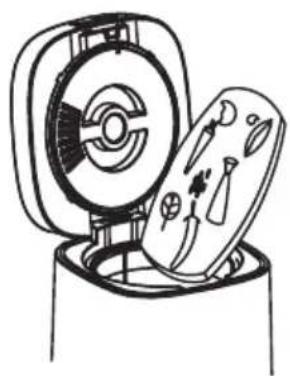
natural_image
Illustration of a mechanical device with a circular component and a tray-like device (no text or symbols visible)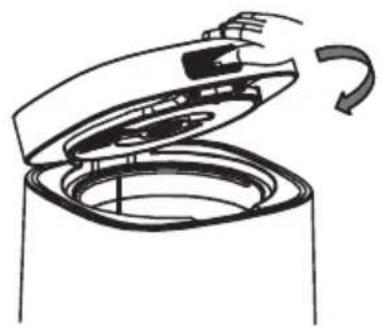
natural_image
Diagram of a kitchen appliance with a lid open and rotating around it (no text or symbols)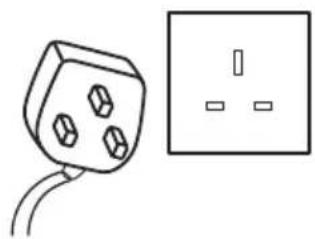
natural_image
Simple line drawing of a plug and a square outlet (no text or symbols)- Short Press the "Volume" button to choose the volume
-
Short Press the "Mode" button to choose the mode
-
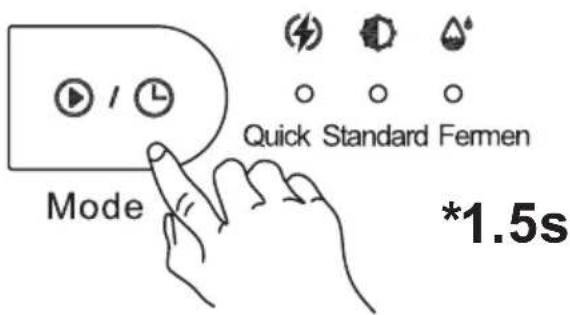
Long Press the "Mode" button for 1.5s to start the machine.
Notice:
- Try not to open the Lid during operation. Otherwise, the timer of the device will be reset.
- Press the "Mode" button to pause if you do need to open the Lid.
- If the machine displays E01, please open / close the cover again
- If the cover is opened in halfway, the condensed water on the cover may splash out, please do not open the cover in halfway.
After Use
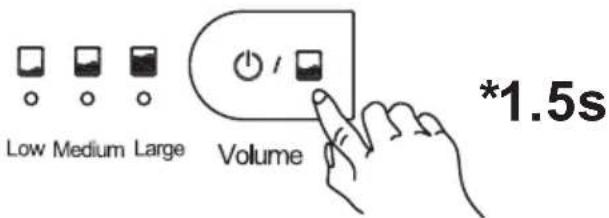
- Long Press the "Volume" button for 1.5 second to power-off the device
- Unplug the power cord
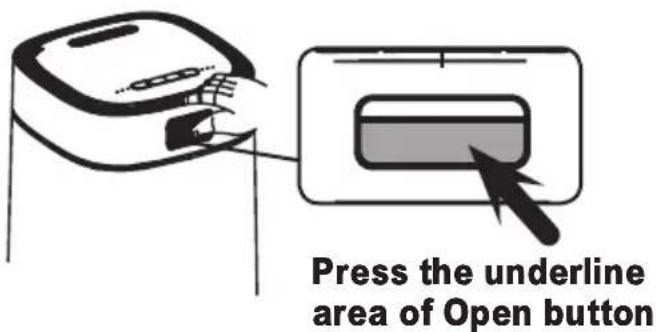
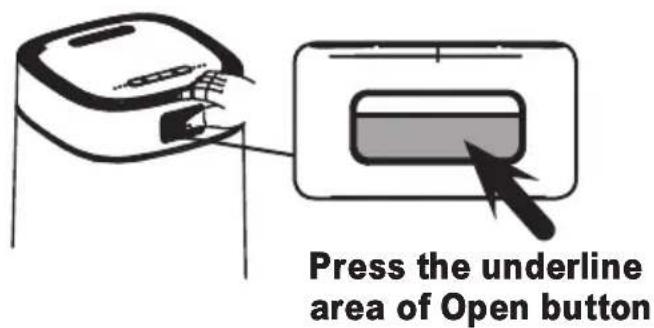
- Press the cover button (Refer to pic.)
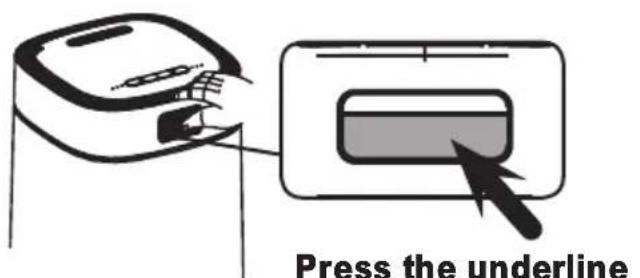
Press the underline area of Open button
- Open the lid upwards.
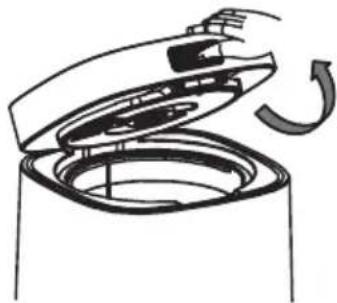
natural_image
Line drawing of a hand opening a circular device with a curved arrow indicating rotation (no text or symbols)- Lift the bucket vertically to the machine
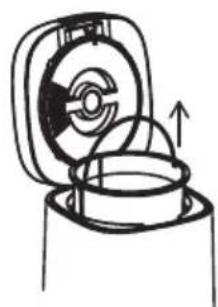
natural_image
Diagram of a mechanical device with rotating components and an upward arrow indicating motion (no text or symbols)- Pour the processed garbage in the bucket into the storage box
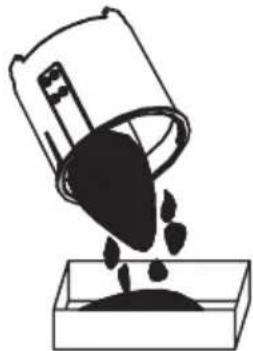
natural_image
Simple line drawing of a container pouring liquid into a container (no text or symbols)- Wash the bucket with water or put it directly in the dishwasher. Please use soft cloths / Do not scratch coating
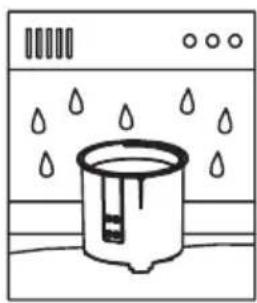
natural_image
Simple line drawing of a water dispenser with raindrops falling (no text or symbols)- Aligning the mark placement buckets
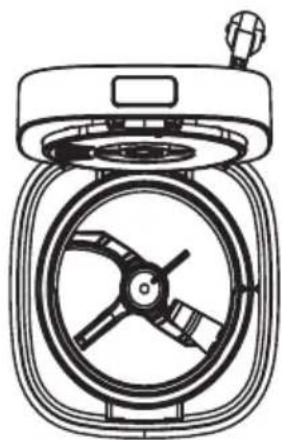
natural_image
Line drawing of a mechanical device with a central wheel and top-mounted knob (no text or symbols)- Close the lid down
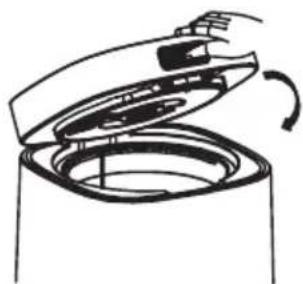
natural_image
Simple line drawing of a refrigerator with an open lid and a curved arrow indicating rotation (no text or symbols)Tips:
If you encounter sticky kitchen waste that is difficult to clean, do not use hard objects or metal to scrape it. You can fill the bucket with 2/3 of water, then press the Mode button 3 times to enter the drying mode. In about half an hour, the sticky kitchen waste will fall off, then rinse the aluminum bucket.
Notice:
- When putting the bucket into the device as shown in the Step 8, turn it left and right slightly and push it to the bottom with a small force to ensure that it is completely in the correct position after aligning the “▲” label.
- After the program is finished, the barrel is still hot. If you want to clean it immediately, please wrap the handle of the barrel with a wet cloth to avoid scalding.
REGULAR USE GUIDANCE
| Button Machine | Status Action | |
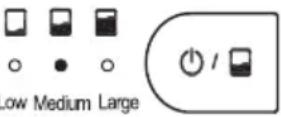 Volume Volume | Power on Mode Long Press the “Volume” button for 1.5s to enter “Standby Mode”. | |
| Standby Mode Long Press the “Volume” button for 1.5s to enter “Power ON Mode”. | ||
| Power on Mode Short Press the “Volume” button for 0.5s to choose Volume, and change the desired Volume with each click. (Low → Medium → Large) | ||
 ModeQuick Standard Ferment ModeQuick Standard Ferment | Power on Mode Short Press the “Mode” button for 0.5s to choose Mode, and change the desired Mode with each click. (Quick → Standard → Ferment) | |
| Power on Mode Long Press the “Mode” button for 1.5s to run the machine. | ||
| Running | Short Press the “Mode” button for 0.5s to Pause/Continue. | |
| Power on Mode Quick and short press the “Mode” button 3 times continuously to “Drying Mode”. | ||
| E05 is displayed on the screen and flashes. | Long Press 10s to cancel the “activated charcoal filter replacement prompt”. | |
LET'S START A SIMPLE CYCLE
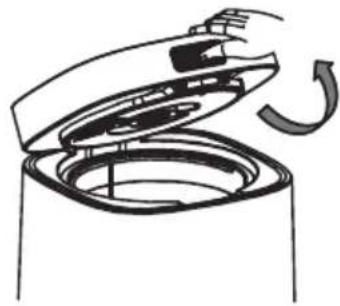
- Press the cover button and open the lip (Refer to pic.)
natural_image
Diagram of a hand opening a cylindrical device with a curved arrow indicating rotation (no text or symbols)-
Cut a small amount (about 300g) of waste into small pieces and pour into the bucket of the appliance
-
Close the lid down
natural_image
Line drawing of a mechanical device with a circular housing and a rectangular component, no text or symbols present.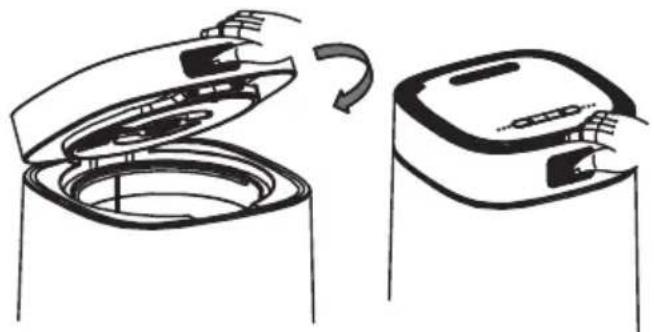
natural_image
Diagram showing two open containers with internal compartments and a right-hand side view of the same container (no text or symbols)- Connect the power cord to wall socket => short press the "Volume" button and select the "Low volume" => short press the "Mode" button and select the "Quick Mode" => long press the "Mode" button for 1.5s to start the operation

- The program will start automatically. Press and hold the "Volume" button for 1.5s to shut down the device in anytime during operation
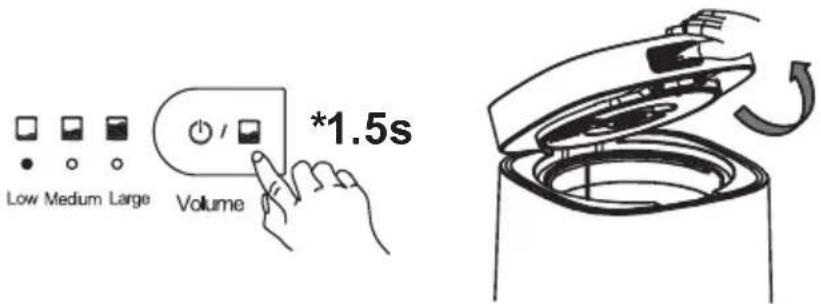
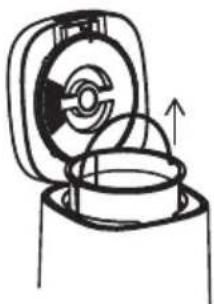
- The bucket need to be lifted out from the device vertically
Note: The temperature is still high when the program is done. Please do not open the lid cover under the device come cool (around 10 minutes after completed the program).
natural_image
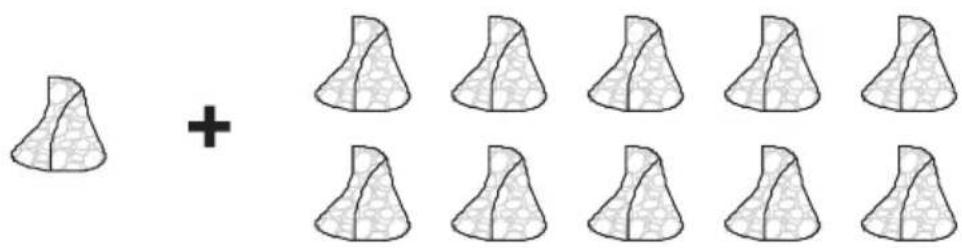
Diagram of a mechanical device with a rotating fan and housing, showing directional arrows (no text or symbols)- Mix the resulting fertilizer with soil in a ratio of 1:10 and add to your garden plants.
- Wash the bucket in the sink or in the dishwasher and wipe the outside of the device with a dry rag. Finally, place the dried bucket back into the device before storage. Please use soft cloths - Do not scratch coating.
natural_image
Simple line drawing of a container with liquid droplets inside, no text or symbols present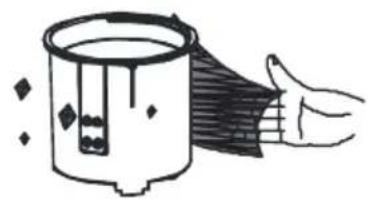
natural_image
Illustration of a hand reaching toward a cylindrical container with liquid, no text or symbols presentTROUBLESHOOTING
| Flash and Sound Explanation | ||
| Problem Reason | Method | |
| E01 The lid is not closed properly | used | Put the lid open and then close it completely |
| E02 The mixing knife in the bucket is blocked by hard objects or long fibers | in the | Unplug the device, lift out the bucket and remove the hard objects or long fibers in the bucket |
| E03 The fan is damaged or stuck | stuck | Unplug the device, remove the carbon box and observe whether the fan is stuck by foreign matters. If it is, remove it. If not, contact the customer service |
| E04 The barrel is not in place, resulting in the barrel not being heated | in | Replace the bucket in position, press it down with your hand. If it still doesn’t work, please contact customer service |
| E05 Time to replace the activated carbon filter. (after 1000 hours of usage) | the | After replacing the activated carbon filter box, long press the “Mode” button for 10s to remove the E05 error |
| Machine Performance | ||
| Smoke From Waste | Added prohibited rubbish, such as thin paper, hay or ordinary cotton | such as thin paper, hay or ordinary cotton.Unplug the device, open the lid cover and remove the prohibited objects |
| Motor Stops Turning And Emits Smoke | Check for large hard bones, metal or glasses that are on the prohibited list | Unplug the device and open the lid cover. Remove the prohibited objects |
| All Indicator Light OFF | not plugged in / inappropriate voltage / machine failure | Check plug is inserted to correct voltage socket. Please contact the customer service |
HOW TO MAKE PERFECT COMPOST
1. Get to Know Your Greens and Browns
There are two main ingredients in any successful compost pile: carbon-rich ingredients and nitrogen-rich ingredients.
Brown Material (high carbon content)
Fall leaves, Pine needles, Twigs, chipped tree branches/bark, Straw or hay, Sawdust, Corn stalks, Paper (newspaper, writing/printing paper, paper plates, napkins, and coffee filters), Dryer lint, Cotton fabric, Corrugated cardboard (without waxy/slick coatings), etc
| Brown Material (high carbon content) |
| Fall leaves, Pine needles, Twigs, chipped tree branches/bark, Straw or hay, Sawdust, Corn stalks, Paper (newspaper, writing/printing paper, paper plates, napkins, and coffee filters), Dryer lint, Cotton fabric, Corrugated cardboard (without waxy/slick coatings), etc |
| Green Material (high nitrogen content) |
| Grass clippings, Coffee grounds/tea bags, Vegetable and fruit scraps, Trimmings from perennial and annual plants, Annual weeds that haven’t set seed, Eggshells, Seaweed, etc |
2. Striking the Right Carbon-Nitrogen Balance
The magic of composting lies in the interaction between carbon compounds (brown) and nitrogen compounds (green). The perfect ratio of carbon to nitrogen in compost is close to 25:1 to 30:1, at the right wet and dry level.
3. Get the Feel of Your Pile
A. If you are a home gardening enthusiast, you only need to put the daily kitchen waste into the compost according to the volume of brown material: green material about 1:3. You can also purchase commonly used microbial composting agents to use with them.
B. If you are a professional compost maker, you can browse relevant gardening books and websites to obtain the carbon and nitrogen content of various materials, and use professional calculation methods to control the results.
When the ratio is lower than ideal (too much nitrogen), the pile will be slimy and stinky; simply add more brown materials.
When the ratio is higher than ideal (too much carbon), the pile will be dry; simply add more green materials.
In general, carbon-rich materials should form the bulk of the pile. A good rule of thumb is that each time you add a batch of nitrogen-rich ingredients, add roughly 4 times that amount in carbon-rich ingredients (in volume, not weight).
What can this appliance's fermentation mode do for composting?
- The intelligent low-temperature fermentation function of the appliance makes the organic matter to go through three different temperature stages, allowing microorganisms suitable for reproduction at different temperatures to grow while killing the eggs of diseased insects.
- Maintain the optimum humidity of 60% of the compost, which is most suitable for the rapid reproduction of microorganisms.
- Proper oxygen can inhibit the reproduction of anaerobic bacteria and produce foul gas.
- Turn the compost pile frequently to distribute the microorganisms evenly throughout the compost pile ingredients (in volume, not weight).
CLEANING AND MAINTENANCE
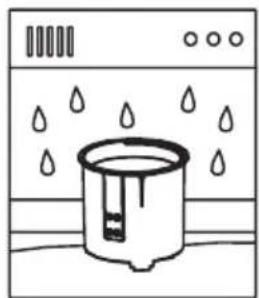
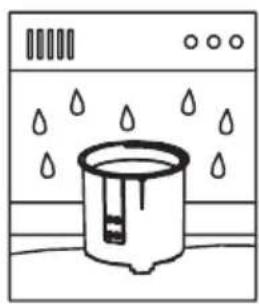
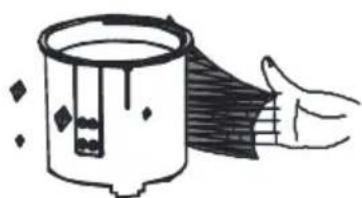
For regular use, you could put the bucket directly into the dishwasher, or if you want to clean it by hands, you just need to use the liquid detergent to do, just like our daily dishwashing.
If you do not use the appliance for more than 1 month, here are the cleaning and maintenance suggestions:
- Rinse the bucket clean
natural_image
Simple line drawing of a container with liquid droplets inside, no text or symbols present- Dry the inner and outer surfaces and bottom of the bucket with a towel.
natural_image
Simple line drawing of a hand holding a cloth over a cylindrical container with diamond patterns (no text or symbols)- Place the bucket into the device before close the lid cover.
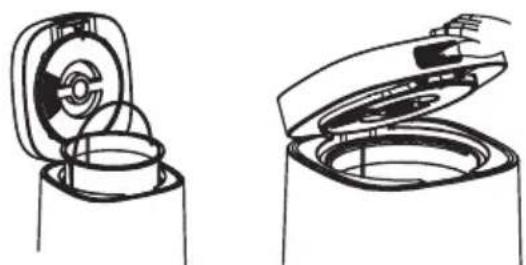
natural_image
Two line drawings of a device with open lid and internal components, no text or symbols present- Plug in the power and press the "Mode" button three time continuously to enter the Drying Mode for 30mins.
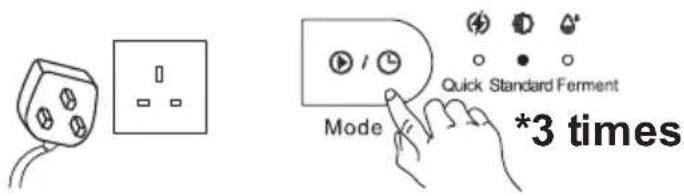
- After 30 minutes, drying is complete and returns to standby mode.
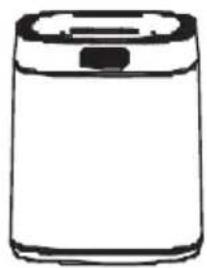
natural_image
Simple line drawing of a cylindrical container with a lid (no text or symbols)- Long Press the "Volume" button for 1.5s to power off and pull the plug.
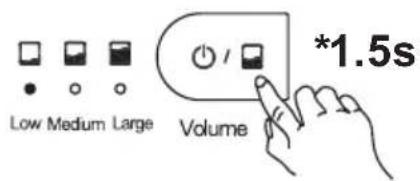
Replacing The Carbon Filter Box
The E05 error occurs when you have accumulated more than 1000 hours of usage. But it does not affect normal use for the time being. After replacing the activated carbon filter box, long press the “Mode” button for 10s to remove the E05 error.
In order to achieve better deodorization effect and according to the frequency of use in each family, we recommend that you replace the activated carbon filter box every 6 months.

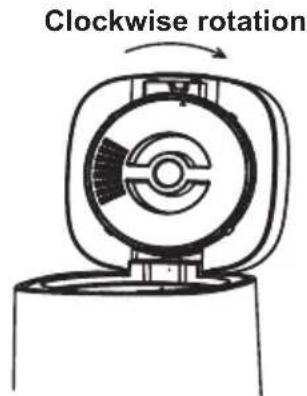
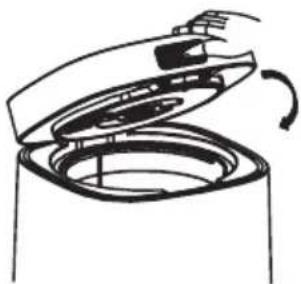
Pic. 1 Pic. 2 Pic. 3 Pic. 4
-
Press the cover button and open the lip cover
-
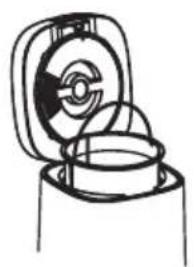
Rotate the Carbon Box to anti-clockwise, then replace it with new carbon granules.
-
Rotate the Carbon Box to clockwise tighten.
-
Close the lid cover
WHAT CAN I PUT IN THIS APPLIANCE
For all modes, you can put in a wide variety of food waste. Some hard and non-decomposable special waste cannot be put into the appliance in order to avoid damaging the machine and thus affecting the warranty service. See below for what “can” and “cannot” be put in appliance
| ALWAYS Fruit | and vegetable scraps:Peel (watermelon, orange, tangerine, banana, etc), Scrap (carrots, broccoli, peas, hummus, etc).Food leftovers :Grains (bread, cereal, oatmeal, rice, pasta, pancakes, etc), cartilage heads and soft shells (fish, eggs, shrimp, meat scraps, etc), dairy products (cheese, yogurt, etc).Biodegradable biomaterials :Tea and coffee (paper filters, coffee grounds, tea bags, etc), paper items (napkins, cardboard, tissue paper, etc).Potted plants and leaves:Houseplants, flowers Yard trimmings flowers, leaves, straw, pine needles, etc.Starches:Bread, pasta, rice. potatoes, cereals, oats and other grains. |
| NEVER Soft peels or fibrous waste: corn husk, pineapple head, pistachio shells, apples, etc. With oil and sauce: Compostable paper towels, napkins and tissues, paper food packaging. Sticky foods: Honey, maple syrup, jams, nut butters, etc. Book, Paper or paper box: Plain paper documents, envelopes, paper packing box, etc. Special kitchen waste : Hard bones (chicken, beef, pork, lamb, etc), greasy foods (cooking oils, pastes, etc), fruit pits (avocados, peaches, apricots, nectarines, mango, etc), walnut shells (toxic to plants, etc). Articles for daily use : Soaps, shampoo and conditioner bars, lined bags (chip, cookie, pet food), soiled diapers, baby wipes, tampon, pet feces, cigarettes, metal, general plastics, glass, foil wrap, alcohol, styrofoam, etc. |
Please contact us if you are not sure if a certain food can be put in.
PRODUCT SPECIFICATIONS
Model No.: GFWD3WH
Voltage: 220-240V\~
Frequency: 50-60Hz
Power consumption: 500W
Processing Time: Quick:
Low-2.5 hours, Medium-4 hours, Large-5 hours
Standard:
Low-4 hours, Medium-5 hours, Large-6 hours
Ferment:
Low-12 hours, Medium-16 hours, Large-20 hours
Product dimensions: 316(H) x 253(W) x 253(D) mm
*The final product specification may be varied according to a different lot of material and actual input voltage power of the usage area.
控制面板
natural_image
Line drawing of a mechanical device with an open lid and internal components (no text or symbols)- 如圖所示安裝碳盒, 撕下前後貼紙
natural_image
Simple line drawing of a kitchen appliance with an open lid and a curved arrow indicating rotation (no text or symbols)natural_image
Line drawing of a mechanical device with a circular component and a rectangular housing (no text or symbols)4. 合上蓋子
natural_image
Diagram of a kitchen appliance with an open lid and a curved arrow indicating rotation (no text or symbols)2. 向上打開蓋子
natural_image
Line drawing of a hand opening a cylindrical device with a curved arrow indicating rotation (no text or symbols)5. 插上電源
natural_image
Simple line drawing of a plug and a socket (no text or symbols)6. 短按「Volume」按鈕選擇容量
natural_image
Diagram of a hand opening a circular device with a curved arrow indicating rotation (no text or symbols)natural_image
Simple line drawing of a mechanical device with an open lid and internal components, no text or symbols present.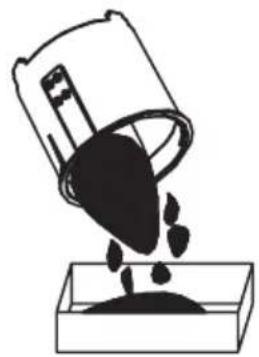
natural_image
Simple line drawing of a bucket pouring liquid into a container (no text or symbols)natural_image
Simple line drawing of a container with liquid drops inside, no text or symbols present- 對齊標記放回廚餘鋁桶
natural_image
Line drawing of a mechanical device with a central hub and top-mounted sensor (no text or symbols)- 合上蓋子
natural_image
Simple line drawing of a refrigerator with an open lid and a curved arrow indicating rotation (no text or symbols)提示:
natural_image
Line drawing of a hand opening a cylindrical device with a curved arrow indicating rotation (no text or symbols)natural_image
Line drawing of a mechanical device with a circular component and a rectangular housing (no text or symbols)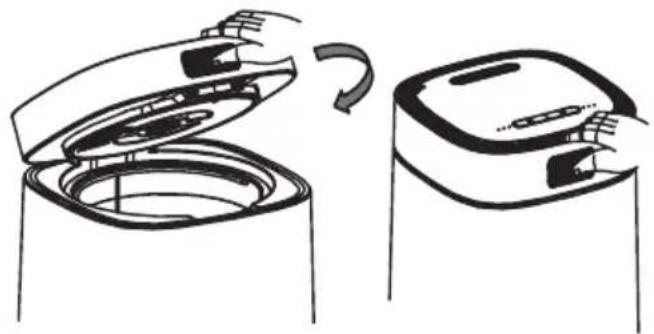
natural_image
Diagram showing two open containers with internal compartments and a curved arrow indicating rotation (no text or symbols)natural_image
Diagram of a mechanical device with a rotating fan and housing, showing no text or symbols.natural_image
Simple line drawing of a container with liquid droplets inside, no text or symbols present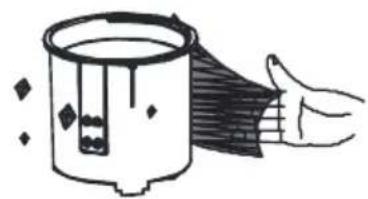
natural_image
Illustration of a hand holding a cloth next to a cylindrical container with diamond-shaped elements (no text or symbols)疑難排解
natural_image
Simple line drawing of a container with liquid drops, no text or symbols presentnatural_image
Simple line drawing of a hand holding a cloth over a container with diamond patterns (no text or symbols)- 將廚餘鋁桶放入設備中,然後關閉蓋子
natural_image
Simple line drawing of a mechanical device with a circular housing and internal components (no text or symbols)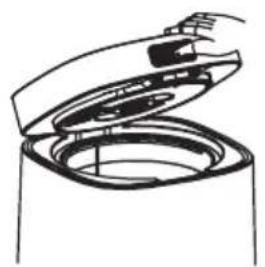
natural_image
Simple line drawing of a hand opening a cylindrical device (no text or symbols)natural_image
Simple line drawing of a plug and a socket (no text or symbols)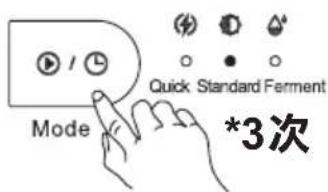
natural_image
Simple line drawing of a cylindrical container with a lid (no text or symbols)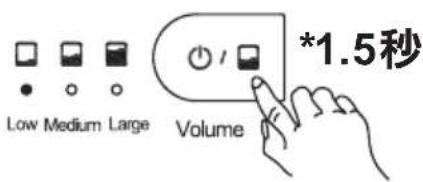
更換活性碳過濾盒
natural_image
Illustration of a hand using a compass to interact with a rotating coil around a circular object (no text or symbols)圖 1 圖 2 圖 3 圖 4
購買日期 Date of Purchase:
單據編號 Invoice No.:
The product specifications may be changed without prior notice.
Please contact customer service for details if necessary.
說明書內容以英文版本為準
If there is any inconsistency or ambiguity
between the English version and the Chinese version,
the English version shall prevail.
保養登記
Warranty Registration

於網上登記新產品保養
Register your product online
www.dchtoolbox.com
小電維修服務 - 自攜點
Repair Service - Collection Points


Gilman
since 1841

DCHToolBox
大昌行電器維修中心
4/F, DCH Building, 20 Kai Cheung Road, Kowloon Bay, Hong Kong
客戶服務熱線 Customer Service Hotline: (852) 8210 8210
- ANTI-BACTERIAL ECO FOOD WASTE DISPOSER
- 除臭抑菌環保廚餘機
- SAFETY INSTRUCTION - GENERAL
- SAFETY INSTRUCTION - ELECTRICITY AND HEAT
- SAFETY INSTRUCTION - DURING OPERATION
- SAFETY INSTRUCTION - UV LIGHT
- WARNING!
- PRODUCT OVERVIEW
- MODES
- Quick Mode:
- Standard Mode:
- Ferment Mode:
- In use
- Notice:
- After Use
- Tips:
- REGULAR USE GUIDANCE
- LET'S START A SIMPLE CYCLE
- TROUBLESHOOTING
- HOW TO MAKE PERFECT COMPOST
- Get to Know Your Greens and Browns
- Brown Material (high carbon content)
- Striking the Right Carbon-Nitrogen Balance
- Get the Feel of Your Pile
- What can this appliance's fermentation mode do for composting?
- CLEANING AND MAINTENANCE
- Replacing The Carbon Filter Box
- WHAT CAN I PUT IN THIS APPLIANCE
- PRODUCT SPECIFICATIONS
- 合上蓋子
- 向上打開蓋子
- 插上電源
- 短按「Volume」按鈕選擇容量
- 提示:
- 更換活性碳過濾盒
- 說明書內容以英文版本為準
Brand : GEMINI
Model : GFWD3WH
Category : Bin