MPH-100 - Tripod Vello - Free user manual and instructions
Find the device manual for free MPH-100 Vello in PDF.


| Product Type | Motorized Pan Head |
| Model | MPH-100 (FreeWave Orbit) |
| Brand | Vello |
| Dimensions (W x H x D) | 5.1 x 2.6 x 4.7 in (13.1 x 6.7 x 12 cm) |
| Weight (without battery) | Approx. 0.9 lb (0.4 kg) |
| Power Source (Orbit) | 1 x EN-EL3e rechargeable lithium-ion battery |
| Power Source (Remote) | 2 x AAA batteries (not included) |
| Charger | EN-EL3e battery charger included |
| Camera Mount | 1/4"-20 threaded screw |
| Tripod Mount | 3/8"-16 threaded socket (with 1/4"-20 reducer bushing) |
| Maximum Remote Range | 100 ft (30 m) |
| Wireless Channels | 16 (2.4 GHz) |
| Panning Speeds | 3 levels (1 = fastest, 3 = slowest) |
| Panning Angle Range | 5° to 360° (in 5° increments) |
| Number of Shots | 1–200 (Moving Mode); 3,4,6,8,12,24,36,45,60,72 (360° Panorama) |
| Shutter Control Delay | 1–99 seconds (requires camera bulb mode for >1s) |
| LCD Display | TFT screen with mode, angle, shots, speed, channel, battery status |
| Ports | USB Mini-B (for firmware upgrades); Shutter trigger port |
| Included Accessories | Remote control, EN-EL3e battery, charger, carry case, 3/8"-16 to 1/4"-20 reducer bushing, shutter release cables (2.5mm to 10-pin, 2.5mm to 2.5mm, 2.5mm to 3-pin, 2.5mm to DC2), 8" product stage, user manual |
| Operation Modes | Moving Mode (variable angle) and 360° Panorama (full rotation) |
| Buzzer | On/Off for setting changes and cycle end |
| Reset Function | Restore factory settings |
Frequently Asked Questions - MPH-100 Vello
User questions about MPH-100 Vello
0 question about this device. Answer the ones you know or ask your own.
Ask a new question about this device
Download the instructions for your Tripod in PDF format for free! Find your manual MPH-100 - Vello and take your electronic device back in hand. On this page are published all the documents necessary for the use of your device. MPH-100 by Vello.
USER MANUAL MPH-100 Vello
MOTORIZED PAN HEAD WITH REMOTE
USER MANUAL

VELLO
THANK YOU FOR CHOOSING VELLO
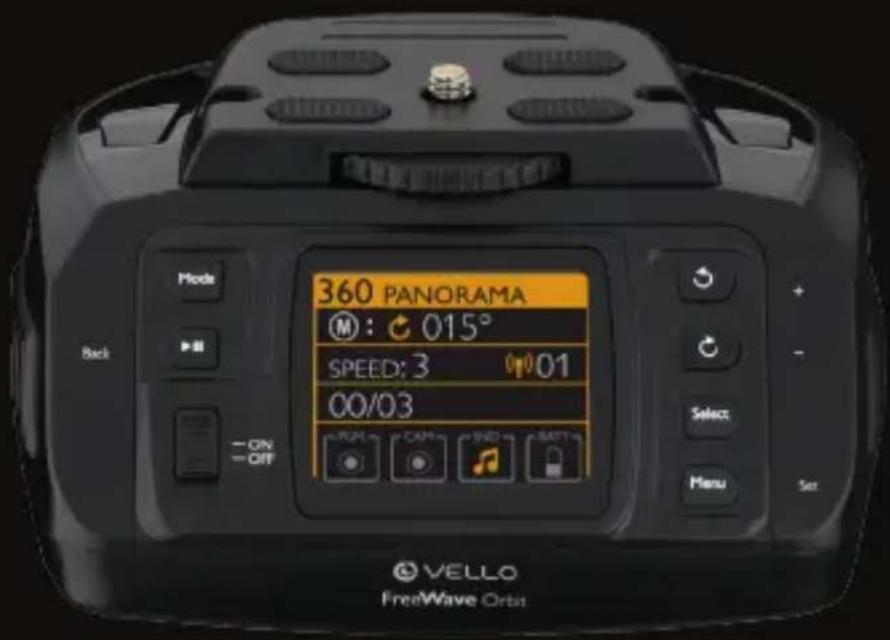
The Vello FreeWave Orbit is a programmable motorized pan head that allows you to capture full 360° panorama pictures for photo stitching as well as still or moving product photography. You can adjust degree angles, number of shots, panning speeds, and direction of your panoramic photos. Your camera attaches securely to the Orbit's 1/4"-20 camera mount and is easily affixed to most tripods with 3/8"-16 or 1/4"-20 mounting options. Wirelessly control the Orbit from up
to 100' (30 m) away with the 2.4 GHz high-frequency remote. Sixteen separate wireless channels minimize interference from other nearby wireless equipment. The Vello FreeWave Orbit is small, lightweight and compact. It's powered by an EN-EL3e rechargeable battery, while the remote requires two AAA batteries. The padded case helps protect the Orbit and keeps all of its accessories organized and together in one place.
natural_image
Professional DSLR camera with dual lens and control panel (no visible text or symbols)TABLE OF CONTENTS
Precautions....4 Connecting a Camera....12 Using the Remote....20
Contents....6 LCD Overview....13 Product Photography....23
Overview....7 Menu Settings....14 FCC Compliance....24
Charging the Battery....8 Moving Mode....14 Specifications....25
Installing the Batteries ..... 9 360° Panorama .....16 One-Year Limited Warranty ..26
Mounting the Orbit....11 System Settings....18
PRECAUTIONS
- Please read full manual before using device.
- Do not disassemble or modify this device.
- Should the product break open due to accidental damage, remove the batteries and send it to an authorized repair center.
-
Keep dry. Do not handle with wet hands, immerse in water, or expose to rain or snow.
-
Do not use in the presence of flammable gases. Failure to observe this precaution could result in fire or explosion.
- Keep out of the reach of children. This product contains small parts that may pose a choking hazard. Should a child swallow any part of this product, consult a physician immediately.
-
Do not expose to high temperatures.
-
Should smoke or any unusual smell come from this product, shut it off and remove the batteries immediately. Send it to an authorized repair facility for service.
- Do not leave this product in a closed vehicle in the sun or other area subject to extremely high temperatures.
-
Observe precautions when handling batteries.
-
Use only the batteries listed in this manual. Do not mix new and old batteries or different brands or types of batteries.
-
Batteries may leak when fully discharged. To avoid damage to the product, be sure to remove the batteries if the product will not be used for an extended period of time or if the battery power is low.
-
Do not attempt to short-circuit or disassemble batteries.
- Do not put batteries in a fire or apply direct heat to them.
-
Do not attempt to install batteries in the reverse direction.
-
Should fluid from damaged batteries come into contact with skin or clothing, rinse immediately with fresh water.
- Read and follow all warnings and instructions provided by the battery manufacturer.
- Images are for illustration only.
CONTENTS
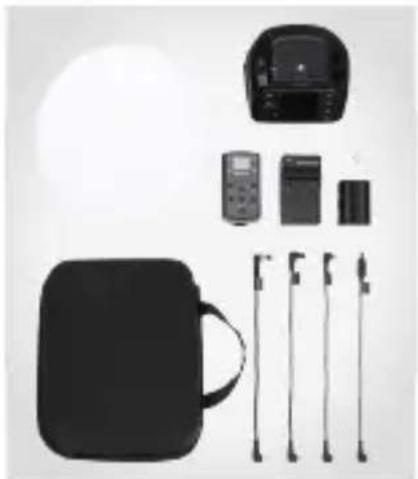
- Vello FreeWave Orbit
- Remote
• EN-EL3e rechargeable battery
• EN-EL3e battery charger -
Carrying case
• 3/8"-16 to 1/4"-20 reducer bushing -
Shutter release cables:
2.5 mm to 10-pin
2.5 mm to 2.5 mm
2.5 mm to 3-pin
2.5 mm to DC2 - 8" product stage
- User Manual
natural_image
Product display of a black compact device with various accessories and accessories (no visible text or labels)OVERVIEW
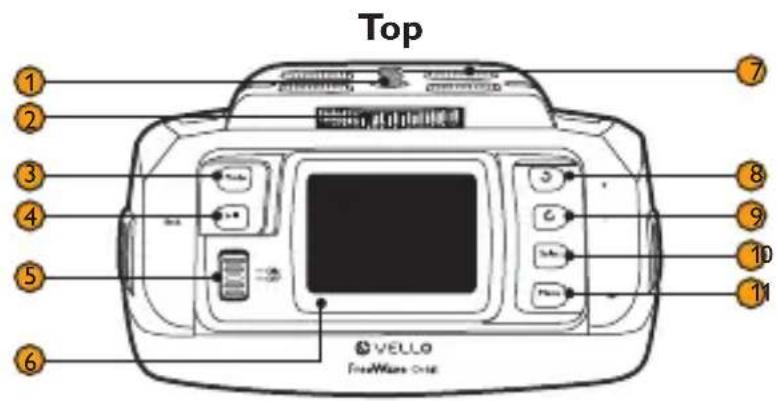
- 1/4"-20 camera mount
- Locking wheel
- Mode Button
- ▶ Back Button
- Power switch
- TFT LCD screen
- Nonslip camera pads
- Ⓧ+ Button
- ⬆- Button
- Select Button
- Menu / Set Button
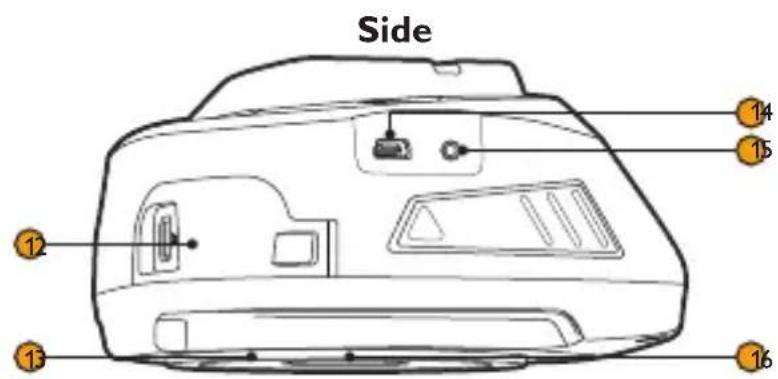
- Battery compartment
- Motorized panning base
- USB interface
- Shutter trigger port
- 3/8"-16 mount
CHARGING THE BATTERY
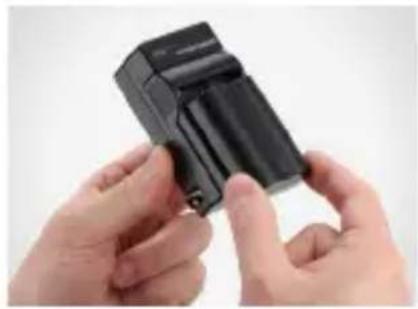
- Align the EN-EL3e rechargeable battery's contacts with those on the EN-EL3e battery charger.
- Slide the battery into the charger so it locks in place.
- Flip out the foldable plug, and connect the charger to a power outlet. A red indicator light will glow while charging. When the battery is charged, the indicator light will turn solid green.
natural_image
Close-up of hands holding a black cylindrical device (no visible text or symbols)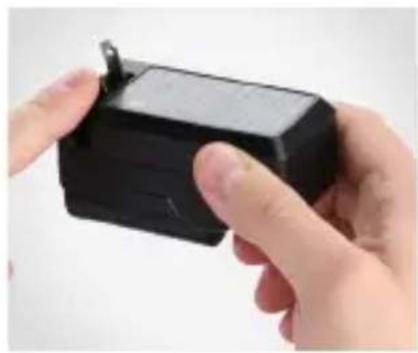
natural_image
Close-up of hands holding a black rectangular electronic device with a small clip, against a plain background (no text or symbols visible)INSTALLING THE BATTERIES
Orbit
-
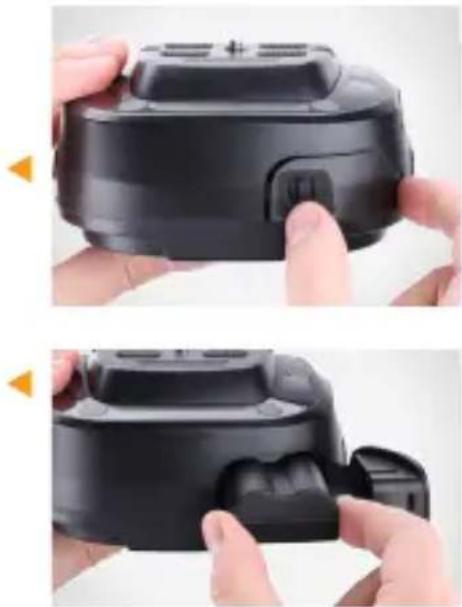
Slide the battery compartment latch in the direction of the arrow, and open the battery compartment door.
-
Insert the battery, with the contacts matching those inside the battery compartment.
-
Close the battery compartment door until it clicks.
natural_image
Two-step photo showing hands holding a black camera module, no text or symbols visibleNote: When the Orbit's battery level is low, it is indicated on the LCD screen.
Remote
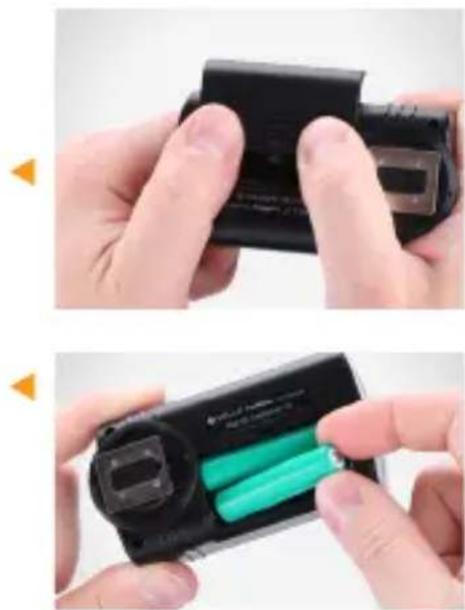
- Open the battery compartment door by sliding the cover in the direction of the arrow.
- Insert two AA batteries matching the visual battery guide on the inside of the battery compartment.
- Close the battery compartment door by sliding it back into place until it clicks.
MOUNTING THE ORBIT
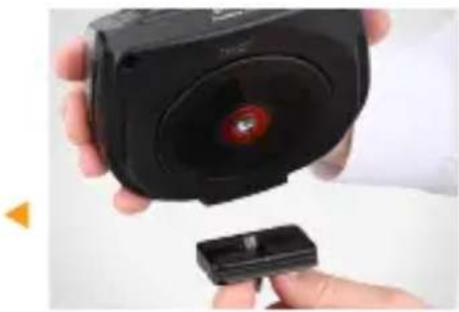
The Vello FreeWave Orbit can be mounted to any 3/8"-16 or 1/4"-20 mounting stud.
-
Screw the tripod's mounting stud into the threaded mount on the bottom of the Orbit. If you need to mount to a 3/8"-16 stud, remove the 1/4"-20 reducer bushing.
-
Use your tripod's locking mechanism to secure the Orbit to the mount.
natural_image
Close-up of a hand holding a black camera with a red laser source, next to a small black electronic device (no visible text or symbols)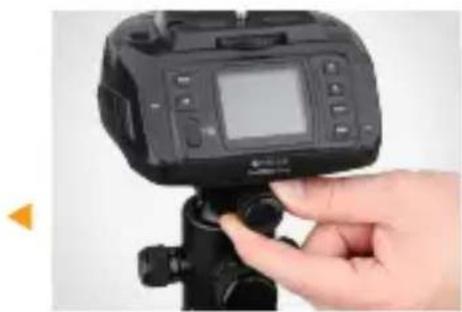
natural_image
Hand adjusting a DSLR camera on a tripod stand (no visible text or symbols)CONNECTING A CAMERA
-
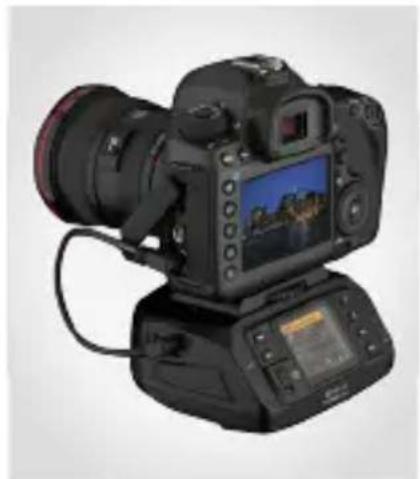
Make sure your camera and the Orbit are turned off, and then seat the camera's tripod mount onto the 1/4"-20 camera mount of the Orbit.
-
Turn the locking wheel counterclockwise until the camera is secure.
natural_image
Close-up of a black DSLR camera with attached cable and connector (no visible text or symbols)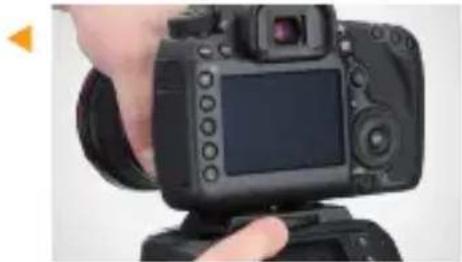
natural_image
Close-up of a hand holding a DSLR camera with lens and screen (no visible text or symbols)-
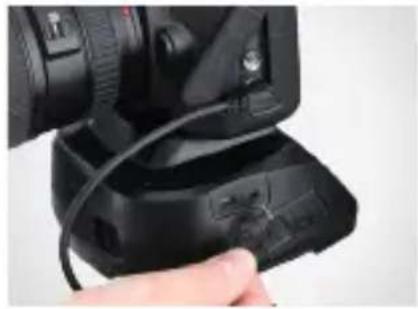
Use the appropriate shutter release cable to connect the Orbit's shutter trigger port to your camera's remote port.
-
Turn the Orbit and your camera on.
LCD OVERVIEW
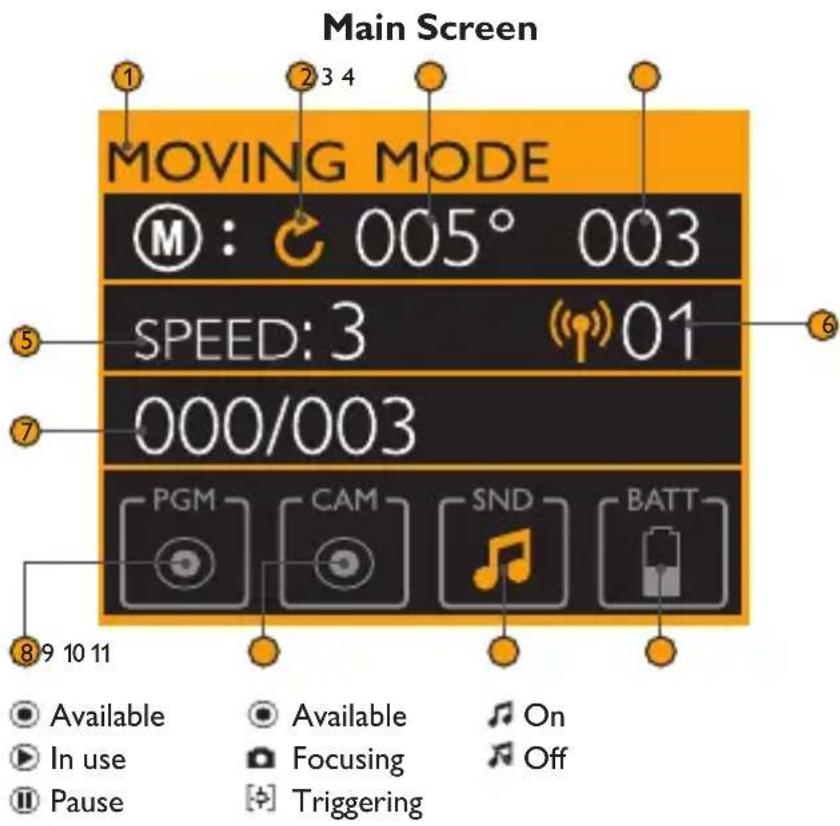
- Operation mode (Moving or 360^ Panorama)
- Panning direction
- Panning angle
- Number of shots (Moving Mode only)
- Panning speed
- Wireless remote channel
- Number of shots taken/total number of shots
- Operation status
- Camera triggering status
- Sound: On/Off
- Battery status
MENU SETTINGS
You can access the panning mode settings and system settings menu.
To navigate the menus:
- Menu/Set: Enters menu and confirms changes.
- Select: Selects menus or highlights settings to adjust.
- Back: Returns to the previous screen.
- Increase (+): Increases the value.
- Decrease (−): Decreases the value.
MOVING MODE
Moving Mode allows you to take a series of photos for panoramic stitching, and set an angle of view less than 360^ . For example, you can capture just a cityscape panorama, and not what's behind you, by setting the Moving Mode to capture only 180^ angle of view.
- Press and hold the Menu button until the Menu screen appears.
- Press the Select button repeatedly to highlight Moving Mode.
-
Press the Set button to enter Moving Mode.
-
Press the Select button to highlight the settings to adjust. Use the (+) and (−) buttons to change the values.
-
Press and hold the Set button to confirm.
-
Press the ▶ Button to start shooting.
Tip: For best results, set your camera to manual focus and prefocus on your subject. This ensures that what you are trying to capture, stays in focus as the Orbit is panning.
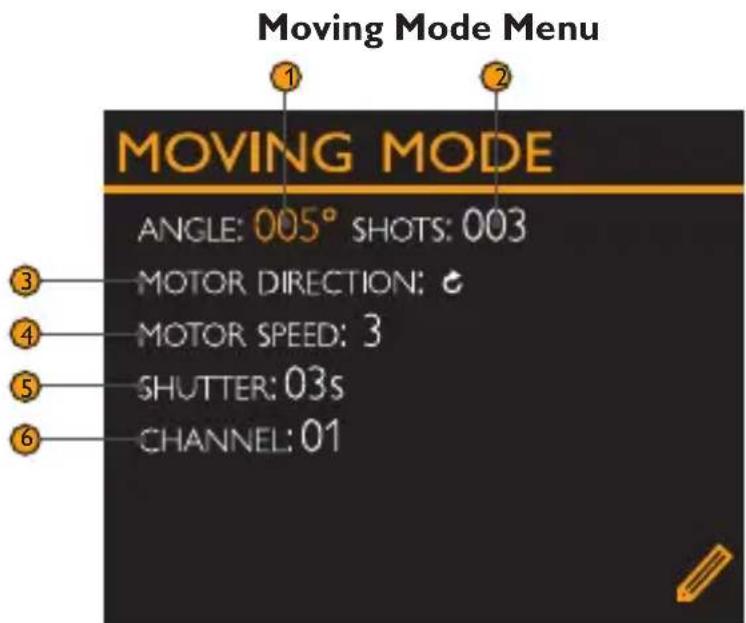
- Angle: panning angle from 5^ - 360^ , in 5^ increments.
- Shots: number of shots (1–200)
- Motor direction: direction of panning (clockwise or counterclockwise)
- Motor speed: speed of the panning head (1–3, from fastest to slowest)
- Shutter: control the length of time the shutter is open (1–99 sec., for exposures longer than 1 sec. set your camera to bulb mode and set the Shutter value on the Orbit.)
- Channel: wireless remote channel (1–16)
360° PANORAMA
360° Panorama mode allows you to take photos for panoramic stitching with a full 360° angle of view. This angle is divided by the number of shots (see table 1a). For example, if you set the Orbit to three shots, it will take a shot every 120° until it completes the 360°. Same for eight shots, one shot every 45°. A smaller number of shots are good for still product photography where you might want to capture different angles. A larger number of shots creates smoother transitions when performing photo stitching for prints, video and VR applications.
- Press and hold the Menu button until the Menu screen appears.
- Press the Select button repeatedly to highlight 360° Panorama.
- Press the Set button to enter 360° Panorama.
- Press the Select button to highlight the settings to adjust. Use the (+) and (−) buttons to change the values.
- Press and hold the Set button to confirm.
- Press the ▶ button to start shooting.
| 360° Panorama AngleDegree Divisions | |
| Numberof shots Angle | |
| 3 120° | |
| 4 90° | |
| 6 60° | |
| 8 45° | |
| 12 30° | |
| 24 15° | |
| 36 10° | |
| 45 8° | |
| 60 6° | |
| 72 5° | |
Table (1a)
Tip: For best results, set your camera to manual focus and prefocus on your subject. This ensures that what you are trying to capture, stays in focus as the Orbit is panning.
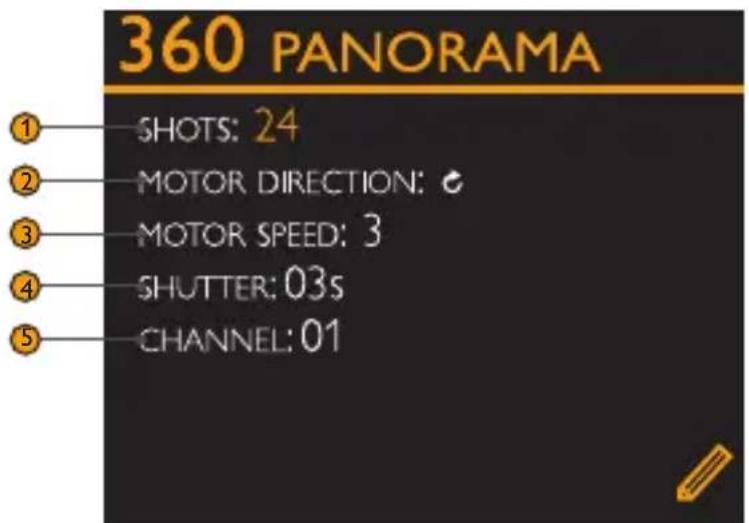
- Shots: number of shots (3, 4, 6, 8, 12, 24, 36, 45, 60, 72)
- Motor direction: direction of panning (clockwise or counterclockwise)
- Motor speed: speed of the panning head (1–3, from fastest to slowest)
- Shutter: control the length of time the shutter is open (1–99 sec., for exposures longer than 1 sec. set your camera to bulb mode and set the Shutter value on the Orbit.)
- Channel: wireless remote channel (1–16)
360 Panorama Menu
SYSTEM SETTINGS
- Press and hold the Menu button until the Menu screen appears.
- Press the Select button repeatedly to highlight Settings.
-
Press the Set button to enter settings.
-
Press the Select button to highlight the settings to adjust. Use the (+) and (−) buttons to change the values.
-
Press and hold the Set button to confirm changes.
-
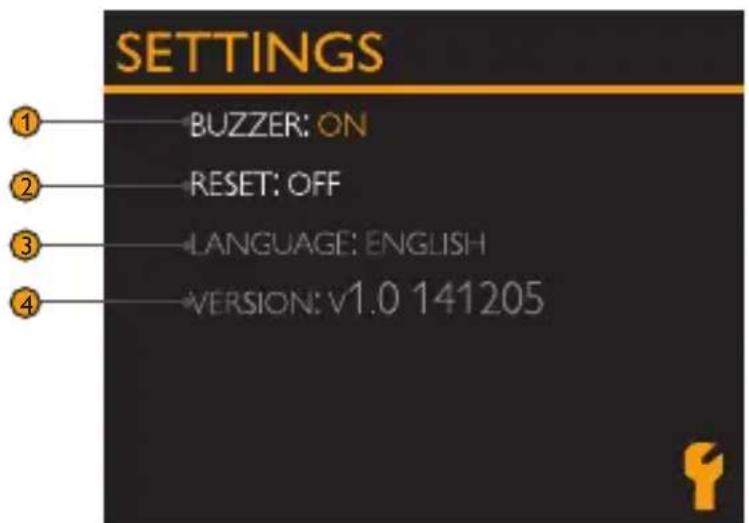
Buzzer: A beep will signify any altering of settings or the end of the panning cycle (on or off).
- Reset: Resets the Orbit to its original settings (on or off).
- Language: English.
- Version: The Orbit's current firmware version.
System Settings Menu
USING THE REMOTE
Overview
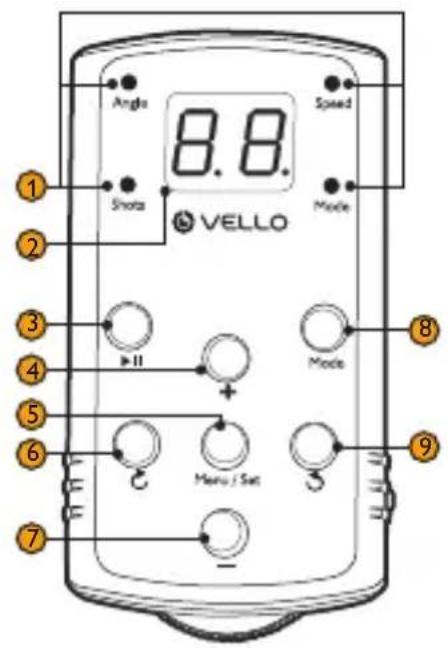
- LED indicators
- Display
- Button
-
- Button
- Menu / Set Button
- Button
-
- Button
- Mode Button
- Button
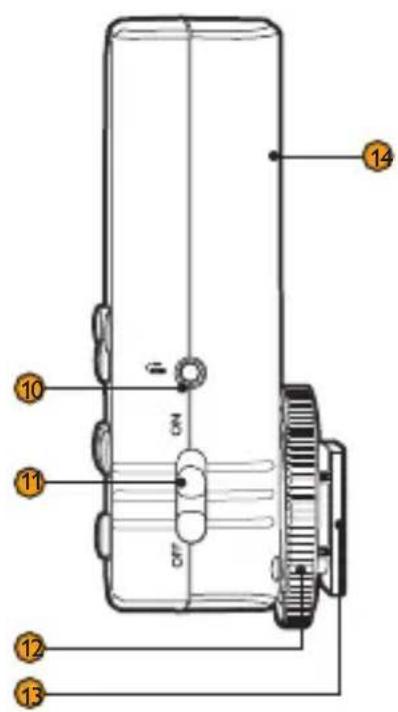
- Trigger output port
- Power switch
- Locking wheel
- Mounting foot
- Battery compartment
Top Side
Use the remote to wirelessly access the Vello FreeWave Orbit's panning modes and settings from up to 100' (30 m) away. It has a Ready Mode to run the Orbit in Moving Mode or 360° Panorama, or a Settings Edit Mode for adjusting the angle degrees, number of shots, and panning speeds.
Remote Navigation
- Mode Button:
Changes between Moving Mode and 360° Panorama (indicated by the green light). - Button:
Starts and pauses the Panning Mode cycle. - and Buttons:
Press once to nudge the Orbit clockwise or counterclockwise. Press and hold to continuously rotate the Orbit clockwise or counterclockwise.
- Menu/Set Button:
Press and hold the Menu/Set button for approximately two seconds. The display will show the wireless channel number. Press repeatedly to access the different settings (Speed, Shots, Angle) indicated by a green LED. Press and hold the Menu/Set button to confirm the settings.
- + and - Buttons:
Press once to increase or decrease the value of the selected setting.
- Wireless Channel: 1–16.
- Speed: Speed of the panning head (1–3, from fastest to slowest).
- Shots: 1–99 (Moving Mode only). You can set 1–200 shots from the Orbits' menu. See table 1a for 360° Panorama.
- Angle: 1–72 in 5^
increments (Moving Mode only). This will appear as numbers 1–72 on the remote, and in degrees on the Orbit's LCD. For example, 1 on the remote corresponds 5° on the Orbit, followed by 2 and 10°, 3 and 15°, and so on.
Note: After ten seconds of inactivity, the remote will revert to Ready Mode.
PRODUCT PHOTOGRAPHY
The Orbit's 8" product plate (available separately or in a kit) allows you to capture stills or add 360° moving imagery to products on display such as jewelry or mobile electronics.
- Attach and secure your camera to a tripod.
-
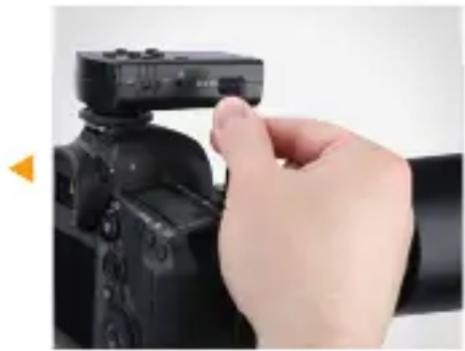
Attach the Orbit remote to the camera's hot shoe via the remote's mounting foot, and secure it with the locking wheel.
-
Use a compatible shutter release cable to connect your camera to the trigger output port on the Orbit remote.
- Turn your camera, the remote, and the Orbit on.
- Set the Orbit into Moving or 360° Panorama Mode and adjust desired settings. This can be done from the Orbit's LCD screen (see pages 14-17) or from the remote (see pages 21-22).
natural_image
Hand adjusting a black DSLR camera module with a camera top (no visible text or symbols)FCC COMPLIANCE
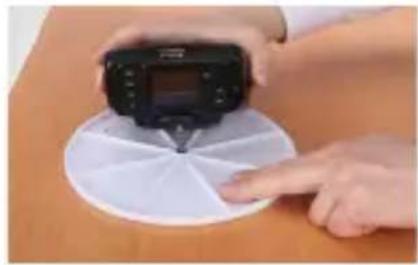
- Align the threaded 1/4"-20 socket on the bottom of the product plate with the Orbit's 1/4"-20 camera mount.
- Rotate the product stage counterclockwise until secure.
- Press the ▶Button to start the panning cycle.
Note: for best results, use manual focus and prefocus on your subject.
natural_image
Person using a camera to scan a circular object on a wooden table (no visible text or symbols)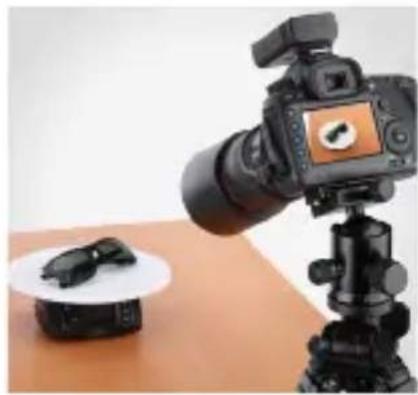
natural_image
Professional camera setup with a DSLR camera on a tripod, a small black object on a white plate nearby (no visible text or symbols)This device complies with Part 15 of the FCC Rules. Operation is subject to the following two conditions:
- This device may not cause harmful interference, and
- This device must accept any interference received, including interference that may cause undesired operation.
SPECIFICATIONS
| Maximum remote range | 100' (30 m) |
| Mounting | 3/8"-16, 1/4"-20 with reducer bushing |
| Camera mount | |
| Ports | USB Mini-B (for firmware upgrades) |
| Frequency | |
| Wireless channels | |
| Panning speeds | |
| Number of shots | |
| Operation time | |
| Power | Remote: 1500 mAh lithium battery |
| Remote power | |
| Dimensions (W × H × D) | 5.1" × 2.6" × 4.7" (13.1 × 6.7 × 12 cm) |
| Weight (without battery) |
ONE-YEAR LIMITED WARRANTY
This VELLO product is warranted to the original purchaser to be free from defects in materials and workmanship under normal consumer use for a period of one (1) year from the original purchase date or thirty (30) days after replacement, whichever occurs later. The warranty provider's responsibility with respect to this limited warranty shall be limited solely to repair or replacement, at the provider's discretion, of any product that fails during normal use of this product in its intended manner and in its intended environment. Inoperability of the product or part(s) shall be determined by the warranty provider. If the product has been discontinued, the warranty provider reserves the right to replace it with a model of equivalent quality and function.
This warranty does not cover damage or defect caused by misuse, neglect, accident, alteration, abuse, improper installation or maintenance. EXCEPT AS PROVIDED HEREIN, THE WARRANTY PROVIDER MAKES NEITHER ANY EXPRESS WARRANTIES NOR ANY IMPLIED WARRANTIES, INCLUDING BUT NOT LIMITED TO ANY IMPLIED WARRANTY OF MERCHANTABILITY OR FITNESS FOR A PARTICULAR PURPOSE. This warranty provides you with specific legal rights, and you may also have additional rights that vary from state to state.
To obtain warranty coverage, contact the Vello Customer Service Department to obtain a return merchandise authorization (“RMA”) number, and return the defective product to Vello along with the RMA number and proof of purchase. Shipment of the defective product is at the purchaser’s own risk and expense.
For more information or to arrange service, visit www.vellogear.com or call Customer Service at 212-594-2353.

VELLO™ A Gradus Group Brand
Product warranty provided by the Gradus Group.
www.gradusgroup.com
VELLO is a registered trademark of the Gradus Group.
© 2016 Gradus Group LLC. All Rights Reserved.
www.vellogear.com
All other trademarks are the property of their respective owners. © Copyright 2016 Gradus Group GG1
- THANK YOU FOR CHOOSING VELLO
- TABLE OF CONTENTS
- PRECAUTIONS
- CONTENTS
- OVERVIEW
- CHARGING THE BATTERY
- INSTALLING THE BATTERIES
- Orbit
- Remote
- MOUNTING THE ORBIT
- CONNECTING A CAMERA
- LCD OVERVIEW
- MENU SETTINGS
- MOVING MODE
- 360° PANORAMA
- Panorama Menu
- SYSTEM SETTINGS
- USING THE REMOTE
- Remote Navigation
- PRODUCT PHOTOGRAPHY
- FCC COMPLIANCE
- ONE-YEAR LIMITED WARRANTY
Brand : Vello
Model : MPH-100
Category : Tripod