HSVC-MBD25.9S - Vacuum Cleaner Heinner - Free user manual and instructions
Find the device manual for free HSVC-MBD25.9S Heinner in PDF.


| Product Type | Vertical vacuum cleaner |
| Model | HSVC-MBD25.9S (Verticlean PRO) |
| Power Consumption | 450 W |
| Suction Power | 140 W |
| Noise Level | 84 dB |
| Voltage | 220-240 V ~ 50/60 Hz |
| Battery Model | BP25925A |
| Charging Time | 2-4 hours |
| Operating Time | 7 min (high), 20 min (medium), 60 min (low) |
| Dust Capacity | Not specified |
| Filter Type | Washable filter core and sponge |
| Accessories | Extension tube, electric floor brush, crevice nozzle, 2-in-1 brush, power adaptor |
| Charging Ambient Temperature | 5°C to 40°C |
| Weight | Not specified |
| Dimensions | Not specified |
Frequently Asked Questions - HSVC-MBD25.9S Heinner
User questions about HSVC-MBD25.9S Heinner
0 question about this device. Answer the ones you know or ask your own.
Ask a new question about this device
Download the instructions for your Vacuum Cleaner in PDF format for free! Find your manual HSVC-MBD25.9S - Heinner and take your electronic device back in hand. On this page are published all the documents necessary for the use of your device. HSVC-MBD25.9S by Heinner.
USER MANUAL HSVC-MBD25.9S Heinner
VERTICAL VACUUM CLEANER
Model:
Verticlean PRO
HSVC-MBD25.9S
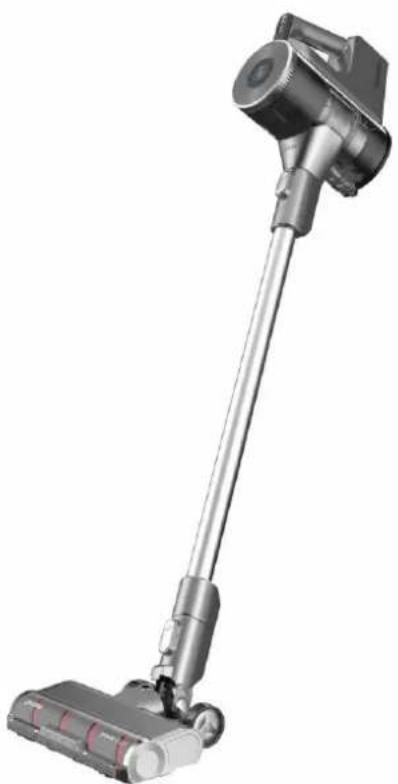
natural_image
3D rendering of a handheld vacuum cleaner with attached cable (no text or symbols visible)• Vertical vacuum cleaner
- Power: 450 W
- Suction power: 140 W
1. INTRODUCTION
Please read the instructions carefully and keep the manual for future information.
This manual is designed to give all necessary instructions concerning installation, use and maintenance of the unit. In order to operate the unit correctly and safely, please read this instruction manual carefully before installation and use.
2. CONTENT OF YOUR PACKAGE
→ Vacuum cleaner
→ User manual
→ Certificate of warranty
→ Declaration of conformity
3. SAFETY INSTRUCTIONS
GENERAL
Please don't put the cleaner close to any heat sources, radiation sources or burning cigarettes, and it is forbidden to use the cleaner to clean the following things:
- Water and any liquid.
- Construction dust and waste such as limes or cements.
- Anything releasing heat, such as cigarettes or carbon that are still burning.
- Sharp fragments, such as glass.
- Flammable and explosive materials, such as gasoline or alcohol.
Warning:
- This appliance can be used by children aged from 8 years and above and persons with reduced physical, sensory or mental capabilities or lack of experience and knowledge if they have been given supervision or instruction concerning use of the appliance in a safe way and understand the hazards involved.
- Cleaning and user maintenance shall not be done by children without supervision.
- The appliance is only to be used with the power supply unit provided with the appliance.
- The appliance must only be supplied at safety with extra low voltage corresponding to the marking on the appliance.
- The instructions for appliances incorporating a battery that contains materials that are hazardous to the environment shall give details on how to remove the battery and shall state that.
– the battery must be removed from the appliance before it is scrapped;
– the appliance must be disconnected from the supply mains when removing the battery;
– the battery is to be disposed of safely. -
The vacuum cleaner can't stand by itself, please put it to the wall bracket after use.
-
When you pause using the vacuum cleaner, please put it to the base stand or leave it in laid down position.
- Only authorized technicians are allowed to disassemble this product, and it is strictly prohibited to disassemble this product by yourself.
- Children, the mentally handicapped or those without home appliance using experience shall not use this product without the guidance from any experienced person.
- This product is for indoor use, please do not use it outdoors.
- Your vacuum cleaner is an electric appliance: it must be used in accordance with normal conditions of use.
- Never leave a vacuum cleaner running without being watched.
- Do not touch the power cord, socket or power adapter with wet hands.
- When the dust container is full, please empty it before using the cleaner.
- When cleaning, repairing or temporarily not using the vacuum cleaner, the power must be cut off.
- Never immerse the vacuum cleaner in water and keep it away from heat-generating appliances or direct sunshine to avoid fire accidents.
- Only the original power adapter can be used for this product, and using other adapters will lead to damage of the product.
- When removing the battery, the power of the cleaner must be cut off; please do not disassemble the battery by yourself.
- If you need to replace it, please contact the after-sales service personnel; when disposing of the product, please do not throw away the battery at will.
• The pole pieces or connector ports shall not contact any conductor, so as to prevent short circuit.
- Cutting off power: Do not pull the power cord, and please hold the plastic parts of the plug to disconnect it. Keep the power cord of the cleaner away from sharp things to protect it from damage.
- Do not move the charging base by pulling the power cord.
- Check to make sure the supply voltage must be the same as the charging voltage of the vacuum cleaner.
- Do not run the cleaner for a long time when the suction inlet is blocked to prevent motor damage or cleaner deformation.
- In case of any of the following conditions, please don't use the cleaner and send it to the service store assigned by our company timely:
o 1. The cleaner has fallen from a high place, leading to obvious damage or operation failure.
- 2. The power cord is damaged.
Notes:
- In the following conditions, the charging time will be longer.
a. Charging the cleaner at the ambient temperature of more than 30°C
b. After using the cleaner, please charge it immediately.
-
No matter how long the cleaner is used, please charge it after using it.
-
When the cleaner is not charged, please disconnect the power plug timely.
-
If your cleaner is not used for a long time (more than 2 months), please unplug it from the power supply, but in order to ensure the battery life, it needs to be fully charged once every 2 months.
-
During the charging process, the cleaner or power adapter may release heat, which is normal. Please don't worry.
4. PRODUCT DESCRIPTION
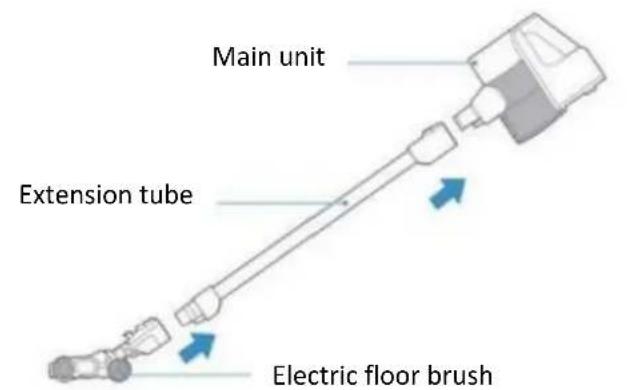
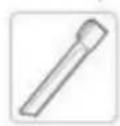
Crevice nozzle
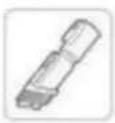
2-in-1 brush
Power adaptor
User instructions
5. USING THE PRODUCT
Battery charging
- The cleaner is delivered without charging the battery, please fully charge the battery before using the cleaner.
- Do not charge the cleaner at the ambient temperature of lower than 5^ C and higher than 40^ C.
- If the low power icon is shown on the LCD screen after turning on the cleaner, the cleaner shall be charged;
- If the operation duration of the cleaner has become significantly shorter and the charging time has become longer, please ask the professional technicians to replace the battery and do not disassemble the cleaner by yourself so as to prevent any hazards.
Operation Instructions
- Put the cleaner stably on the storage rack.
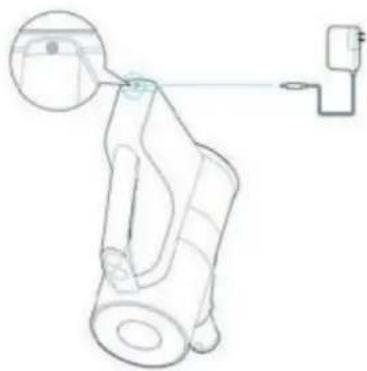
- Connect one end of the power cord to the socket and the other end to the charging port of the battery pack of the cleaner.
- Charging time: 2-4 hours; discharging time: 7 minutes at high level, 20 minutes at middle level and 1 hour at low level
natural_image
Diagram of a device with a magnified inset showing a component, connected to a power outlet (no text or symbols present)Sweeping
- To prevent the blockage of air ducts, please clean large pieces of waste (such as large paper and package films) in the area to be cleaned.
- Do not use and maintain the battery at the ambient temperature of lower than 5°C and higher than 40°C;
- When disposing of the product, please remove the battery from the cleaner.
- It is forbidden to alter the cleaner, accessories, adapter, or battery.
- Battery model: BP25925A
Operation Instructions
- Press the "Power on button" once to start the cleaning process.
- Press the "Power on button" again to stop cleaning.
- After turning on the cleaner, it will run at the default level.
When the screen shows "Auto" level, press the speed regulation button to show "High level", press the button again to show "Middle level", press the button for the third time to show "Low level" and press the button for the 4th time to show the "Auto level" and so on.
- When using the cleaner at "Auto" level, the dust sensing function will be enabled. After sensing dust, the animation will change from blue to purple blue. If no dust is not sensed, the screen will return to blue.
- The power will be displayed in the external circle of the screen in 6 sections. As the power is consumed, the blue light sections will be off in turn. In case of insufficient power, the screen will show "Low Power" and after charging the screen will remind completion.
Power button
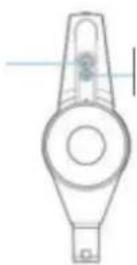
Speed regulation button
6. CLEANING AND MAINTENANCE
Disassembly, installation and cleaning of dust cup
To ensure the suction force of the cleaner, please clean the dust regularly.
Disassembly of the dust cup:
Place the cleaner as shown in the figure, and hold the bottom of the dust cup. Press the release button and pull the dust cup out downward.
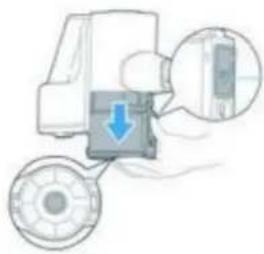
natural_image
Diagram of a vehicle with wheels and a directional arrow, showing a close-up inset (no text or symbols)Dust cup release
Installation of the dust cup
Push the dust cup up with the suction inlet facing outward.
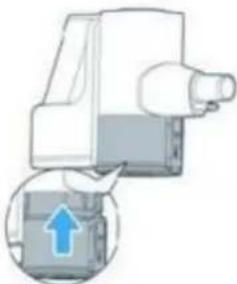
natural_image
Diagram of a mechanical device with an arrow indicating upward motion (no text or symbols present)Cleaning of the dust cup
Press the button and the bottom cover of the dust cup will open automatically to empty the cup.
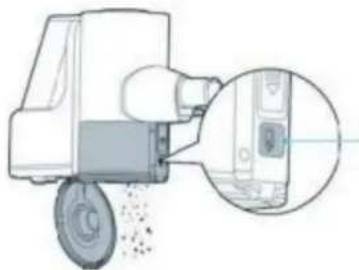
natural_image
Diagram of a mechanical device with a magnified inset showing internal components (no text or symbols)Dust cup release
Disassembly and cleaning of filter components
• Make sure that all components shall be installed properly, otherwise, product failure may be caused.
- Do not let water get into the electric elements of the cleaner, otherwise, product failure may be caused.
- Hold the ribs on both sides to take the filter components out of the dust assembly.
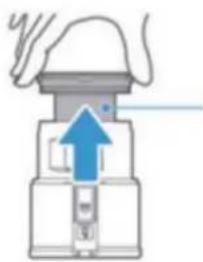
natural_image
Diagram of a mechanical device with an upward arrow indicating motion or force (no text or symbols)Filter components
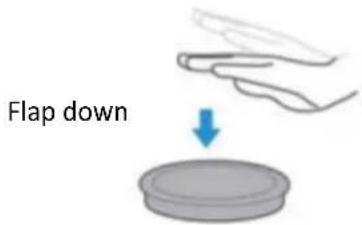
- Take out the filter sponge and tap it (the filter sponge shall not be tapped in the reversed direction); (the filter sponge shall not be tapped in the reversed direction)
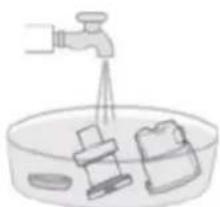
- Wash the filter core, filter components and dust container with water
natural_image
Illustration of a faucet pouring liquid into a basin with plastic containers and bags (no text or symbols)- After washing the components, they must be fully dried and installed back to the dust container in the reversed order
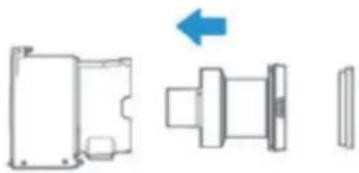
natural_image
Technical line drawing of a mechanical component with three views: front, side, and top (no text or symbols)Disassembly and cleaning of electric floor brush
-
To ensure the normal operation of the electric floor brush, when the rolling brush or wheels are tangled or become dirty, please clean them.
-
When disassembling the components for maintenance, please stop the operation of the electric floor brush.
-
Water washing is not recommended for cleaning the floor brush, and the hairstyle tangled on the brush may be removed with scissors or blades, and the dirt attached to the rolling brush could be cleaned with brush.
-
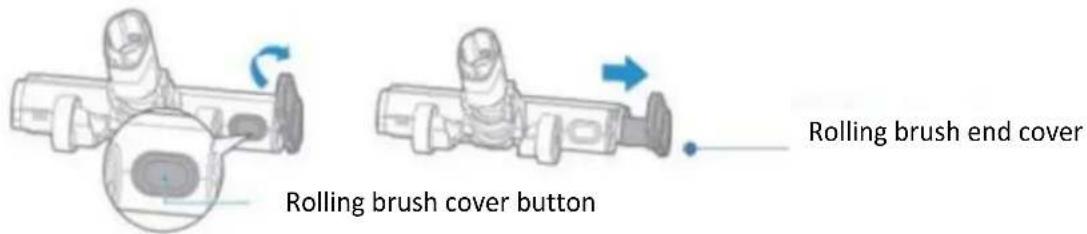
Press the button to remove the electric floor brush:
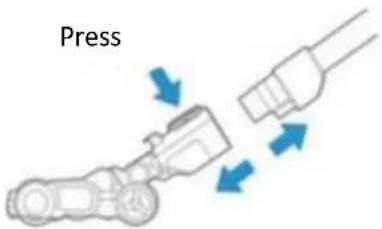
- Rotate the rolling brush end cover upward to open it and take out the rolling brush for cleaning. After cleaning the brush, reinstall it in reversed order.
7. TROUBLESHOOTING
Please check the following table in case of any abnormal conditions, when using the cleaner
| Abnormal condition | Possible reason | Solution |
| Three indicators flash | - Floor brush or mite removal brush is tangled by hair- The ambient temperature for operation is too high or too low | - Floor brush or mite removal brush shall be cleaned- Please use the cleaner in proper environment |
| Electric floor brush is not working | Large pieces of waste have been engaged (package films)- The rolling brush has been tangled by hair | - Clean the hair on the rolling brush- Clean the waste |
| Operation duration becomes shorter | - Battery aging- The ambient temperature for operation is too high or too low- The battery is not fully charged | - Contact the store or after-sales department to buy a new battery- Please use the cleaner in proper environment- Please charge the battery |
| Suction force is weakened | - Too much dust in the dust cup- The filter sponge of the dust cup is blocked- The suction inlet of the floor brush or accessories is blocked- The cleaner is not fully dried after washing with water | - Clean the waste timely- Clean the filter sponge- Remove the blocking materials- Put the components in cool are after water washing |
| Charging failure | - Ambitious temperature during charging process is too high or too low | - Charge the cleaner at the proper ambient temperature |
| Battery liquid leakage | - The battery has not been used for a long time | - Change the battery |
CUSTOMER CARE AND SERVICE
Always use original spare parts.
When contacting our Authorised Service Centre, ensure that you have the following data available: Model and Serial Number.
The information can be found on the rating plate. Subject to change without notice.
TECHNICAL DATA
| Voltage | 220-240V~50/60Hz |
| Power | 450W |
| Suction power | 140W |
| Noise level | 84 dB |
Thank you for purchasing this product. If you need support with your product, visit our website using the links below.
Get User manuals: https://www.heinner.ro
Get Service information: https://www.heinner.ro

Environment friendly disposal
You can help protect the environment!
Please remember to respect the local regulations: hand in the non-working electrical equipment's to an appropriate waste disposal center.

HEINNER is a registered trademark of Network One Distribution SRL. Other brands and product names are trademarks or registered trademarks of their respective holders.
No part of the specifications may be reproduced in any form or by any means or used to make any derivative such as translation, transformation, or adaptation without permission from NETWORK ONE DISTRIBUTION.
Copyright © 2013 Network One Distribution. All rights reserved.
www.heinner.com, http://www.nod.ro

This product is in conformity with norms and standards of European Community.

Importer: Network One Distribution
Marcel Iancu Street, 3-5, Bucharest, Romania
Tel: +40 21 211 18 56, www.heinner.com, www.nod.ro
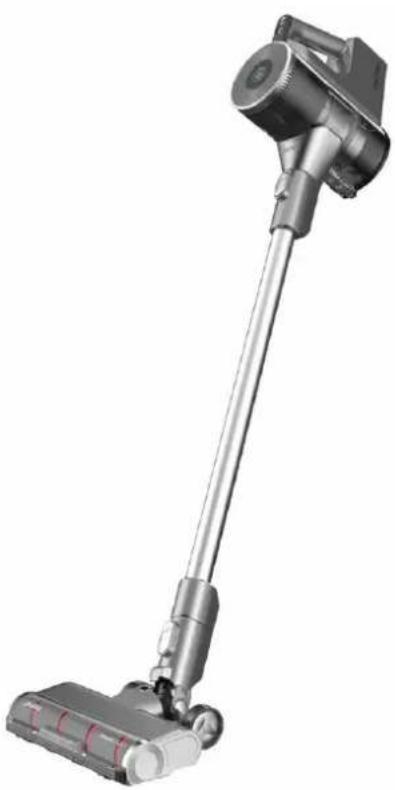
ASPIRATOR VERTICAL
Model:
VertiClean PRO
HSVC-MBD25.9S
natural_image
3D rendering of a handheld vacuum cleaner with attached cylindrical body (no text or symbols visible)- Aspirator vertical
- Putere: 450 W
- Putere de aspirare: 140 W
1. INTRODUCERE
natural_image
Line drawing of a device with a magnified inset showing a circular component and a connected electrical outlet (no text or symbols)natural_image
Diagram of a vehicle's front wheel assembly with a downward arrow indicating motion (no text or symbols)natural_image
Diagram of a mechanical device with an arrow indicating upward motion, no text or symbols presentnatural_image
Diagram of a truck with exhaust pipe and circular inset showing internal components (no text or symbols)natural_image
Diagram of a mechanical device with an upward arrow indicating motion or force (no text or symbols)natural_image
Illustration of a hand holding a pen above a circular object with a blue arrow pointing downward (no text or symbols)natural_image
Simple line drawing of a faucet pouring liquid into a basin with other items (no text or symbols)natural_image
Technical line drawing of a mechanical component with three views: front, side, and top (no text or symbols)natural_image
Diagram of a mechanical component with a circular inset showing a highlighted section (no text or symbols)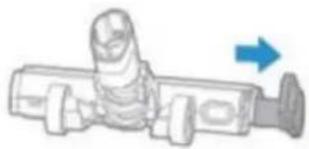
natural_image
Mechanical component diagram showing a lever and shaft assembly with a blue arrow indicating direction (no text or symbols)Capac lateral al periei rotative
natural_image
3D rendering of a handheld vacuum cleaner with attached cylindrical body (no text or symbols visible)natural_image
Technical line drawing of a mechanical device with a close-up view of its top component (no text or symbols)Porszívó használata
natural_image
Diagram of a vehicle's internal components with arrows indicating movement, no text or symbols presentnatural_image
Diagram of a device with an arrow indicating upward motion, showing internal components (no text or symbols)natural_image
Diagram of a mechanical device with a magnified inset showing internal components (no text or symbols)natural_image
Diagram of a mechanical device with a blue upward arrow indicating motion or force (no text or symbols)Szürő alkatrészek
natural_image
Simple line drawing of a hand holding a tray with a blue arrow pointing downward to a circular base (no text or symbols)natural_image
Illustration of a faucet spraying water into a basin with plastic containers and a bag (no text or symbols)natural_image
Technical line drawing of a mechanical component with three views: front, side, and top (no text or symbols)natural_image
Diagram of a mechanical component with a circular inset showing internal features, labeled 'Fo' (no text or symbols on the diagram itself)
natural_image
Diagram of a mechanical component with a blue arrow indicating direction (no text or symbols present)natural_image
3D rendering of a handheld vacuum cleaner with attached cylindrical body (no text or symbols visible)• Вертикална прахосмукачка
- Мощност: 450 W
natural_image
Technical line drawing of a mechanical device with a close-up view of its body and a connected electrical outlet (no text or symbols)natural_image
Diagram of a vehicle's front suspension system with a downward arrow and wheel (no text or symbols)natural_image
Diagram of a device with an arrow pointing to a component, no text or symbols presentnatural_image
Diagram of a mechanical device with a magnified inset showing internal components (no text or symbols)natural_image
Simple line drawing of a faucet pouring liquid into a basin with plastic containers (no text or symbols)natural_image
Technical line drawing of a mechanical component with three views: front, side, and top (no text or symbols)natural_image
Diagram of a mechanical device with a circular inset showing internal components (no text or symbols)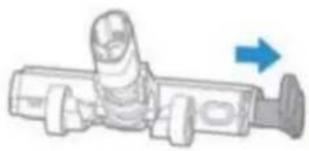
natural_image
Illustration of a mechanical component with a blue arrow indicating direction (no text or symbols)- VERTICAL VACUUM CLEANER
- INTRODUCTION
- CONTENT OF YOUR PACKAGE
- SAFETY INSTRUCTIONS
- GENERAL
- Warning:
- Notes:
- PRODUCT DESCRIPTION
- USING THE PRODUCT
- Battery charging
- Operation Instructions
- Sweeping
- CLEANING AND MAINTENANCE
- Disassembly of the dust cup:
- Installation of the dust cup
- Cleaning of the dust cup
- Disassembly and cleaning of filter components
- Disassembly and cleaning of electric floor brush
- TROUBLESHOOTING
- CUSTOMER CARE AND SERVICE
- TECHNICAL DATA
- Environment friendly disposal
- ASPIRATOR VERTICAL
- INTRODUCERE
- Porszívó használata
Brand : Heinner
Model : HSVC-MBD25.9S
Category : Vacuum Cleaner