PPBCM9 - Camcorder Pyle - Free user manual and instructions
Find the device manual for free PPBCM9 Pyle in PDF.


| Product Type | Digital Camcorder |
| Brand | Pyle |
| Model | PPBCM9 |
| Dimensions | 4.5 x 2.8 x 1.2 inches |
| Weight | 0.5 lbs (approx.) |
| Power Source | Rechargeable lithium-ion battery |
| Video Resolution | 1920x1080 Full HD |
| Photo Resolution | 16 MP (interpolated) |
| Storage Media | MicroSD card (up to 32GB, not included) |
| Display | 2.7 inch LCD screen |
| Optical Zoom | 4x digital zoom |
| Connectivity | USB 2.0, HDMI output |
| Built-in Microphone | Yes |
| Night Vision | Yes (infrared LED) |
| Main Functions | Video recording, photo capture, playback, webcam mode |
| Maintenance & Cleaning | Clean lens with soft, dry cloth; avoid moisture |
| Safety Precautions | Keep away from water, extreme temperatures, and strong magnetic fields |
| Spare Parts & Repairability | Battery, charger, USB cable available; seek professional repair |
| General Information | Compact design for easy portability; includes software for video editing |
Frequently Asked Questions - PPBCM9 Pyle
User questions about PPBCM9 Pyle
0 question about this device. Answer the ones you know or ask your own.
Ask a new question about this device
Download the instructions for your Camcorder in PDF format for free! Find your manual PPBCM9 - Pyle and take your electronic device back in hand. On this page are published all the documents necessary for the use of your device. PPBCM9 by Pyle.
USER MANUAL PPBCM9 Pyle
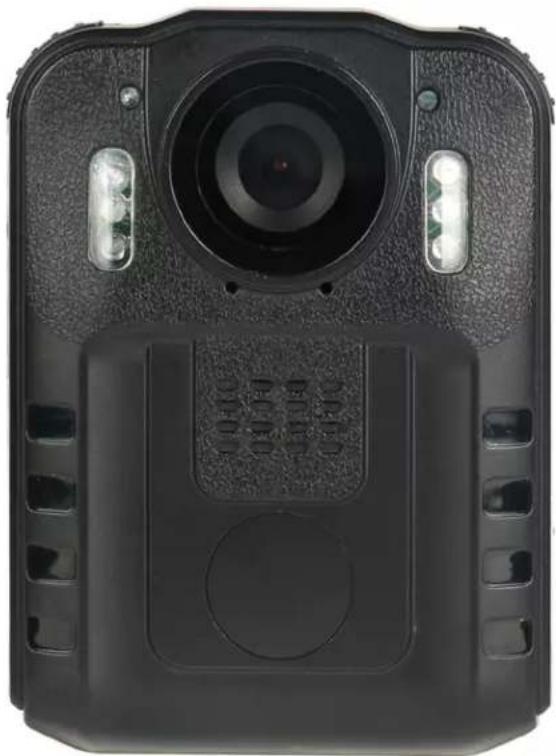
BODY-CAM USER MANUAL
natural_image
Top-down view of a black digital camera with lens and control panel (no visible text or symbols)Warning:
- Be careful not to use this product in strong magnec elds, which may cause image interference or cause product fault.
- Be careful not to direct sunlight for a long me the lens when using this product outdoors, which may cause damage to the lens of the light-sensitive devices;
- Please do not strike or drop the product to avoid damage to the product or loss of data;
- To avoid a loss of data stored in the device, aer you have nished using the product, please copy to your computer's hard drive;
- When you see the low baery reminder, you should immediately begin charging the device.
Content
Content....1
I. User guide....1
- Structure....1
- LCD display....2
- Charge device....2
II. Basic operaon....3
- Power on....3
- Power o ....3
- System sengs....4
- Video....5
- Photo....6
- Audio only....6
- Infrared mode....6
- File playback and delete ....6
- Restart....7
- Remote control operaon....8
- AV output....8
III. Specicaon....9
IV. Troubleshoong and handling....10
I. User Guide
1. Structure


2. LCD display

① Storage card capacity will show you how much recording me you have le before the card is full.
② Mode icon will show you what mode you have the camera in (photo, video, etc)
③ Video resoluon
④ Baery capacity
3. Charge device
Low baery indicator: when baery capacity is too low, the baery capacity icon at the LCD down right corner will turn red and blink and the buzzer will remind you with a beeping sound; ve minutes later, the camera will shut down automacally. Once the camera reminds you of the low baery, please set it up to fully charge.
natural_image
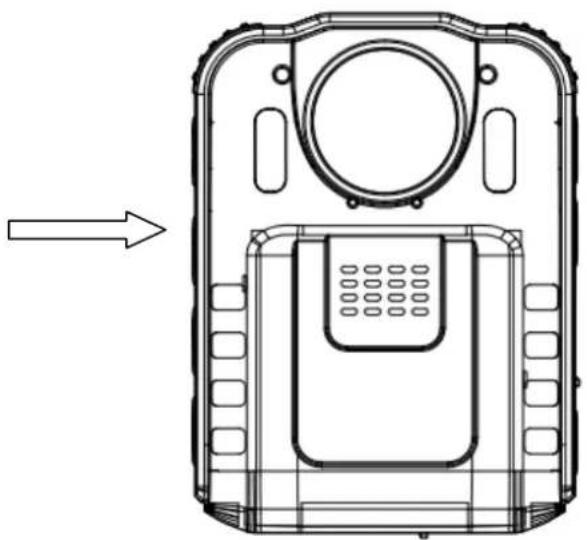
Technical line drawing of a device casing with internal components and a directional arrow (no text or symbols)Please refer to this picture, connect the camera with the PC via the USB cable to charge it. The baery charging status can be seen from the LCD icon (power-on charging) or from the indicator lights (power-o charging), while charging, the LED is shining blue, when fully charged, the LED will turn o.
II. Basic Operaon
1. Power on
Press and hold the "Power on/o" buon to turn on the camera; aer it's powered on, it will enter the recording standby mode.
2. Power o
In the boot state, Press and hold "Power on/o" button for 3 seconds to turn o the camera; the LCD will turn o.
3. System sengs
Press "OK" buon, enter "menu setng".
① Video resoluon: Press the “Conrm” button to enter the opons list, press ‘Up’/‘Down’ to choose the resoluon, then press the “Conrm” button to conrm it.
② Photo resoluon: Press the “Conrm” buon to enter opons list, press ‘Up’/‘Down’ to choose the resoluon, then press the “Conrm” buon to conrm it.
③ Loop recording: Press the “Conrm” button to enter opons list, press ‘Up’/‘Down’ to choose the “on”/“o”, then press the “Conrm” buon to conrm it.
④ Split me: Press the “Conrm” button to enter opons list, press ‘Up’/‘Down’ to choose the split me, then press the “Conrm” button to conrm it.
⑤ Moon detecon: Press the “Conrm” button to enter opons list, press ‘Up’/‘Down’ to choose the “on”/“o”, then press the “Conrm” buon to conrm it.
⑥ Video sound: Press the “Conrm” button to enter opons list, press ‘Up’/‘Down’ to choose the “on”/“o”, then press the “Conrm” buon to conrm it.
⑦ Delay-recording: Press the “Conrm” button to enter opons list, press ‘Up’/’Down’ to choose the “on”/”o”, then press the “Conrm” buon to conrm it.
⑧ Frequency setng: Press the “Conrm” button to enter opons list, press ‘Up’/‘Down’ to choose the “50”/“60HZ”, then press the “Conrm” buon to conrm it.
⑨ Battery saving mode: Press the “Conrm” button to enter opons list, press ‘Up’/’Down’ to choose the “on”/”o”, then press the “Conrm” buon to conrm it.
⑩ Date and me: Press the “Conrm” buon to enter options list, press ‘Up’/’Down’ to choose the Date and Time then press the “Conrm” buon to conrm it. Press “Audio” buon to choose which part of the me you want to change.
⑪ Reset All: Press the “Conrm” button to enter opons list, press ‘Up’/‘Down’ to choose the “on”/“o”, then press the “Conrm” buon to conrm it.
Aer nishing sengs, press "OK" to return the recording standby state.
4. Video
In the power on standby mode, press “Video” buon to start recording, there will be recording me at the upper right corner. Press the “Video” buon again to stop recording, the videos will be saved in the SD card automacally, and display will return to standby state.
5. Photo
In the power on standby mode, press “Photo” buon to take a picture and the picture will be save, camera return back to standby state. Each press the photo buon, the camera will take one picture and save to SD card.
6. Audio only
In the boot state, press “Audio” button to start recording audio, the display will be blue and there is a sound recording icon, press “Audio” buon again to stop recording, the audio le will be saved to SD card automacally, display will return to standby state.
7. Infrared mode
Aer boong, the infrared is o by default, lter switch is color, suitable for dayme use. At nighme, press “Infrared” buon to turn on the infrared lights, the lter will switch to black and white, suitable for nighme use. In the power on standby state, press “Infrared” buon to enter infrared mode, six infrared lights will turn on; Press the “Infrared” buon again, exit the infrared mode, standby display or video recording display return to be color.
8. File playback and delete
- Press and hold "OK" buon to enter "Playback" mode, press "Conrm" buon to start playback the videos, audios and photos, press "Up" and "Down" buon to choose the le. Press "OK" buon, enter the menu list, press
"Up" / "Down" buon to choose operaon, delete, format, playback card.
- 1 Delete: Press the "Conrm" button to enter le delete mode, press "Up" / "Down" buon to choose the delete sengs.
- 2 SD card format: Press the "Conrm" button to enter format mode, press "Up" / "Down" buon to choose.
- 3 SD card switch: Press the “Conrm” buon to enter SD card switch mode, press “Up” / “Down” button to choose the internal card or external card. If you choose internal card, the camera will playback the internal card les, if you choose external card, the camera will playback the external card le.
- Connect the camera to PC via the USB cable, Press and hold "Power on" buon, boot the camera, it enters into removable disk, check and delete the les in the SD card. When you switch to be internal card (refer to 1.3), you will see the internal card les on PC; When you switch to be external card (refer to 1.3), you will see the external card les on PC.
9. Restart
Because of improper operaon or other special reasons caused the equipment to crash or stop responding, can use the available nibs, toothpick or similar items press the reset key (be careful not to use too much force) are restart. Aer the restart key is pressed, the device will automacally shut down, then restart, it can save what you set before the shung down. The restart hole is under the boom of the devices, open the HDMI, you could see a small hole. It is a restart hole.
10. Remote control operaon (oponal funcon)
The machine can be oponal remote control, and remote operaon can take pictures and video more convenient and more humane.
As instructed below:
① 【】 key: Photo/Camera button. Press once to take a photo. In video mode, press the key to capture.
② 【■◆】key: Video recording button. Press once to shoot a video, press once again to stop shoong and save les.
③ 【■】key: Sound recording button. Press once to start recording, press once again to stop recording and save les.
11. AV output
The device has the AV output funcon, connect the TV display via the AV output. You can check/playback les on TV display.
III. Specicaon
| Specicaon | |
| Video input | Built-in lens resoluon up to 1920*1080 |
| LCD display | 2. 0" 16:9 TFT LCD |
| Lens angle | 170 degree wide angle |
| Focus | 0. 3~∞ |
| CMOS sensor | 1/4" Color CMOS sensor |
| Body size | 3.26" x 2.6" x 1.1" (length×width×height) |
| Photo | JPG format resoluon up to 8M pixel |
| Video recording | 1920×1080;1280×720;848×480;640×480 |
| Video format | AVI |
| Exposure Mode | Auto Exposure |
| IR night vision | Built-in 6 high-power infrared light, night photography and video support, can identify faces in 8 meters |
| Audio | Built-in microphone / speaker |
| Pickup | 64KHZ |
| Memory | Standard 16GB TF memory, oponal 32GB |
| Shuer / Shuer Speed | Electronic Shutter: 1/2 - 1/2000s |
| Filter Switch | Switchable lens Iter, suitable for both dayme and night use |
| White Balance | Automac |
| USB Interface | Mini USB/USB 2. 0 |
| Lithium Baery | High-capacity polymer baery;3. 7V 1500mAh (default), 2000mah, 2600mah, three opons |
| Operang Temperature/Humidity | -30°C~65°C <90% |
| Operang Current | 3. 7V |
| Waterproof | IP54 |
IV. Troubleshoong and handling
Device won't turn on
- Please connect the charger to equipment, charging 2 hours later, then check the problem;
- Please check the charger and the connecng line is normal;
- Please press the reset key to restore the device to factory sengs, and then check to the problem;
- If it does not resolve the problem, please contact customer service sta to return the factory repair.
Device failed to connect computer, and the failure to enter upload mode
Please contact customer service sta resolved.
Red equipment image
The device uses relay control infrared Iter lens. When it has been hit in the course of transportaon or fall could lead to an infrared Iter lens stuck, the magnec force cannot be reset aer the relay is energized. At this me, please repeatedly pressing the infrared switch, recovery relay control infrared Iter lens. If not, please shut down aer the inverted device, to beat in a surface is relavely so place (Arm of the chair, mouse pad etc.). Boot and check is normal, if not, please contact customer service sta to return the factory repair.
- BODY-CAM USER MANUAL
- Warning:
- Content
- User Guide
- Structure
- LCD display
- Charge device
- Basic Operaon
- Power on
- Power o
- System sengs
- Video
- Photo
- Audio only
- Infrared mode
- File playback and delete
- Restart
- Remote control operaon (oponal funcon)
- AV output
- Troubleshoong and handling
- Device won't turn on
- Device failed to connect computer, and the failure to enter upload mode
- Red equipment image
Brand : Pyle
Model : PPBCM9
Category : Camcorder